I’m sharing all my tiny laundry room storage solutions, but first, did you catch my recent laundry room refresh post or video? If you didn’t, you don’t want to miss it…it’s a pretty big before and after for such a tiny little nook. Head over and check it out first, I’ll be waiting for you when you get back 🙂
This post is sponsored by The Home Depot and PureBond Hardwood Plywood. This post also contains affiliate links. See policies.
.
During the process of renovating my tiny laundry space, storage was a key issue I set out to improve.
.
In the original space, I had good intentions of adding more storage, but all I ended up doing was making a little cabinet with flimsy, hard to open doors. And yes, that was a design flaw that was 100% my fault. I’m aware.

But for the time, it functioned okay and did give us a place to put our laundry detergent so I left it be with good intentions of returning to fix it.
.
It only took a year, but I FINALLY got back around to working on this space and my first task was to fix this boring, hard to open cabinet. My second task was to add more storage. And my third task was to improve my laundry hamper cart…that’s actually this bar cart I made a few years ago.

I was able to check all three laundry room storage solutions off my list and I’m excited to show you how I added some much needed storage and function to my laundry nook by building a sliding door cabinet, adding a second cabinet, and “converting” my bar cart into a laundry hamper cart.

Check out the video below and all the details following.
First, let me share with you my cabinet building secret 😉 I build a lot of cabinets (I built my own kitchen last year and my sister’s this year) and I always use PureBond plywood for them. PureBond makes excellent quality plywood right here in the USA and Canada, it’s formaldehyde free, and available at most Home Depot stores. Good cabinets start with good plywood.
.
For the cabinet bodies in this project, I used ¾” PureBond Birch sheets and I used 2×4 panels of ¾” PureBond Hickory Plywood for the doors to match what I used on my kitchen cabinets here.

Now, let’s get to the builds.
Task #1: Build Sliding Door Cabinet
Since I already had good bones with my existing cabinet, I decided to just take it down, take it apart, modify it for thicker doors (thicker doors would be less flimsy and easier to slide back and forth to open), and put it all back together.

But, I’ll show you how to build it from scratch because most likely, you don’t already have this cabinet in your laundry space 😉
.
First, I cut down two 12” wide strips of ¾” birch PureBond plywood using my circular saw and Kreg Rip Cut. I trimmed these down to two pieces 58” long, two pieces 19” long and two pieces 17 ½” long.

Then, I used my new Ridgid ½” 2 HP router and this Diablo ½” straight bit to cut out the slot for the doors. Since I already had a ¼” slot in the top and bottom pieces of the cabinet, I lined up a straight edge so that my ½” bit would run right along next to that slot and made sure it cut to the same depth to make a ¾” slot (I cut it ¼″ deep).

Then I cut my slot out with running the router left to right. However, since you most likely don’t already have this slot, you could set your bit to cut so that you leave about ½” between the slot and the front of the piece, and cut about ¼” deep. Then, adjust your straight edge back ¼” and cut again to give you ¾”. See diagrams below.

Once I had my slot cut, I test fit a ¾” plywood scrap piece to make sure it fit. I wanted a tight fit, but also loose enough to easily slide back and forth.
.
Then, it was ready to start assembling. I trimmed my middle divider panels widths to be about ⅛″ narrower than the distance from the back of the slot to the back of the cabinet and assembled using 1 ¼″ wood screws like shown. The screws will be hidden and this was quick. But you could also assemble with dowels or pocket holes.

Then, I attached a couple scrap pieces of ¾” plywood onto the back in order to be able to hang it onto the wall.

I found it easier to hang the cabinet without doors, so at this point, I went ahead and screwed the cabinet to the wall using 2 ½” screws through these back pieces into the studs.
.
Then, I cut two ¾” plywood doors 18” x 19”, applied edge banding, painted, and attached door pulls.

Then, I slid the doors in place and attached the other side panel.

And just like that, laundry room storage solution #1 was complete 😊

Task #2: Add Additional Storage
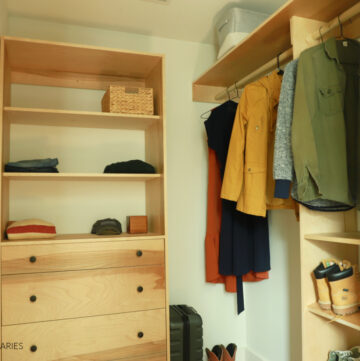
In addition to the sliding door cabinet, I wanted to fill this empty space to the left with something useful to store my overflow of random things. We live in a tiny garage apartment, so anywhere I can stuff random seasonal décor, craft supplies, bedding, etc is an asset.

So I built a SIMPLE little cabinet to fit this space and assembled it with ¾” PureBond Plywood and pocket holes and screws. You can see more details on building simple cabinets in this post. I built this one 16” deep just to give me some room to store deeper items.

Once the box was assembled like shown above, I added some strips at the top and bottom in order to give me a way to hang it onto the wall, then I installed it next to the sliding door cabinet using 2 ½″ screws through these strips into the studs on the wall.

I added adjustable shelves to the cabinet with my Kreg shelf pin jig and I installed this Hickory Plywood door with concealed inset hinges. I simply trimmed the 2×4 plywood panel down to the size I needed and I had quick and easy hickory cabinet door 😉 PS, I’ve got details in this post on how to measure for the correct size door for your cabinets. And I also have details here on how to install them using concealed hinges.

This space is adjacent to my kitchen in our home. We used this Hickory plywood for my kitchen cabinet doors and I wanted this space to tie into that aesthetic. I LOVE THIS PLYWOOD and it’s SO easy to simply cut it to size, and install it as a beautiful and simple cabinet door. PS PureBond has other options besides hickory…but personally, hickory is my FAV.

Making a few simple cabinets like this for any little nook or wall space around your house is SO easy and such a quick way to add extra storage. Cover it up with a specialty plywood door, and you have yourself a designer cabinet *wink wink*
Task #3: Add a Laundry Hamper
In my old space, I stuck a laundry basket in my old bar cart and it fit nicely in this little gap between the washer and the wall. It looked cluttered, but functioned, so I never bothered to do anything with it. But once I hung the Hickory plywood door on the upper cabinet, I knew this was starting to look too nice to leave all this junk exposed.
.
But, I didn’t want to get rid of the cart because it was the perfect size for everything I needed. I just needed to cover up the chaos.
.
So, I took another piece of PureBond hickory plywood, trimmed it to size and used some L brackets to attach it to the front side of the bar cart and added a matching handle.


This worked PERFECTLY because if I ever want to use the bar cart for a bar cart again, I can remove these brackets and never even know they were there since the screw holes are on the bottom side of the boards.

And that completes task #3. My work here is done 😊

I seriously LOVE this new laundry space. Would I love a bigger room? Heck, yeah. But am I making the best of the small one I have? Heck, yeah.
.
And I know I’m not alone with my tiny laundry nook. Many people have a small laundry space (tiny laundry room owners UNITE!) and if that’s you, I hope this post has given you some ideas on how to improve it and make the most of your laundry room storage space.

Be sure to check out PureBond’s specialty plywood options. They make such EASY cabinet doors, but have such a bold impact. I love them in this space with the grey backsplash (tutorial for backsplash right here), the pink sliding doors, and the champagne finish washer and dryer (see my thoughts on them here).
.
I hope you’ll head over here to check out the full before and after of this space and I’d love it if you’d pin this for later.

Until next time, friends, happy building 😊