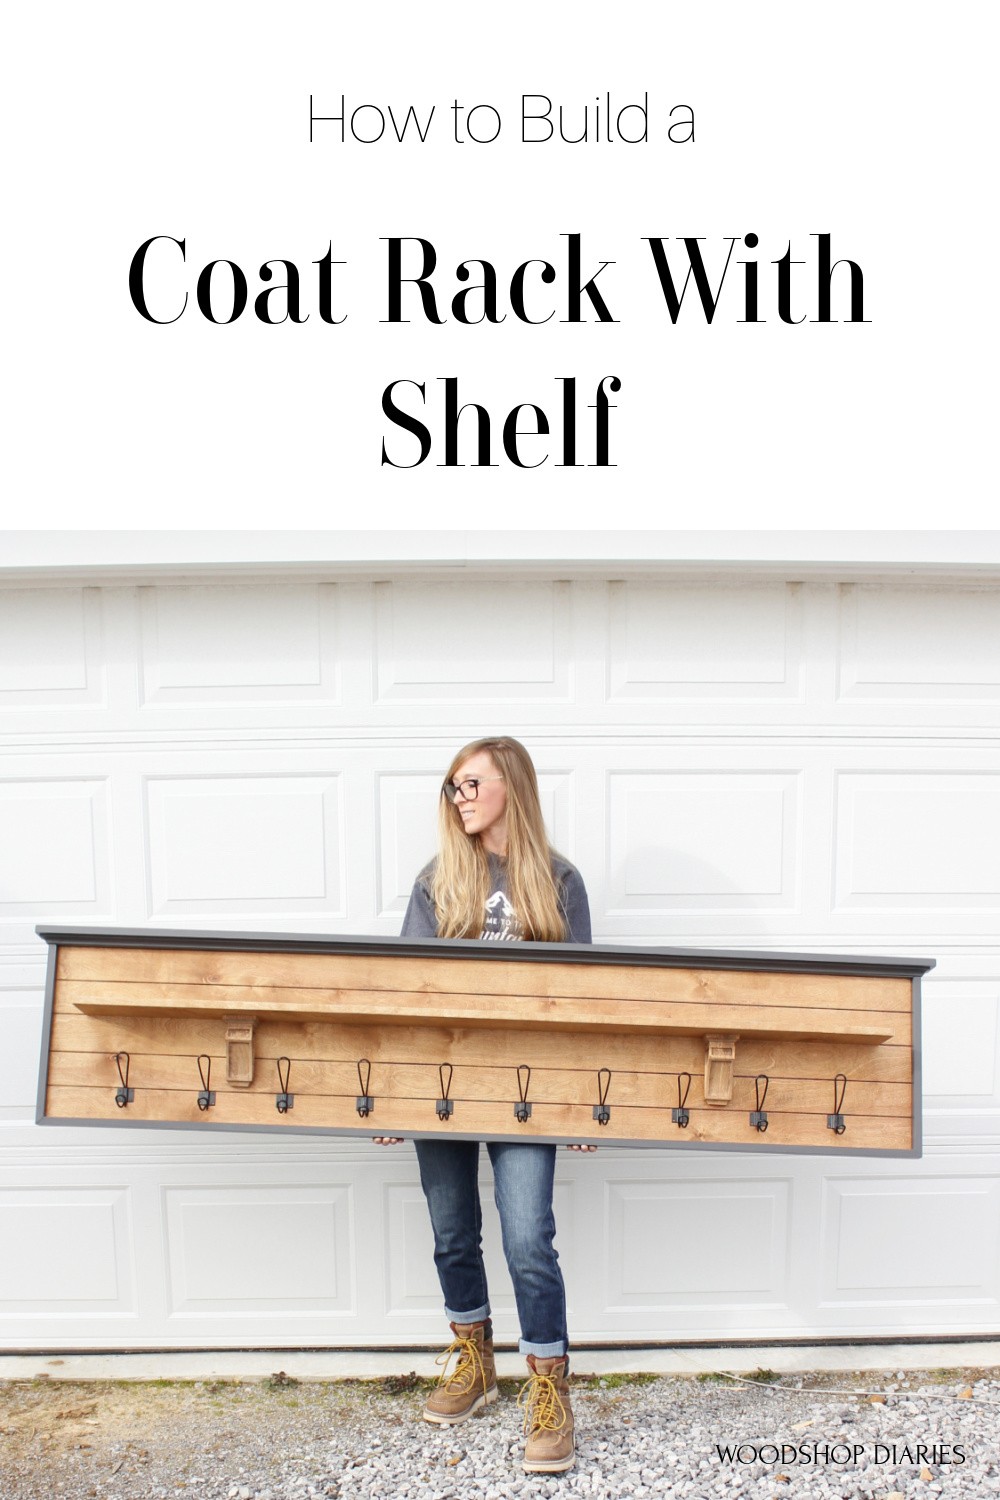
In this post, I’m sharing how to build this DIY Coat Rack with Shelf–and faux shiplap!
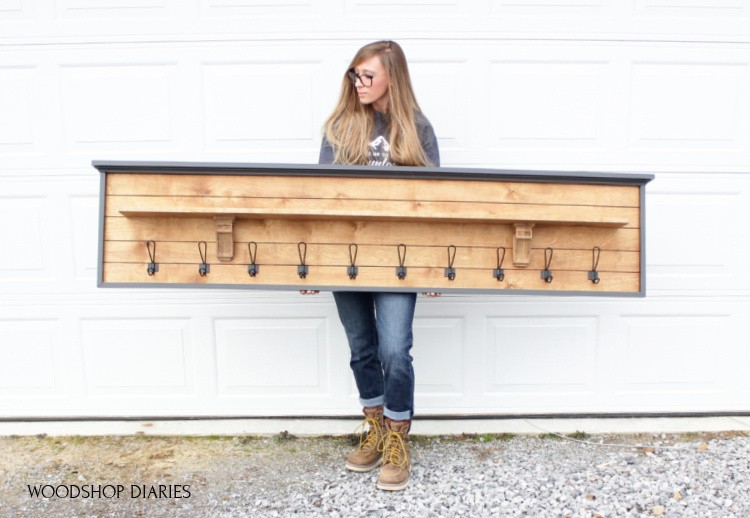
My friend had a long hallway in her home that lead to the garage where they had been kind of “dumping” their coats.
She was tired of coats, hats and gloves on the floor, so she asked me to make her a large coat rack to fit her long hallway.
She requested a coat rack with hooks, of course. But she also asked for a shelf to give them somewhere to place keys, gloves, and other trinkets.
So I built her this HUGE DIY coat rack with shelf.
BUT, don’t worry. If you need something a little smaller, you can definitely make this shorter to fit your own entryway.
It’s a really simple design and easy to customize.
So if you’re ready to get building, let’s dive in.
Tools & Materials
This post contains affiliate links. See policies.
Materials:
- ¾″ plywood (amount depends on the size you want to make)
- (2) 1x2x8 boards
- (1) 1x3x8 board
- (1) 1x6x8 board
- (1) 8 ft stick cove molding
- Coat Hooks
- (2) corbels
- 2″ & 2 ½″ wood screws
- 1 ¼″ brad nails
- Wood Glue
NOTE: Material amounts will vary based on the overall size coat rack you choose to build.
I encourage you to search your scrap pile as you may be able to find most of what you need there.
Additional Notes Before Getting Started
The overall dimensions of this project are approximately 80″ long, 18 ¼″ tall and 6 ¼″ deep.
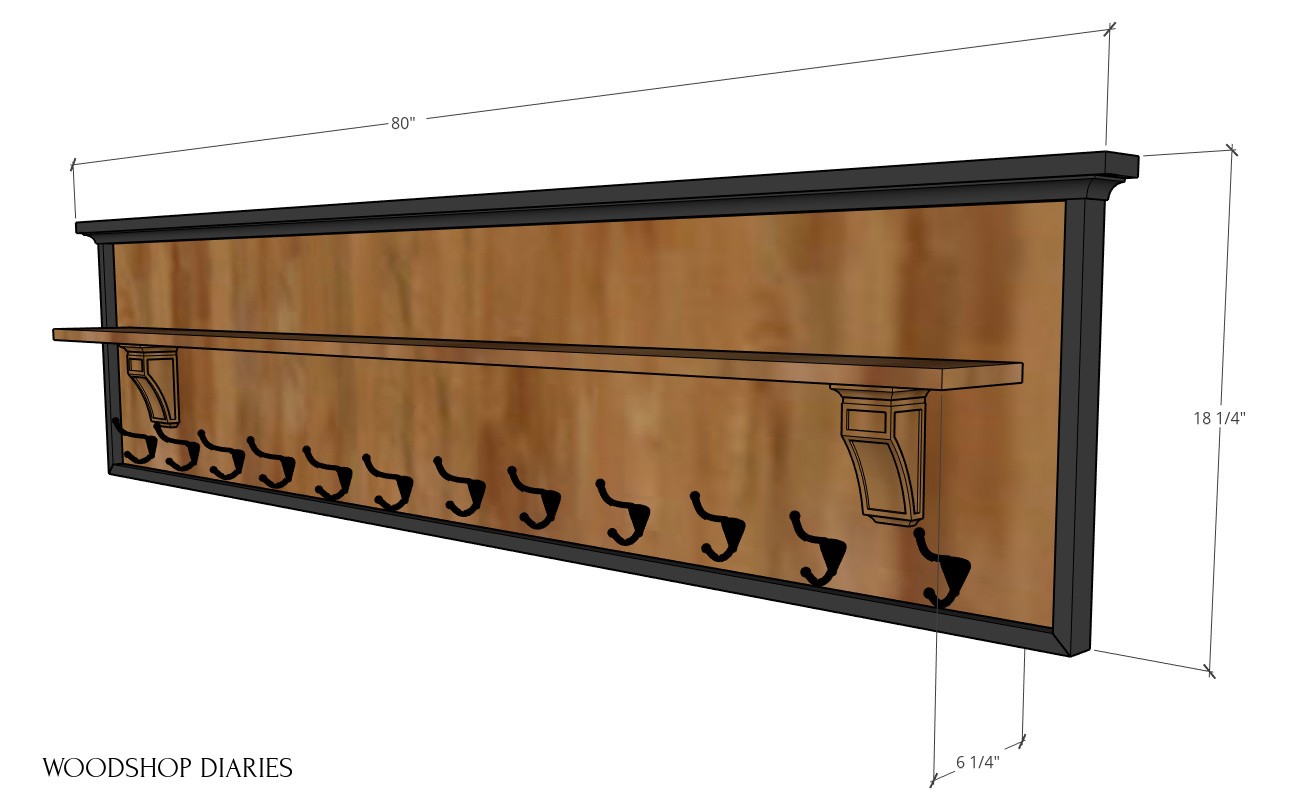
However, you can easily modify the size to fit your needs by simply cutting the back panel to whatever size you’d like.
Securing DIY coat rack to the wall
To install this coat rack, you will need to secure it to wall studs or use heavy duty wall anchors.
The finished project is quite heavy (especially if you make it very large), so you’ll want to make sure it’s securely fastened to the wall once complete.
I recommend using a few (at least) 2 ½″-3″ screws through the back panel of the coat rack and into the wall studs behind it.
Check out the last step below for more details.
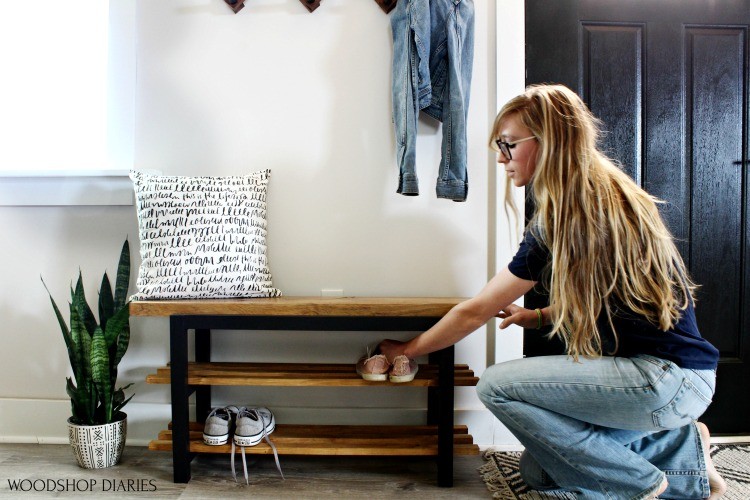
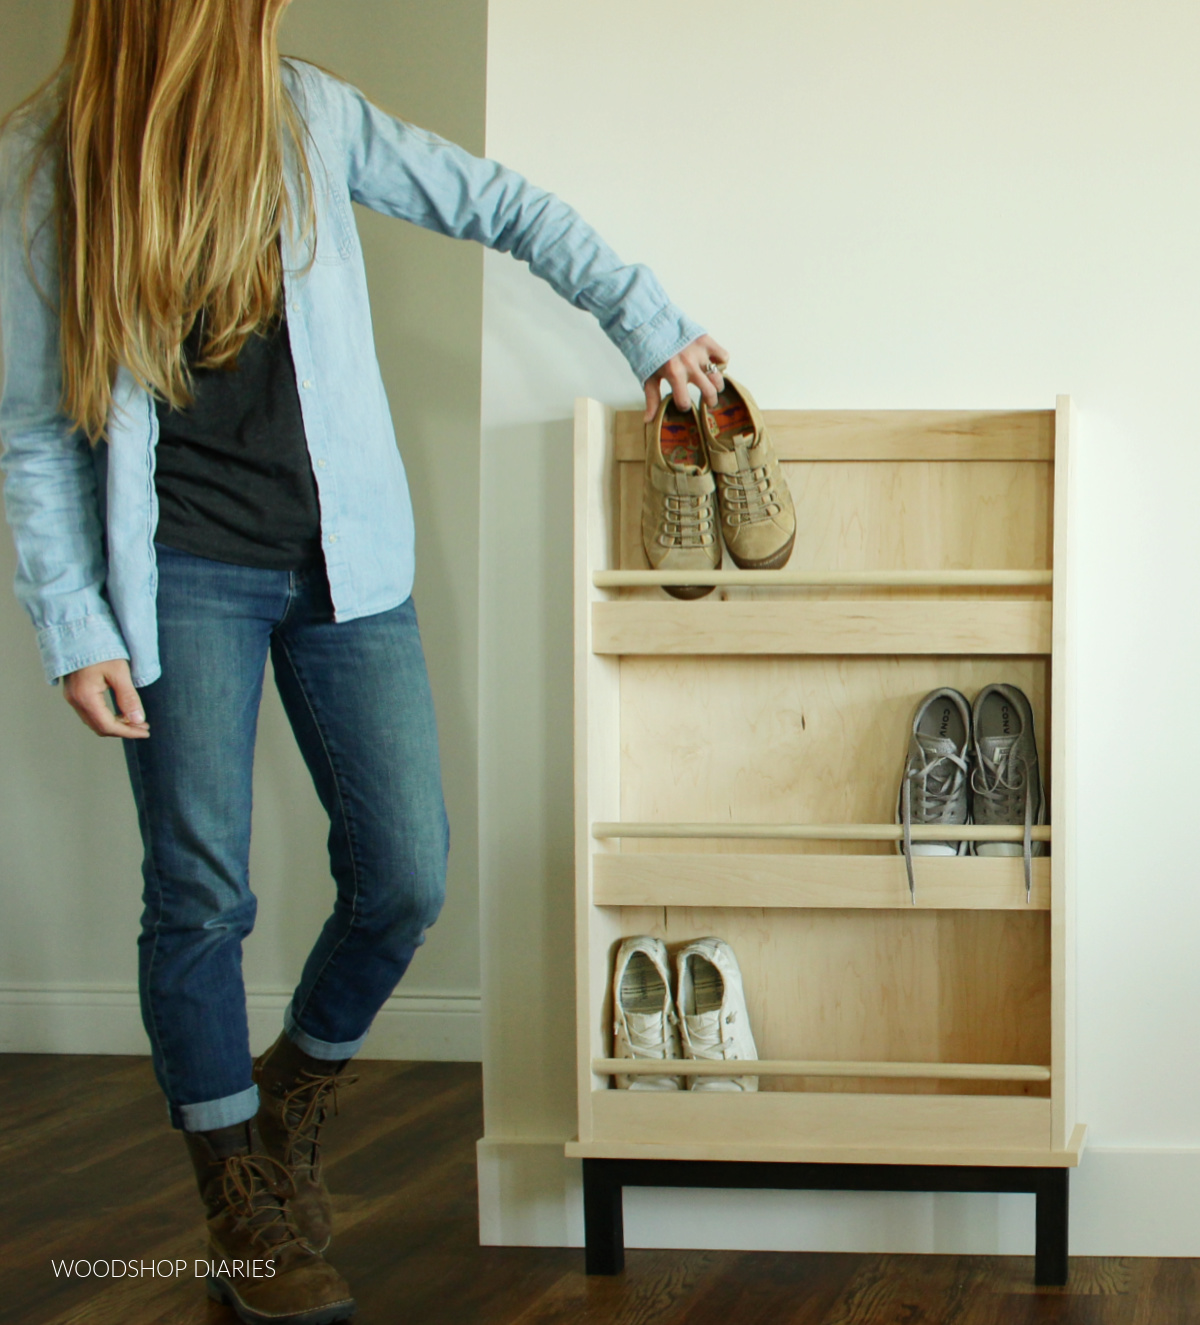
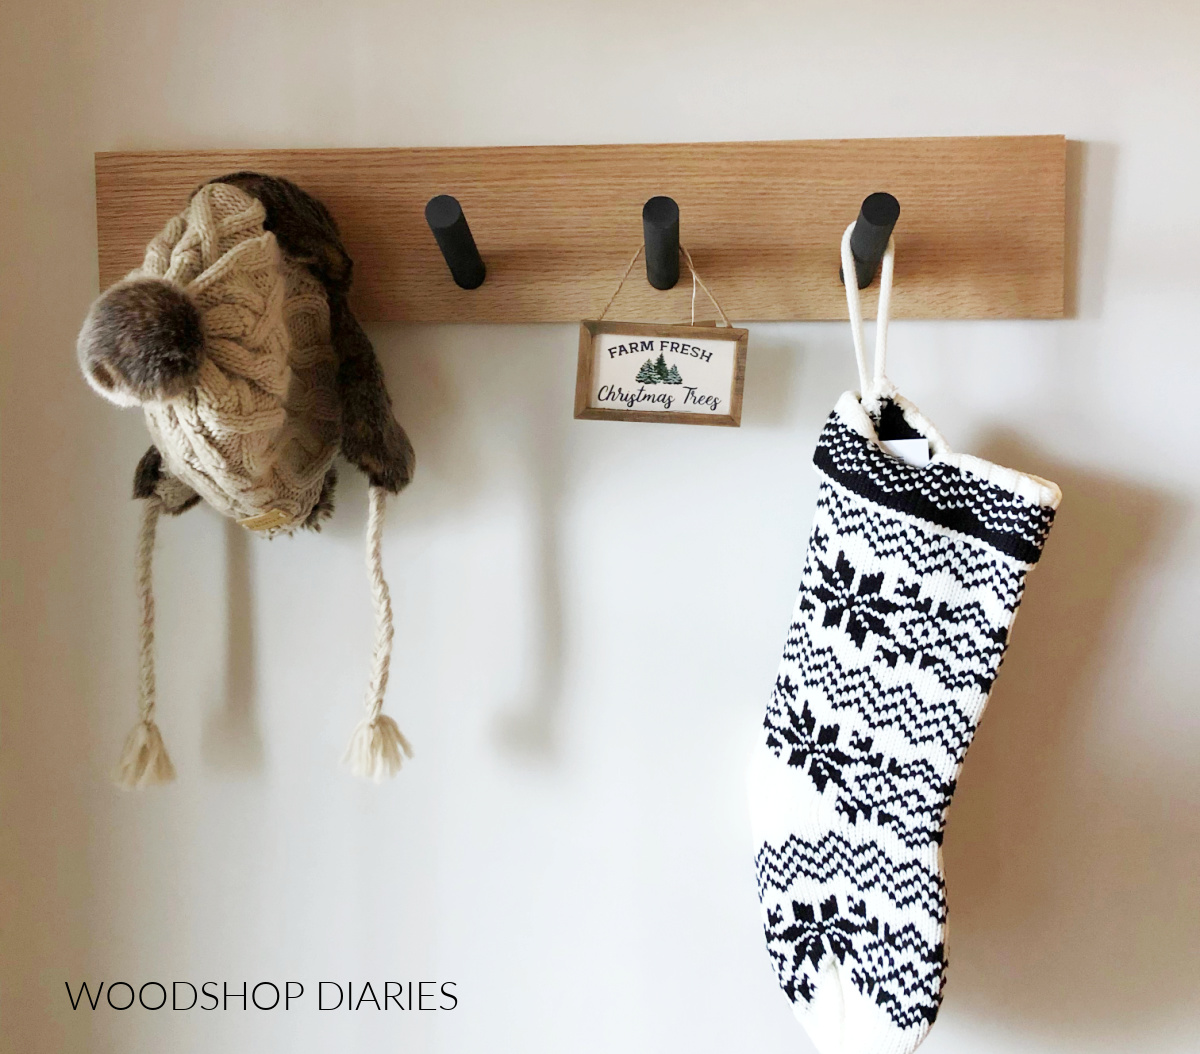
You may find these guides helpful in the building process:
How to Build a Coat Rack with Shelf
This is an excellent weekend woodworking project as it only takes a couple hours to complete.
The steps below walk you through the process, but remember, feel free to adjust your sizing as desired.
Step 1: Cut Back Panel of DIY Coat Rack
To keep things simple in this case, I just used ¾″ plywood for the main panel of this coat rack.

Here’s where you get to modify your sizing. I cut my piece to 16″ x 76″. Feel free to cut yours however large or small you want.
RELATED: Here’s how to cut down your plywood sheets!
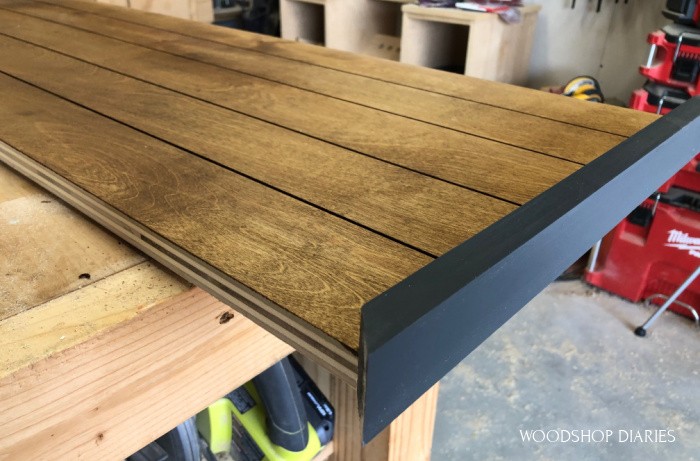
Now, this part is totally optional, BUT I added a “faux slat” or “faux shiplap” detail on my back panel to give it a little more visual interest.
I used my table saw for this, but you could also use a circular saw and a straight edge as well.
First, I set my blade height to about ¼″ and took my panel width and divided by 5 (in my case, it was 16″ / 5 = 3.2″) to give me my faux slat widths.
I set my rip fence to APPROX 3.2″ (your measuring tape will very likely not have a 3.2″ mark haha…so just get it close).
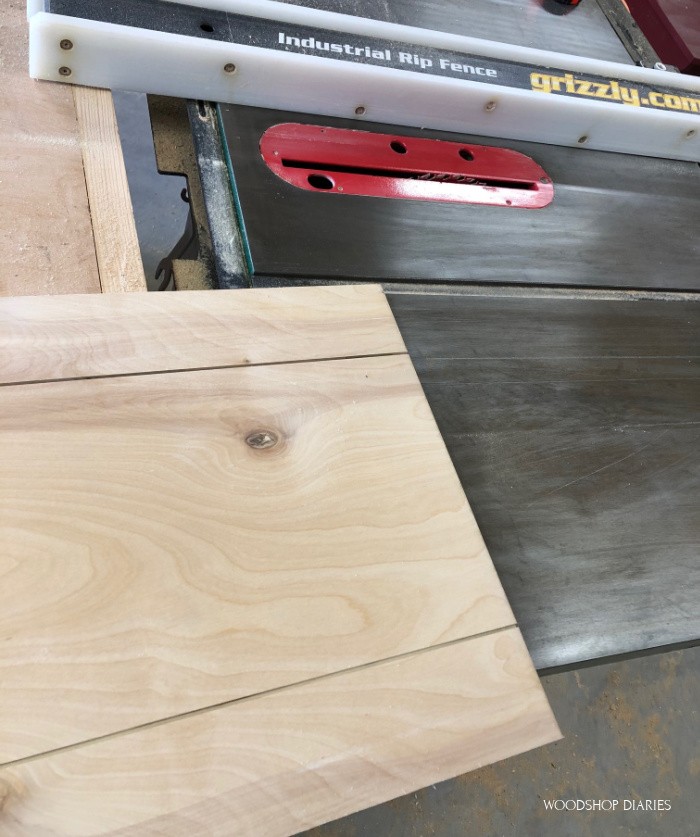
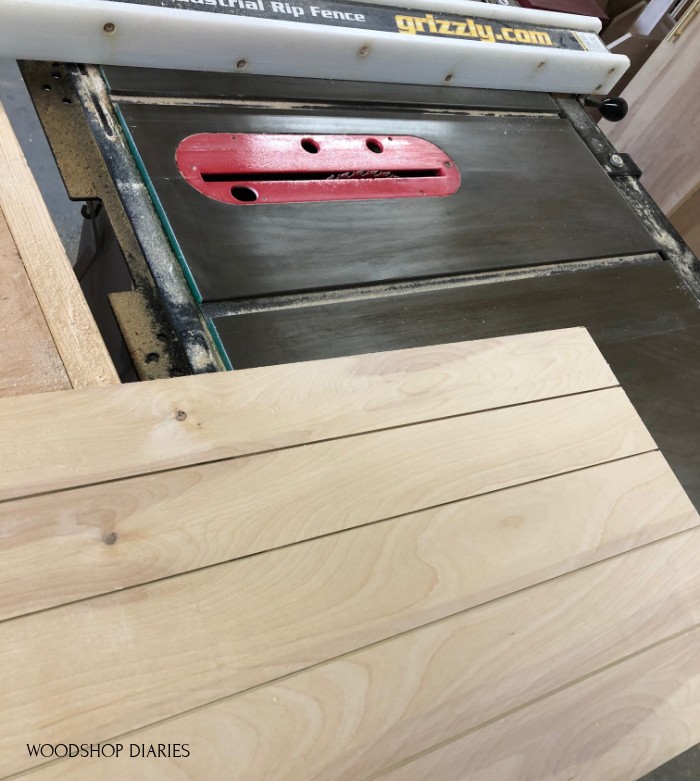
Then, I ran my piece through on each side to give me two “fake slats.” (See above.)
I used a similar method to cut the sides on this faux slat toy box.
I adjusted it over another 3.2″ and did the same to give me five total “slats.”
Now, if you don’t have a table saw and want to use a circular saw for this, you’d just set your saw’s cutting depth to about ¼″ deep.
Then, clamp a straight edge (or use a track or guide if you have one) to run your saw along the panel to cut your lines at the same locations.
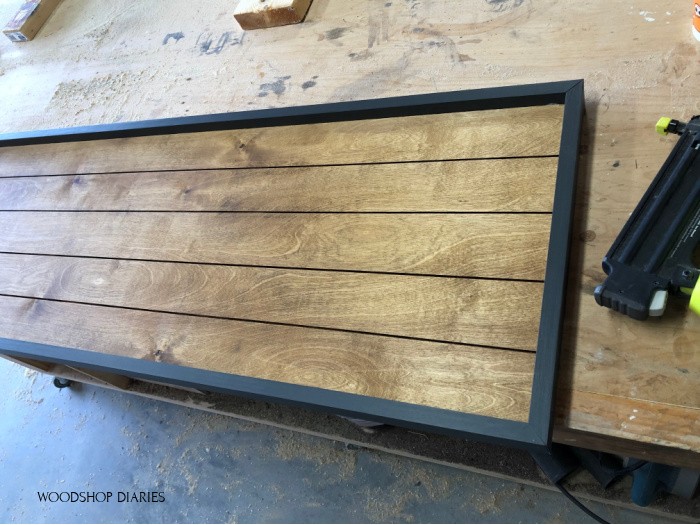
Step 2: Frame Out Coat Rack Panel
Once the back panel was cut, I cut to fit 1x2s to frame around it.
I mitered my corners 45 degrees, but you could simply butt them together at 90 degrees as well.
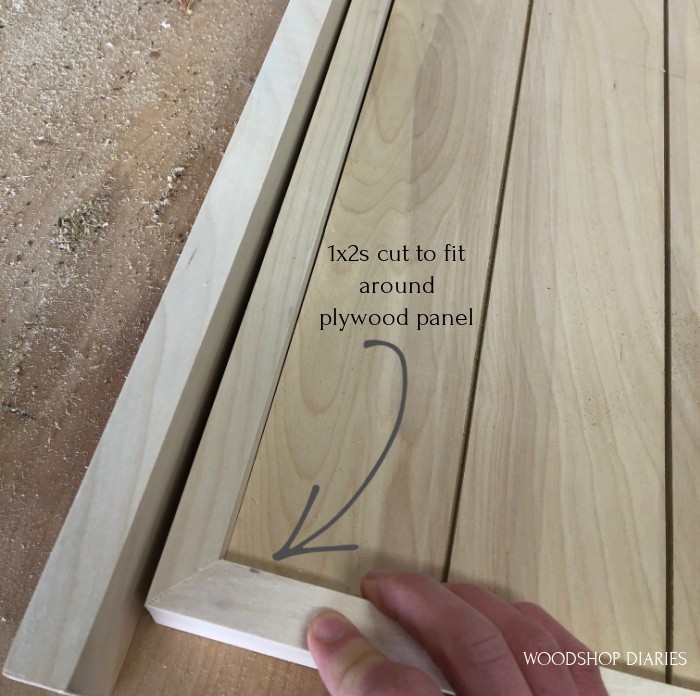
Basically, I just cut 1x2s to fit around the edges of the back panel like shown. But I didn’t attach them yet!
I painted these frame pieces black (SW Iron Ore) and stained the panel (Minwax Early American) before assembling to make finishing easier.
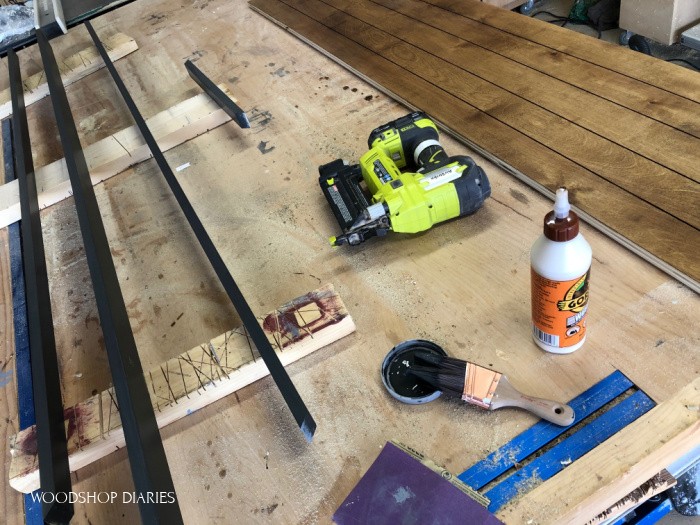
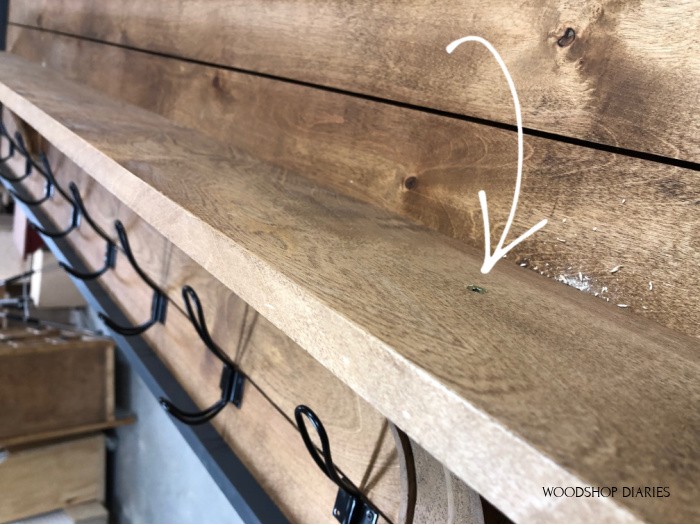
Once the stain and paint was dry, I glued and brad nailed this frame around the edges.
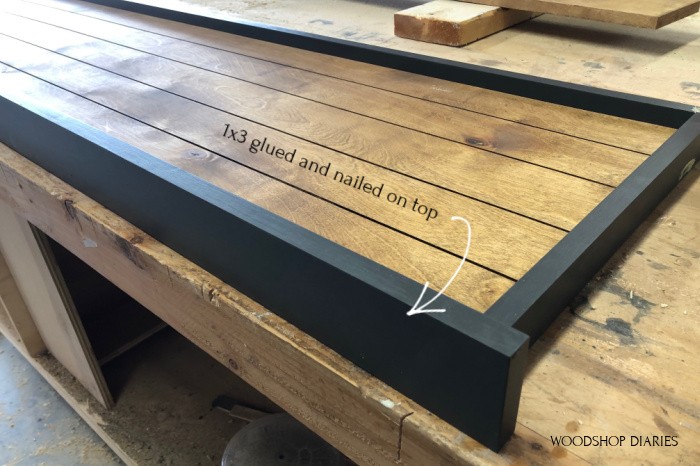
Once the frame was attached, I also cut a piece of 1×3 that was about 2″ longer than the overall width of the framed panel.
This piece will run along the top, flush to the back edge, and overhang each side 1″.
I painted this piece to match the frame, then glued and nailed it along the top of the framed panel.
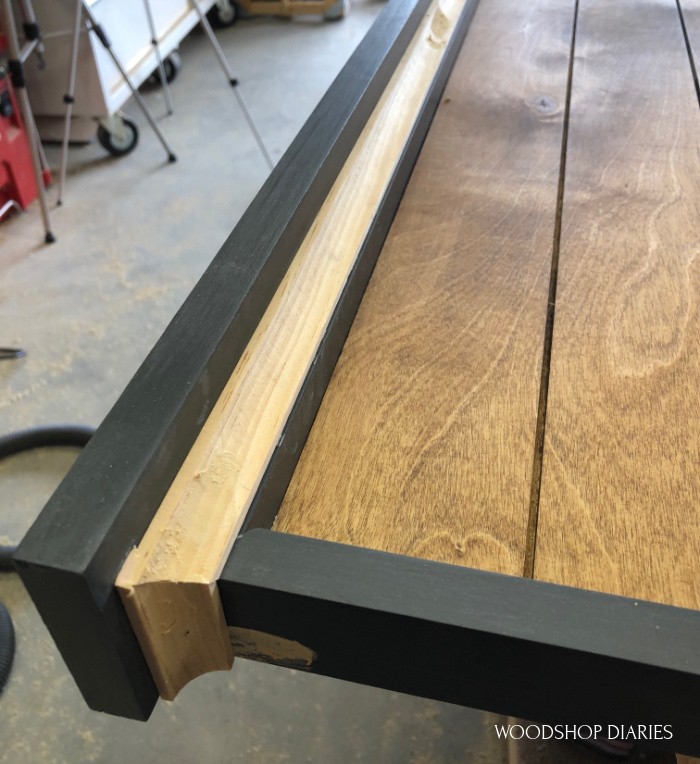
As an optional detail, I cut to fit some cove molding around the top between the 1×2 frame and the 1×3 board and nailed it in place.
This is totally optional, but it does dress it up a little if you like extra detail in your projects 🙂
I puttied the nail holes, then painted the molding to match the frame and top board.
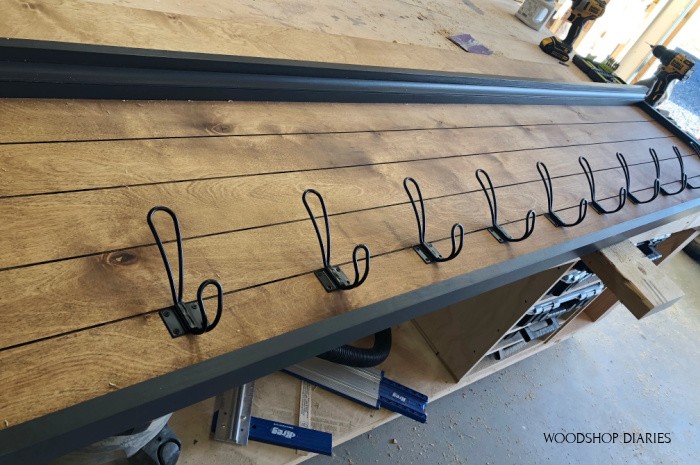
Step 3: Attach Hooks to DIY Coat Rack
Once all the paint was dry, I installed these coat hooks onto the panel with the screws provided with them.
You can add as many or as few hooks as you wish. Just make sure to space them evenly.
Spacing will depend on how many hooks you want and how large you made your coat rack.
Step 4: Attach Shelf to DIY Coat Rack
I cut a piece of 1×6 to use as the shelf. I just cut this a few inches shorter than my back panel.
In my case, I cut it to 72″ long.
I was supporting this shelf with two small corbels and I stained everything to match the back panel before assembling.
Then, I applied wood glue to the back side of the corbels and placed them on the plywood panel so that they were at the same height from the bottom and the same distance in from the sides.
It doesn’t matter what this distance is as long as they’re both the same–I just fit mine between the hooks where I thought it looked good proportionally.
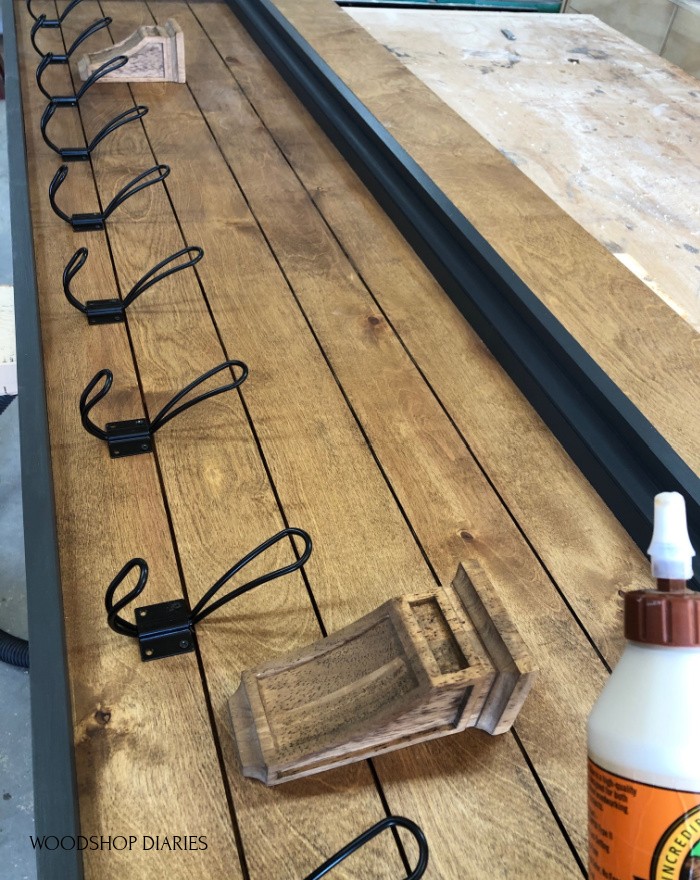
Once the glue had had time to cure enough to keep them in place, I used a couple 2″ wood screws from the back side to secure them in place.
Then, I centered the shelf on the corbels and used a couple 2″ screws to secure it to them.
Step 5: Attach to the Wall
Now, I am giving this to my friend to install, so I don’t have a photo of it hanging to show you.
BUT, in order to hang this, locate at least two (three is better, especially for long coat racks) studs in the wall you’re hanging this on.
Use at least three 3″ wood screws through the back plywood panel to secure this piece to the studs. It’s heavy, so make sure it’s attached securely.
Now, it’s ready to hang up coats, keys, and hats, and the shelf can be a catch-all for mail and other odds and ends.

This is such an easy project that can be such a huge improvement and addition for your entryway or mudroom!
If you’re looking for more simple entryway projects, check out a few favorites:
For more DIY projects straight to your inbox, be sure to sign up for our newsletter below!
And if you enjoyed this DIY coat rack with shelf project and want to save it for later, don’t forget to pin it!
Until next time, happy building! 🙂