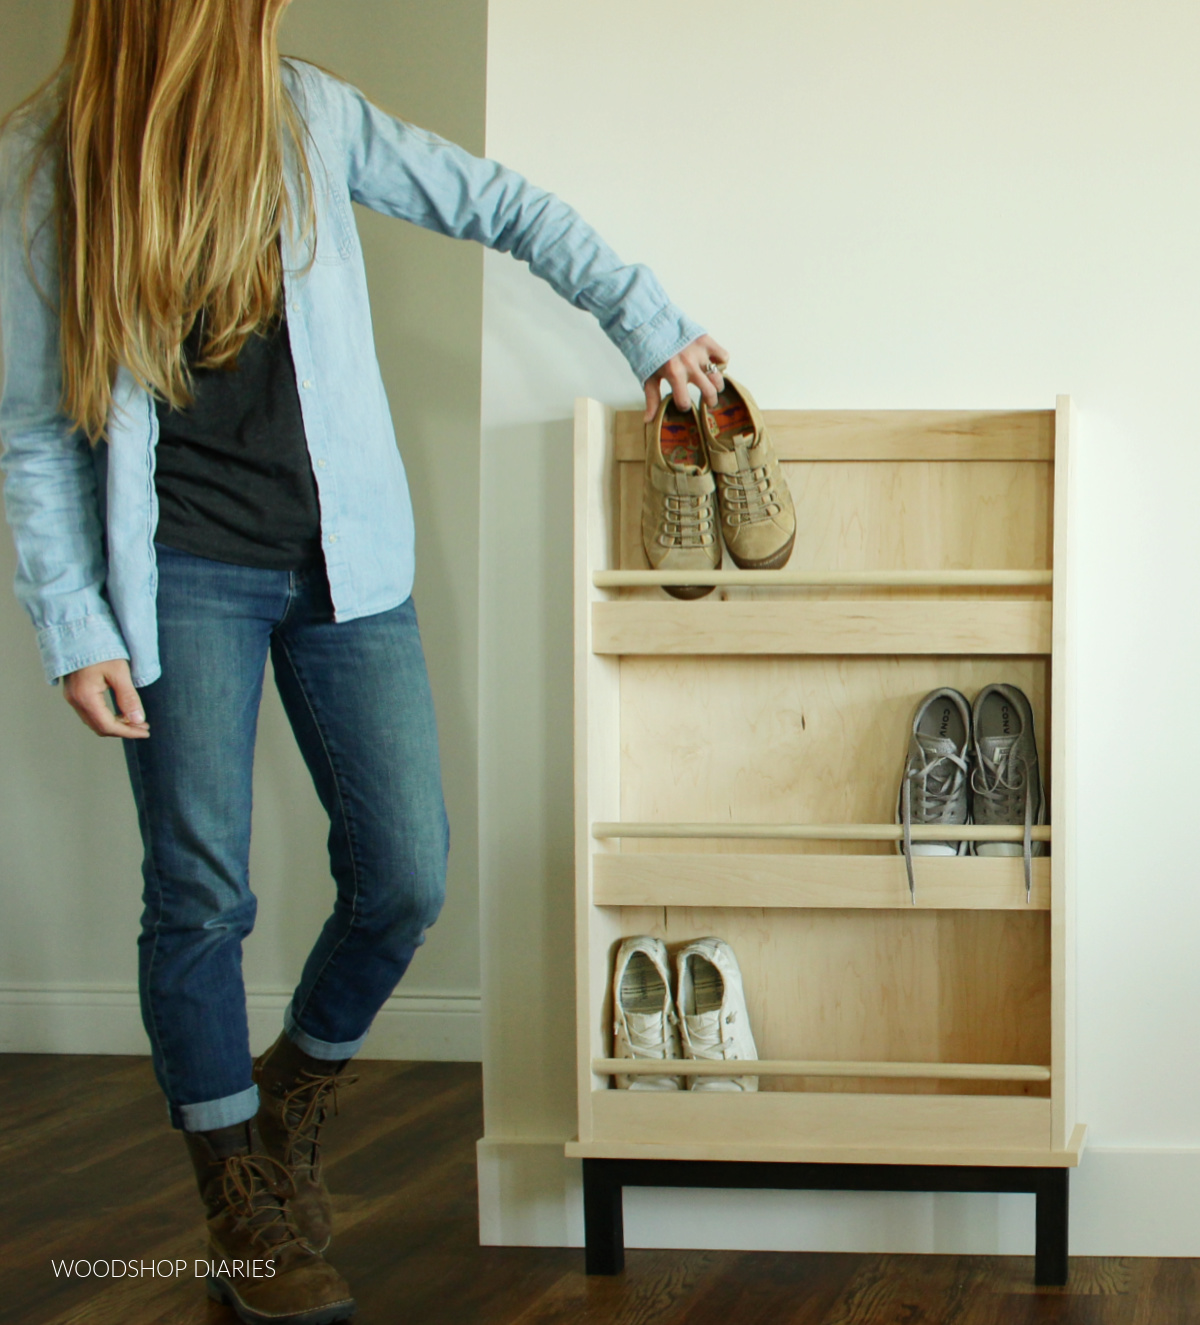
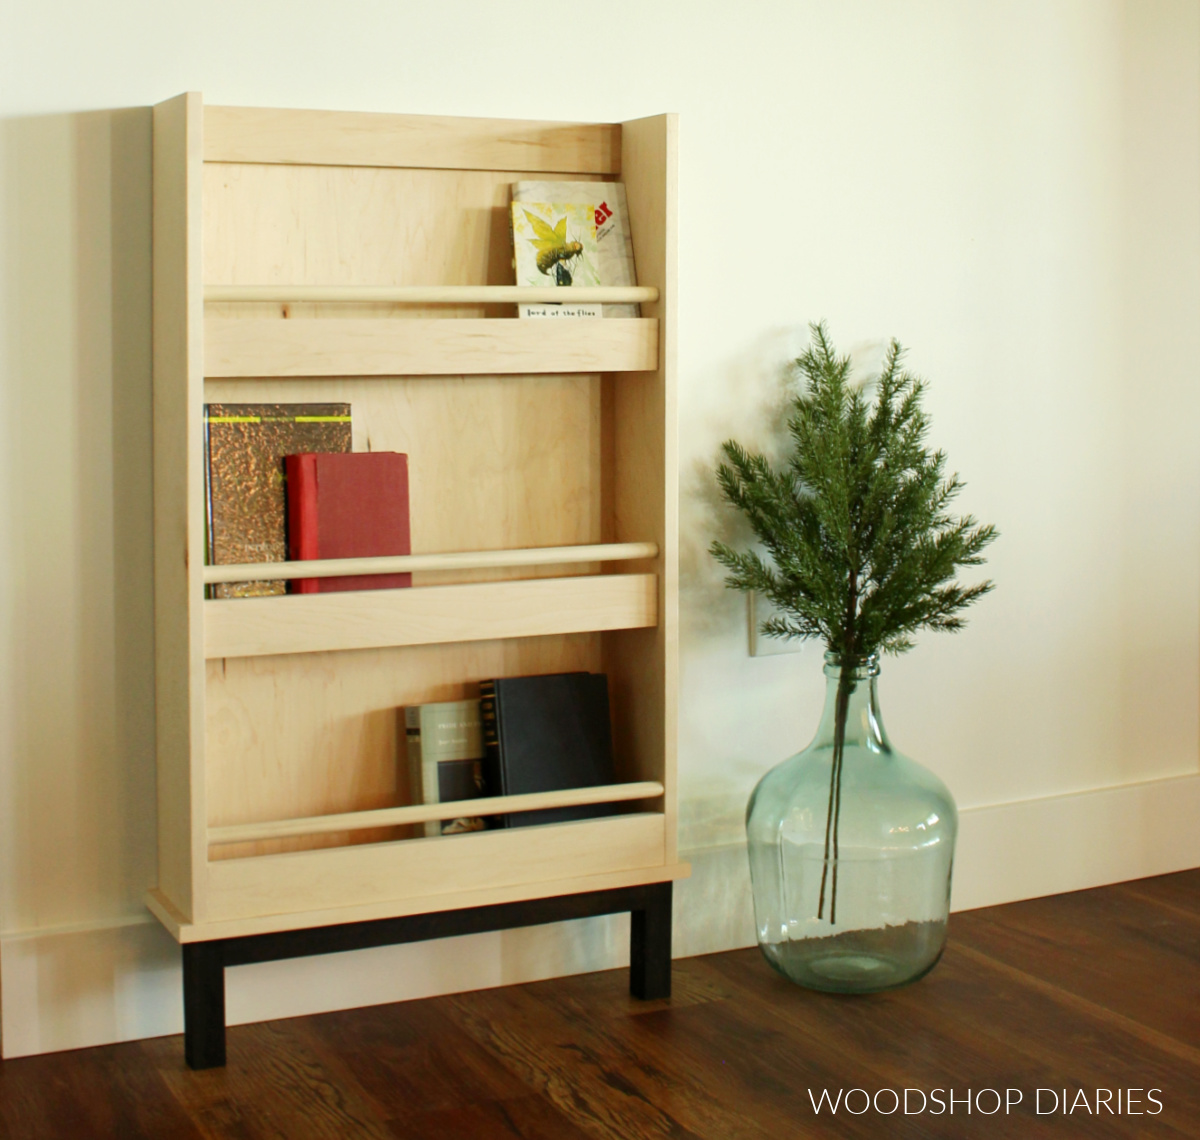
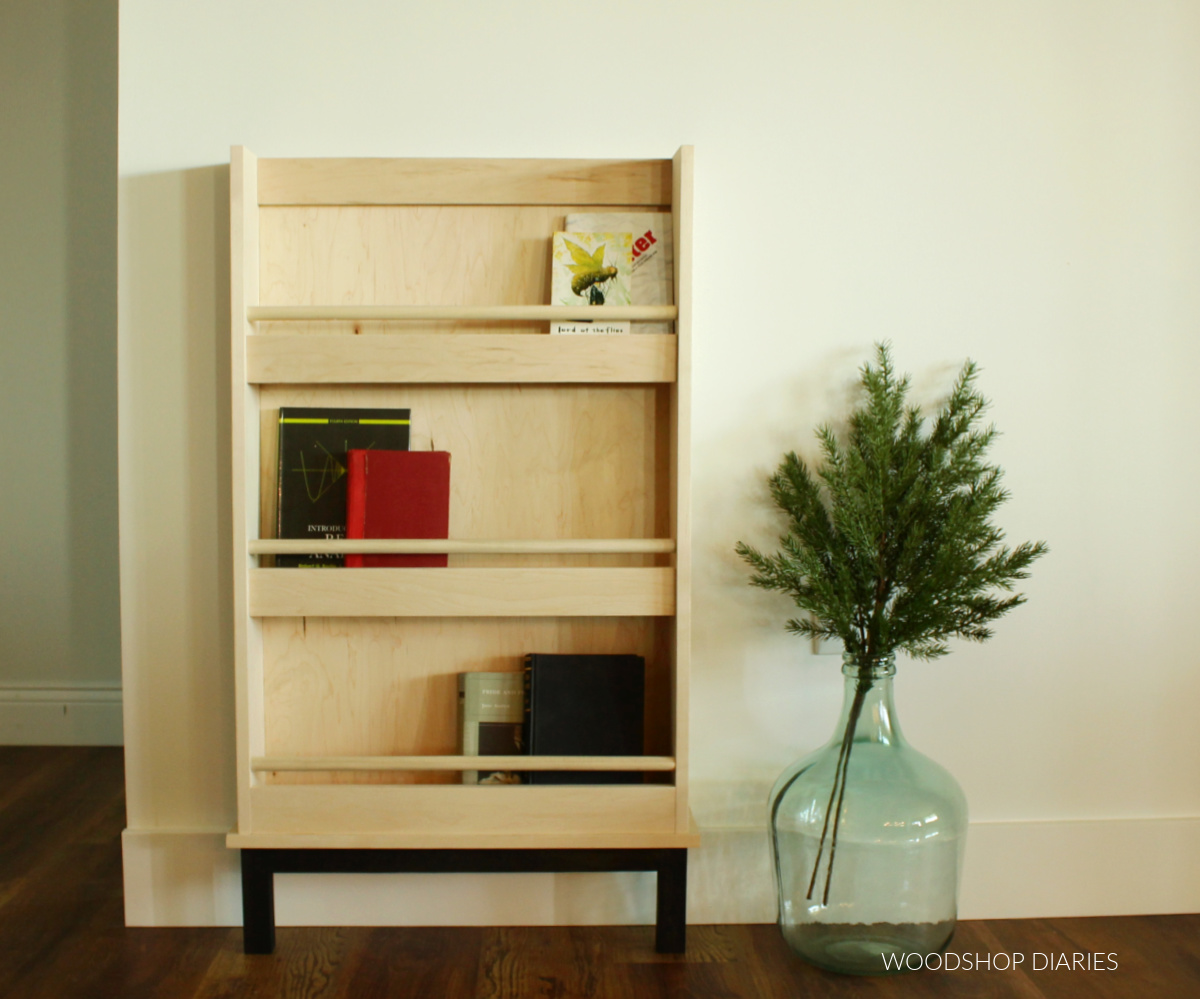
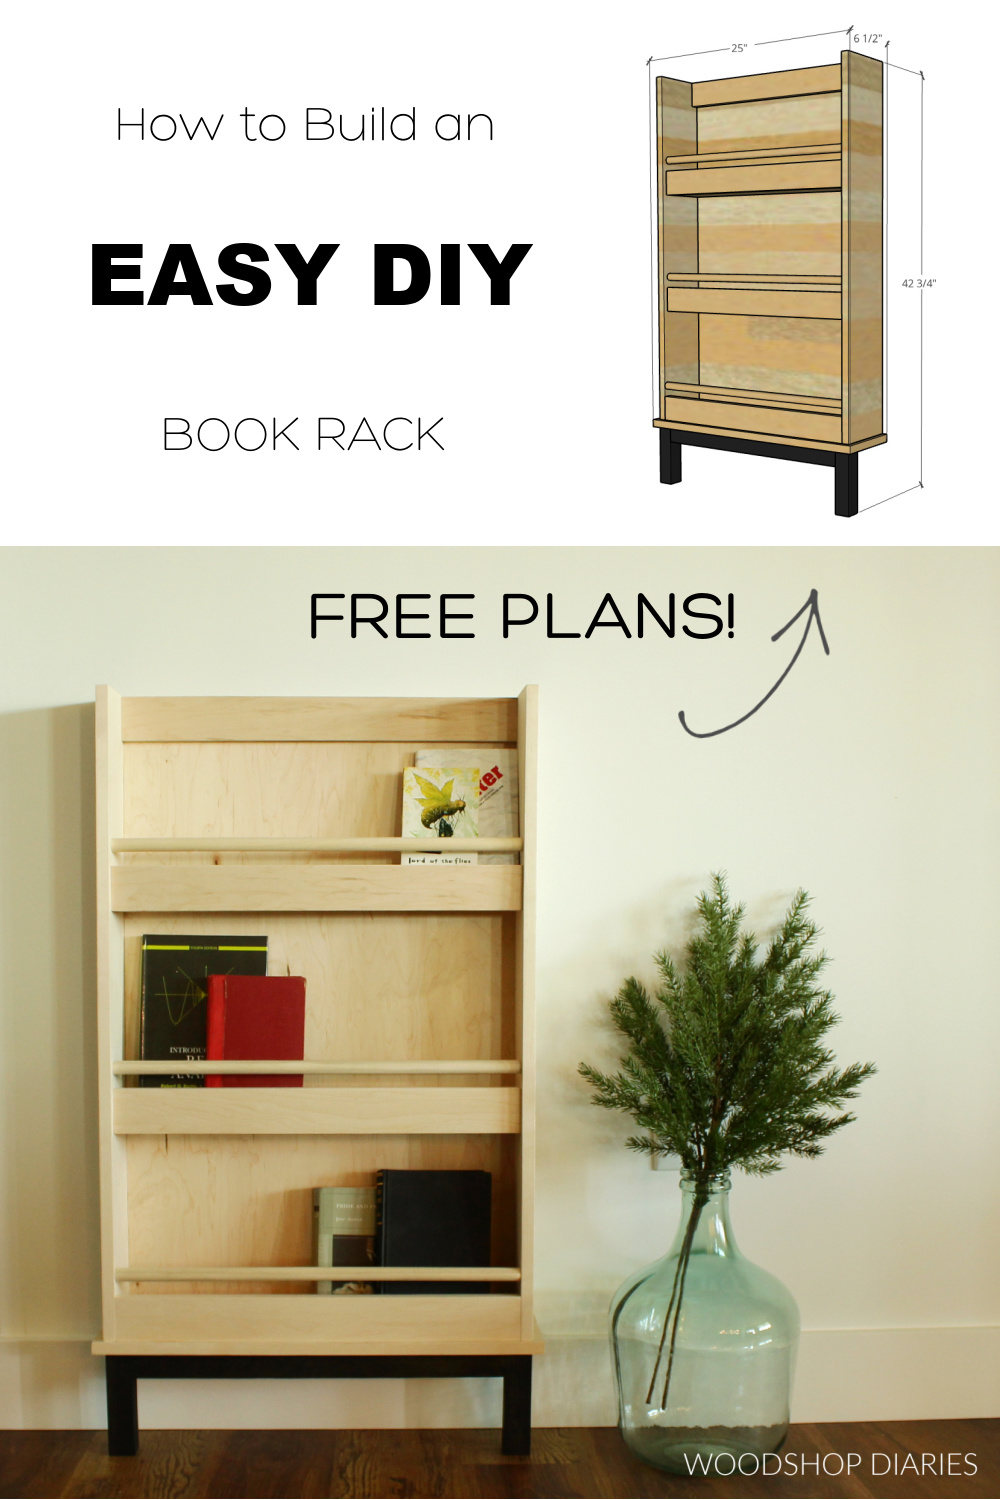
In this post, I’m sharing how to build this simple DIY book rack that could double as a shoe, plate, or towel rack, too!
*This post is sponsored by KregTool.com. It also contains affiliate links. See policies page.
This project may be small and simple, but it packs a ton of opportunity!
.
You could use this in the kitchen as cookbook rack, spice rack, or as a plate rack.
.
Use it in a bathroom for toiletries or towels.
.
Use it in a kid’s room for books and toys.
.
Or use in an entryway as a shoe rack.
.
There are so many options, but no matter what you use it for, I’m sharing how to make your own right here!
.
Check out the video and plans below:
Tools & Materials:
Materials:
- ½ sheet ¾” plywood
- (1) 2x2x8 board
- (2) ¾” x 48” dowel rod (optional)
- 1 ¼” pocket hole screws
- 2 ½” pocket hole screws
- 1 ¼” wood screws
- 2” wood screws
- 1 ¼” brad nails
- Wood glue
- Edge banding (optional)
PRINTABLE PLANS: You can grab the FREE PRINTABLE PLANS for this DIY book rack complete with plywood cutting guide on KregTool.com here.
Notes About this DIY Book Rack Project:
Overall Dimensions:
The overall dimensions of this project are 6 ½″ deep x 25″ wide x 42 ¾″ tall.
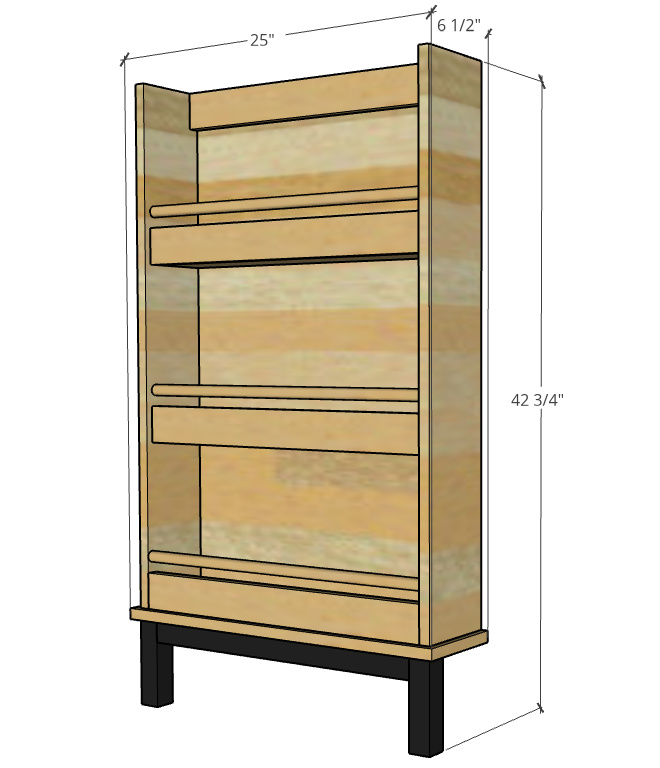
However, the sizing is EASILY customizable so if you need it larger or smaller, feel free to get creative to suit your own needs and space.
Base Sizing:
The base on this project is simply two legs and a piece between them mounted toward the front.
.
This is because this project is designed to be mounted to the wall and the back needs to sit flush against it. So the base needs to be taller than your baseboards and inset far enough from the back edge that it doesn’t come into contact with your baseboards.
Some posts you may find helpful in the build:
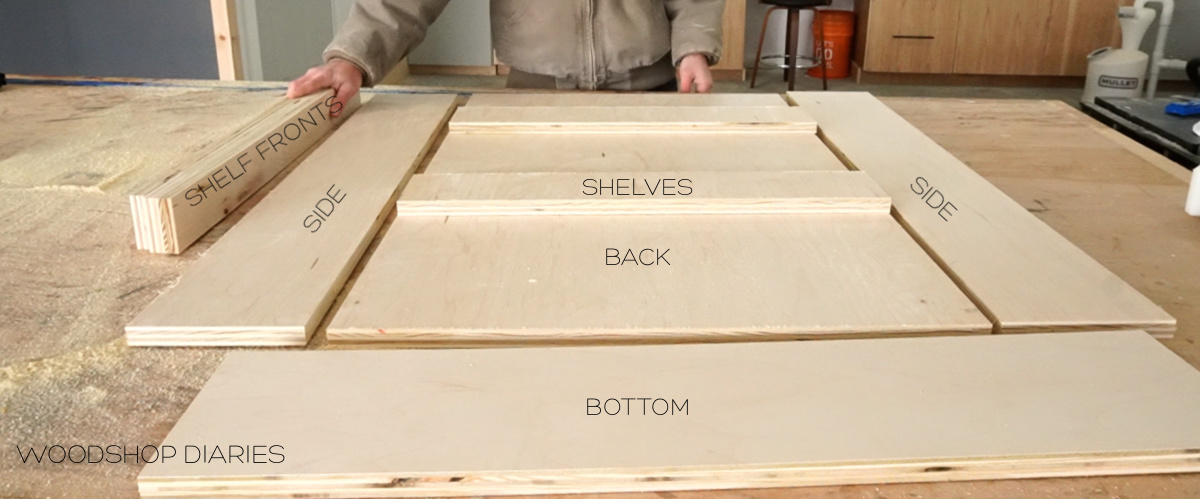
Step 1: Prepare Plywood for Book Rack
I share the plywood cut diagram in the plans here showing how to cut everything you need from a ½ sheet of ¾″ plywood.
.
However, if you have scraps, I recommend browsing your scrap pile to see what you can use for this because most of the pieces are fairly small.
.
I used my circular saw and Kreg cutting guides to cut down my plywood pieces into a back panel, two side panels, a bottom, two shelves, and three shelf fronts.
RELATED: How to cut plywood sheets using a circular saw
I laid them out on the workbench and marked the edges that will be exposed in the finished project so I knew which edges to edge band.
.
As always, edge banding is optional, but it makes the project look a little cleaner, so I like to add it.
RELATED: How to apply iron on edge banding
.
I applied iron on edge banding to all the edges that will be showing at the end and once I had all the sides that I marked covered, I gave everything a good sanding.
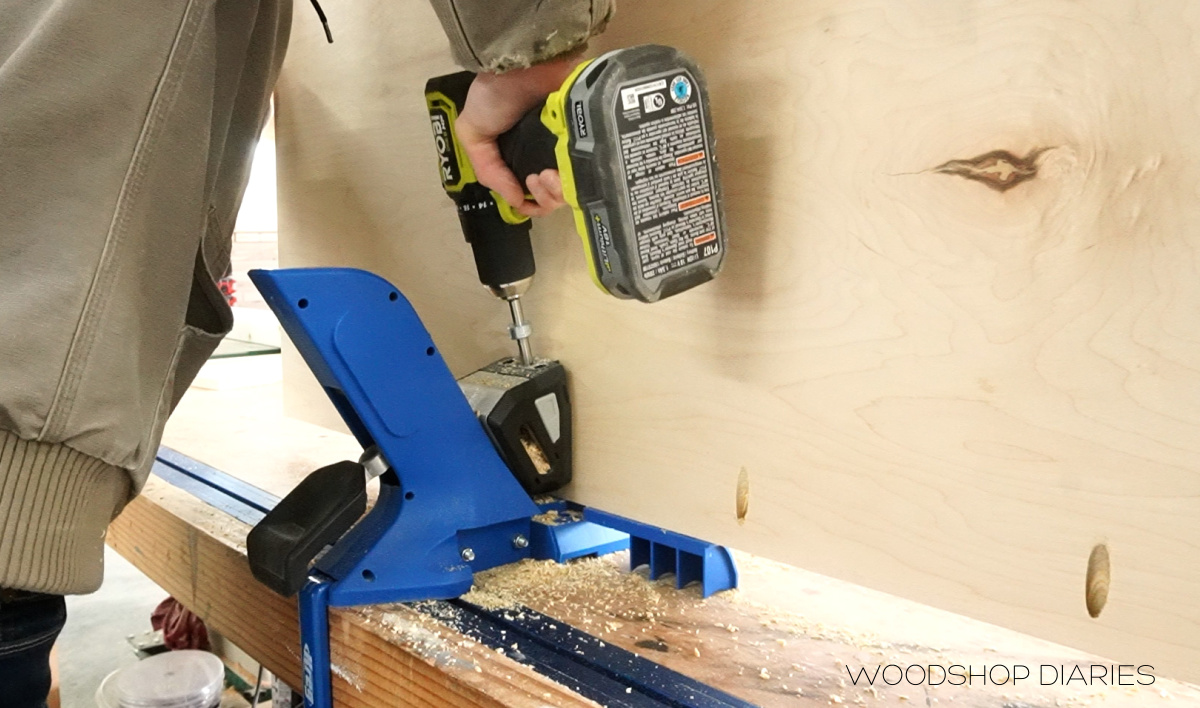
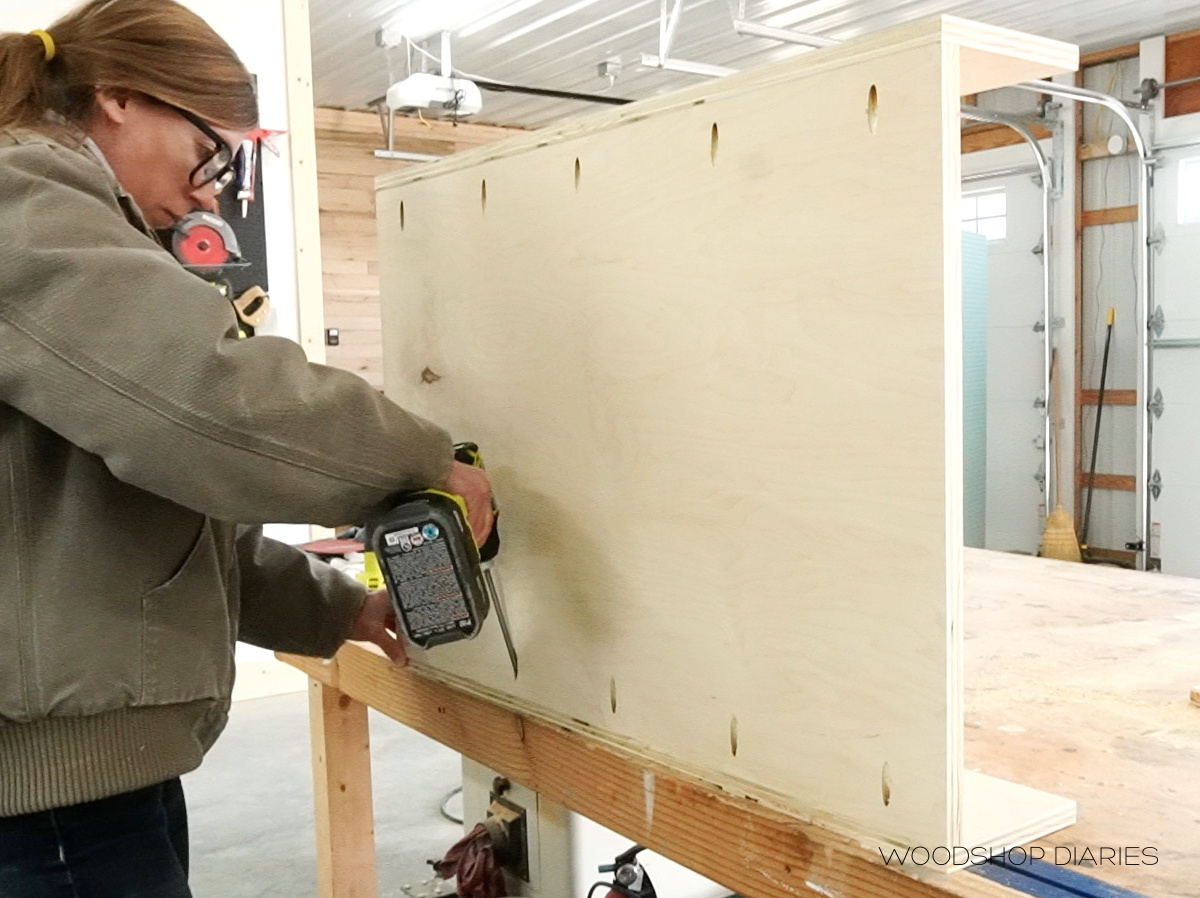
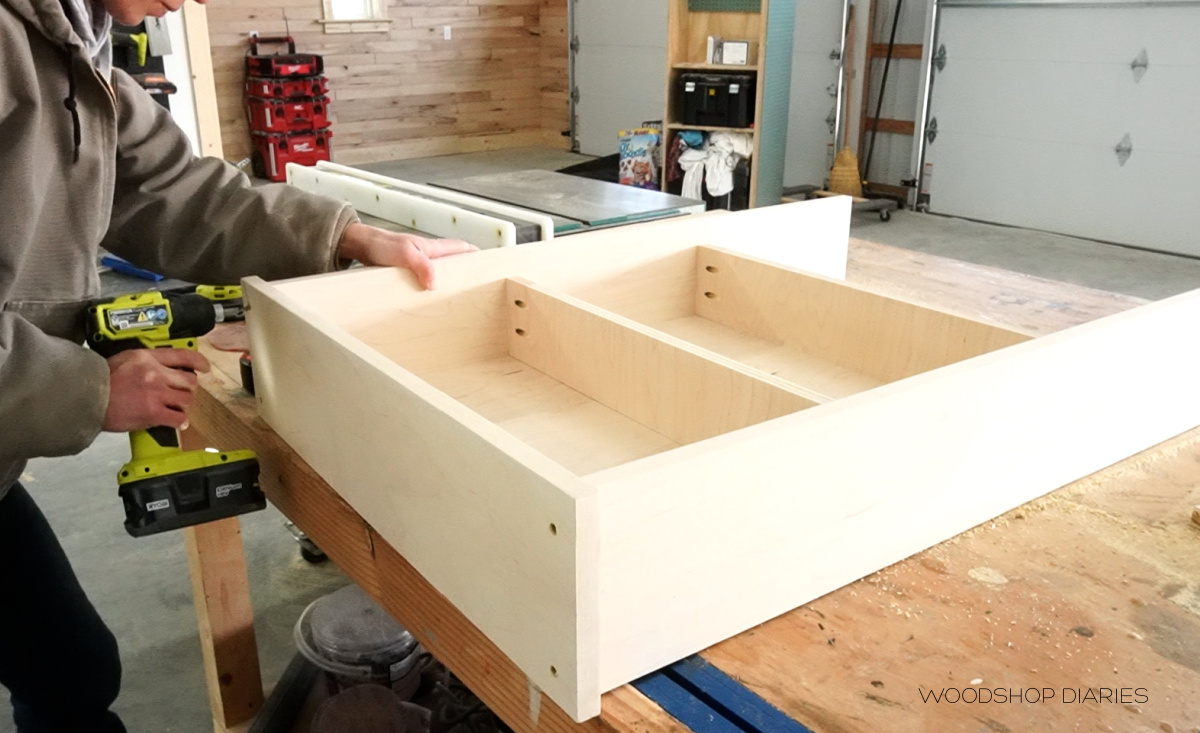
Step 2: Attach Book Rack Back and Sides
I assembled this project using pocket holes and screws, so I pulled out my Kreg pocket hole jig and drilled ¾” pocket holes into the ends of the little shelves and along the long edges of the back side of the back panel.
RELATED: How to use a pocket hole jig
I used 1 ¼” pocket hole screws to secure the back panel between the side panels making sure to place my edge banded edges in the right position.
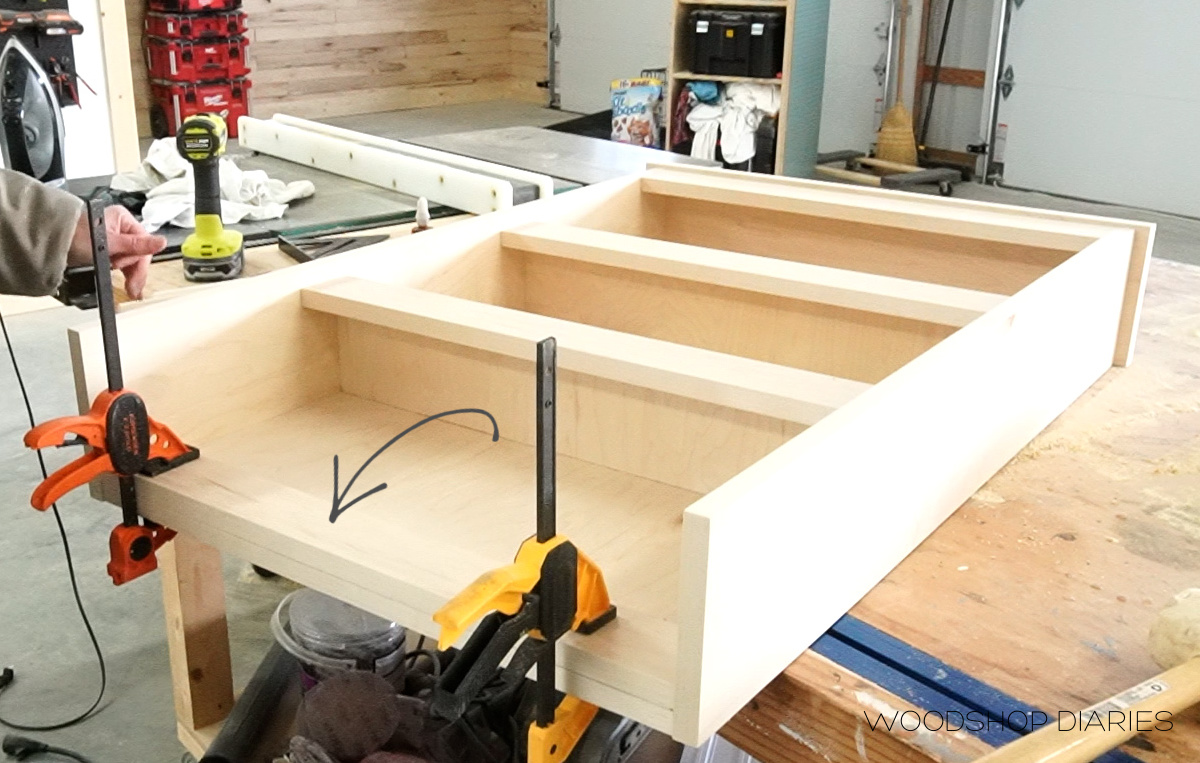
Step 3: Install Shelves
Then, I placed the two middle shelves in and secured these with 1 ¼” pocket hole screws.
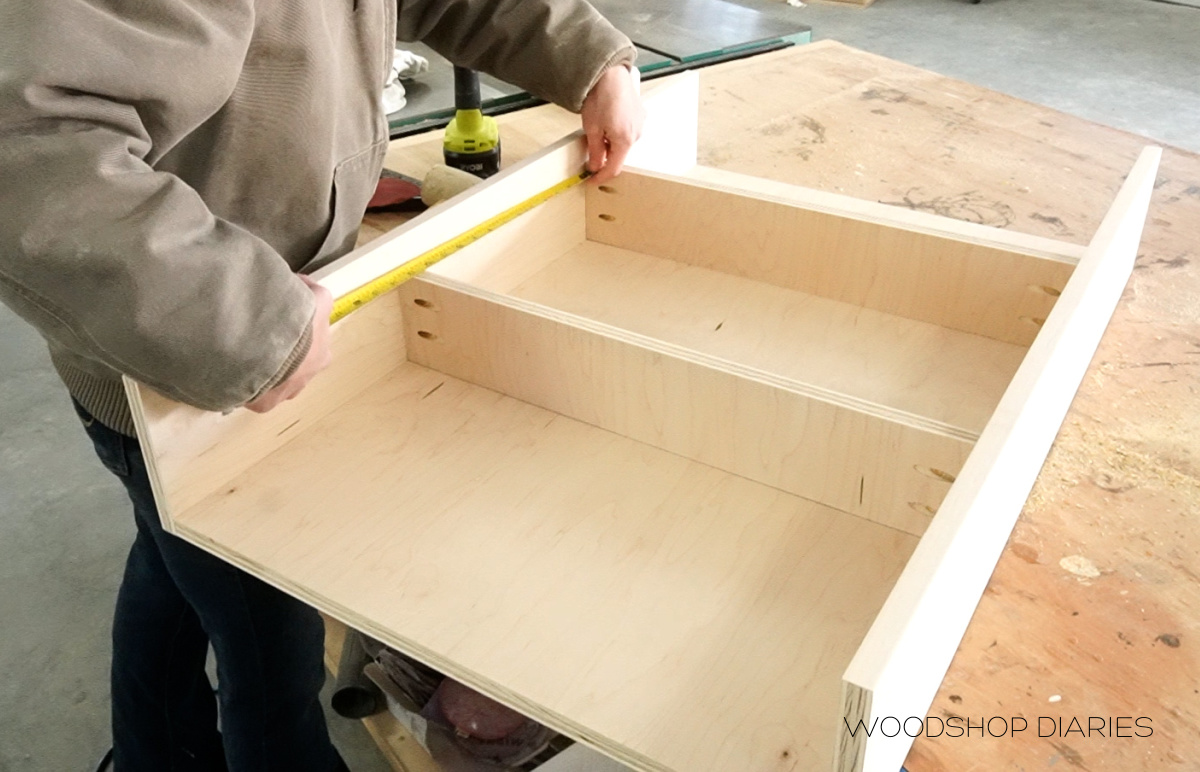
Before securing, I made sure these were equally spaced out and that the shelves were square to the back so the shelves wouldn’t be tilted.
Step 4: Add Bottom to Book Rack Shelf
For the bottom panel, I centered it side to side, but kept the back edge flush to the back panel and simply screwed this in using 1 ¼” wood screws from the bottom.
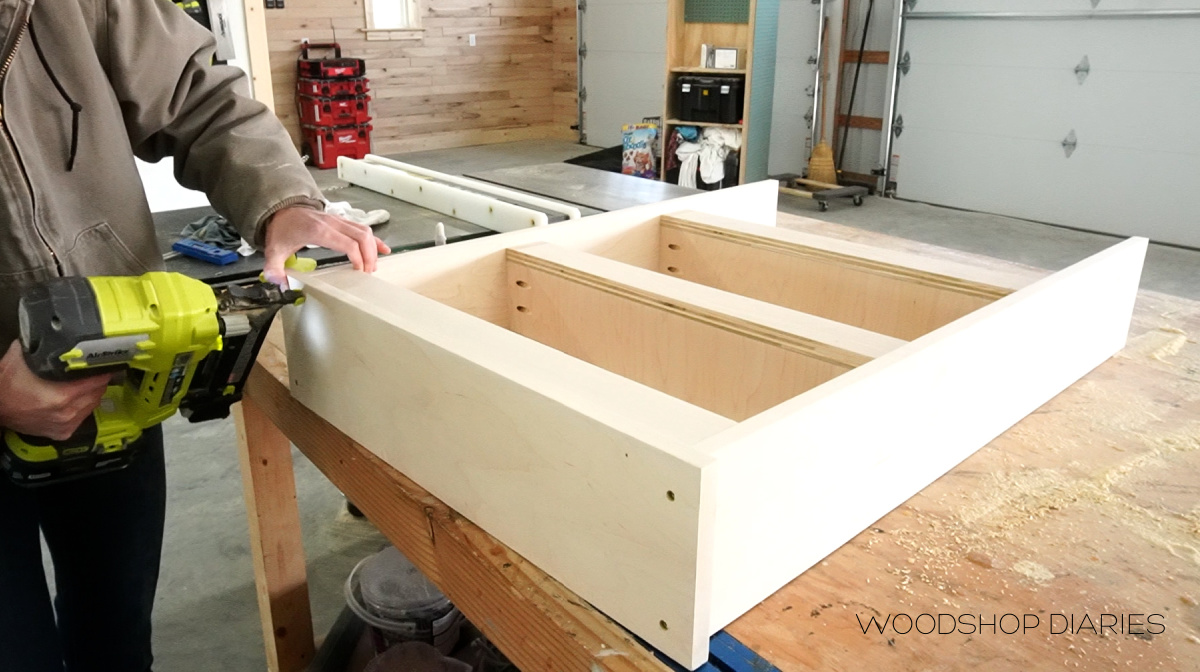
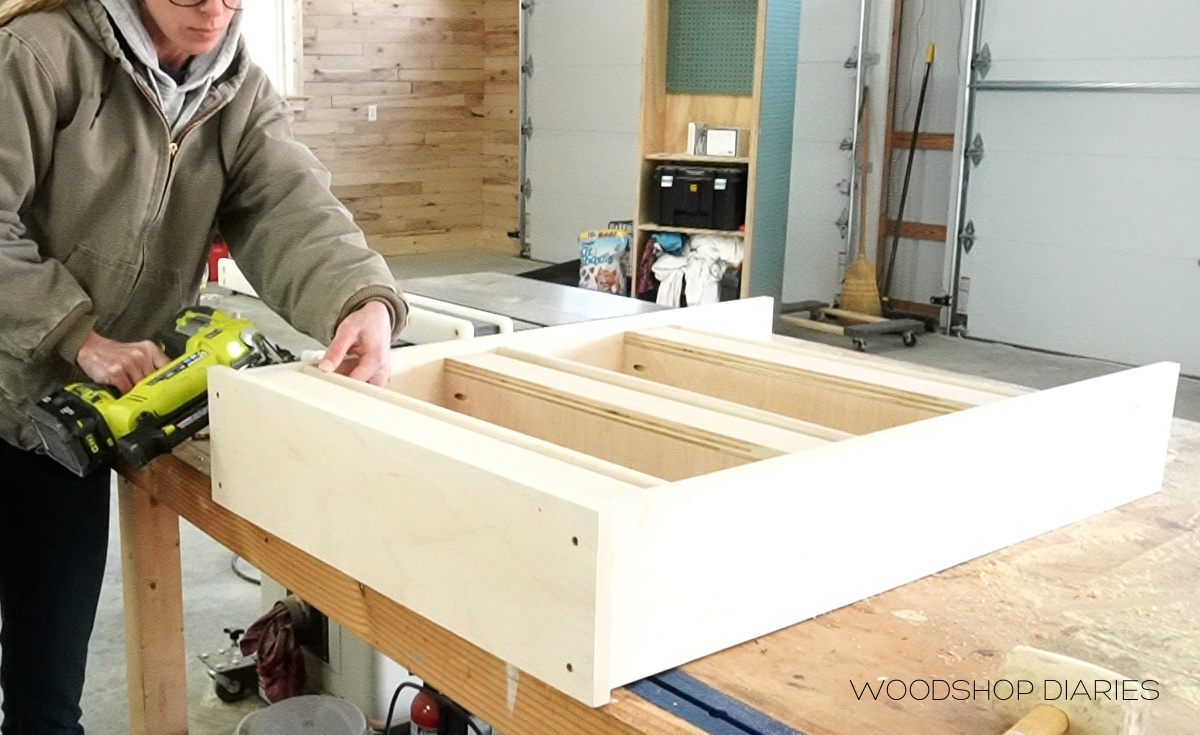
Step 5: Add Shelf Fronts
To prevent books, shoes, plates, whatever you put in here from sliding off the shelves, I added some small pieces along the front edges of each shelf.
.
You could also install these using pocket holes and screws, but it’s a super tight fit to try to drive them, so I simply used wood glue and brad nails.
RELATED: Finish vs Brad vs Staplers–What’s the difference?
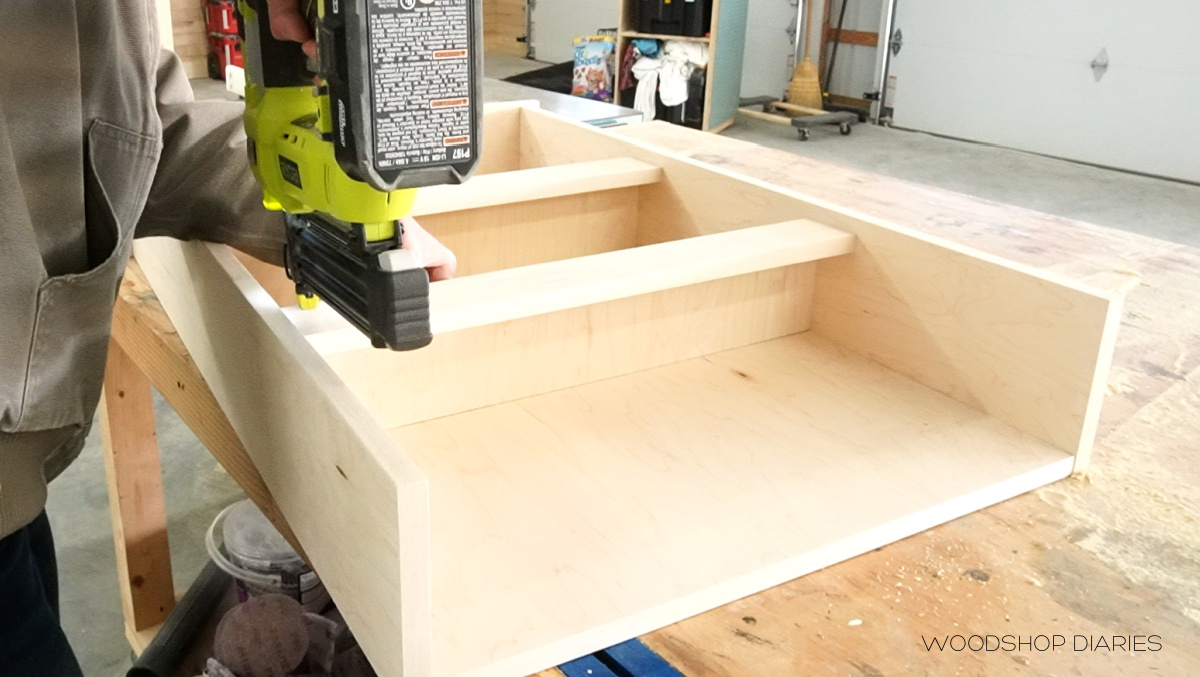
I applied wood glue along the front edges of both shelves and nailed these pieces on through the front and through the side panels.
.
For the bottom, since there’s no shelf to nail to, I applied wood glue on the bottom edge and glued it to the bottom panel. I used nails through the bottom and sides to keep it in place while the glue dried.
Step 6: Add Top Trim
I cut a small scrap piece to glue to the top edge here—100% just for looks. I don’t know why, but I felt like this top section needed something here to finish it off.
Step 7: Add Dowels to Shelf Tops
Then, I cut three ¾” dowels to fit right above these shelves. I added these to give some extra height to the shelf fronts to prevent things from falling out.
.
These pieces are optional and you could definitely trade these out for something else if you wanted to use 1x2s, square dowels, etc.
.
This was kind of messy, but I just added some glue on the ends of each dowel and slid it in place about ¾” above the shelf fronts.
I shot a nail through each side and into these ends to hold them while the glue dried, then wiped and sanded off any glue messes that occurred while putting these in.
Step 8: Assemble Shelf Rack Base
I cut some scrap 2x2s—two at 6” long and the other 21” long. I drilled 1 ½” pocket holes into the ends of the long piece and assembled this base using wood glue and 2 ½” pocket hole screws.
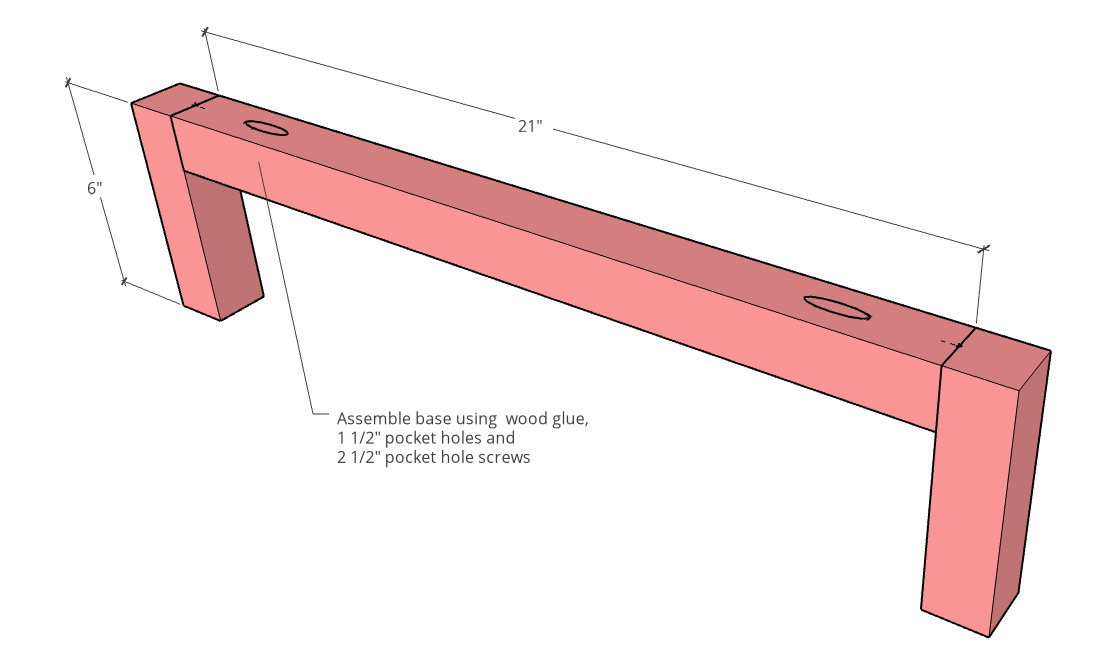
As a side note—theoretically, each joint should have at least two screws, but I’ve found when using 2x2s, that they’re more likely to split when driving two screws into such a small piece.
.
So I’ve found that in most cases, some wood glue and one screw works well.
.
Before attaching the base, I went ahead and stained it. I used ebony stain because I wanted the base to be dark to contrast the shelf.
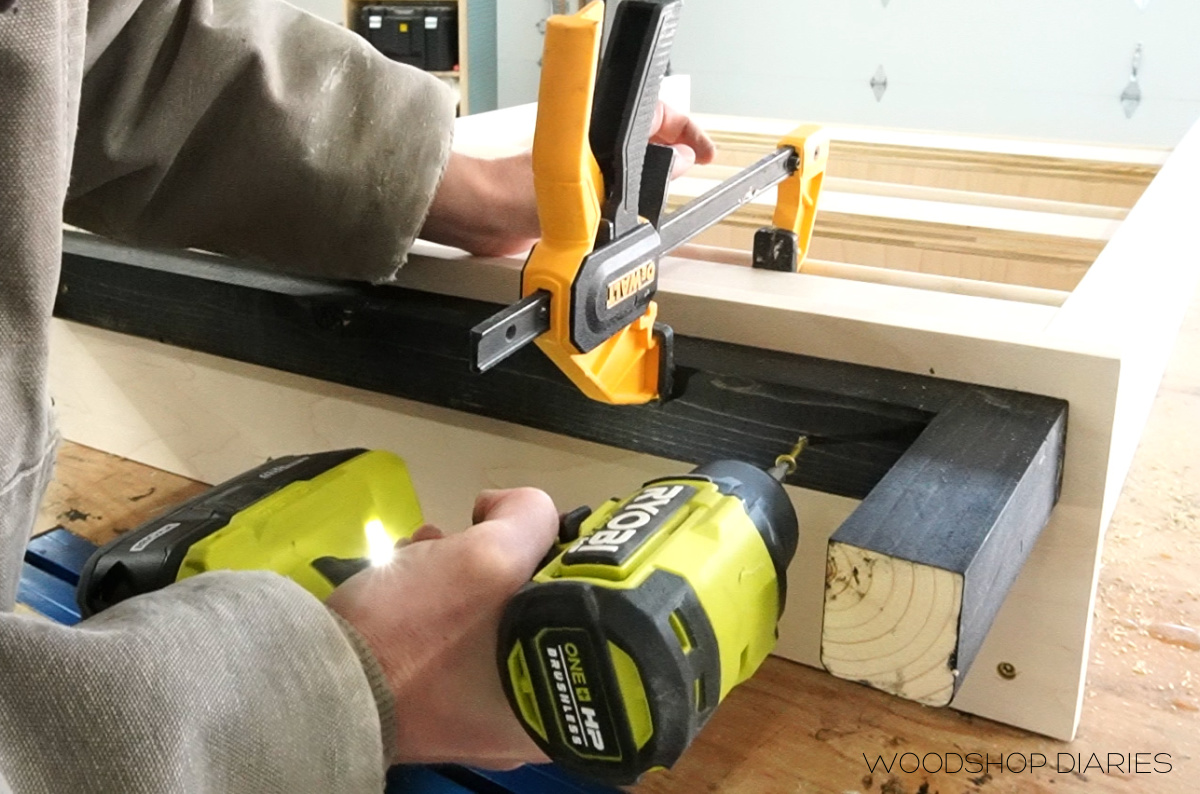
Step 9: Attach Base to Book Rack
Then, I secured the base to the bottom of the shelf using 2” wood screws.
Step 10: Secure to the Wall
This shelf rack is tall and skinny, so it has the potential to easily tip over. So it should be secured to the wall once complete.
Once you place it where you want it, I recommend using a screw to secure it to a wall stud behind it through the back panel or use another method to anchor it in place.
.
And now it’s ready for books, shoes, plates, towels, whatever.
I hope you enjoyed this simple little project build and if you want the plans to build your own, you can grab them here for FREE from KregTool.com.
.
If you enjoyed this easy DIY Book Rack project and can’t wait to see more, be sure to subscribe to the newsletter to be the first to know about the latest plans and videos on WoodshopDiaries.com!
And if you want to save this for later, don’t forget to pin it or share it to your favorite social channel!
Until next time, friends, happy building!