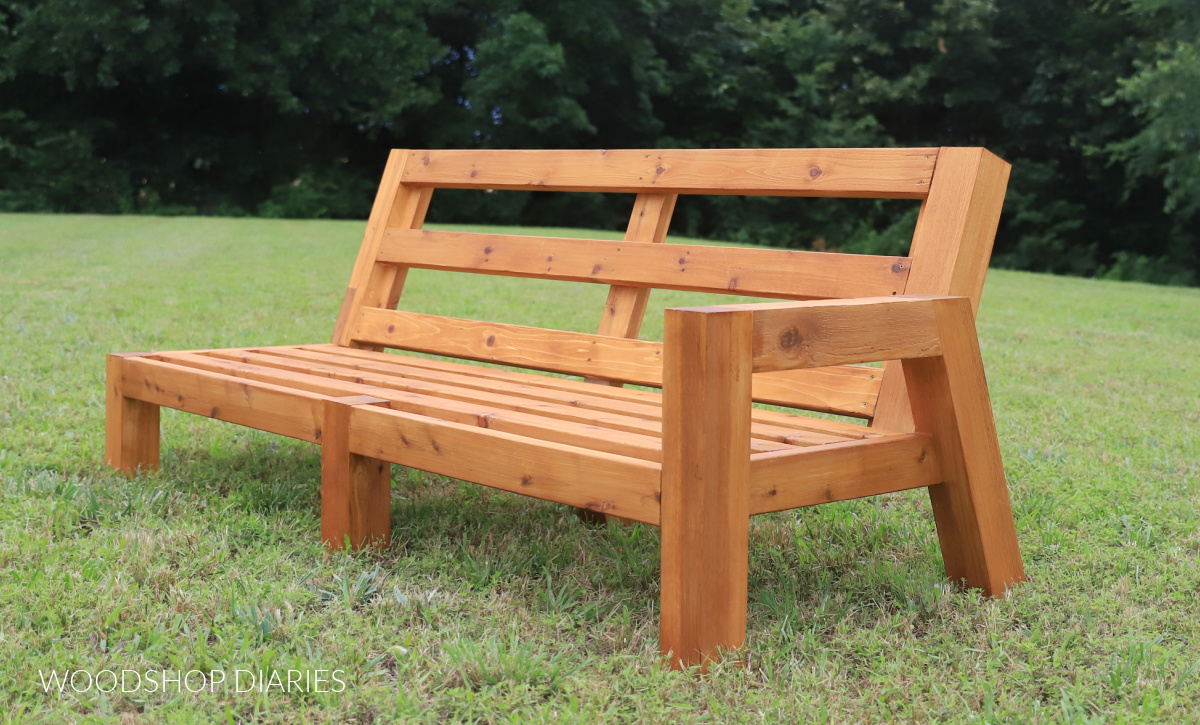
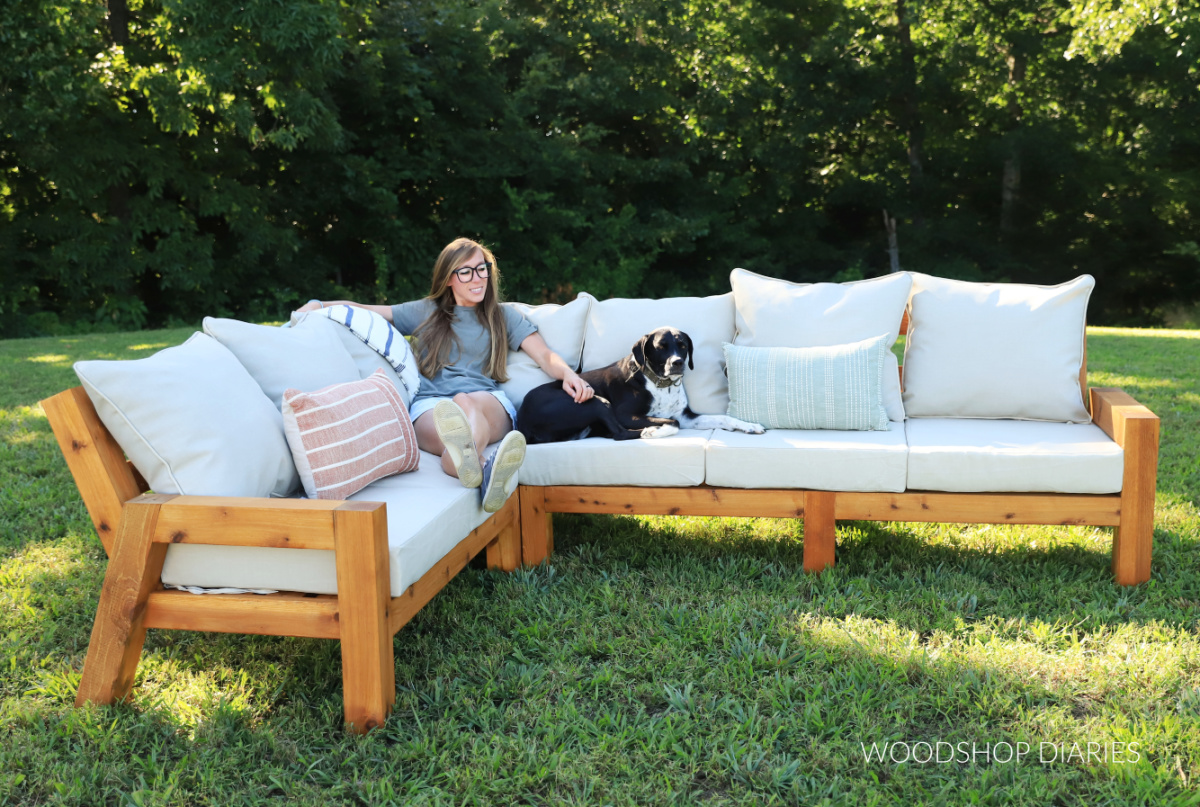
In this post, I’m sharing how to build a DIY modular outdoor sectional!
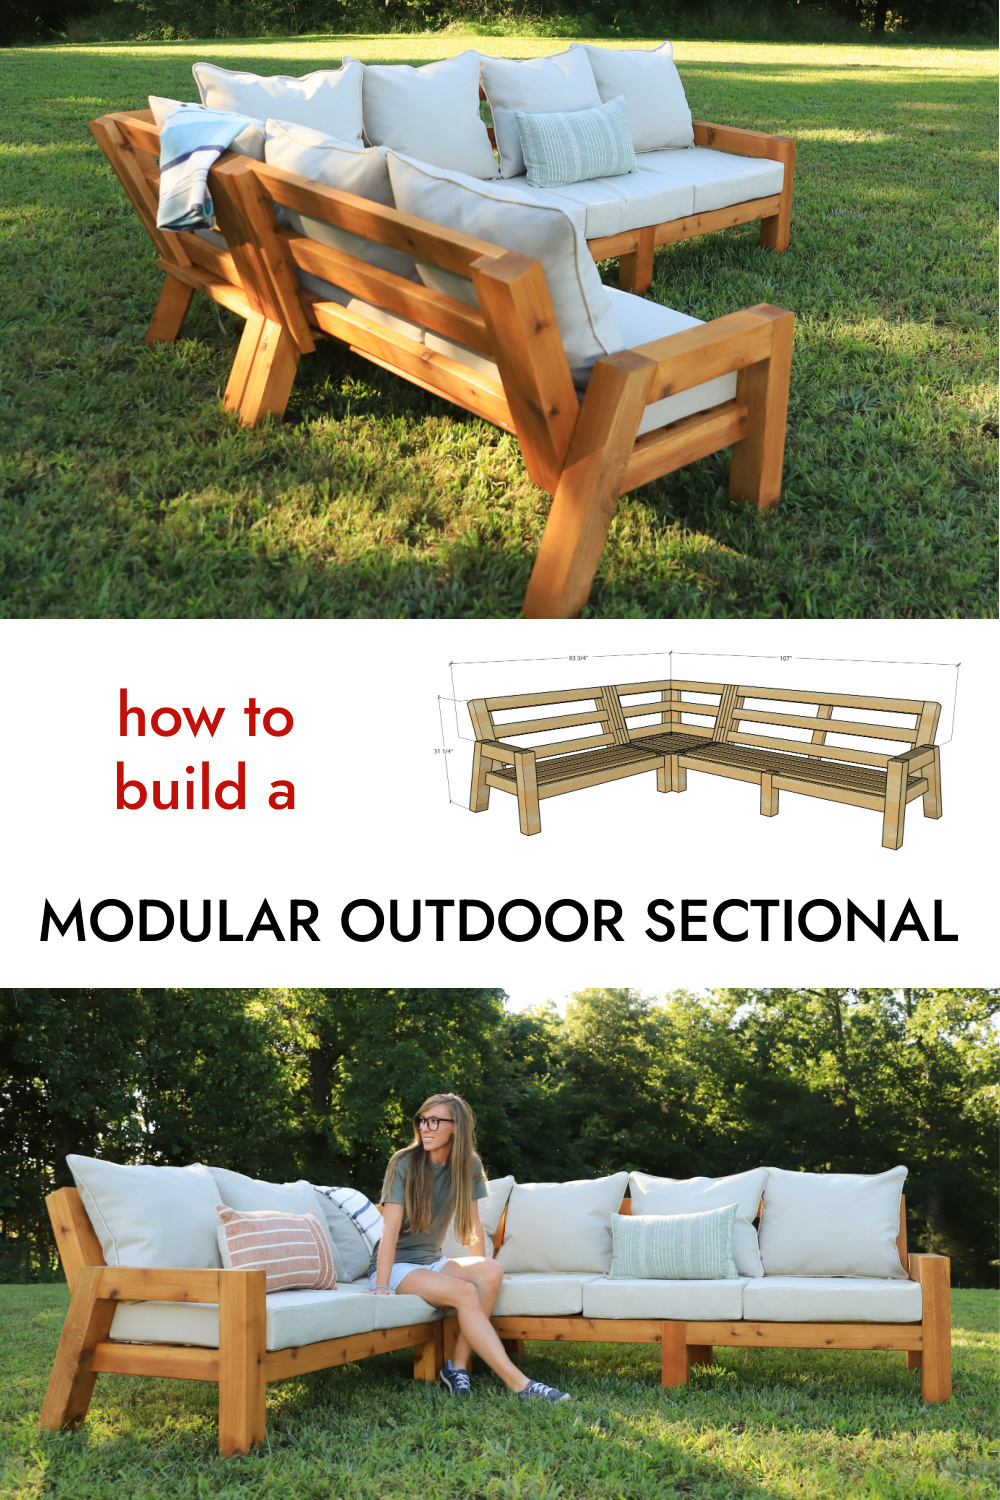
I designed this L shaped outdoor sofa in three pieces to make it easy to build and move and easy to customize to fit your space.
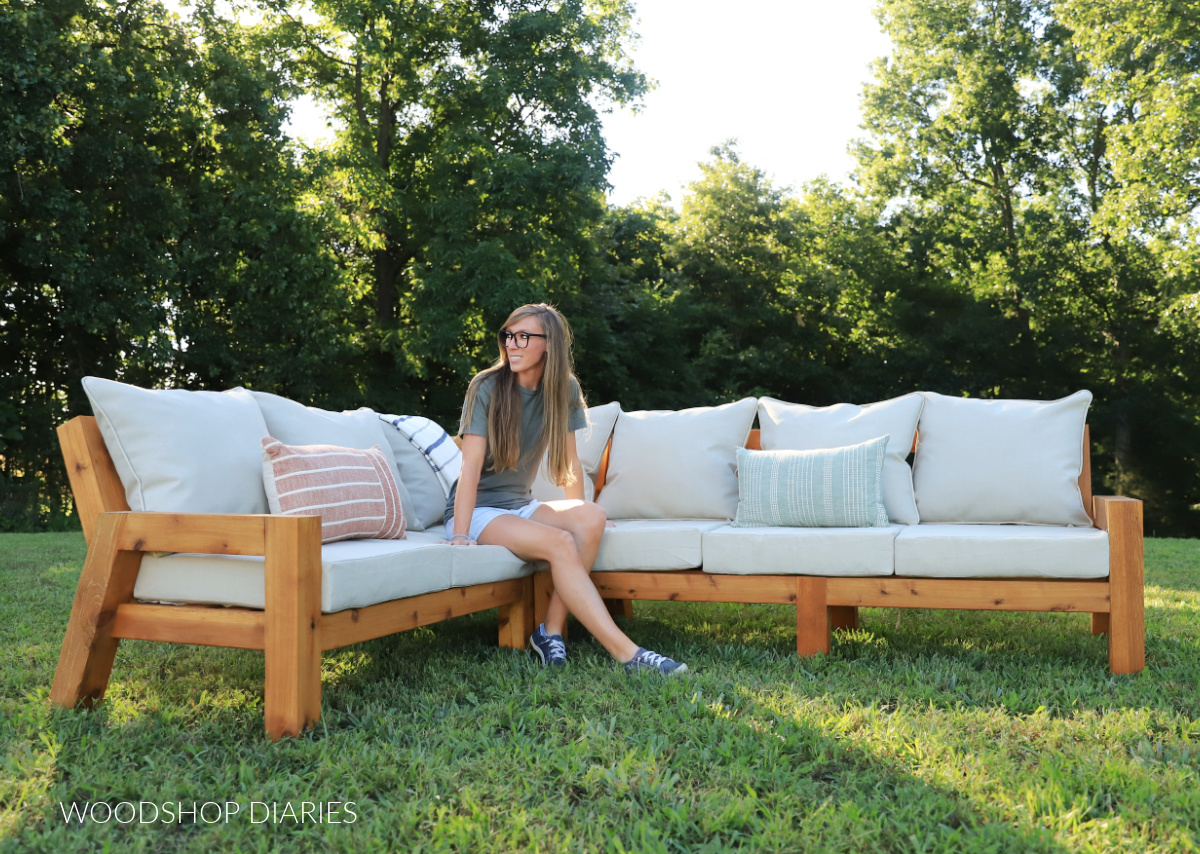
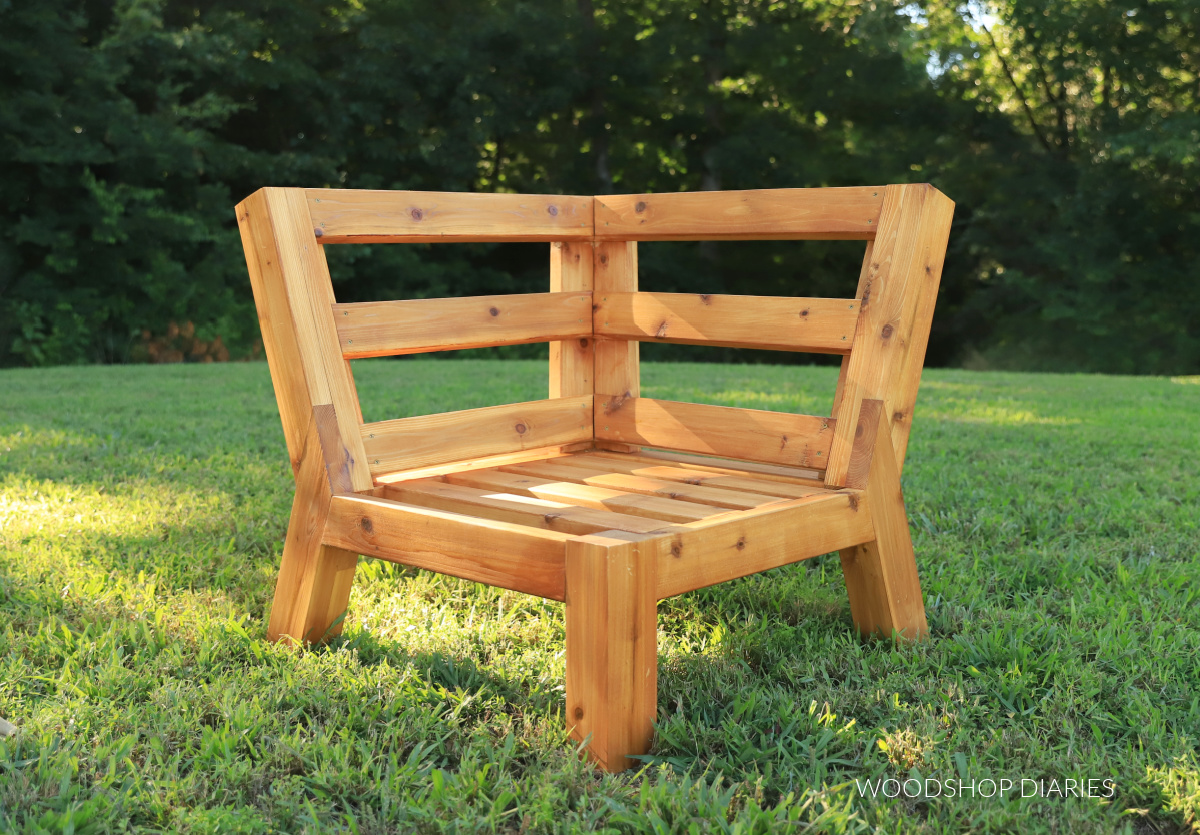
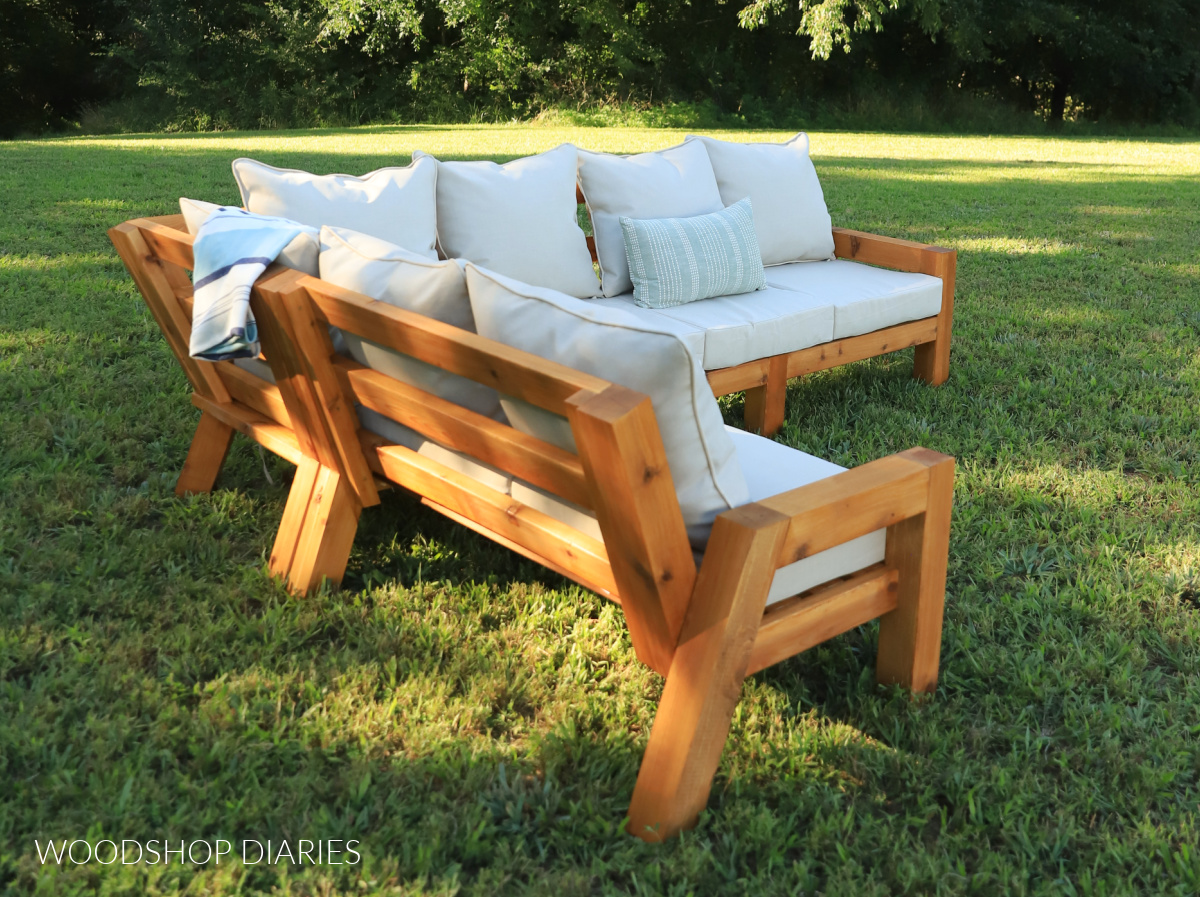
The back corner piece has two “open sides” (or simply sides without an arm rest). So the one armed sofa pieces can simply butt up to it on each side.
You can add two three seater sofas to the corner for a 7 seat option, or two 2 seater sofas for a 5 seat option. Or mix and match one of each for a 6 seat option–which is what I did here.
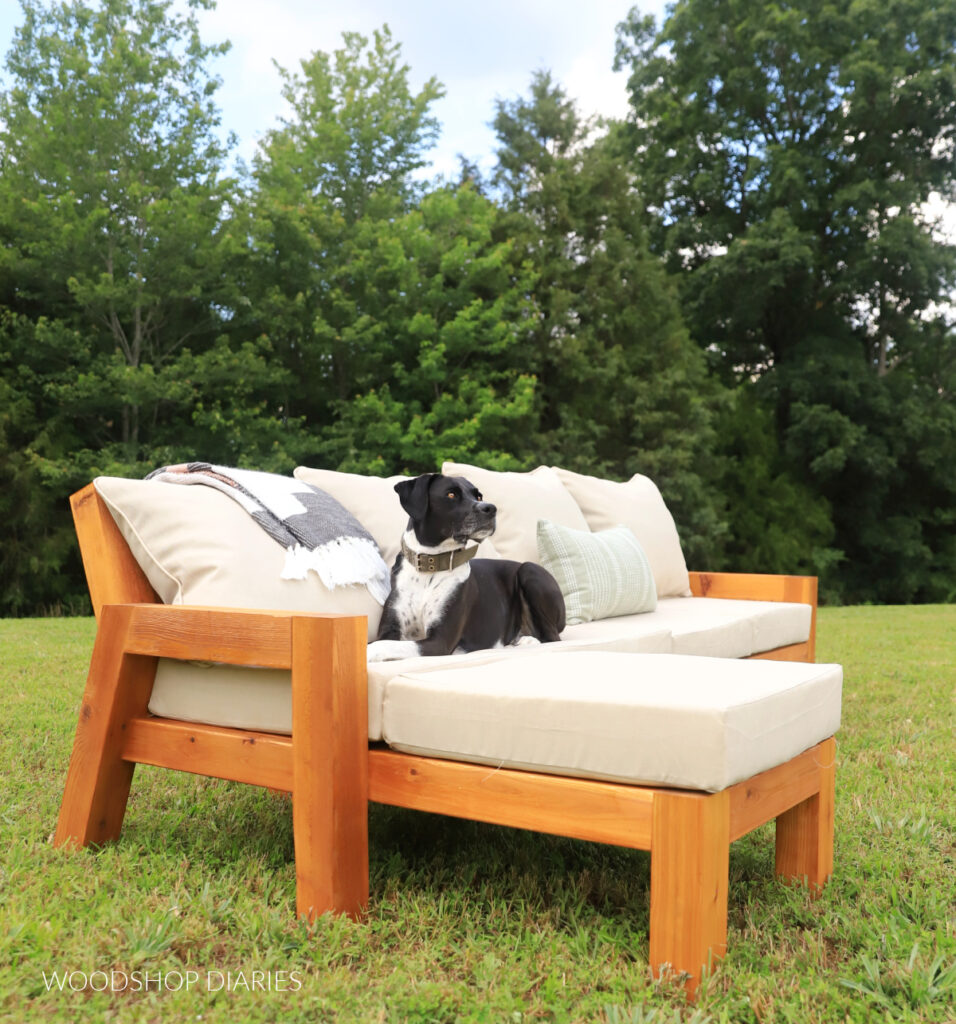
Last week, I shared plans for a chaise version of outdoor sectional. And these pieces go right along with it so you can mix and match two different styles of sectional in multiple sizes.
So be sure to check that one out, too! But in the mean time, let’s dive into building this 3 piece modular sectional!
*This post contains affiliate links. See website policies.
WHAT TO KNOW BEFORE BUILDING
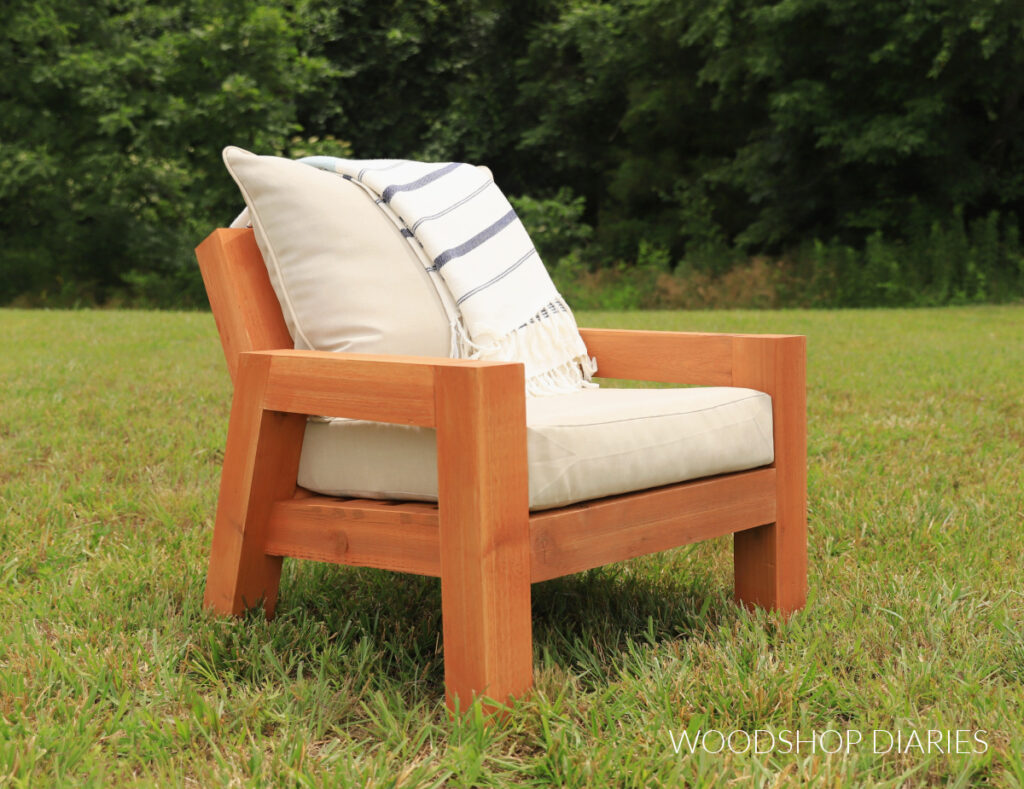
If you’re thinking this design looks familiar, you may be remembering the matching outdoor furniture collection I shared last year.
So many people requested a matching sectional after I shared this collection that I finally decided to build and share–not just one, but TWO different versions!
You can find the chaise sectional version here. But below, I’m sharing the L shaped sectional version that’s a little different style.
Are DIY projects your thing? Sign up for our newsletter for priority access to the latest projects and build plans!
MODULAR SECTIONAL DESIGN
I designed this sectional to be built in pieces. This makes it easy to assemble, easy to move, and easy to mix and match.
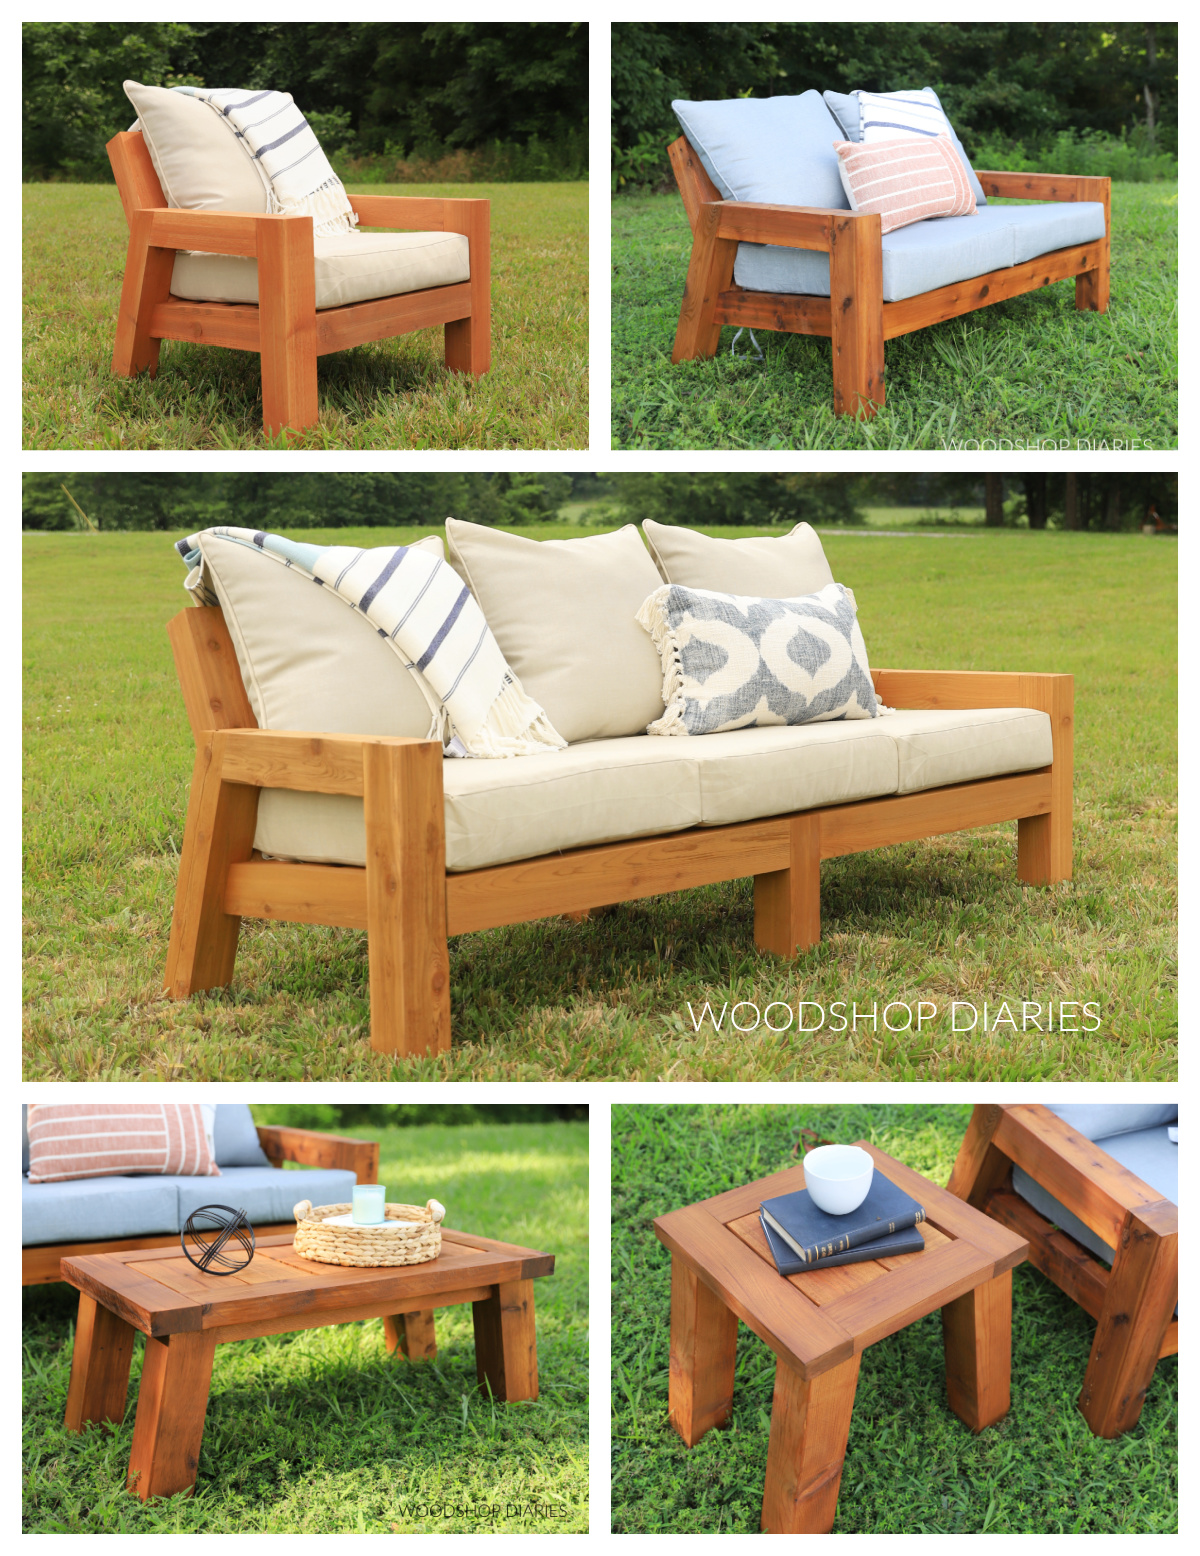
For this design, I built a corner chair piece–with two open sides (or, simply sides without arm rests).
Then, I built two one armed sofas to butt up to it on each side. One sofa is a 2 seater and the other is a 3 seater. But these could be mix and matched.
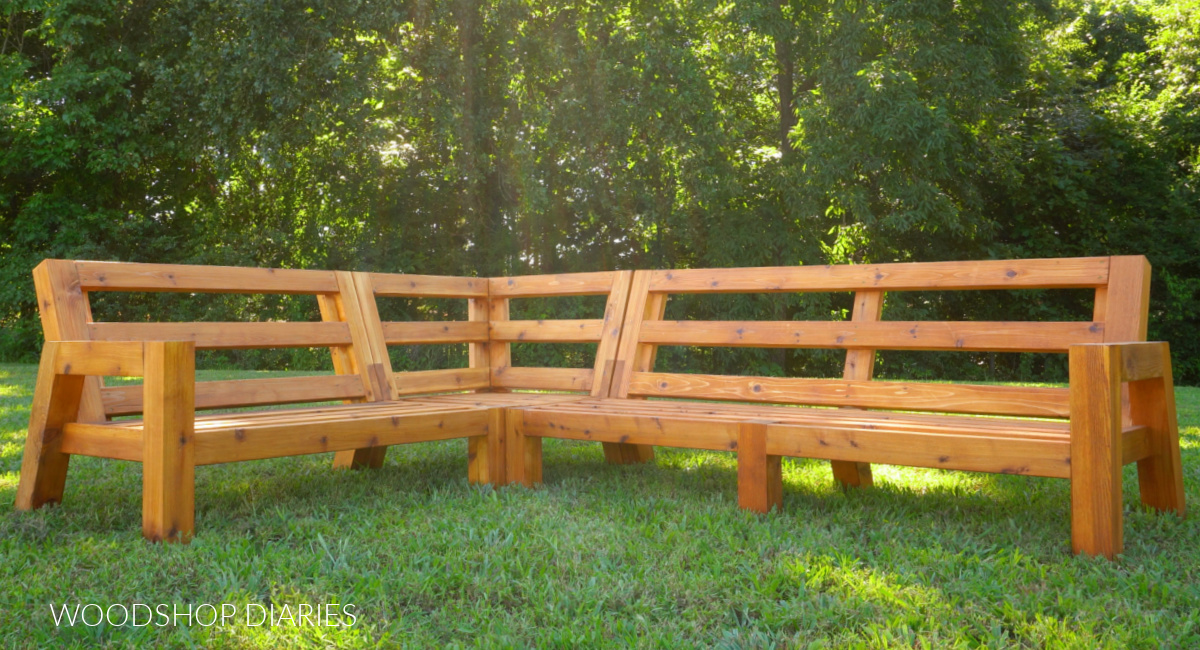
So this outdoor sectional is in three total pieces.
Sectional Cushions
These seats fit standard 24″ x 24″ outdoor seat cushion sets. These are the EXACT same cushions I used for the matching sofa, loveseat, and chair I mentioned earlier.
The cushion sets I used here come with both a deep seat cushion and a matching back pillow. You can find the cushions sets I used for this sectional here.
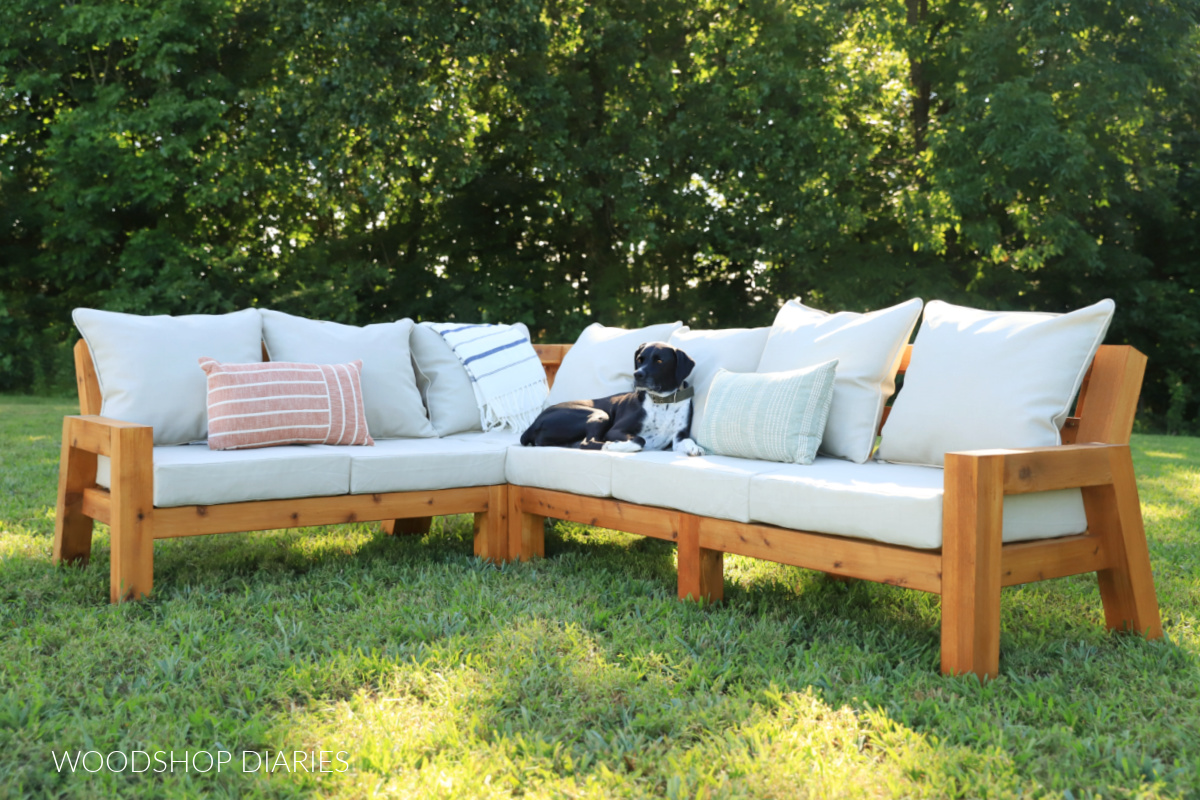
Note that the corner chair needs two back cushions, but only one seat cushion.
You can purchase two sets and just have a spare seat cushion (which is always handy to have). Or, you could just purchase one set and use other pillows to fill the space.
OVERALL DIMENSIONS
The overall dimensions of the sectional as shown is approximately 31 ¼″ tall x 83 ¾″ wide on the left side x 107″ long on the right side.
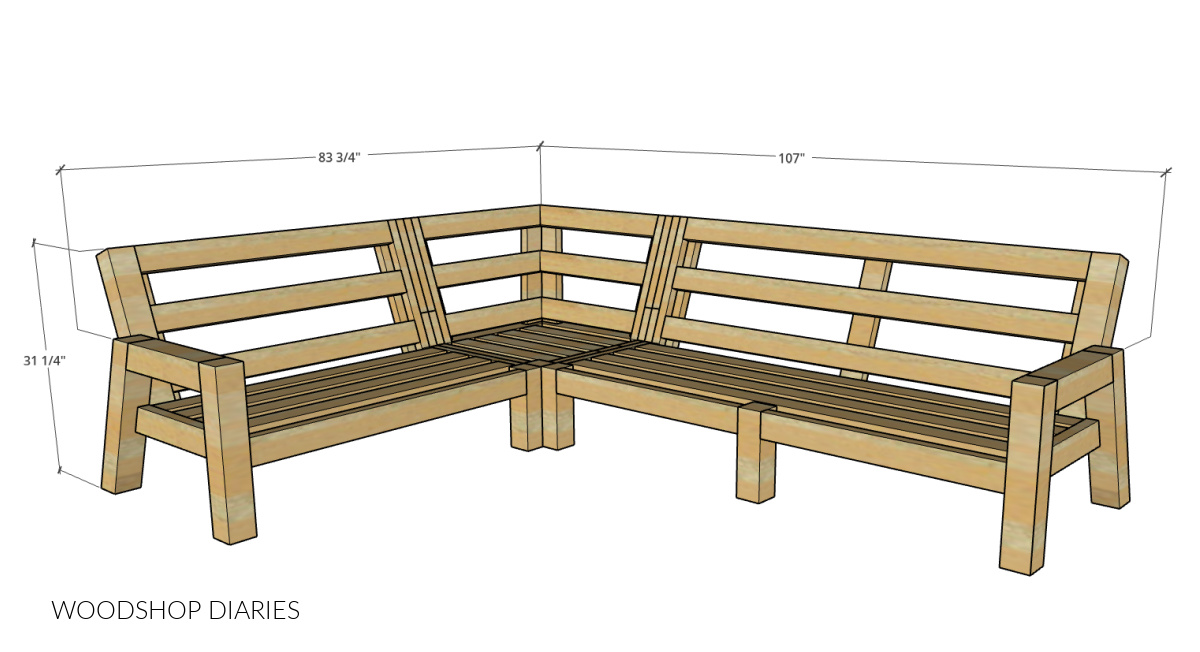
These dimensions don’t include the seat cushions and the seat height is 12″.
I know 12″ seems short, but 1.) The seat cushion adds about 5″ to that and 2.) Outdoor seating is normally lower to the ground than indoor seating.
WHAT TYPE OF WOOD TO BUILD AN OUTDOOR SOFA WITH
Untreated pine is the most budget friendly option to build with, but I personally don’t recommend it for outdoor projects unless it’s going to be under cover (like on a covered porch).
It can last several seasons outdoors if properly finished (sealed and/or painted) and kept under cover, but will deteriorate quickly if exposed to a lot of sun and moisture.
RELATED: How to shop for lumber
Pressure treated wood is another budget friendly option and is intended for use outdoors. It will last a long while even when exposed to the elements. However, it’s heavy and is treated with chemicals you may not want to handle.
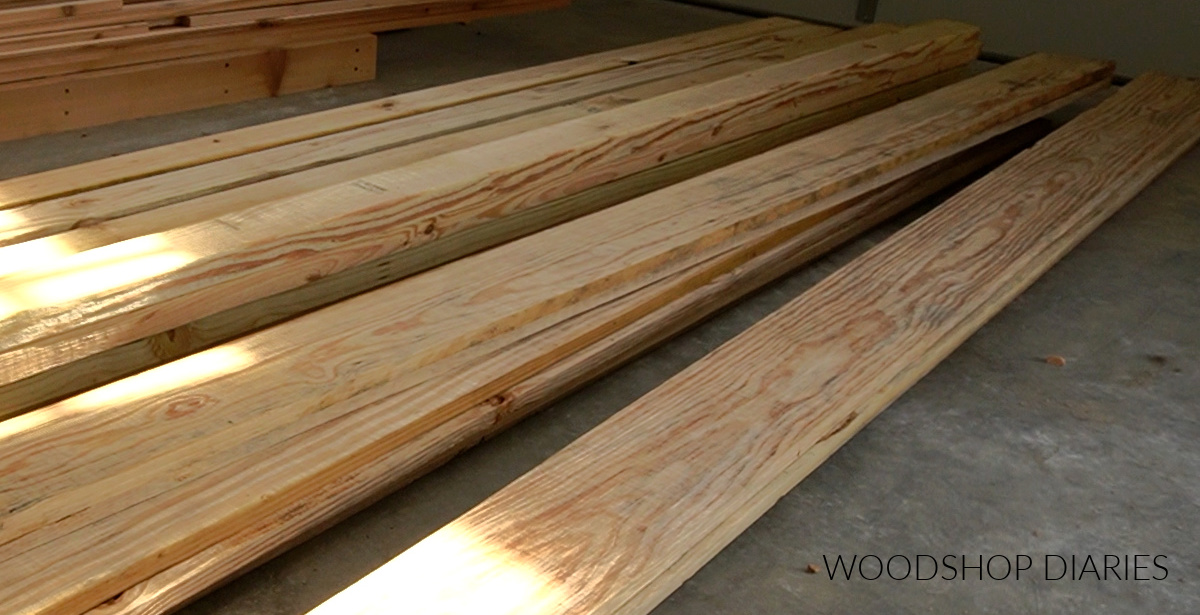
Cedar, red wood, and teak are all naturally decay and insect resistant wood options that look really nice. But, that comes with a price tag. These wood types can be quite expensive and sometimes hard to find depending on where you live.
So when building for outdoors, consider your budget, availability, and the pros and cons of each option before choosing your wood type.
For this project, I opted for cedar. As of May 2024 when this was built, the lumber cost to build this sofa with cedar (where I live) was approximately $330.
The cost to build it from pressure treated wood would have been approximately $112.
Don’t forget when building outdoor projects–make sure the hardware (screws), glue and finish you use are rated for exterior use.
How to build a Modular Outdoor Sectional
Prefer to watch? Watch the full build video with helpful tips along the way on my YouTube channel here:

Are videos your thing? Subscribe to my YouTube Channel for more project and how to videos!
I’m sharing the step by step tutorial to build this outdoor sectional below. But if you prefer to print it out and take the plans to the shop with you, I’ve got you covered! Grab the outdoor modular sectional building plans here.
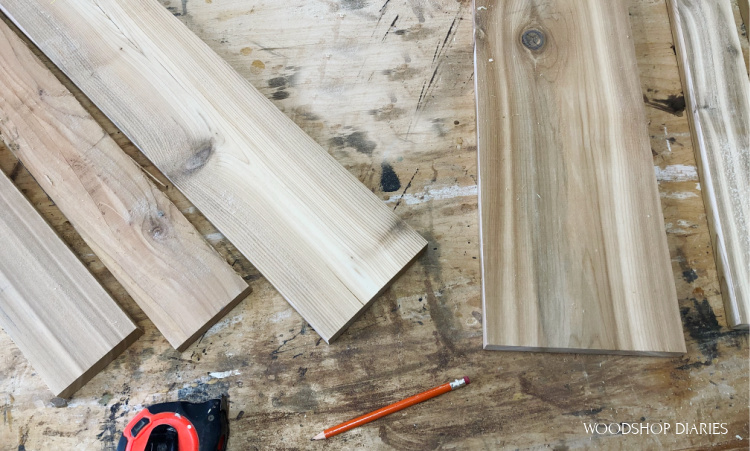
Tools & materials
Tools:
- Miter Saw
- Drill/Driver
- Pocket Hole Jig (both the standard size jig and the XL jig)
- Sander
Materials:
- (2) 4x4x8 posts
- (2) 2x2x8 board
- (20) 2x4x8 boards
- 4″ exterior pocket hole screws
- 2 ½” exterior wood screws
- 2 ½” exterior pocket hole screws
- 4 ½” long timber screws or lag screws
- Wood Glue (exterior rated)
- (5-7) 24″ x 24″ seat & back cushion sets (optional)
NOTE: Materials are for one corner piece, one 2 seater sofa, and one 3 seater sofa.
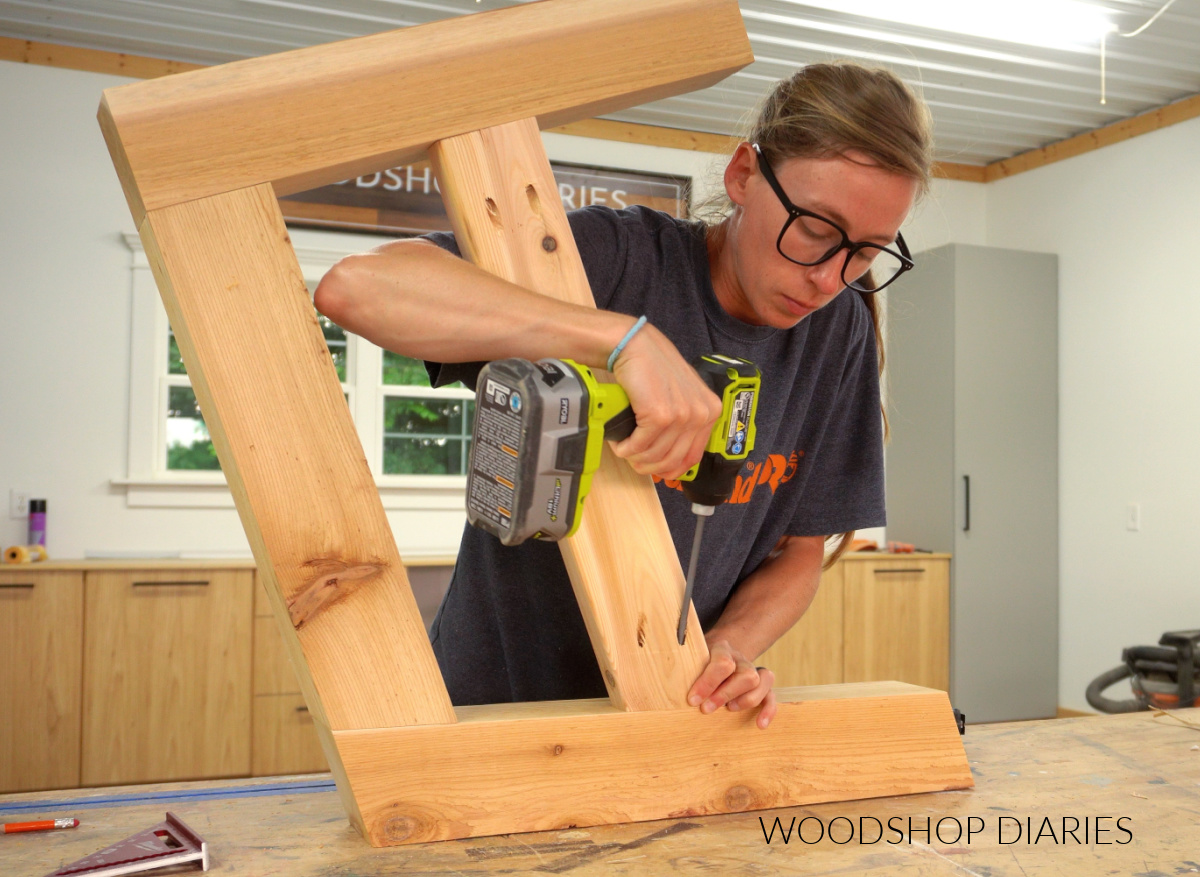
Step 1: Assemble Angled Back Legs
The open sides are simply the sides without an arm rest. To build this entire project, I needed four open side frames total–two for the corner piece and one for each of the sofas.
And each of these open side frames needs an angled back leg. I built these from 2x4s, but you could also half lap 4x4s instead (4x4s were much more expensive, though, so I opted to go with 2x4s).
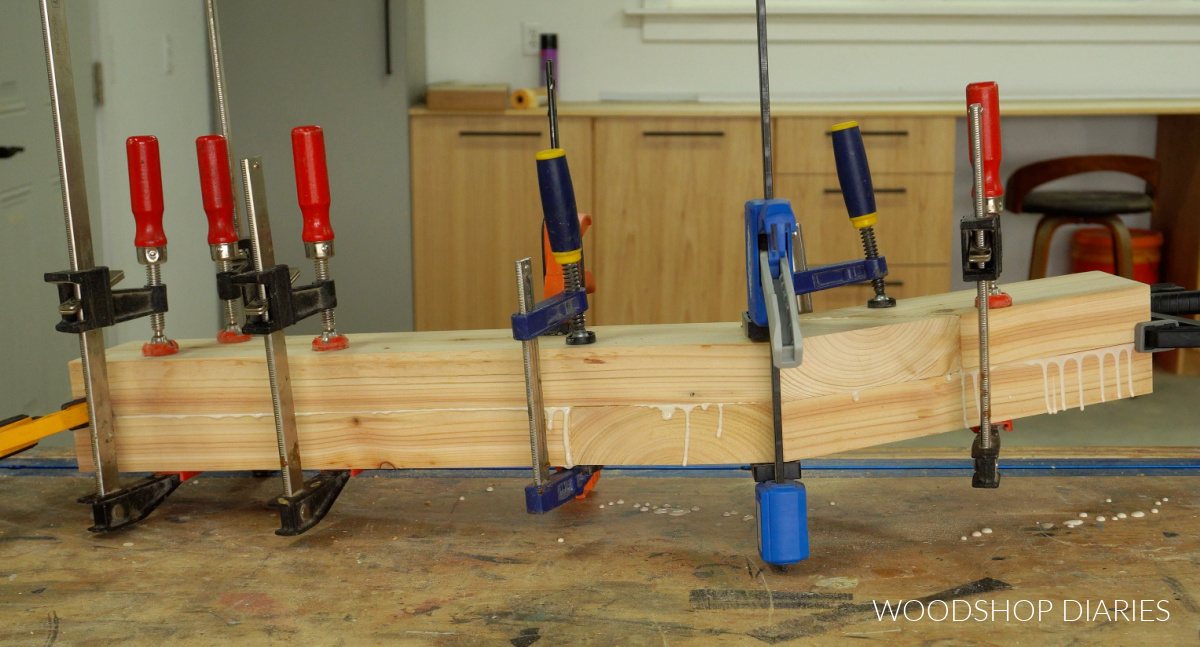
I cut four pieces of 2×4 to glue together to make a post. These four pieces will overlap in the middle like shown below.
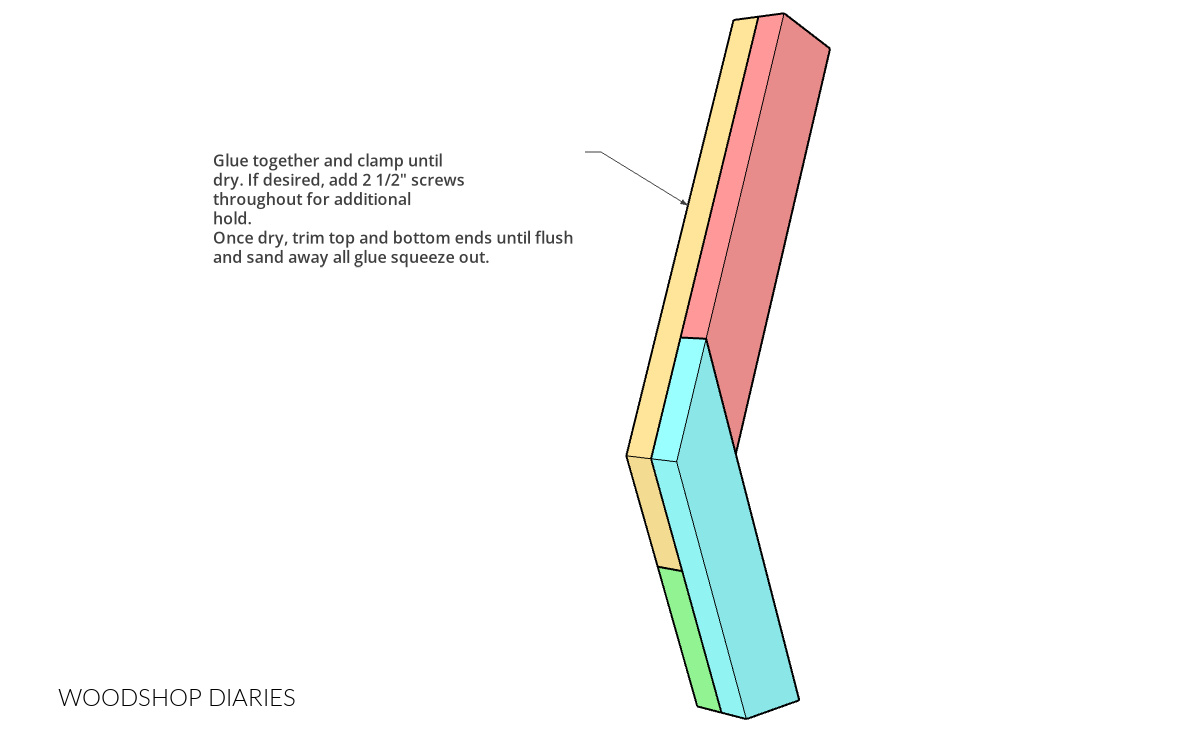
I first attached the pink and blue pieces together using wood glue and pocket holes/screws.
Then I attached the yellow and green pieces together (from the image above) the same way.
Then, I glued the two assemblies together to make the angled post.
All the dimensions and angles for these pieces are found in the printable plans here.
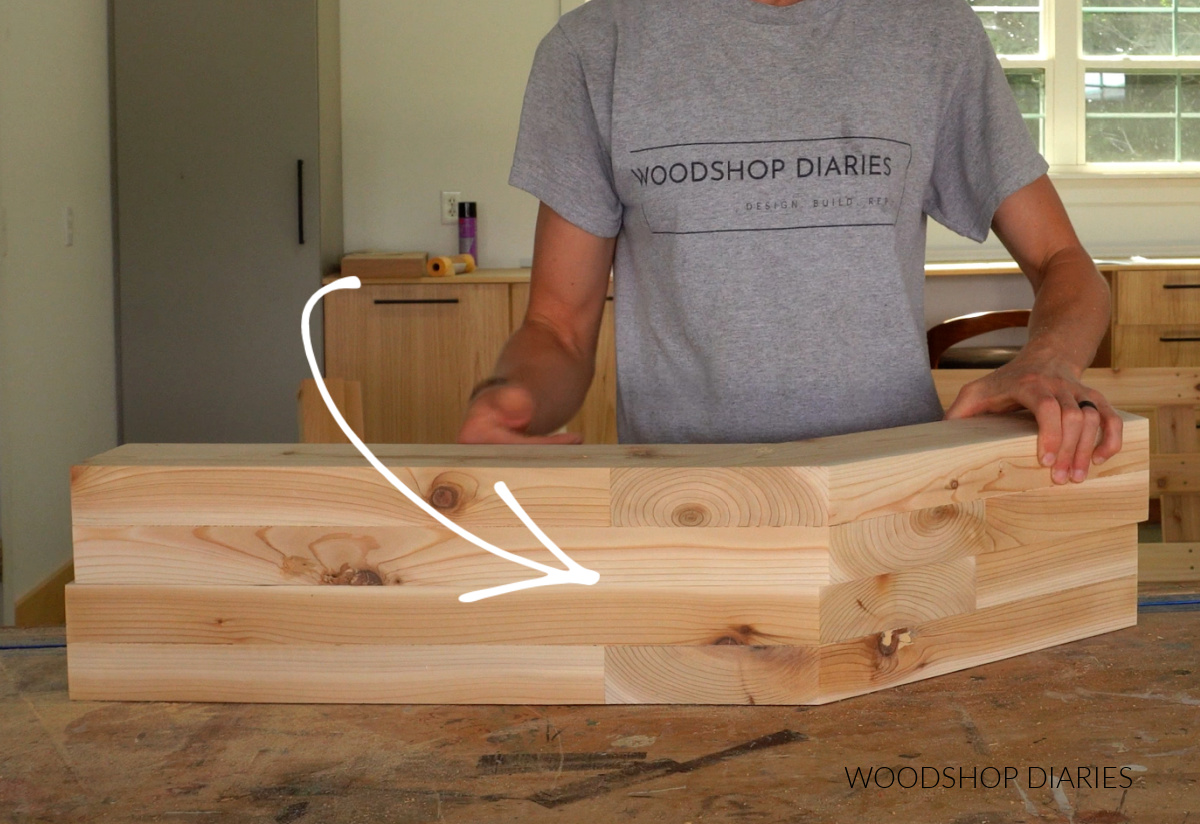
Once the glue was dry, I trimmed the ends so they were flush and sanded away all the glue squeeze out–it was kind of a lot of sanding, but worth it!
RELATED: How to sand wood
I repeated to make four identical posts, but I made sure that two of them were mirrored to the other two.
This is important because the end grains where they meet in the middle don’t need to both go on the same side of the post.
Then, I glued up three pair of 12″ long 2x4s to make the front legs. One will be for the corner piece and one will go on each of the sofas.
Step 2: Assemble Sectional Corner Chair
The corner chair is the most challenging part of the entire sectional. And it’s not that it’s DIFFICULT.
It’s just that it involves some compound angles since both backs are meeting at the corner on a slant.
If you’re not familiar with compound angles and how to cut them, check out this guide to cutting angles on a miter saw. You can also check out the video I linked above for some super helpful tips and visuals.
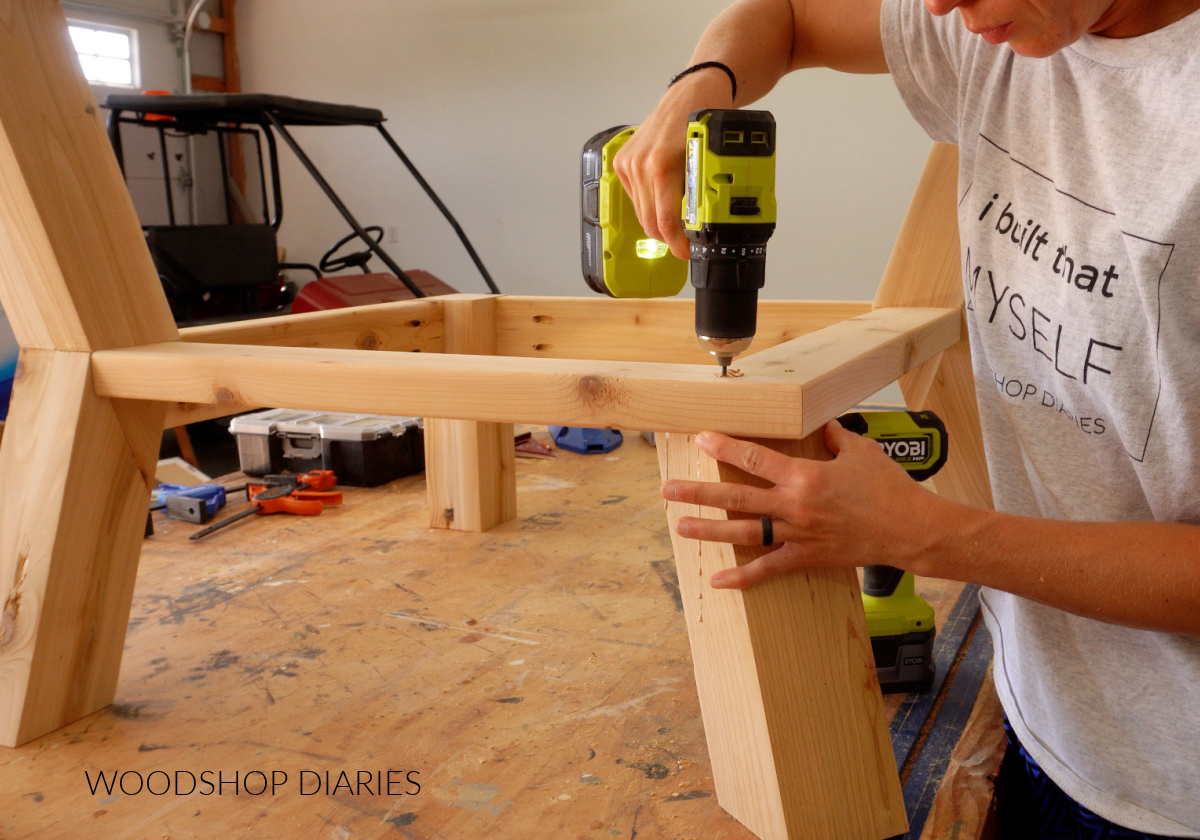
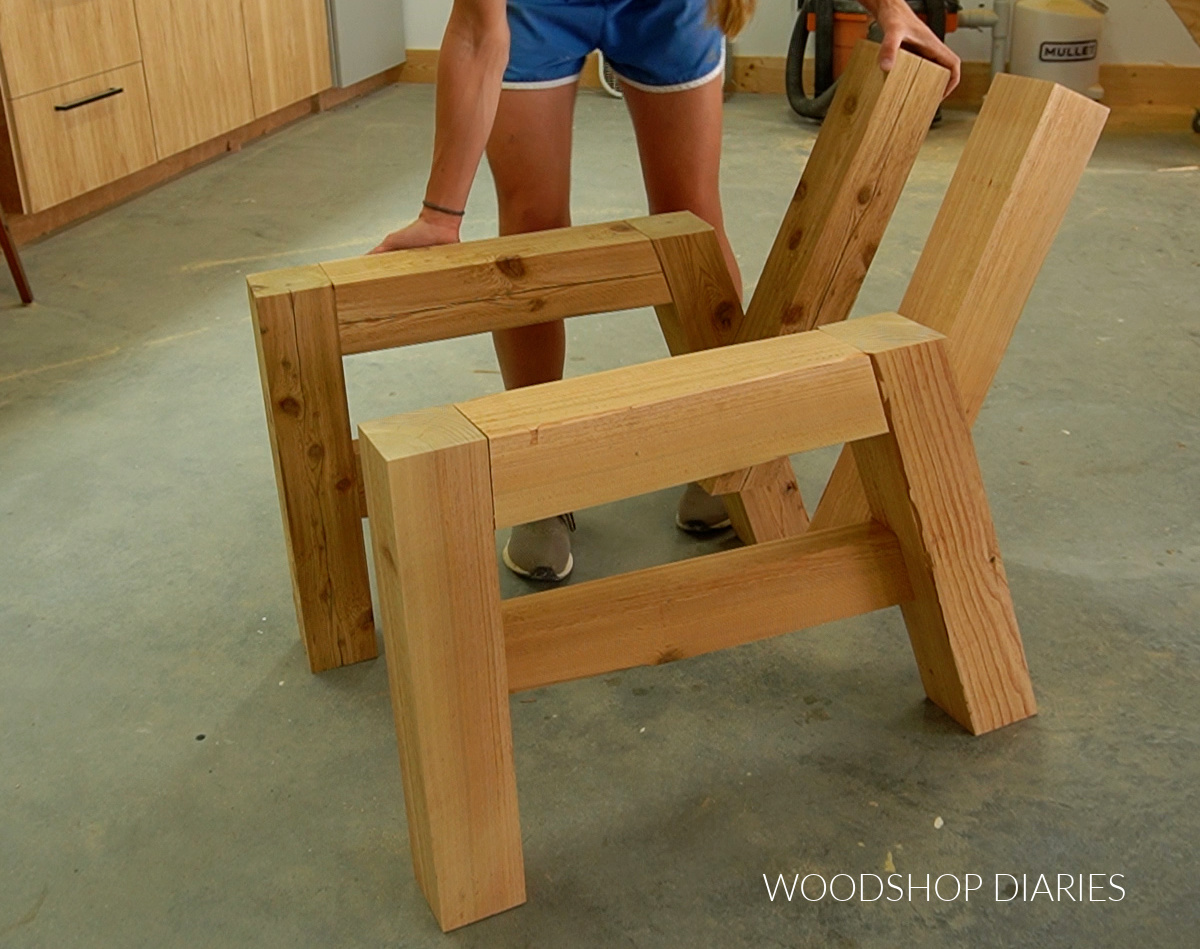
First, I assembled the seat framing by attaching 2x4s between one of the little 12″ posts and two of the angled back posts from step 1.
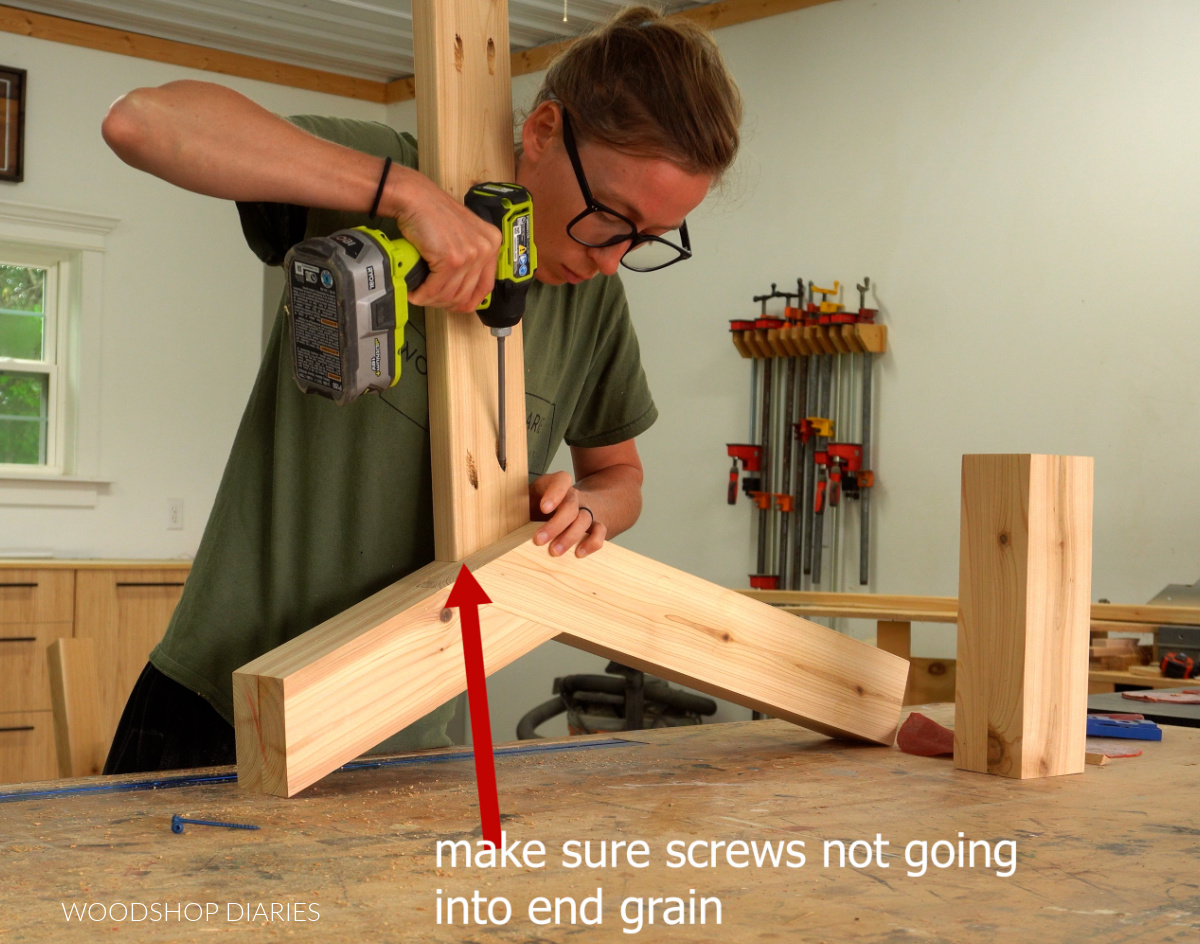
I added a 2×4 on each side to make the front corner. I used pocket holes and screws to assemble the majority of this build.
RELATED: How to use pocket hole jig
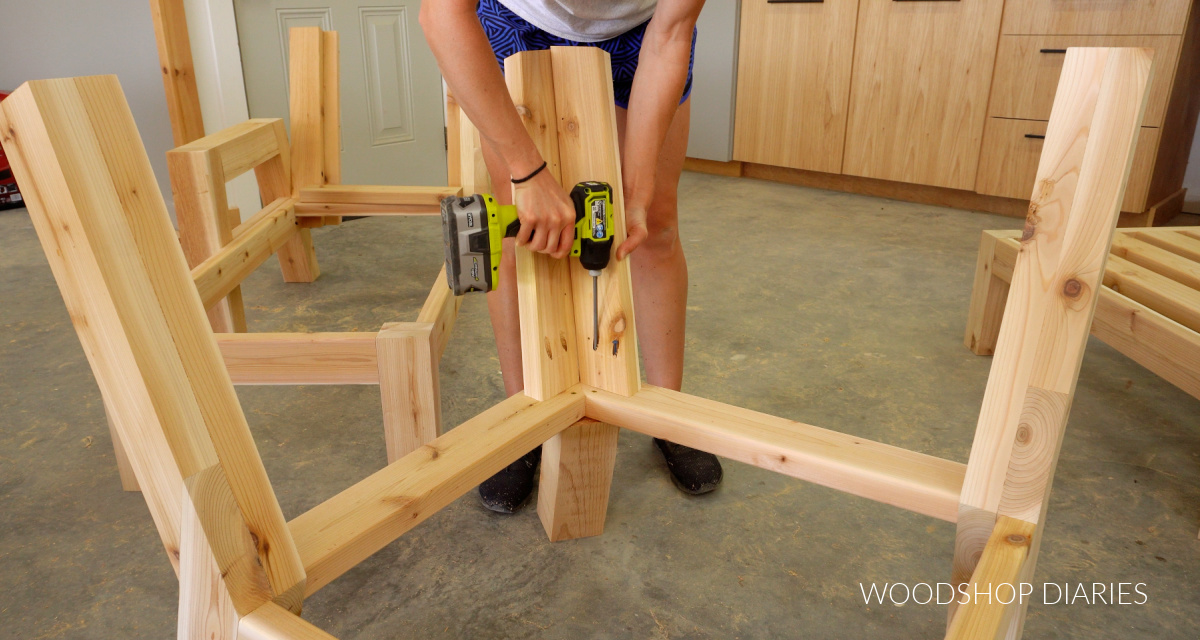
Then, I added two more 2x4s (turned on their sides) between the angled back posts to create the back corner.
This back corner needed some sort of leg to support it, so I glued and screwed on a post at the back.
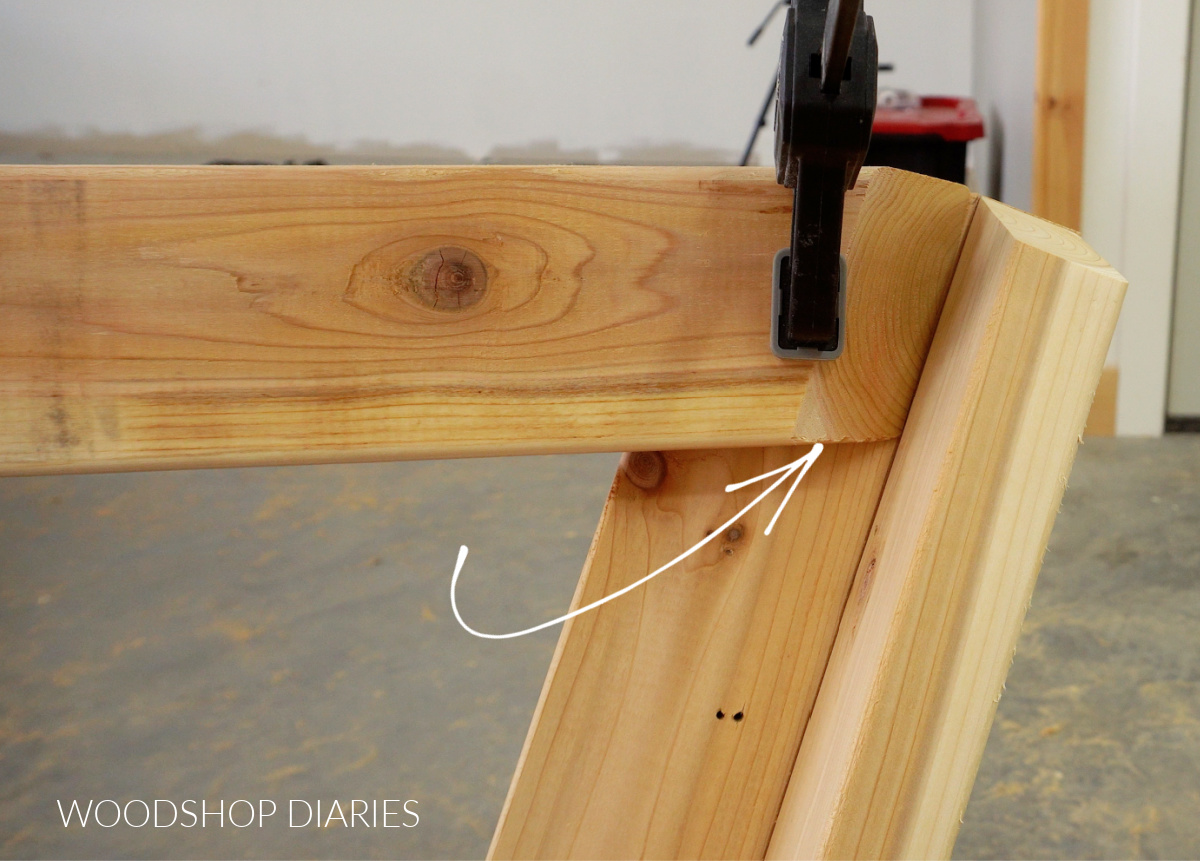
The ends of this post are mitered 20 degrees so it slanted to match the angled back supports.
Here is where the compound angles came in. I cut two 2x4s to go at the back corner with bottom ends mitered AND beveled both 20 degrees.
I secured these at the back corner with pocket holes and screws to create the angled back brace. Both of these 2×4 should be slanting outward and the should meet at the corner.
I also cut to fit a 2×2 to run along the back corner between these two 2x4s. I screwed this 2×2 to each board to connect them together and keep them sturdy.
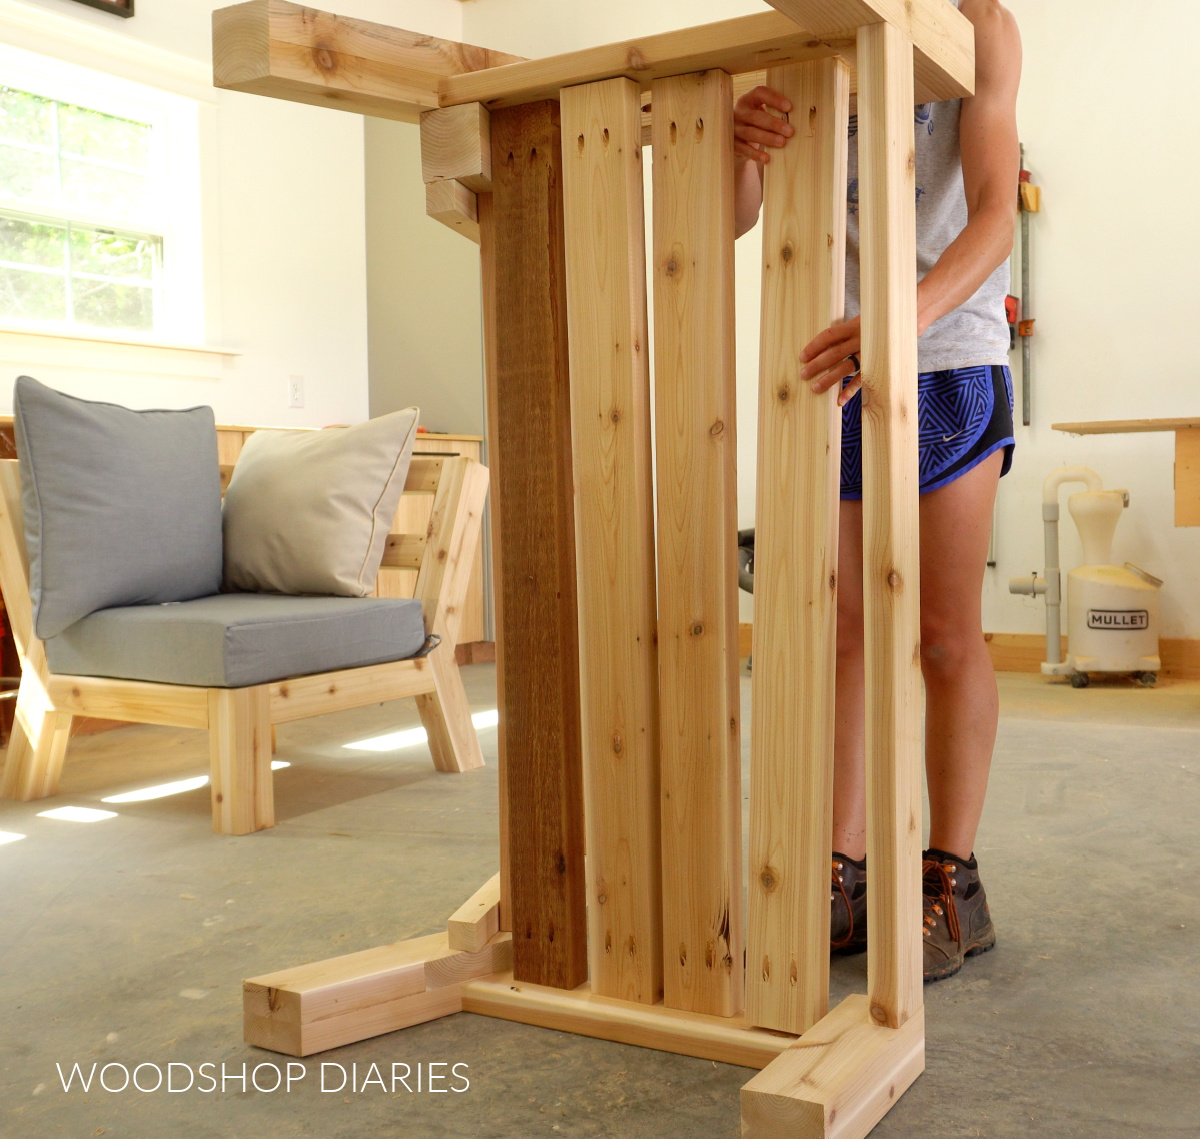
Next, I cut and installed seat slats between the seat supports with pocket holes and screws from the bottom side.
You can run these slats either direction since this chair is square.
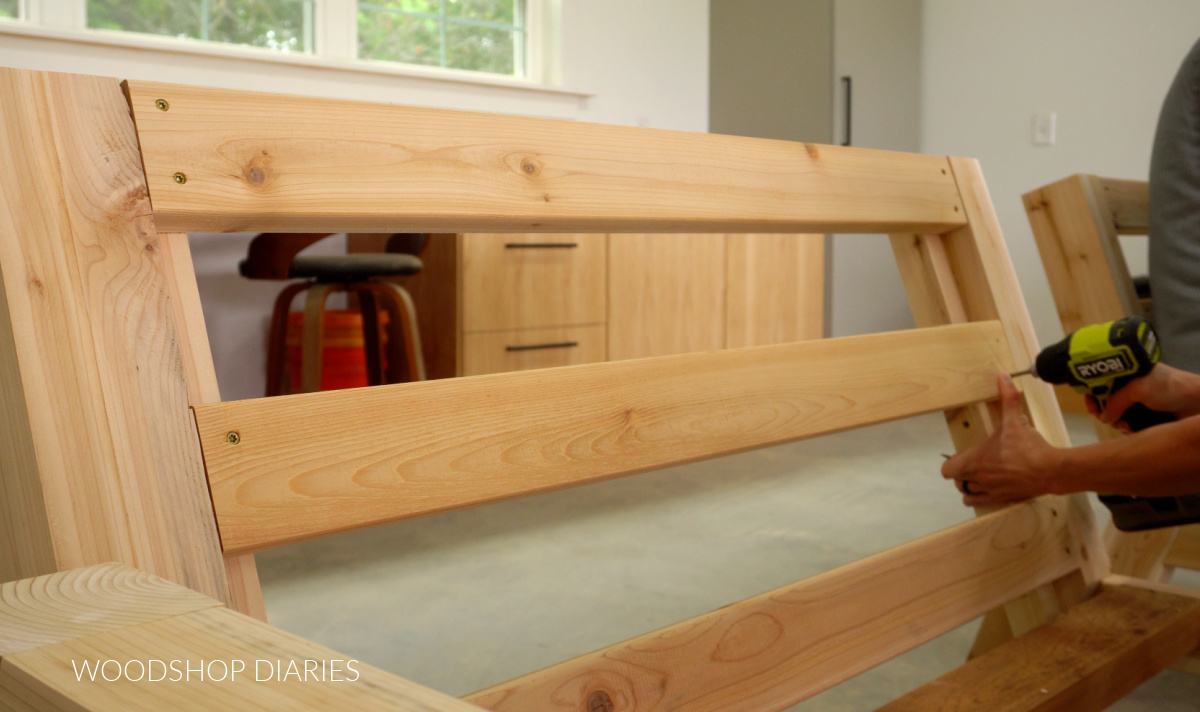
Now I can add the back slats. The slats that run across the back have one end cut square and the other end (the one that goes in the corner) mitered 20 degrees and beveled 45 degrees.
Prefer to print? Grab the printable building plans for this sectional here.
I cut each slat to fit (I found that much easier than trying to actually measure anything).
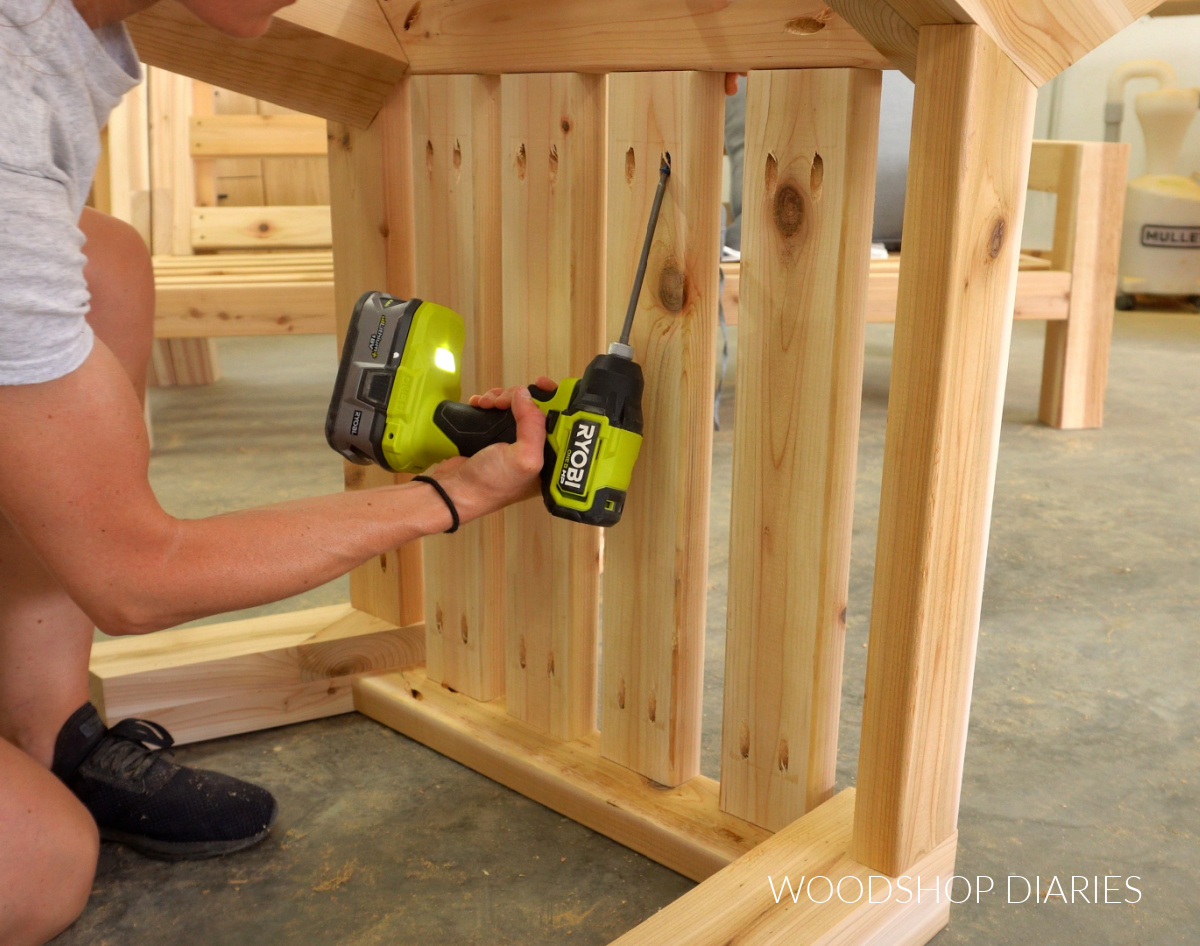
To install these to the post, you could use pocket holes and screws, but I didn’t want to see the pocket holes.
So instead, I screwed 2x2s into the angled back posts to attach the back slats to. Then I could screw them directly to the corner brace in the middle.
Step 3: Assemble Arm Rest Sides
This process is exactly the same as step 1 of this post. I won’t repeat every detail again here, but the arm rest sides are built mostly with 4×4 lumber except for the 2×4 seat support.
I need two of these side frames–one for the left sofa and one for the right sofa.
The back posts are screwed onto the insides of the arm rests and it’s important to mirror them since one goes on each side.
Step 4: Assemble Left Sectional Sofa
In this case, I built a 2 seater for the left sofa, but you could also swap it for a 3 seater.
The assembly of each size is very similar, only the 3 seater has a middle divider for extra support.
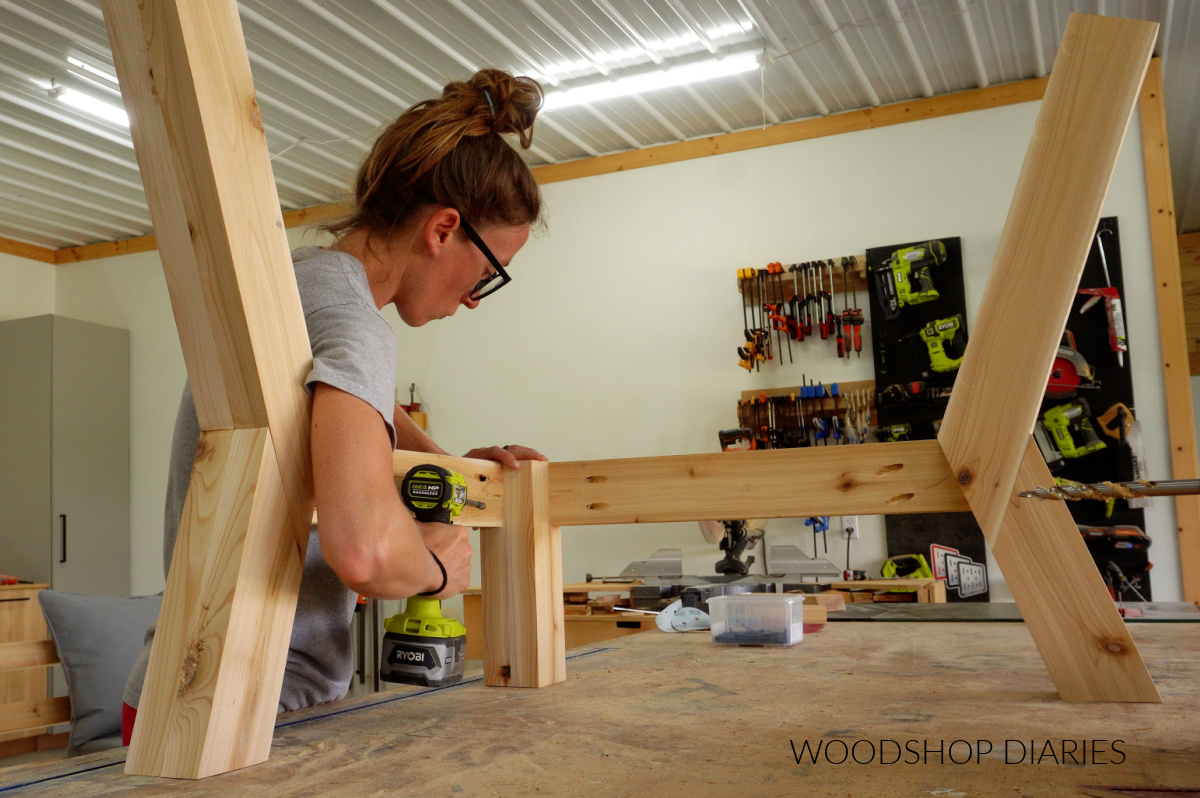
For the left sofa, I needed one arm rest side from step 3 and one open side frame. The arm rest will go on the left side.

I attached them together by running a 2×4 across the front between the two legs using pocket holes and screws. This should be 12″ up from the ground.
Then, I added four evenly spaced 2×4 boards behind that one for the seat slats.
These are screwed into the 2×4 seat supports on each side frame so that they are flush along the top edge.
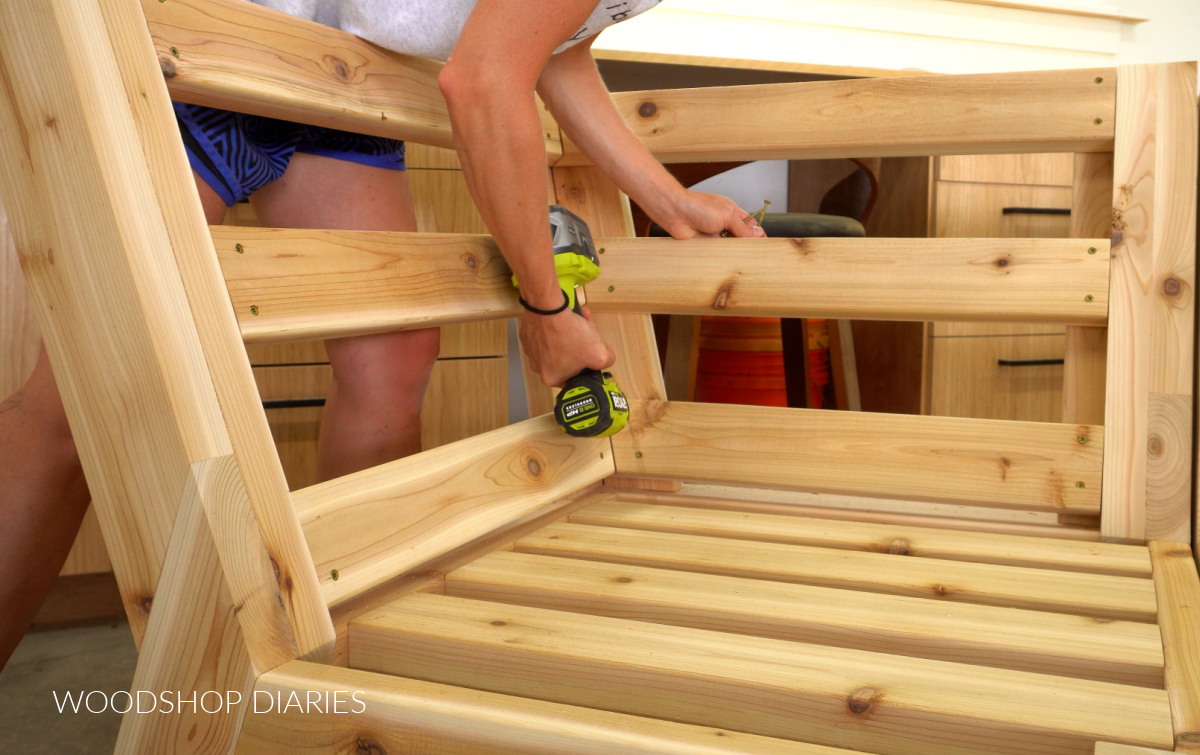
Then, just like for the corner piece, I added some 2x2s on the back posts to run the back slats across to screw into.
I cut and attached three 2×4 back slats using 2 ½″ long decking screws. BE SURE TO PREDRILL to help prevent the wood from splitting.
Step 5: Assemble Right Sectional Sofa
The right sectional is simply a mirrored version of the left sofa. You can build this as either a two or three seater.
I used the 3 seater version that I shared in step 4 of this post. But if you wanted to build the two seater, simply repeat step 4 “flip flopped” using the other arm rest from step 3.
For specific dimensions, details, and diagrams for each size, grab the printable building plans here.
Step 6: Finish and Attach Pieces
Cedar can be left outside unfinished, but it will quickly turn gray and weathered looking, especially if exposed to a lot of sunlight.
So I sealed these pieces with a coat of Cabot Australian Timber Oil in Honey Teak. I LOVE this finish and it’s super easy to apply.
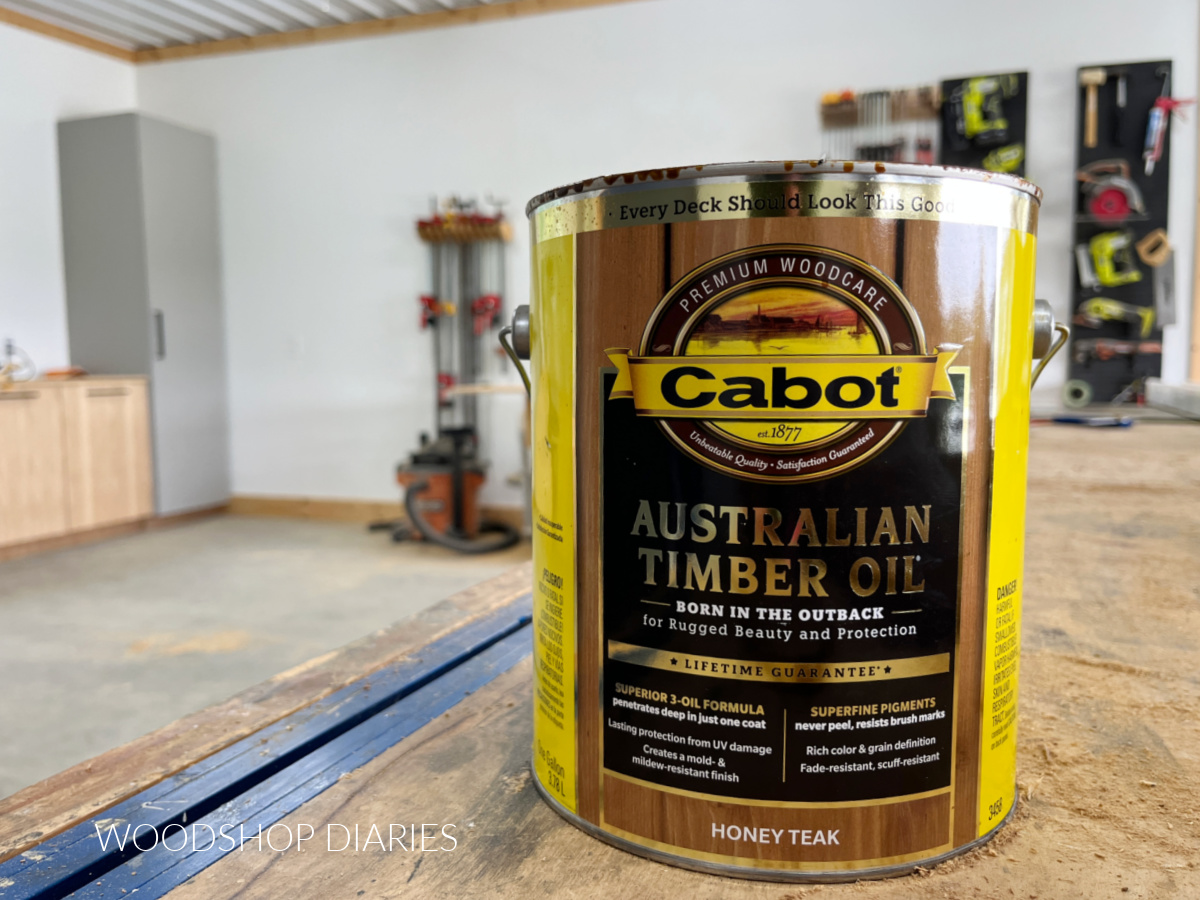
Of course, there are TONS of great outdoor stain and sealant (or paint if you want that instead!) options and colors so feel free to pick your favorite. Cabot and Olympic are great brands and are available at the big box stores.
Once finished, these pieces are ready to piece together and put to use. Make sure to screw the pieces together once you get them where you want them so they don’t scoot apart during use.

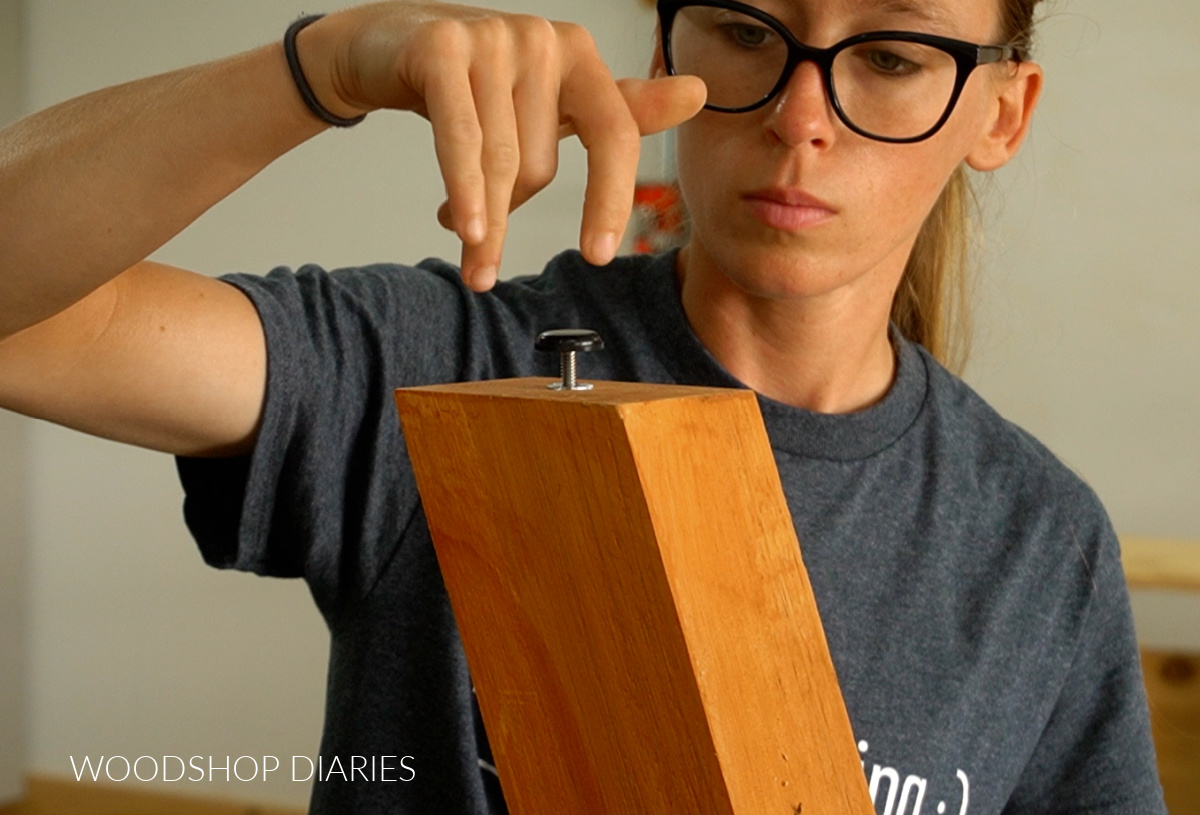
If placing on an uneven surface, consider adding some simple foot levelers to the legs.
These are the levelers I used and I simply drilled a 5/16″ hole into the center of each foot, tapped the insert into the hole and screwed the foot in.
Once the cushions were in place, this sectional was the perfect place to rest (with friends!) after the build.
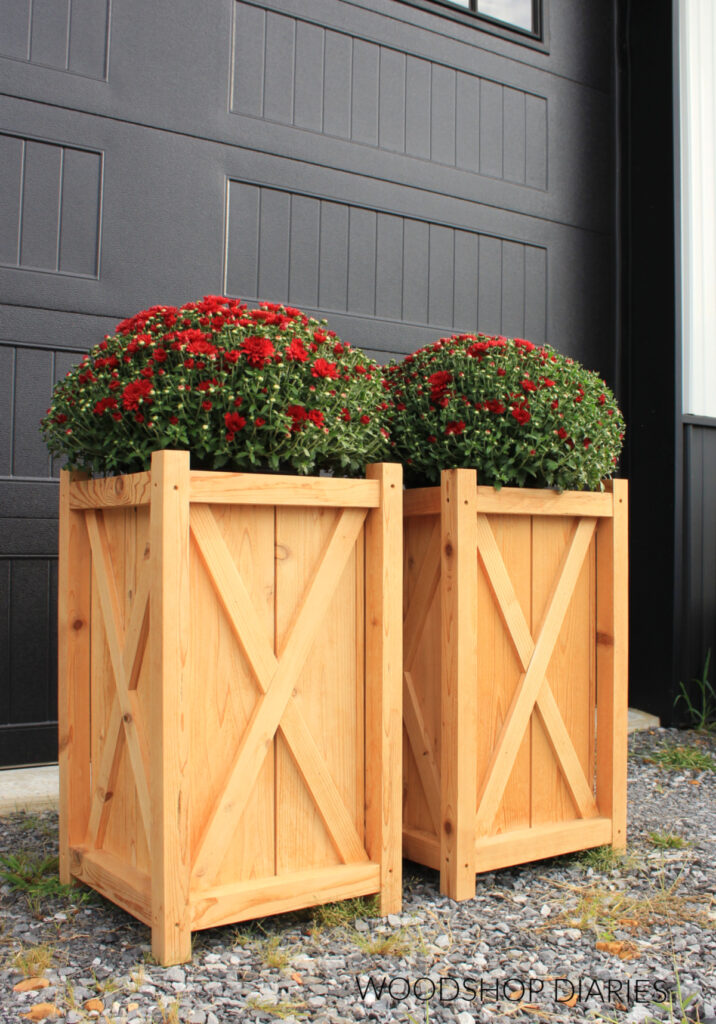
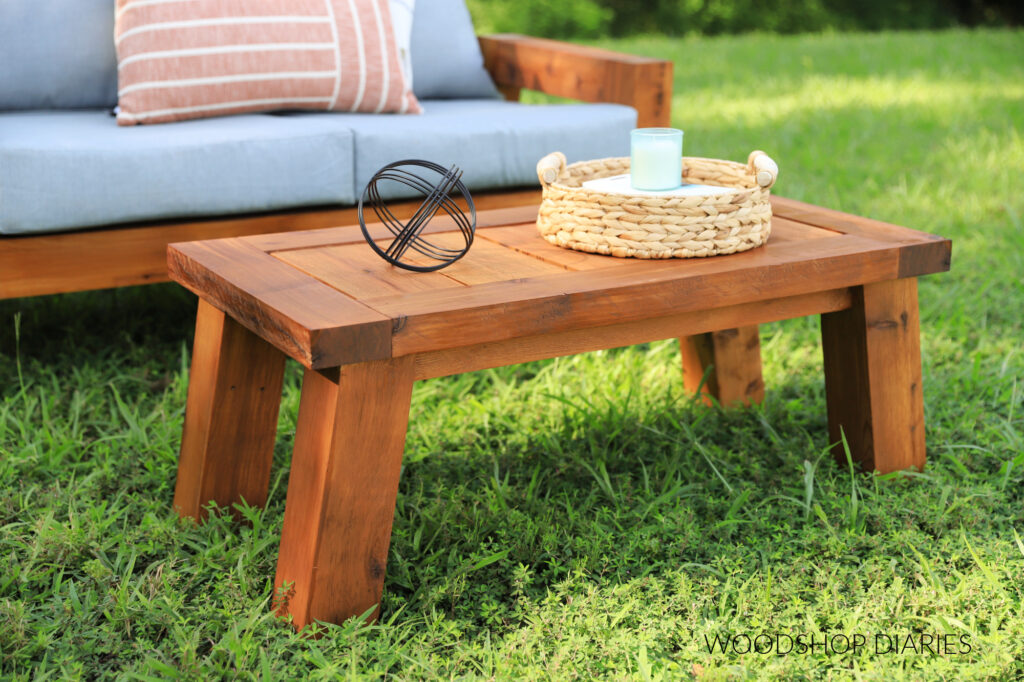
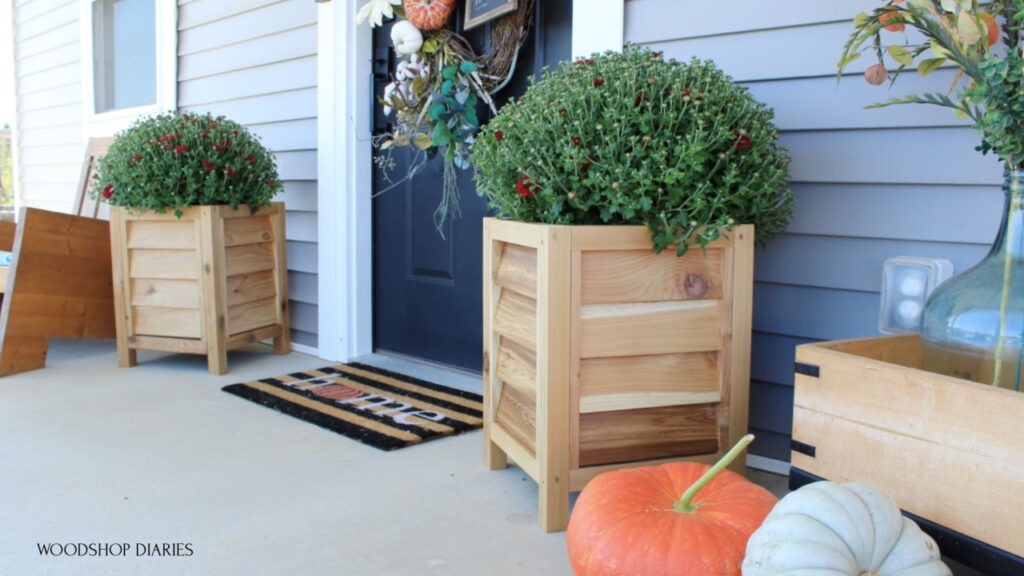
Looking for More Outdoor DIYs?
Looking more for outdoor DIY projects? Here are a few of my personal favorites you might enjoy browsing:
If you enjoyed this project and want to save it for later, don’t forget to pin it or share to your favorite social channel!
Until next time, friend, happy building!