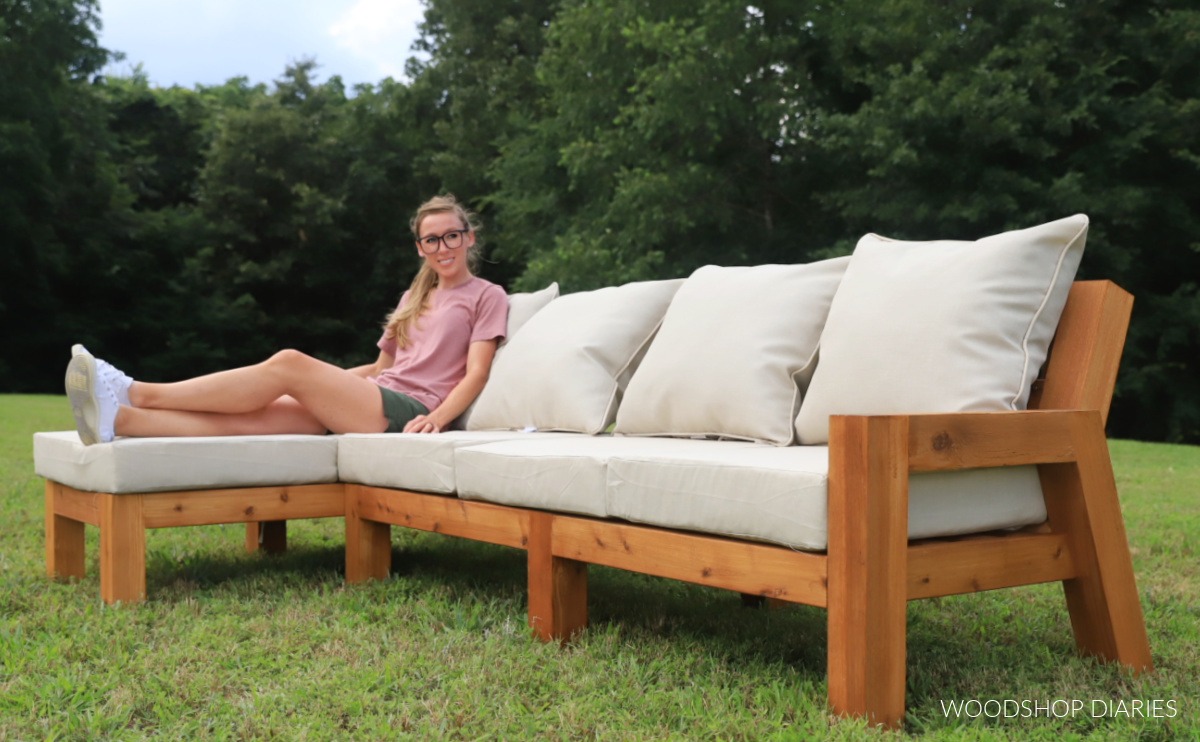
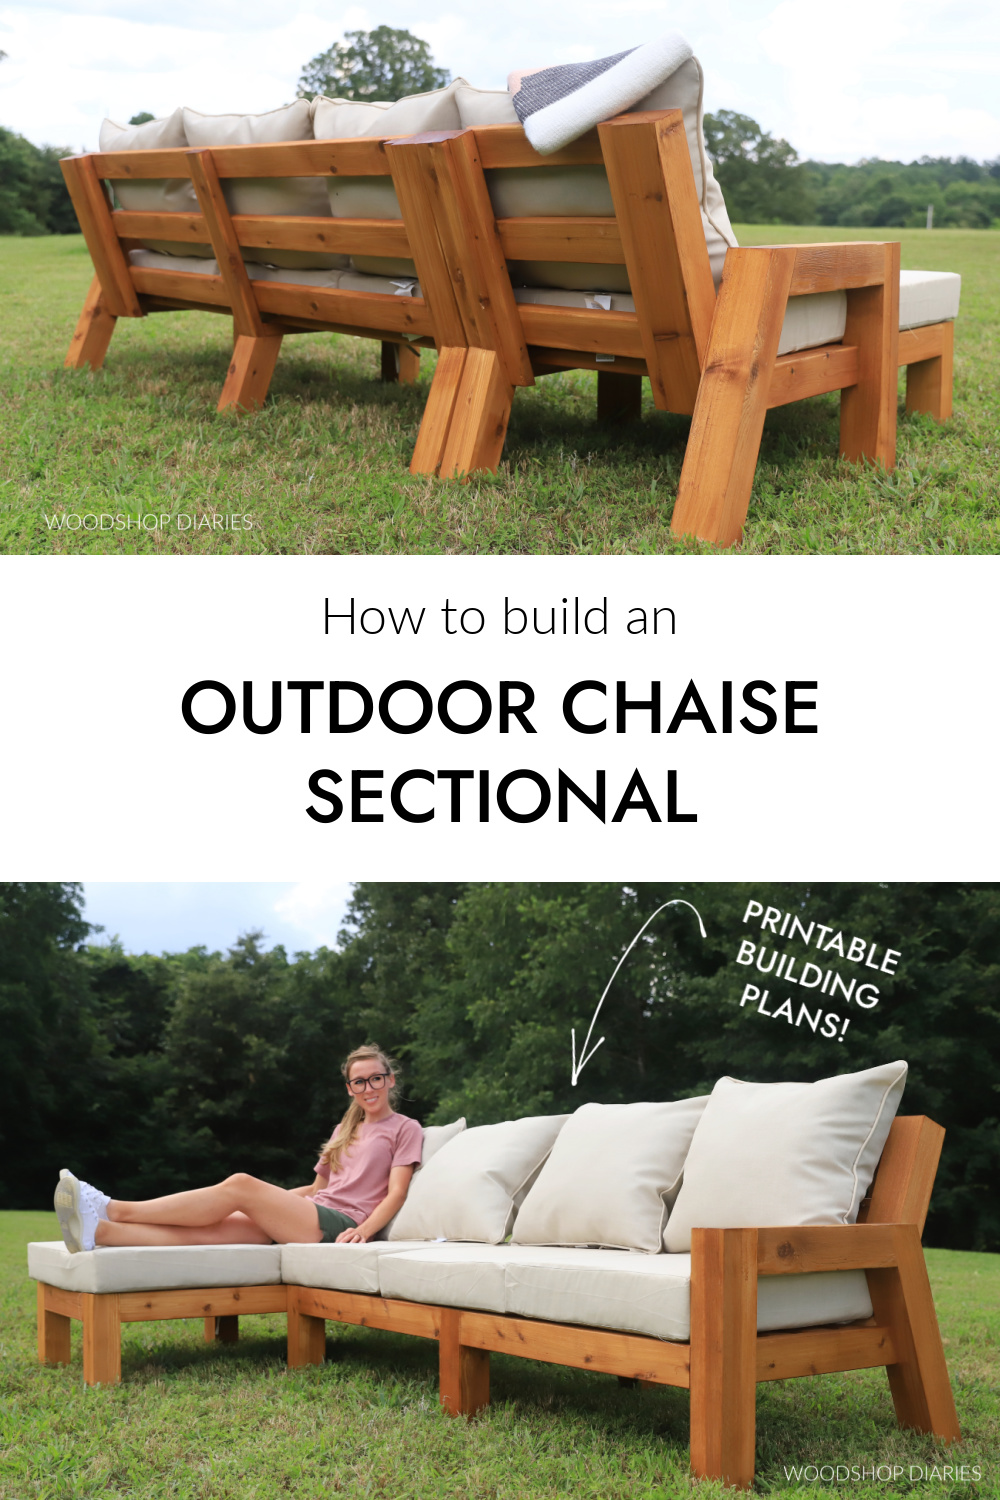
In this post, I’m sharing how to build a chunky, modern outdoor chaise sectional!
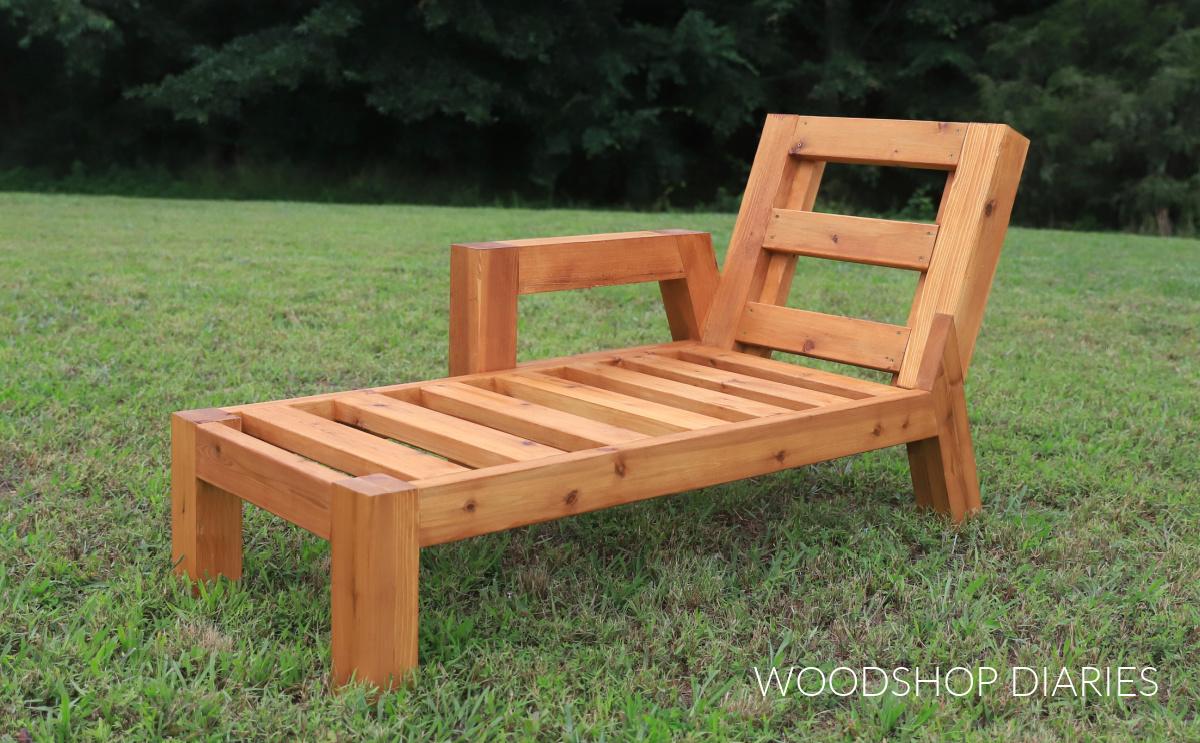
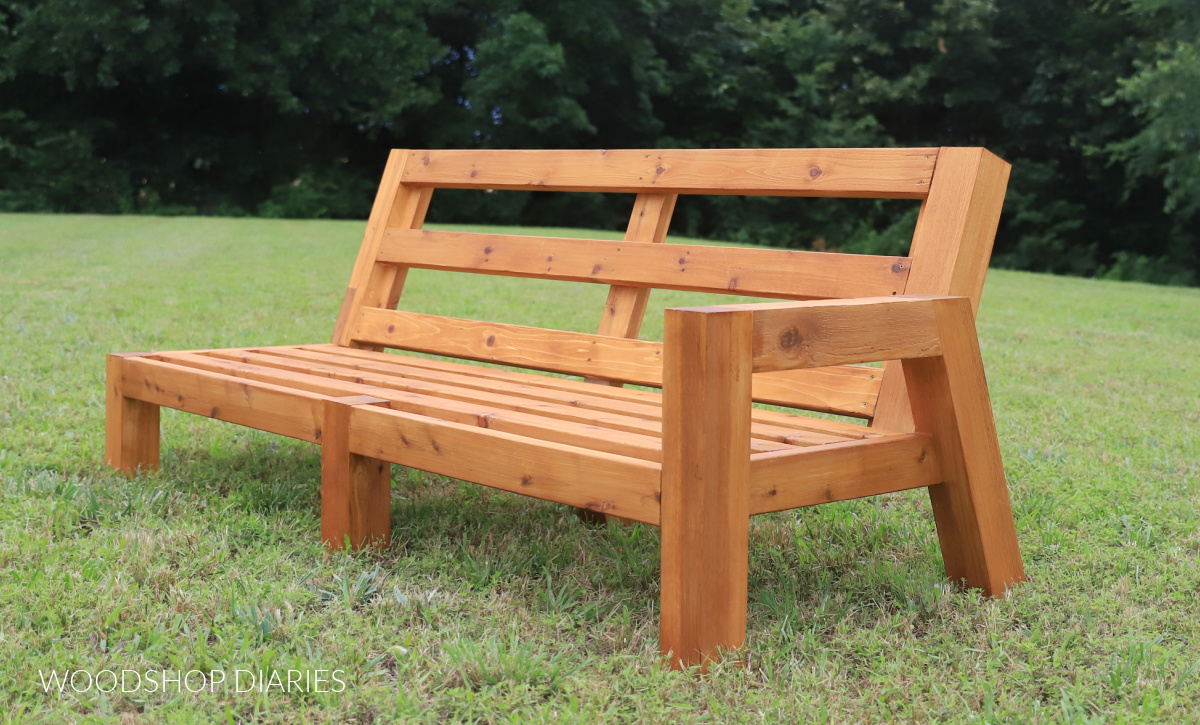
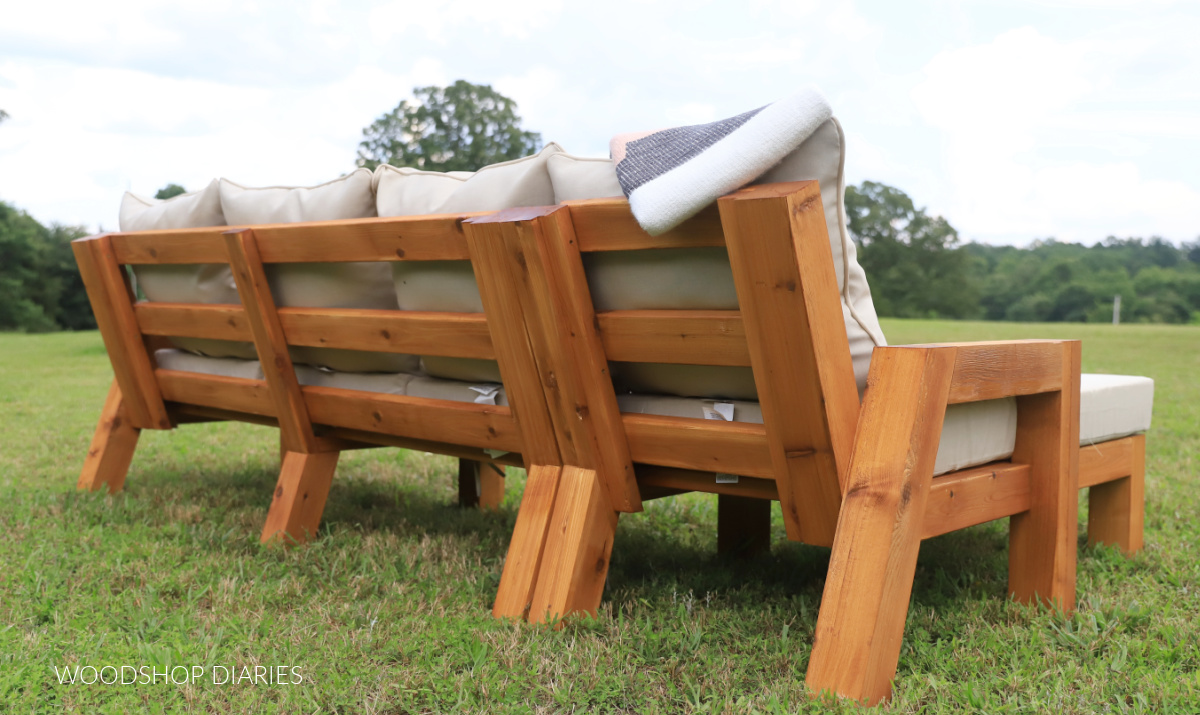
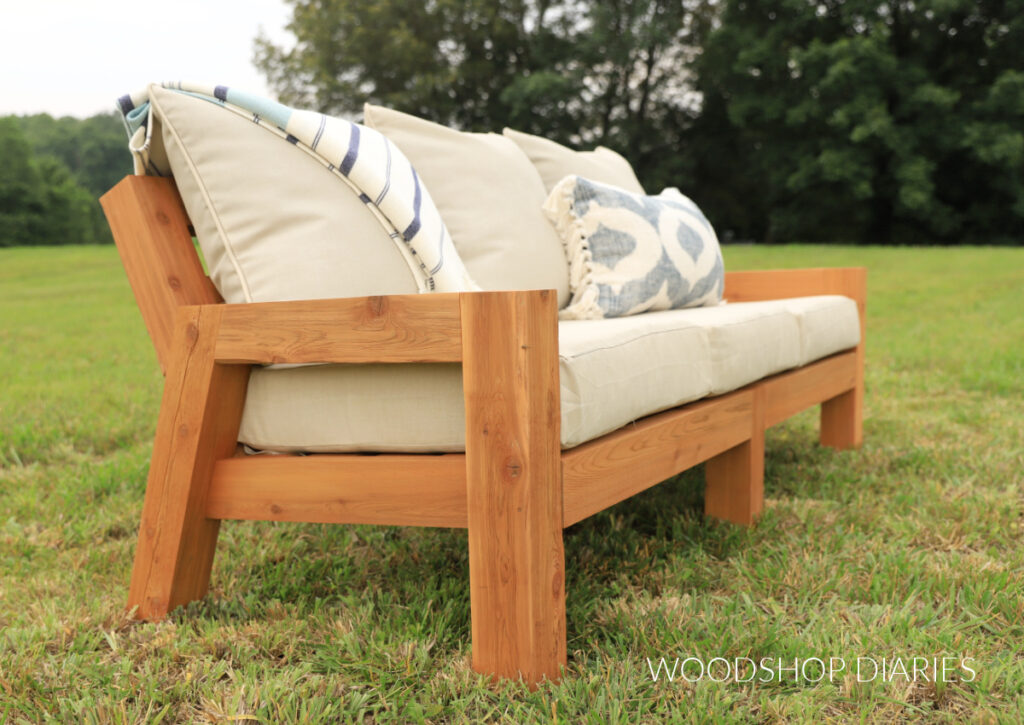
This modular sofa design consists of two individual pieces–a 3 seater sofa on the right and a chaise lounge on the left.
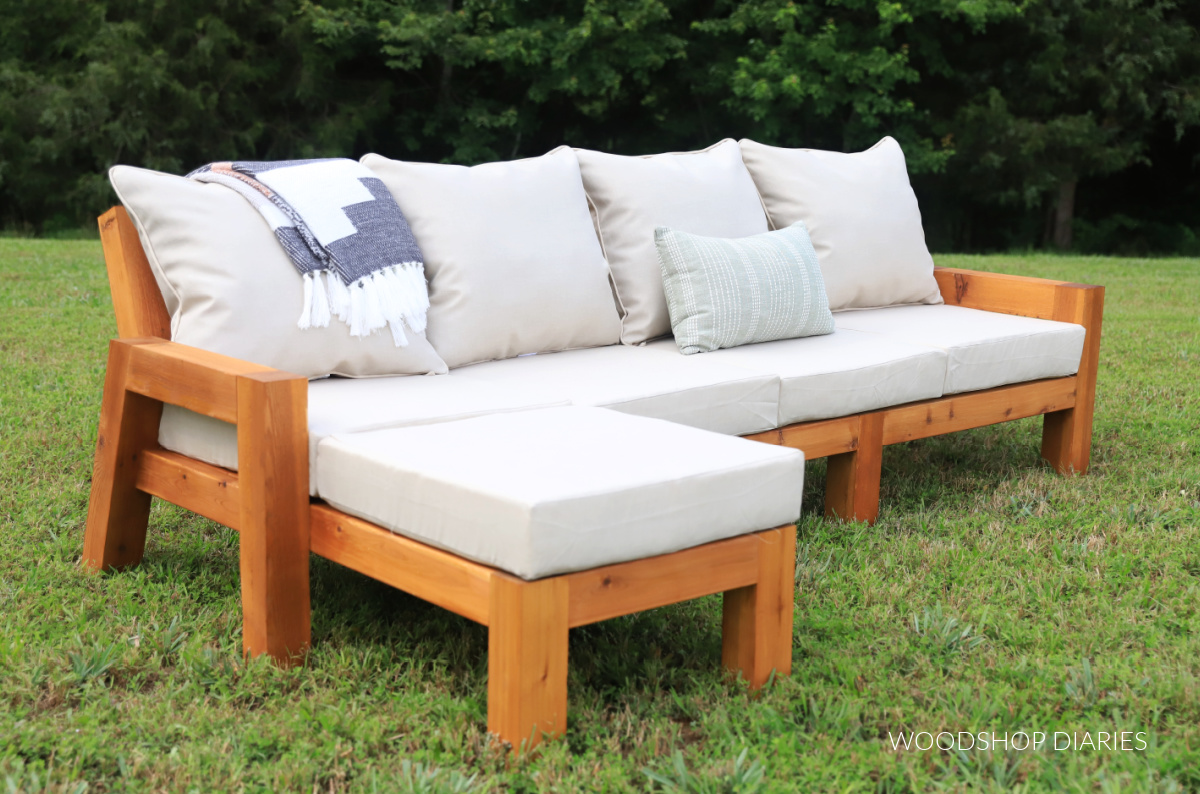
Each piece has one open side and one arm rest so they can butt together to create a sectional.
Not enough room for the three seater PLUS the chaise? No worries! I made this design modular so you can mix and match pieces as needed.
In another post, I’m sharing plans for a smaller 2 seater version and a different style corner piece so you can mix and match two different styles of sectional in multiple sizes.
But, if you’d like to see how this chaise sectional was built, I’m sharing the how to below.
*This post contains affiliate links. See website policies.
What to know before building
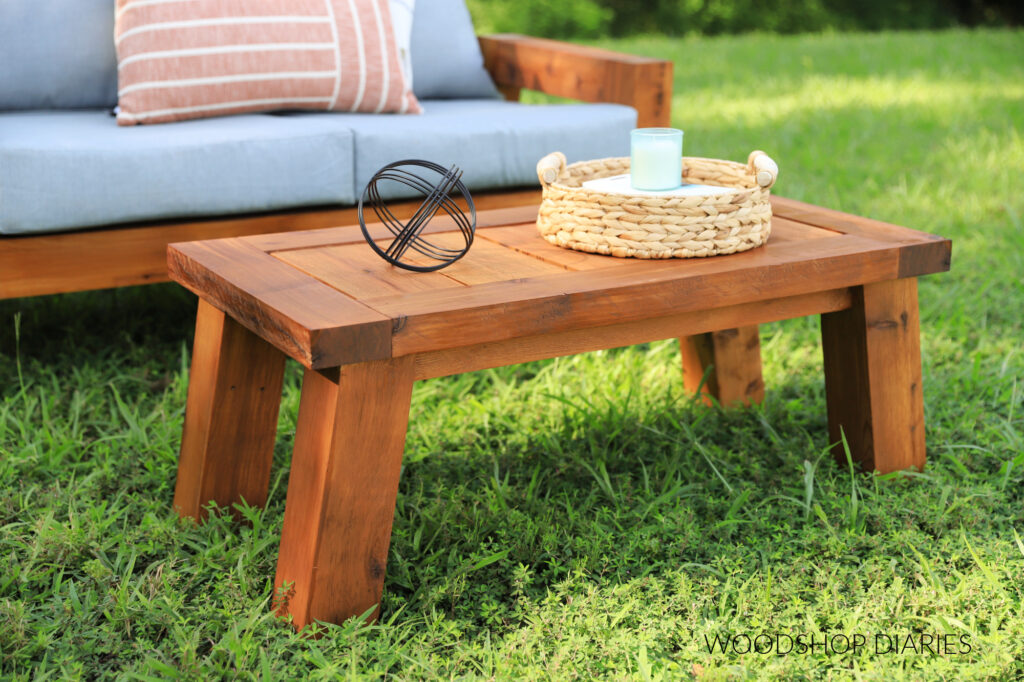
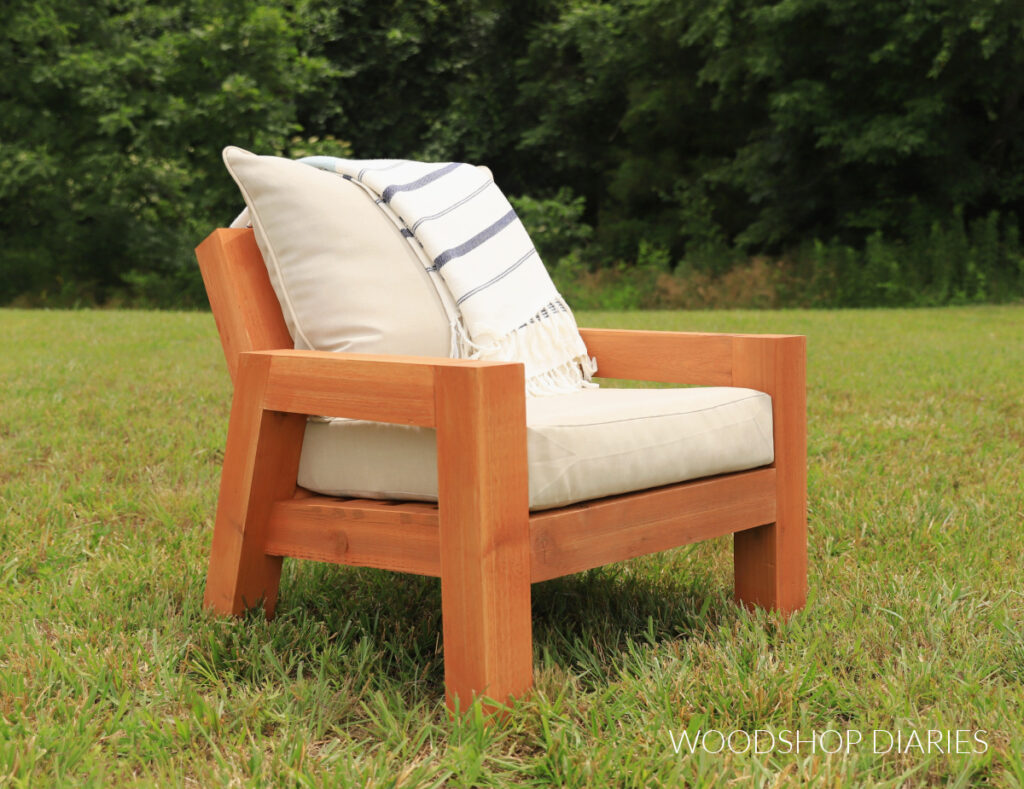
If you’re thinking this design looks familiar, you may be remembering the matching outdoor furniture collection I shared last year.
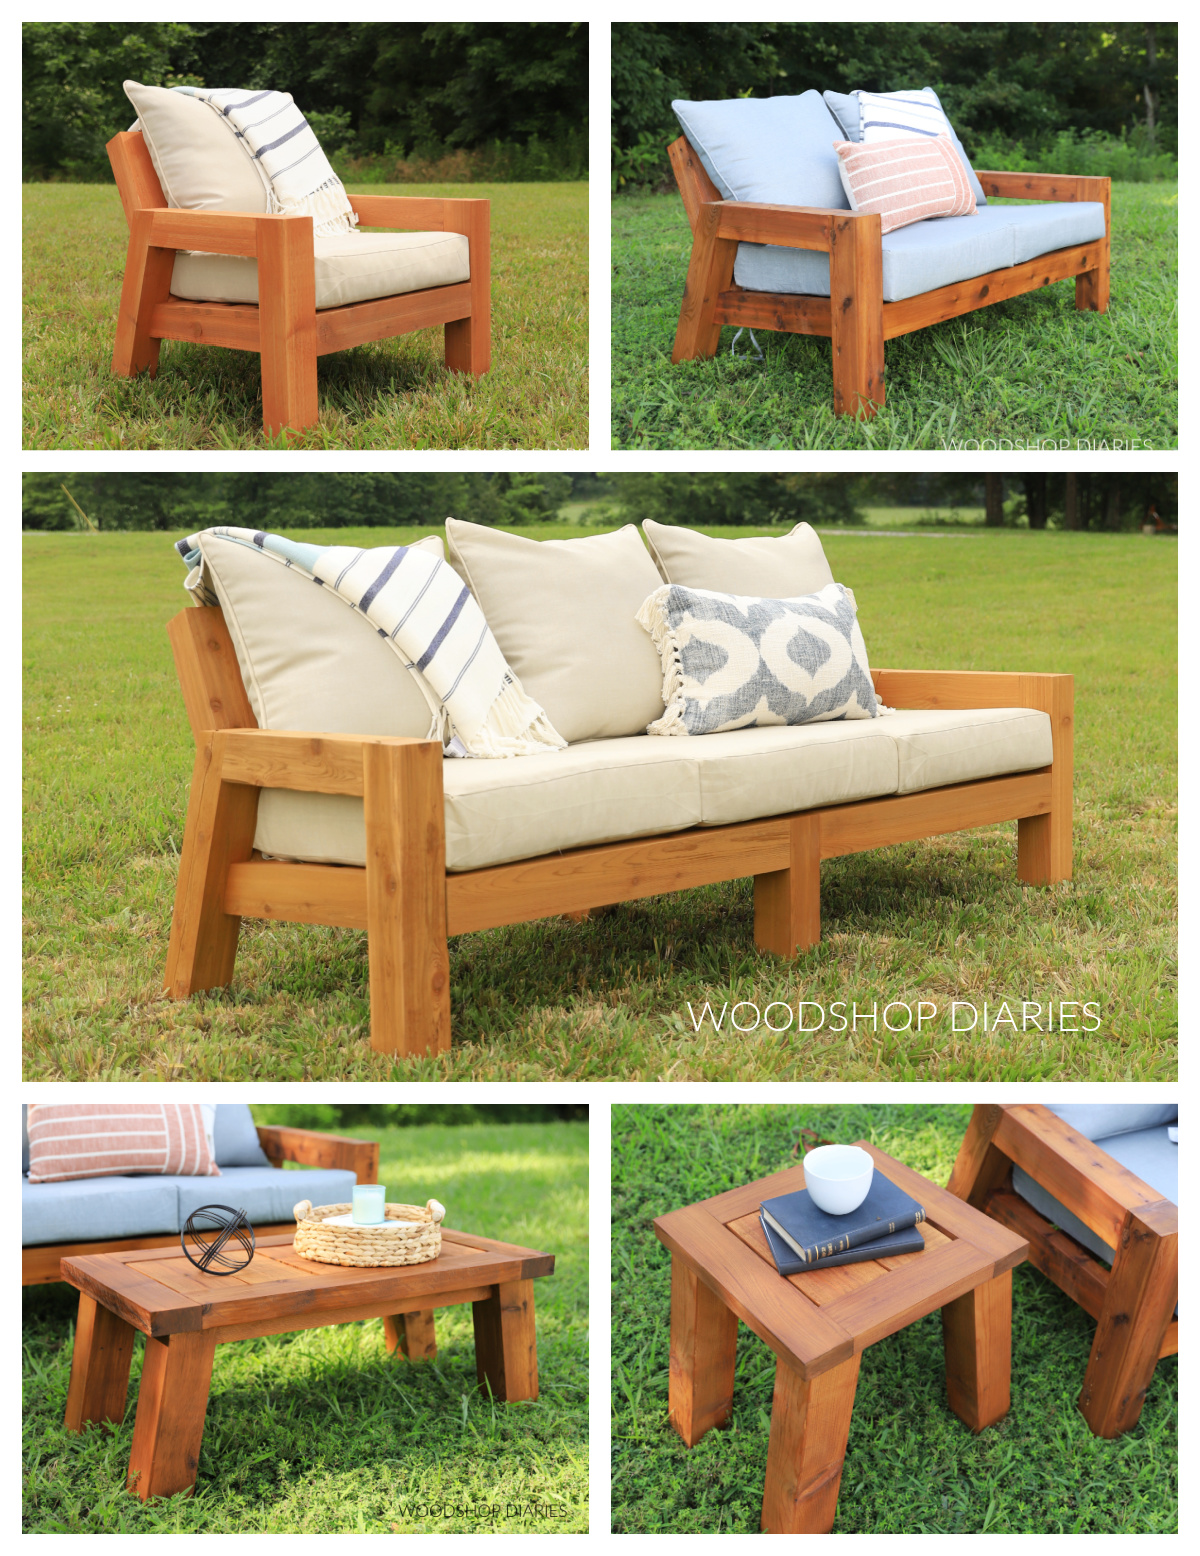
Since sharing those projects, I’ve received so many requests to add a matching sectional to the collection. But, in my mind, there are two different types of sectionals–a chaise sectional and an L shaped sectional.
Since I wasn’t sure which one people wanted most, I decided to build both–starting with the chaise version I’m sharing here.
Be the first to know about new posts, plans, and woodworking tips on Woodshop Diaries. Sign up to our newsletter for priority access!
Modular Design
I designed this sectional to be built in pieces. This makes it easy to assemble, easy to move, and easy to mix and match.
For the chaise sectional, I made a chaise lounge–with one side open and one side with an arm rest.
Then, I built a sofa to butt up to it–again with one side open and one side with an arm rest.
You could also build these “flip flopped” so that the chaise is on the right side, instead.
Outdoor CUSHION OPTIONS & SIZING
This outdoor sectional fits standard 24″ x 24″ outdoor seat cushion sets. These are the EXACT same cushions I used for the matching sofa, loveseat, and chair I mentioned earlier.
The cushion sets I used come with both a deep seat cushion and a matching back pillow. You can find the cushions sets I used for this sectional here.
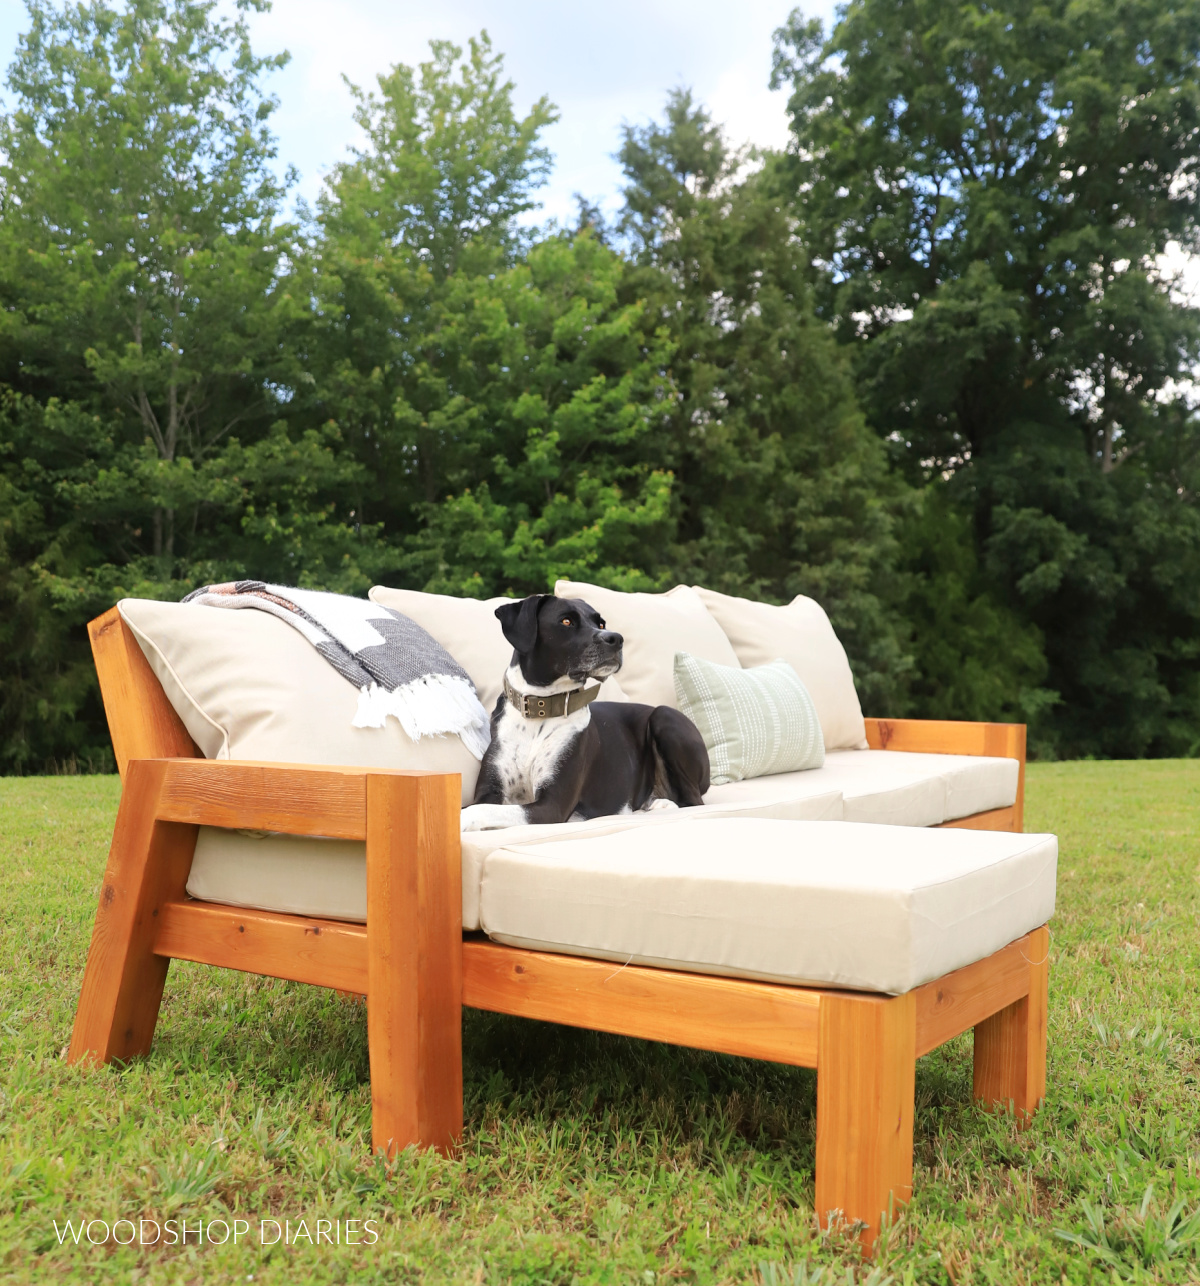
Note that the chaise needs two seat cushions, but only one back cushion. So you’ll end up with one extra back cushion, but it’s always nice to have a spare.
OVERALL DIMENSIONS
The overall dimensions of the chaise and 3 seater sofa together are approximately 101″ wide x 57 ¼″ deep x 31 ¼″ tall.
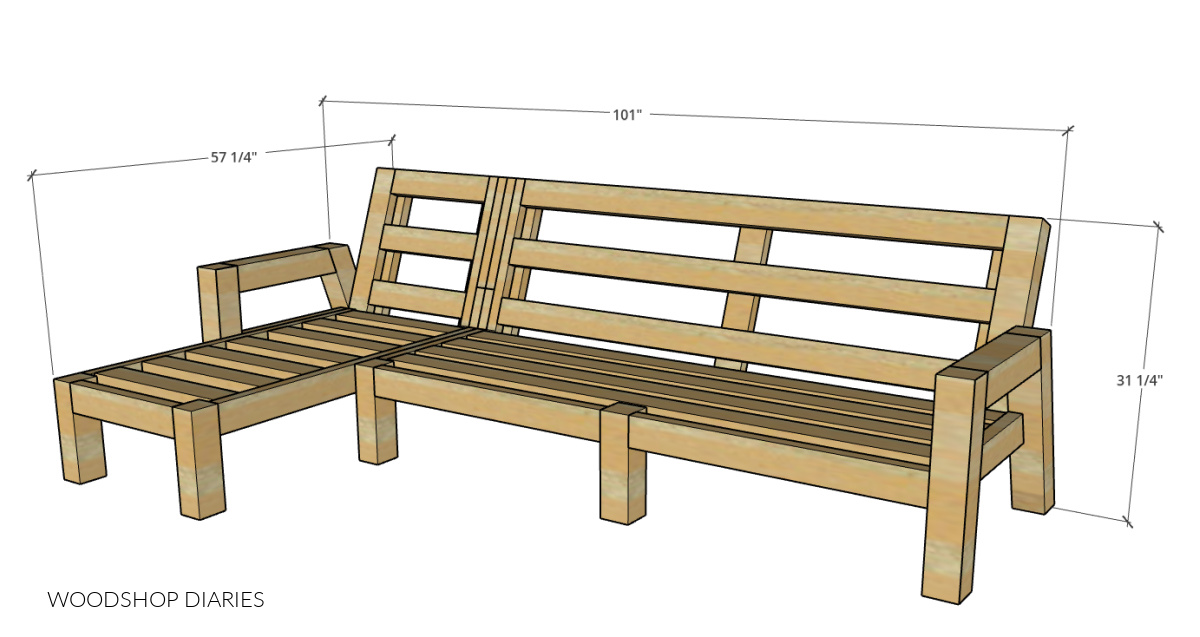
These dimensions don’t include the seat cushions and the seat height is 12″. I know 12″ seems short, but 1.) The seat cushion adds about 5″ to that and 2.) Outdoor seating is normally lower to the ground than indoor seating.
WHAT TYPE OF WOOD TO BUILD AN OUTDOOR SOFA WITH
Untreated pine is the most budget friendly option to build with, but it usually doesn’t last very long in outdoor projects.
It can last a few seasons if properly finished (sealed and/or painted) and kept under cover, but will deteriorate quickly if exposed to a lot of sun and moisture.
RELATED: How to shop for lumber
Pressure treated wood is another budget friendly option and is intended for use outdoors. It will last a long while even when exposed to the elements. However, it’s heavy and is treated with chemicals you may not want to handle.
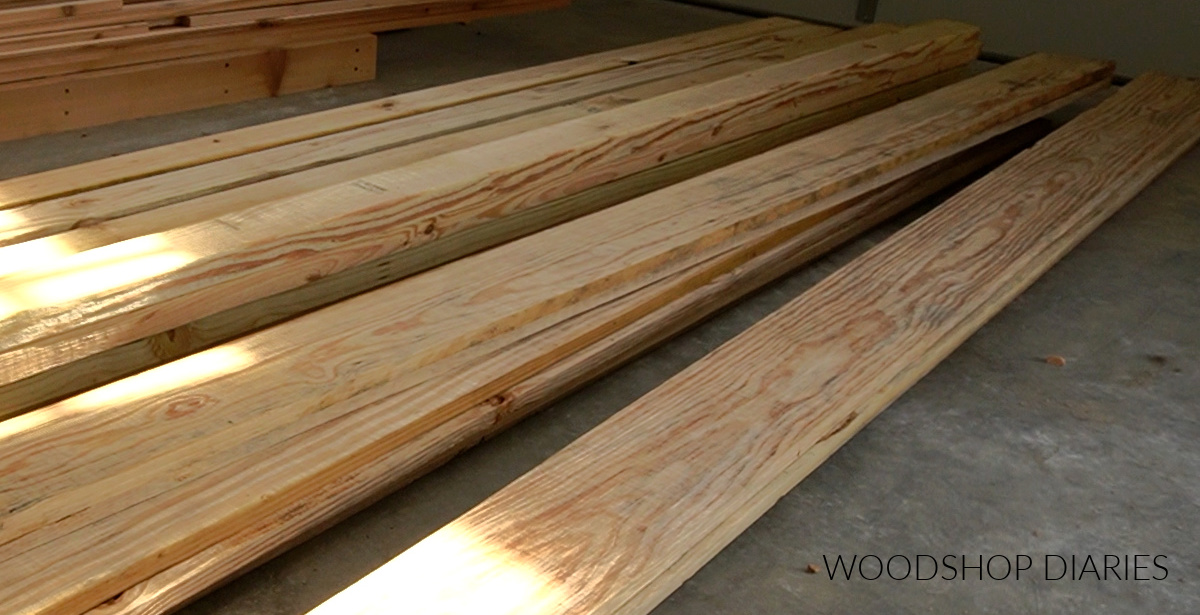
Cedar, red wood, and teak are all naturally decay and insect resistant wood options that look really nice. But, that comes with a price tag. These wood types can be quite expensive and sometimes hard to find depending on where you live.
So when building for outdoors, consider your budget, availability, and the pros and cons of each option before choosing your wood type.
For this project, I opted for cedar. As of May 2024 when this was built, the lumber cost to build this sofa with cedar (where I live) was approximately $240. The cost to build it from pressure treated wood would have been approximately $90.
Don’t forget when building outdoor projects–make sure the hardware (screws), glue and finish you use are rated for exterior use.
How to Build an Outdoor Chaise Sectional
Prefer to watch? Watch the full build video with helpful tips along the way on my YouTube channel here:
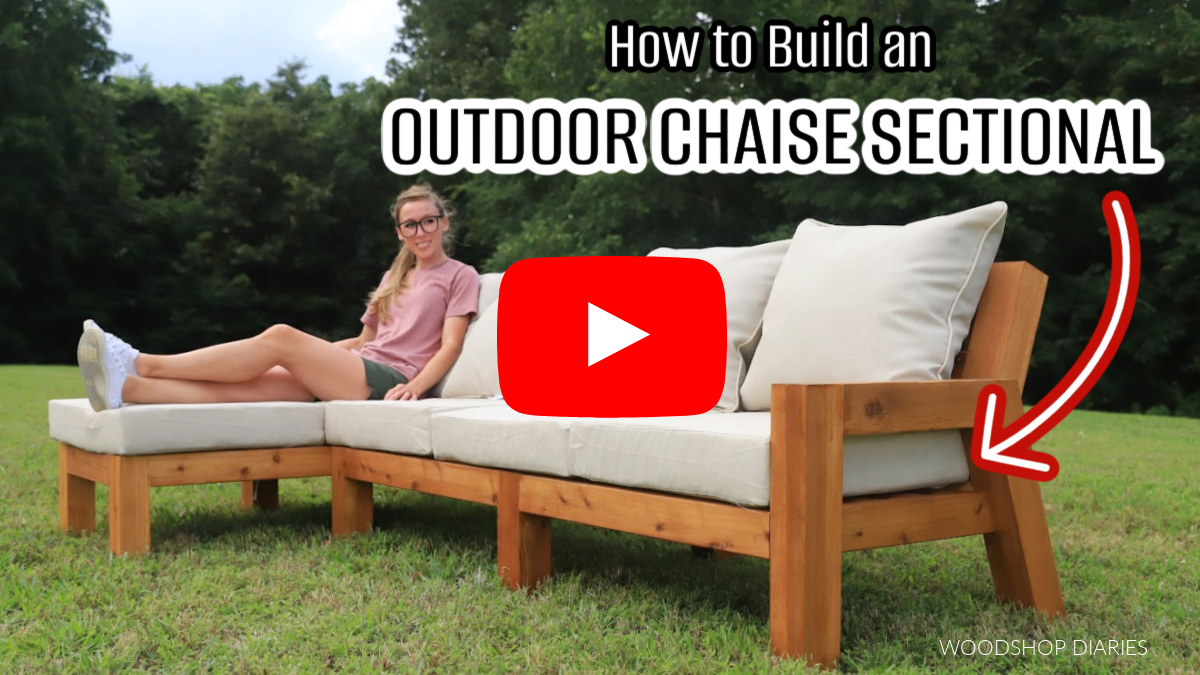
Are videos your thing? Subscribe to my YouTube Channel for more project and how to videos!
I’m sharing the step by step process to build this couch below. But if you prefer to print it out and take the plans to the shop with you, I’ve got you covered! Grab the outdoor sectional printable building plans here.
Tools & Materials
Tools:
- Miter Saw
- Drill/Driver
- Pocket Hole Jig (both the standard size jig and the XL jig)
- Sander
Materials:
- (2) 4x4x8 posts
- (1) 2x2x8 board
- (13) 2x4x8 boards
- 4″ exterior pocket hole screws
- 2 ½” exterior wood screws
- 2 ½” exterior pocket hole screws
- 4 ½” long timber screws or lag screws
- Wood Glue (exterior rated)
- (5) 24″ x 24″ seat & back cushion sets (optional)
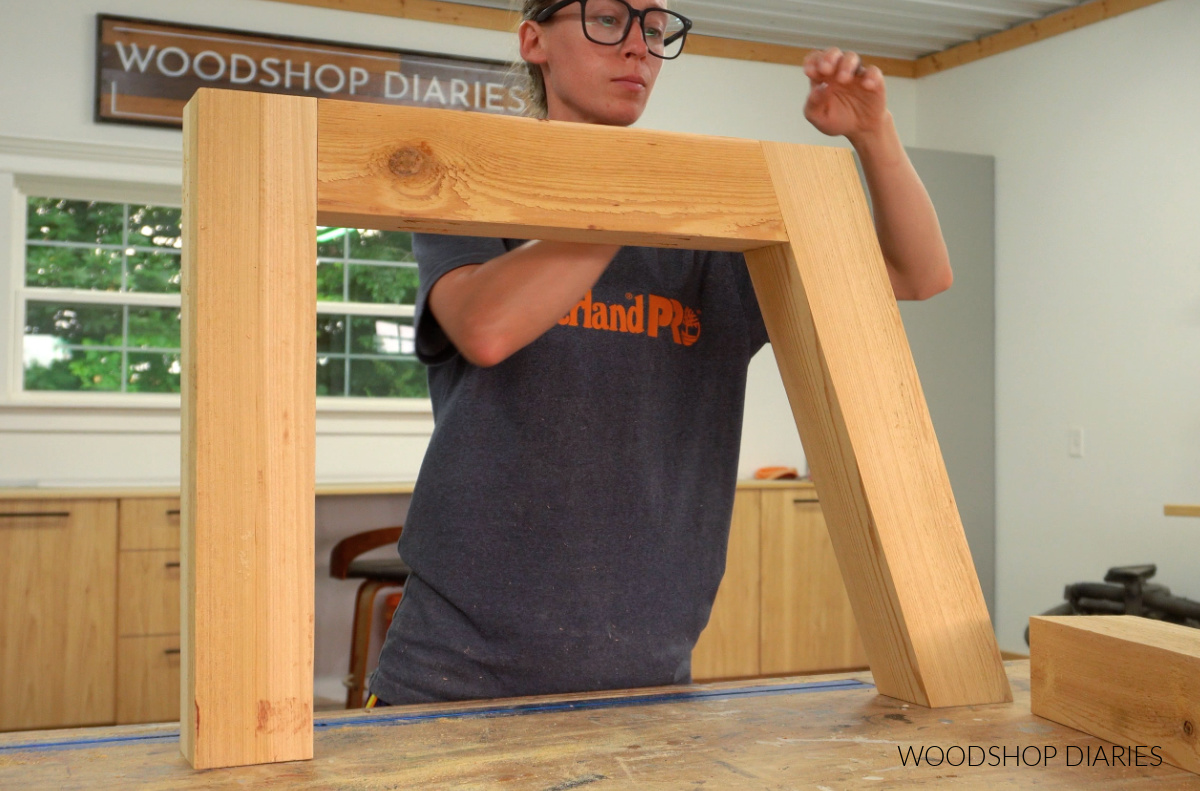
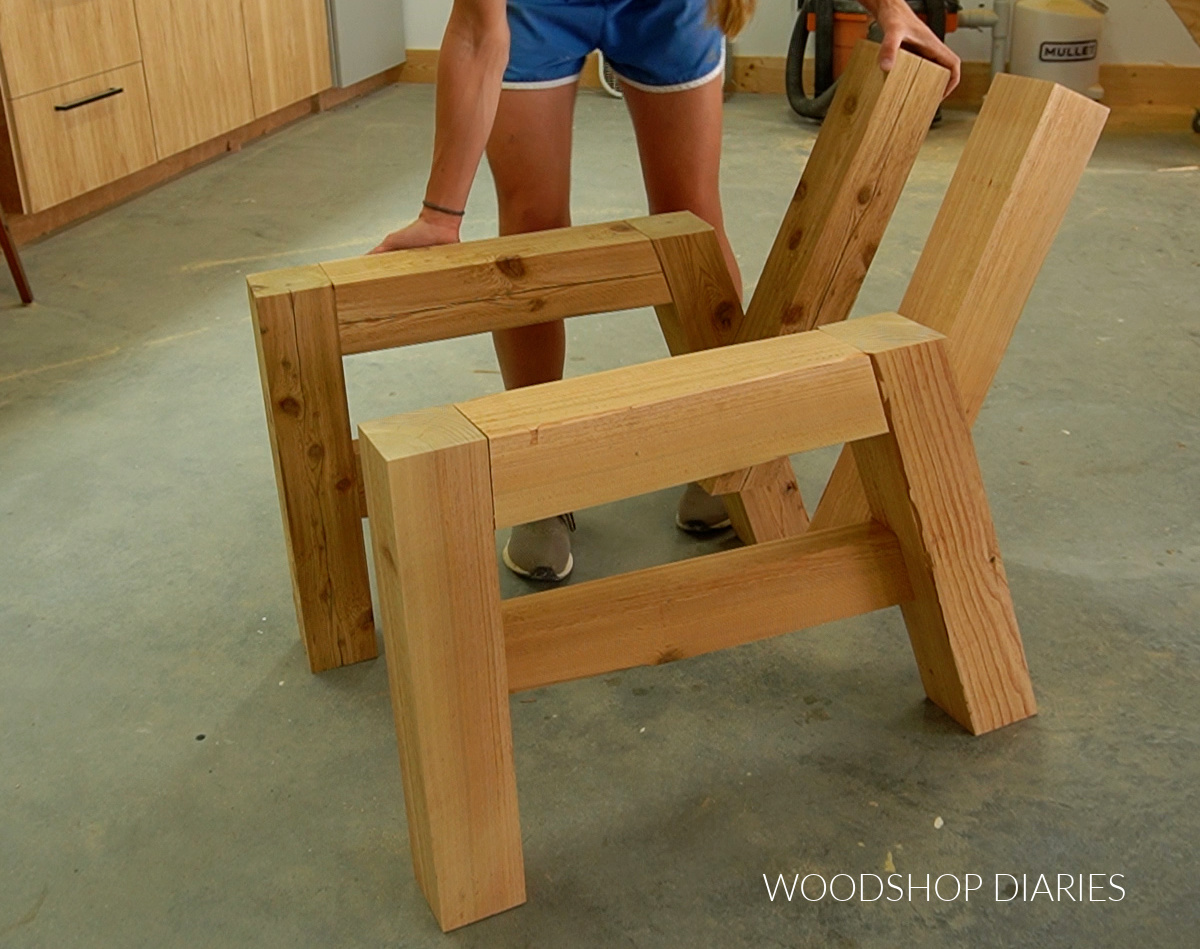
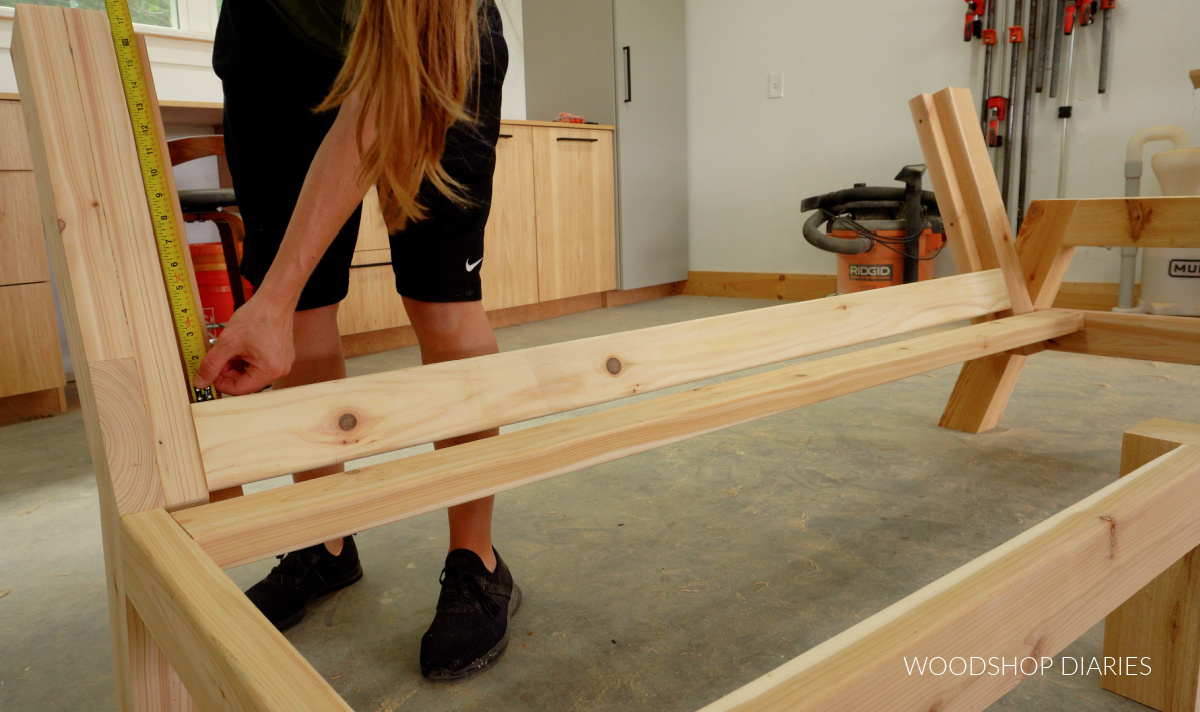
Step 1: Assemble the Arm Rest Side Frames
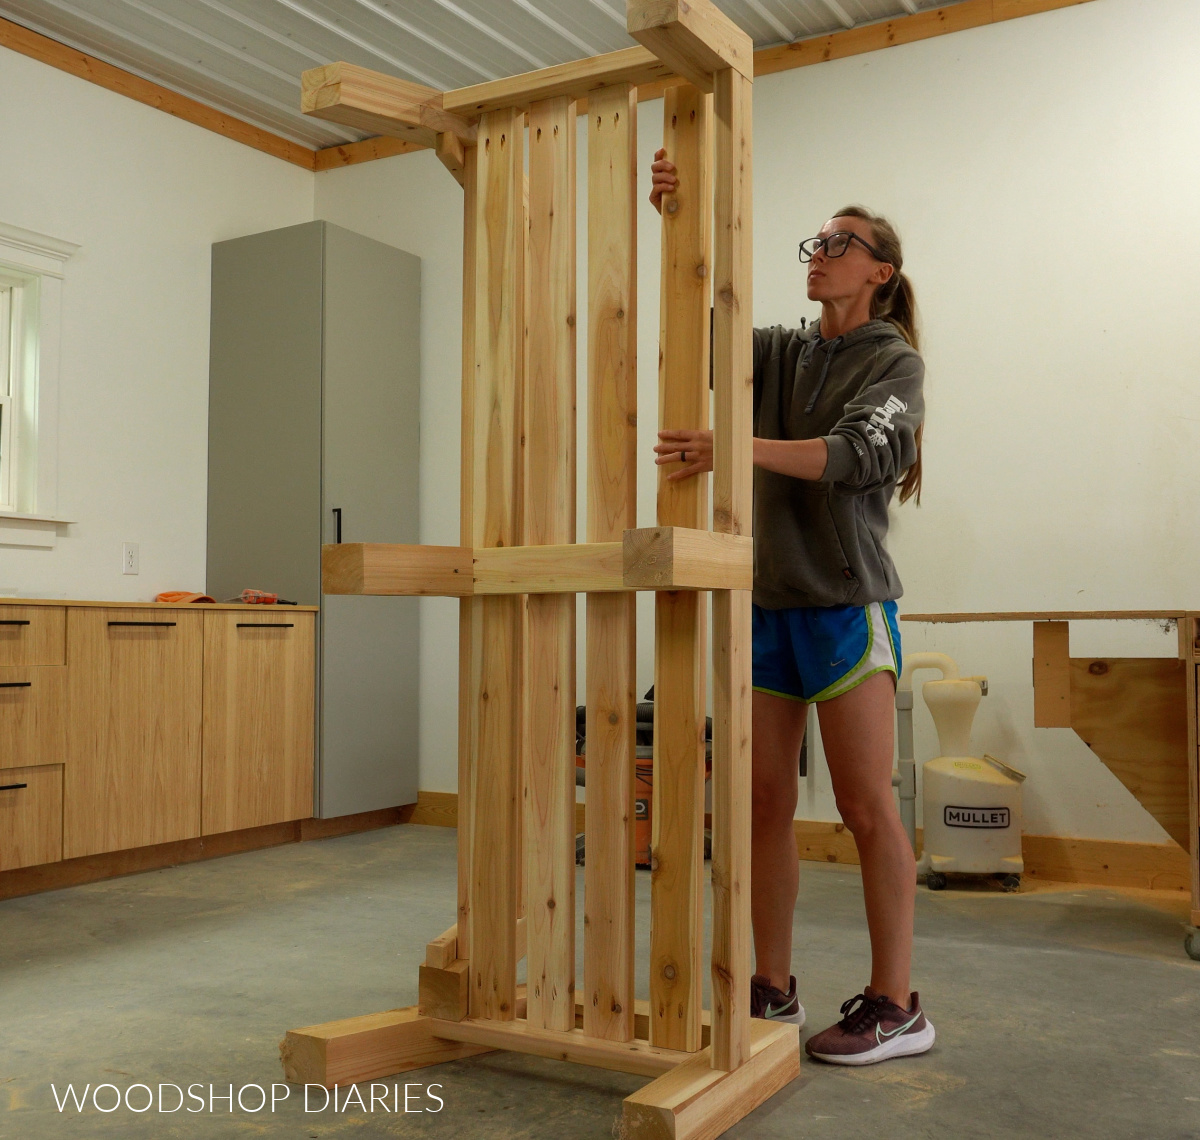
Although I’m building two separate pieces, these first two steps apply to both. I began by assembling the two “end caps” of the sectional.
These side frames are assembled from 4×4 lumber and are the arm rests for each side.
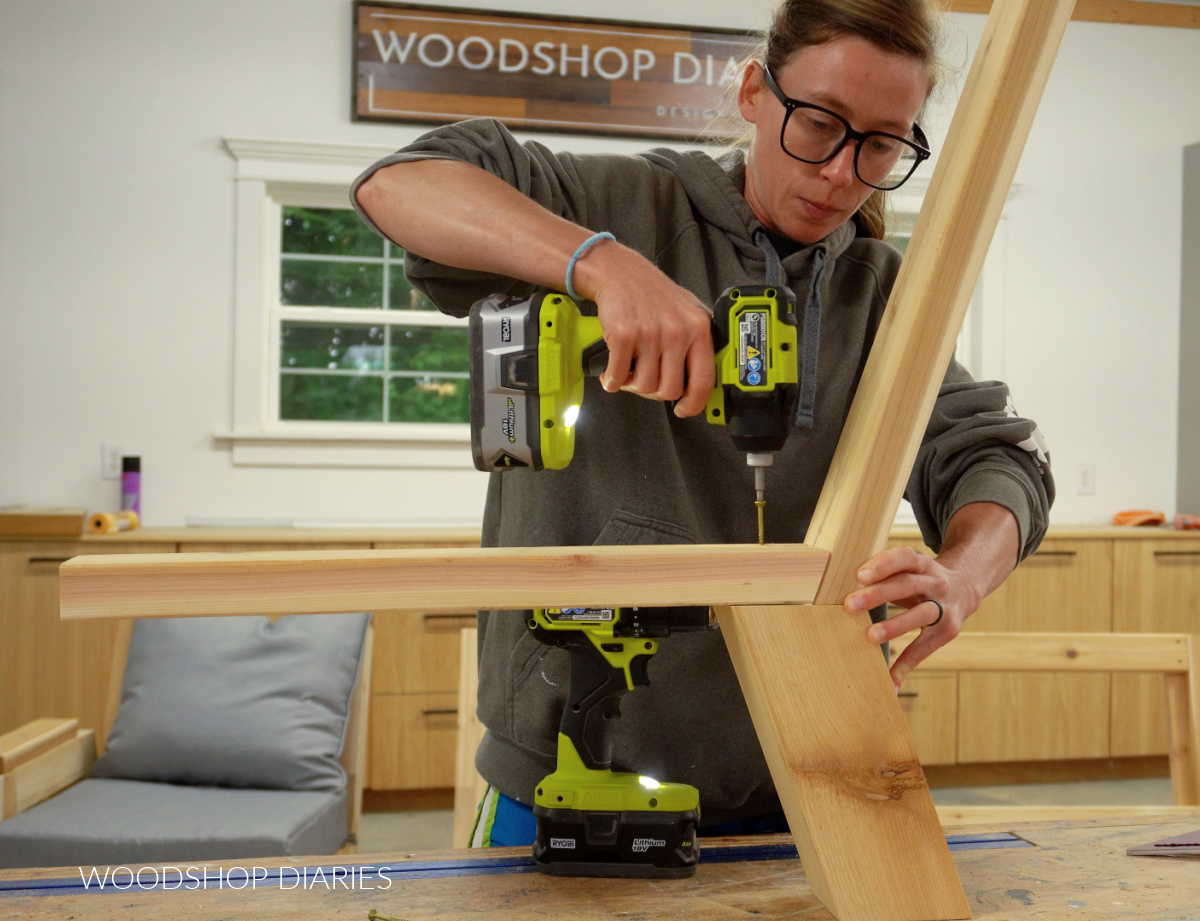
First, I cut a front leg from the 4×4 post. Then, I cut a back leg with ends mitered 20 degrees. Then, I cut another piece to run between them at the top.
I assembled these together using pocket holes and screws. BUT, standard size pocket hole jigs aren’t designed to use with 4x4s. So to drill the pocket holes in the 4×4 at the top, I used a Kreg XL Pocket Hole Jig.
This jig has settings for 3 ½″ material, which is what a 4×4 is. Confused? Don’t worry. Check out this post about how to understand lumber sizing.
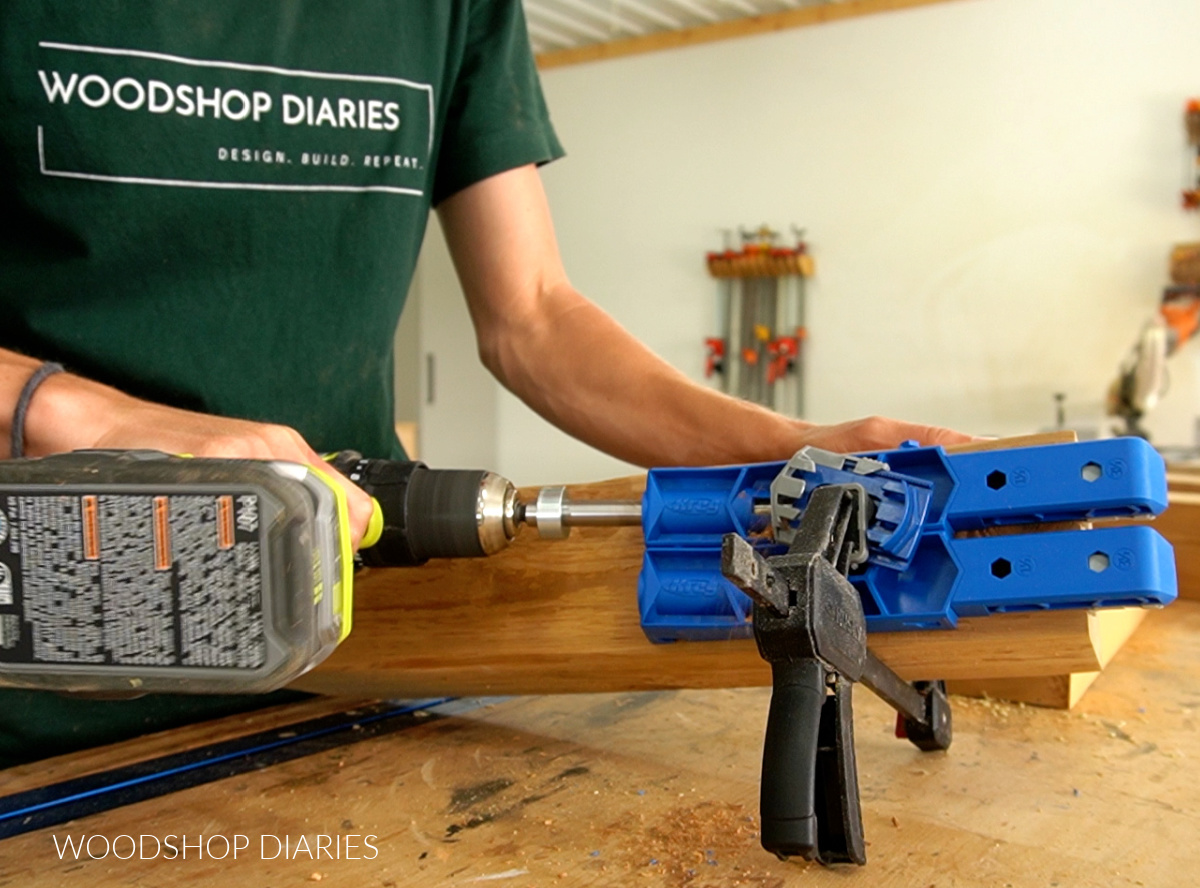
So I drilled 3 ½″ pocket holes on the bottom side of the top 4×4 and attached it between the two legs using 4″ XL pocket hole screws.
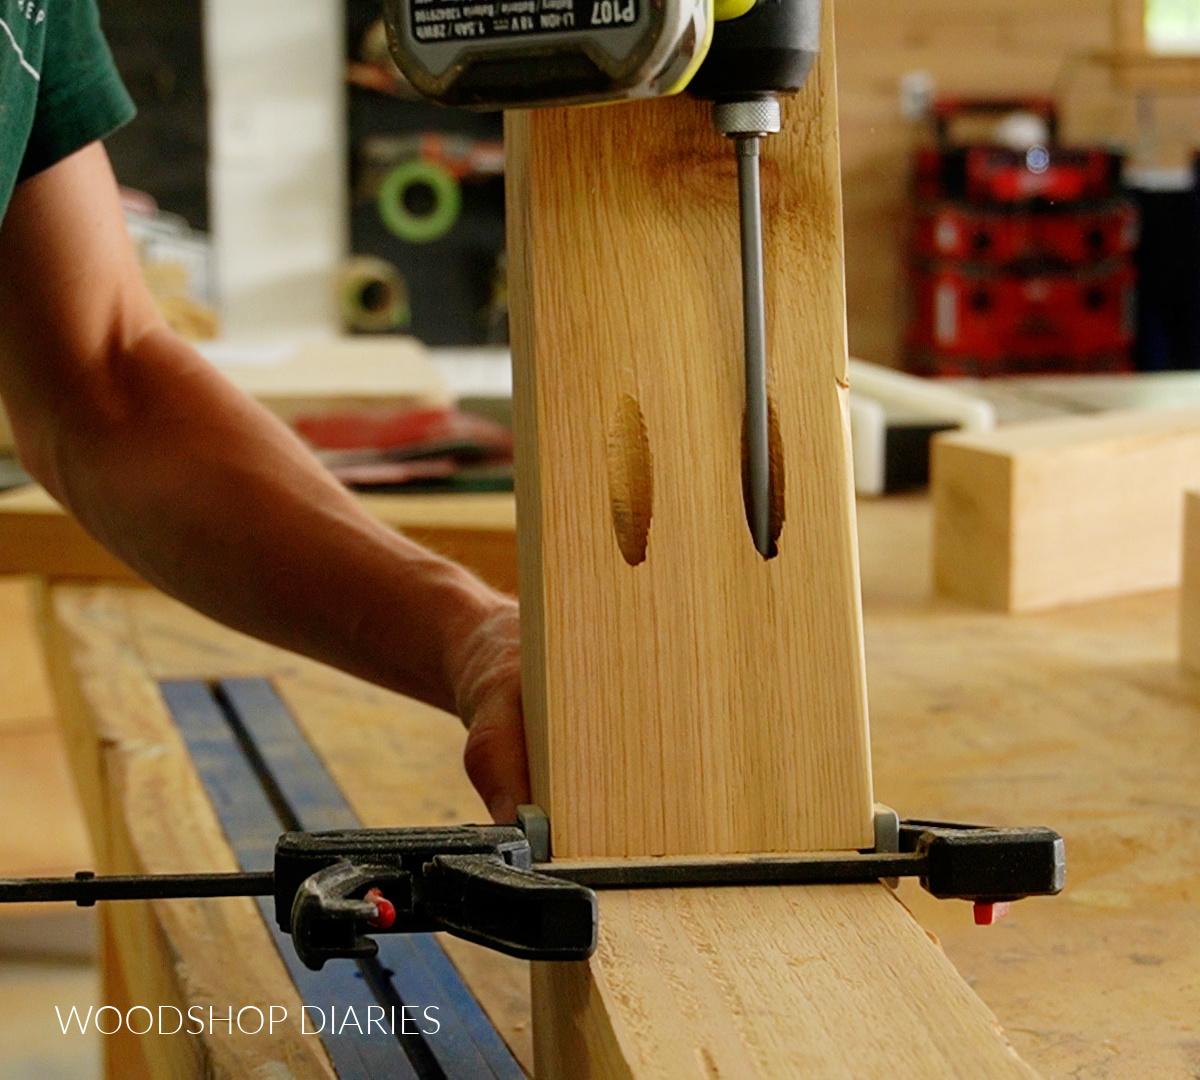
Once the legs and top were together, I cut and installed a piece of 2×4 to run between them using standard size pocket holes and screws–1 ½″ pocket holes with 2 ½″ pocket hole screws. This piece should be flush to the INSIDE of the legs.
RELATED: How to use a pocket hole jig
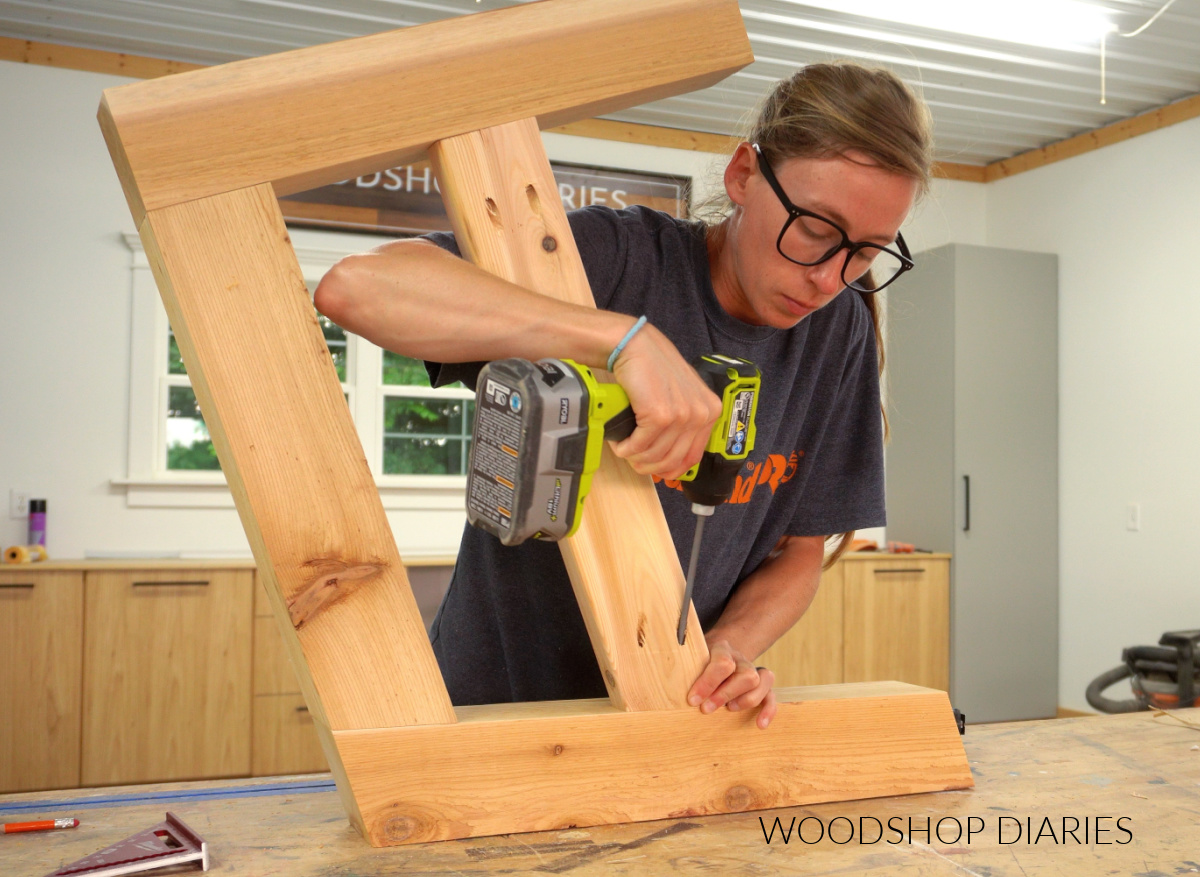
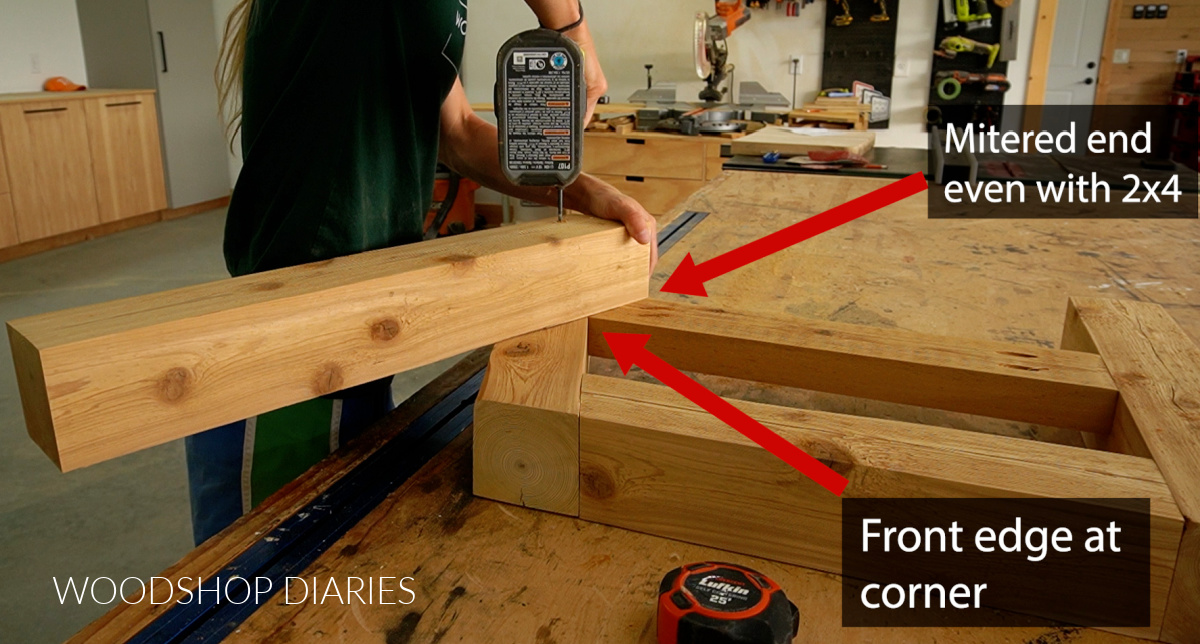
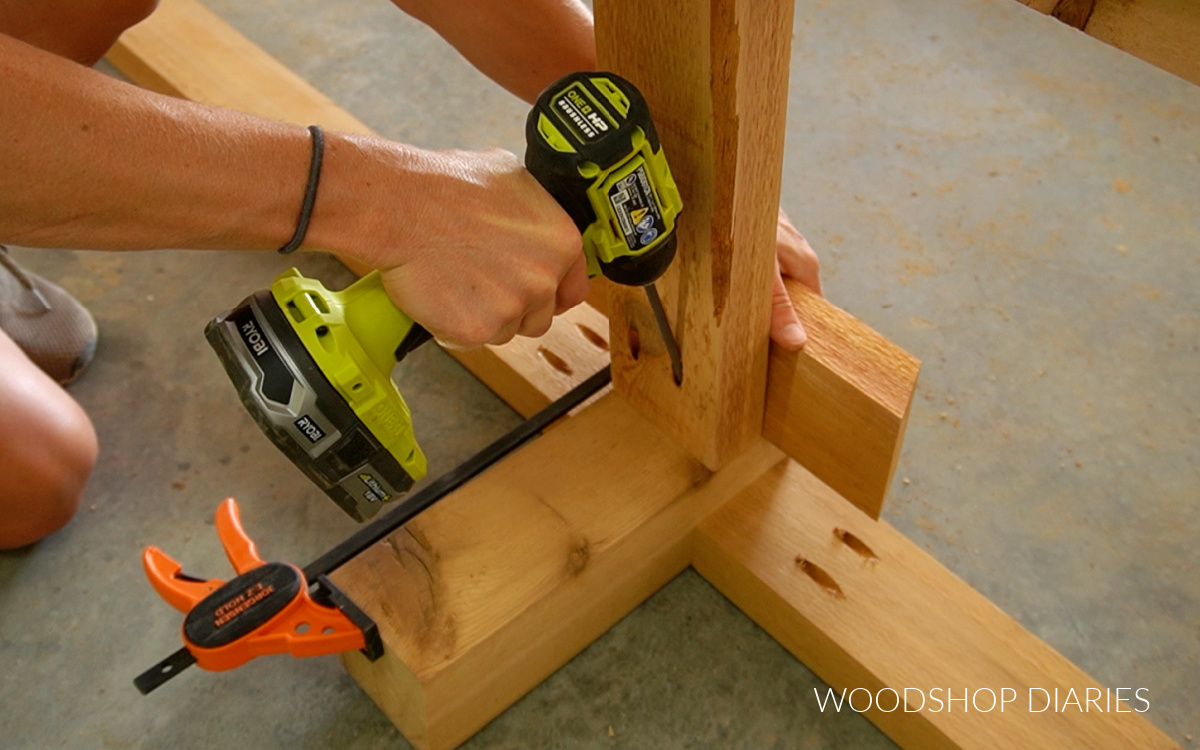
Then, I cut another 4×4 post for the back support–one end is mitered 20 degrees and the other end square.
This piece should go on the INSIDE of the side frame so that the mitered edge is lined up with the bottom of the 2×4 and the front edge is in line with the corner.
I secured this in place with wood glue and 4 ½″ timber screws. You could also use 4 ½″ long lag screws. Don’t forget to predrill pilot holes as these large screws can easily split the wood.
Once one side frame was assembled, I built another just like it, only mirrored. One will be for the left side of the chaise and one for the right side of the sofa.
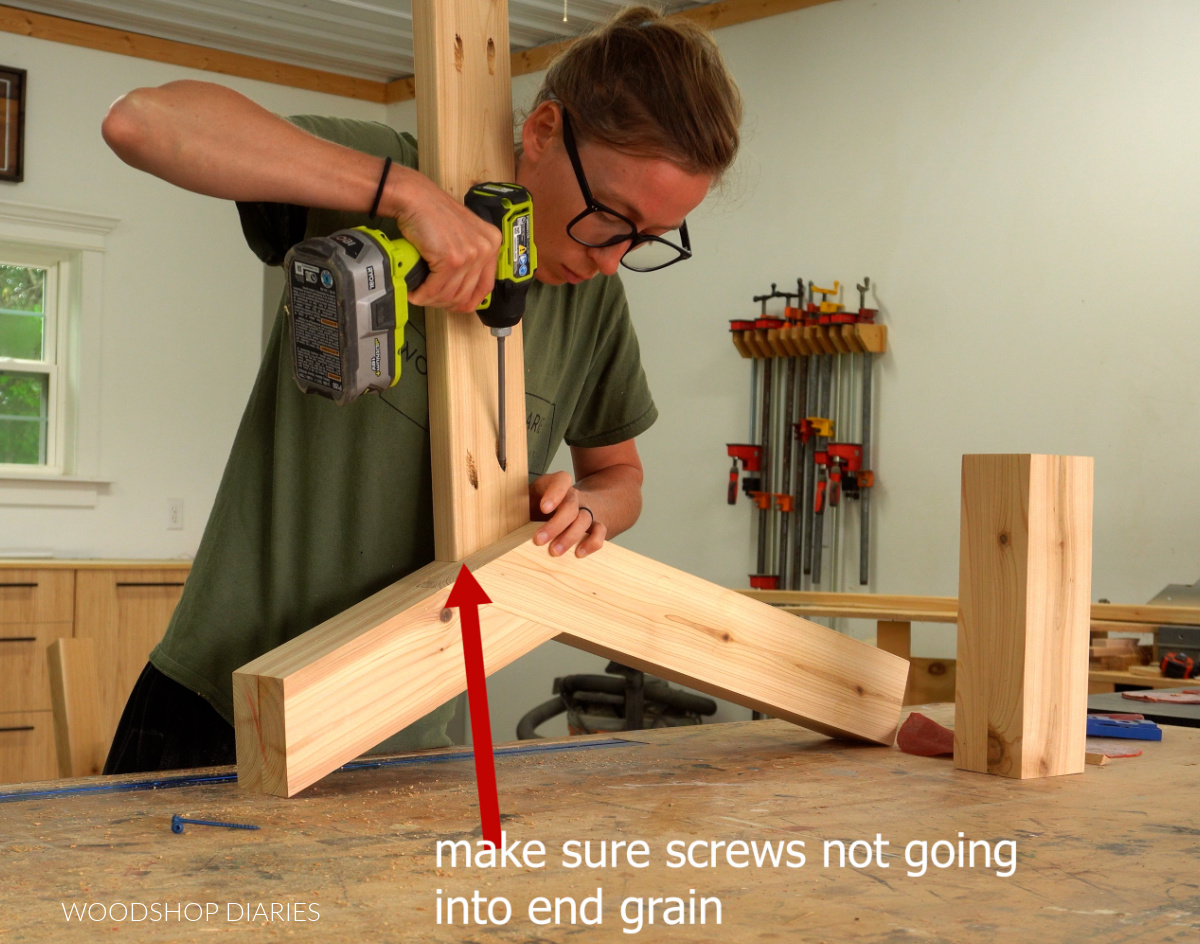
Step 2: Assemble the Open Side Frames
For the sides of each piece that butt together, I needed to assemble a back leg/back support but it couldn’t have an arm rest.
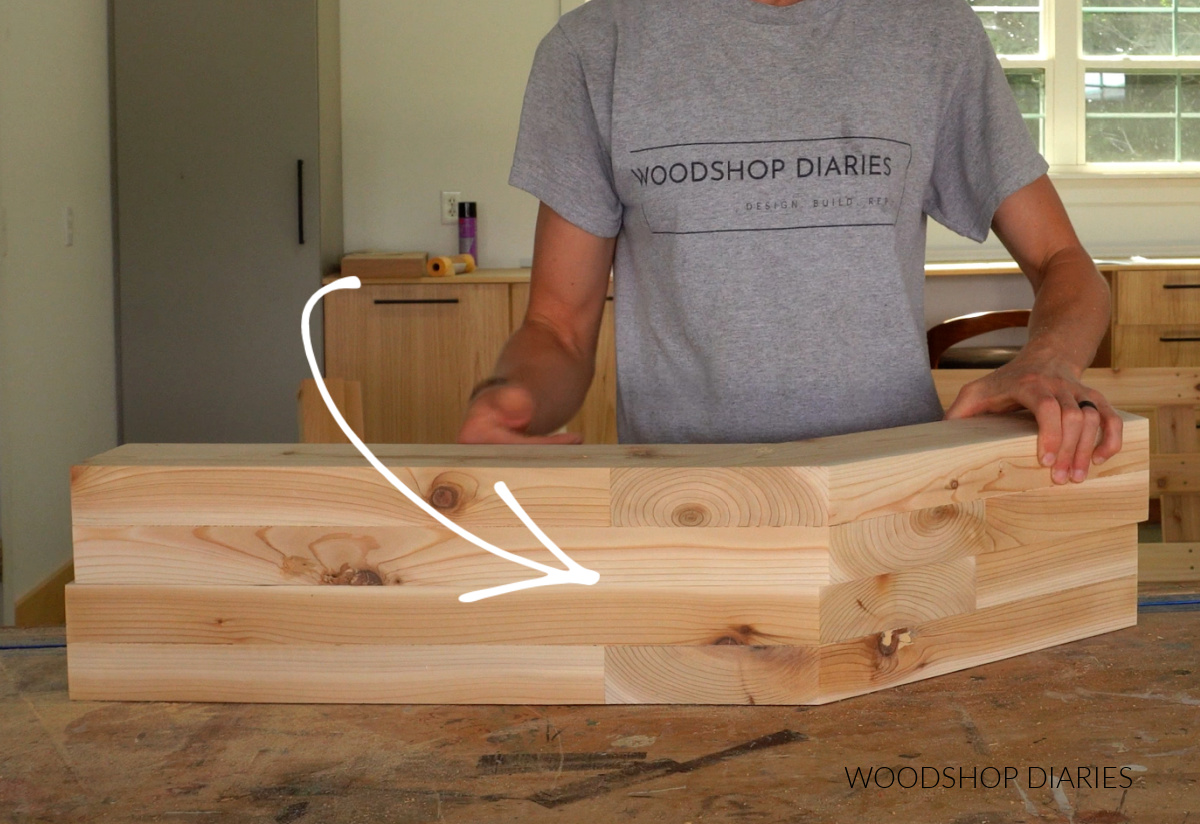
So I cut four pieces of 2×4 to glue together to make a post. These four pieces will overlap in the middle like shown below.
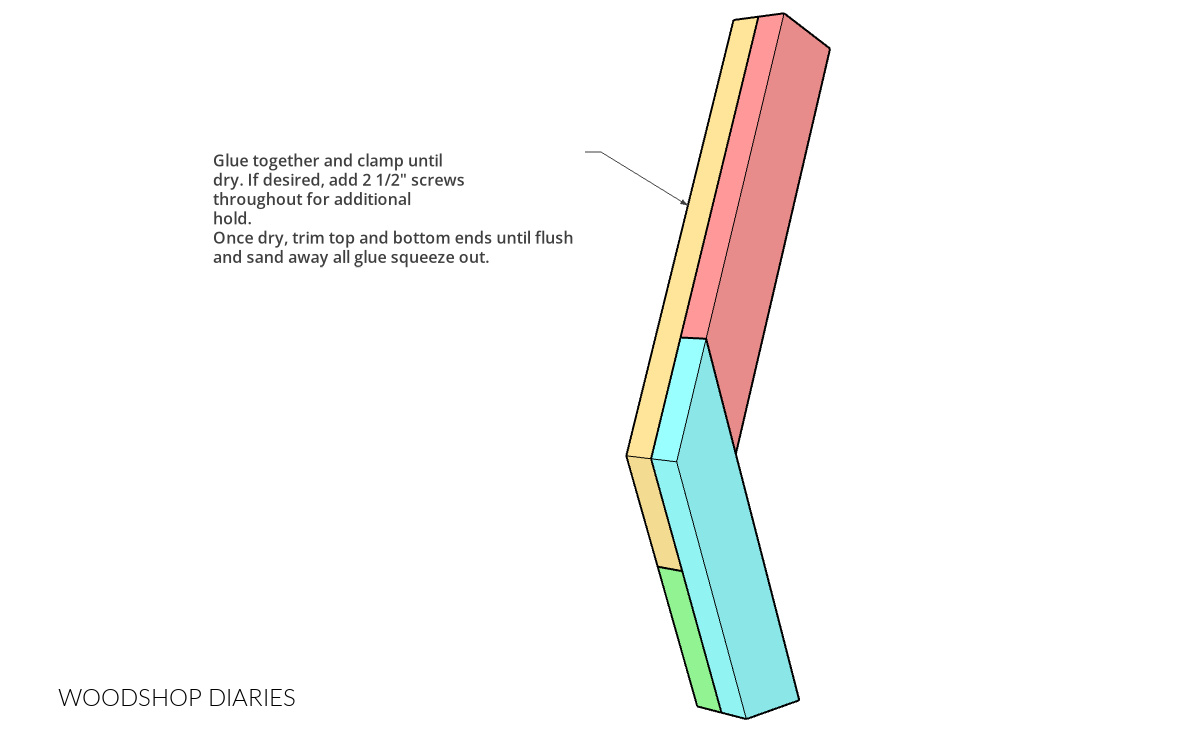
I first attached the pink and blue pieces together and then I attached the yellow and green pieces together (from the image above) using wood glue and pocket holes and screws. Then, I glued the two assemblies together.
All the dimensions and angles for these pieces are found in the printable plans here.
I repeated to make two identical posts, but I made sure one was mirrored to the other one. This is important because the end grains where they meet in the middle don’t need to both go on the same side of the post.
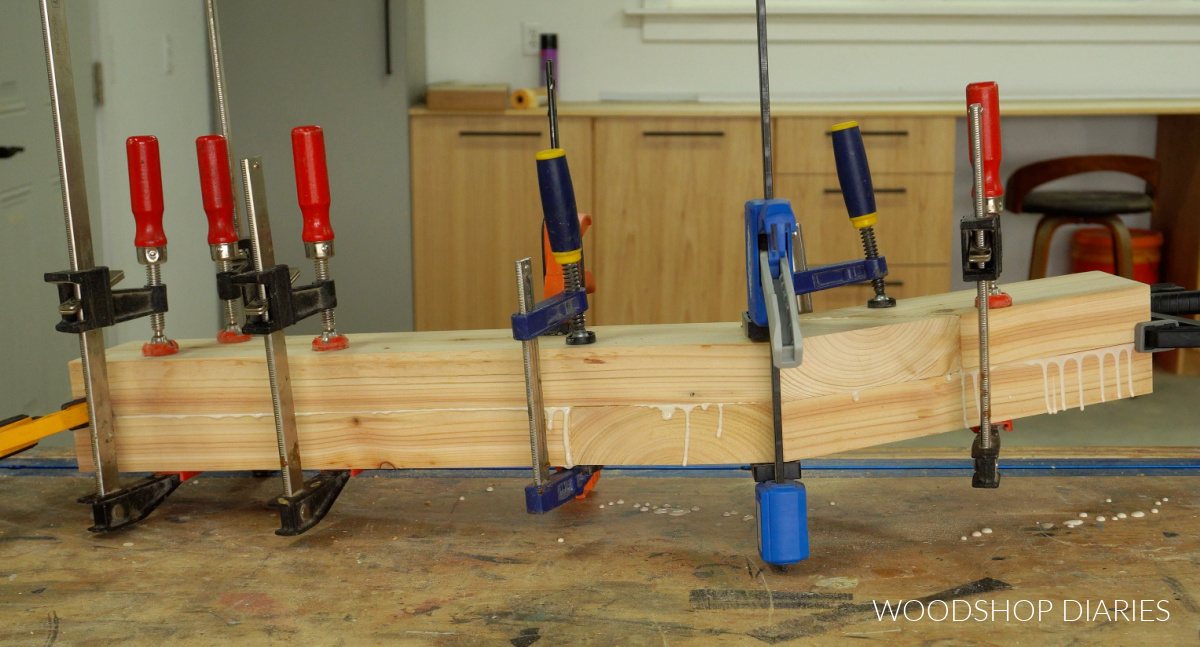
Then, I glued up three pair of 12″ long 2x4s to make the front legs. Two will be for the chaise and one will be for the sofa.
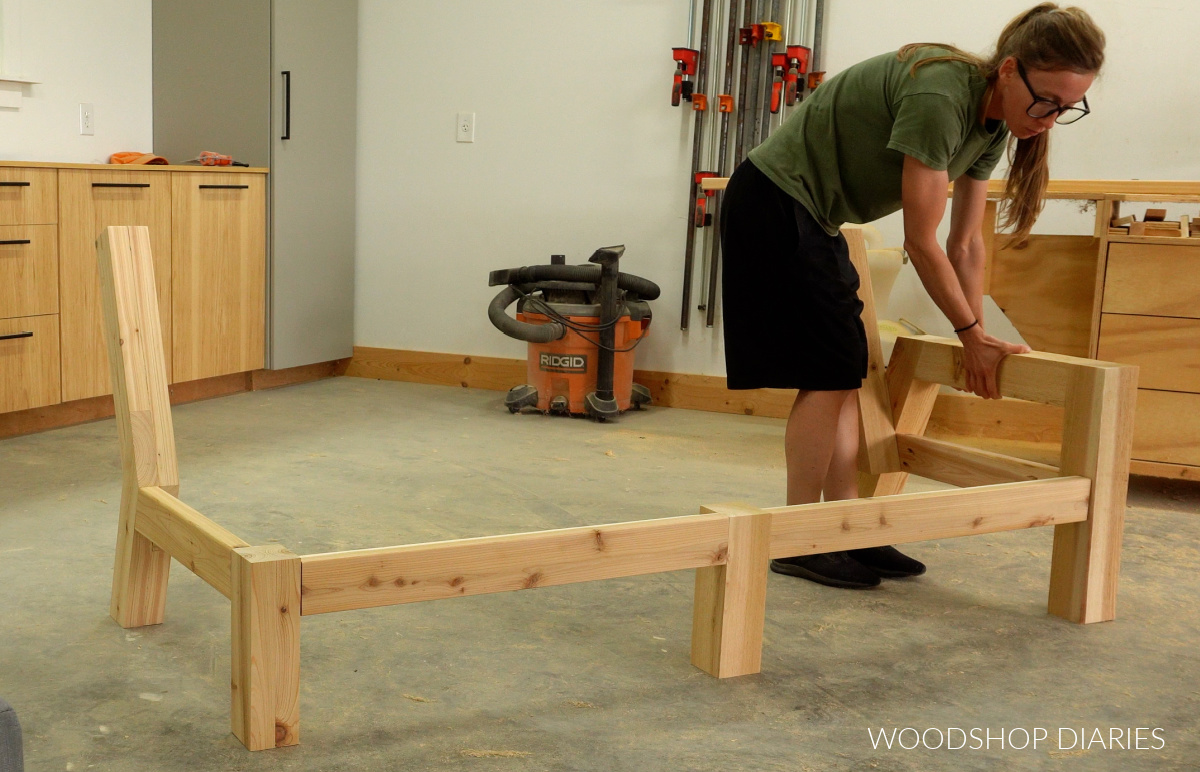
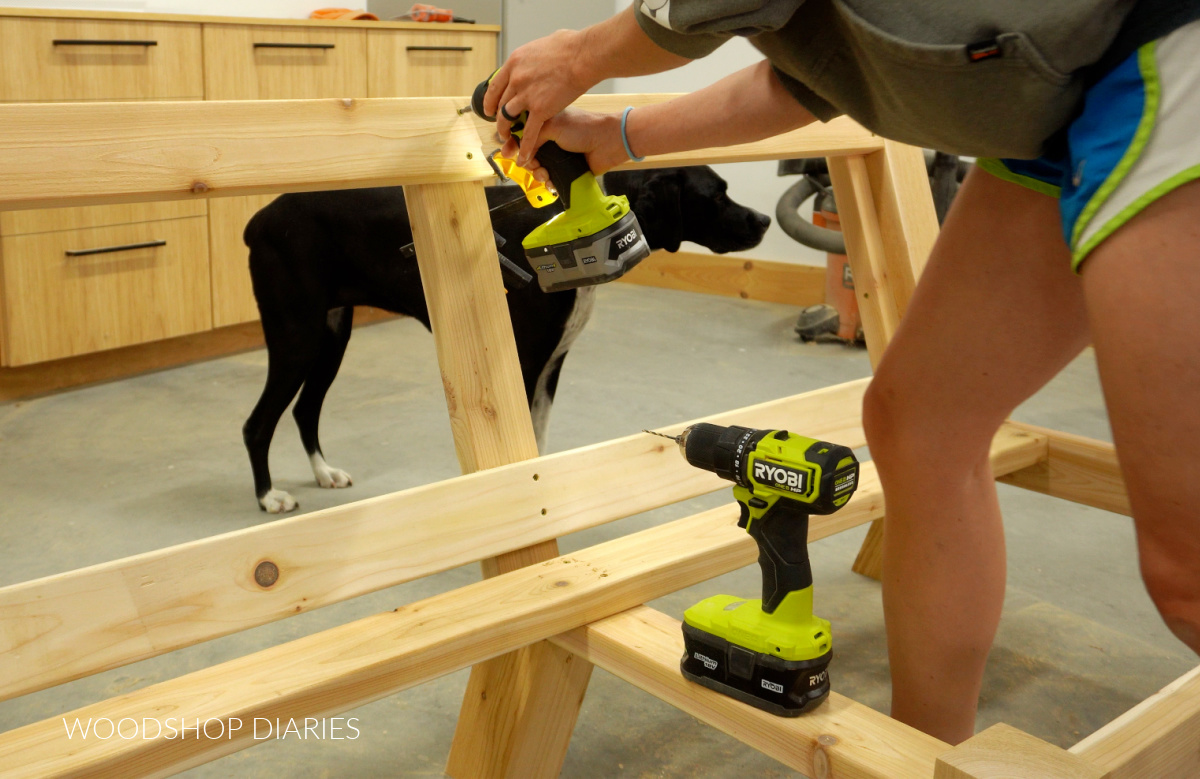
Step 3: Build the Chaise Part of the Sectional
After the side frames were made for both parts, I focused on building the chaise lounge first. Essentially, the chaise is a really deep chair.
So I cut and attached two long 2x4s (I cut these long enough for two chair cushions) to run between the 12″ posts from step 2 and the back legs.
I attached these using pocket holes and screws, then added a few extra screws through the arm rest side.
Note that when I attached the 2×4 to the angled back leg that I didn’t drive the screws into the end grain.
Then I tied these two sides together with a 2×4 across the front (between the front legs) and a seat slat toward the back.
For the back slats, you could install these using pocket holes and screws, but I didn’t want to see the pocket holes, so instead, I glued and screwed 2x2s along the back posts.
Then, I could attach the back slats to those. You still see the screw heads, but it’s much less obvious than large pocket holes.
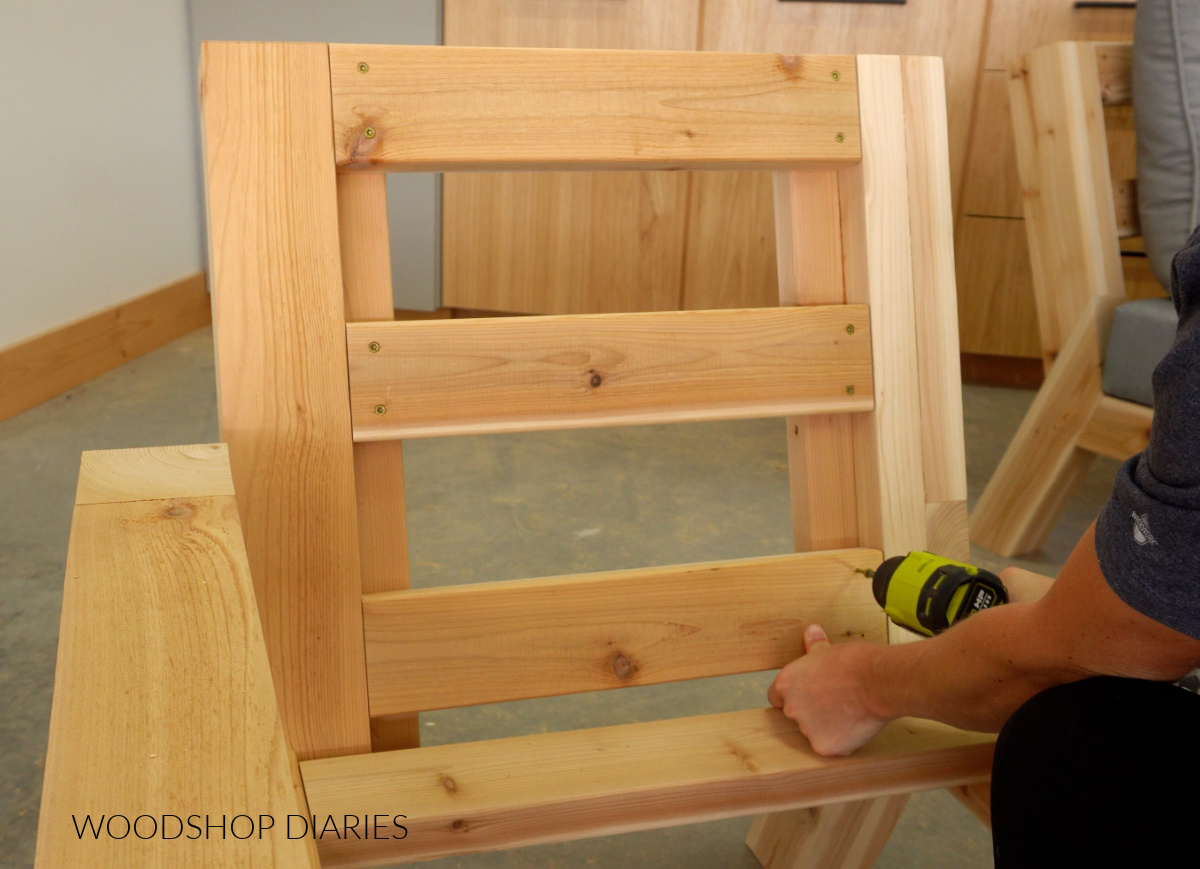
I finished up the chaise by adding the remaining seat slats using pocket holes and screws.
Step 4: Build the Sofa Part of the Sectional
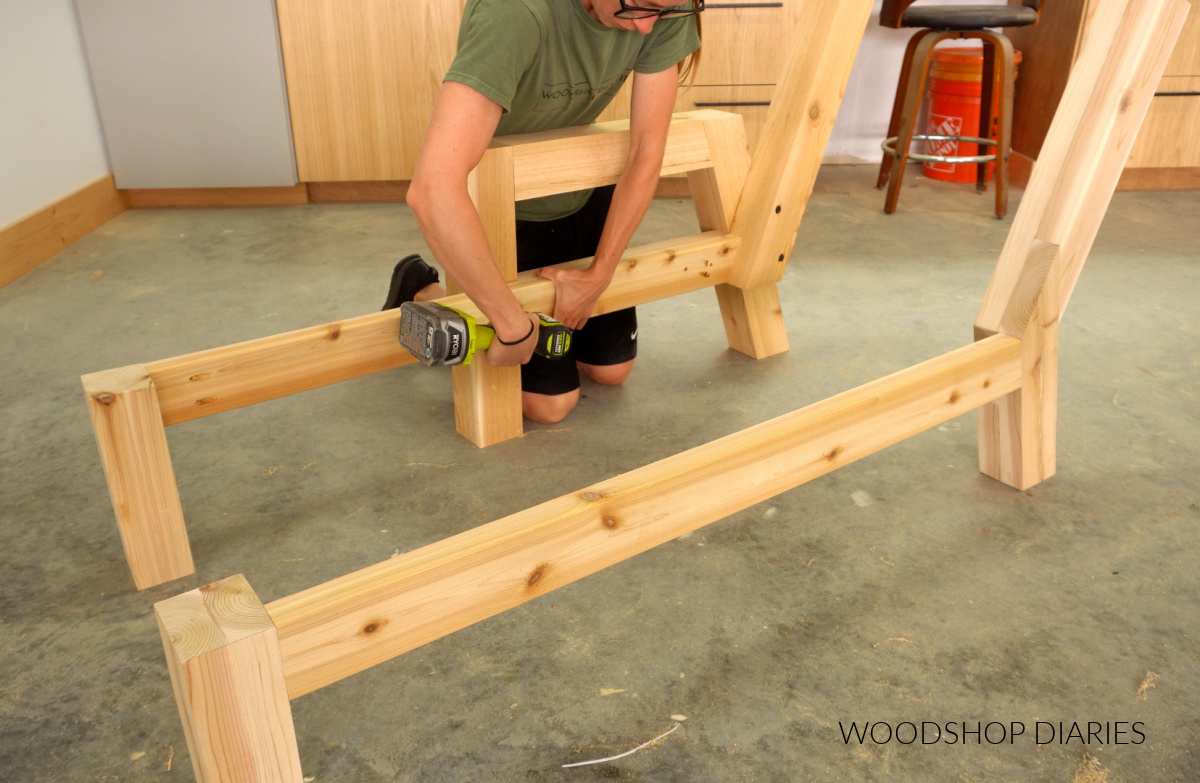
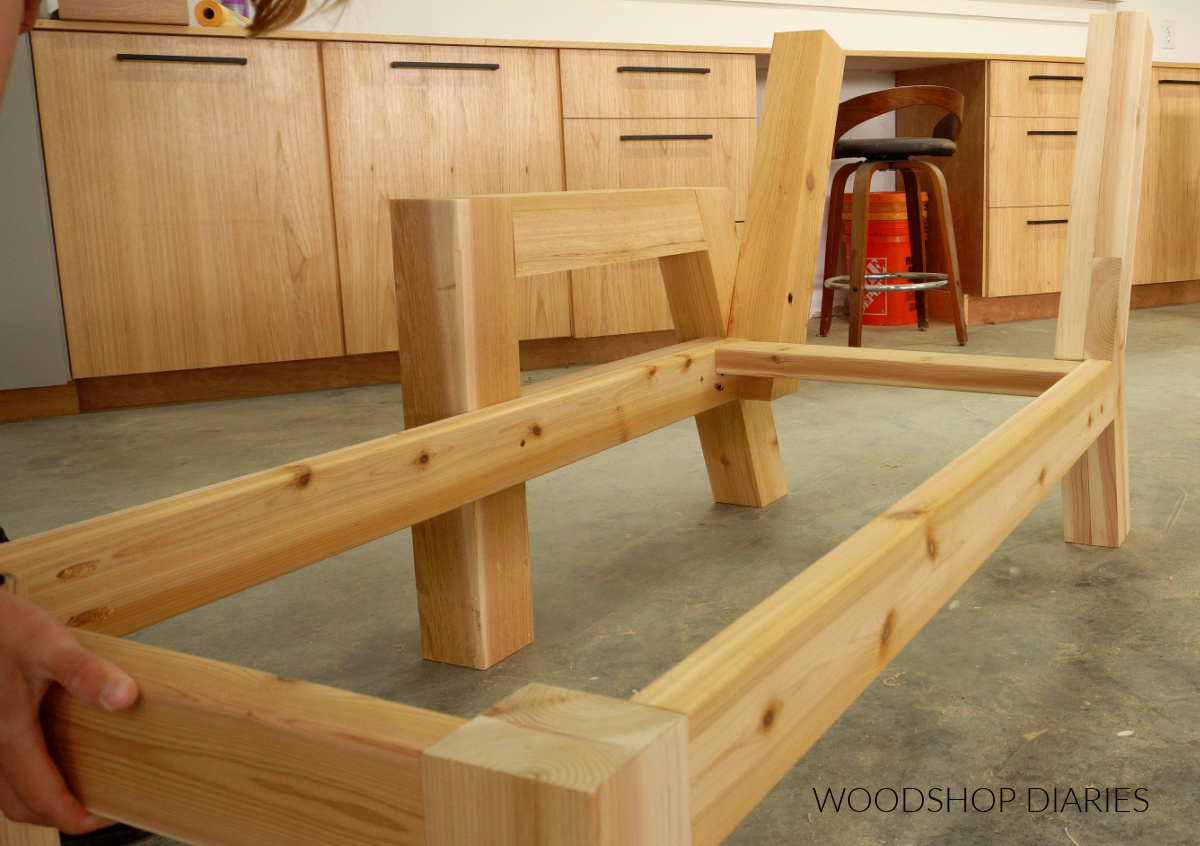
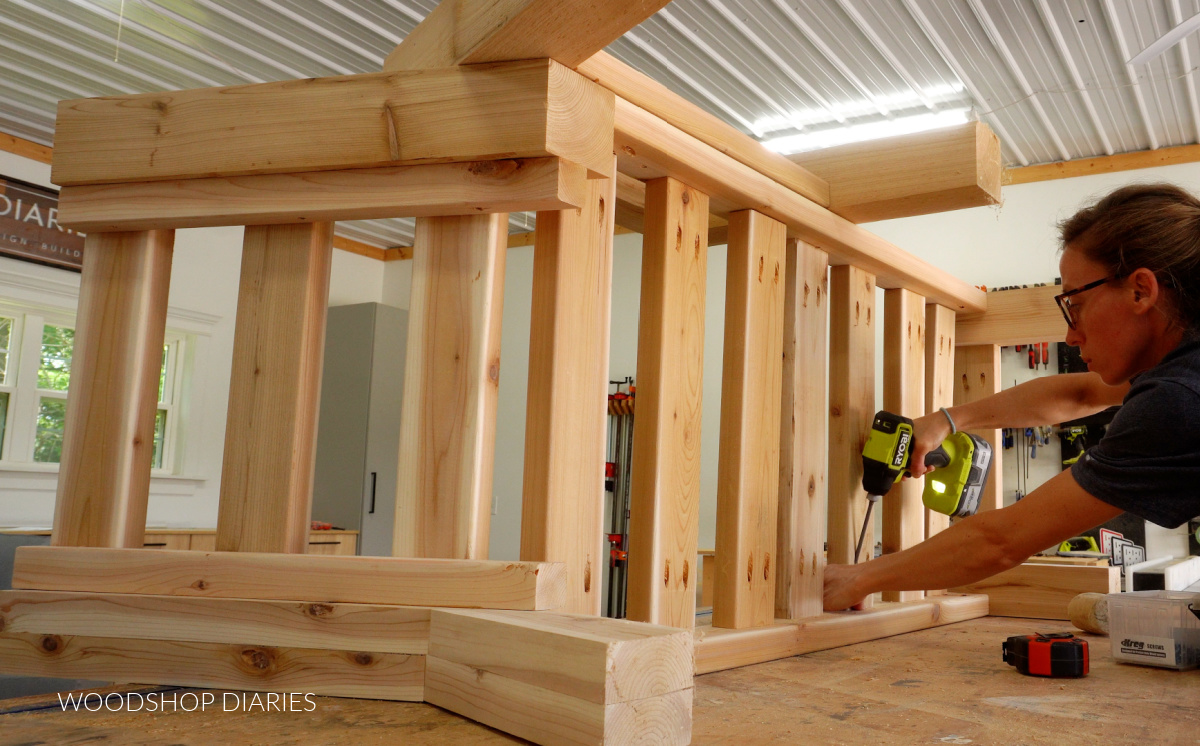
Now I needed to switch gears and focus on building the sofa part. This is very similar to assembling the chaise, only instead of the seat being deep, it’s wide.
I cut and installed a short seat support to run between the other angled back leg and 12″ tall post from step 2. This will be the left side of the sofa.
The span of the 3 seater frame was too wide to go without a center support. So I attached two equal length 2x4s to a 4×4 post to run between the two sides.
Then I tied the two side frames together at the back by adding the back seat slat with pocket holes and screws (from the bottom side) and the top and bottom back slats.
The reason I attached these first is that it makes adding the middle support brace much easier. I show how this helps in the video here.
The back slats are attached to 2x2s just like I did for the chaise in step 3, but if you wanted to use pocket holes instead, that would work as well.
Just like for the outdoor sofa build, I assembled a middle support brace by attaching two 2x4s together–one for the bottom and one for the back.
Then, I glued and screwed this to a short back leg like shown above.
Now this support can simply slide in behind the back slats and run underneath the seat slats. It attaches to the front 4×4 center post using pocket holes and screws so that it’s 1 ½″ down from the top.
Then I screwed it to the slats.
Now all that’s left is adding the remaining seat slats on the seat and the back.
Prefer to print? Grab the printable building plans for this chaise sectional here.
Step 5: Seal and Finish
Now both parts of the sectional are built and ALMOST ready to go. But they still need to be finished.
Cedar can be left outside unfinished, but it will quickly turn gray and weathered looking, especially if exposed to a lot of sunlight.
So I sealed both pieces with a coat of Cabot Australian Timber Oil in Honey Teak. I LOVE this finish and it’s super easy to apply.
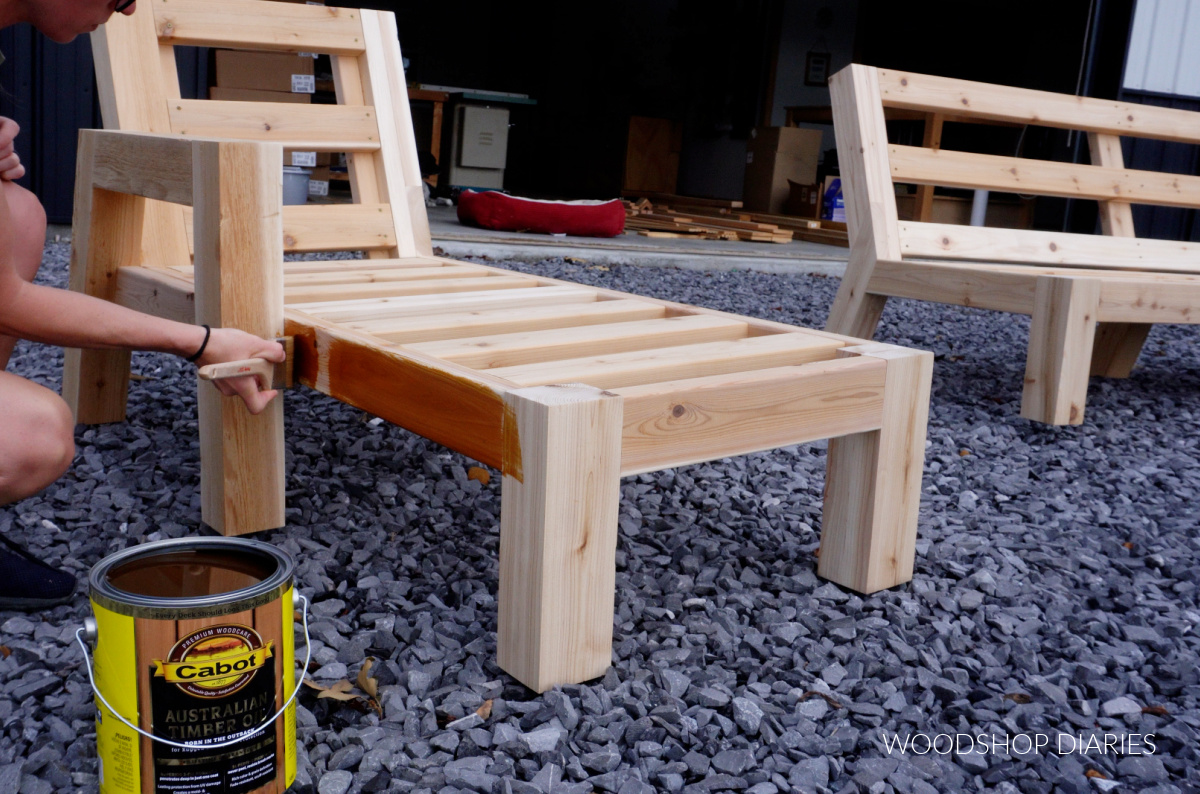
Of course, there are TONS of great outdoor stain and sealant (or paint if you want that instead!) options and colors so feel free to pick your favorite. Cabot and Olympic are great brands and are available at the big box stores.
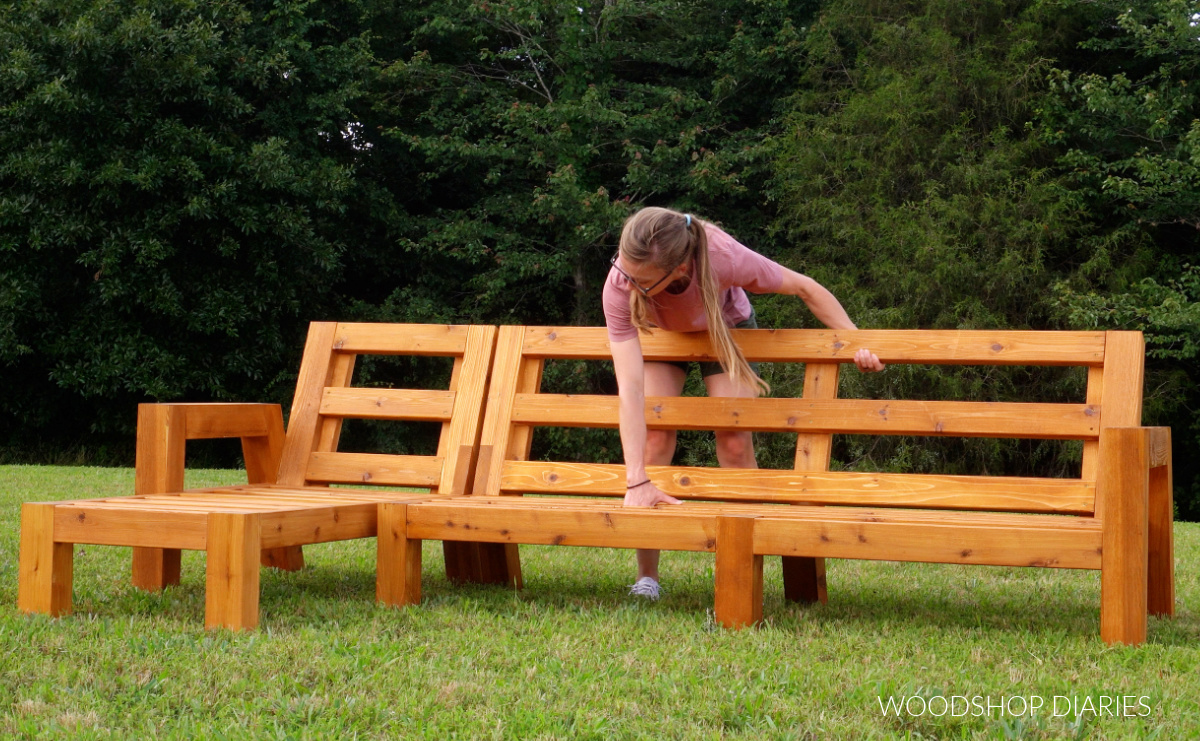
Step 6: Piece Sectional Together
Once finished, these pieces are ready to piece together and put to use. Make sure to screw the two pieces together once you get them where you want them so they don’t scoot apart during use.
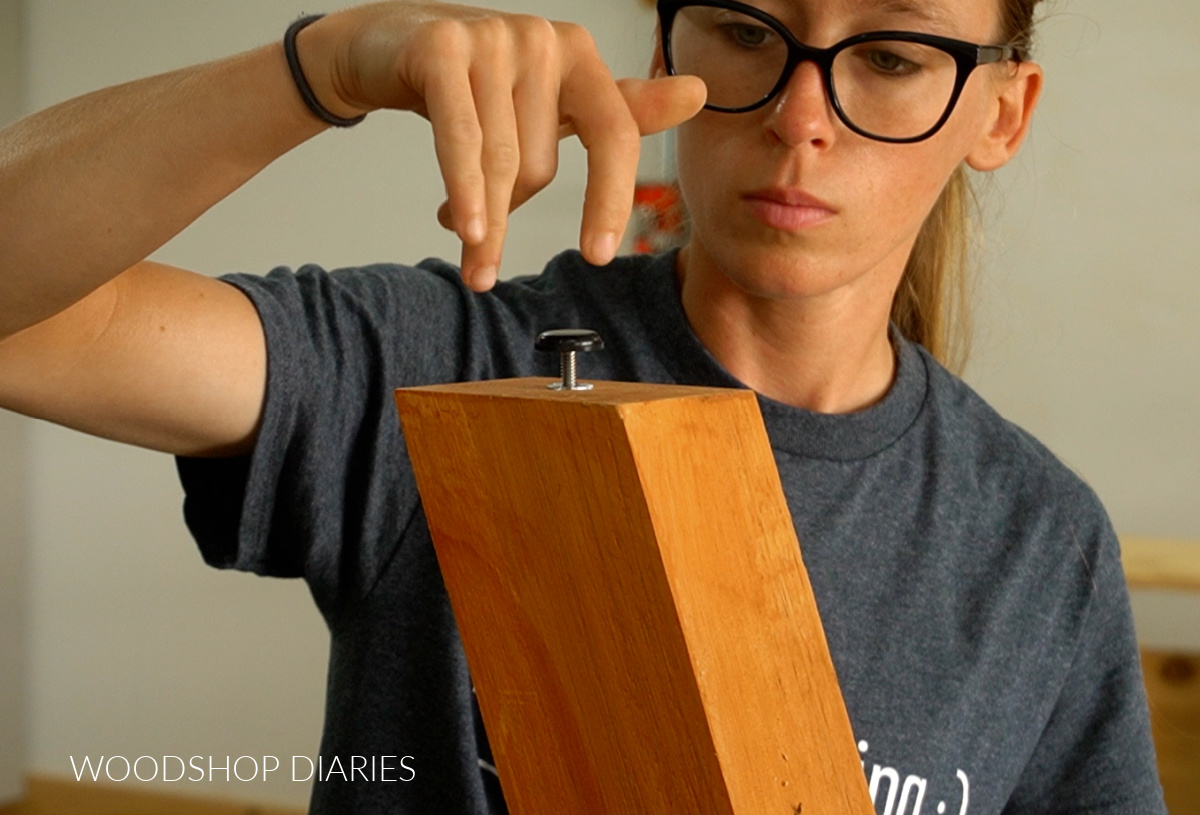
If placing on an uneven surface, consider adding some simple foot levelers to the legs.
These are the levelers I used and I simply drilled a 5/16″ hole into the center of each foot, tapped the insert into the hole and screwed the foot in.
Once the cushions were in place, this chaise sectional was the perfect place to rest after the build haha.
Looking for more Outdoor DIYs?
Looking more for outdoor DIY projects? Here are a few of my personal favorites you might enjoy browsing:
If you enjoyed this project and want to save it for later, don’t forget to pin it or share to your favorite social channel!
Until next time, friends, happy building!