In this post, I’m showing you how to cut angles on a miter saw for your DIY woodworking projects.
I’ll also show you how to better understand the miter saw settings and how to confidently add angled elements into your next project.
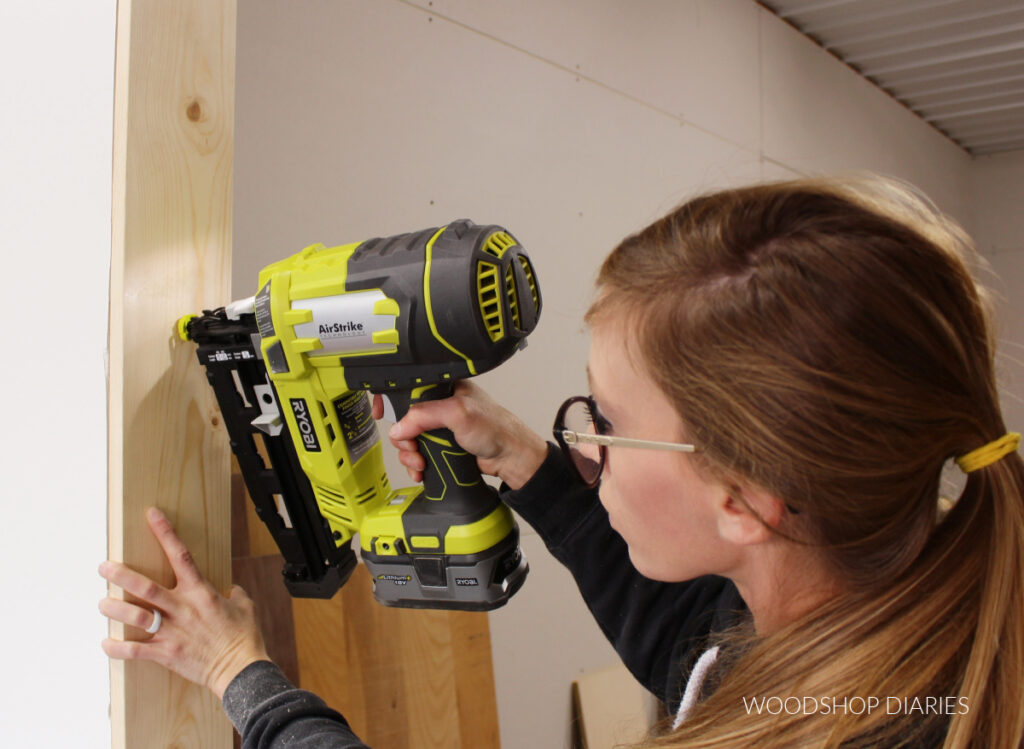
A miter saw is one of the most versatile and most used tools in many woodworking shops. It’s one of the top 5 tools I recommend starting with and is incredibly valuable for quick and accurate cuts.
*This post contains affiliate links. See website policies.
What is a Miter Saw?
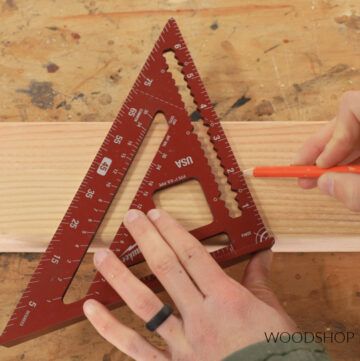
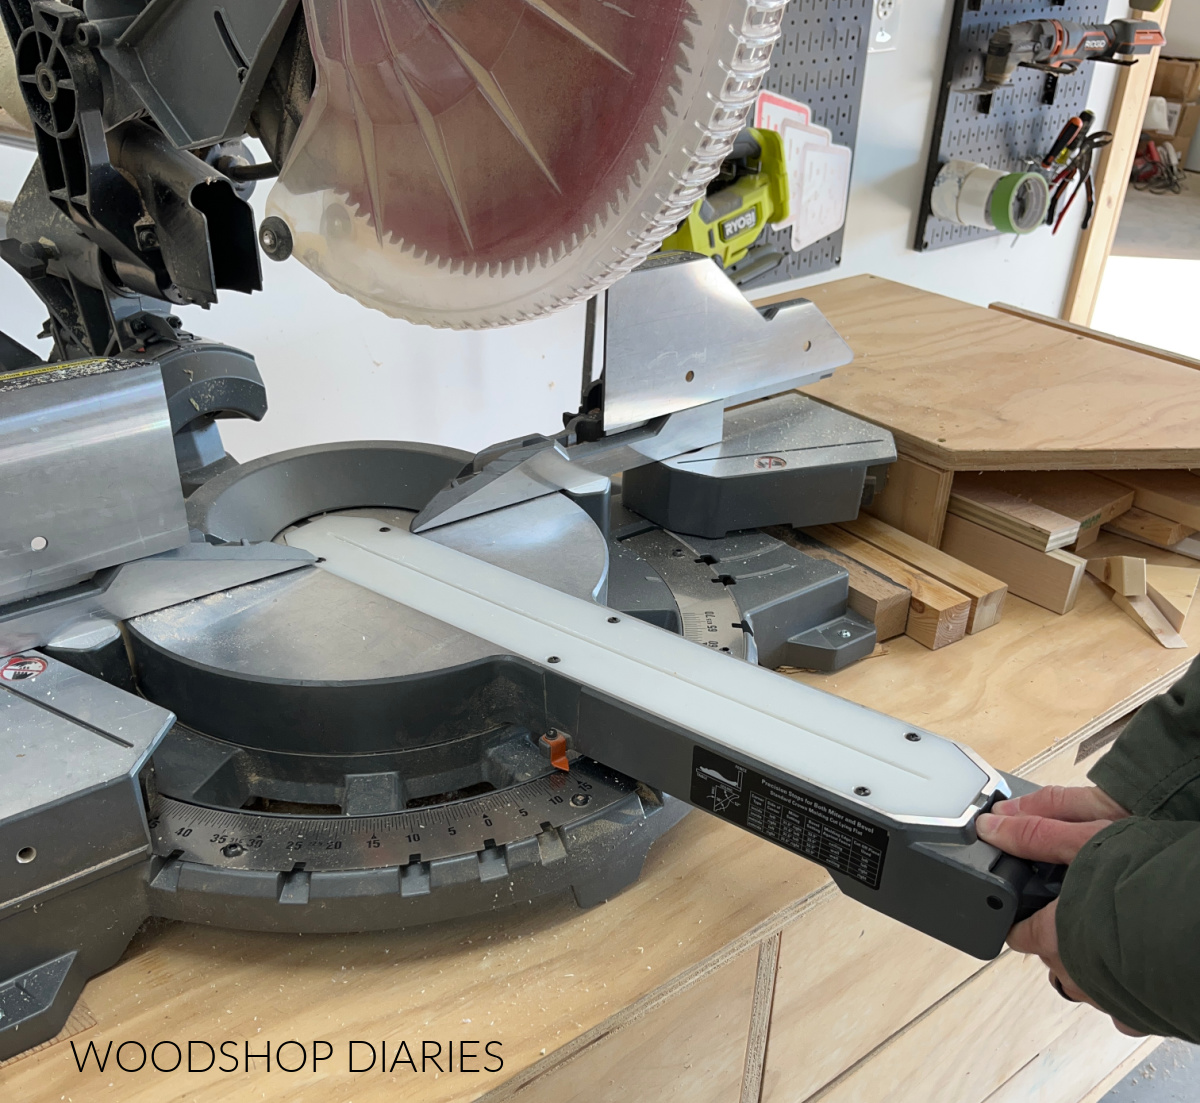
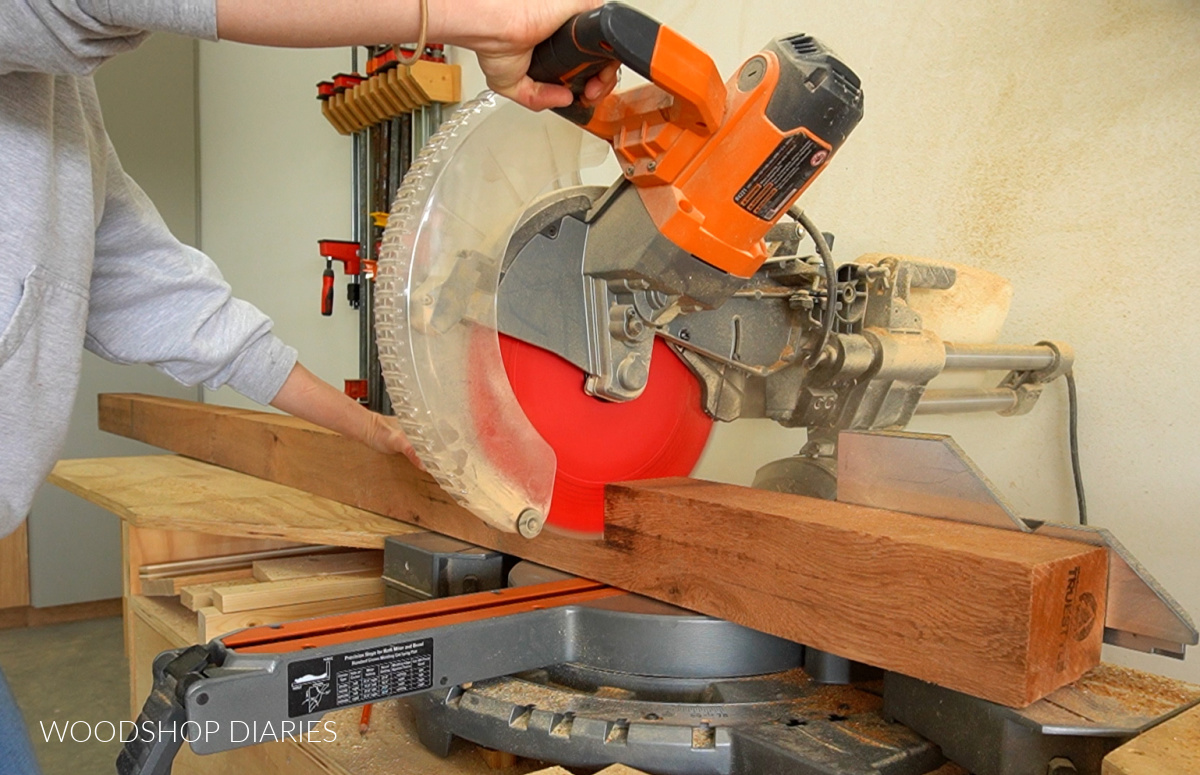
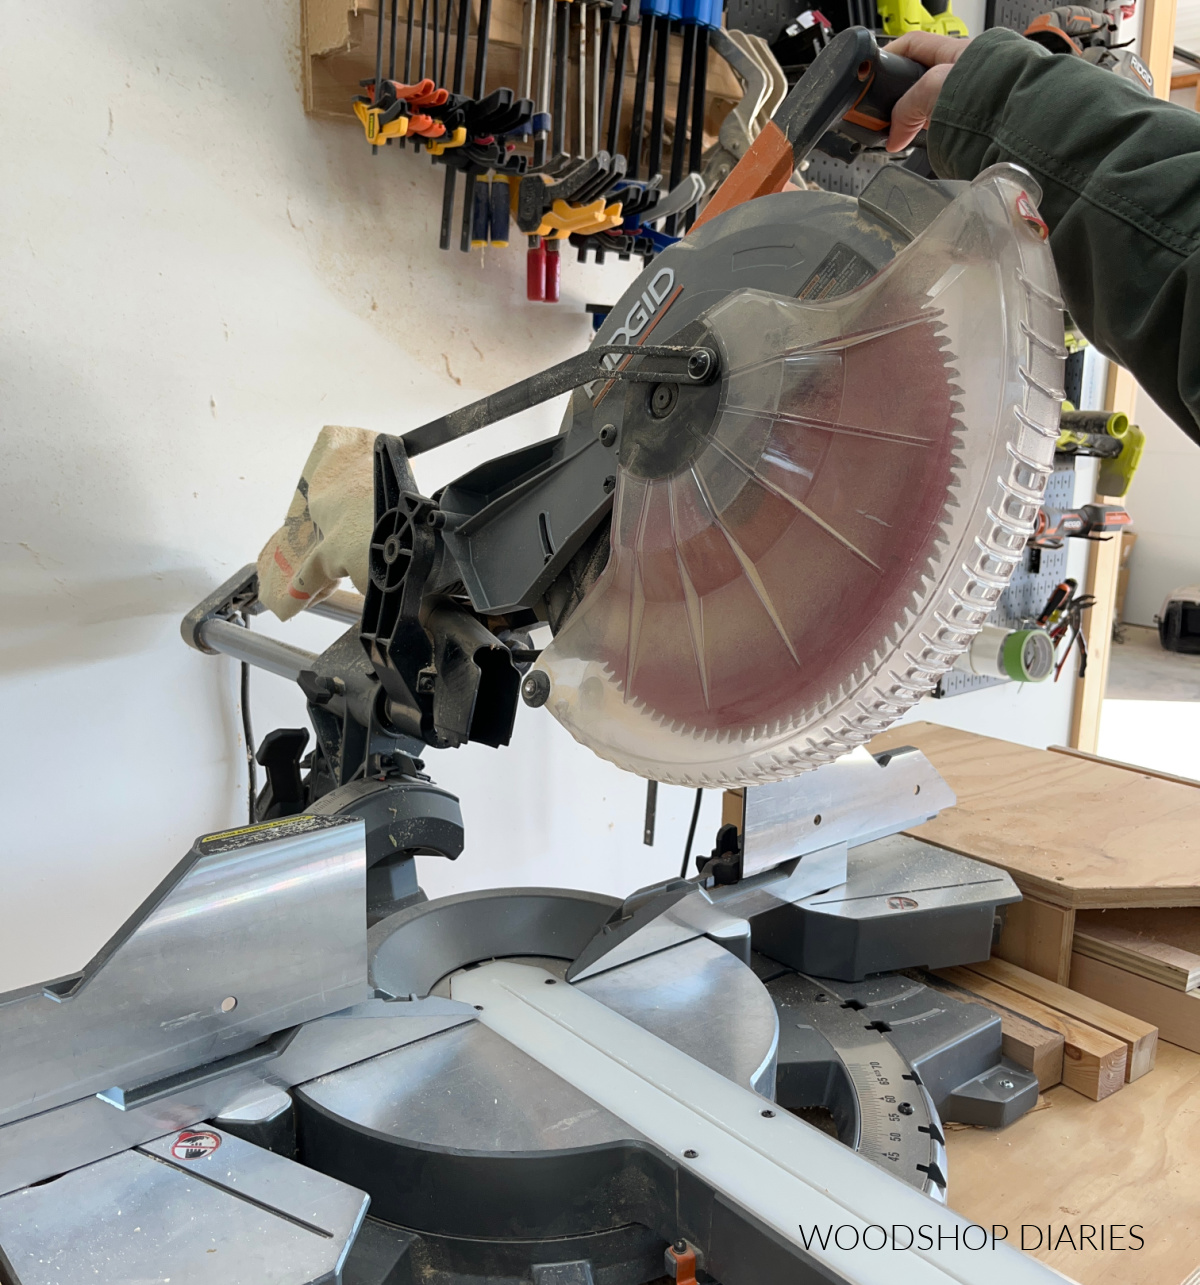
A miter saw is a saw that allows you to make quick and accurate cross cuts at varying angles. To cut, you place the board against the saw’s back plate and lower the blade to cut across it.

Some miter saws slide along a rail (like the one shown above) to allow a greater cutting capacity for wider boards.
Most miter saws are compound miter saws meaning that they can cut either miters or bevels or both at the same time. Common miter saw sizes are 10″ and 12″ and these refer to the blade diameter.
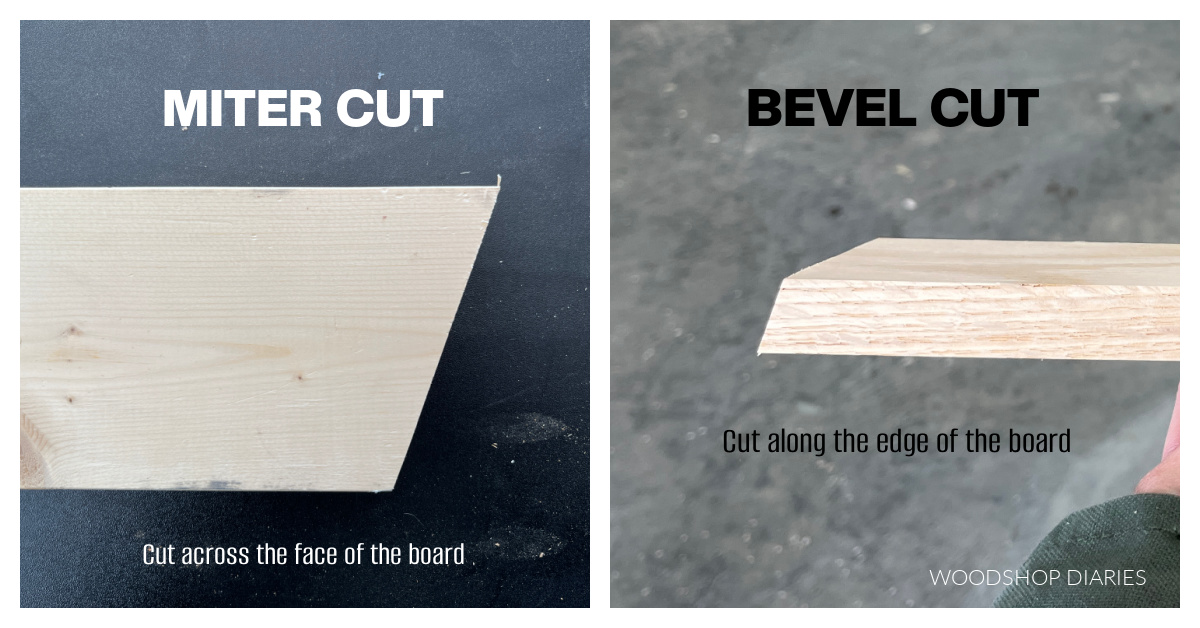
Miter vs Bevel Cuts
In short, miter cuts are cuts across the face of the board and bevel cuts are cuts along the edge of a board.
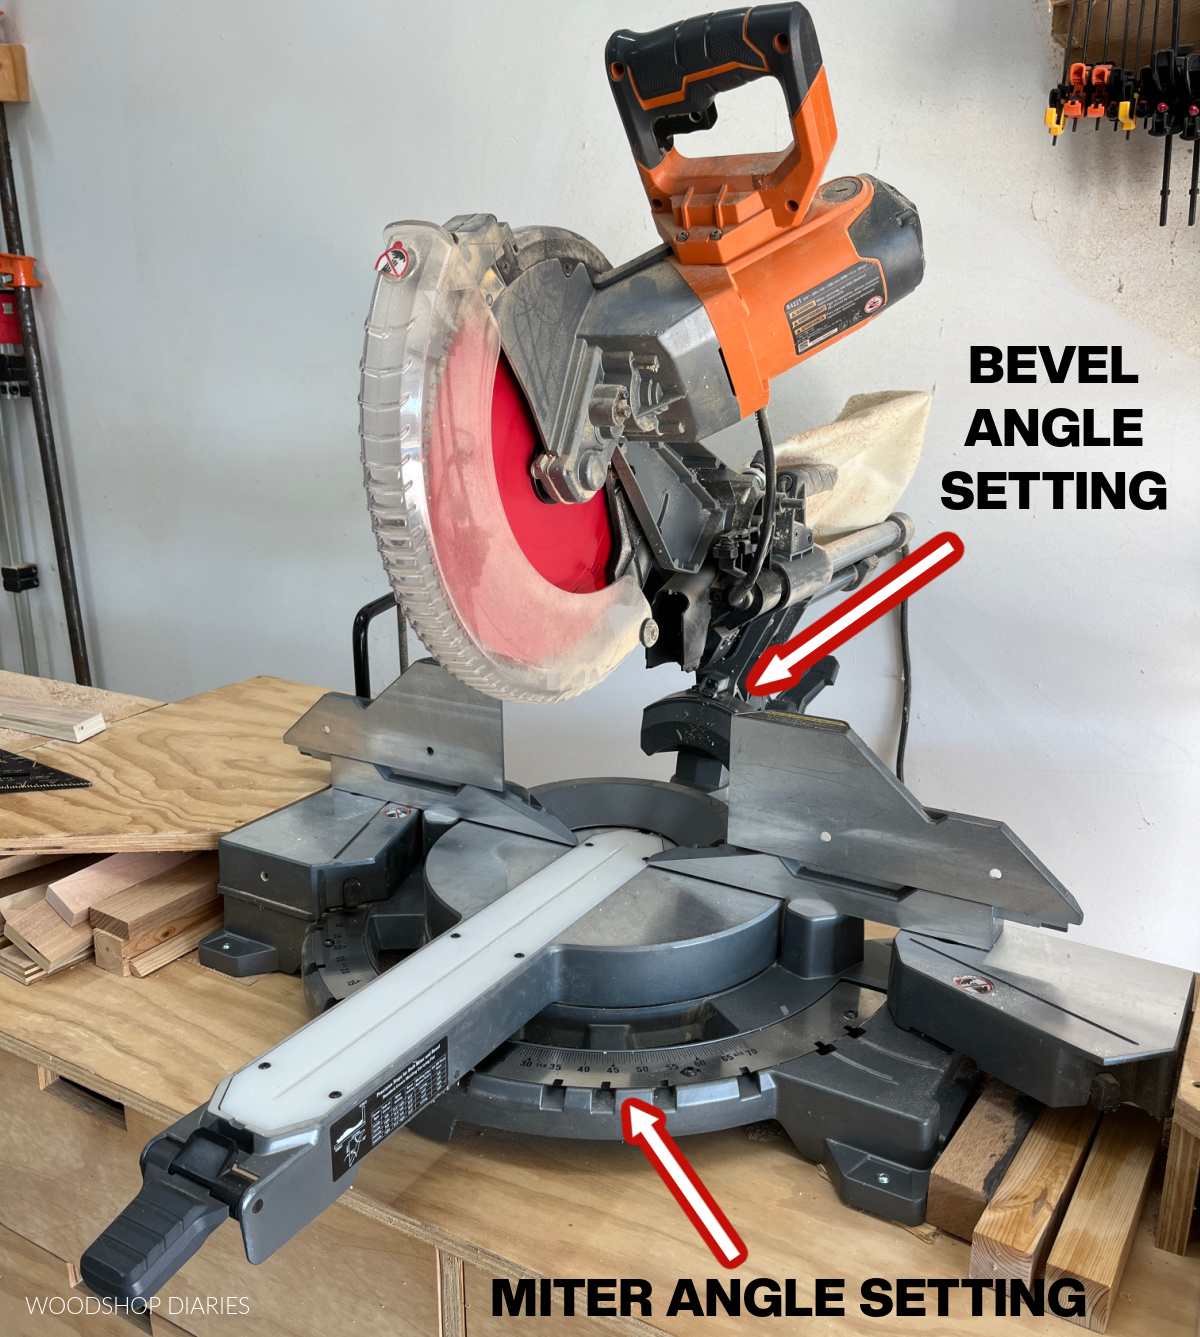
Typically you make miter cuts by swiveling the saw base left or right and you make bevel cuts by tilting the saw’s head at the back.
Understanding Your Miter Saw Angle Settings
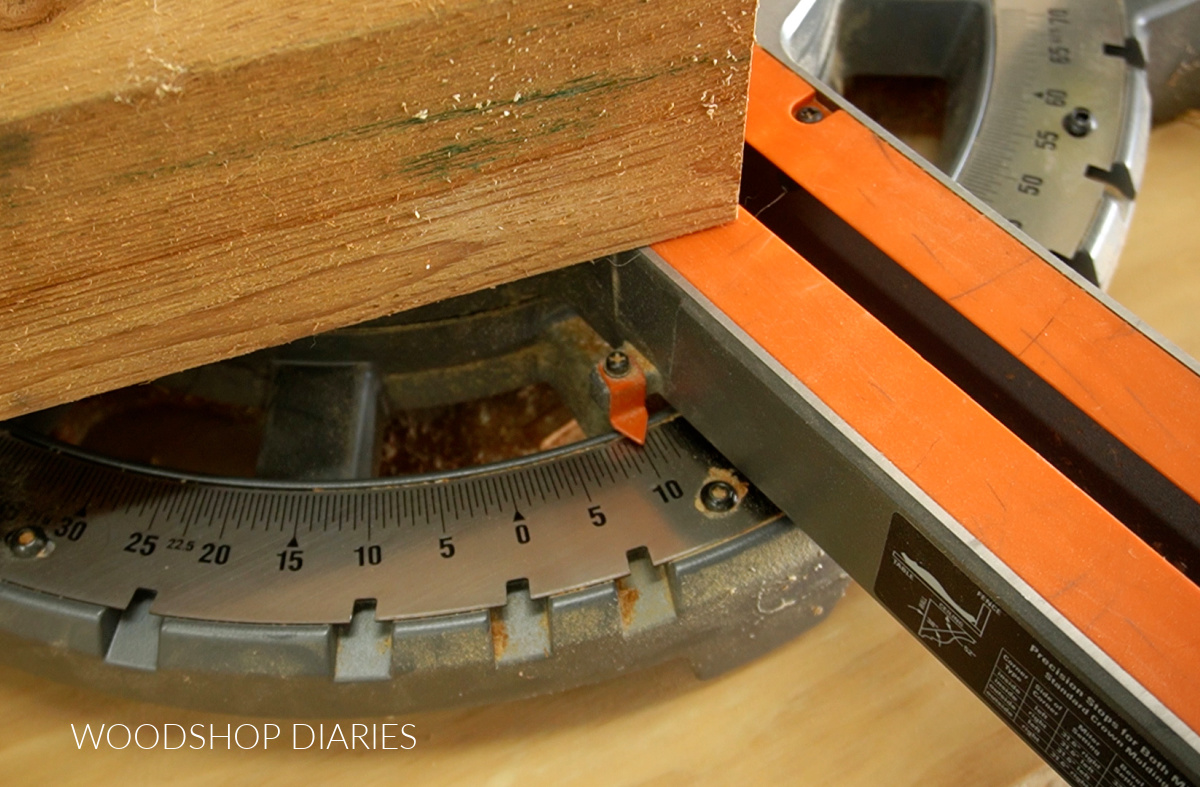
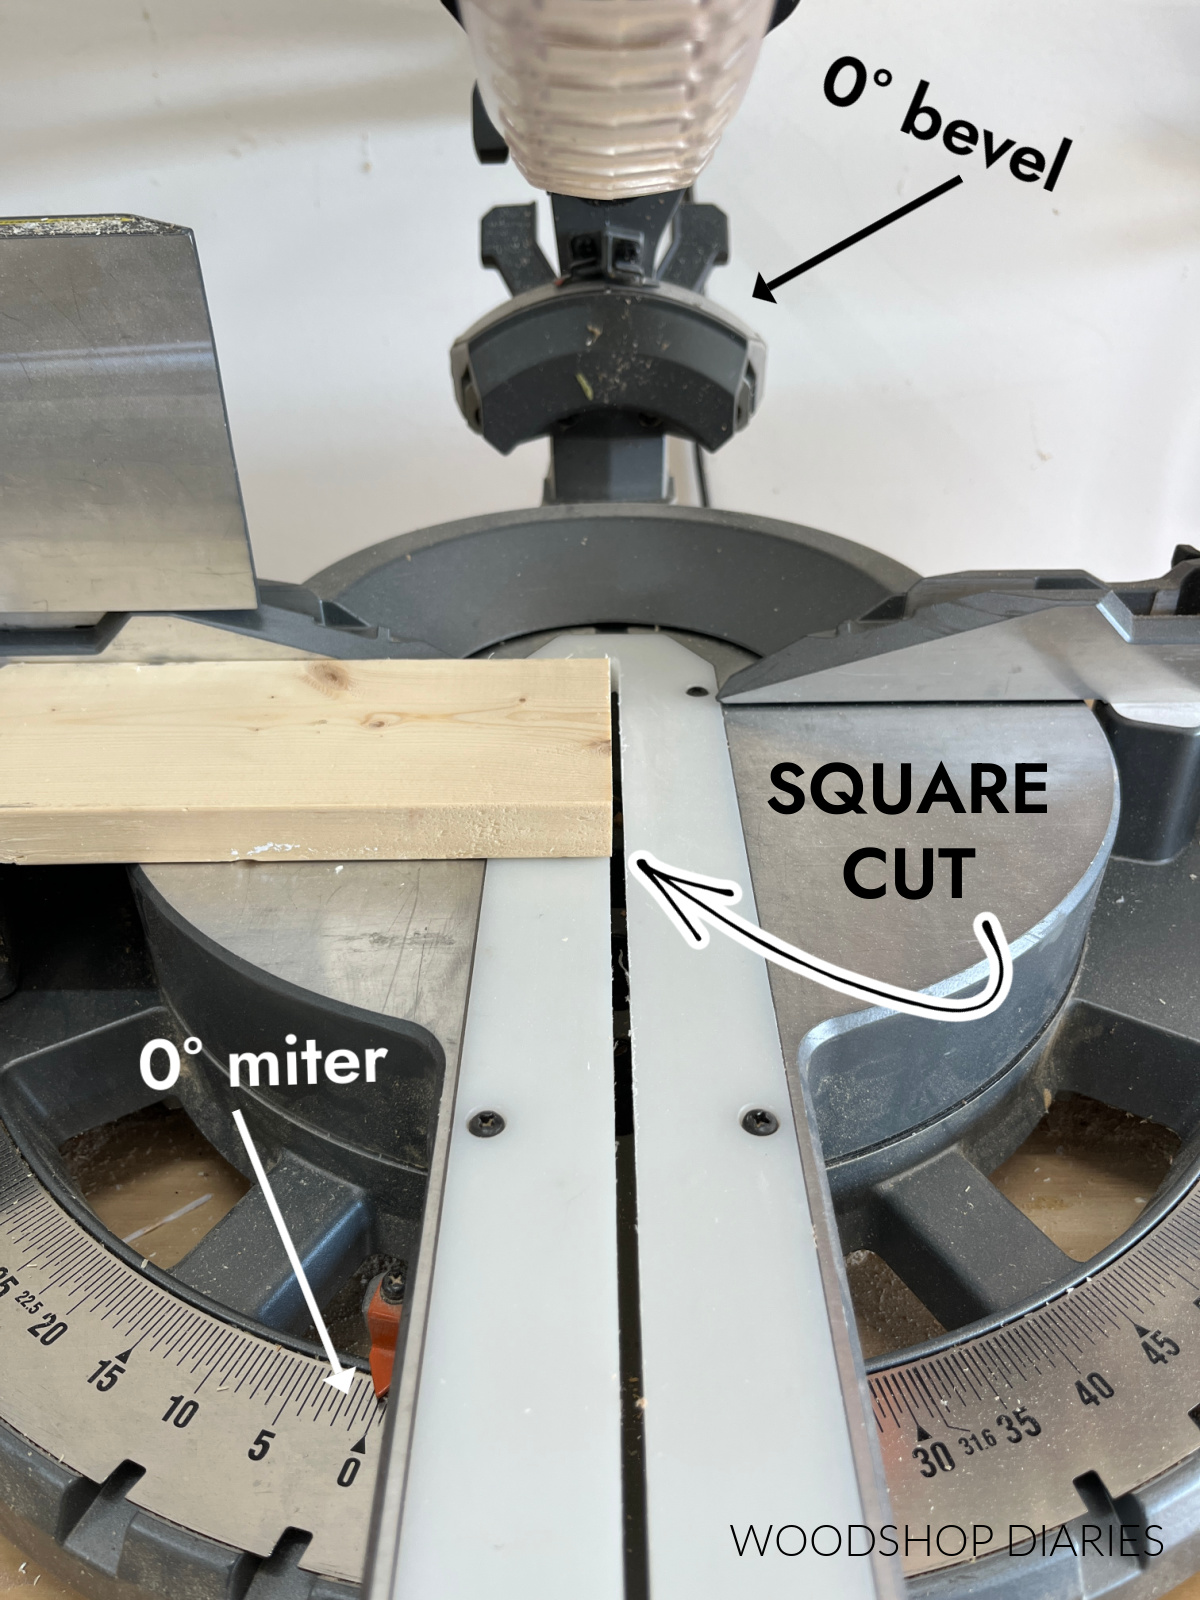
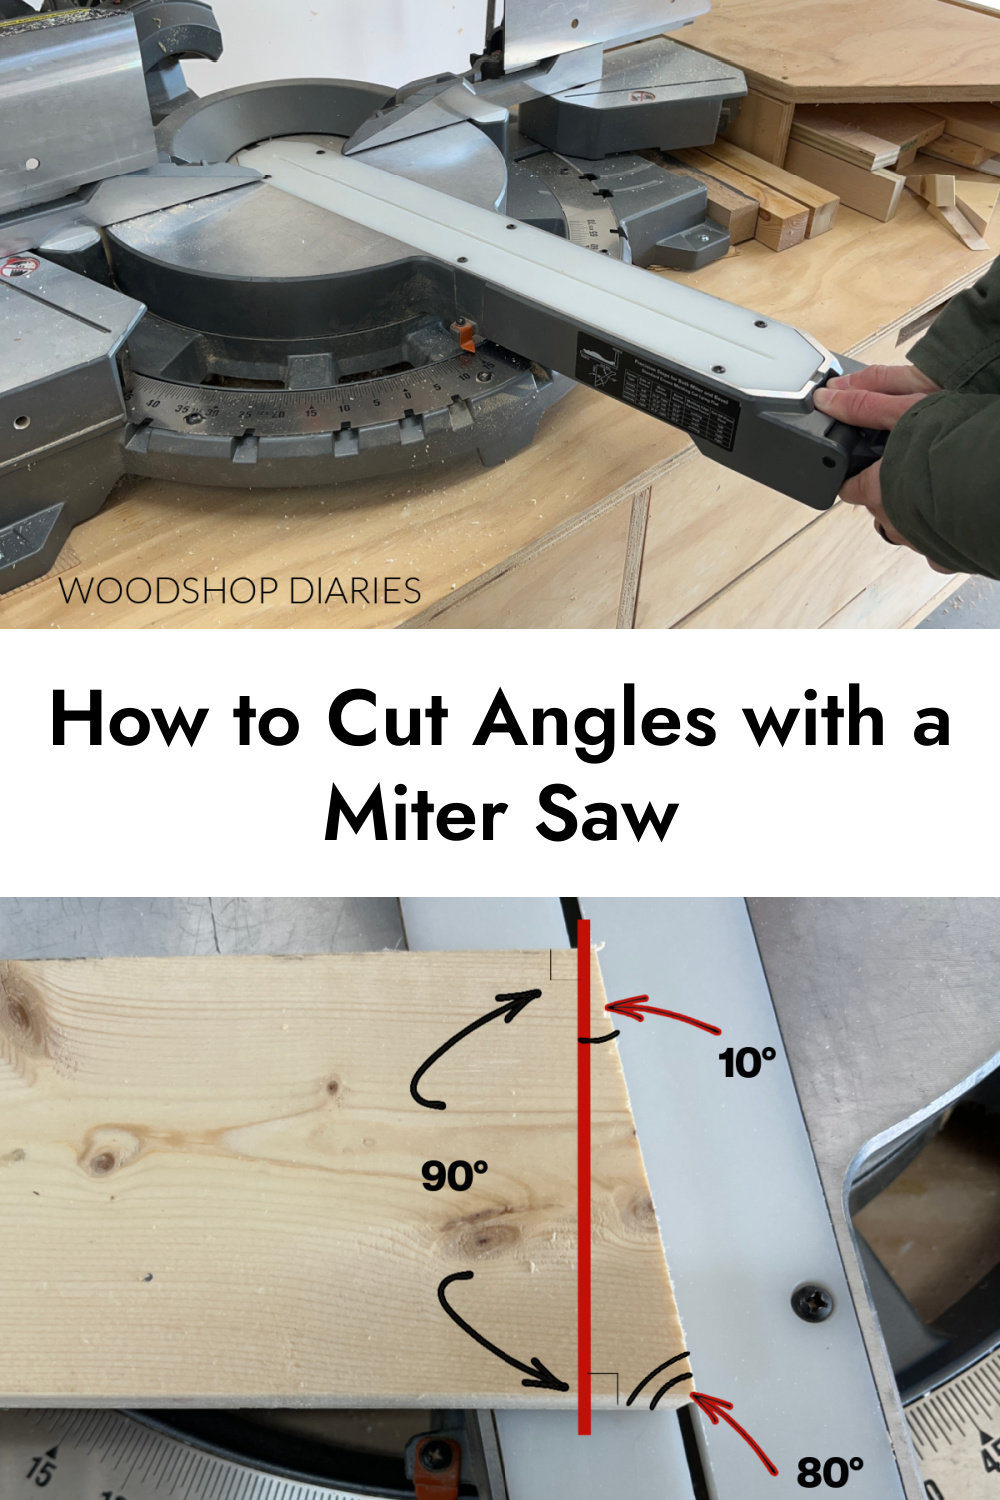
The confusing thing about miter saws is that the 0° mark is actually a 90° square cut.
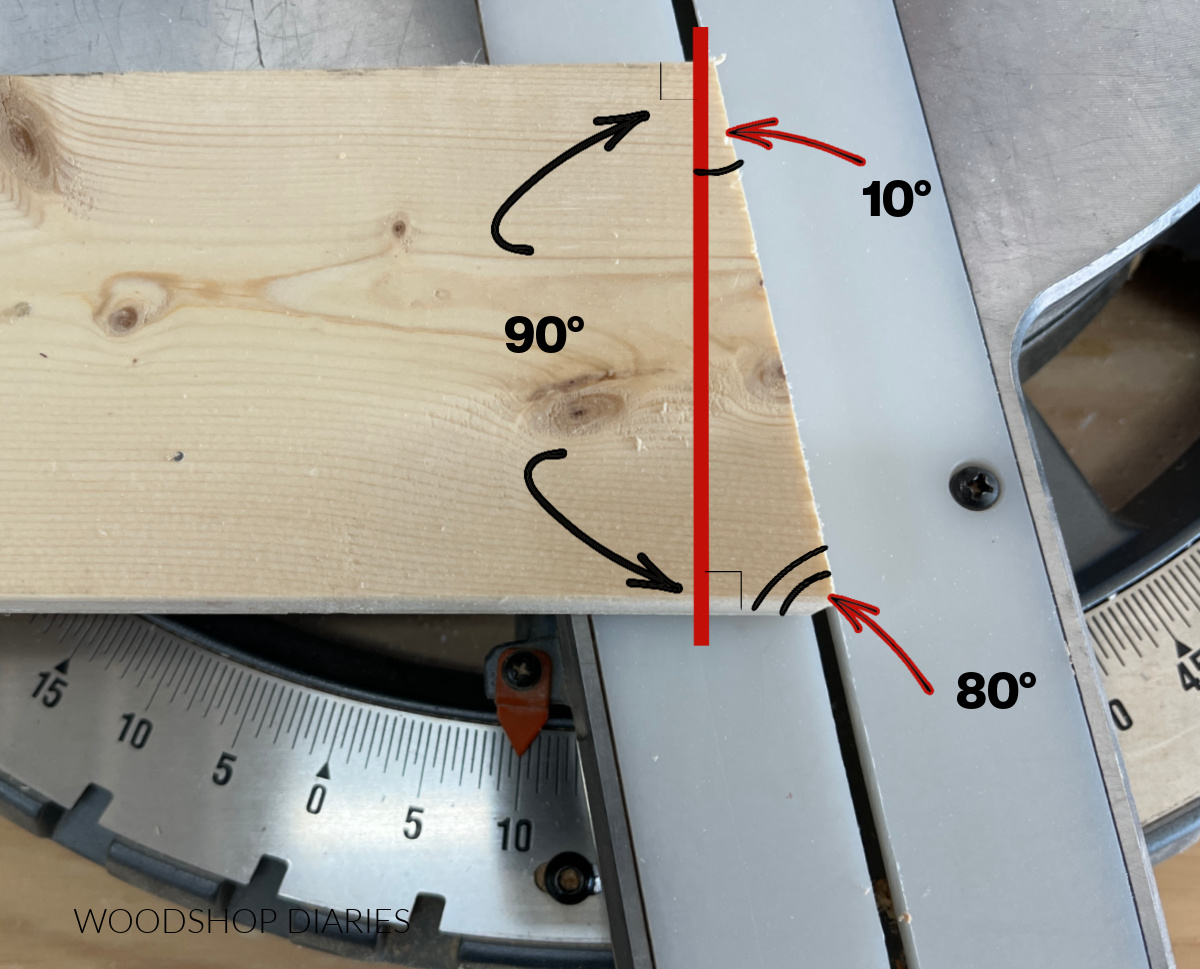
So, for example, if you set your saw’s miter angle to 10°, it’s actually 10° OFF SQUARE. The angles on the board aren’t 10°.
To give you a visual, here’s what you’re actually cutting. One angle is 90° + 10° = 100°. And the other angle is 90° – 10° = 80°.
This may seem kind of odd at first, but it’s not too bad once you get used to it. I’ll share a real life example at the end of the post.
Are DIY projects your thing? Sign up for our newsletter for priority access to the latest projects and build plans!
Basic Geometry Overview
I’m a math nerd so I love this stuff, but I know most people don’t, so don’t worry. I won’t bog down this post with math lessons.
But, there are a few key geometry principles that are incredibly helpful to remember when learning how to use a miter saw and working with angles.
Most of these you’ve probably learned already, so this is just a brief refresher and a look at how they apply to real life/woodworking.
What is Parallel vs Perpendicular?
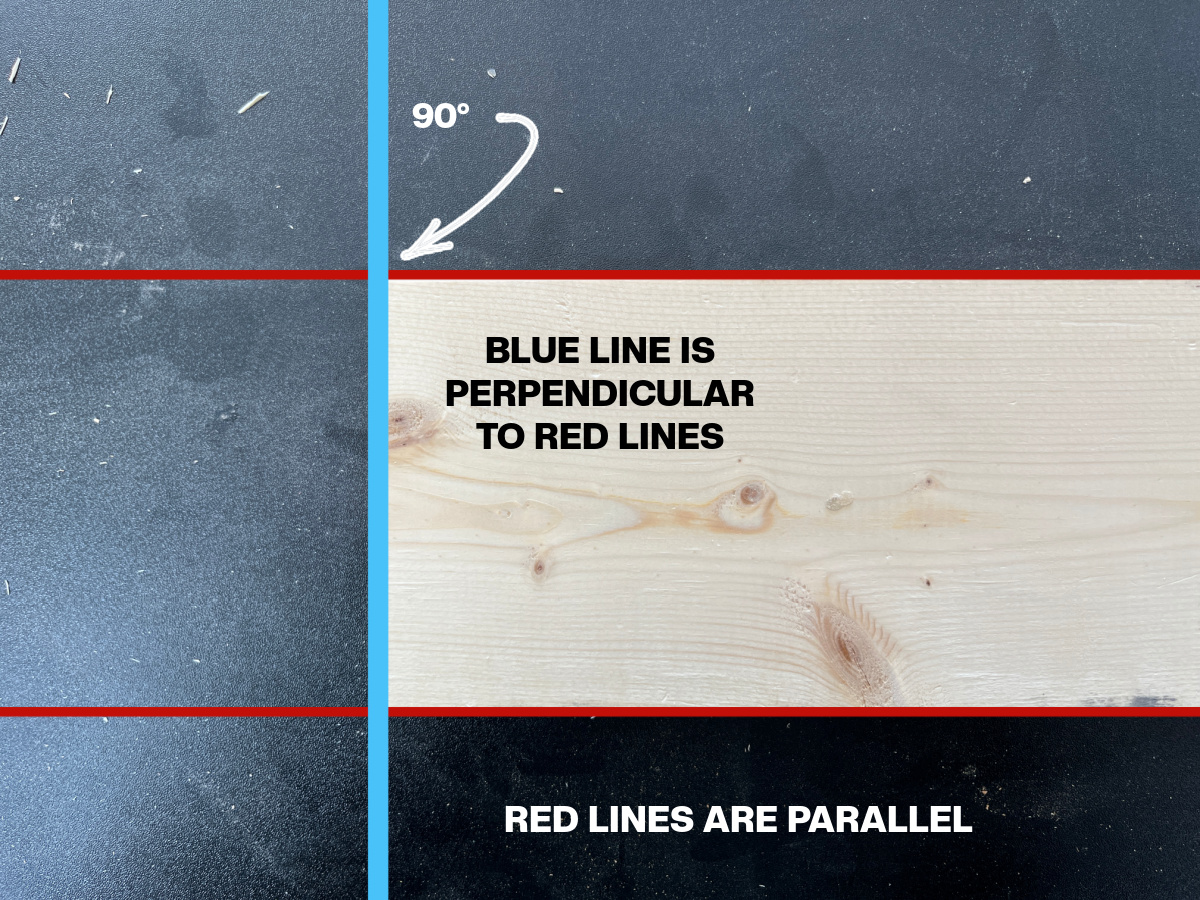
Two lines are parallel if they can go on forever in either direction and never intersect. They will always be equal distance apart–like the two edges of a board.
Two lines are perpendicular if they intersect at a right–or 90° angle.
Straight and Right Angles
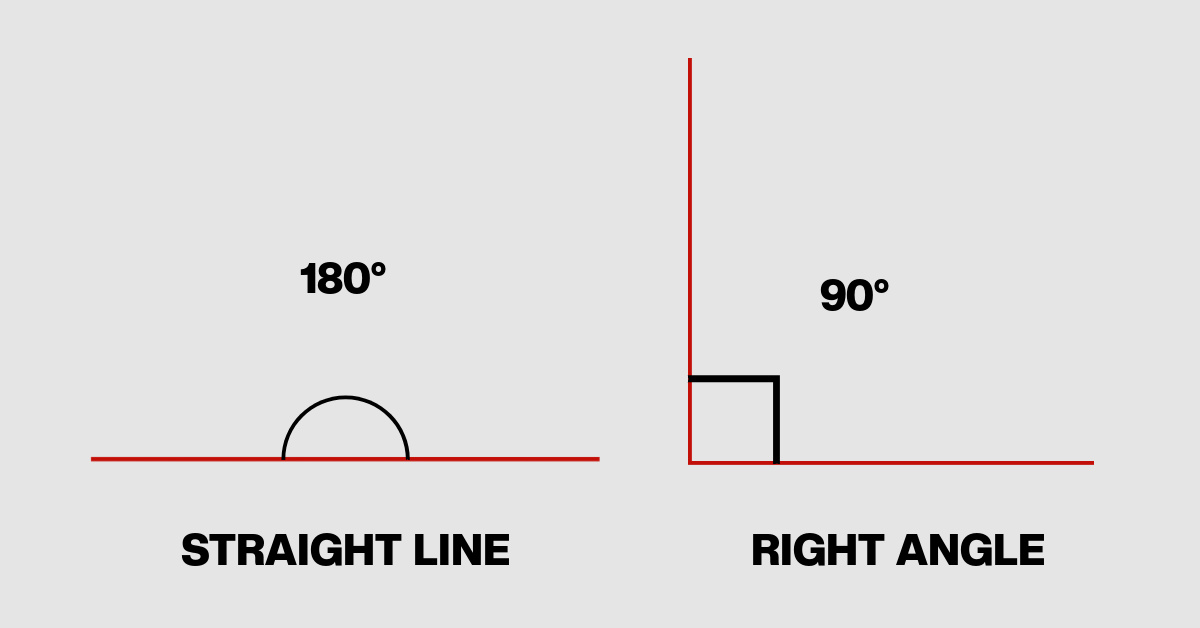
A straight line has 180° and a right angle has 90°.
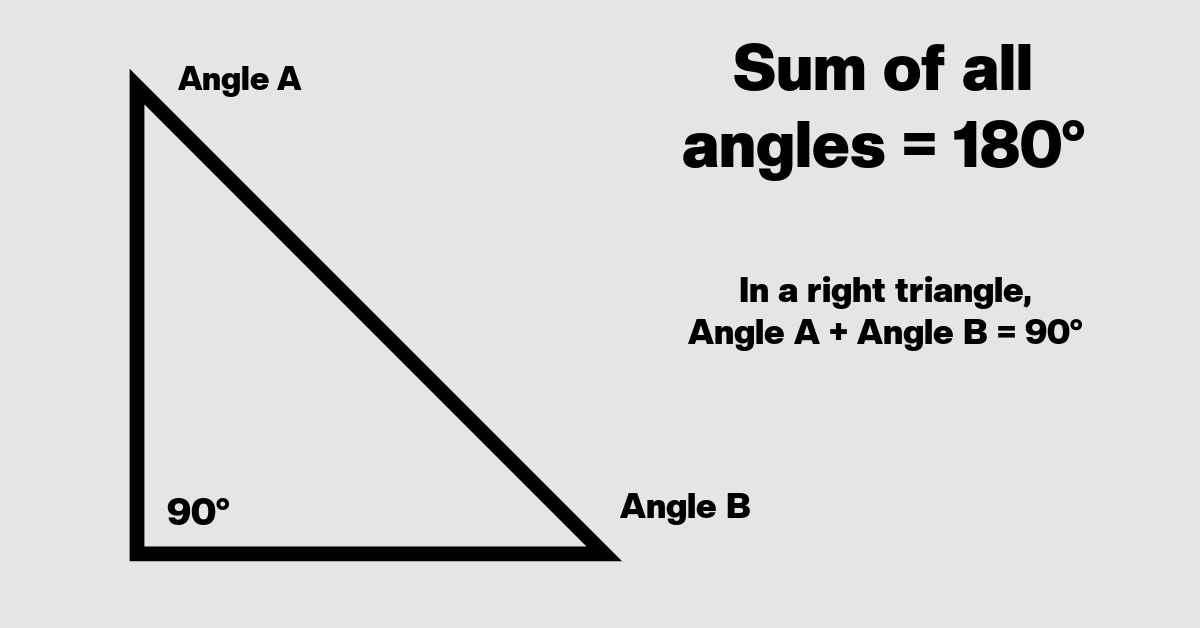
The sum of all angles in a triangle = 180°
In a right triangle, one angle is already 90° (by definition), so the sum of the other two angles must be 90°. This is helpful to remember when making miter cuts because it allows you to easily determine all the board angles after a cut.
Identifying Congruent Angles
This post is a great resource for explaining this in more depth. But congruent angles are angles that have the same number of degrees.
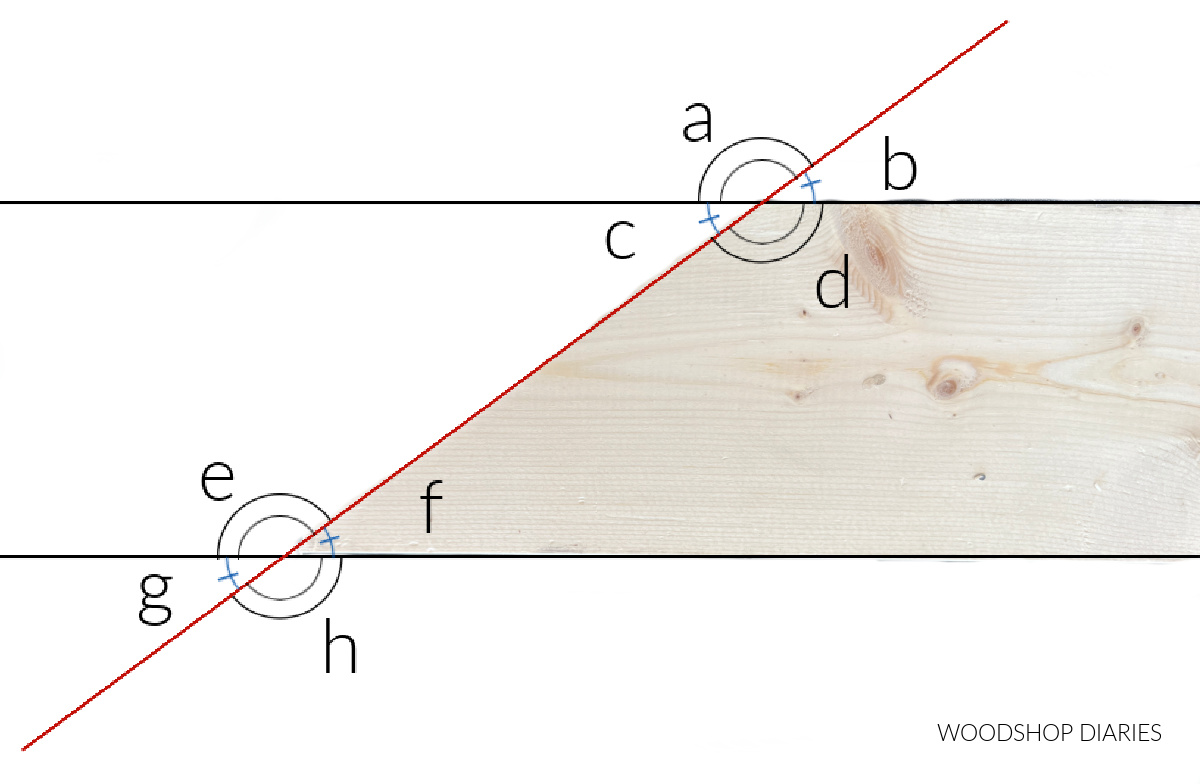
In this example, the black lines are parallel and the red line intersects them both. So we know that angles a, d, e, and h are congruent (they have the same number of degrees) and the angles b, c, f, and g are congruent (they have the same number of degrees).
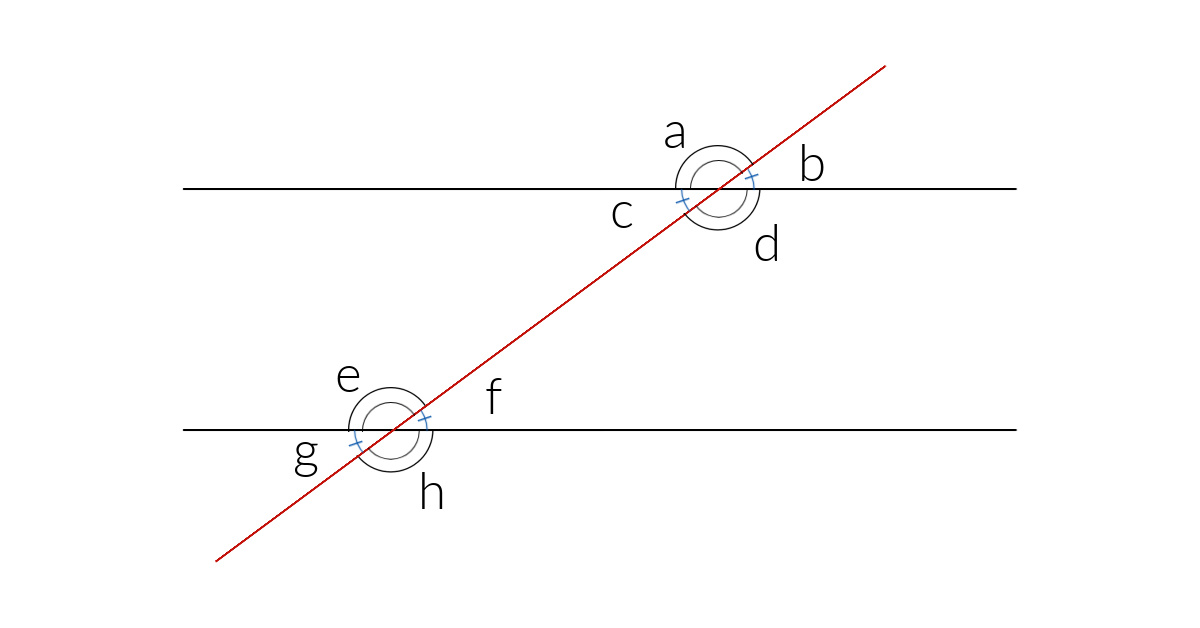
What does this have to do with woodworking? Imagine the black lines are board edges and the red line is a miter cut. If you know what your saw’s miter angle was set to when it was cut, you can determine all the angles in question in this drawing.
How to Make Miter Cuts
To cut a miter angle, pivot your saw’s base left or right along the gauge until the indicator is set at your desired degree. Keep in mind this will be a degree OFF SQUARE.
Then, place your board flat in the saw (make sure both ends of the board are properly supported), and against the back plate.
NOTE: Make sure your hands, clamps, and supports are all out of the way of the blade before cutting.
Bring the blade to full speed before making contact with the wood, then slowly lower the blade to cut across the board. If using a sliding saw, start at the front, then slide it toward the back to cut through.
What if your saw doesn’t cut the angle you need?
Miter saws will vary as far as their miter angle capacity. Some saws go all the way up to 70° and some stop at 45°.
If your miter saw doesn’t go up to the degree you’re wanting to cut, you can use some of the geometry tips above to help you get there.
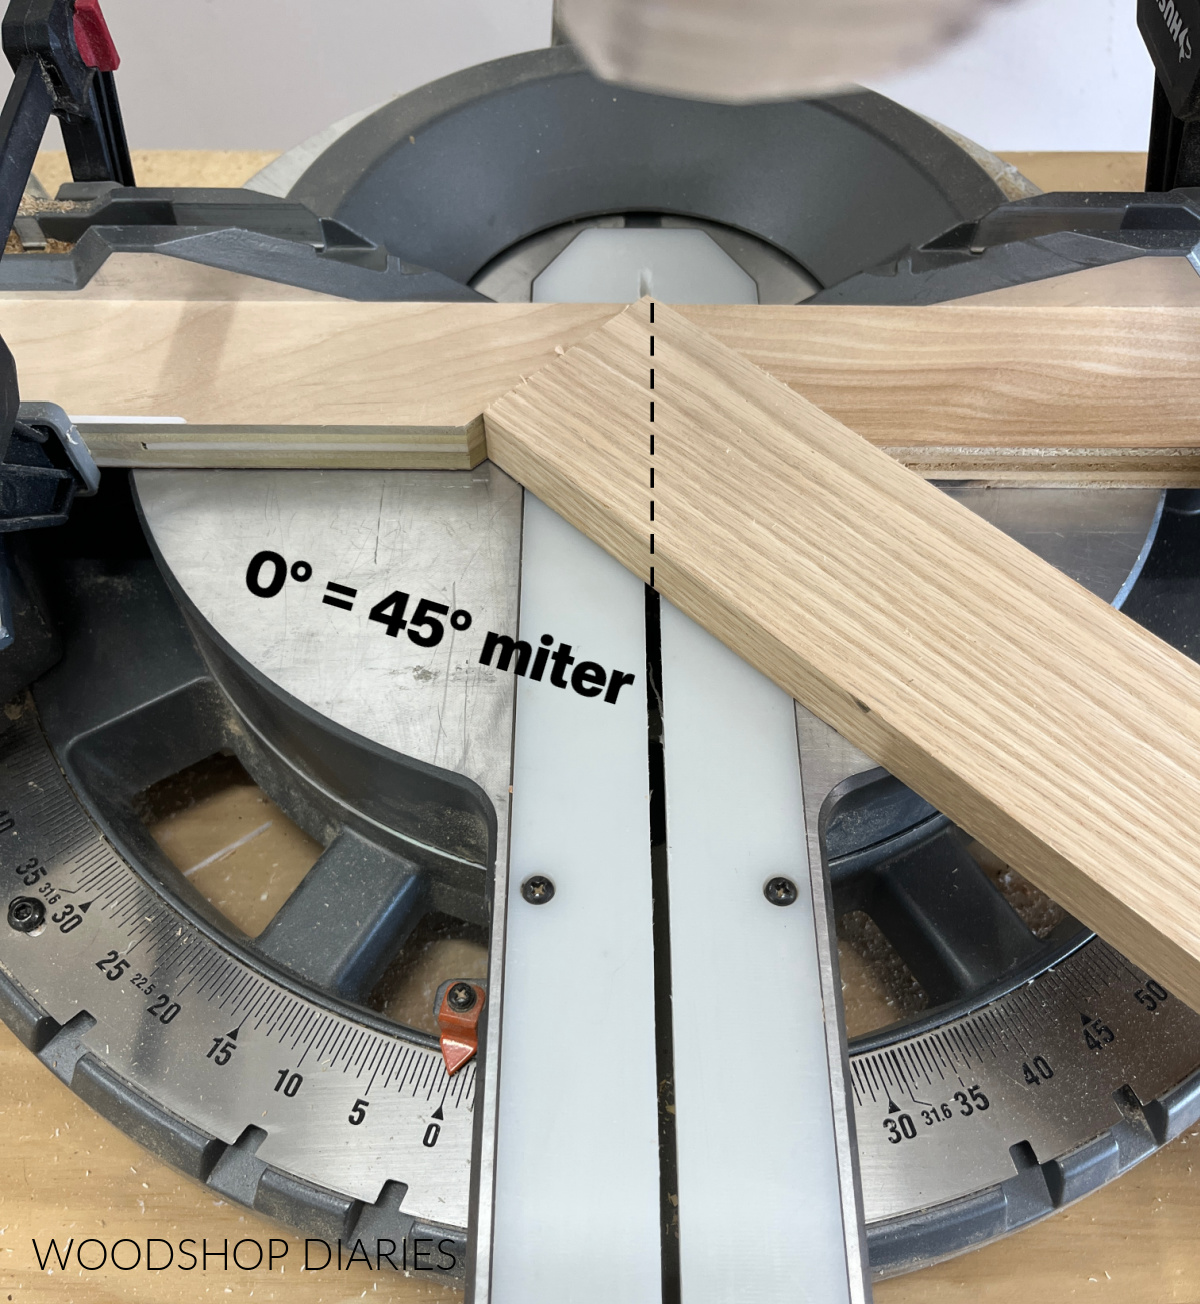
For example, if I want to cut a 60° miter angle, but my saw only goes to 45°, I can cut 45° mitered scrap pieces and clamp (or use heavy duty double sided tape) them to the saw base.
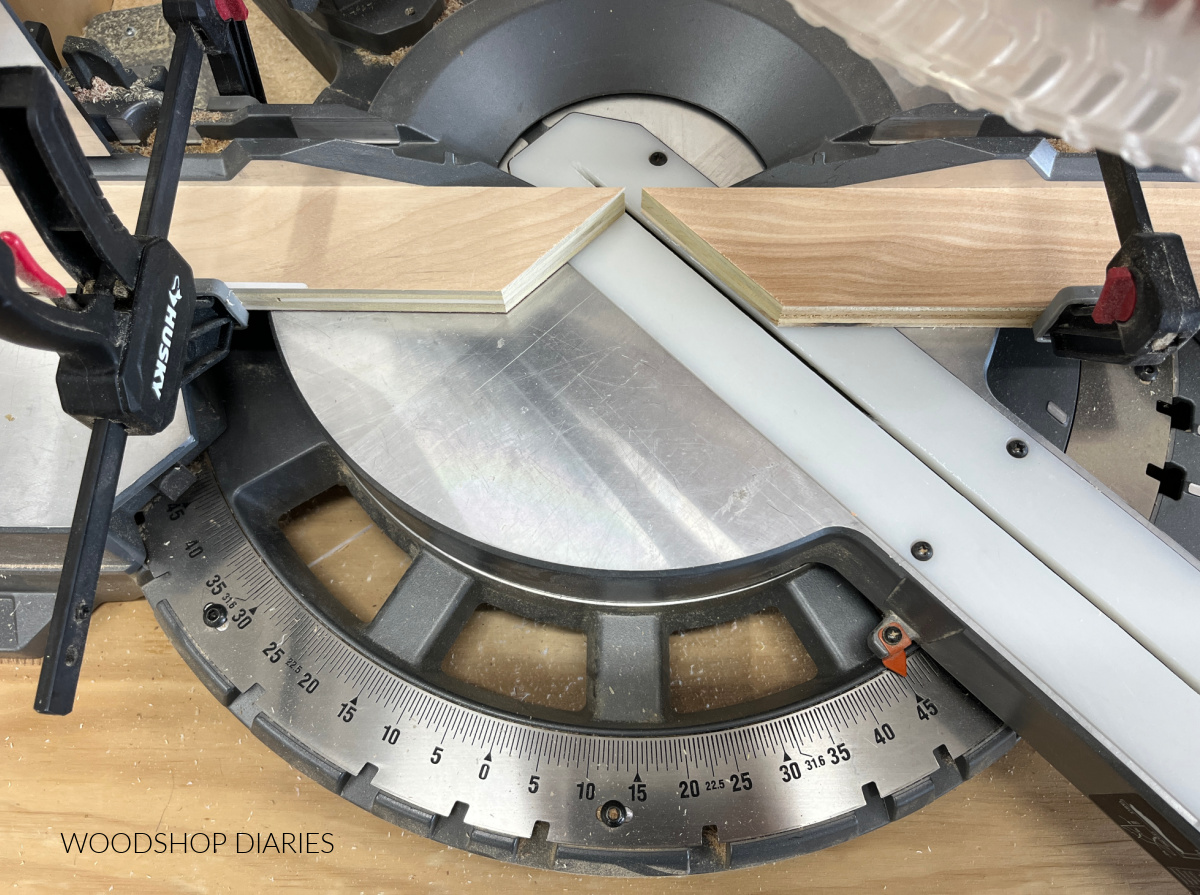
Then, I can use these scrap boards as my “back plate.” If I place the board I’m wanting to cut against these pieces now and cut it with my miter set to 0°, it’s going to cut it 45°.
So if I adjust the miter angle to 15°, it will cut 45° + 15° = 60° off square. Of course, you can adjust the angle as needed to cut your desired degree.
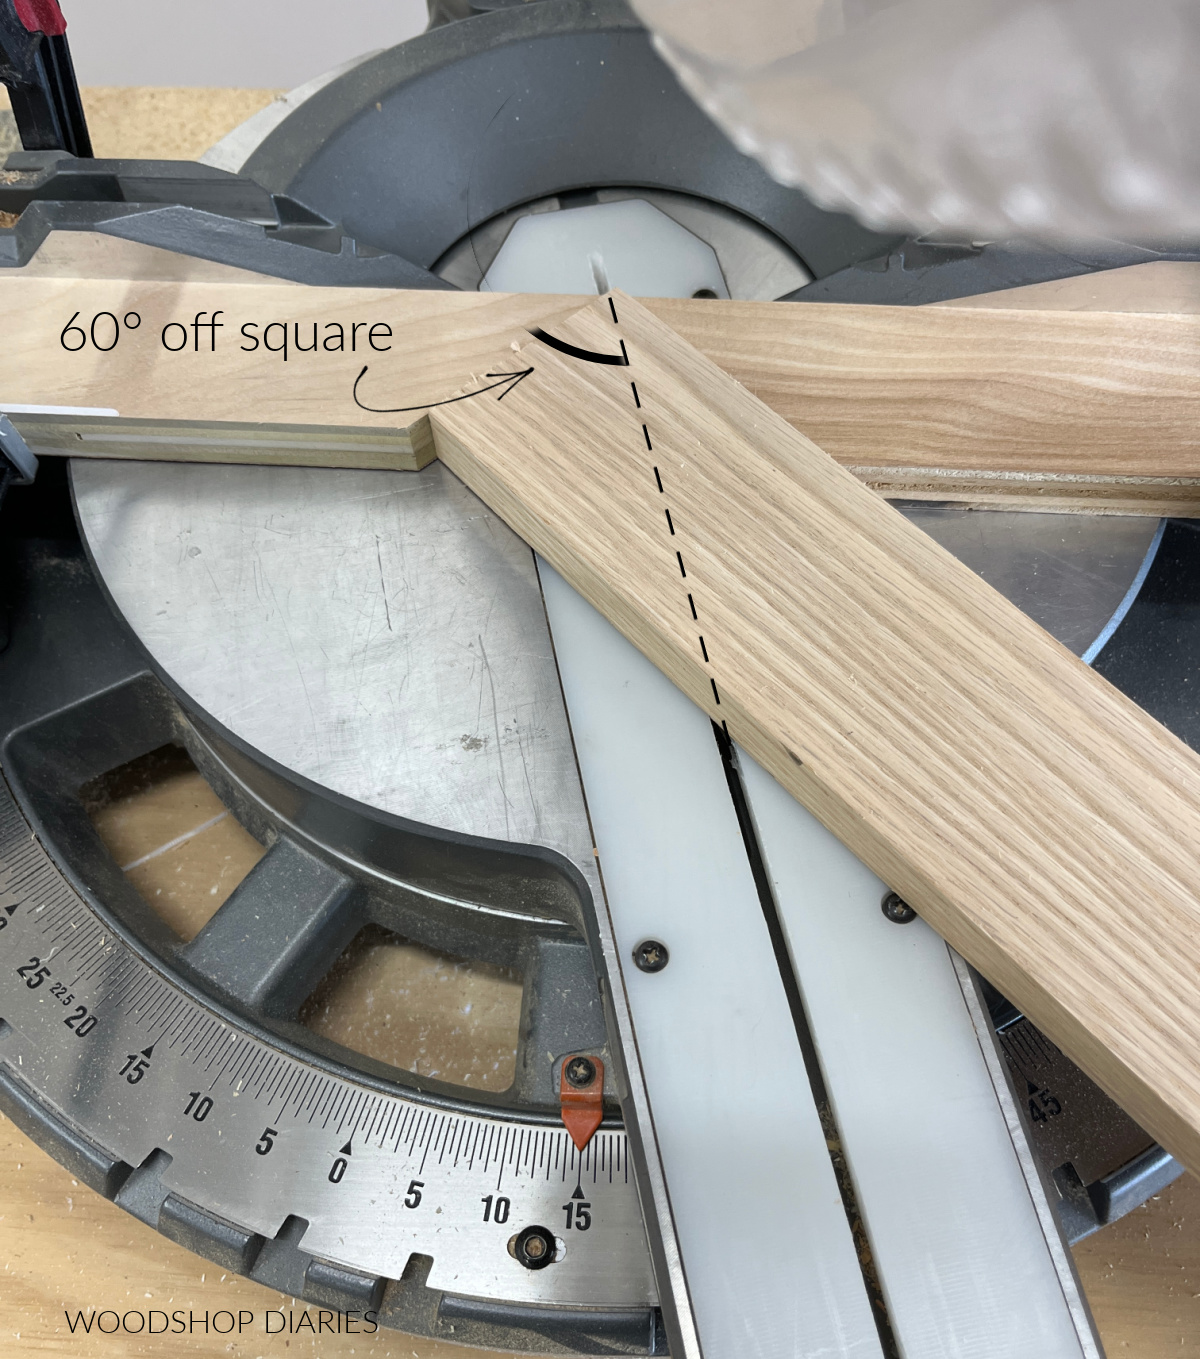
NOTE: BE VERY CAREFUL when attempting cuts like this to make sure everything is well supported, clamped, and sturdy before making a cut.
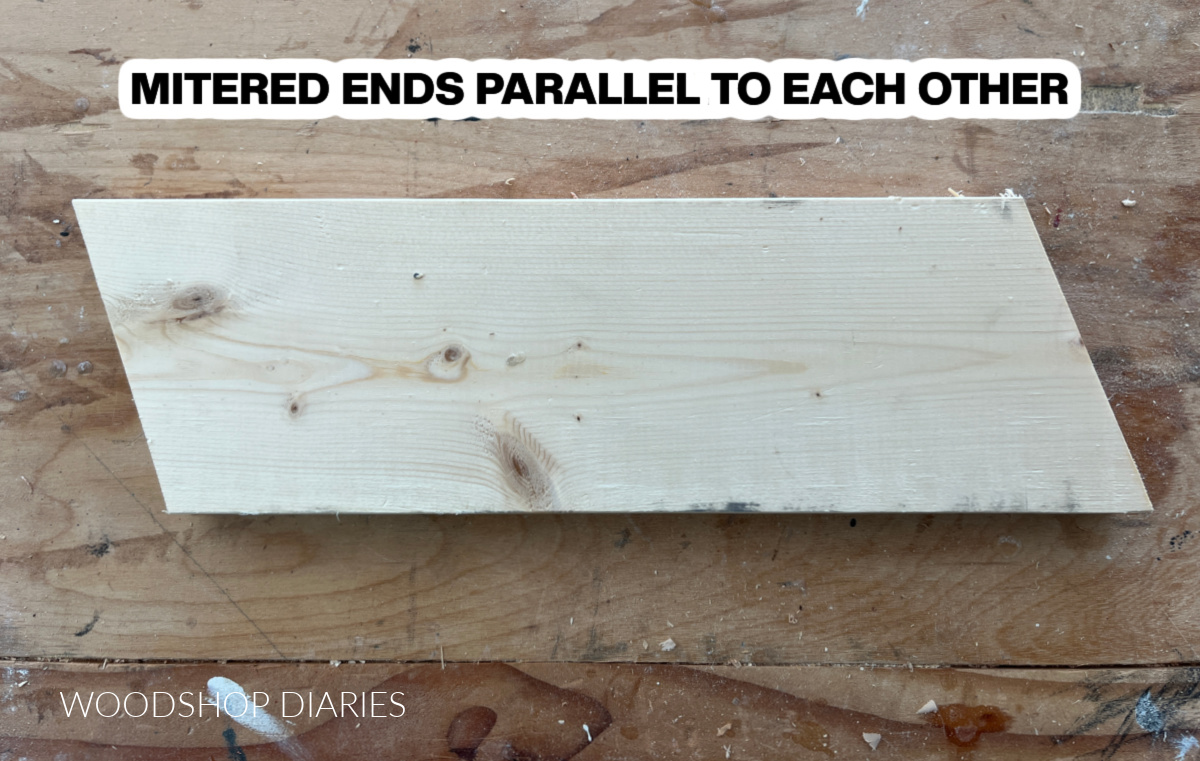
Miter cuts parallel to each other
If you’re mitering both ends of a board and the plans tell you to miter them parallel to each other, that means the ends should both slant the same direction at the same degree.
Here’s an example–both ends are mitered 10 degrees the same direction.
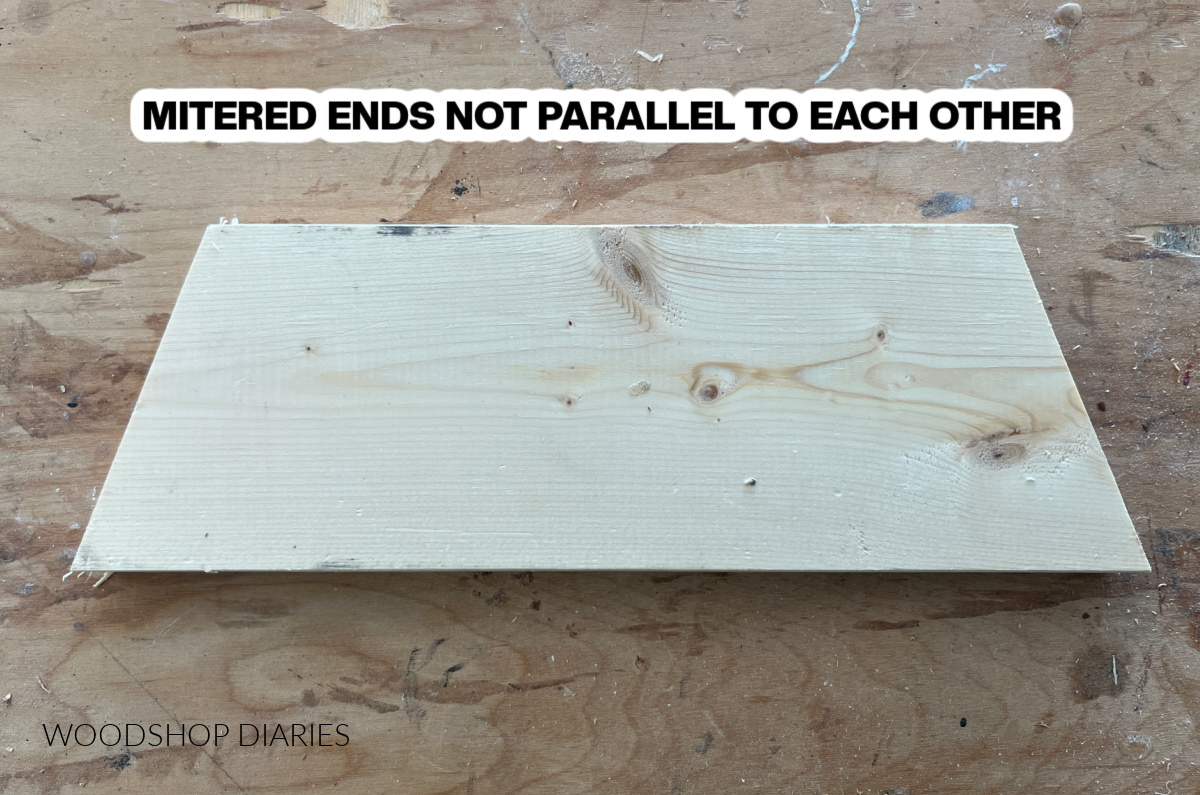
Miter cuts NOT parallel to each other
If you’re mitering both ends of a board and the plans tell you to miter them NOT parallel to each other, that means the ends do not go in the same direction.
Here’s an example of mitered ends not parallel.
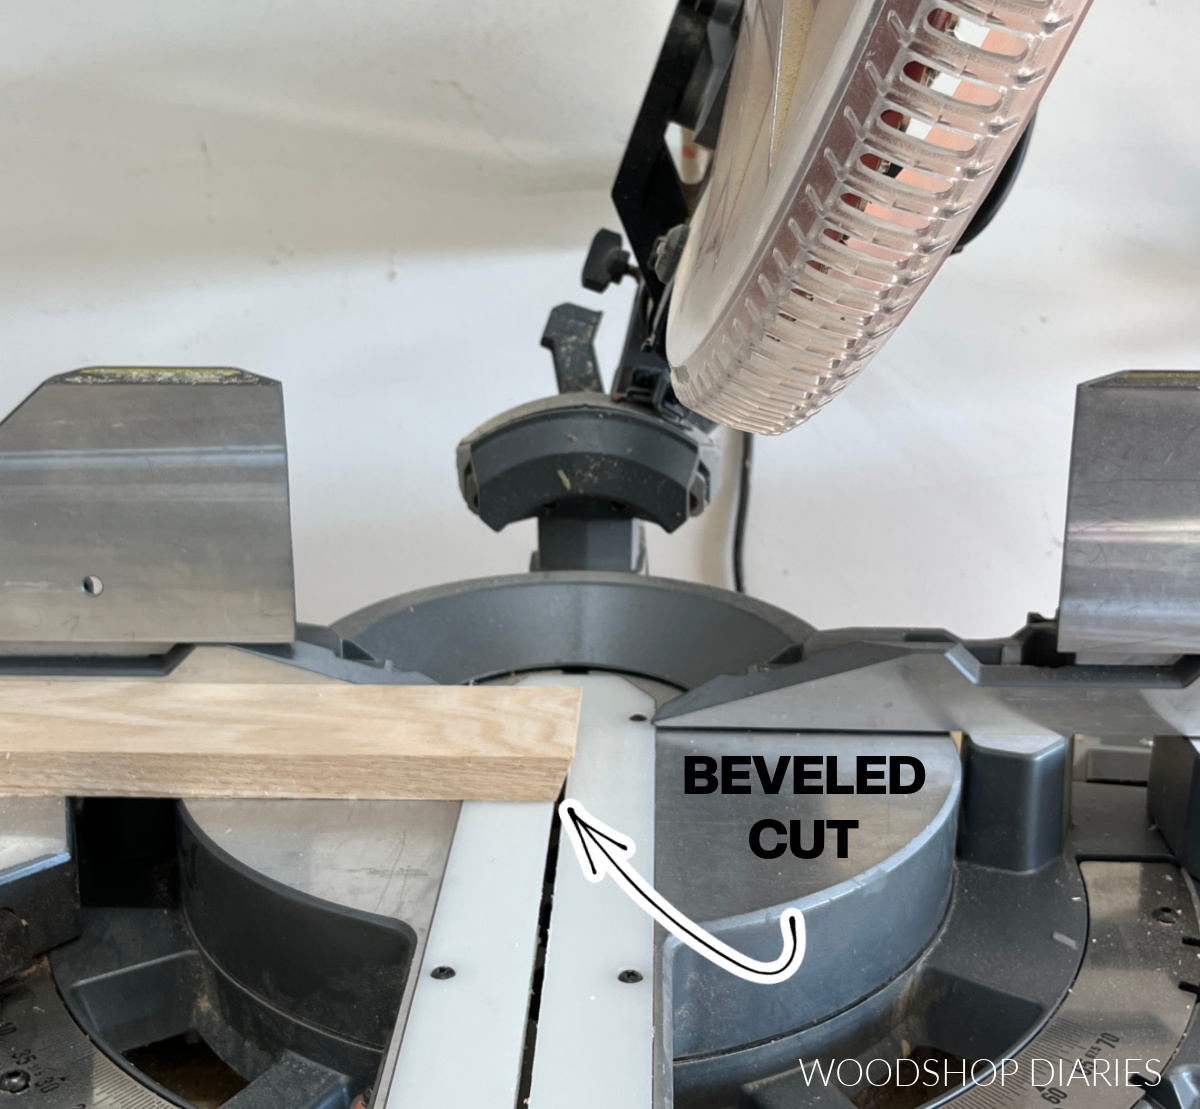
How to Make Bevel Cuts
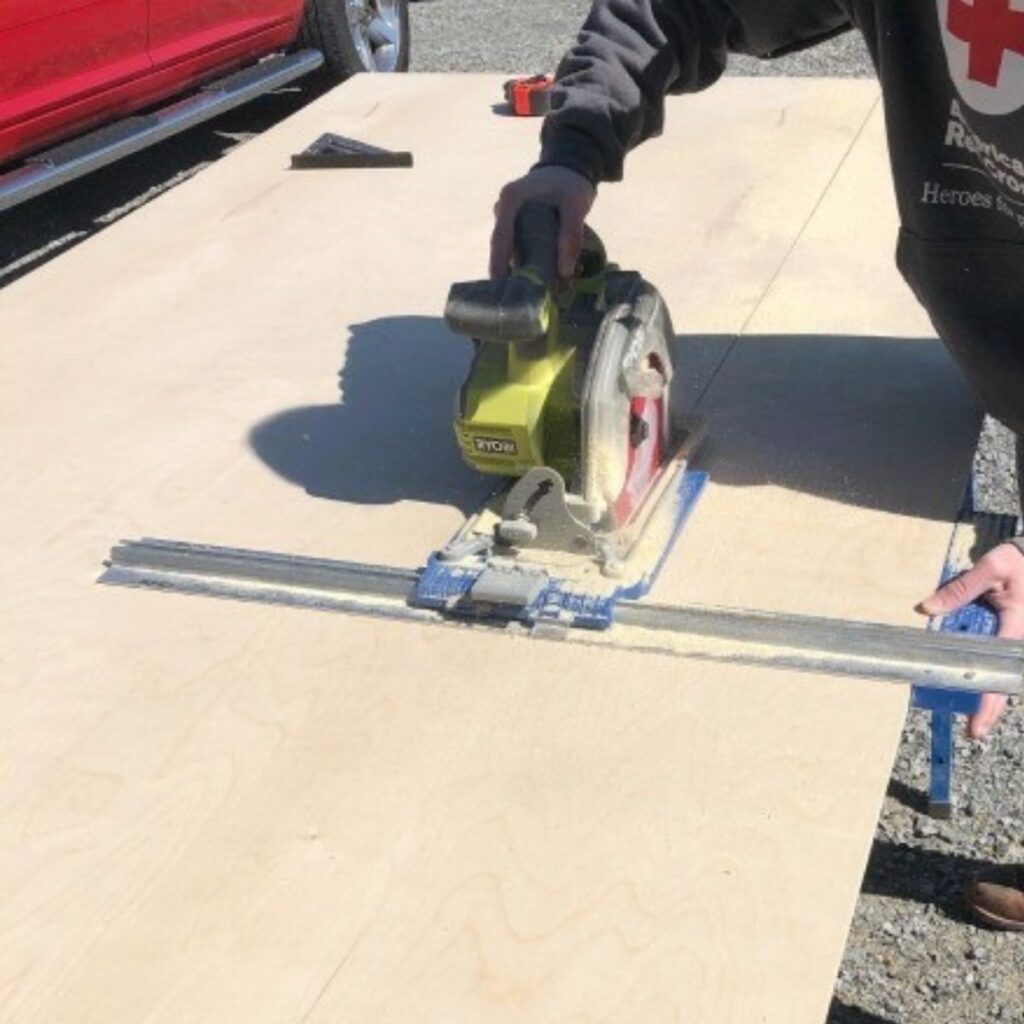
You likely won’t make beveled cuts as often as miter cuts on the miter saw (at least not in my experience). Often you see bevel cuts on wide panels–like table tops or desks–and these are usually cut with a circular saw or table saw.
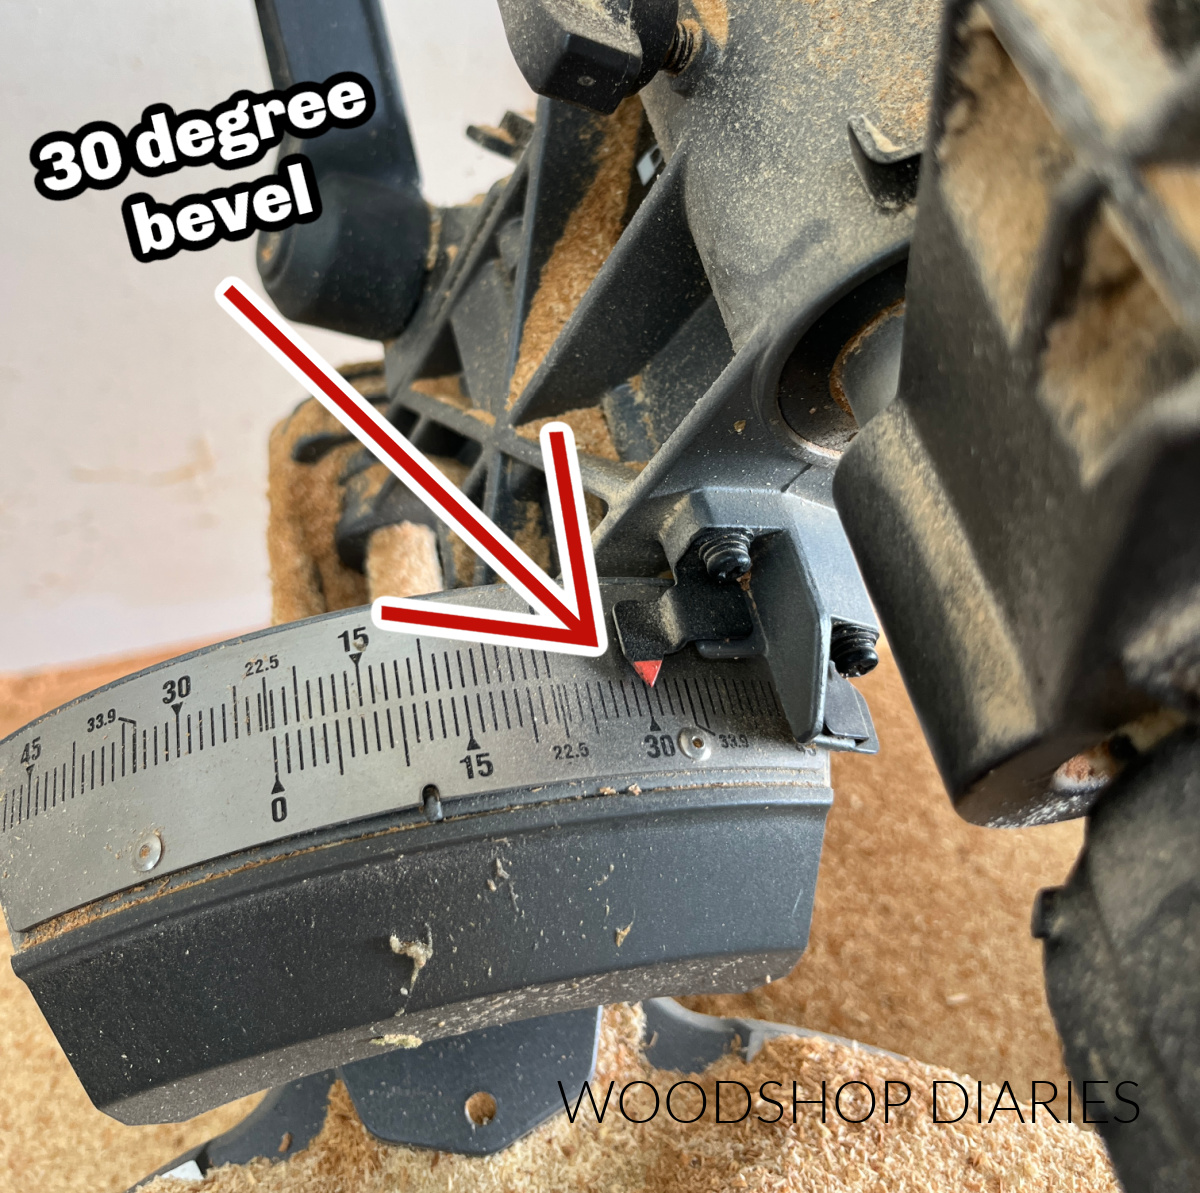
However, for smaller pieces, a miter saw works great to cut a bevel. To do so, adjust the saw’s head tilt to the desired angle. Usually this setting is toward the back of the saw. Keep in mind this will be a degree OFF SQUARE.
Then, place your board flat in the saw (make sure both ends of the board are properly supported), and against the back plate.
Bring the blade to full speed before making contact with the wood, then slowly lower the blade to cut across the board. If using a sliding saw, start at the front, then slide it toward the back to cut through.
TIP: If the board you are cutting isn’t very wide, you can also cut bevels by standing the board upright against the back plate and adjusting the miter angle instead of the bevel angle on the saw.
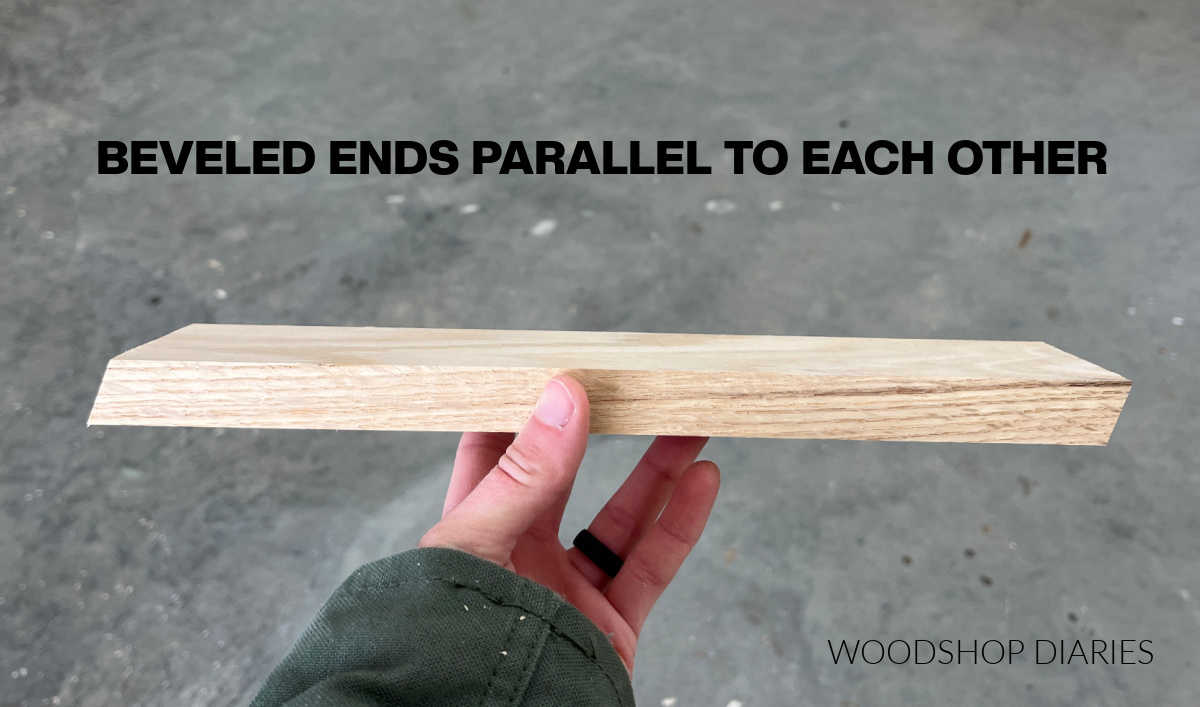
Bevel cuts parallel to each other
Just like with miters, if you’re beveling both ends of a board parallel to each other, that means the bevels should slant the same direction at the same degree.
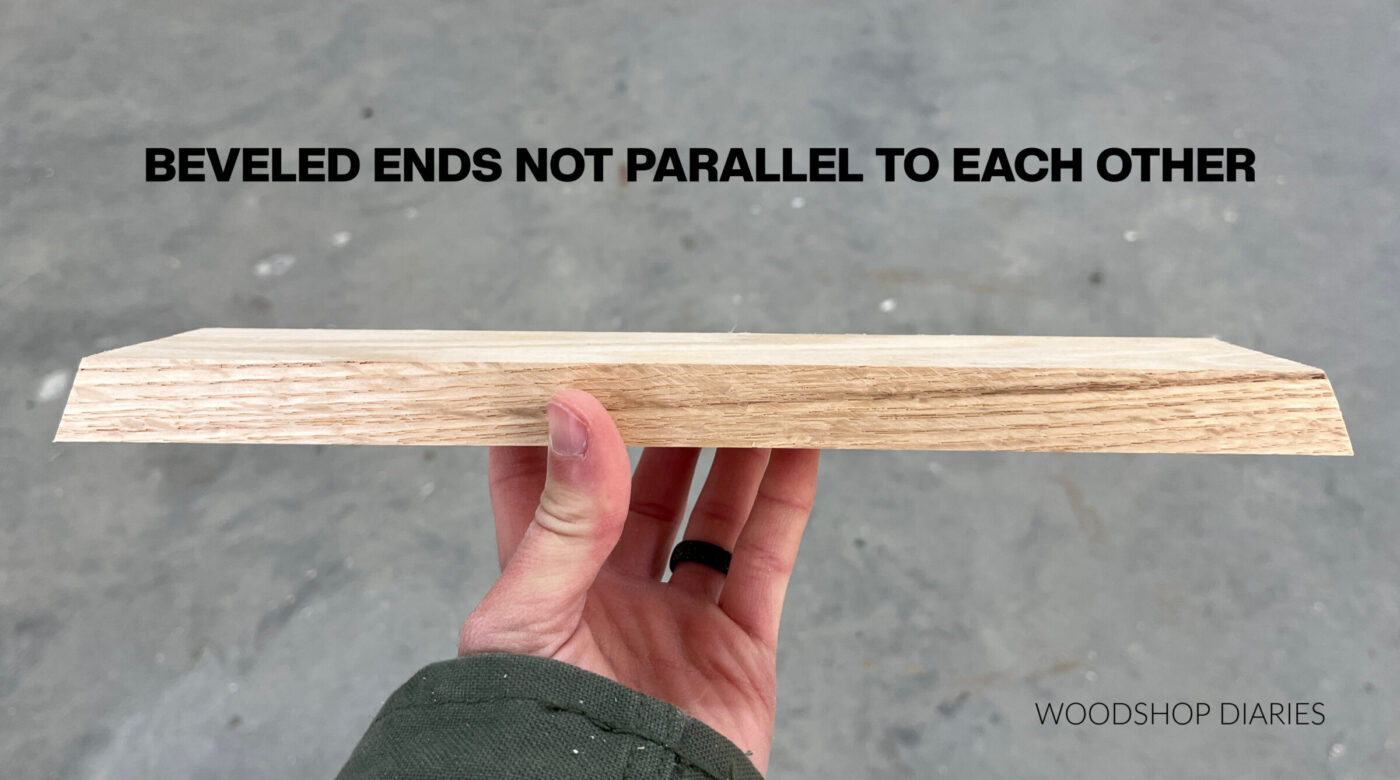
Bevel cuts NOT parallel to each other
If you’re beveling both ends of a board not parallel to each other, that means the bevels don’t slant the same direction.
Determining Miter Angles in a Project–EXAMPLE
Let’s take a look at a recent project as an example and discuss how I determined what angles to use here. Here I have a simple bench with angled legs.
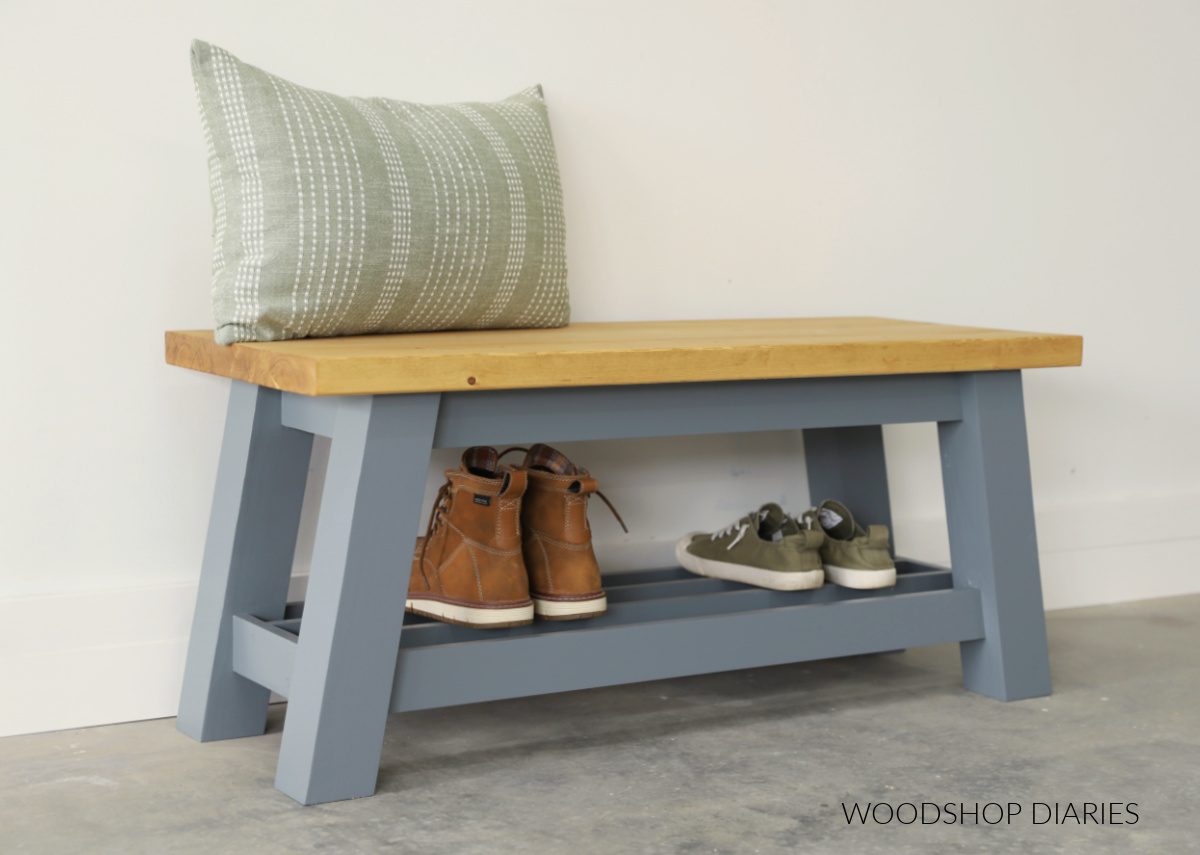
If I cut the legs with a miter angle of 0°, they’d stand straight up, which is square. But, I cut the legs with a 10 degree miter so they would slant OFF SQUARE 10°.
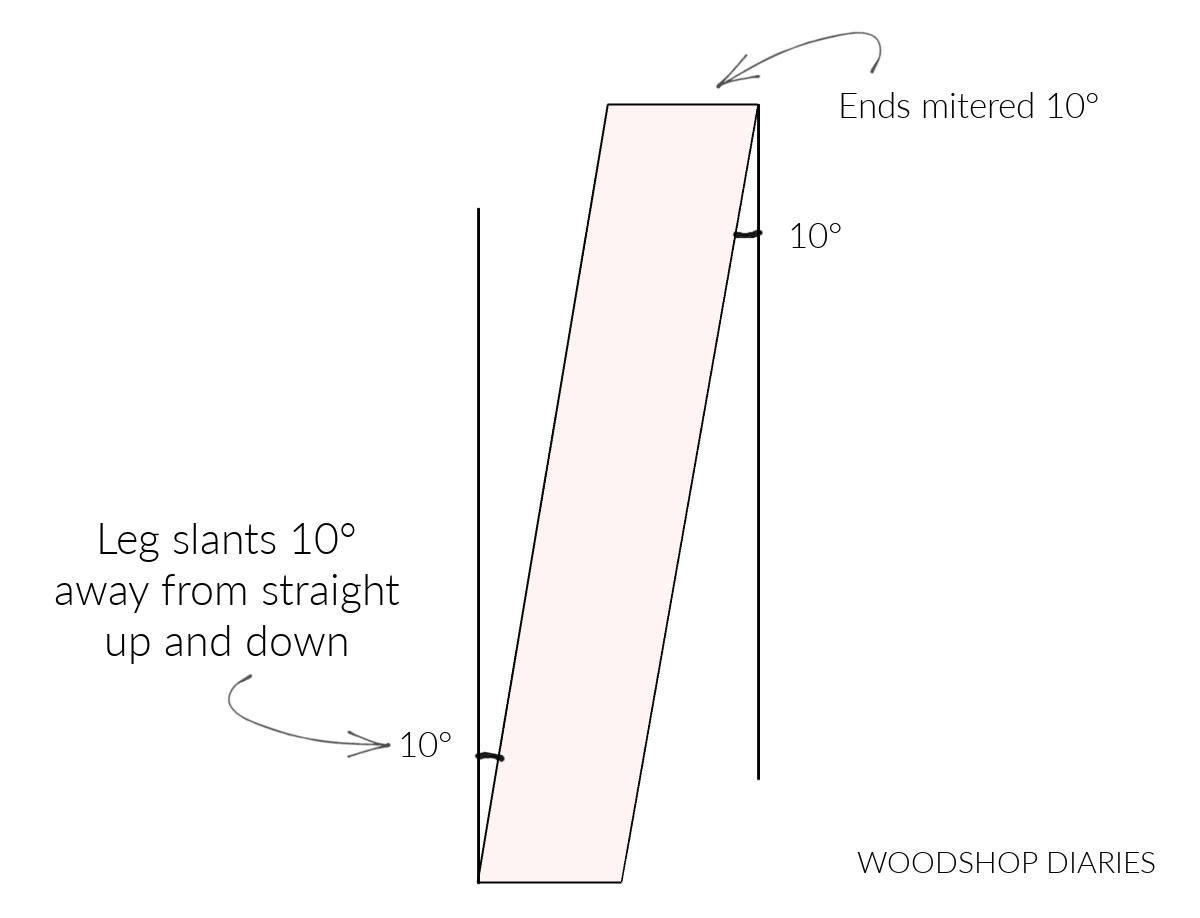
Why 10? I just picked 10° because it was an easy number to work with and looked like a good amount of slope. No other reason–you could pick 5 or 7 or 12 or 15 if you wanted. It just depends on how much slope you want your legs to have.
Now I need to determine what angle to cut the ends of my top and bottom supports that will join each leg. Based off the image above, it’s easy! Those need to be mitered 10°, too.
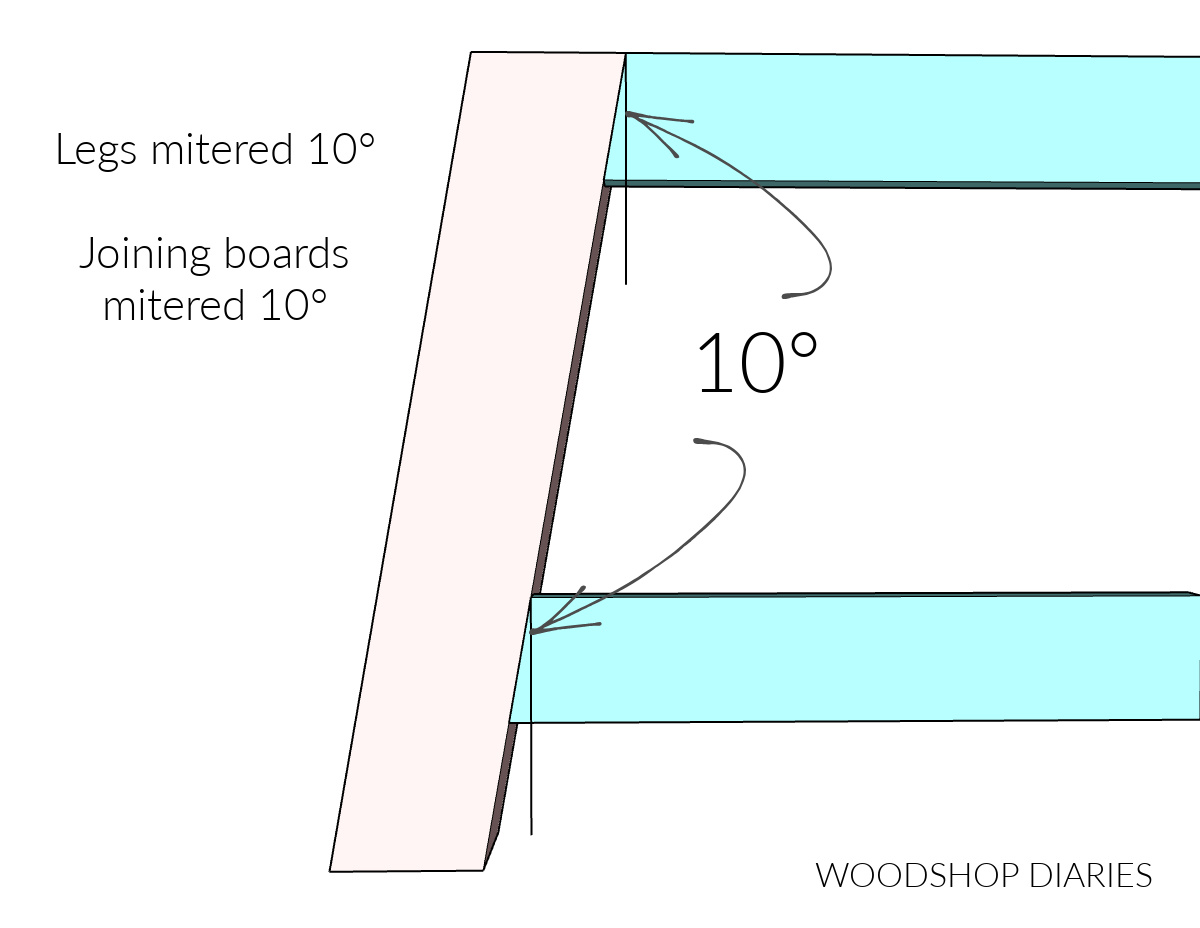
In most cases, in basic projects like this (not all, but most), whatever angle one piece is mitered, the angled pieces that join it are mitered the same.
I think people get really overwhelmed with angles thinking you need to figure each one out for every piece. But most of the time, if there’s an angle in the build, it’s the same angle for everything.
Looking for more DIY woodworking Tips for beginners?
Getting started in woodworking can be intimidating. Check out these helpful beginners guides to getting started so you can confidently build your next DIY masterpiece! Head to the Getting Started page for even more resources.
If you’d like to save this post for later, be sure to pin it or share it to your favorite social platform!
Until next time, friends, happy building!