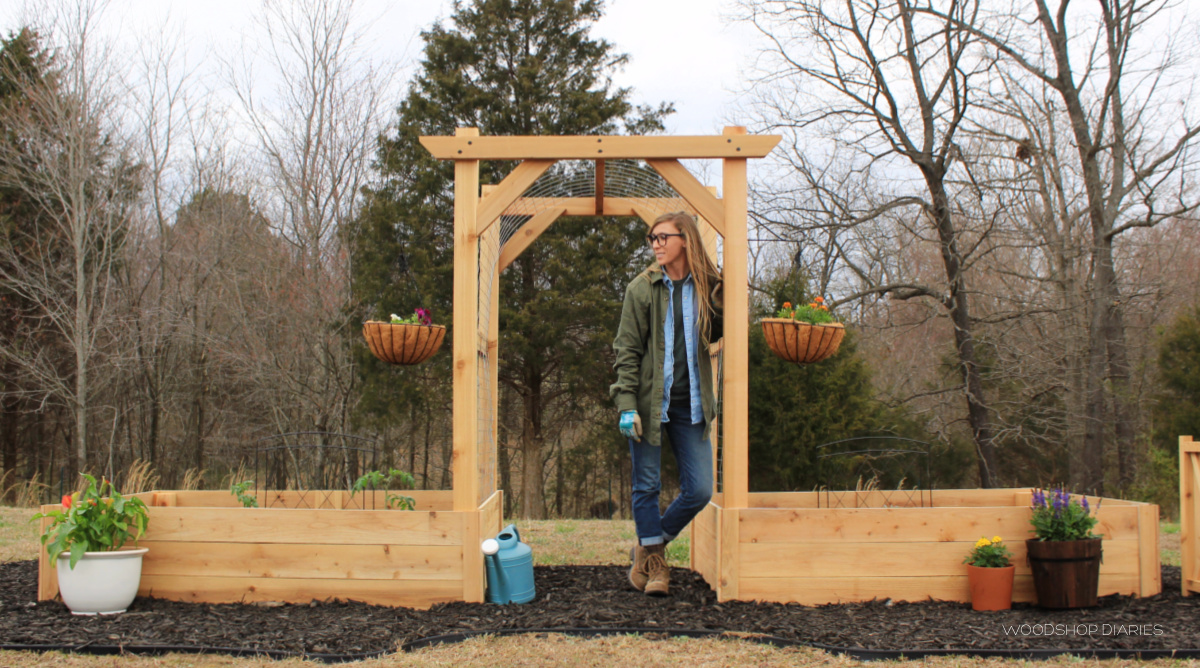
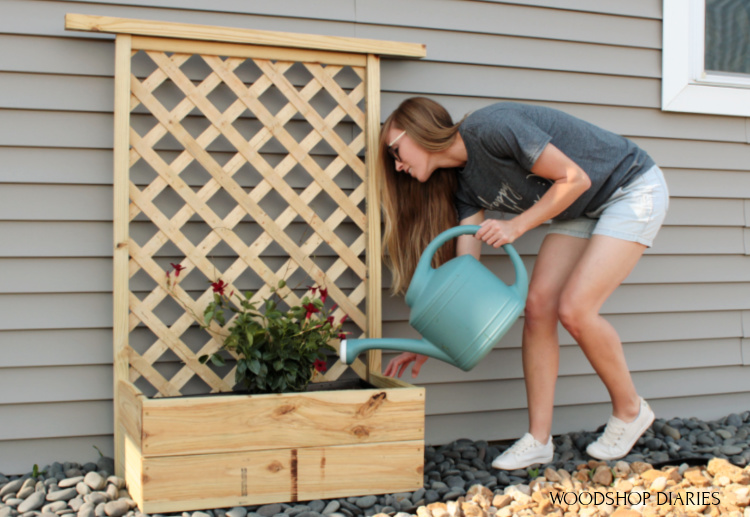
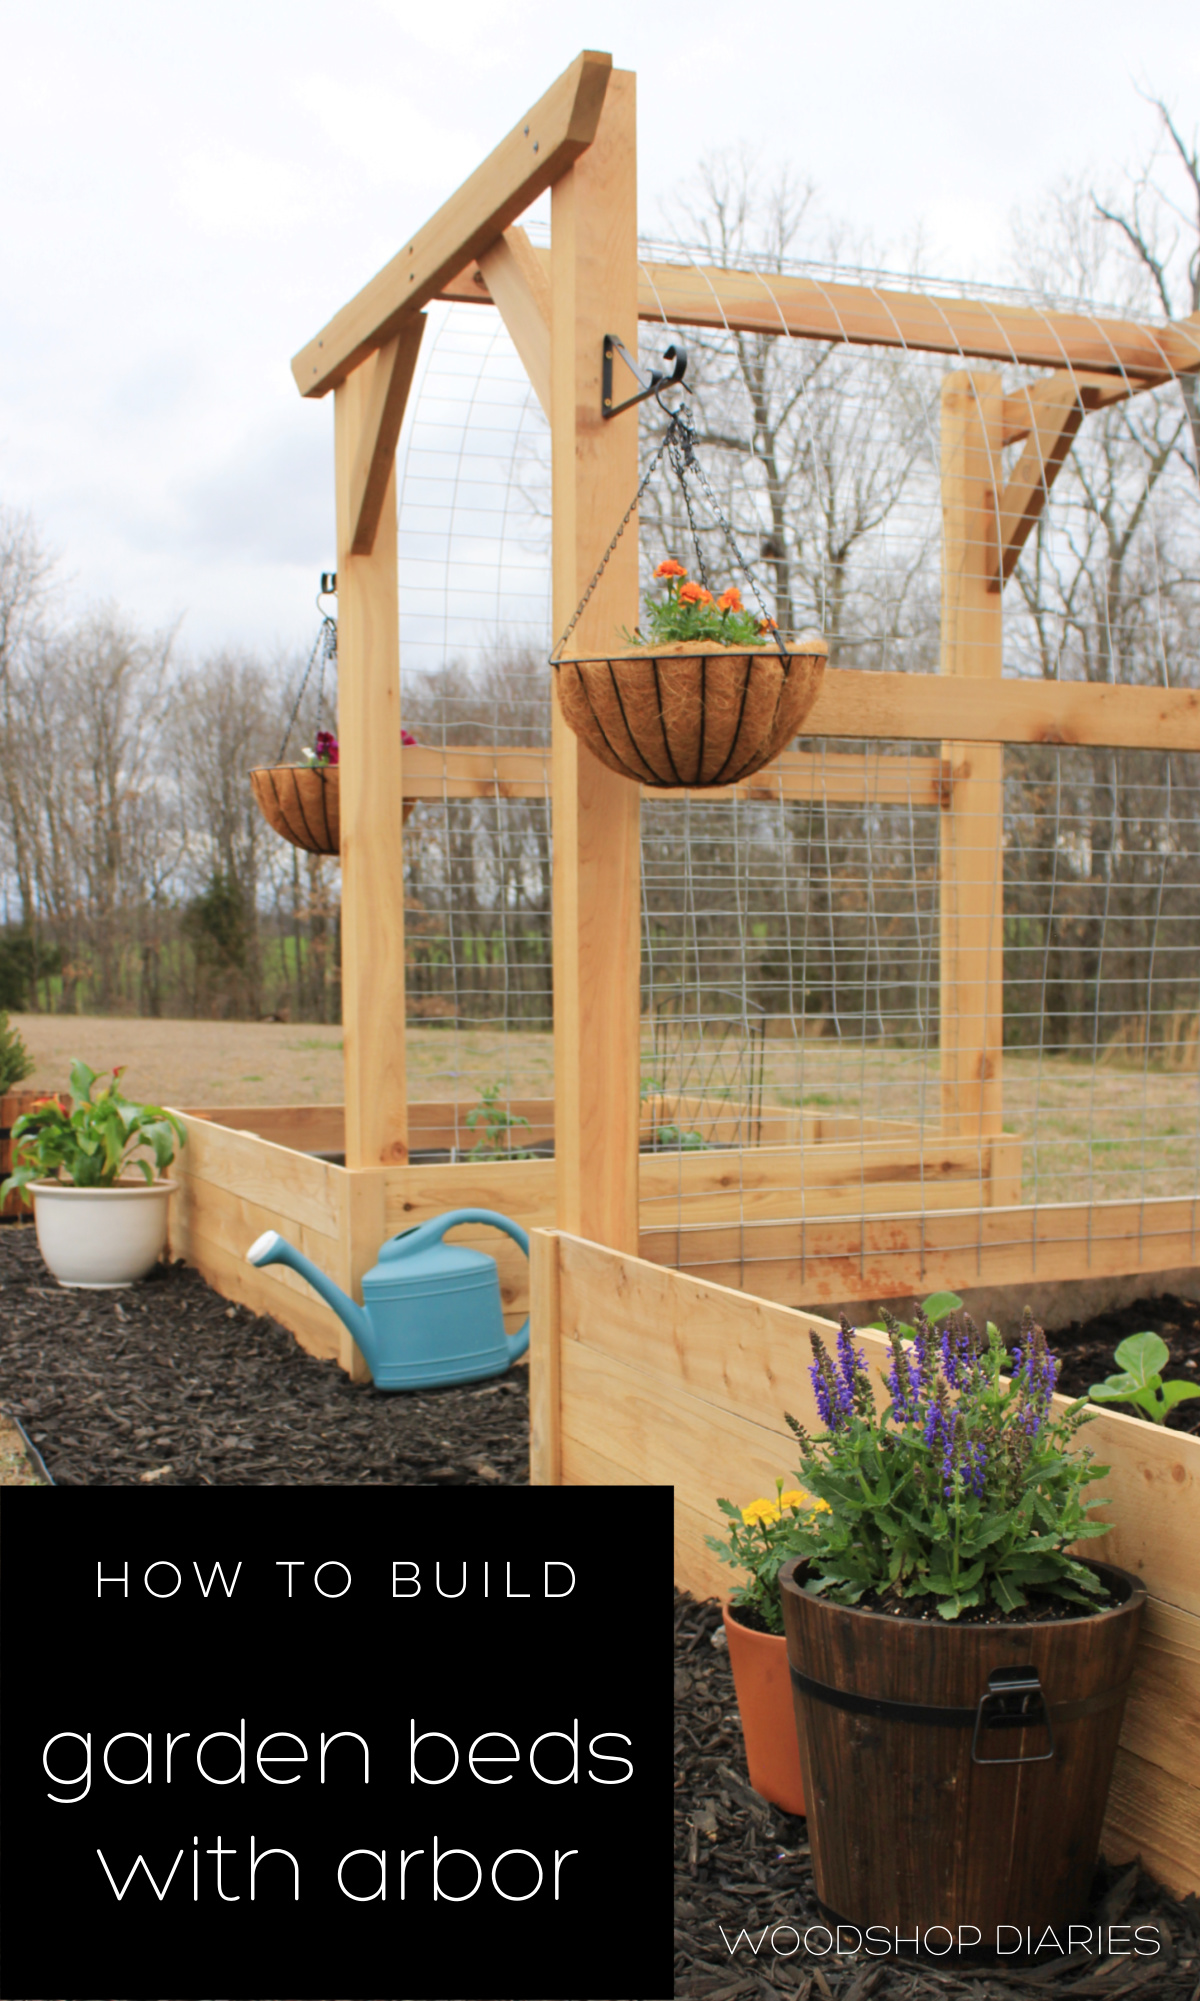
In this post, I’m sharing how to build your own DIY garden beds with arbor!
You can use the arbor for both looks–because it’s pretty ha!–and for vertical growing in your garden.
This year, I’m all about the outdoor projects because we have a big open yard to work with now in the new house.
.
The only down side is that this place needs some grass…it’s clearly pretty bare haha. So just ignore that for now. We will get some planted when it warms up a little more 😉
.
I built these raised DIY garden beds with arbor to give me somewhere to plant my tomato, cucumber, and pepper plants. But obviously, you can plant all your favorite garden veggies in yours 🙂
.
So if you’re ready to build your own, I’m sharing all the details on this one below. Check out the full video tutorial here and the plans and details following:
*This post contains affiliate links. See policies for details.
Tools & Materials:
Tools:
- Miter Saw or circular/jig saw (any saw that can cut straight lines would work fine)
- Drill/Driver
- Table Saw (optional)
- Pocket hole jig (optional)
- Stapler
Materials:
- (26) Cedar fence pickets
- (4) Cedar 4x4x8 posts
- (4) Cedar 2x4x8 boards
- 4 ft wide welded wire
- Heavy Duty Landscape Fabric
- Garden Staples
- No Dig Edging
- Black Mulch
- Garden Soil/Potting Soil
- 1 ¼” exterior screws
- 2 ½” exterior screws
- 2 ⅞” timber screws (optional)
- ½″ long staples for stapling wire and fabric to garden beds
- Veggies, flowers, shrubs as desired
- Coco baskets
- Plant Hanging Brackets
Prefer to print? Grab the printable building plans for this build here:
Some Notes About the Build:
Wood Type:
Since this is an outdoor project, I used cedar as it’s a naturally rot and moisture resistant wood species and it’s readily available in my area.
.
You can use regular untreated pine/construction grade lumber for this, but it won’t last as long and will likely rot away in a few years.
.
Treated wood will last a good while, but it’s not recommended for use in a garden bed where you plan to grow food. If you want to just grow flowers/plants for looks, it would be okay, but I don’t recommend it for anything edible.
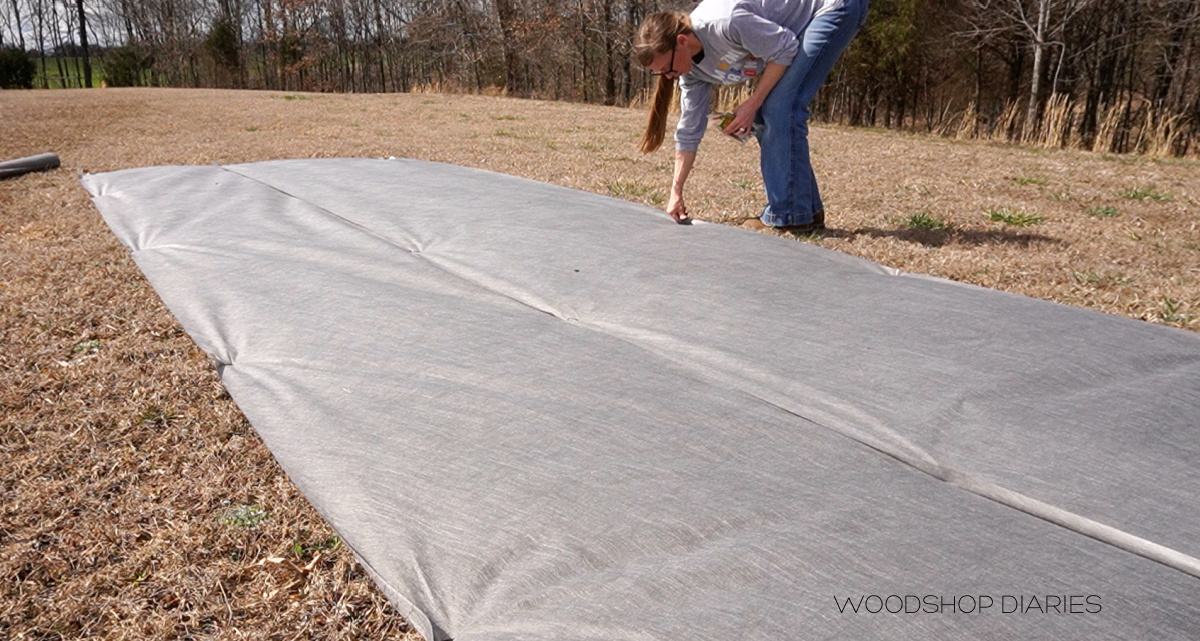
Garden Location & Ground Prep:
You want to make sure to pick a spot to put these garden beds that is fairly level so you don’t have to deal with uneven or sloping beds.
.
I measured out roughly where to put mine and rolled out landscape fabric to block out any weeds from eventually growing up into my garden.
Then, I began the fun part—building stuff.
.
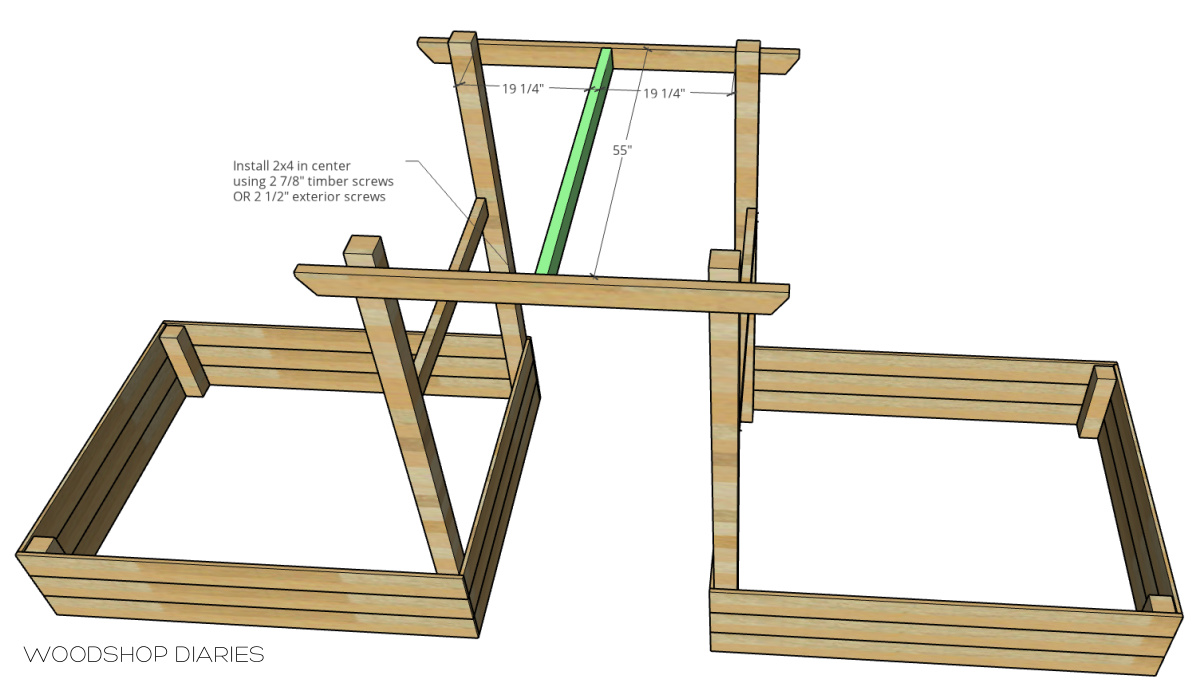
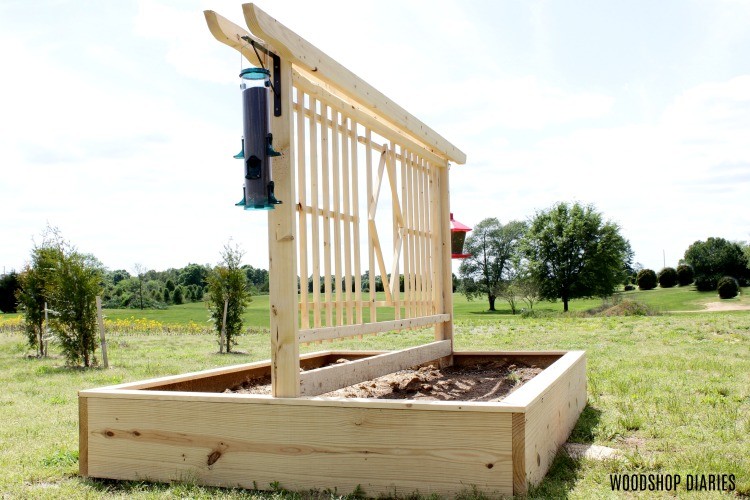
Step 1: Assemble Garden Arbor Frame
I built the arbor frame using 4x4s for the corners and 2x4s between them.
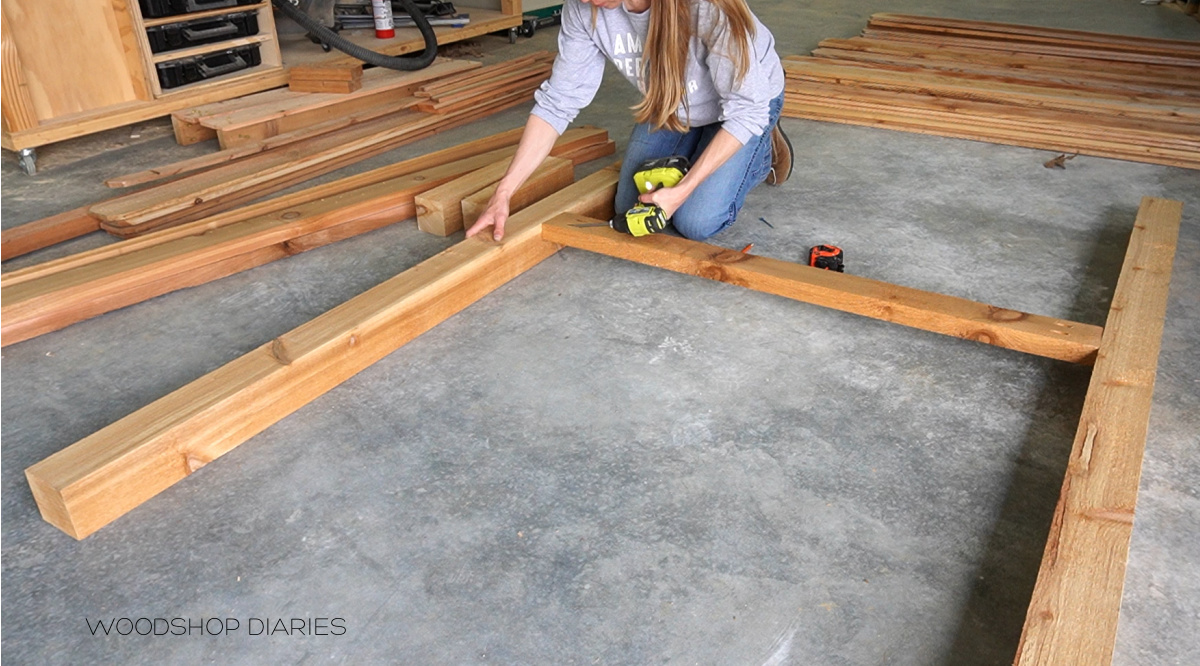
I cut 16” off each 4×4 post and set these shorter pieces aside for now. Then I cut one of my 2x4s in half and drilled pocket holes into the ends of them.
RELATED: How to use a pocket hole jig
.
Want to print these plans and take them with you to the workshop? Grab the printable raised garden bed building plans with arbor here.
Pocket holes aren’t necessary here—you could definitely just use long exterior screws and drive them in at an angle. But if you do use pocket holes, be sure to use the blue kote exterior grade screws since this will be an outside project.
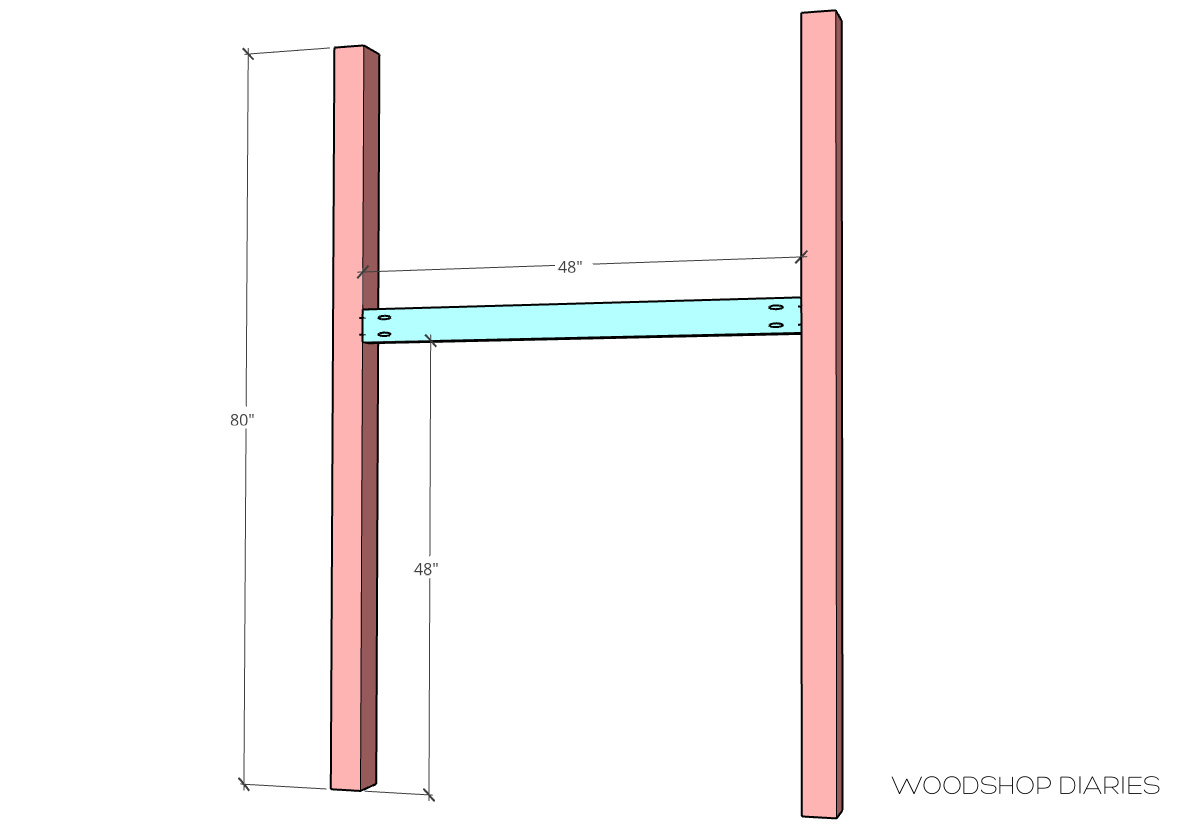
I made two arbor frames by screwing the 2x4s between 4×4 posts about 4 ft from the bottom edge.
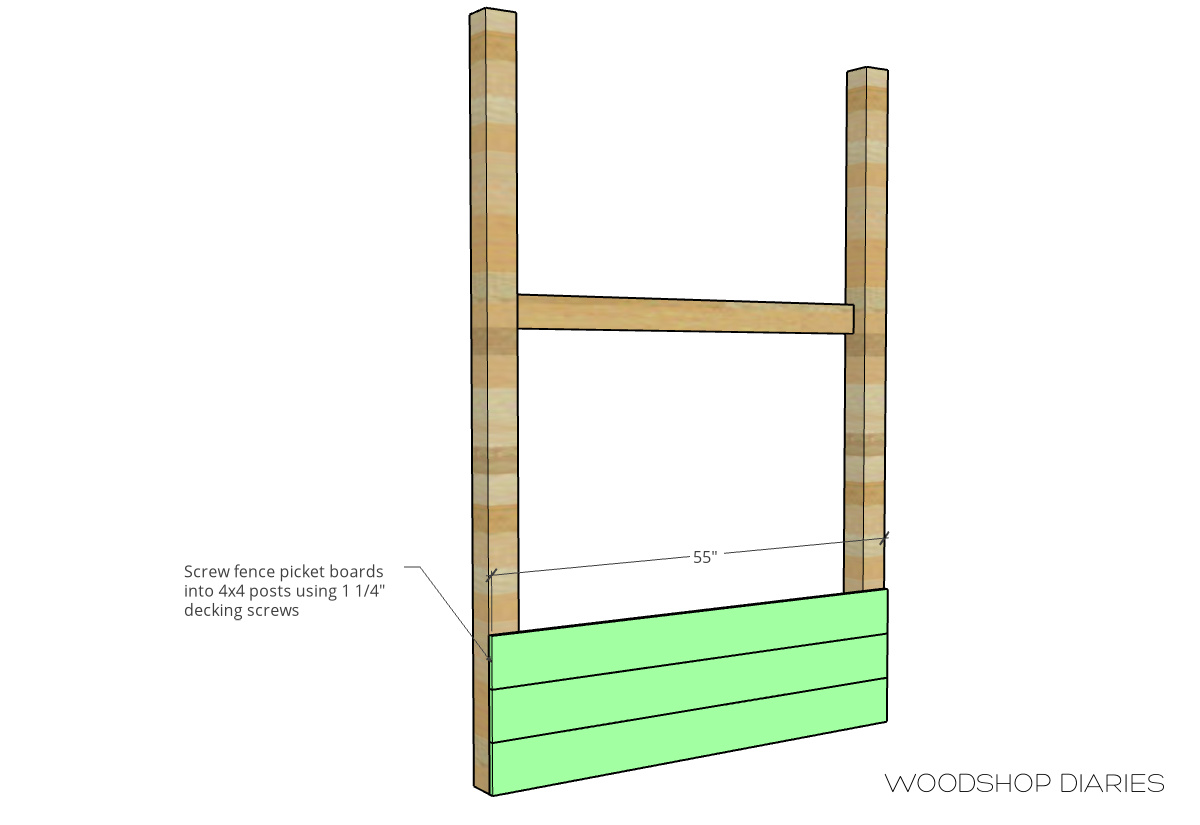
Step 2: Assemble Garden Bed Sides
I used 1×6 fence pickets for the sides of the garden beds. So, I cut 6 fence pickets down to install at the bottoms of the two frames from step 1. Three boards will go on each one.
I kept the pieces I cut off these pickets to trim out the corners later…which you will see shortly 🙂
.
I used 1 ¼″ decking screws and these fence pickets are easy to split, so I was careful to predrill all my holes before driving the screws.
.
Then, I did the same thing with the 16″ long pieces I cut off the 4×4 posts earlier—just screwed three fence boards between the two.
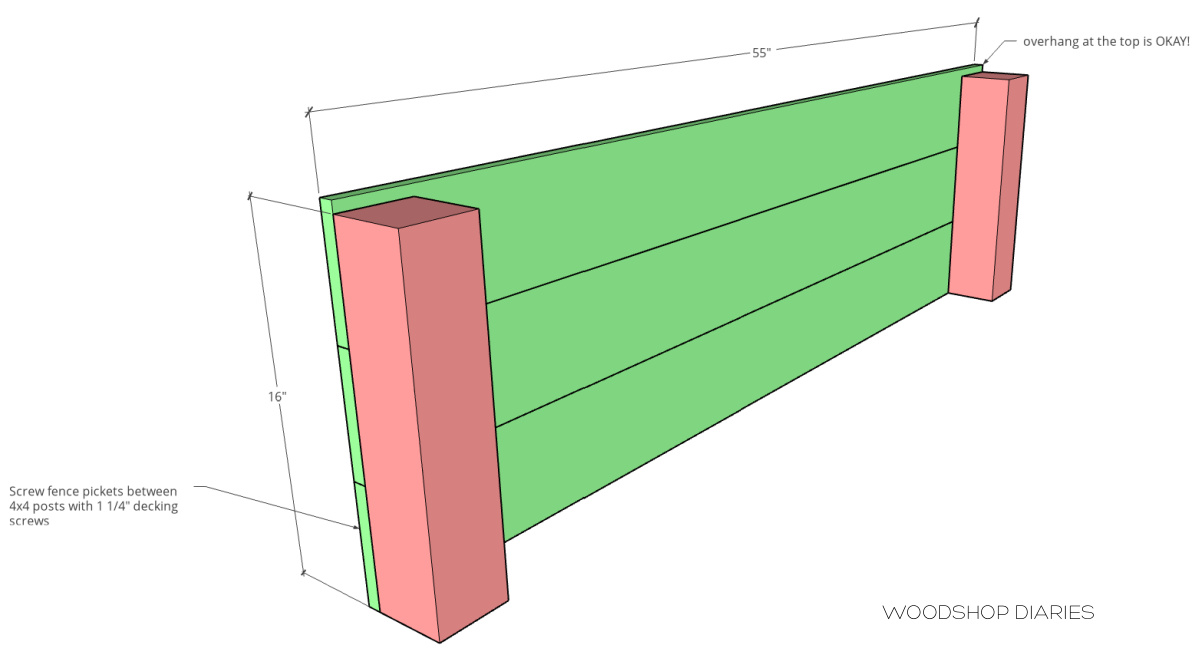
Note that the top fence picket will hang over the top of the 4×4 about ½″. That’s okay!
Step 3: Assemble Garden Bed Boxes
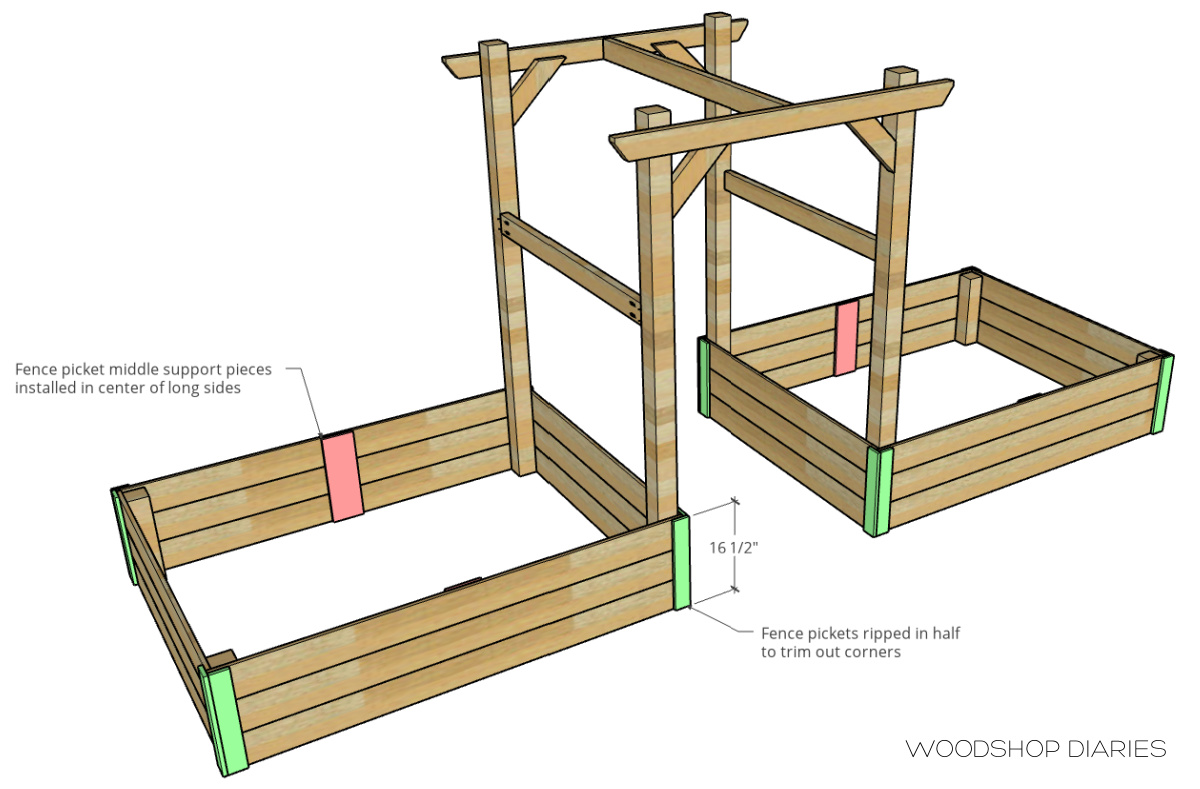
I carried the short sides and arbor frames from step 2 out to my garden area along with 12 full length fence pickets.
.
The fence pickets I used here were 6 ft long, so these beds ended up being about 4 ½” feet by 6 feet and about 16 ½” deep.
.
So, if you wanted to adjust the sizing, it’s obviously pretty easy to do so. Simply trim these boards as desired before assembling the boxes.
.
I assembled the two garden beds together by screwing three full length fence pickets between the arbor frame and the small sides on both the front and the back with some more 1 ¼″ decking screws.
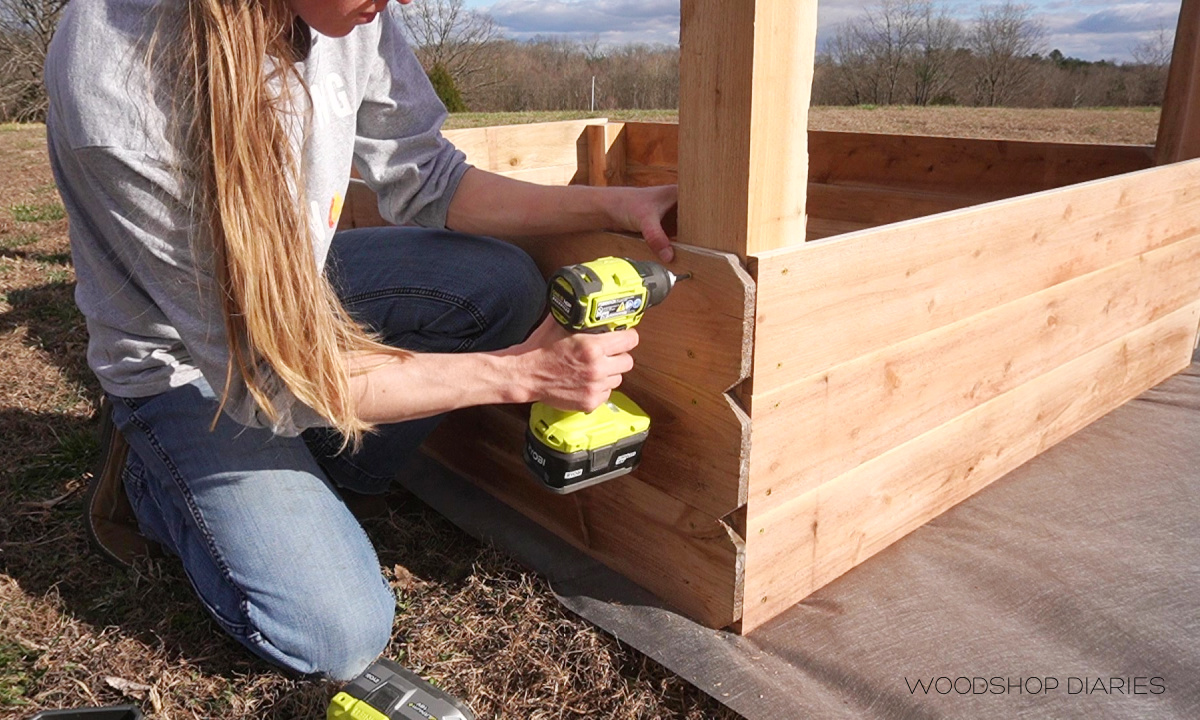
You’ll notice that I didn’t cut off the dog ear ends here…and that’s okay because I came back later and trimmed the corners out to cover that up.
.
With both beds assembled, I spaced them out about 40” apart. I played around with the spacing here and there’s no right or wrong distance.
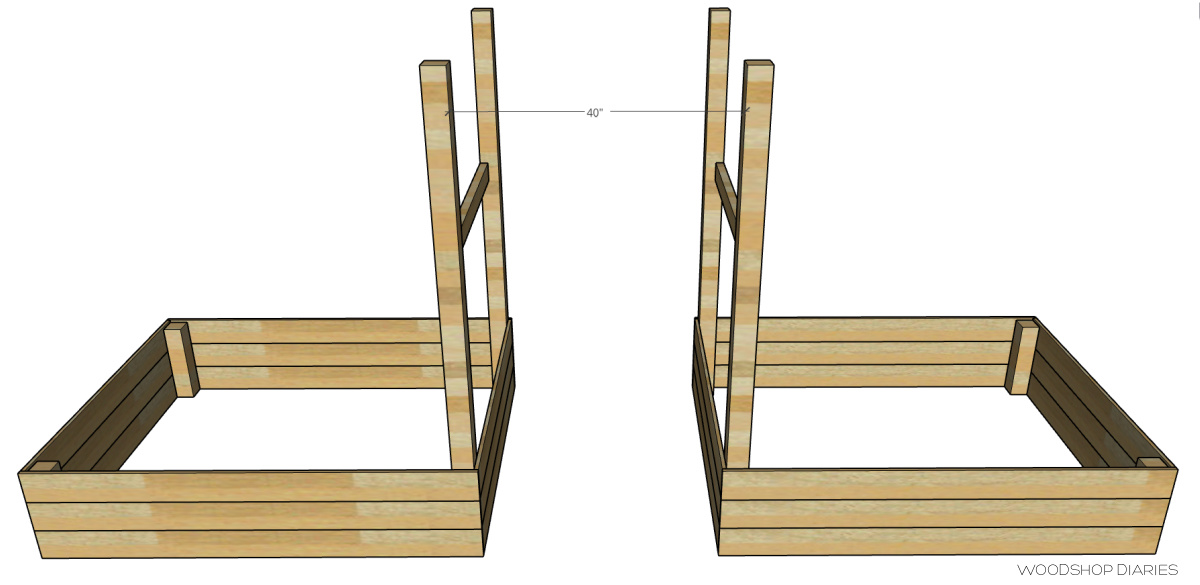
But 40” between them looked good to me without being too cramped, so that’s what I went with.
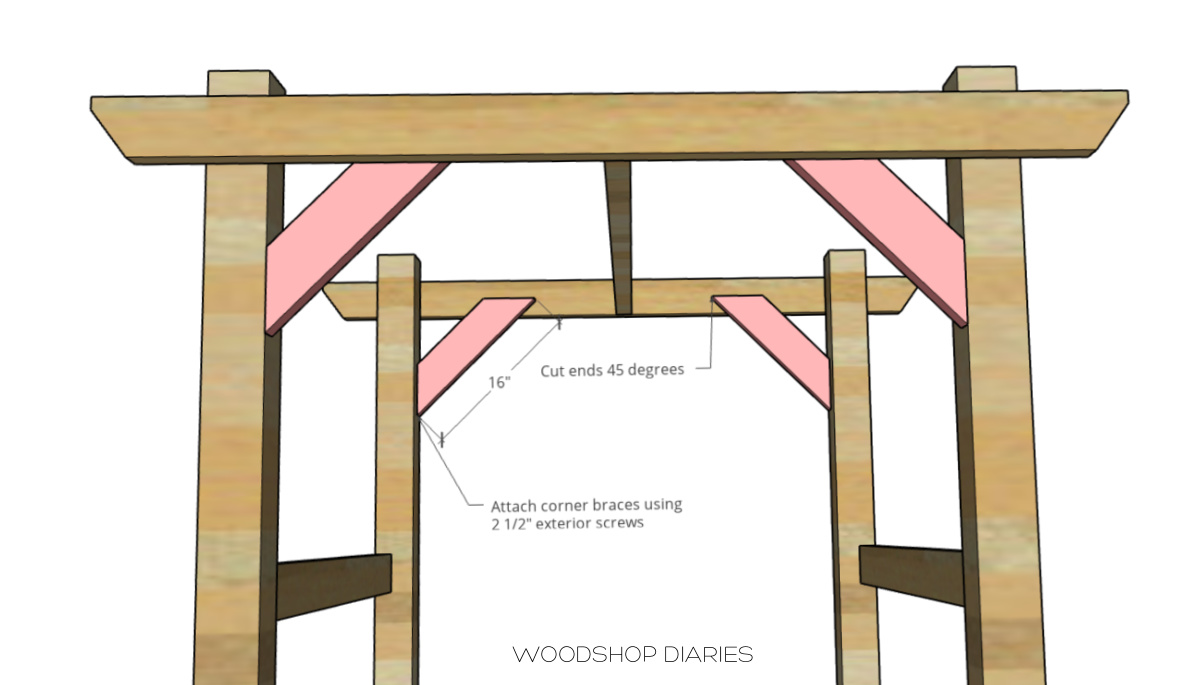
Step 4: Assemble Garden Arbor Top
I cut 2x4s long enough to overhang each 4×4 post by about 6”, and used the miter saw to trim off a corner just for a little decorative detail. You could also use a jig saw to cut a curved detail, instead.
.
Then I attached these between the posts about 2” down from the top and so they overhung each side about 6”. No reason for the 2” thing except I liked how it looked haha.
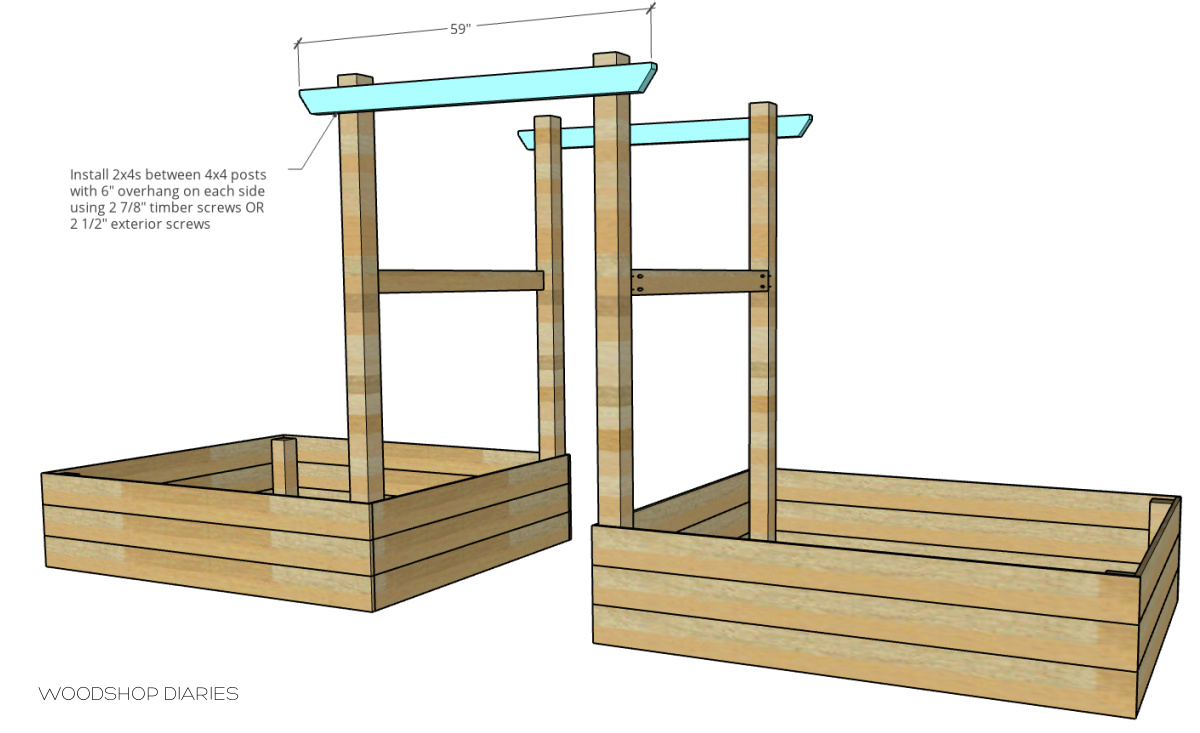
I used 2 ⅞″ black timber screws for this because I thought they looked nice. But you could use regular 2 ½″ exterior screws as well.
.
Once the front and back pieces were secured, I added another 2×4 between them in the center.
Then, from the remaining 2×4 material I had left, I cut some corner braces. I just cut these ends 45 degrees, and screwed them in place using 2 ½” decking screws.
Step 5: Trim Garden Beds and Add Middle Supports
Now—remember those off cuts from cutting down the fence pickets in step 2? I ripped them in half on the table saw to trim out the corners.
.
You could use the full width boards if you don’t have a table saw, but I just liked the looks of the thinner trim.
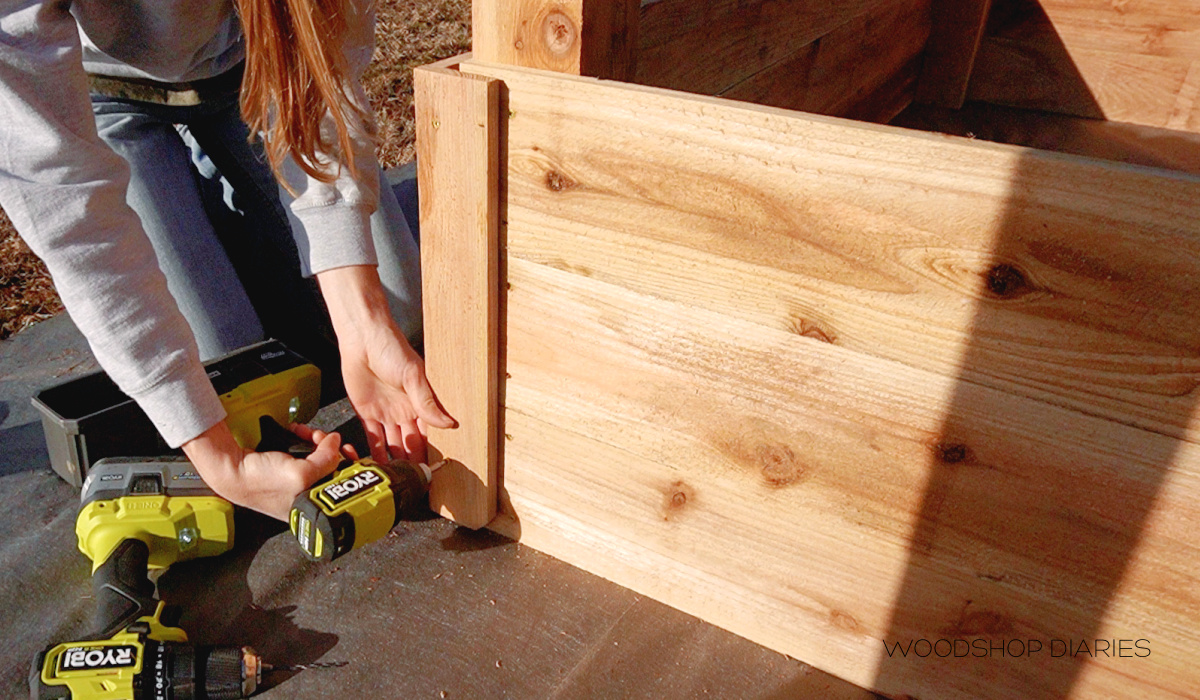
I screwed these onto the corners to cover the dog ears and to add some visual interest using 1 ¼″ decking screws.
.
These corner trim pieces are totally optional.
.
In addition to these corner trim pieces, I did add a couple other pieces in the middle of the long sides on the inside of the beds to help hold the pieces firmly together.
Check out the printable building plans for this raised garden bed build here.
Step 6: Add Wire/Trellis to Garden Arbor
The arbor is pretty if you just wanted it for looks, but it could also serve a purpose if you wanted to use it to grow things vertically.
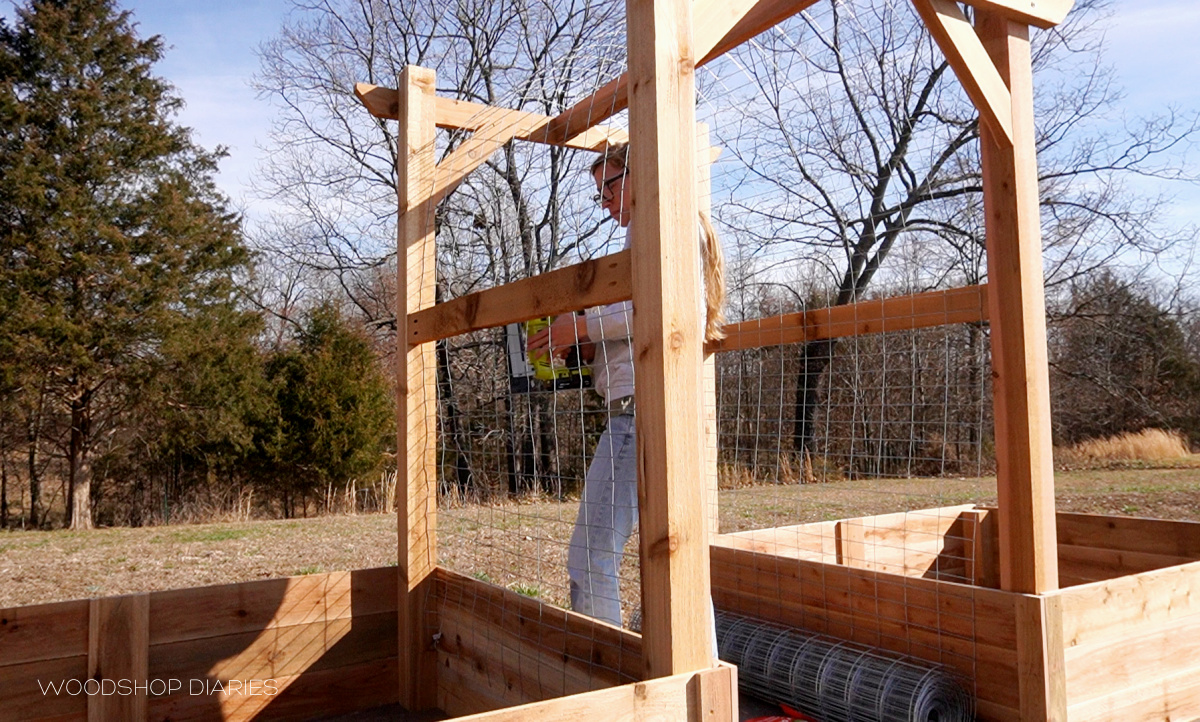
I stapled some welded wire here around the arbor to give me somewhere to tie off the plants as needed while they grow. You could also just attach some wood scraps here to make your own trellis…feel free to get creative.
RELATED: Check out how I made a simple trellis from wood in this garden project
Step 7: Prep DIY Garden Beds for Soil
I lined the inside of the garden beds with landscape fabric. This also isn’t totally necessary, but does help to hold the soil in from running out the cracks between the side boards.
.
And that will keep it looking a little cleaner after big rains.
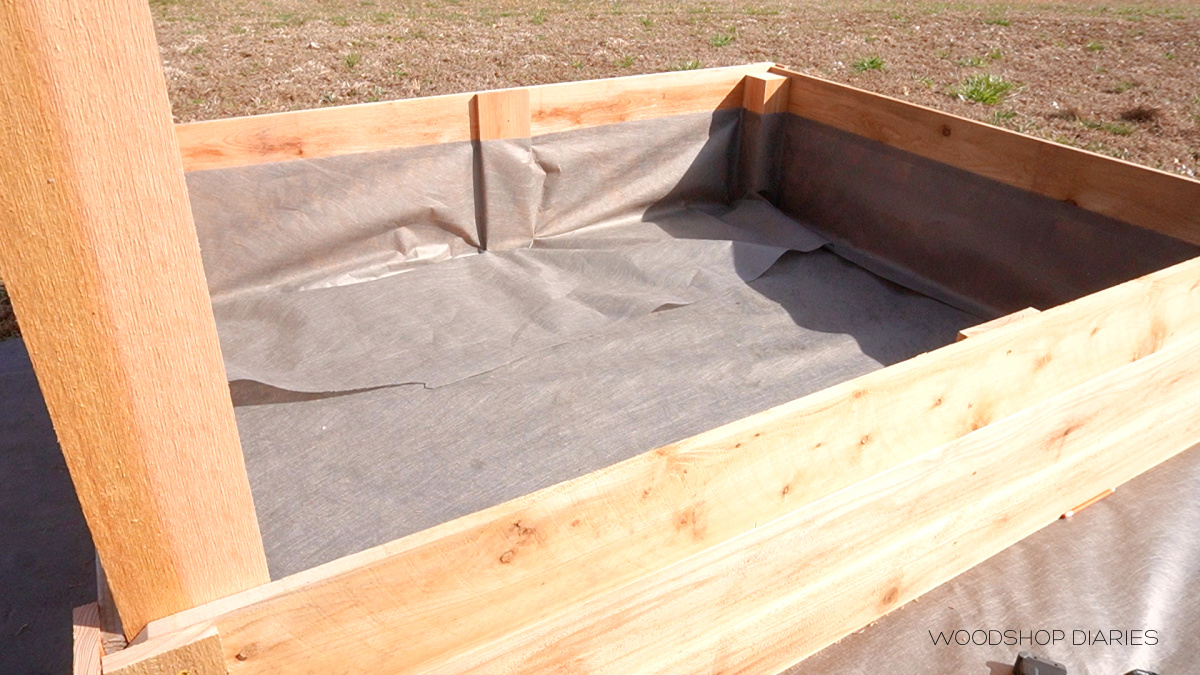
I just stapled the fabric around the inside and trimmed away the excess—which somehow proved more difficult than it should have with the wind blowing as hard as it was haha.
Step 8: Add Plants, Landscaping as Desired
And the rest is just for fun. I wanted to dress up around my new garden beds, so I added some edging. Then some mulch.
RELATED: See how easy this no dig edging is to install in this post from last year’s garden!
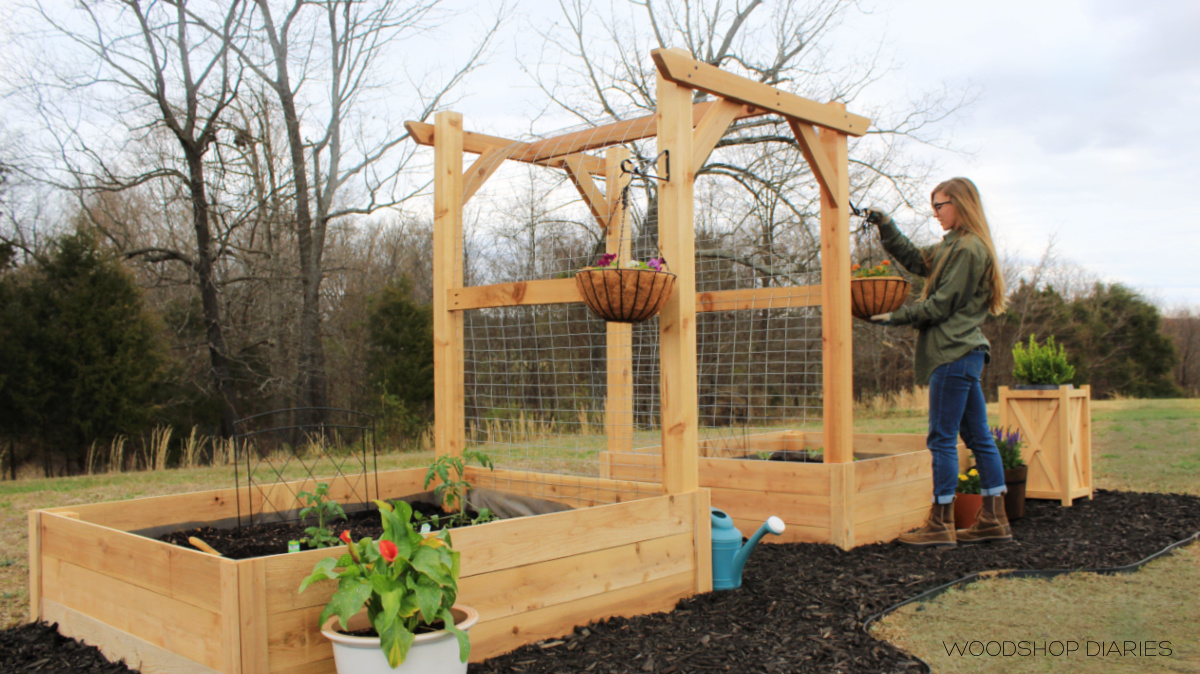
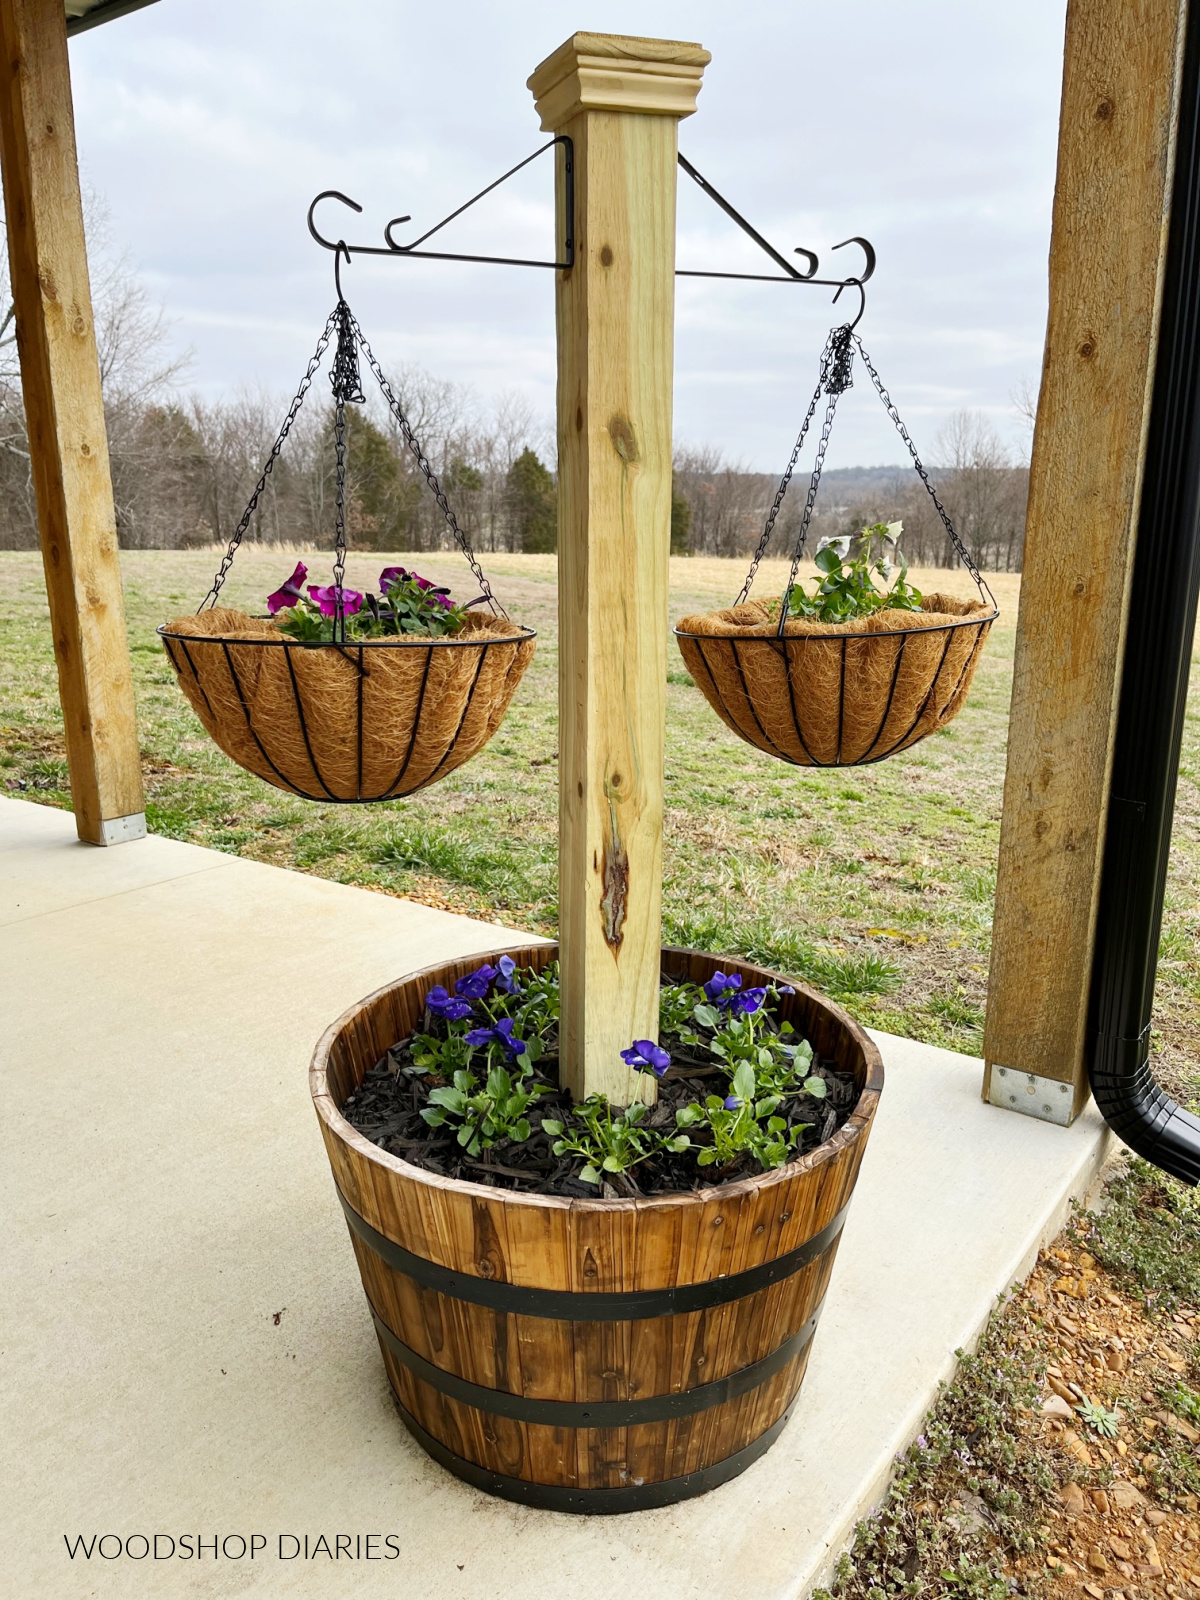
Then, for some color, I added some plant hangers, and a few flowers.
.
We filled the beds with a mix of top soil we had from the field and bagged garden soil.
.
And finally, it was ready for planting.
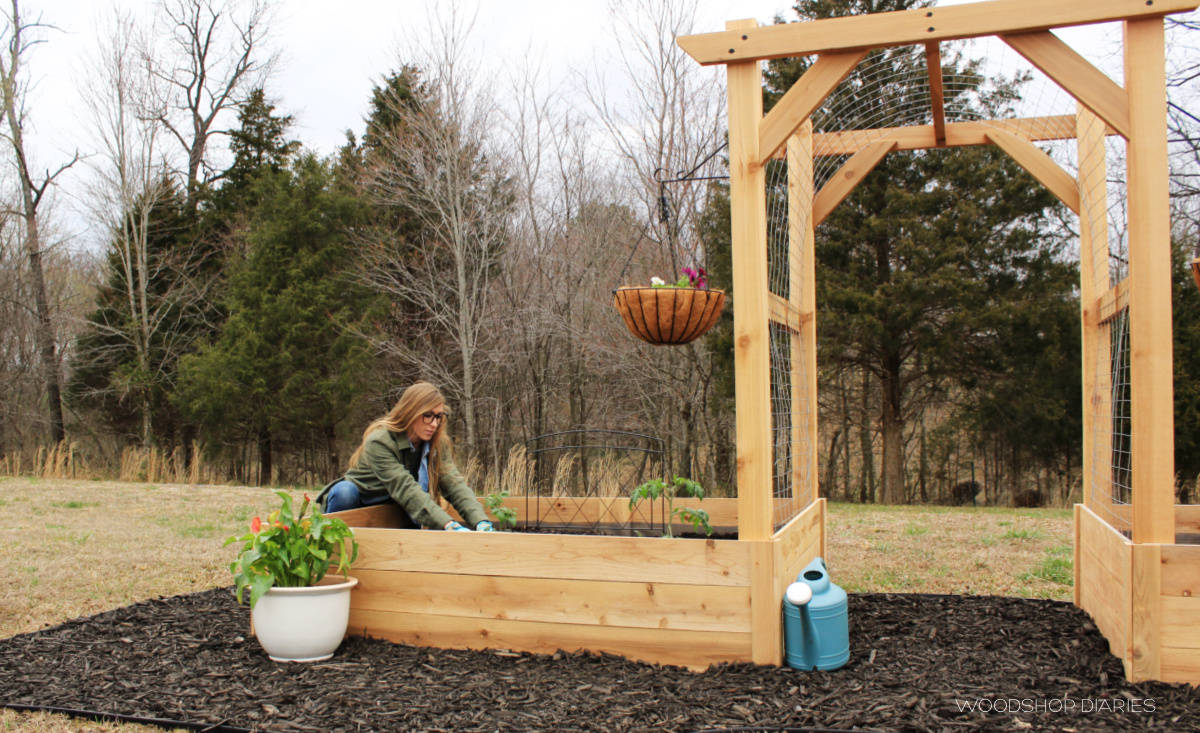
I’m really happy with how this new garden project turned out and we’ve got plenty of room to add on to it later as we need.
.
Eventually I’d like to add a patio out here nearby, but that’s another project for another day haha.
.
If you’d like to check out more garden and outdoor projects, here’s a few of my favorites!

I hope you guys enjoyed these DIY garden beds with arbor plans and if you want to keep up with all the upcoming projects and plans, be sure to subscribe so you don’t miss out on what’s coming next!
Don’t forget to save this for later by pinning it or sharing to your favorite social channel!
Until next time, friends, happy building! 🙂