In this post, I’m sharing about how we gave our backyard a giant makeover for spring and how to create a garden patio you can enjoy through all the seasons!!
.
*I partnered with my friends at The Home Depot and Vigoro to bring this project to life. This post contains affiliate links. See policies.
If you’ve been following along very long, you know that we live in a garage apartment. Basically, we bought 8 acres, put up a 30×50 garage–we live in half and my shop is the other half.
.
This was actually supposed to be a very temporary living space while we built a “real house” next to it on our property, but as things often happen, life didn’t go as planned and the house hasn’t been built.
.
We are about to head into our third summer here. I’m not complaining, BUT since this was supposed to be temporary, we never added any kind of outdoor space (like a deck or patio) and three summers is just too many to waste sitting inside.
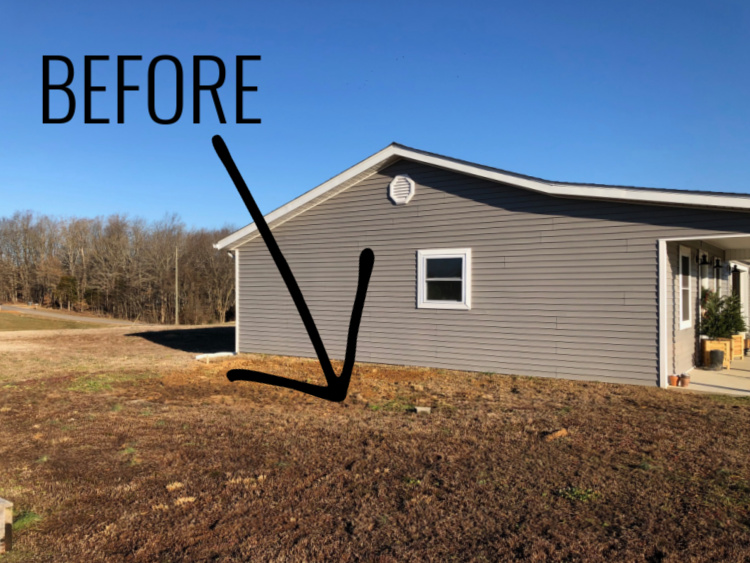
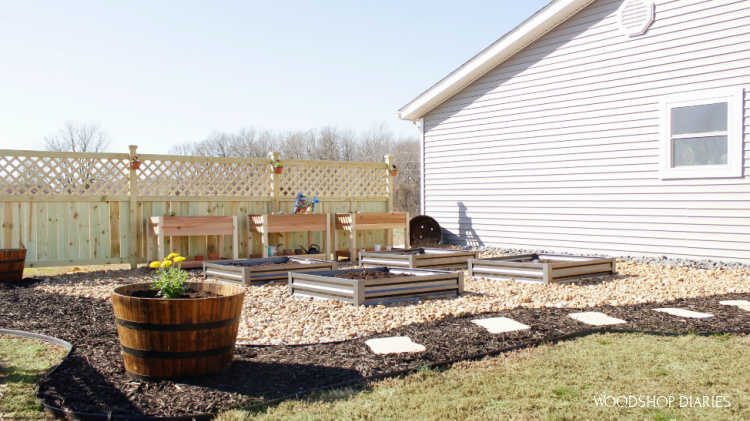
So this spring, I decided it was time to give the yard a refresh and set up a garden patio–a space we can both work, grow and relax.
.
So if you’re ready to see how I transformed this muddy mess into a private garden patio, let’s get building 🙂
.
Check out the video I created showing the whole backyard makeover and I’ve also got the written tutorial below as well.
My Two Goals for this DIY Garden Patio/Back Yard Makeover
I had two goals with this project:
- The main goal was to expand our growing capacity and build a bigger, bolder, better garden in what was this wasted space next to the house.
- And the second was to create an outdoor space we can actually enjoy spending time in.
.
So, the very first thing we needed was a little more privacy.
Products and Materials Used in the Makeover:
I will link specific products throughout the post below, but here’s a quick list of the items we used in this back yard makeover in case you just want to shop the space:
- Vigoro Antique Iron Raised Beds
- Vigoro Barrel Planters
- Vigoro Elevated Cedar Planters
- Vigoro Pond Pebbles
- Vigoro Mexican Beach Pebbles
- Vigoro Black Mulch
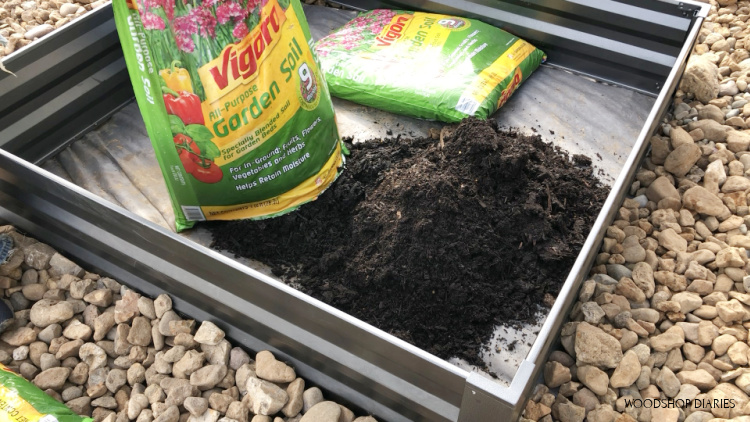
- Vigoro Garden Soil
- Vigoro Potting Soil
- Heavy Duty Landscape Mesh
- Garden Staples
- Vigoro No Dig Edging Kit
- Stepping Stones
- Pot Hangers on Fence
- Bamboo Plant Labels
- Plastic Plant Label Tags
Step 1: Add Some Privacy to the Patio
I kicked off the project by adding a privacy fence along the back side of what will become our new garden patio.
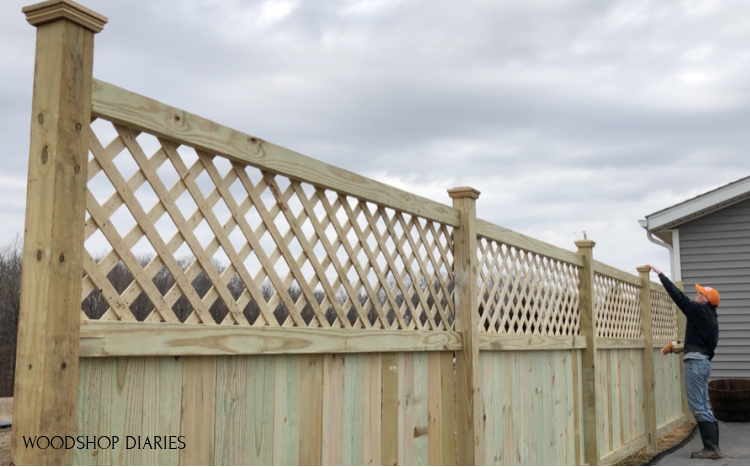
I kept this pretty basic and just made a straight privacy fence solid on the bottom with lattice on the top.
.
You can check out the whole post about how I built this privacy fence here.
Step 2: Prepare the Ground for Garden Cover
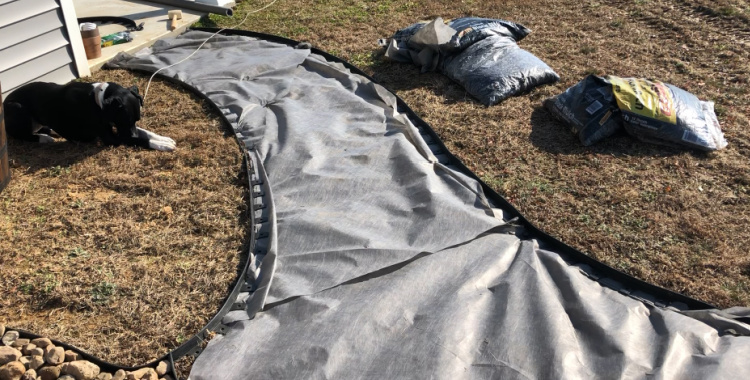
Now I measured this area out and decided to make this garden space about 22 ft x 22ft. I used some scrap sticks to roughly mark the corners of my square.
.
Then, I used some Vigoro Heavy Duty landscape mesh and garden staples to line the entire area square. This will just help prevent weeds from growing up in our garden and in the rock and mulch.
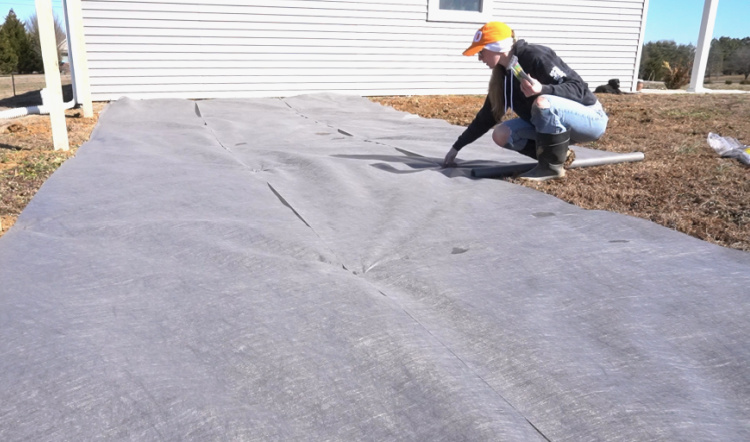
*I had to come back later and fill in some spots where I got creative with the edging haha.
.
Speaking of edging, once the mesh was in place, I used this Vigoro No-Dig Edging to outline the garden and to separate where I would have mulch vs dark rock, vs lighter rock.
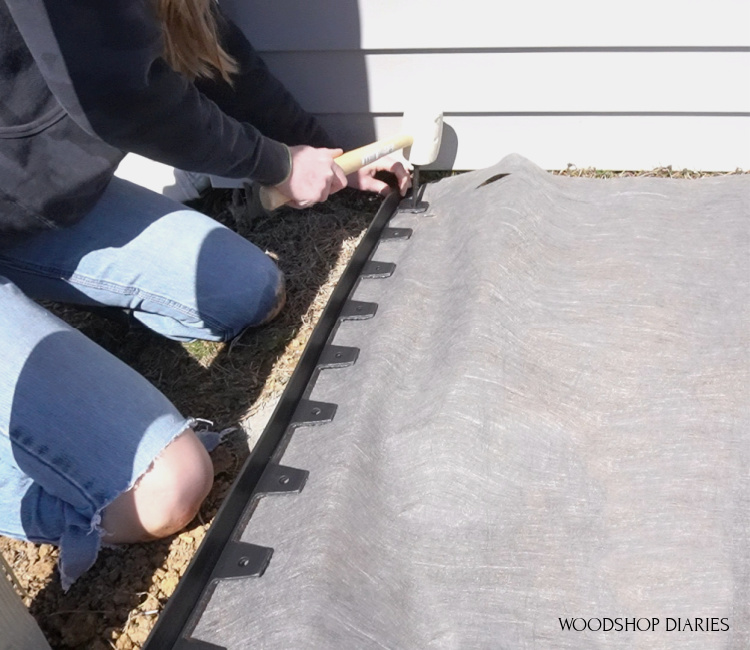
If you saw my video about how I built a faux fence to hide my ugly well house back last fall, you may remember seeing this edging before. It’s SUPER easy to install and it’s flexible so you can lay it out in any shape you want.
.
You literally just use a rubber mallet to stake the edging in place—no digging required.
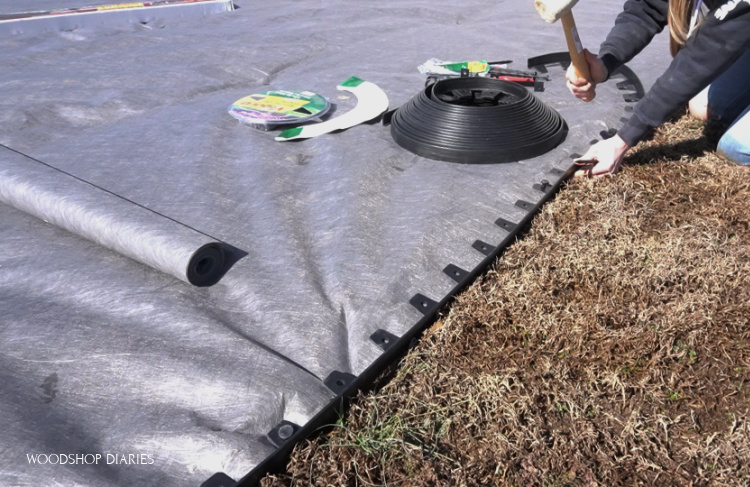
I was totally winging it here with my design, so I just kind of outlined the rough shape I wanted the garden to take. Once I had the edging installed, I went back and added mesh anywhere that wasn’t already covered.
.
Now, the back right corner was a high spot. I decided instead of doing a bunch of digging and leveling, I would just use this as part of the design. I used a barrel planter in this back corner laid on its side so it looks like it’s kind of pouring rock out into the garden.

So I installed some edging going out from that corner and then tied the left and right edging together to make a little walkway from the front porch.
.
Lucy helped me decide how to lay out the walkway 🙂 She’s the best helper haha.
Step 3: Add Garden Beds
Before filling up this space with the rock and mulch, I added the raised beds.
.
I wanted something that was going to withstand the weather, so picked out these powder coated raised beds by Vigoro to put in the middle.
.
They were really easy to put together and once they were assembled, I spaced them out evenly and did my best to level the ground underneath them to get them to sit flat.
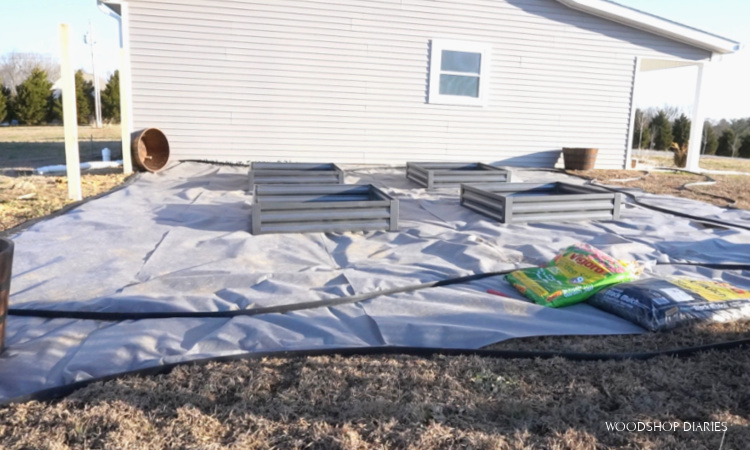
Since the ground was so wet, that was pretty simple—I just stomped around until they were level haha. But, if your ground wasn’t so easy to work with, you could lift a section of the mesh up and dig out just the area you needed.
Step 4: Add the Ground Cover
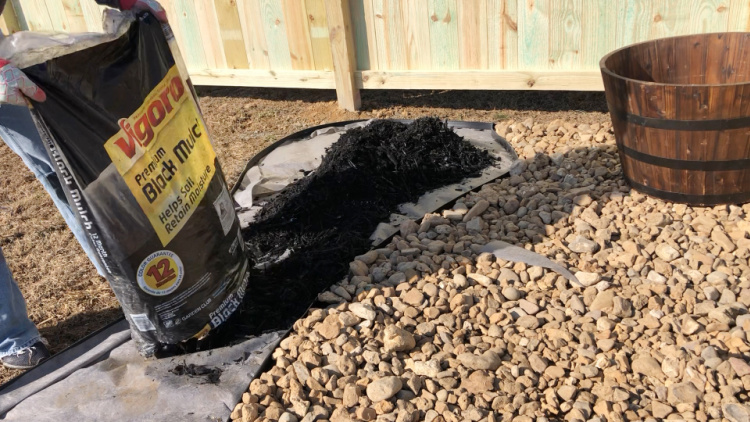
For this project, I used Vigoro Pond Pebbles for the middle section, Mexican Beach Pebbles for the small area next to the house, and black mulch for the outside border and walkway.
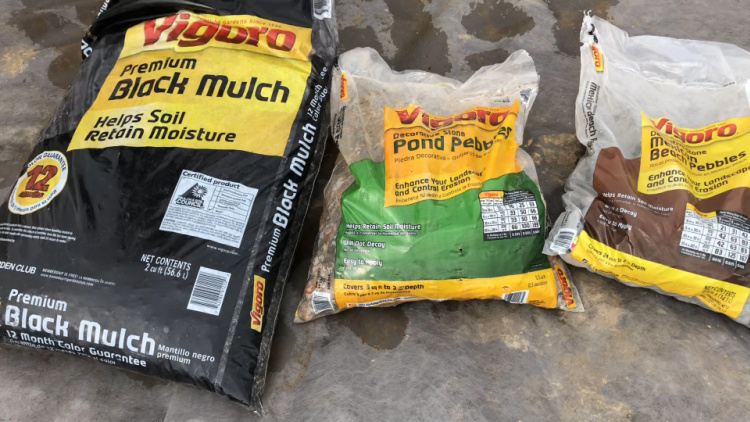
I spread the bags out over the area, cut them open and spread the rock around about 2-3 inches thick all the way up to the edging.
.
HELPFUL TIP: If you find these products on The Home Depot website, you can type in the size of the area you are covering and it’ll figure how many bags you will need 🙂
.
I just used a metal rake to evenly spread out all the pond pebbles after I had them out on the ground.
.
Then, I filled in the area over by the house with these Mexican beach pebbles to give it some contrast.
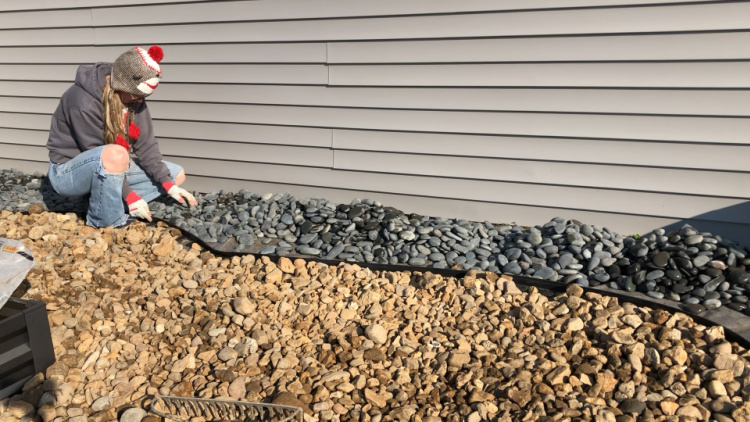
Then, I added the black mulch around the outside and down the walkway.
While I was at The Home Depot, I also picked up some stepping stones to add to the black mulch walkway.
.
I tried to casually walk and estimate my foot steps so that I could place these at a natural distance apart and set them in place in the mulch.
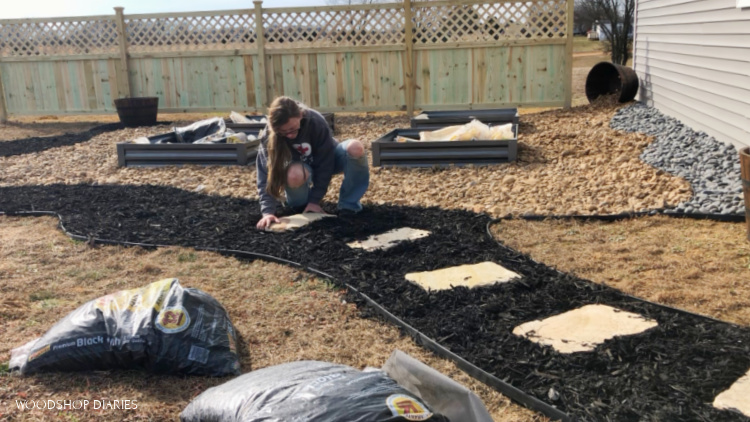
I’m sure there’s a way more scientific approach to that, but this worked haha.
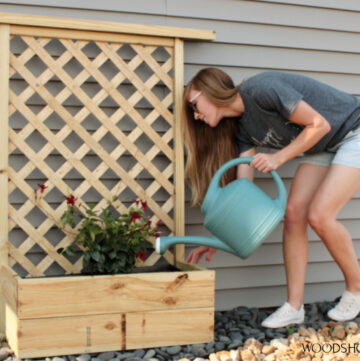
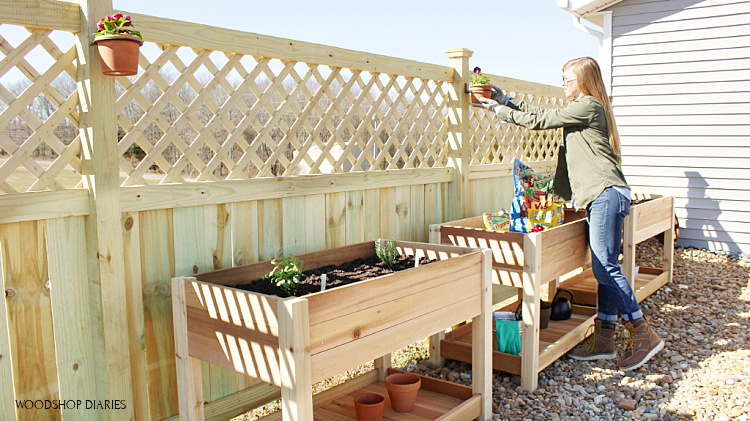
Step 5: Add Additional Planters to Garden Patio
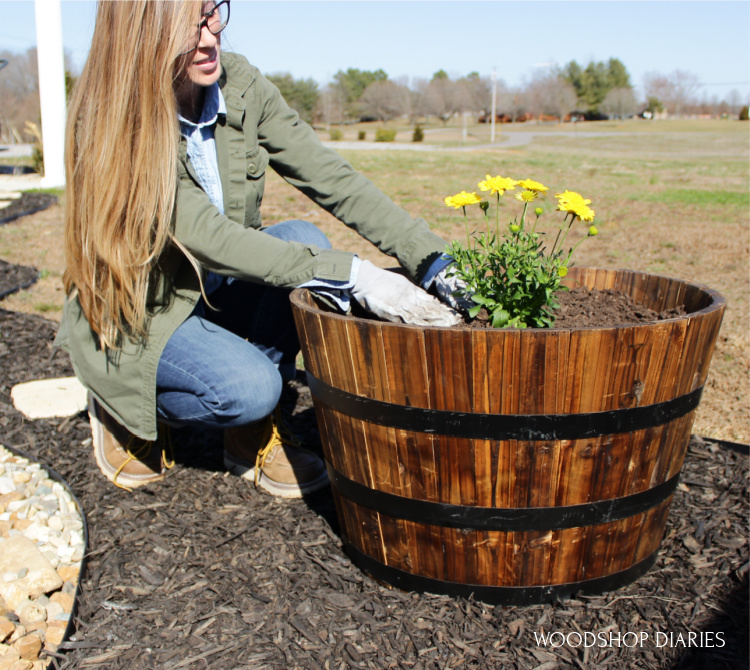
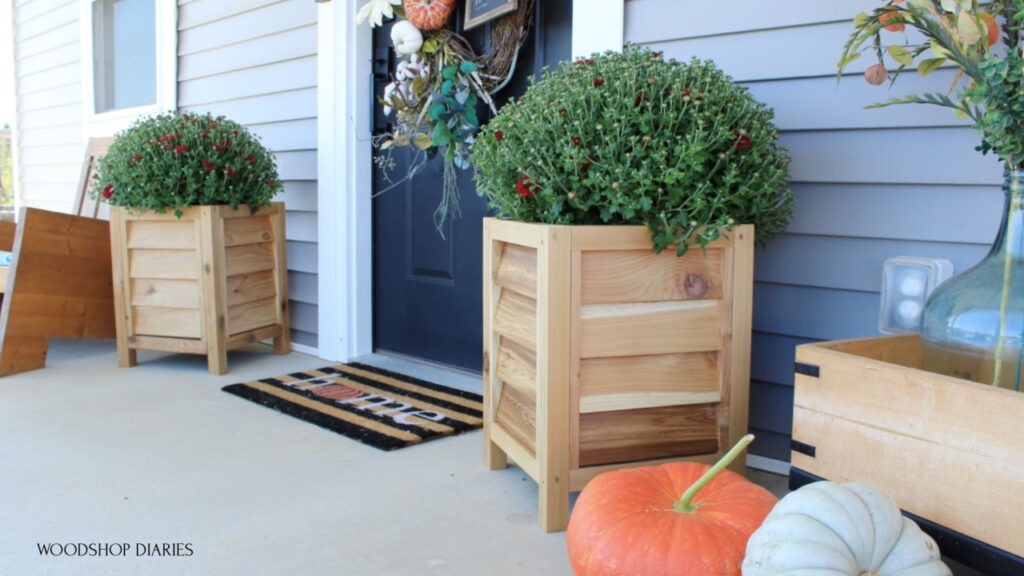
In addition to the raised beds in the center of the patio, I added two more sets of planters—three elevated cedar planter beds along the fence, and some barrel planters at the corners.
.
The barrel planters just simply set in place.
But the elevated cedar planters require a little assembly. Nothing difficult and no tools required–you just use a rubber mallet to tap the pieces together.
.
But, what I love about these particular cedar planters is that I can buy the kit with precut pieces and put it together in about 5 minutes.
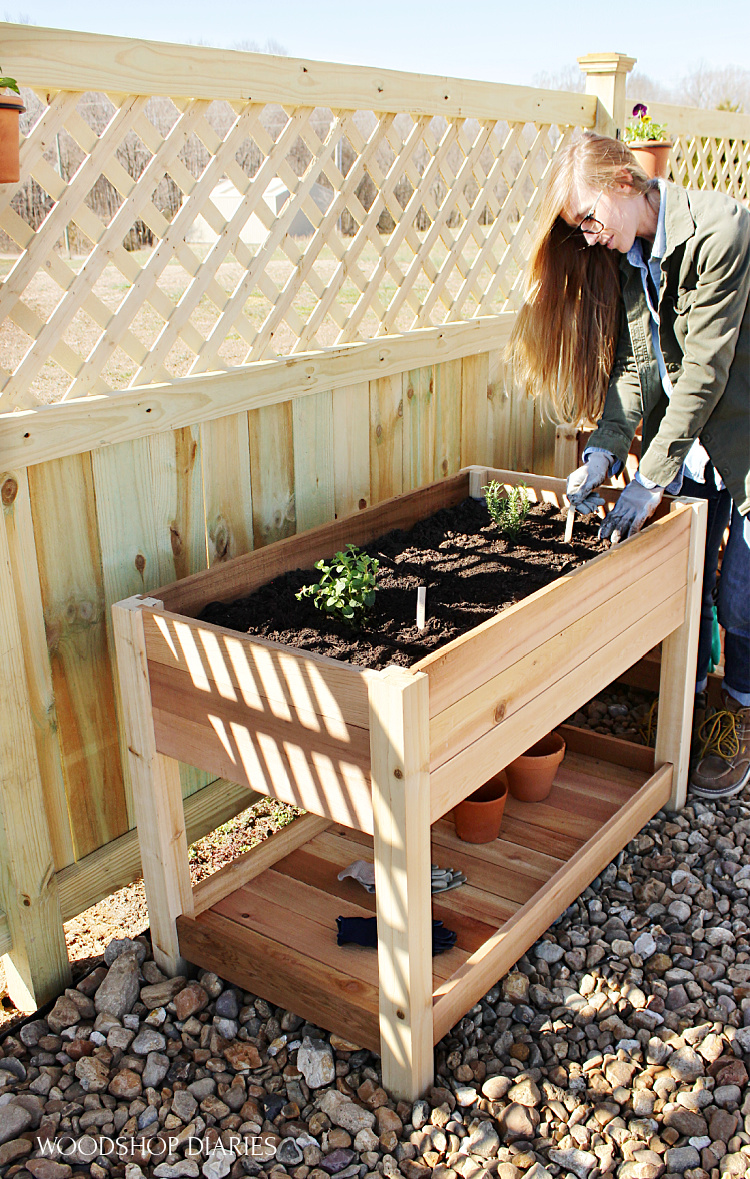
I had actually planned to build a potting bench for this space, but when I got these raised beds and put them together, I decided one of these would work perfect as a potting bench and the kit was cheaper than I could have bought the wood to build one.
Step 6: Add Garden Soil
After all the raised beds, barrel planters, and elevated cedar planters were in place, assembled, and level, I filled them all with garden soil to plant herbs and flowers in except for the one planter I will use as a potting bench.
To finish up, I added some little pot hangers and pots on the fence posts and some plant labels in all the beds.
.
I did manage to find a few flowers locally, but right now it’s slim pickings as it’s still a little early for flowers and planting in our area. But as soon as it warms up, these planters will be ready.
And so will the rest of this garden. I’m so excited about this back yard makeover, our new garden, and that we will finally have somewhere to spend time in outside this summer.
I’m definitely brainstorming some seating and entertainment options to add to this garden patio space and possibly a swing or a firepit, too.
.
If you’re anxious to see what I come up with, be sure to subscribe to my newsletter below so you don’t miss out on those upcoming projects!
In the mean time, if you’d like to see some more outdoor ideas, check out a few of my favorites here:

DIY Privacy Fence 
DIY Louvered Planter Box 
How to Hide Outdoor Eye Sores 
DIY Outdoor Chair


I hope this has inspired you to quit waiting for someday to build a better garden. Bring on spring now and start enjoying it.

Until next time, friends, happy building 😊