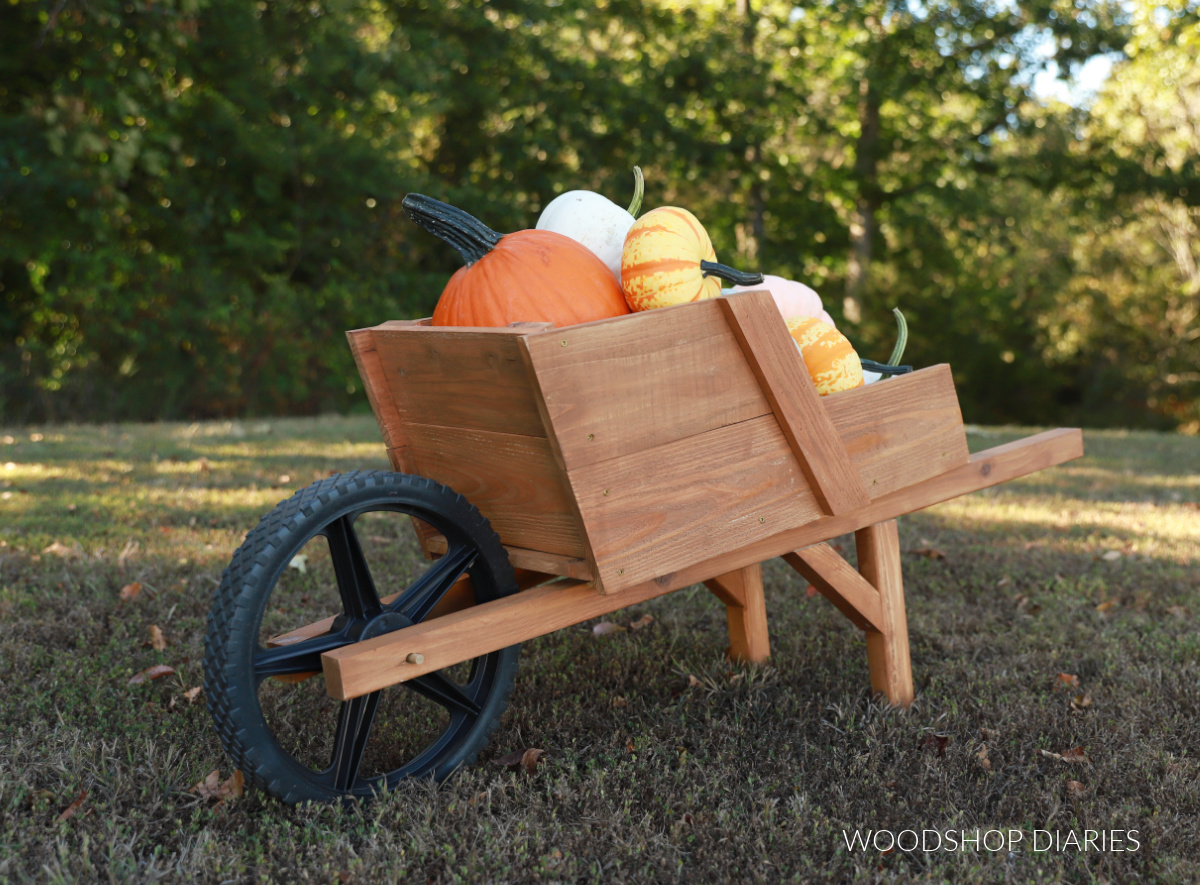
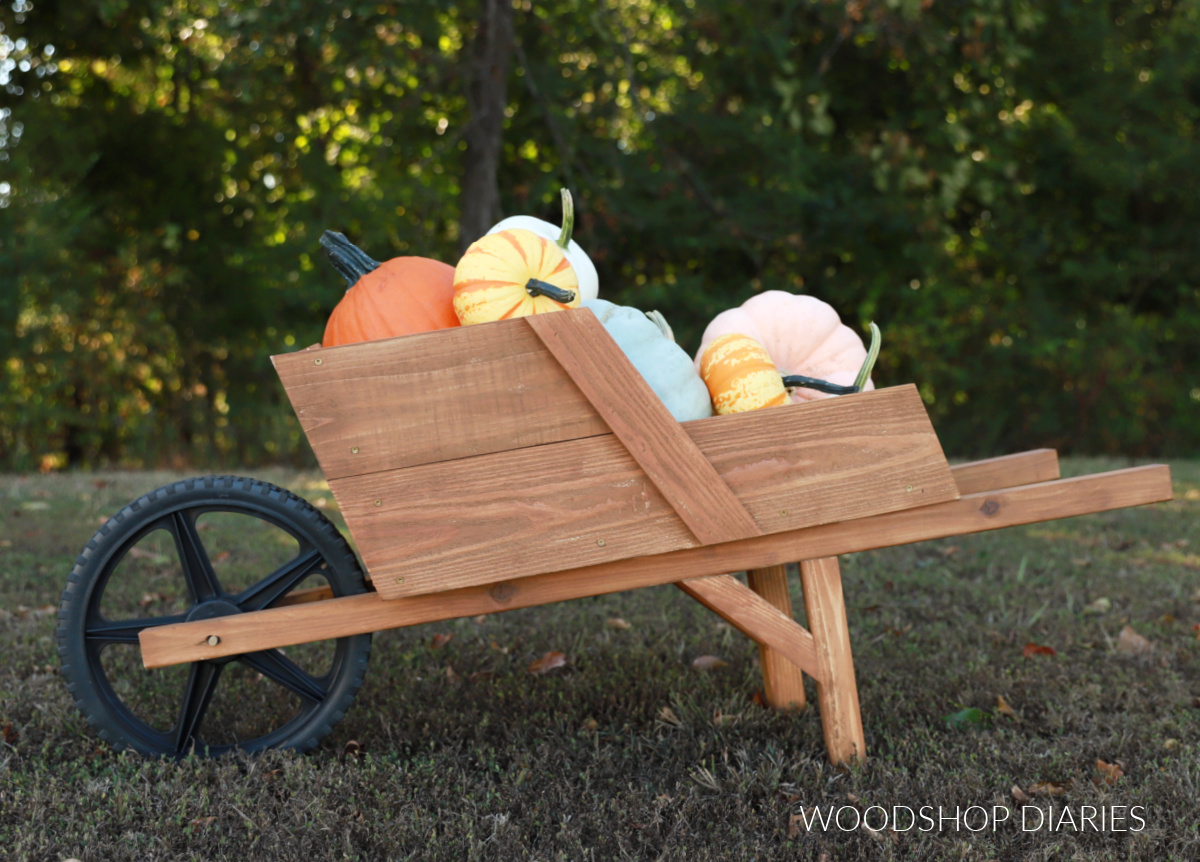
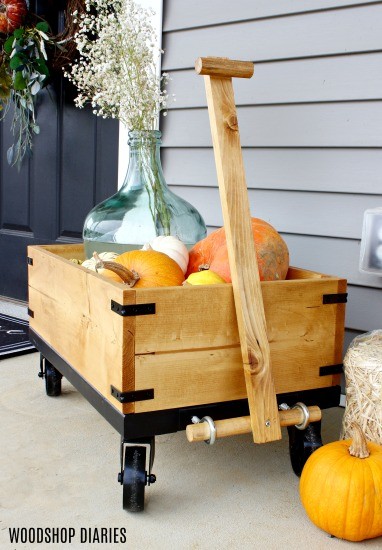
In this post, I’m sharing how to build a decorative DIY wooden wheelbarrow!
I’ve always thought these rustic wooden wheelbarrows were so cute in the garden and on the porch–especially at fall.
But, they’re a little difficult to find during certain times of the year and rather expensive to buy.
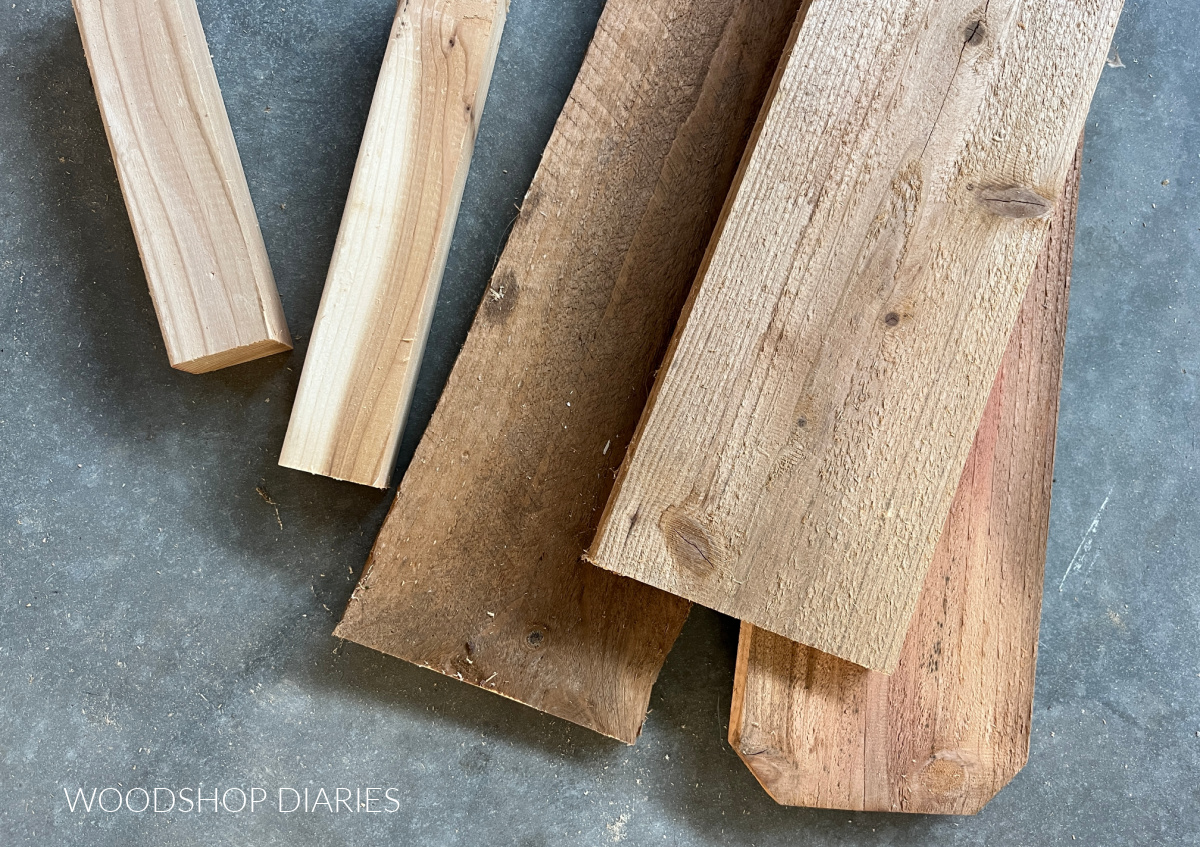
So, instead of buying one, I decided to build mine from a few leftover fence pickets and some 2x2s I had in the shop.
I made this one to fill with pumpkins for fall, but it would also make an adorable planter box that would work well for any season.
If your porch could use a fun new decoration, I’m sharing the plans to build your own wooden wheelbarrow in the post below.
*This post contains affiliate links. See website policies.
What to know before building
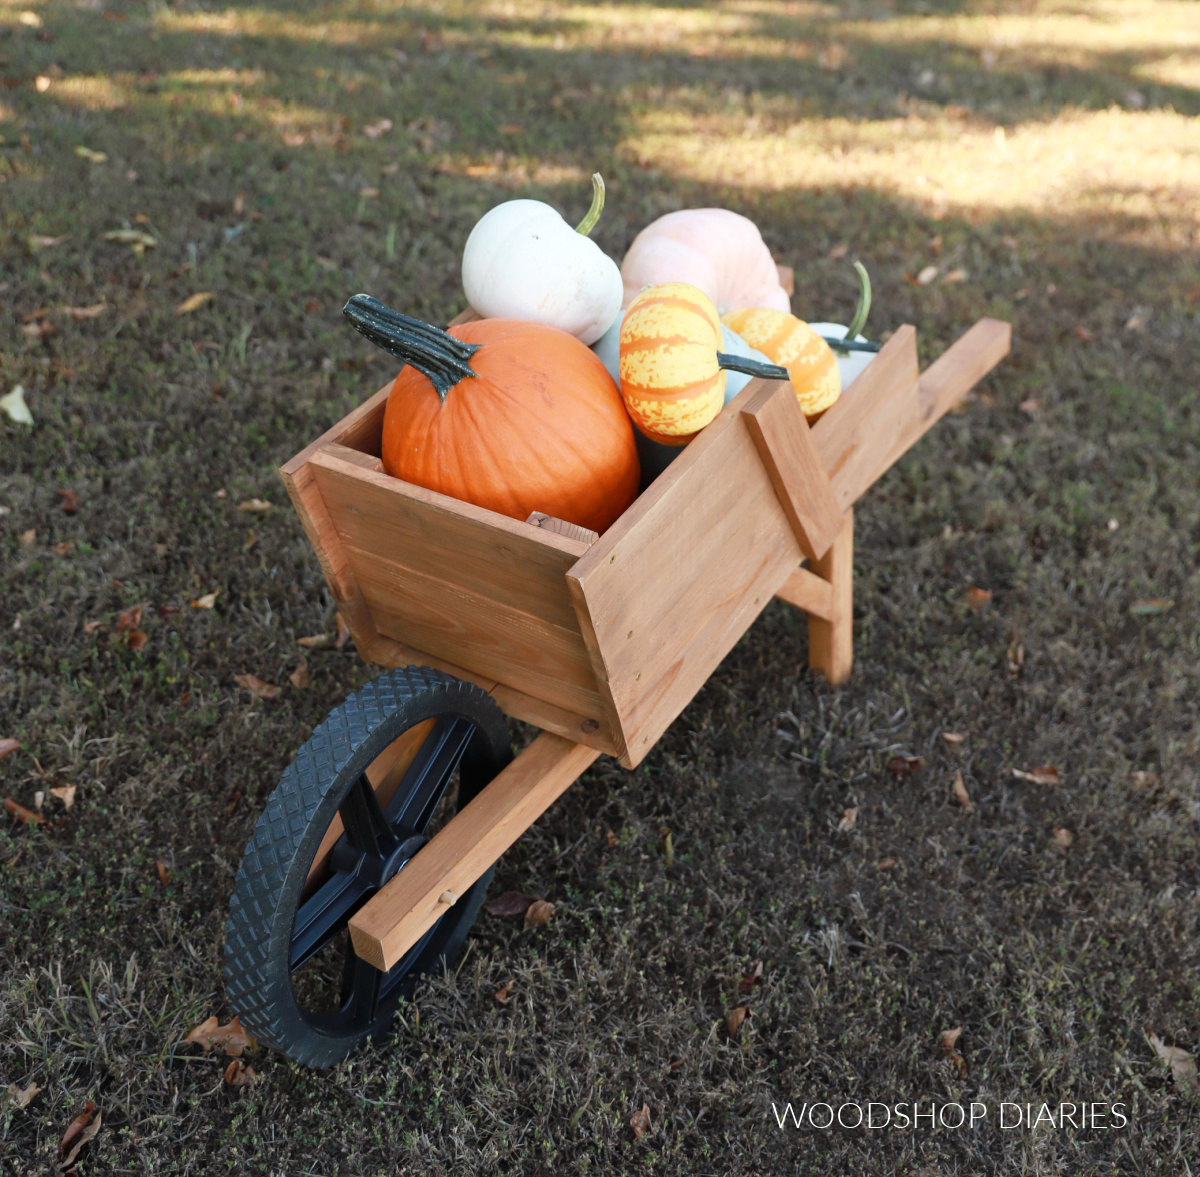
Once finished, this wheelbarrow does actually function–the wheel spins and it does support a good amount of weight inside.
However, it’s intended for decorative purposes–not to be used as an actual wheelbarrow.
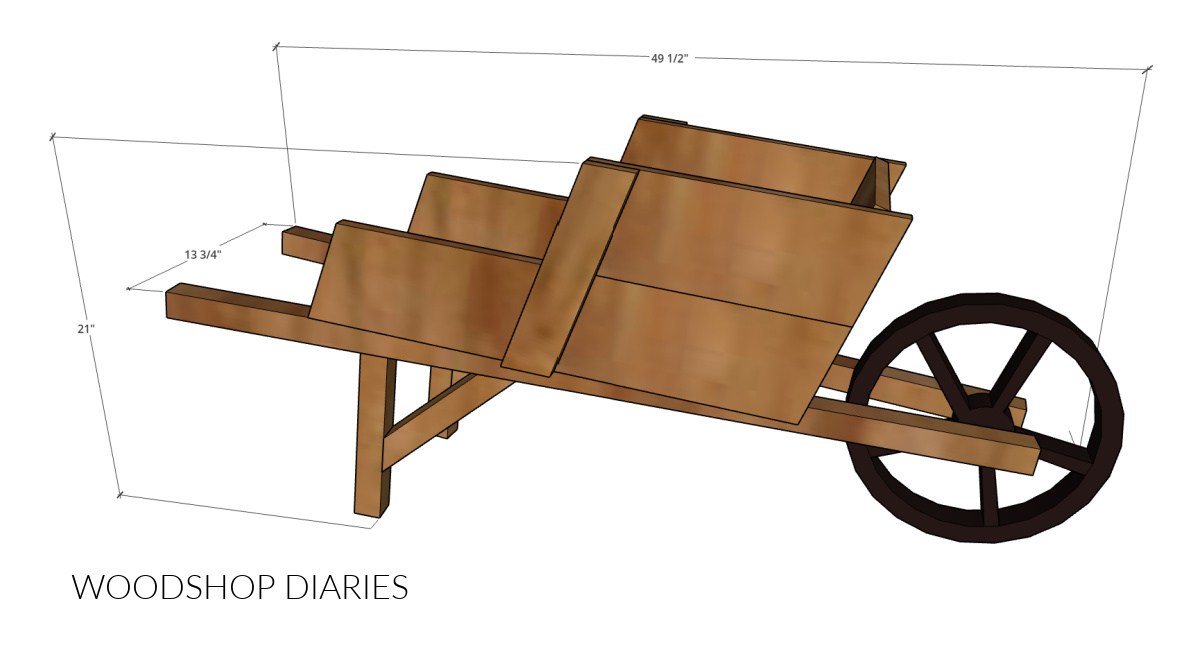
The overall size of this project ended up being approximately 13 ¾″ wide x 21″ tall x 49 ½″ long.
While I would have loved to be able to find an antique metal wheel to use with this, I didn’t have any luck finding one the size I needed at the local junk stores.
So instead, I used a replacement lawnmower wheel. It’s not as rustic looking as I would have liked, but it works well and was fairly inexpensive.
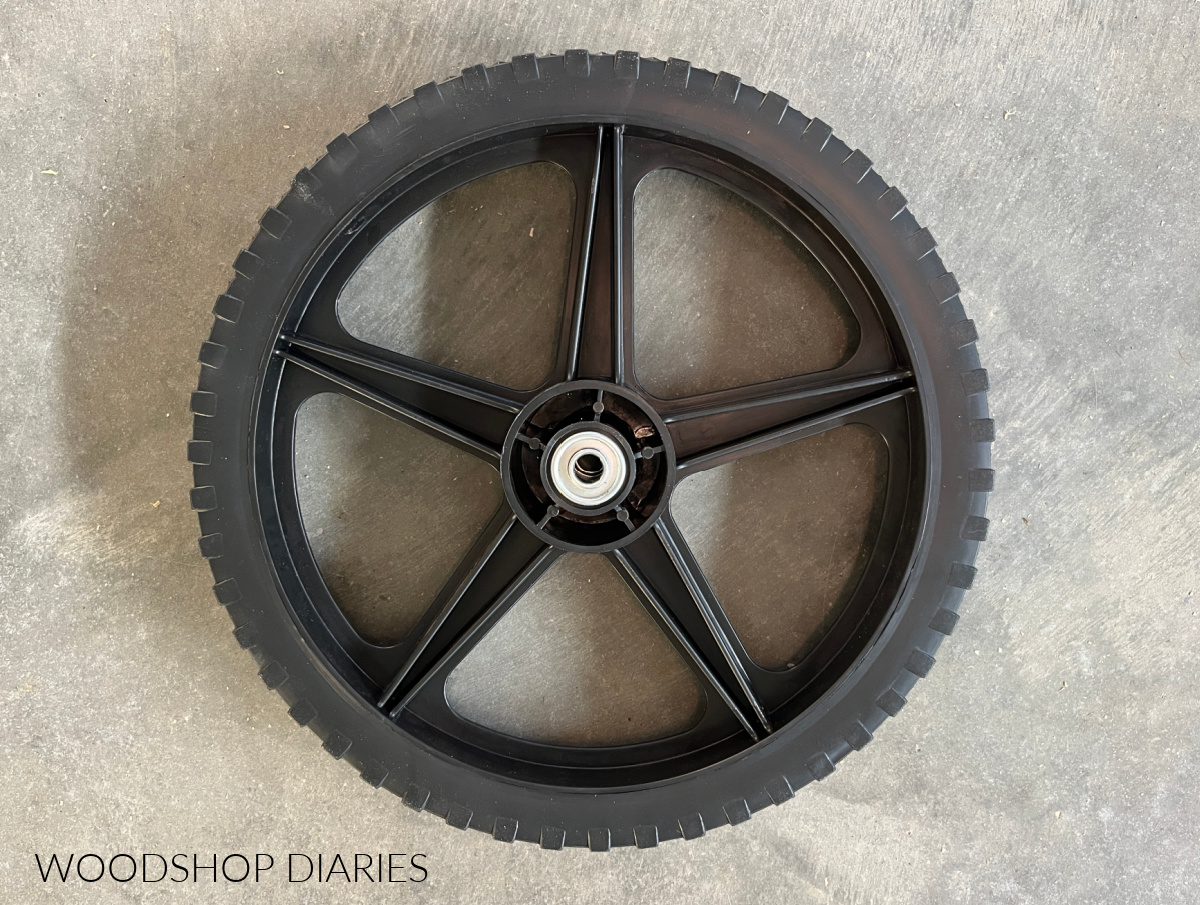
Alternatively, you could also use a small bicycle wheel or cut your own wooden wheel from some plywood or other scraps.
The exact type, style and size of wheel isn’t critical here, so feel free to get creative. But a wheel about 12-14″ diameter seemed to be a good fit.
Enjoy DIY projects and woodworking plans? Sign up for priority access for the latest posts on Woodshop Diaries!
How to build a decorative wooden wheelbarrow
This project is an easy build that you can complete in just an hour or two. You can assemble with nails and/or screws, but if using nails, don’t skip the wood glue!
Feel free to get creative and adjust the style, angles and sizing as desired. This is one of those projects where you don’t have to be super precise and many of the details aren’t critical.
Tools & Materials
Tools:
- Miter saw
- Drill/Driver
- Brad Nailer (optional)
- ⅜″ drill bit
Materials:
- (3) 1x6x6 fence pickets (or 1×6 boards)
- (2) 2x2x8 boards
- ⅜″ diameter wooden dowel rod (about 10″ long)
- 1 ¼″ wood screws
- 2 ½″ wood screws
- 1″ OR 1 ¼″ brad nails (optional)
- Wood Glue
- Wheel (see notes)
*NOTE: I assembled parts of this project using brad nails, but if you don’t have a brad nailer, you can use a drill and screws instead. Brad nailer and nails are optional.
Not sure what screws to use? Check out this post to learn how to choose the right screw for your DIY projects.
Step 1: Cut and Assemble Sides & Bottom Separately
I made the wheelbarrow part of this project from 1×6 cedar fence pickets. Cedar fence pickets are a great option for this because they are a fraction of the cost of regular 1×6 cedar lumber.
But any regular 1×6 boards would work fine here. You may even be able to find some in your scrap pile!
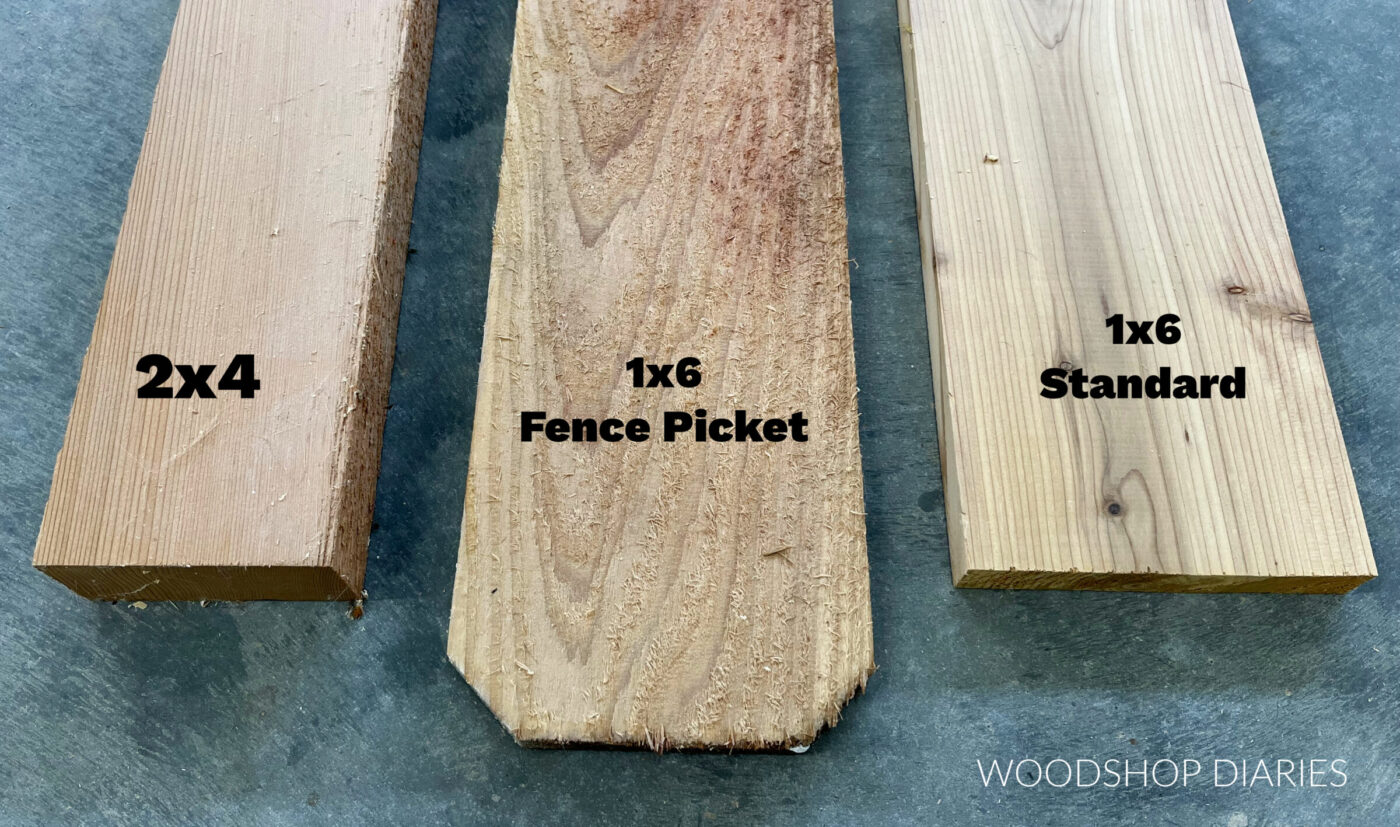
I used cedar since this was an outside project, but pine would also work fine. It just may not last as many seasons if it’s exposed to the elements (rain, sun, harsh weather).
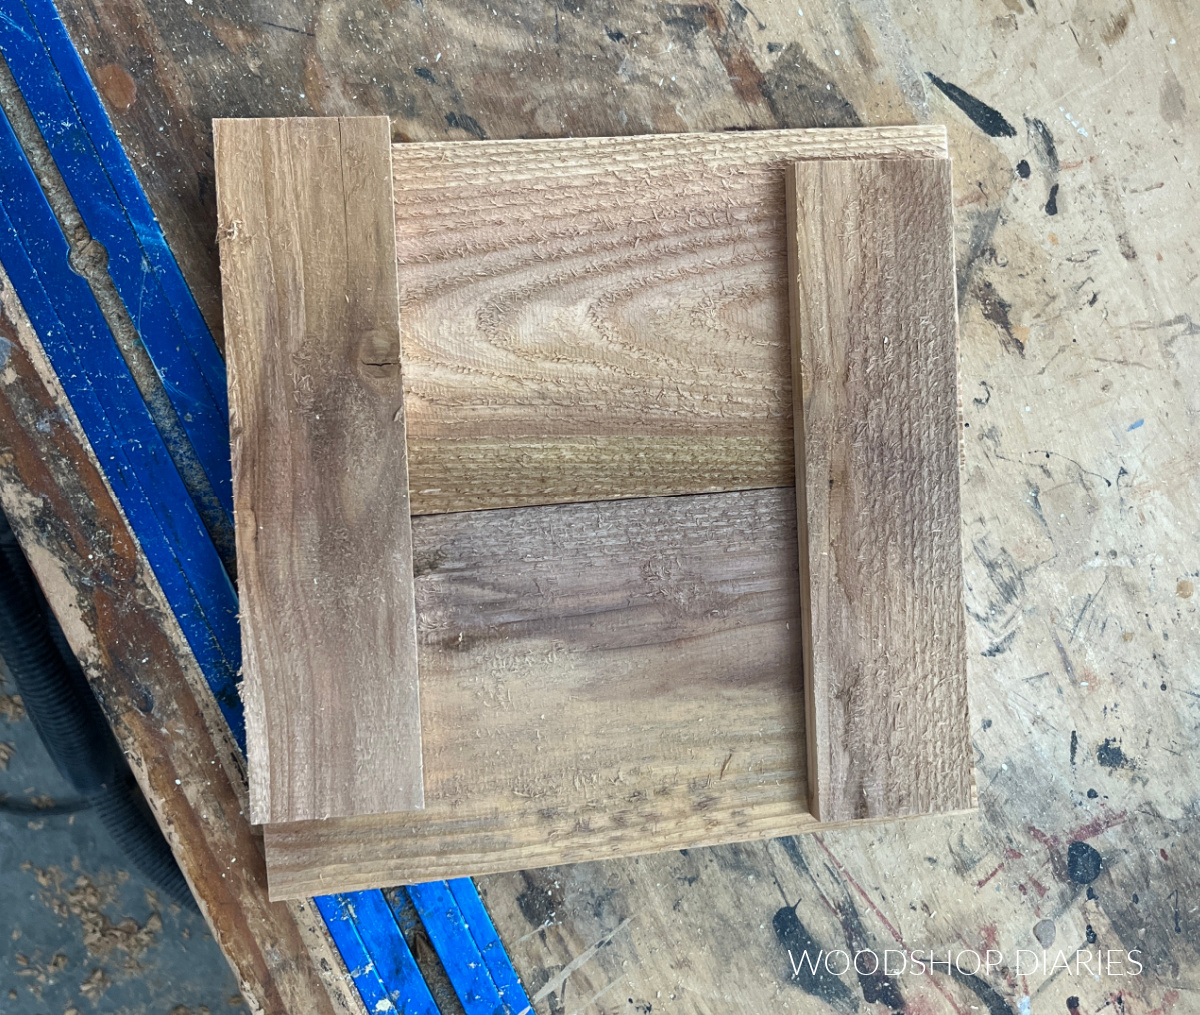
For the bottom of this wheelbarrow, I cut two pieces of fence picket to 26″ long. By the way, 1×6 boards are actually 5 ½″ wide. For more information, see this post on understanding lumber sizing.
Then, I cut another piece of fence picket to 11″ long and ripped it in half to make two thinner strips to go across the longer pieces like shown below.
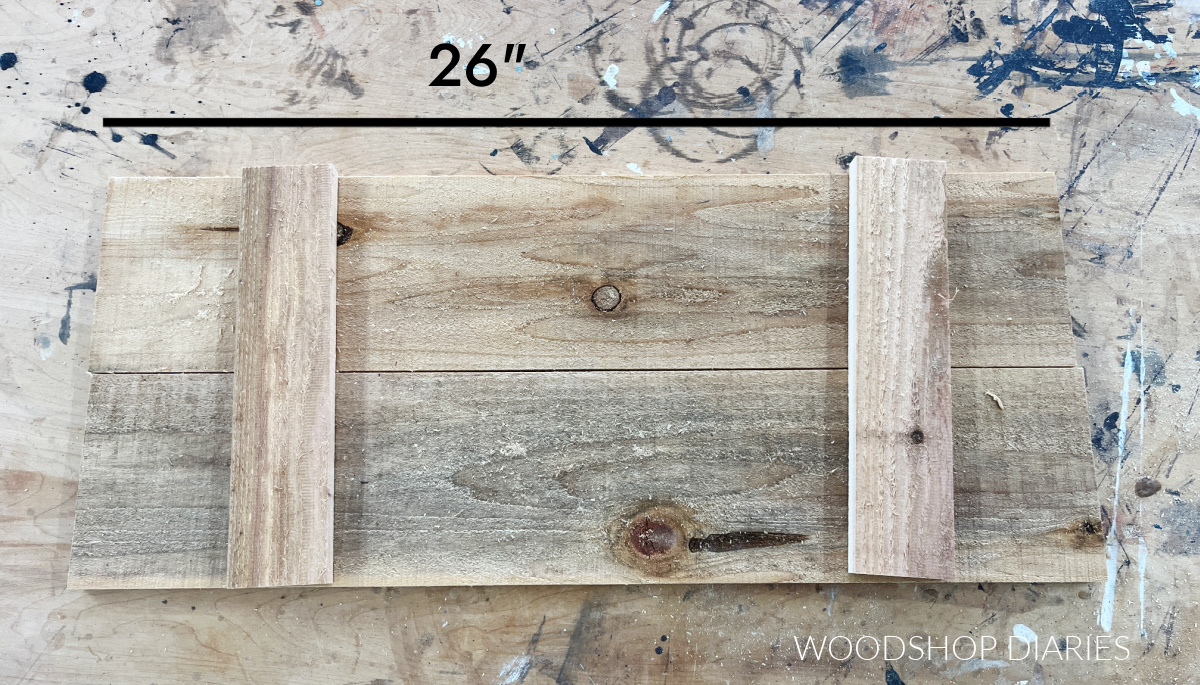
NOTE: If you didn’t want to rip fence pickets in half, you could use 1x3s instead, or use the full width picket.
Fence pickets are often pretty rough, so I recommend sanding the pieces well before assembling.
I glued and nailed these pieces together like shown below to make the bottom panel.
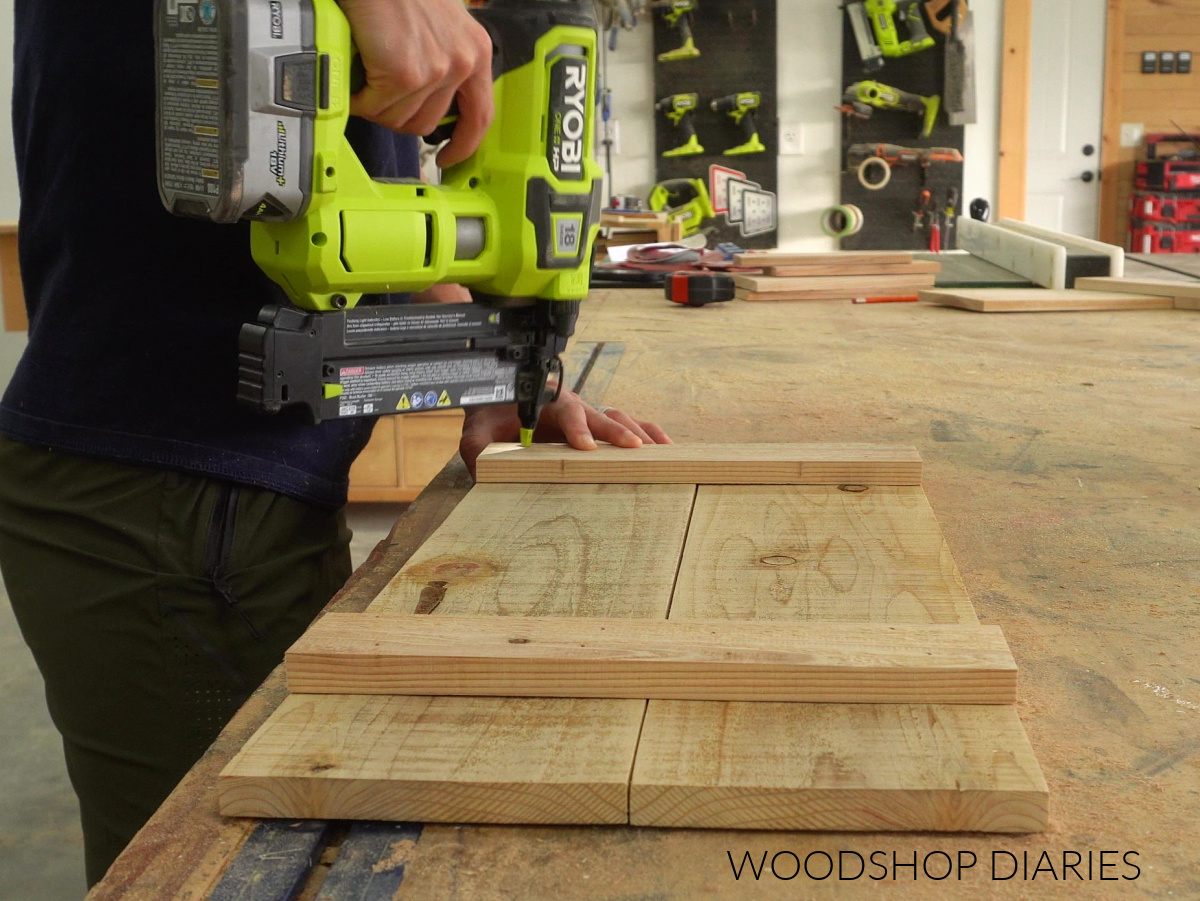
TIP: Since fence pickets are only ⅝″ thick, I used 1″ long nails. If you were using regular ¾″ thick material, use 1 ¼″ nails. And if you didn’t want to nail, screws would work, too.
For the two sides of the wheelbarrow, I cut two more pieces of 1×6 cedar fence picket to 26″ long and 15″ long with ends mitered 15 degrees.
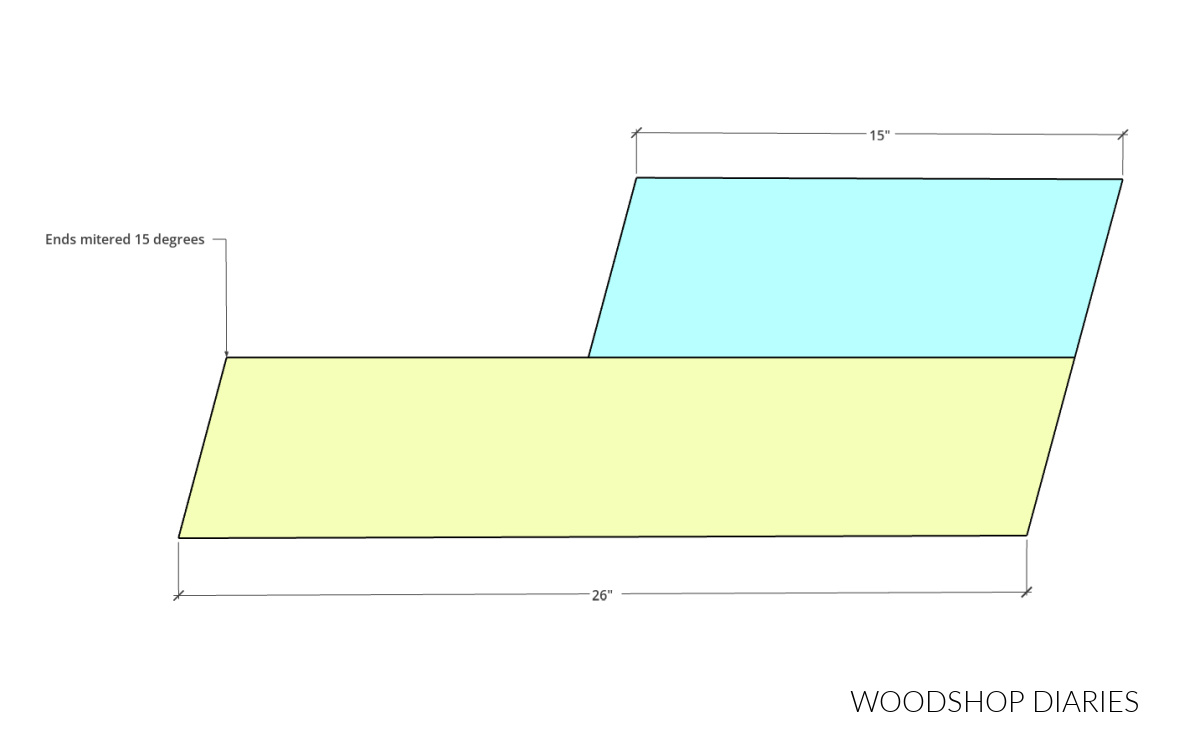
I ripped another piece of fence picket in half and cut these to fit across these boards like shown (note the ends will be mitered 15 degrees).
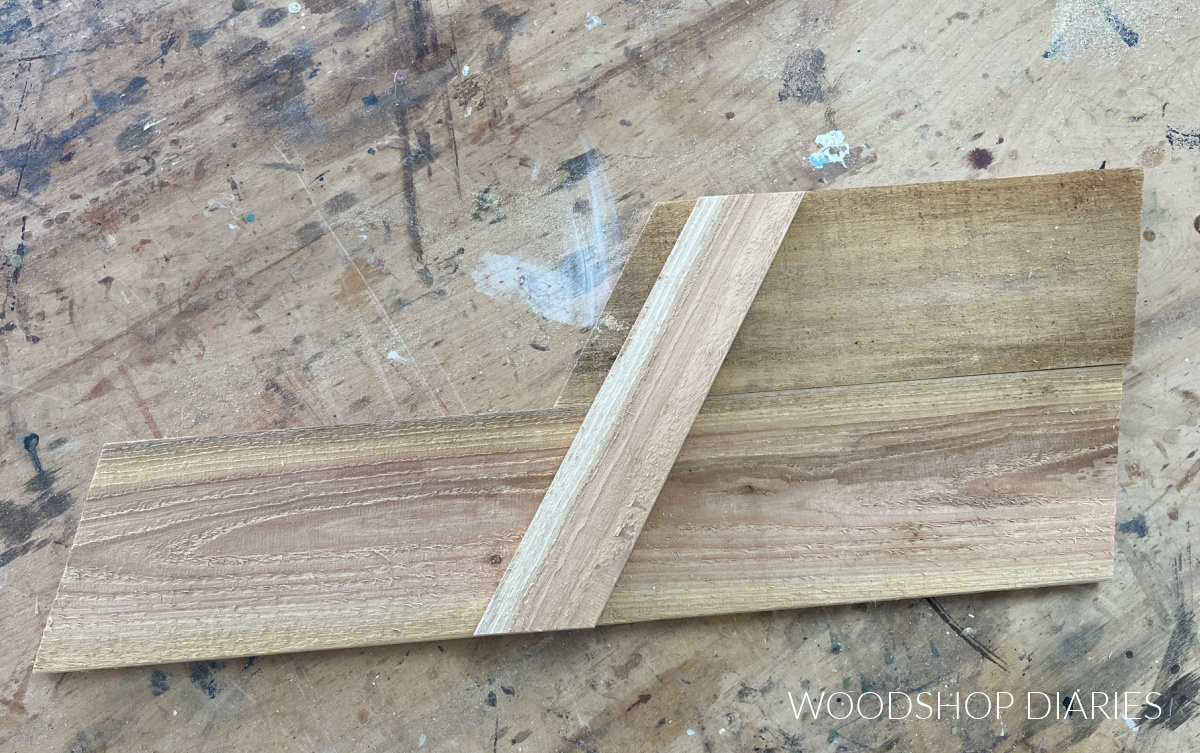
Then I glued and nailed them together, just like the bottom panel, making sure one side panel mirrored the other side panel.
Step 2: Assemble Wheelbarrow Body
Once the glue dried on the bottom and sides, I screwed the sides to the bottom using 1 ¼″ wood screws.
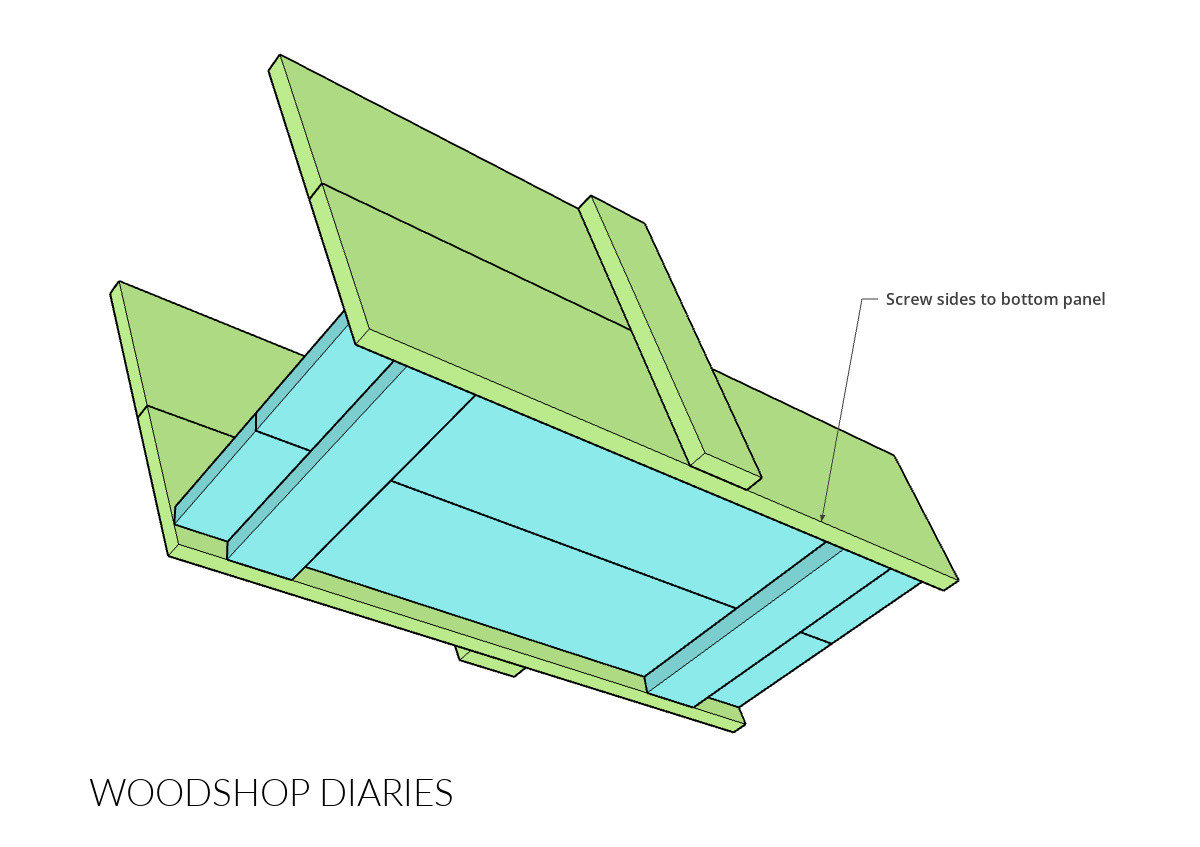
Be sure to predrill before driving the screws to prevent splitting the wood.
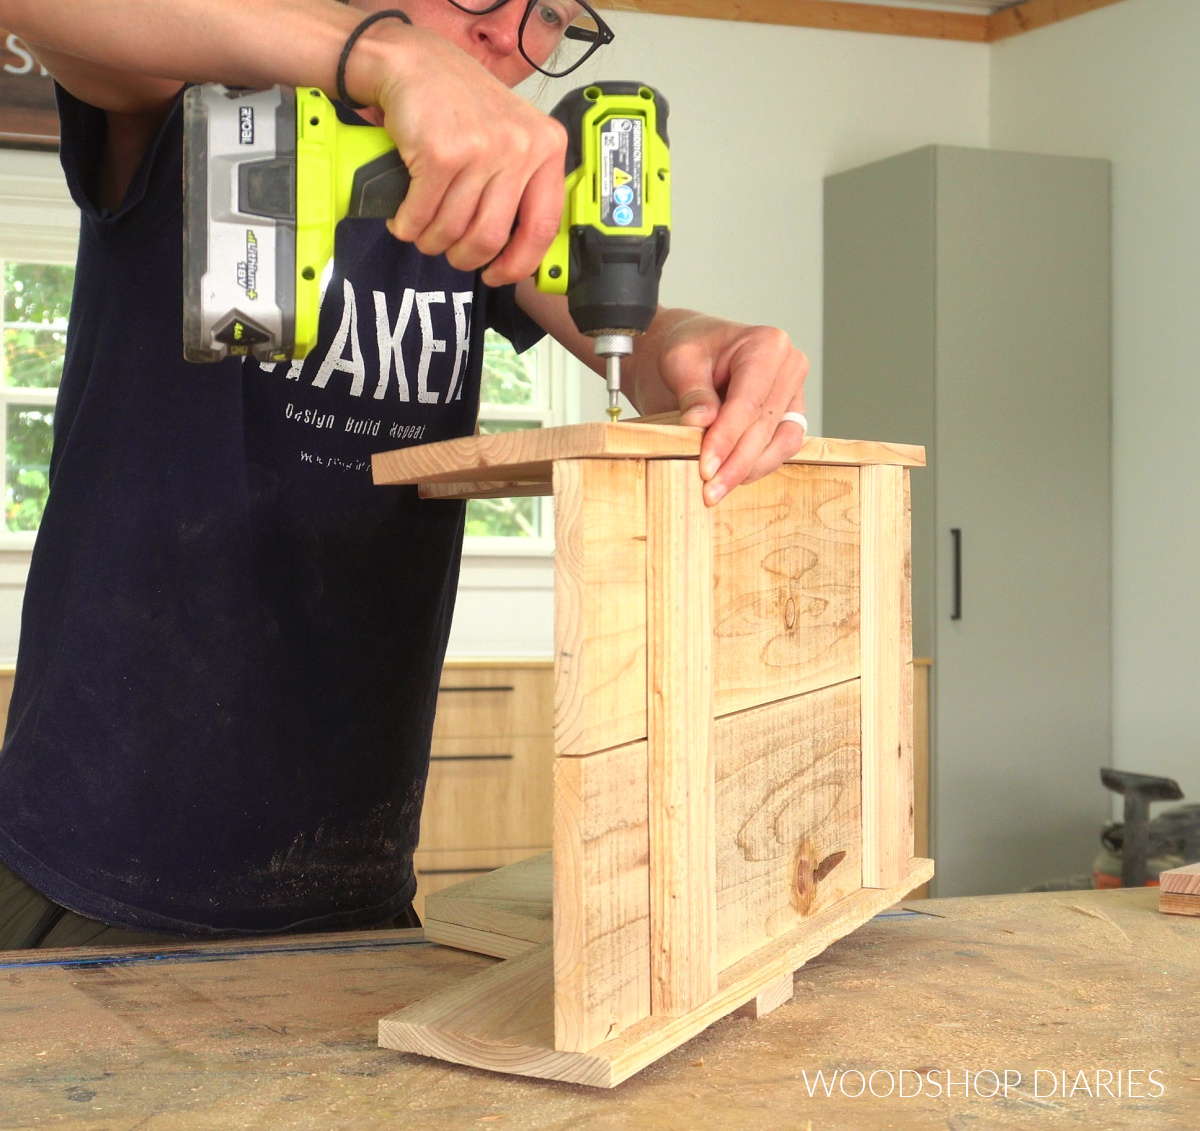
Note that the bottom should be installed so that the supports face down and the sides should be flush to the bottom of the supports like shown above.
For the front of the wheelbarrow, I cut two more fence pickets to 11″ long. Then I cut another piece of fence picket in half to connect them together just like the bottom and side panels in step 1.
I placed this assembly into the front of the wheelbarrow and marked where it met the top of the side panels.
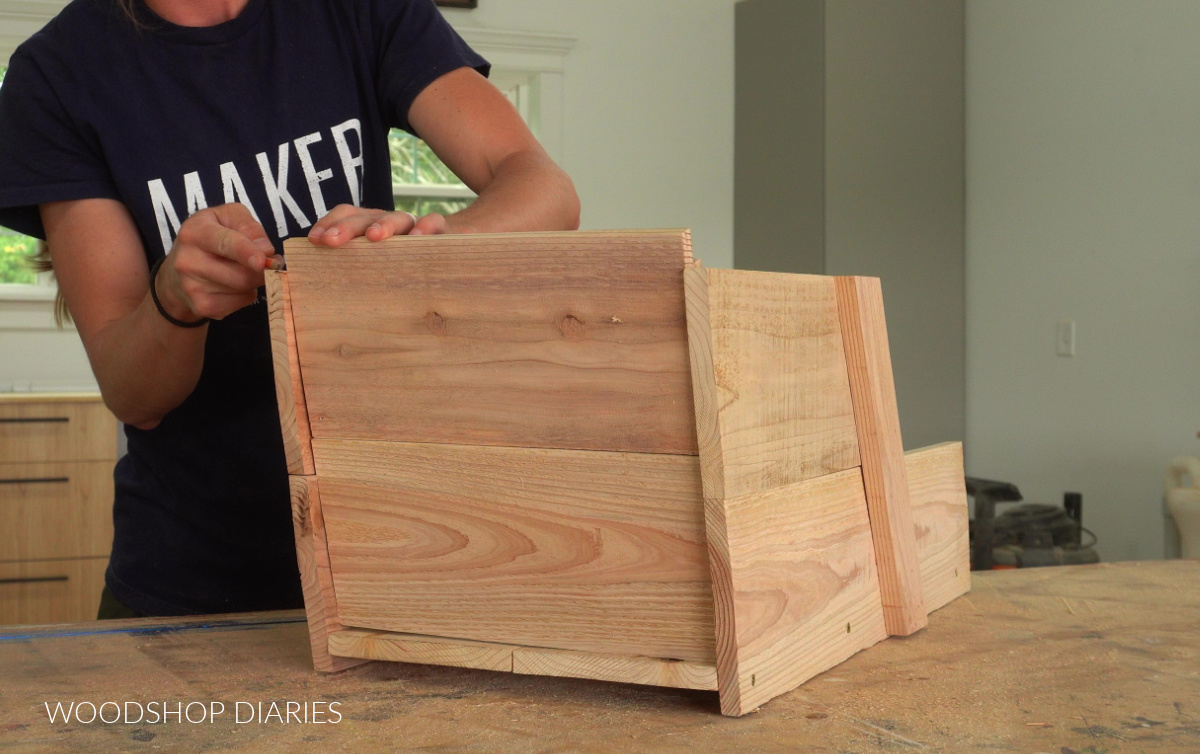
Then I trimmed this down along the mark (try to avoid cutting into any nails or screws!) and installed between the side panels with 1 ¼″ wood screws.
I thought this looked neat being inset a little, so I set it back about 1″. But, you could install it flush to the front edge of the sides. It’s a decorative wooden wheelbarrow–some of these details are not that critical and is really just personal preference.
Step 3: Assemble Wooden Wheel Supports
Now that the body is together, I needed to build the bottom supports that connects with the wheel. For these, I used cedar 2x2s (but regular pine 2x2s would work fine, too).
I cut two 2x2s to 46″ long and marked 3″ from one end of each board, centered side to side.
I used a ⅜″ diameter drill bit to drill holes through the boards at these marks. Once I had drilled through, I carefully “expanded” the hole slightly by keeping the bit spinning while kind of twisting the drill around.
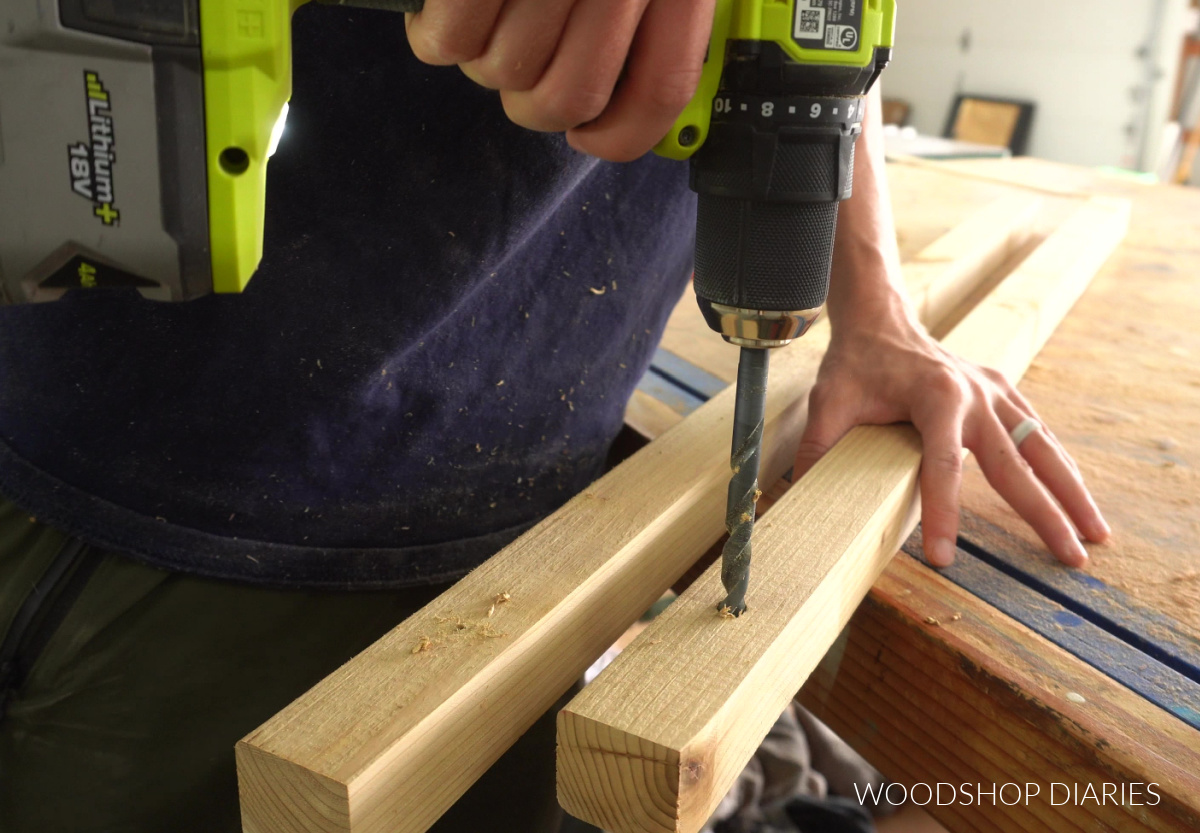
This hole needs to be large enough for a ⅜″ diameter dowel to go into it and have a tiny bit of wiggle room.
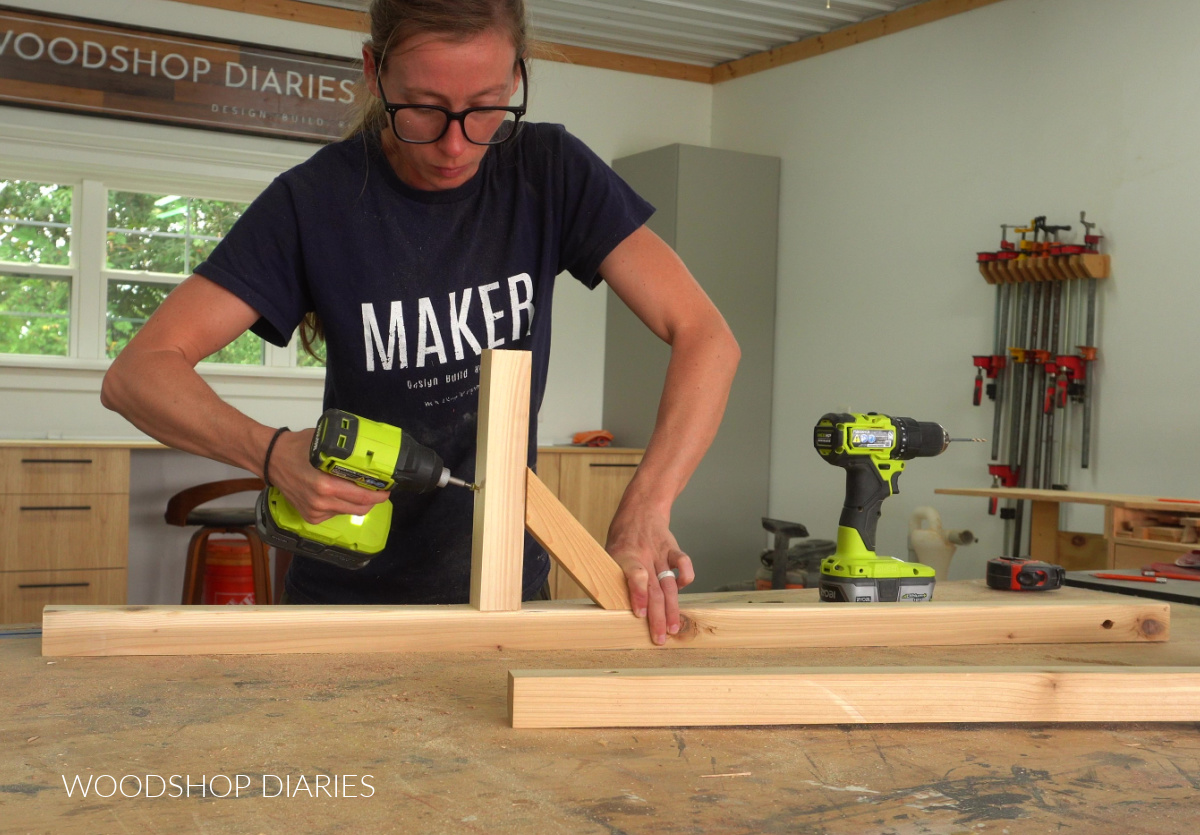
Once the hole was drilled, I cut two more pieces of 2×2 to 10″ long and screwed this into the long 2x2s about 12″ from the opposite end as the hole using 2 ½″ wood screws.
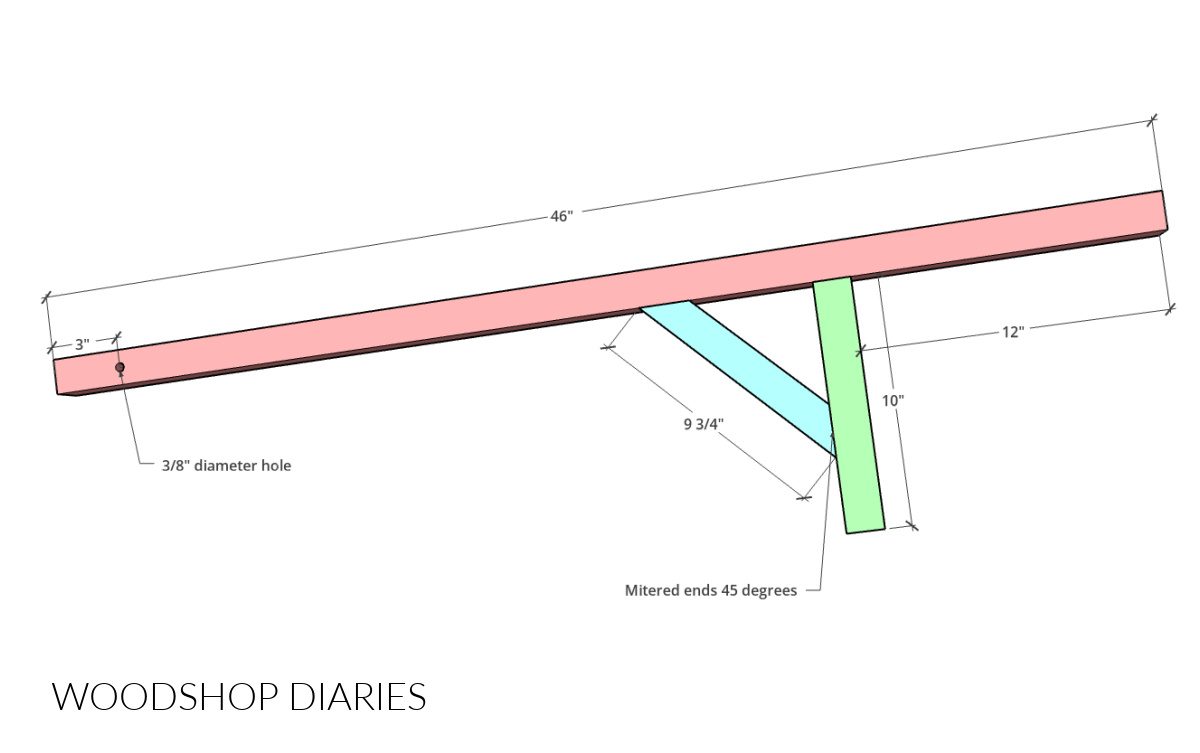
Then, I cut two pieces of 2×2 with ends mitered 45 degrees to go run between them.
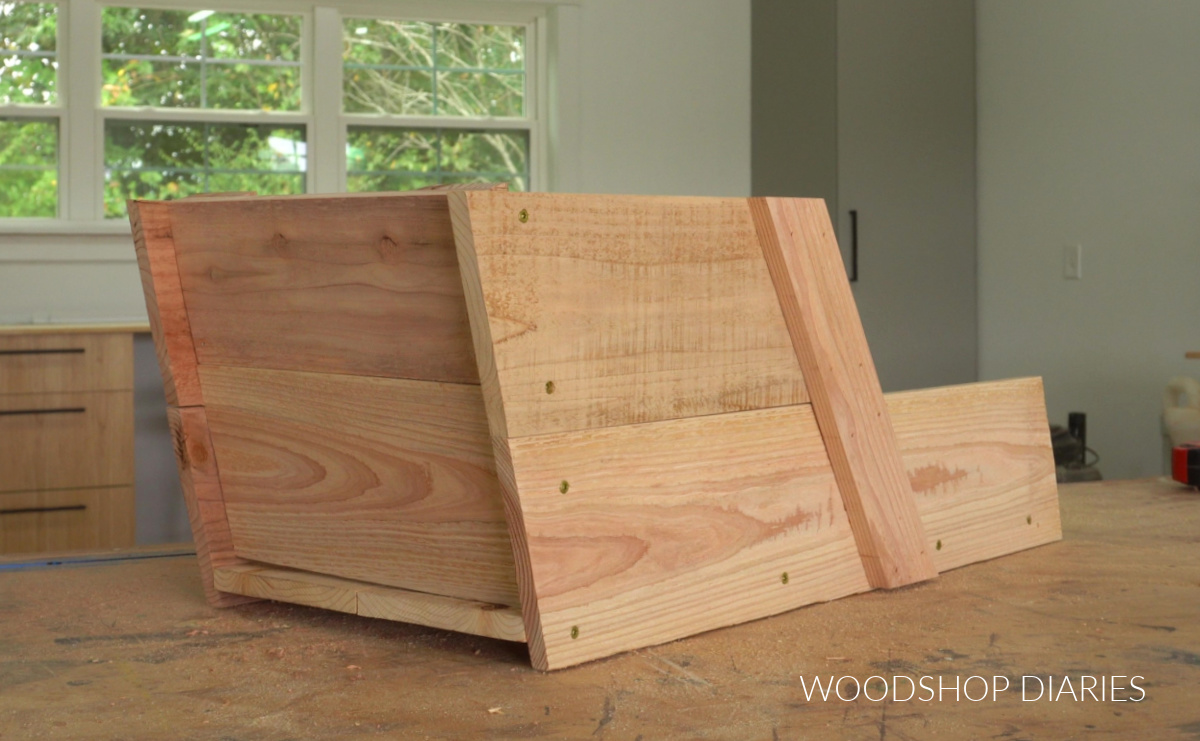
Step 4: Attach Wheelbarrow to Supports
I cut a piece of ⅜″ diameter dowel to about 10″ long and inserted this through the hole of one of the braces from step 3.
Then, I slipped the wheel onto the dowel, then ran it through the hole on the other brace so that the wheel is kind of “sandwiched” between the braces.
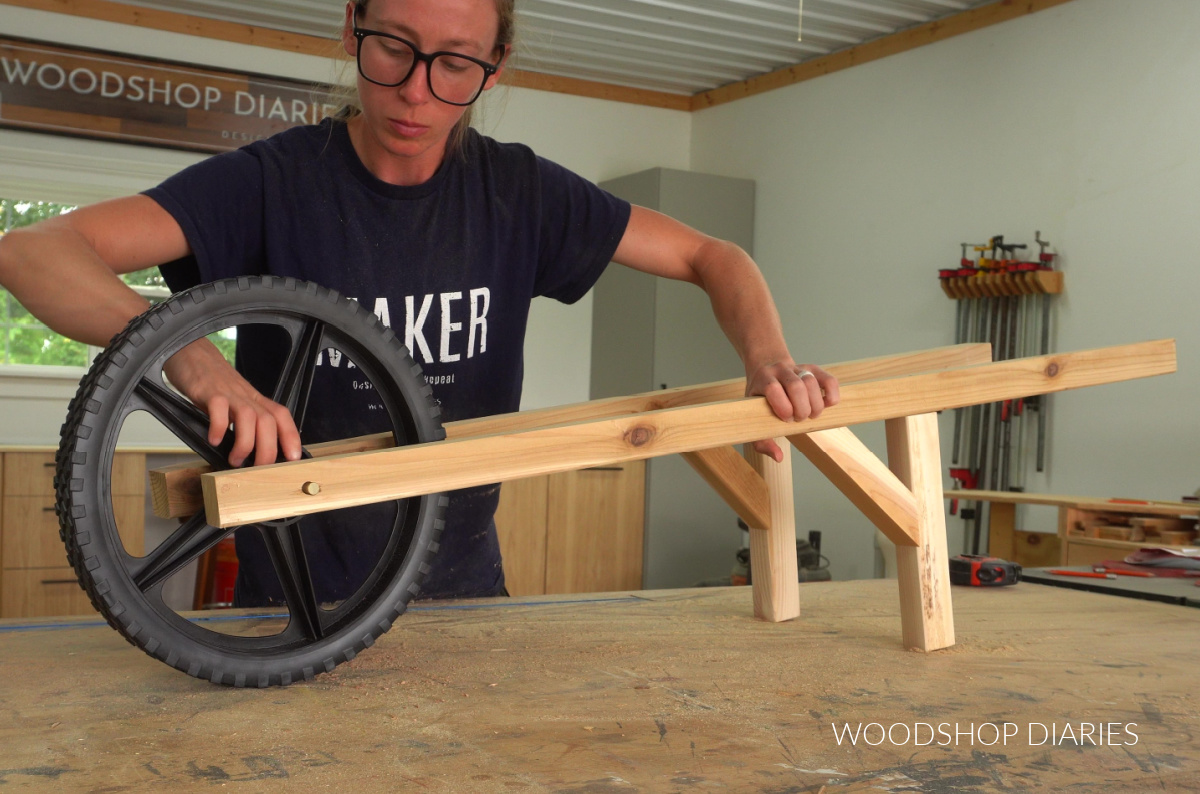
There should be some space between the wheel and the braces so that they don’t rub together. And the braces should have enough wiggle room to kind of angle out a little from the wheel to the back handles.
If the dowel feels too tight, widen the holes in the braces a little more.
Once everything seemed to fit together well, I placed the wheelbarrow body onto the braces and adjusted everything so it looked even and the spacing seemed right (this doesn’t have to be specific).
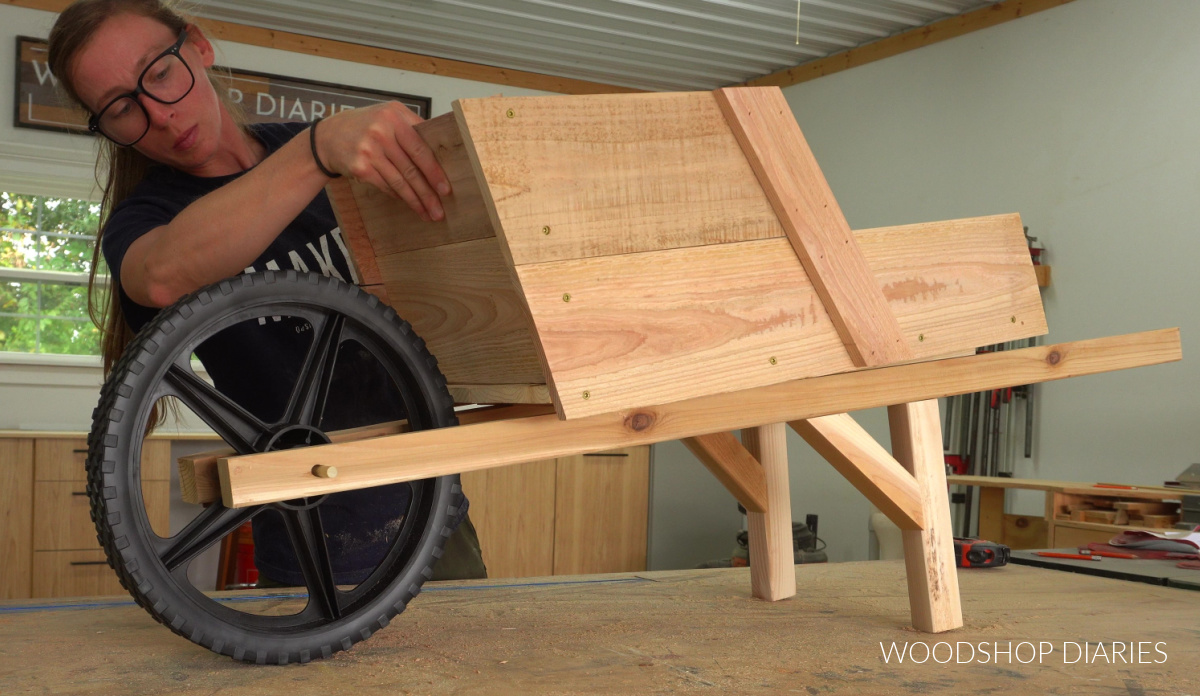
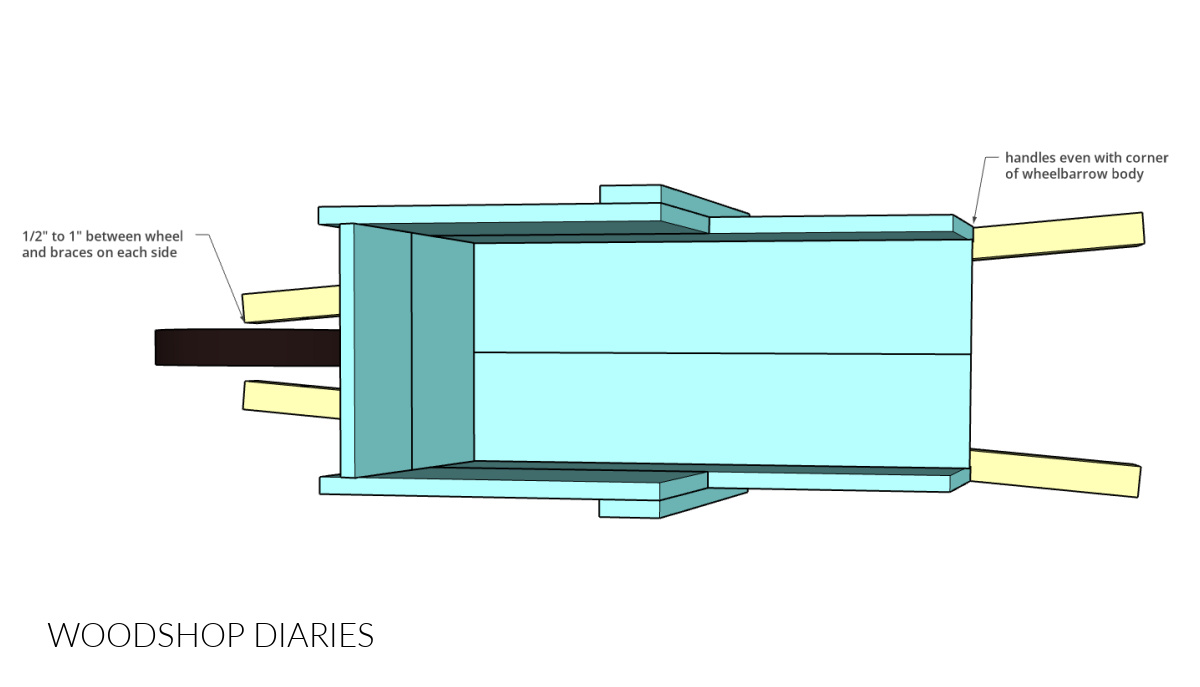
Once I had the wheelbarrow on top, I tried to adjust so that the wheel had about ½″-1″ space on each side between the braces and so that the braces were even with the back corners of the wheelbarrow body.
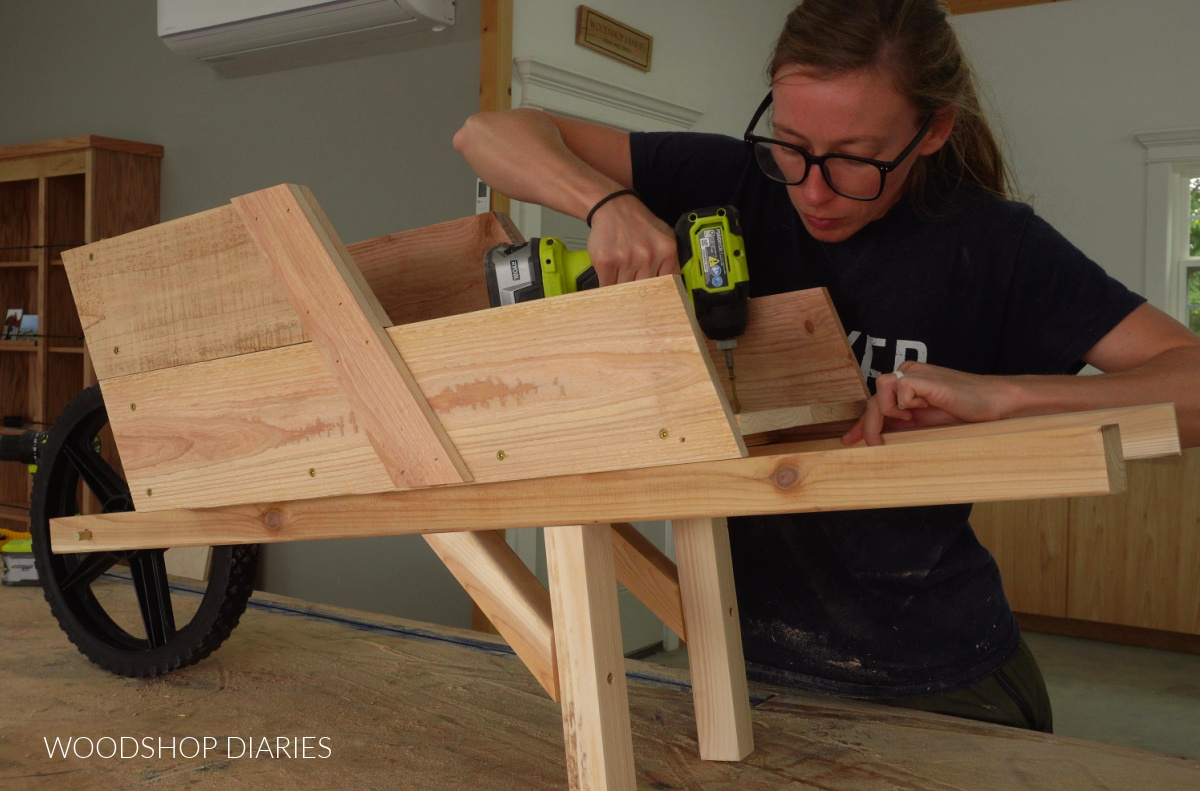
With everything in place, I secured the wheelbarrow to the braces below using 2 ½″ wood screws through the bottom in four places–two through each bottom support.
Step 5: Finish
Then I stained the wheelbarrow with an outdoor stain and sealant. I used Cabot Semi Transparent stain in Bark Mulch.
TIP: I removed the wheel to make finishing easier.
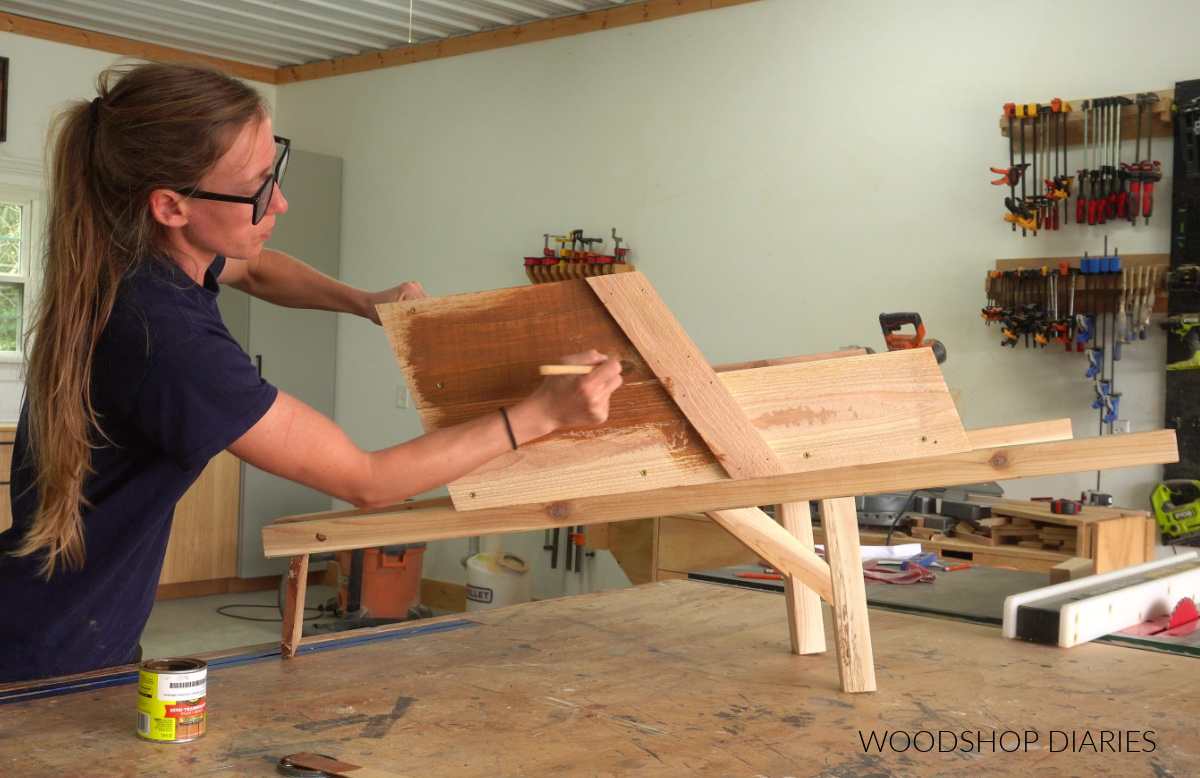
Feel free to use any stain or paint or combination of finish for your project. Keep in mind if you’ll be using this outdoors that it’s best to use an outdoor rated finish.
Once it was dry, I slipped the wheel back on and now it’s ready to fill with pumpkins, mums, flowers, or whatever else you’d like to use it for.
TIP: Once you add the wheel back on, if the dowel is too loose, you can add a cap, screw, or some kind of “stop” on each end of the dowel to keep things in position. Mine ended up being a nice, snug fit, so I left it as is so it’s easy to remove later if I need to.
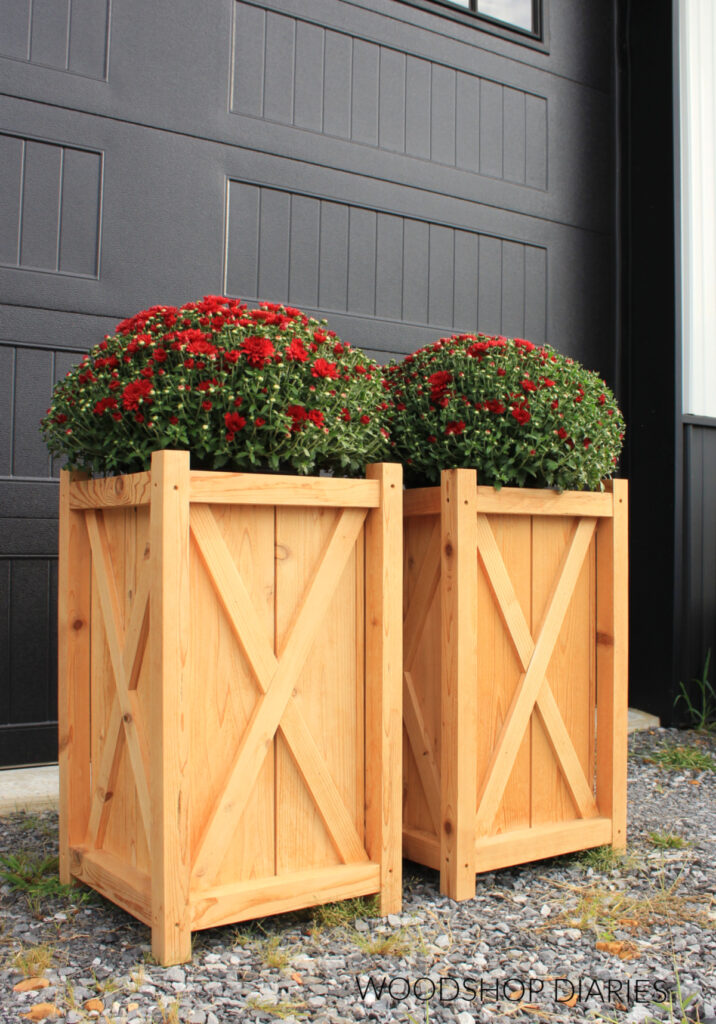
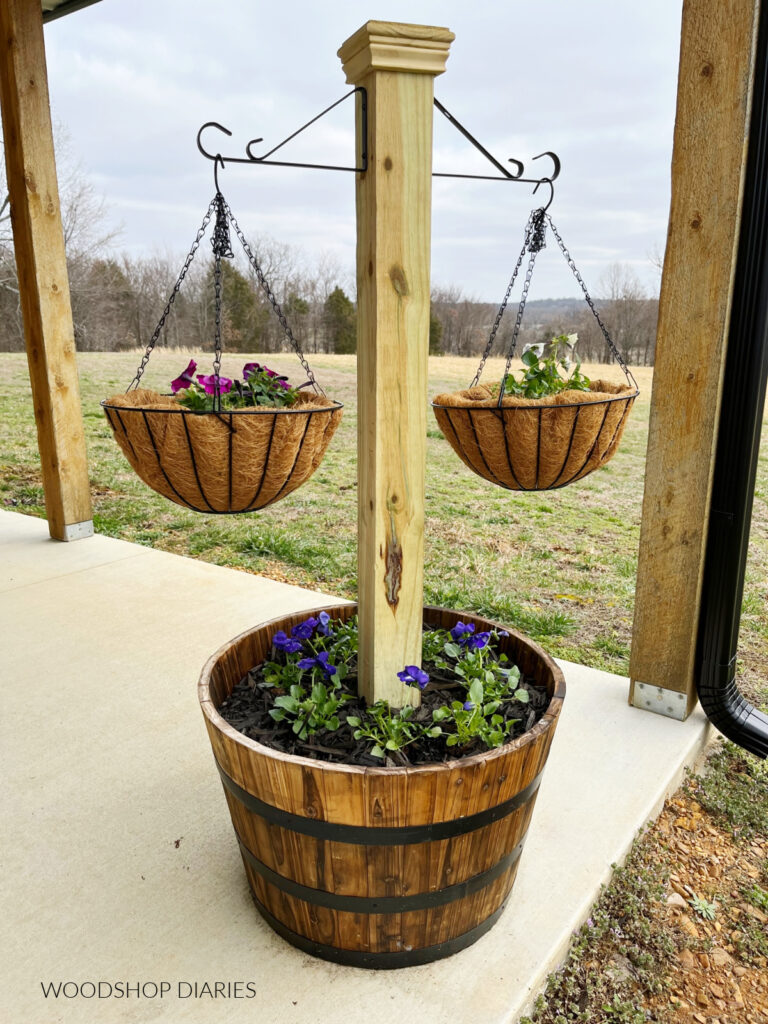
Looking for more DIY porch decorating ideas?
Looking for more DIY porch decorating ideas? Here are a few fun projects you might enjoy browsing. Click on the images below for the instructions on how to make each one!

If you enjoyed this project and would like to save it for later, don’t forget to pin it or share to your favorite social platform!

Until next time, friend, happy building!