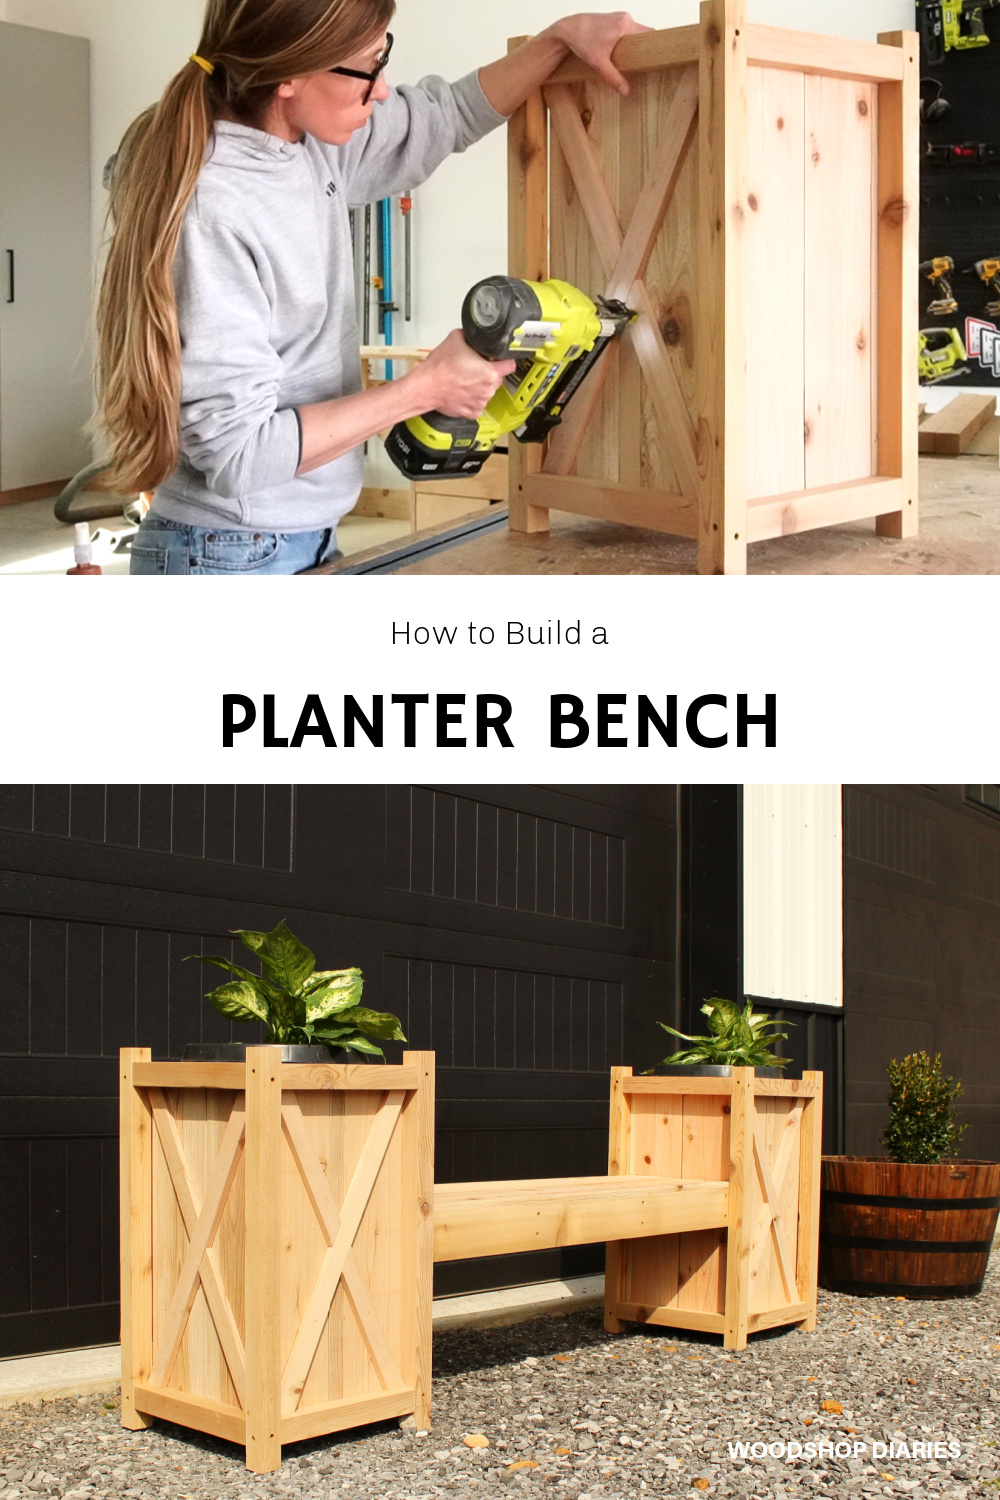
In this post, I’m sharing how to build this DIY wooden planter bench!
*This post is sponsored by The Home Depot x Vigoro. It also contains affiliate links. See policies page.
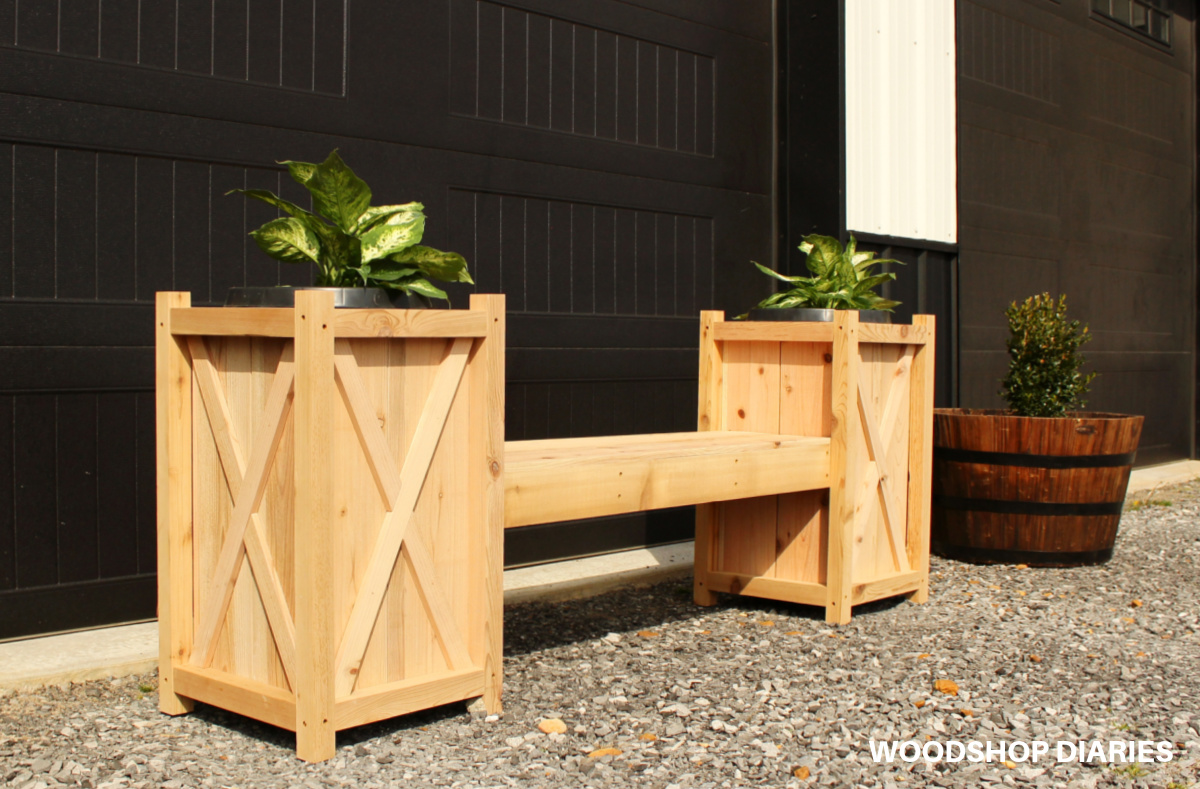
You could build these as just the planters, and skip the bench part if you wanted to. But, the bench is an easy addition that’s great for adding some extra seating to a porch or garden.
.
PSST…peep those adorable barrel planters to the right in the photo above?? I know someone is sure to ask where I got them, so here’s the link!
.
I’m sharing the building plans for this DIY wooden planter bench and a video below, with lots of helpful tips including how to easily figure the angles for X trim (without doing any math!).
.
So if you’re ready to see how it came together, let’s go 😊
Tools & Materials:
Tools:
Materials:
- (4) 2x4x8 boards (I used cedar)
- (10) 1x6x72 fence pickets (I used cedar)
- Exterior Wood Glue
- 1 ¼″ exterior wood screws
- 2 ½″ exterior wood screws
- Brad nails (1″ long)
- (2) nursery pots for planting
- Vigoro Potting Mix
- Vigoro Plants/Flowers of your choice (I used these!)
Some notes about the project:
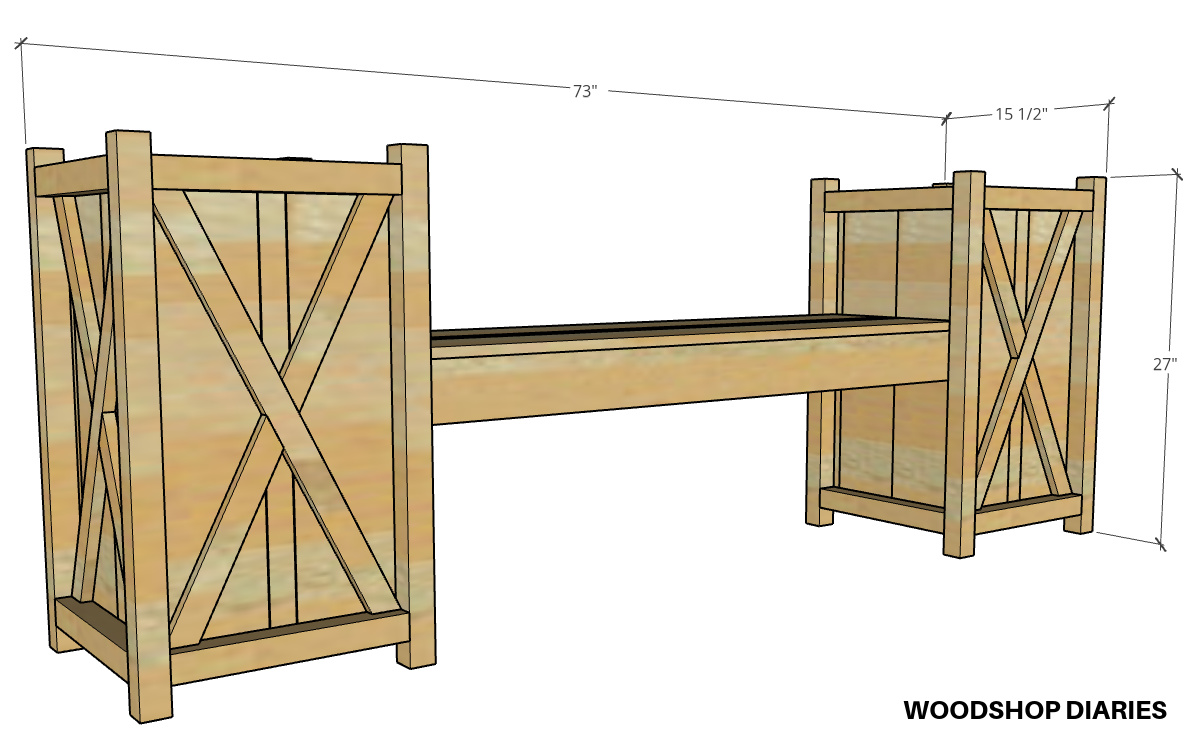
Overall Dimensions:
The overall dimensions of this planter bench are 27″ tall, 15 ½″ deep, and 73″ wide.
Wood Type:
Since this was an outdoor project, I opted for cedar since it’s a naturally water and rot resistant wood and it’s readily available where I live.
.
However, there are other great wood options for outdoor use as well and you could also use treated wood, too.
.
If you wanted to use basic untreated pine/spruce/whitewood, you certainly can, just keep in mind that it may not last as long out in the elements.
.
Wood Sizes:
I couldn’t find cedar 2x2s locally, so I cut my own 2x2s from cedar 2x4s.
RELATED: How to make your own 2x2s
.
I used cedar fence pickets for the planter sides and bench seat. Cedar fence pickets come as 1x6s and are usually 72″ long. You can certainly use standard 1x6x8 boards instead, but the fence pickets are MUCH cheaper.
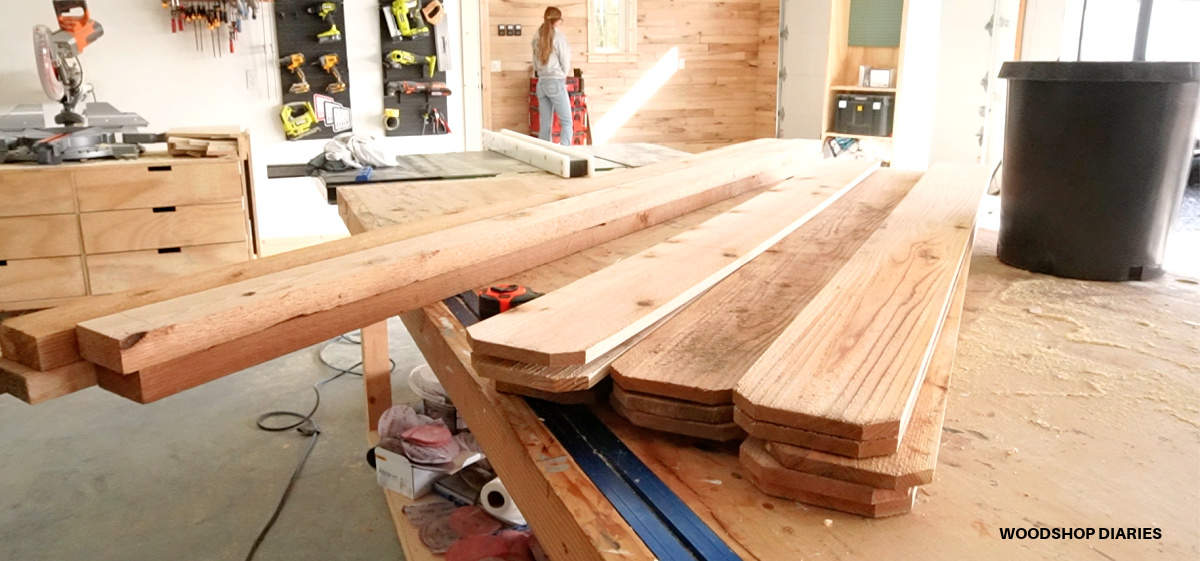
Keep in mind that the fence pickets are LABELED 1×6. A regular 1×6 board is actually ¾″ x 5 ½″ but fence pickets are actually ⅝″ x 5 ½″ wide, so they’re a little thinner than regular boards.
.
And they don’t have super tight tolerances–several of mine were actually a little wider than 5 ½″ when I bought them.
.
Tools:
Since there is so much potential variation in the fence pickets, several of these pieces require being cut to fit. So, a table saw is highly recommended for this project to make those cuts.
.
Planter Pots:
I used these 6.24 gallon nursery containers and built the planters to fit so they just drop in and rest on the frame.
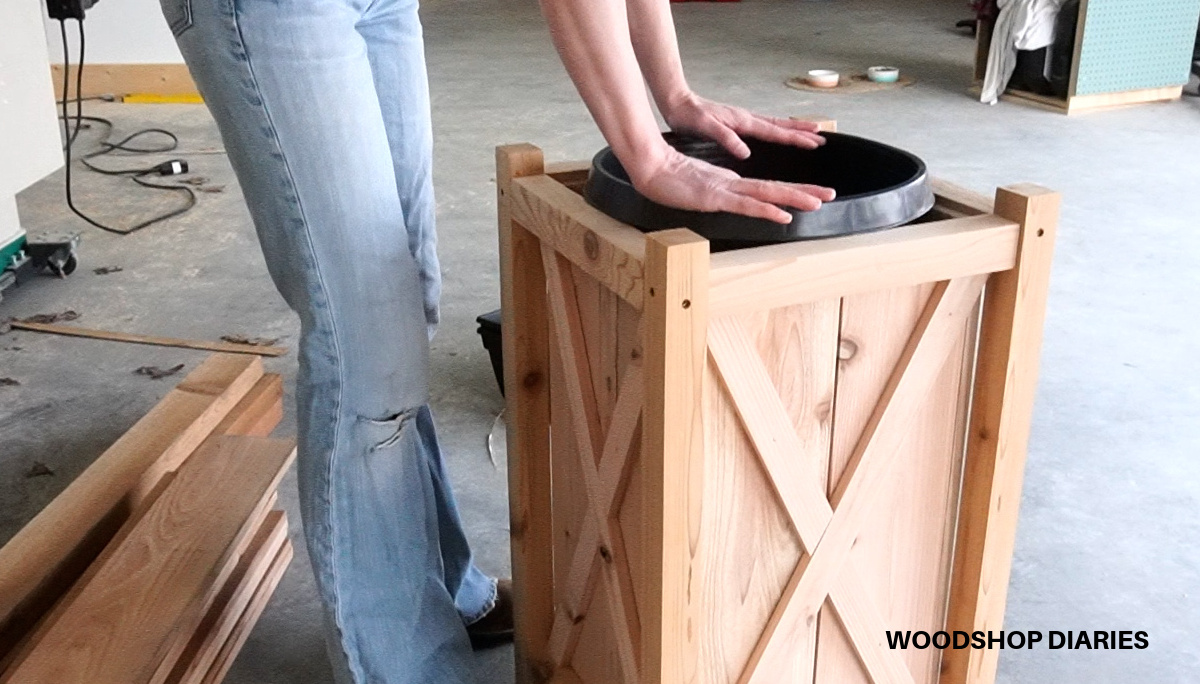
However, you could certainly adjust your sizing to use a larger pot, or if you have smaller pots, you can add a little shelf on the inside of the planter to set your pot on. That’s covered in step 6.
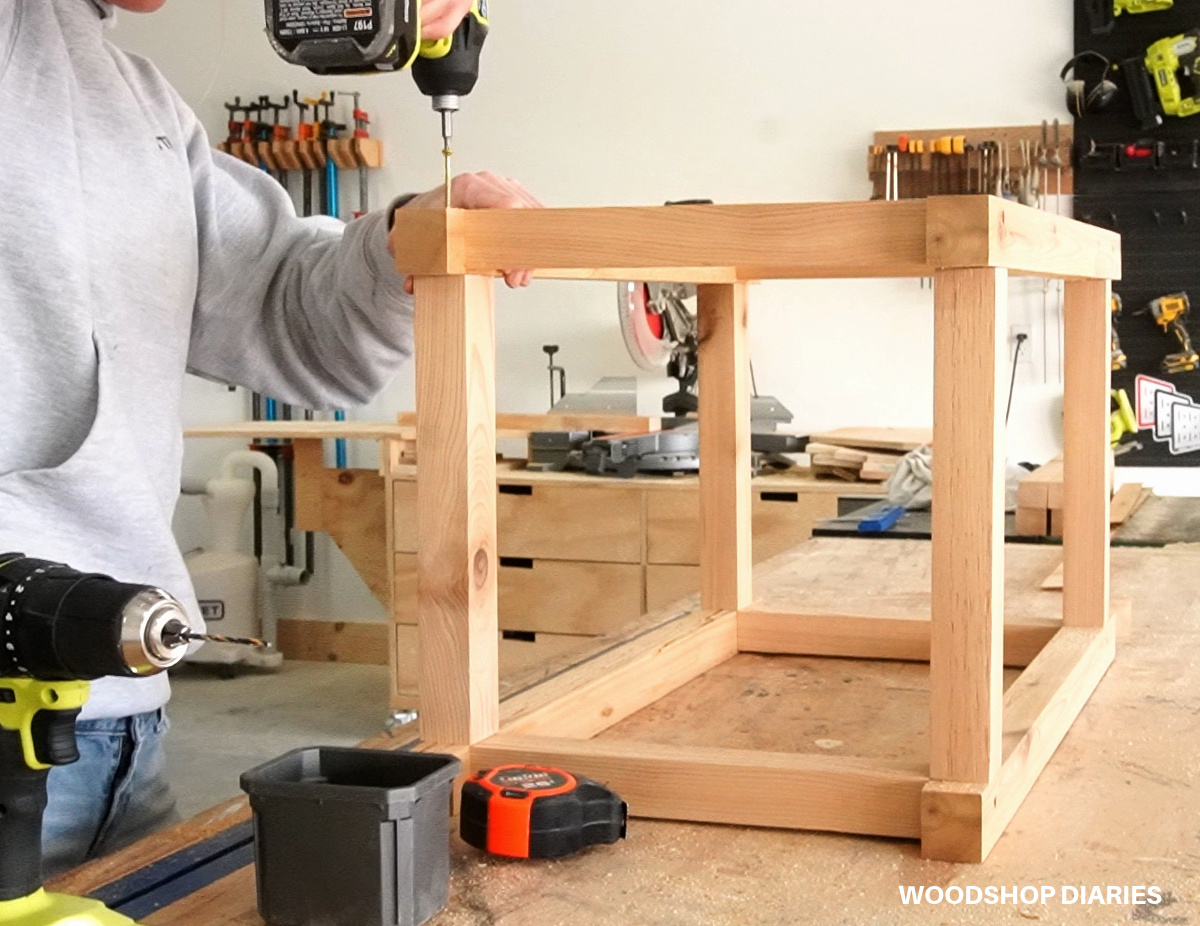
Step 1: Assemble Wooden Planter Frame
To get started, I cut 2 ½ of my 2x4x8s down into 2x2s.
RELATED: How to cut your own 2x2s
.
Then, I cut these 2x2s into 4 legs and 8 frame pieces for each planter box.
- (4) @ 27” long for the legs and
- (8) @ 12 ½” long for the rest of the frame
FOR EACH PLANTER BOX. You can grab the full plans for this planter bench here.
.
These were pretty rough, so I gave them a good sanding before assembling.
.
You can assemble this a million ways, but I kept it simple and just assembled this frame using 2 ½” long exterior decking screws.
You can use large decorative screws (like what I used in this DIY porch swing) if you prefer, or use pocket holes on the inside so you don’t see any screws.
RELATED: How to use a pocket hole jig
.
I predrilled all the holes before driving the screws to help prevent splitting and I tried to drive the screws so they were slightly off center so they didn’t run into each other at the corners. (Ignore my “serious face” below haha!)
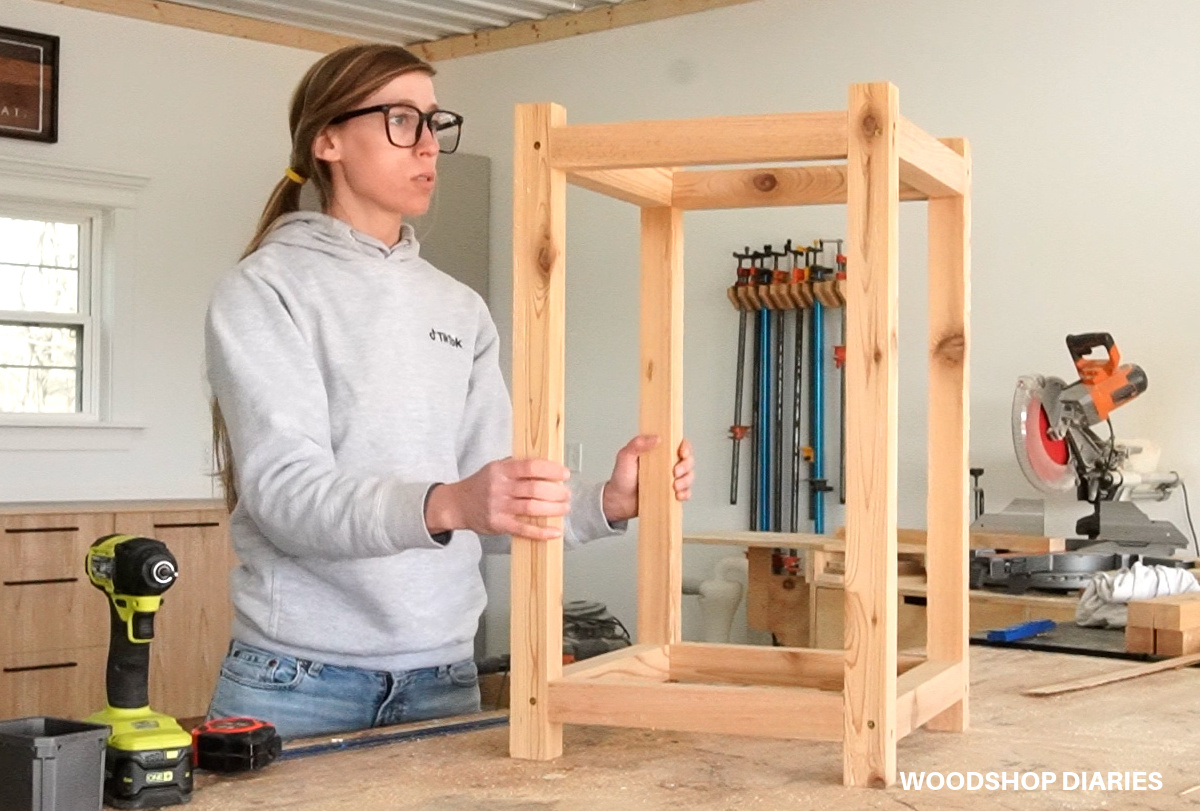
Repeat to make two frames.
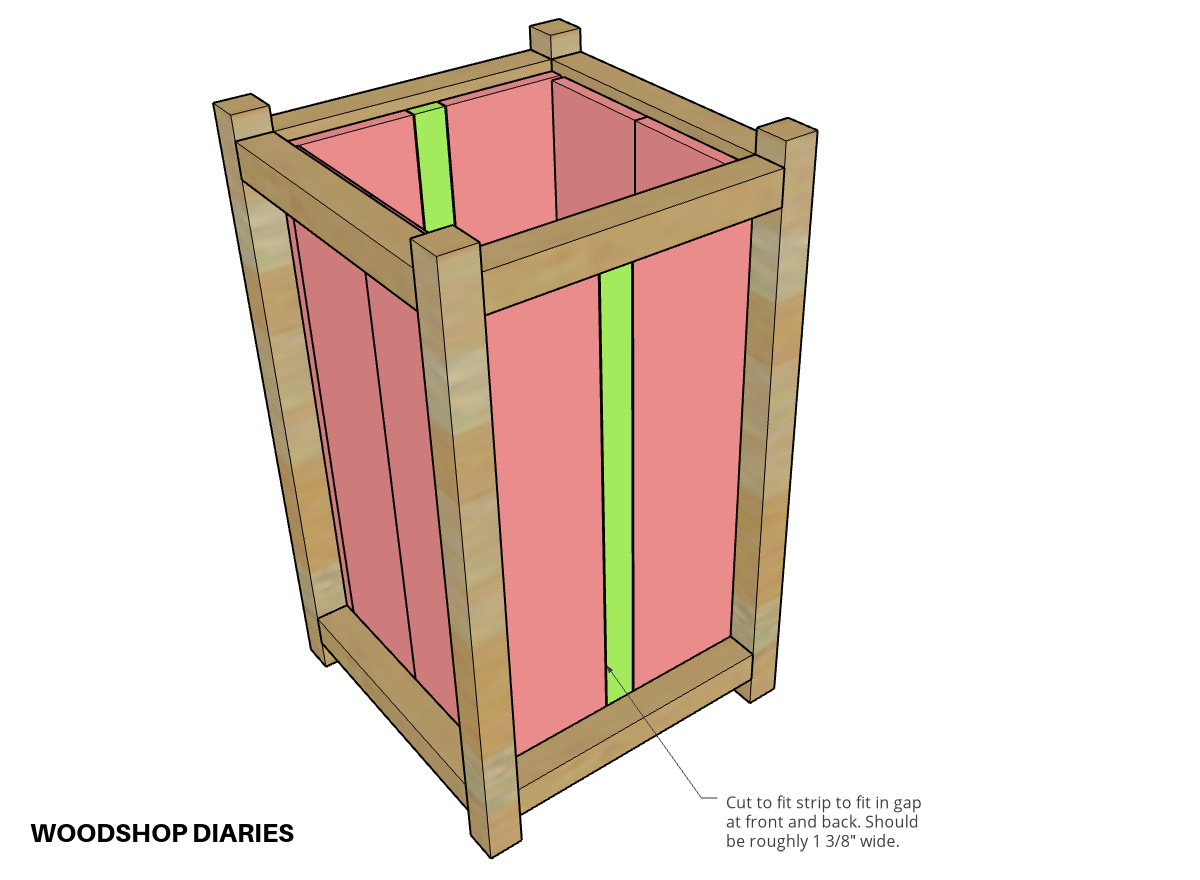
Step 2: Add Planter Box Sides
I cut 8 pieces of cedar fence picket to line the insides of these frames and sanded them well.
.
I used 1 ¼″ screws to install two of these on the inside of two opposite sides of the planter frame so that they were pushed all the way to the far left and far right. This will leave a gap between them. See image below.
.
Then, I installed two more on the other two sides like shown. There will very likely be some small gaps between the boards–that’s okay. Just space them out fairly evenly.
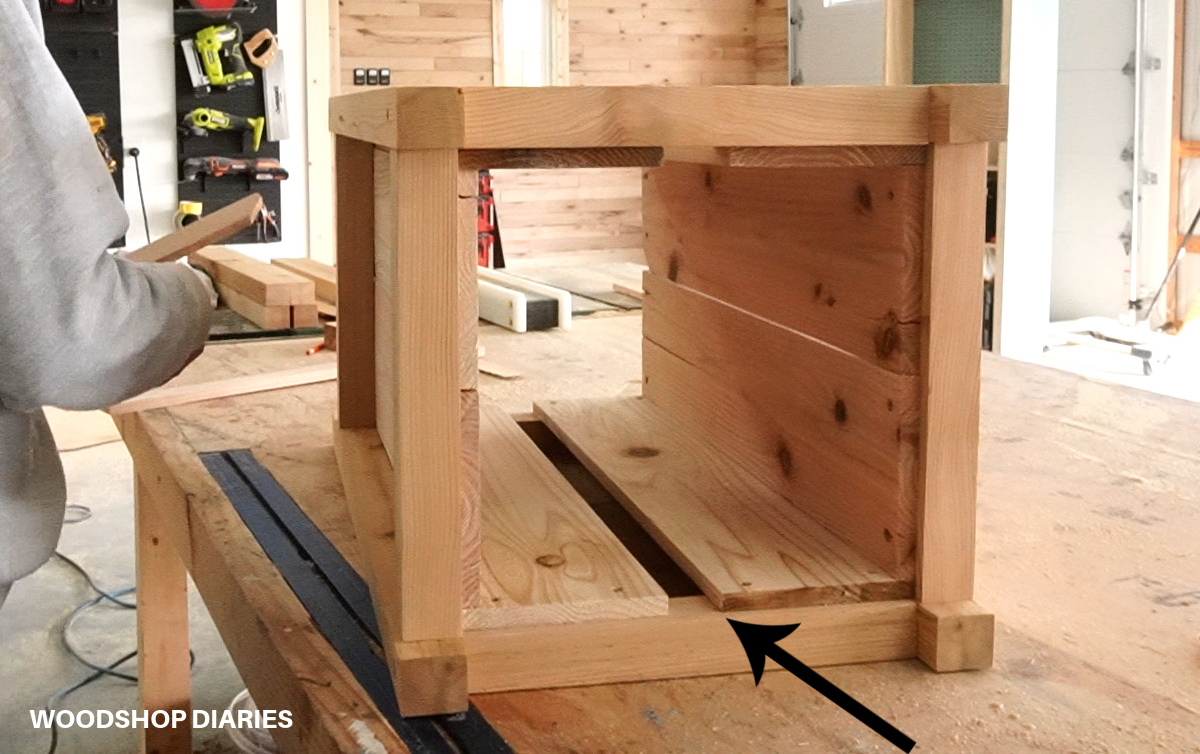
Once these pieces were in place, I measured the gaps I needed to fill on the first two sides. They should theoretically be the same, but these fence pickets have some variation, so it’s best to measure and cut to fit.
.
Mine ended up being about 1 ⅜” wide, so I ripped two strips this width on the table saw and screwed them in place.
Repeat for the second planter box.
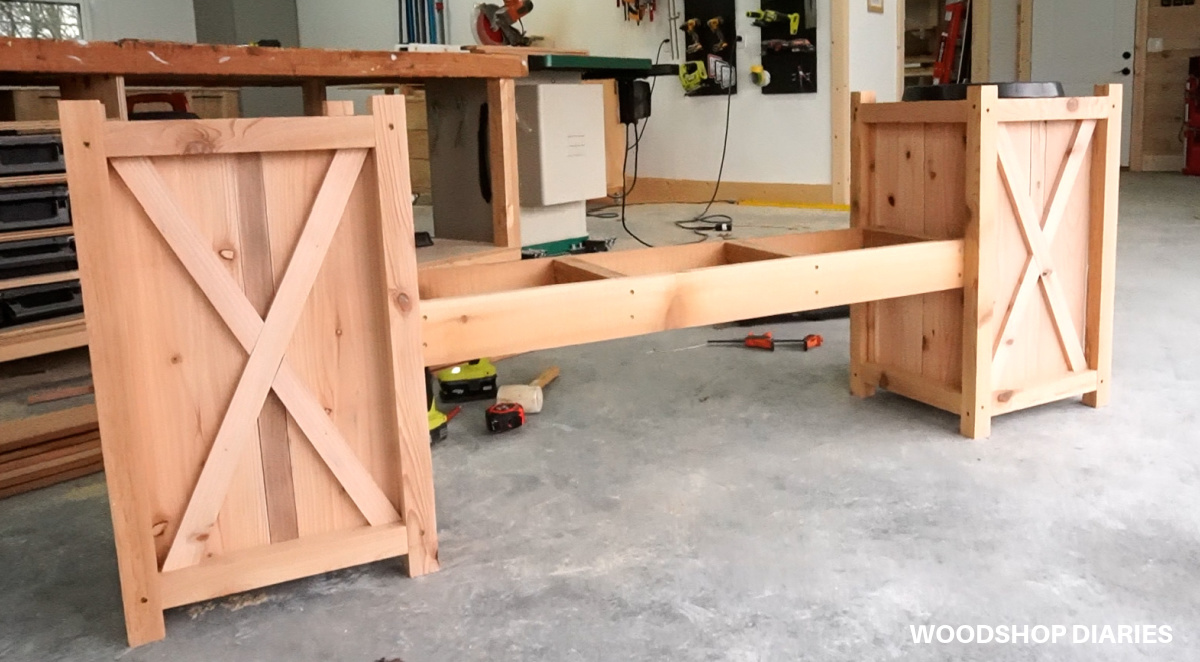
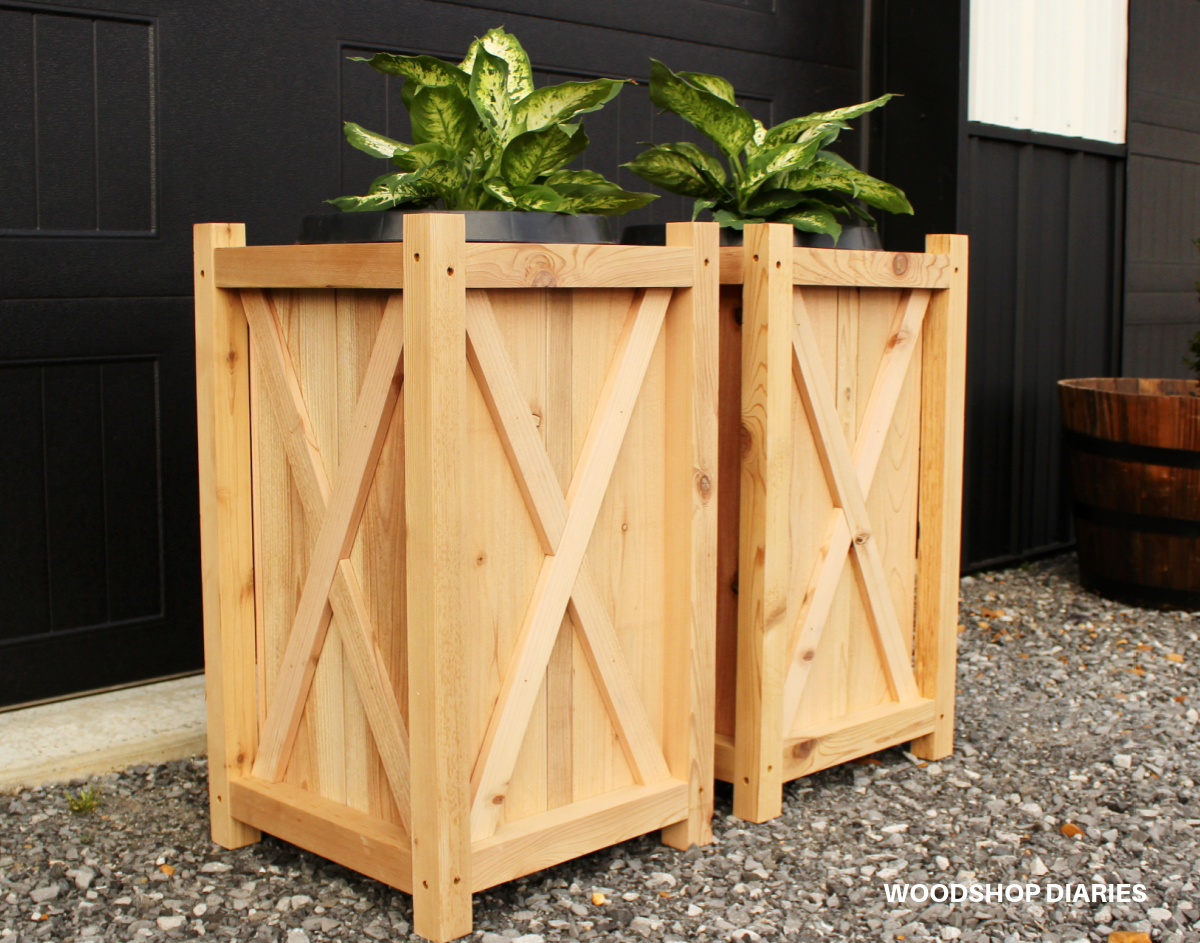
Step 3: Add X Trim to Planter Sides
At this point, the planters are technically complete, but I wanted to add a decorative X to the sides. This is totally optional, but really dresses up the sides with some nice detail.
.
I’ll show you a simple way to add X trim here in this video without having to do any math. It’s just a minute long video and I promise it’s worth the watch!
.
I cut X pieces for three sides. I didn’t install an X on the side the bench will go on since the bench will cover most of it anyway. And I used exterior wood glue and brad nails to secure these pieces to each side.

And, again, I repeated for the second planter box.
Step 4: Add Planter Bench Frame
Obviously the bench is optional, but if you want to add it, it’s really simple!
.
I cut two cedar 2x4s for the front and back supports and screwed them into the inside of the 2x2s on the planters about 16” up from the bottom.
Once I had them installed into one, I flipped it back over and screwed it into the other.
.
Then, I cut four short pieces to go between them—two at each end and two spaced out in the middle—and screwed them in place.
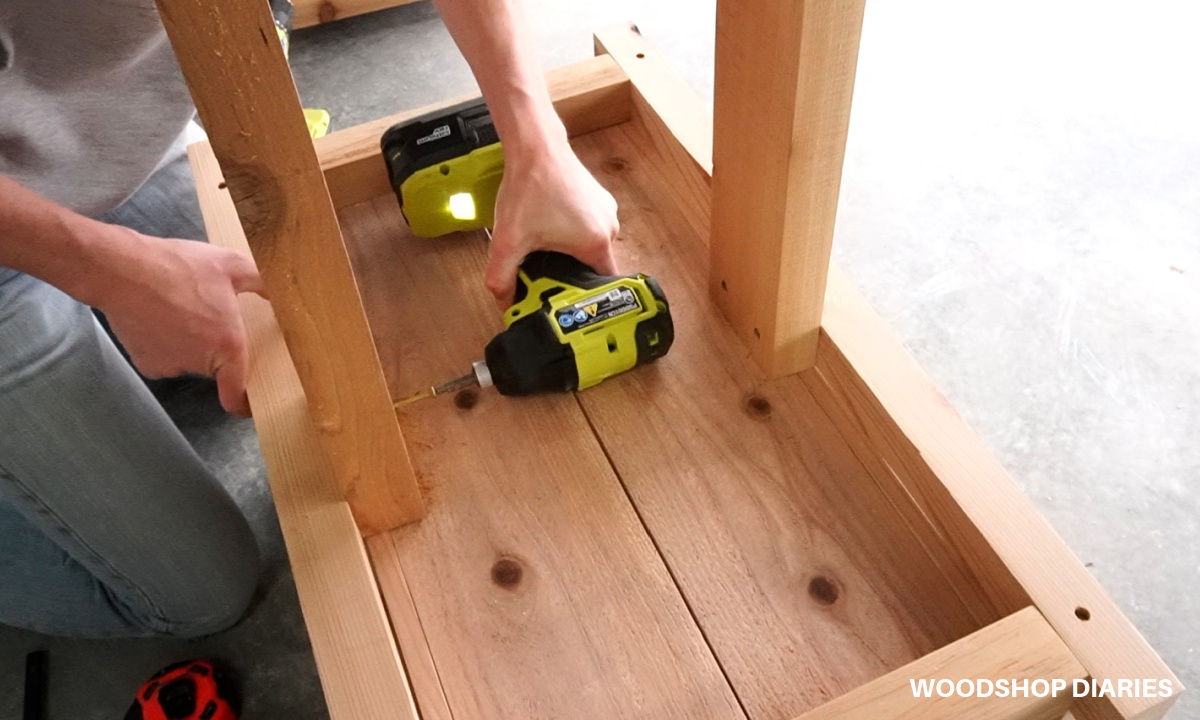
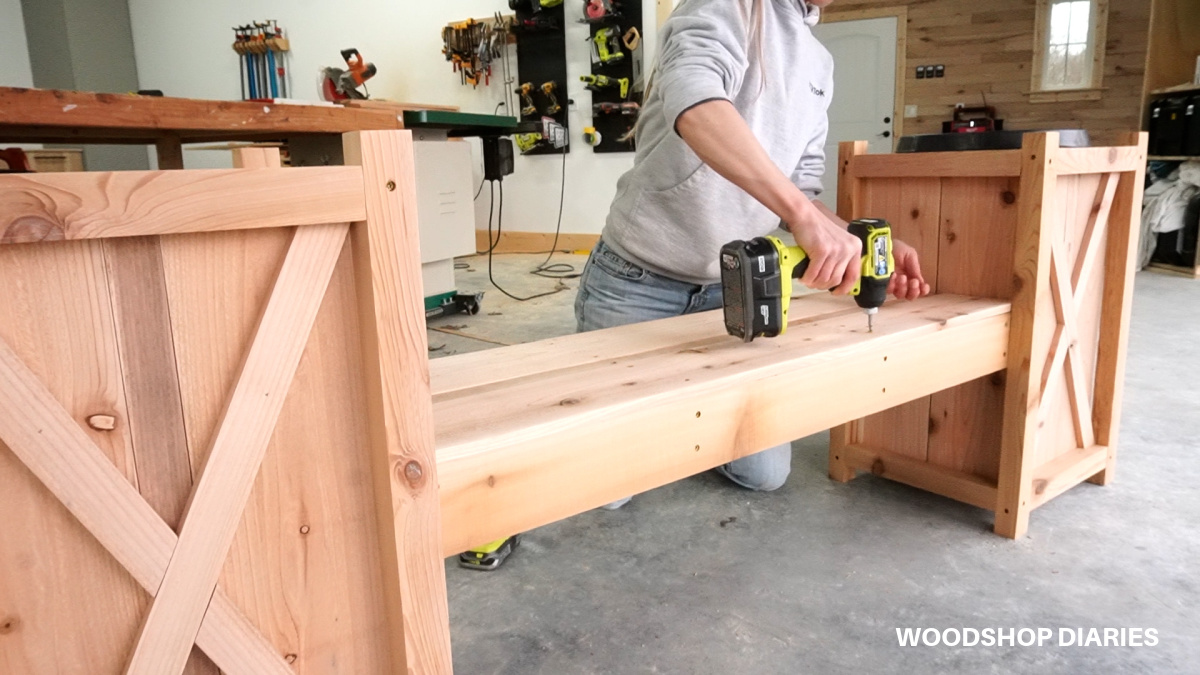
Step 5: Add Planter Bench Seat Slats
I cut two fence pickets for the seat. The gap between them in the middle was bigger than I wanted, so just like with the planter sides, I measured and ripped a strip to fit between them and screwed these three seat slats into the bench frame.
Step 6: Add Plants to Planter Boxes!
Now that the planter bench build was complete, it was time to add some greenery and finish this up!
.
If you remember, last year, I built an outdoor garden area at our previous home with the help of Vigoro, and this year, I’m trusting them again to help me with all the outdoor projects around our new home.
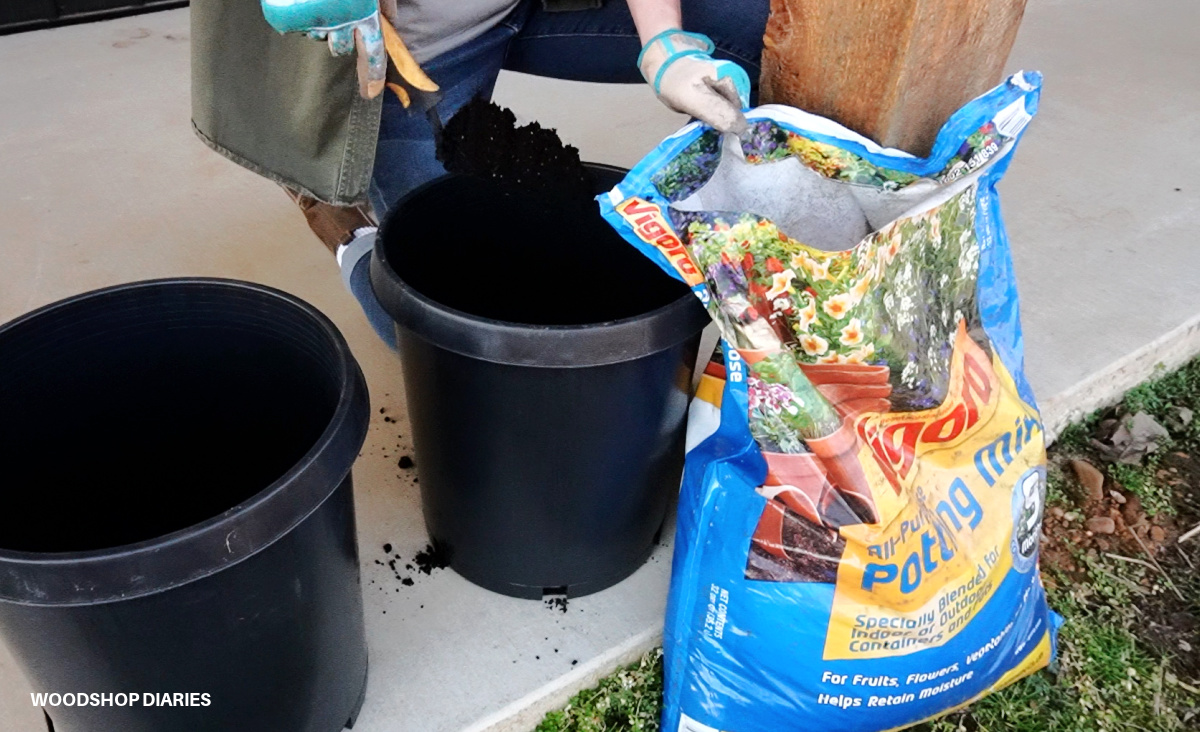
I filled my nursery pots with Vigoro Potting Mix and added some greenery to each one.
.
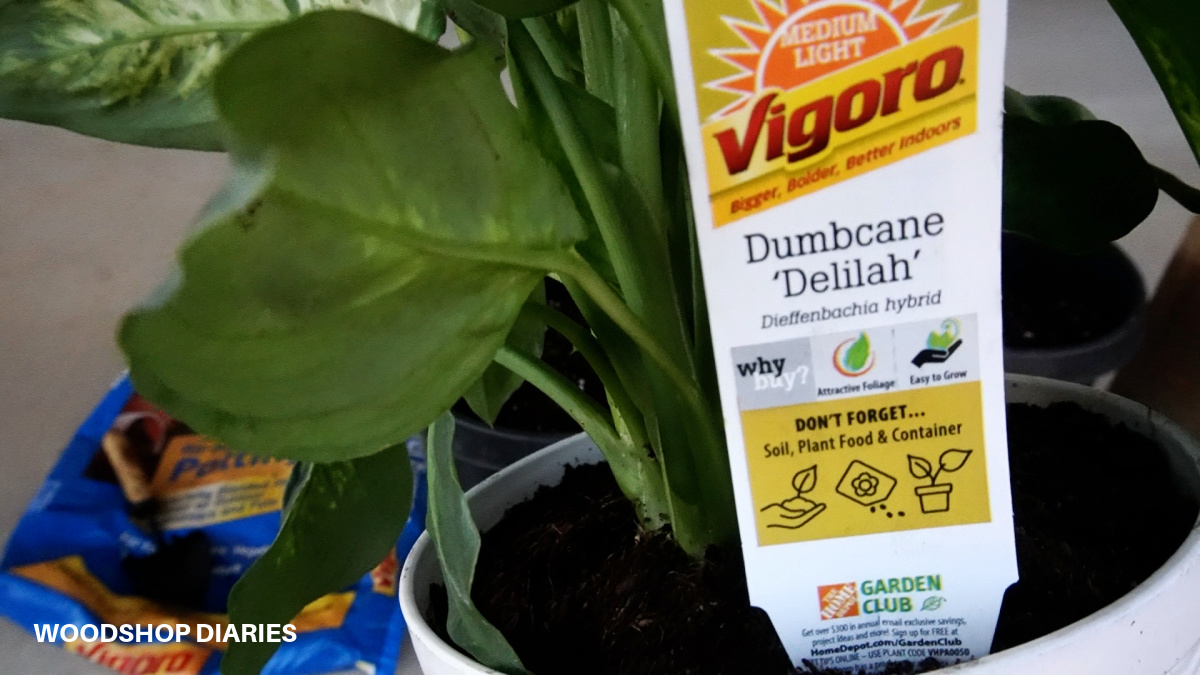
I used these 6″ Vigoro Dieffenbachia plants here, and they are beautiful. However, they’re a shade and warm temps only plant, so keep that in mind when planting!
If you like to switch things up, you can trade these plants out with the seasons and add some spring flowers now, some ferns this summer, and some mums this fall.
.
No matter what you decide to plant here, Vigoro has you covered with everything you need to add soil, color, and life to your planter pots. You can find it all in the garden center at your local Home Depot.
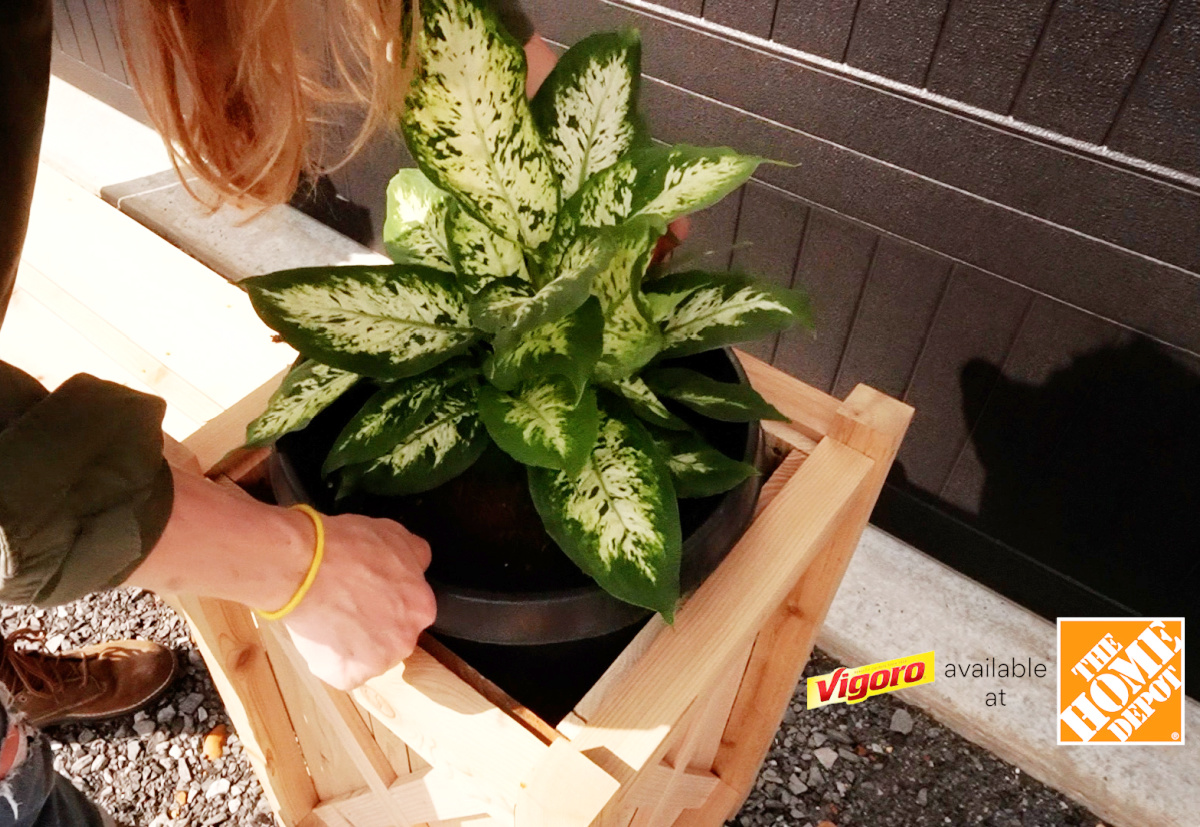
I mentioned earlier that I built these planters so these pots would just drop right in.
.
However, if you wanted to use a different size pot, don’t worry. You can easily add a little “shelf” inside these planters by screwing some scraps along the insides and cutting a piece of fence picket to sit across them to set your pot on.

This DIY wooden planter bench will make a great addition to the front porch, patio, or garden.
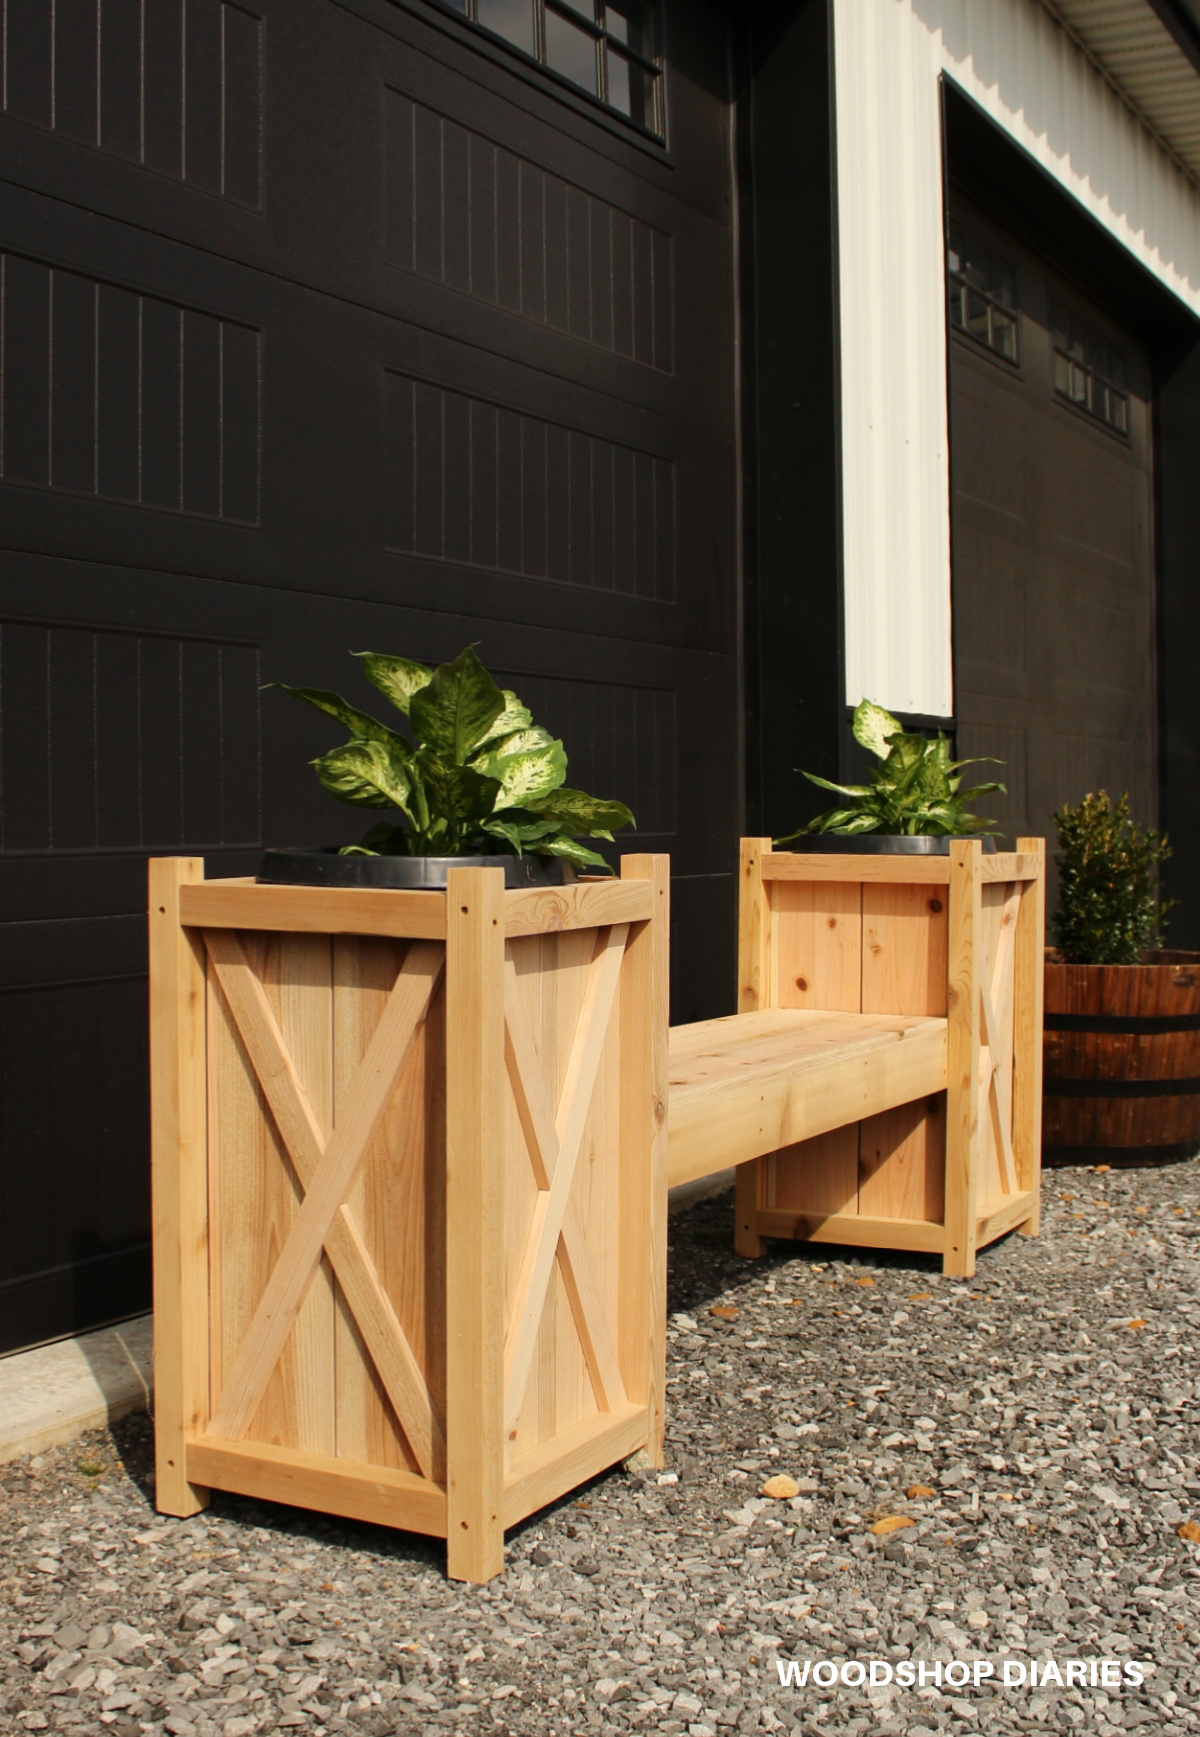
And if you want to skip the bench addition, the planters are super cute all by themselves, too!
Don’t forget to grab the printable plans to build your own here!
.
If you’d like to save this for later, be sure to pin it or share it to your favorite social channel!
I can’t wait to share some more outdoor projects this summer so if you want to check them out, be sure to subscribe to the newsletter below and follow along.
Until next time, friends, happy building!