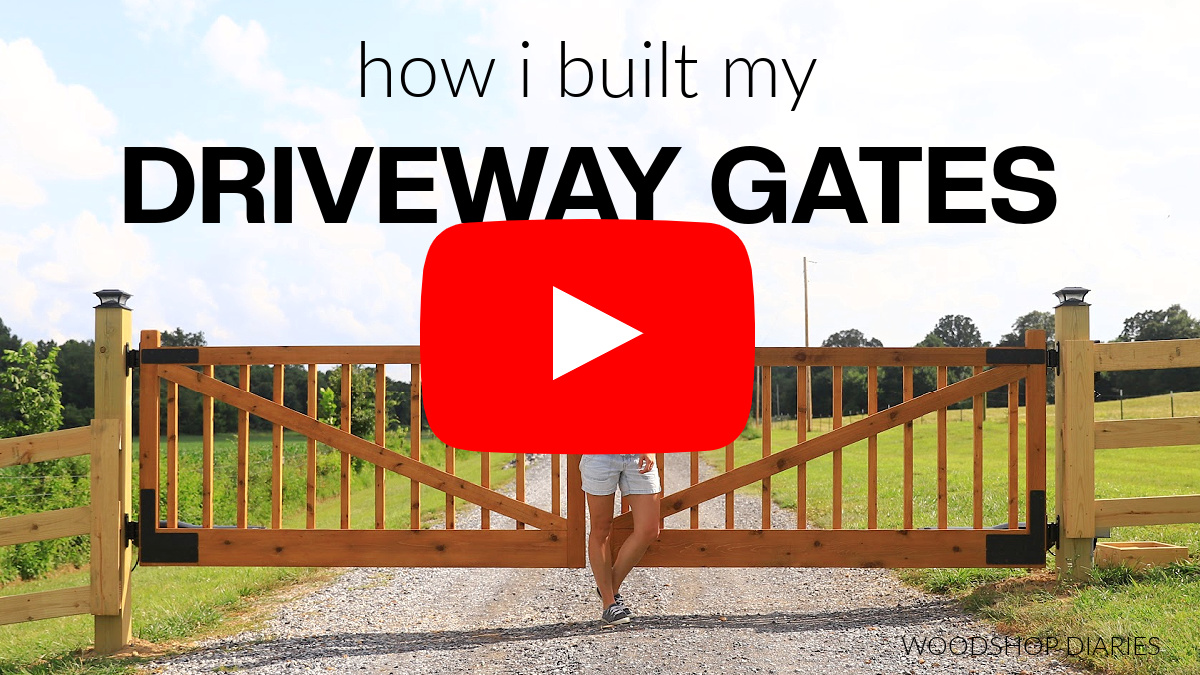
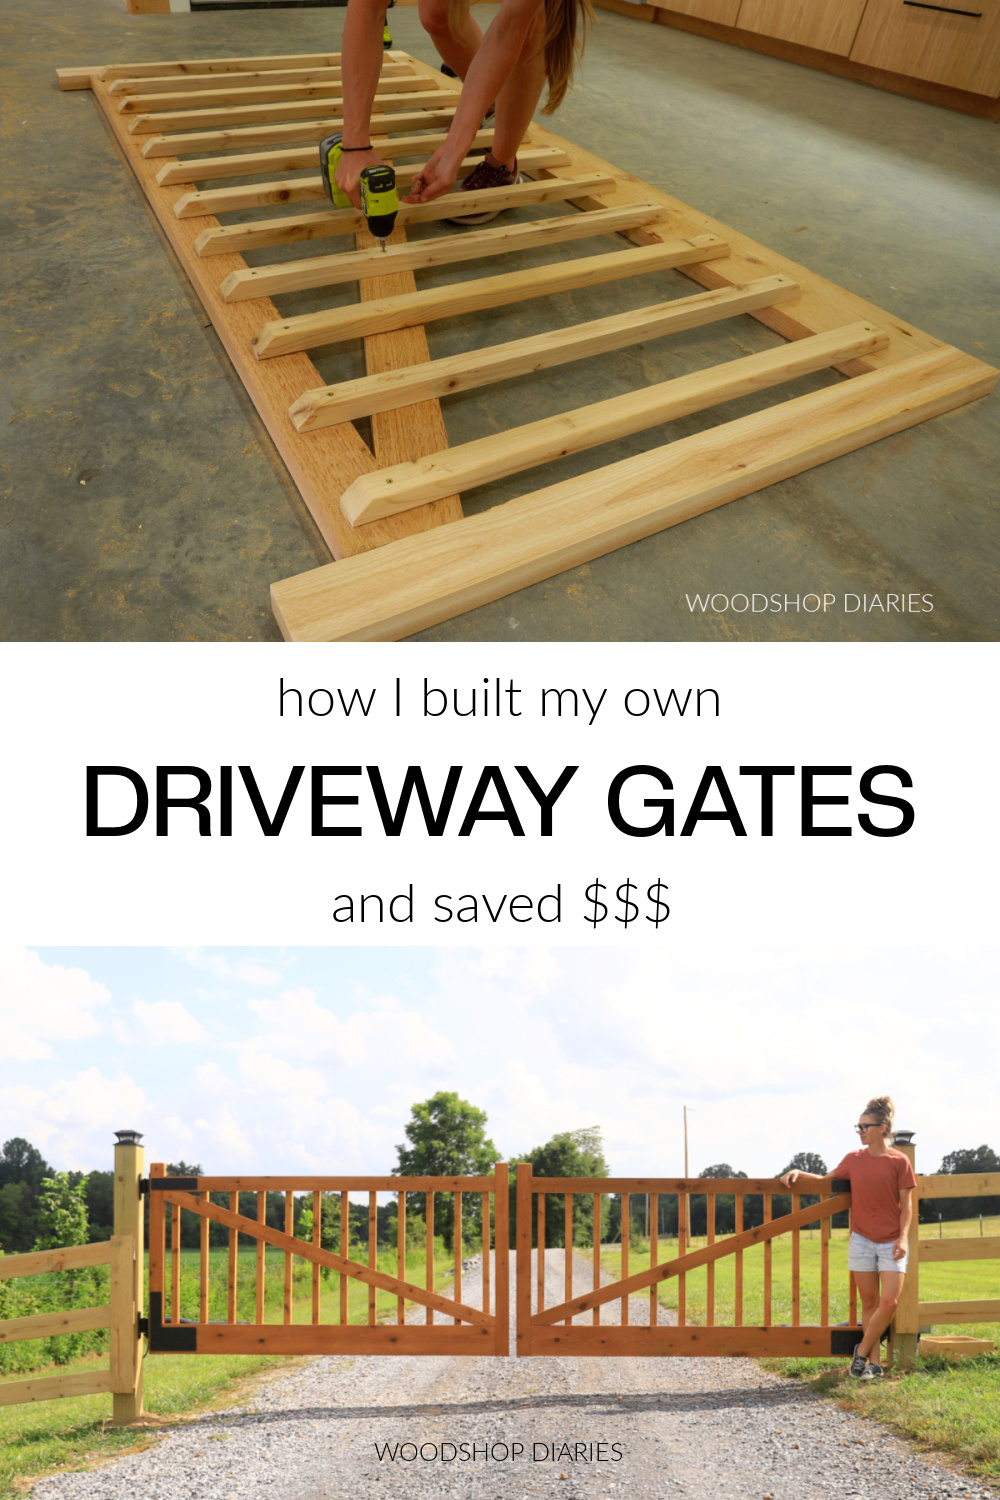
In this post, I’m showing you how I built my own custom wooden driveway gates!
We live in a very rural area where gravel roads are not uncommon. So our gravel driveway often get’s mistaken for a road–which can be a bit…annoying.
Adding some driveway gates seemed to be the best solution, but if you’ve ever priced driveway gates, they’re crazy expensive. So instead of buying them premade, I built some and they turned out even better than I’d hoped!
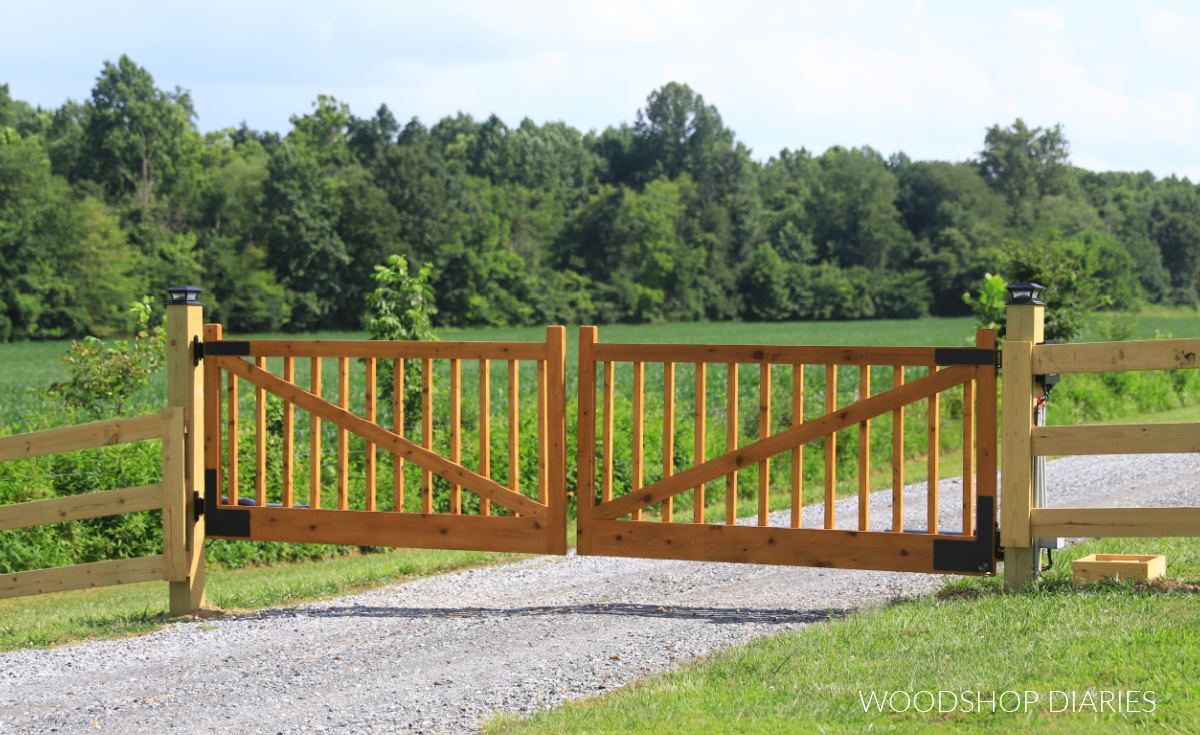
It’s a surprisingly simple project (if you don’t mind a little digging to set the posts) and the best part is you can easily customize the design and the size. So if you’re ready to dive in, I’ve got all the details and the how-to below.
*This post contains affiliate links. See website policies.
Why I Chose to Build vs Buy My Gates
There were three main reasons that I chose to build my own gates vs buy them:
- Cost
- Aesthetics
- Size
First–cost. Unless we wanted to buy the hollow tube cattle style gates (like the ones you see at Tractor Supply), the cheapest options we were finding for driveway gates in the width we needed were about $2700-$3000.
I was able to build these cedar gates for about $350-400. That’s a significant savings!
Second–aesthetics. I wasn’t loving the look of most of the prebuilt designs plus they were pretty much all metal and I much preferred wood.
Third–the size. Most of the driveway gates we were finding online were 6′ tall and I felt like that height would look really odd.
Building them myself would allow me to customize the size however I wanted.
An added bonus to wooden gates is that if they get damaged from a storm, a vehicle, or animal, it’s usually fixable and/or you can replace parts of it. With a metal one, if it gets bent or damaged, it’s likely going to require a full replacement.
What to consider before building your own gates
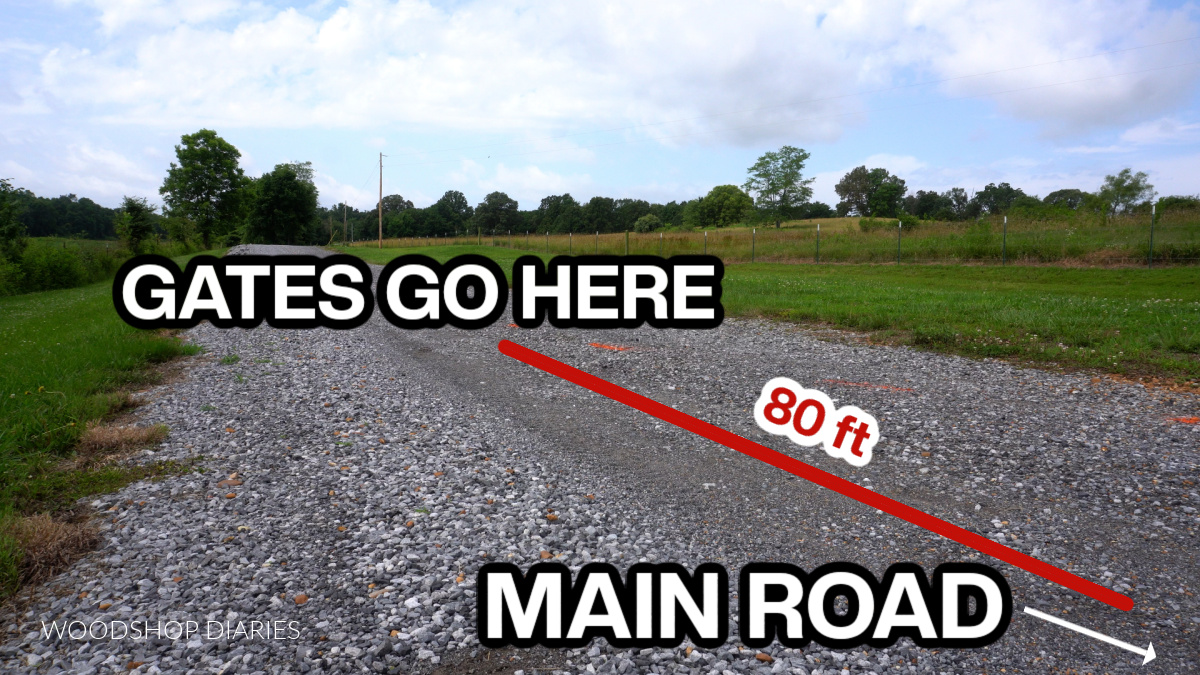
One of the biggest things to consider when building a driveway gate is the size and placement.
Where should we place our gates?
Proper placement is crucial because you want to make sure that vehicles have enough room to pull into the driveway and be out of the road while waiting for the gates to open.
You also want to make sure that if you ever bring a trailer up the drive, that there’s enough room to pull in off the road and straighten up to fit between the gates.
We ended up placing our gates about 80′ from the road. This allowed plenty of room to pull in a truck and trailer from either direction and get straight before pulling through the gates.
Deciding on Gate Size
Once I determined WHERE to place the gates, I measured across the driveway at this point (it was about 14′ across) and added an extra foot for some wiggle room on each side. That gave me 15′.
Since I was building double gates, I divided this by 2 and decided to build each gate 90″ wide (which is 7 ½′). And I decided to build them 4′ tall–this just looked right proportionally.

You can certainly make wooden gates other sizes within reason. Keep in mind the wider the gate, the more likely it is to sag simply because of the long span.
Choosing a Gate Material
Since this is an outdoor project, it’s important to choose a material that can last outdoors.
I built these gates from cedar because it is naturally rot and insect resistant material. (Teak and/or red wood are also great options depending on what’s available in your area.)
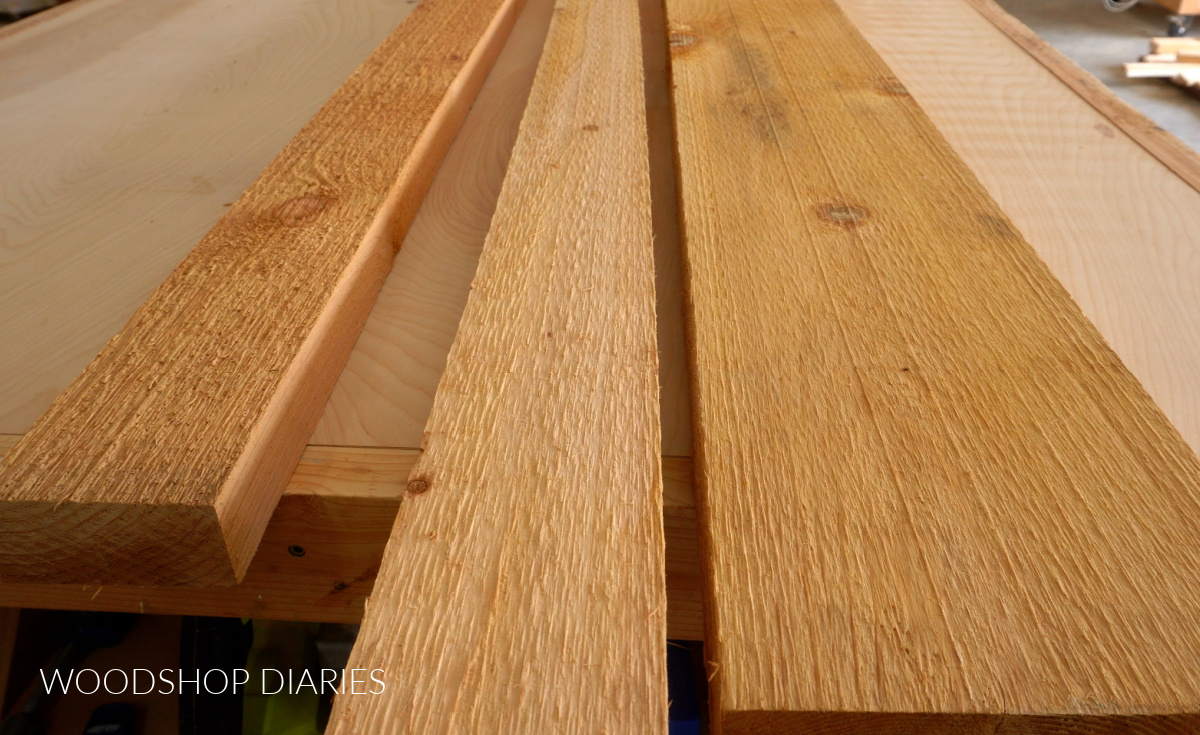
Cedar is a great choice because it’s lightweight. These gates ended up weighing only about 53 lbs each once complete. Other options (like pressure treated wood) may be too heavy to be practical for a gate this size.
Ideally, you want to choose a gate material that is strong, lightweight, and rot resistant.
NOTE: For the 6×6 posts (that go into the ground), we used ground contact rated pressure treated lumber.
Are DIY projects your thing? Sign up for our newsletter for priority access to the latest projects and build plans!
How to Build Wooden Driveway Gates
If you prefer to watch, I’ve shared the full build video with tons of tips, behind the scenes, and additional details on my YouTube Channel here.
Love watching how-to videos? Subscribe to my YouTube channel for plenty more where that came from!
Tools & Materials
Tools:
- Miter Saw
- Circular Saw
- Drill/Driver
- XL Pocket Hole Jig
- Post Hole Digger
- Level
- Router and chamfer bit (optional)
Materials:
- (6) 2x4x8 cedar boards
- (2) 2x8x8 cedar boards
- (12) 2x2x8 cedar boards
- 2 ½″ XL Pocket Hole Screws
- 2 ½″ & 3″ long decking/outdoor screws
- L Brackets
- Straight Brackets
- (2) Pair Heavy Duty Gate Hinges
- (2) 6x6x8 treated posts
- Post Setting Material (foam/concrete/etc–see step 5 below)
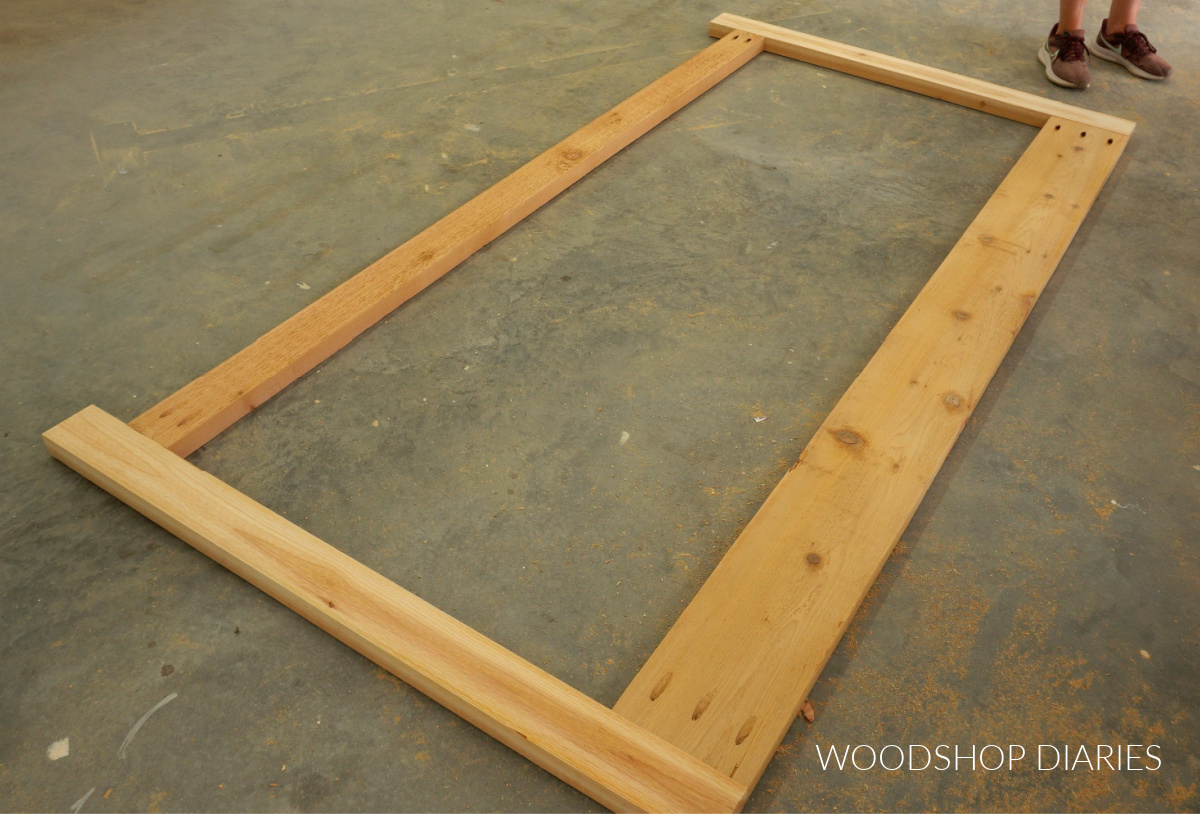
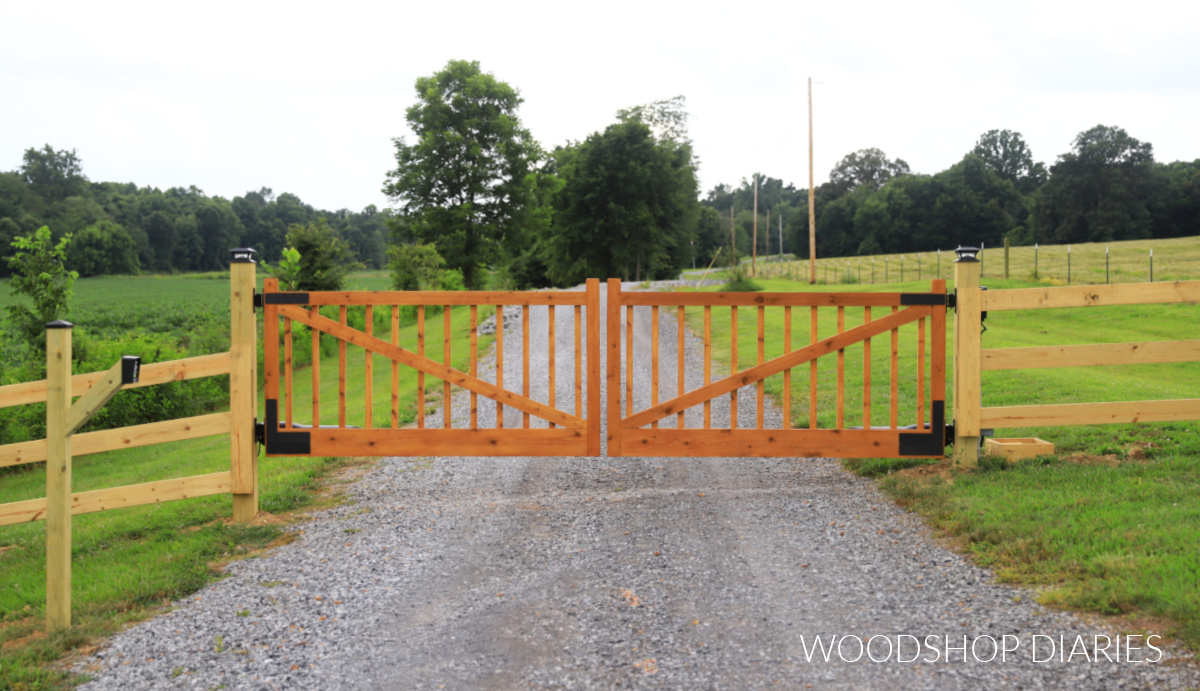
Step 1: Assemble Gate Frame
I built my gate frames using 2x4s for the sides and top and a 2×8 for the bottom. Basically, I cut a 2x4x8 board in half (48″ each) for the sides and cut another 2×4 and a 2×8 to 83″ long to run between them.
I used a Kreg XL pocket hole jig to drill pocket holes into the ends of the long 2×4 and 2×8 board. Learn how and when to use the Kreg XL pocket hole jig here.
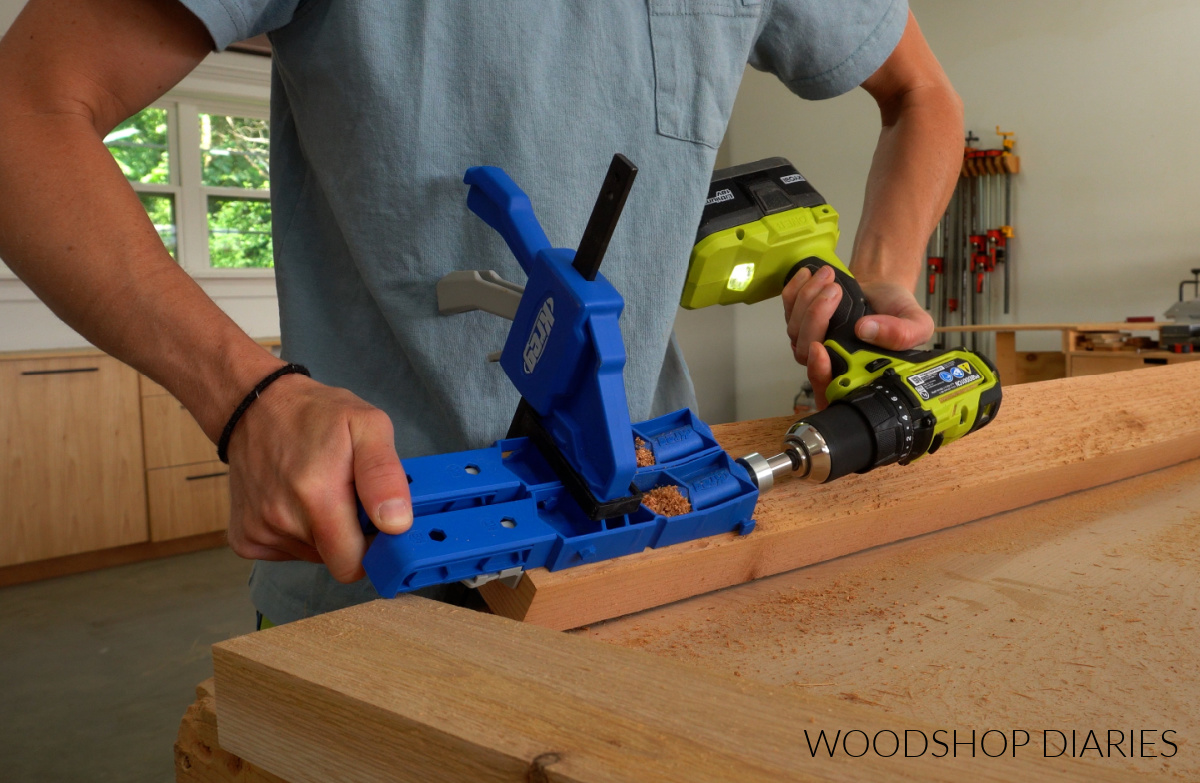
Then, I assembled this gate frame with 2 ½″ long XL pocket hole screws. I installed the 2×8 flush to the bottom edge of the 2×4 sides like shown below.
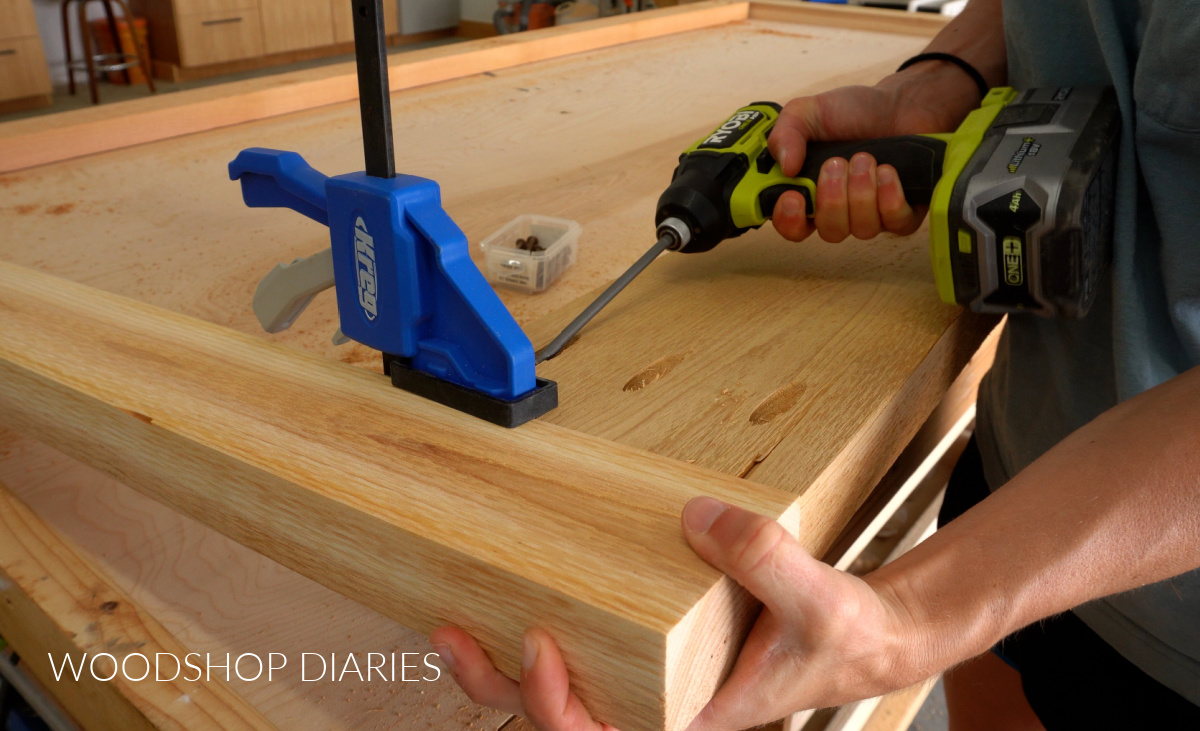
And I secured the top 2×4 about 3″ below the top of the sides. Once I had one frame together, I repeated to make another just like it. The overall dimensions of each frame was 48″ x 90″.
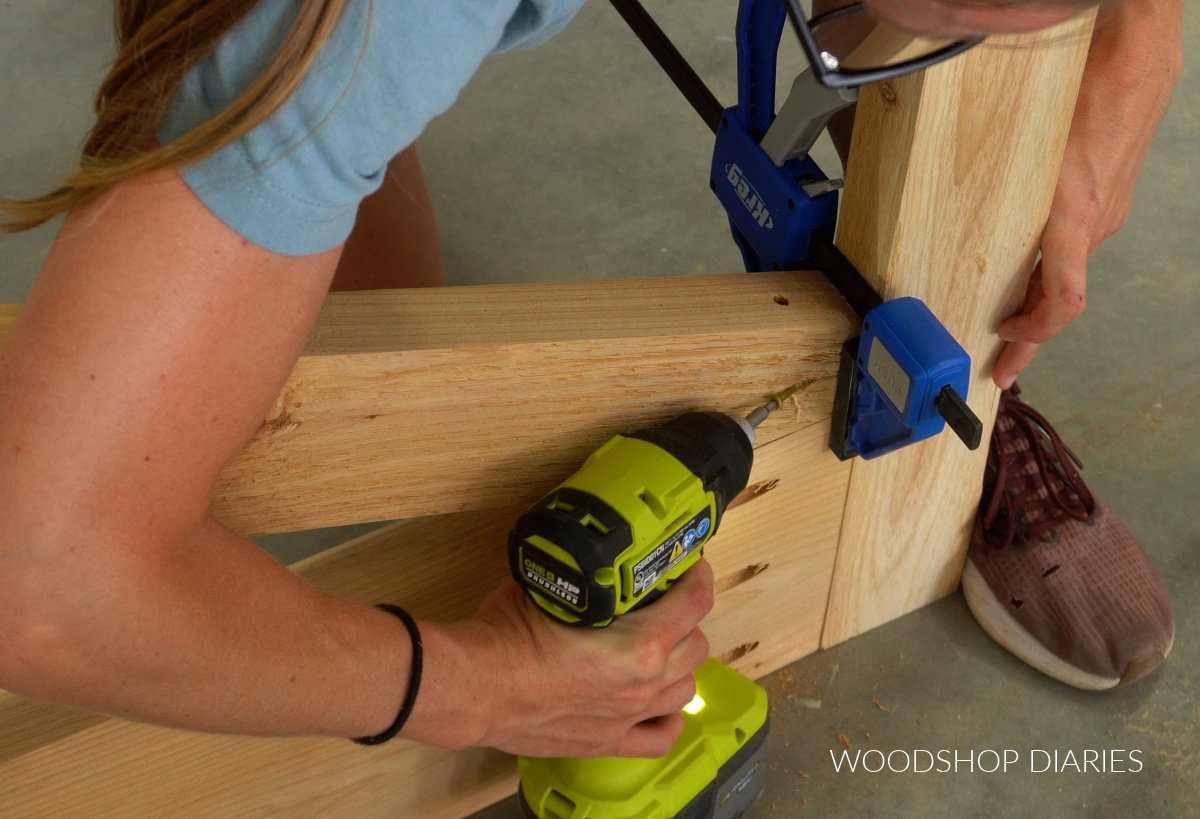
Step 2: Add Diagonal Brace
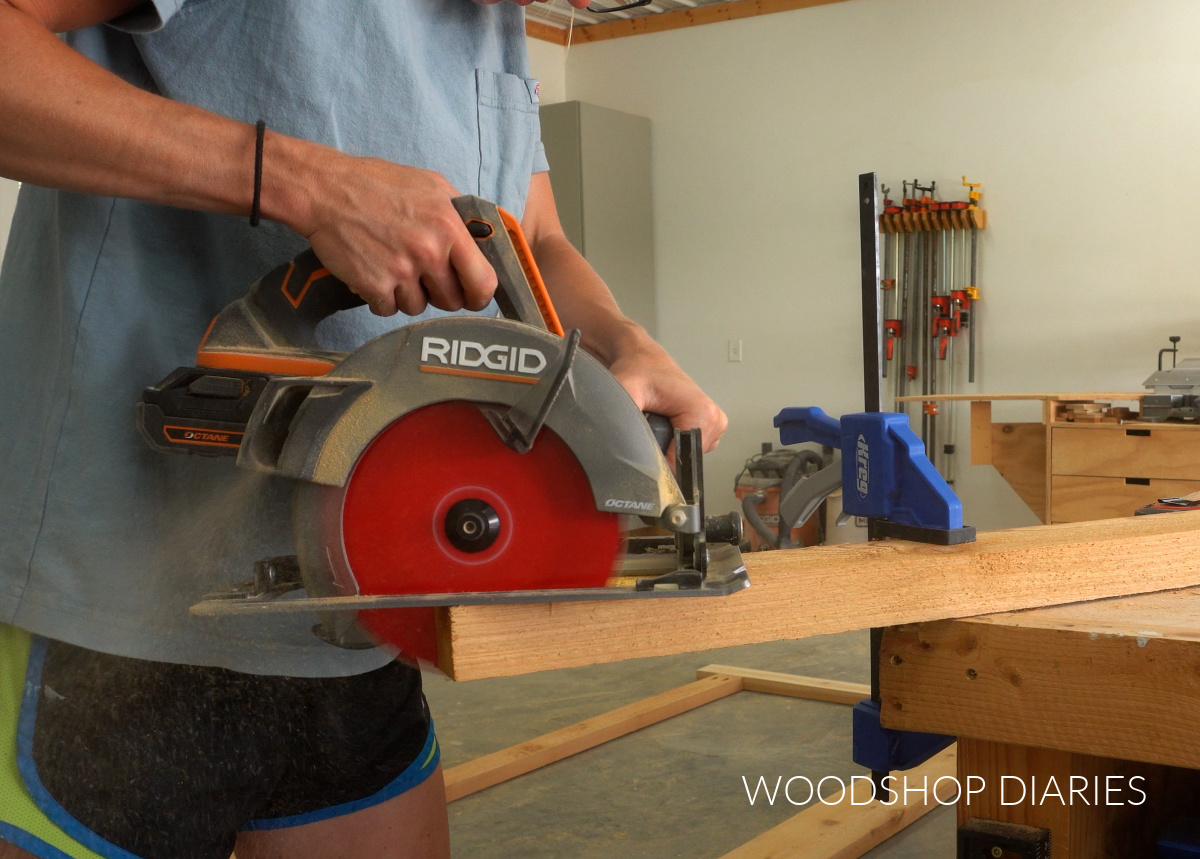
Next, I added a diagonal brace. This 2×4 brace will help hold the gate square and add some extra support.
The ends of this brace will need to be cut to fit into the frame opening. So, I laid a 2×4 across the back side of the frame so that the corners lined up in the center of the board. Then, I marked where they intersected.
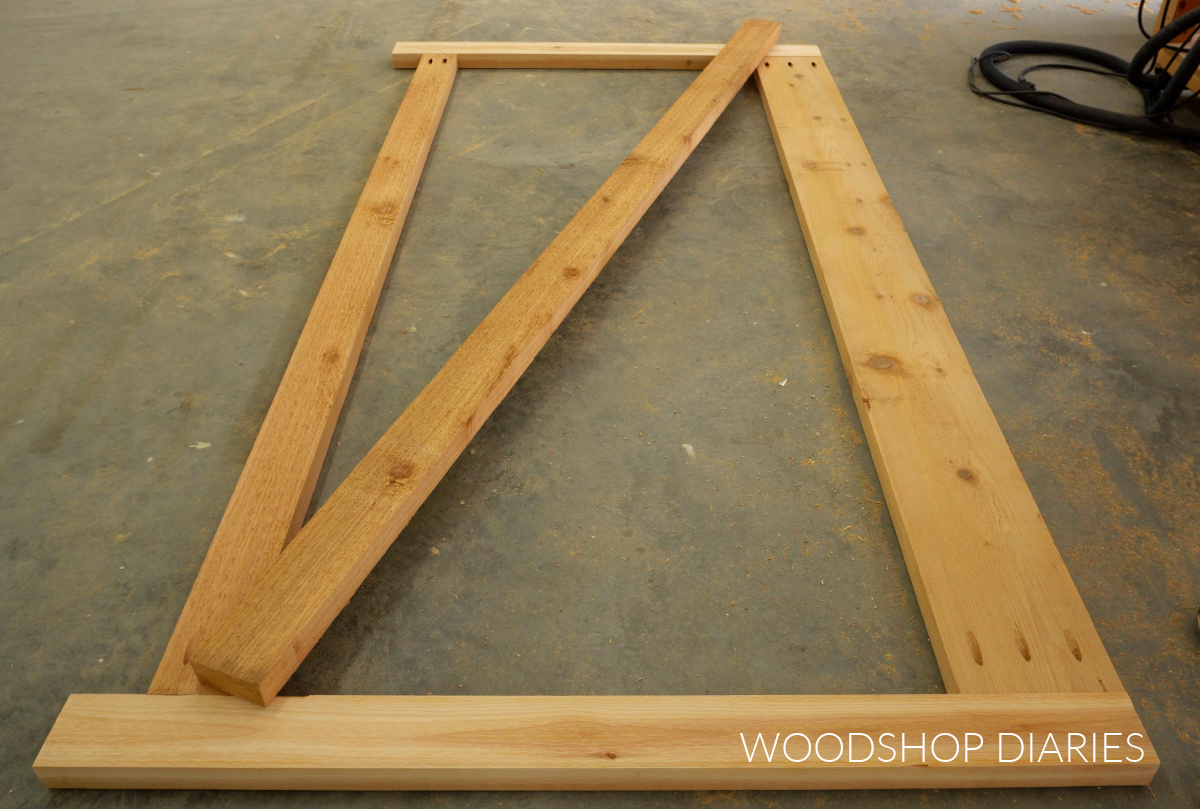
These were odd angles and there wasn’t any reason to figure them in order to cut them on the miter saw. You can if you’d like, but I just used a circular saw to carefully cut along the lines I had marked.
This diagonal brace should fit snugly inside the frame once trimmed. I repeated for the second gate, but this time, I ran the diagonal the opposite direction so that the gates are mirrored.
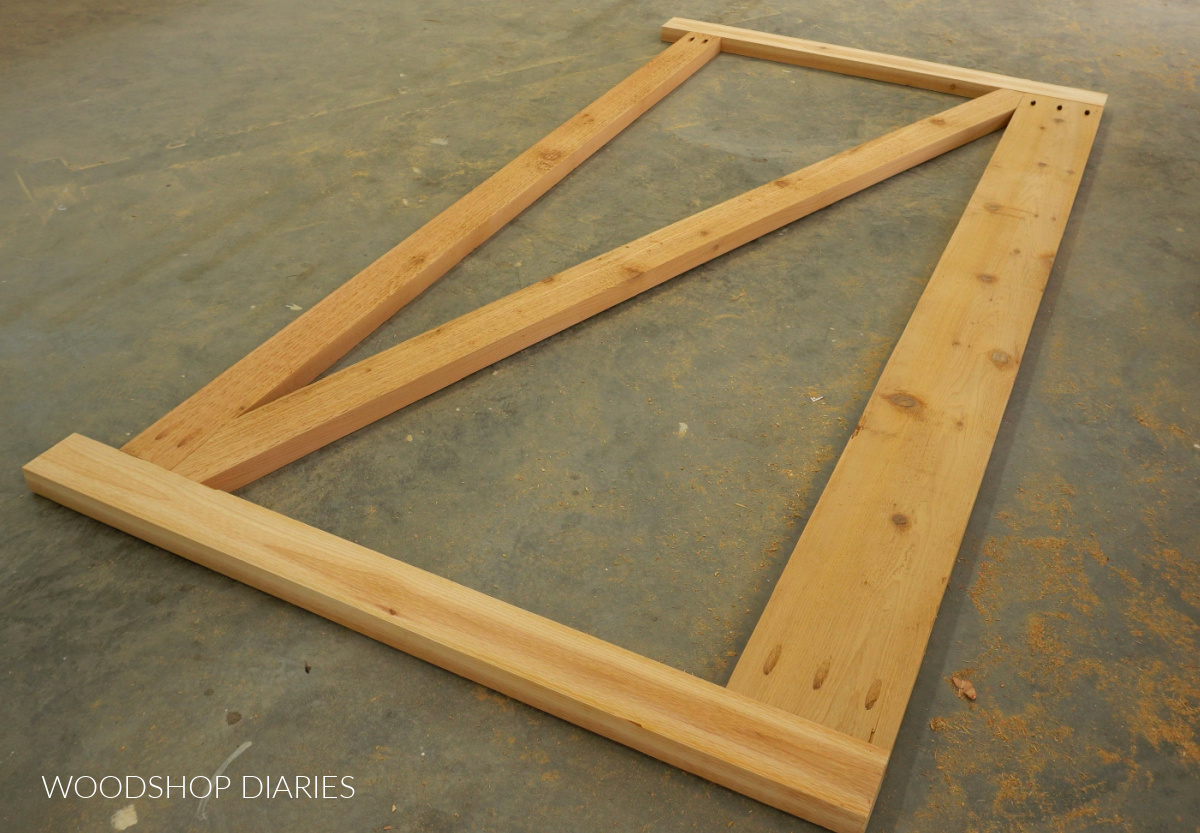
Once cut and fit, I secured the diagonal braces into the frame using some 3″ wood screws. I drove three screws on each end in different directions (you’ll have to kind of “toenail” them in at an angle like shown below).
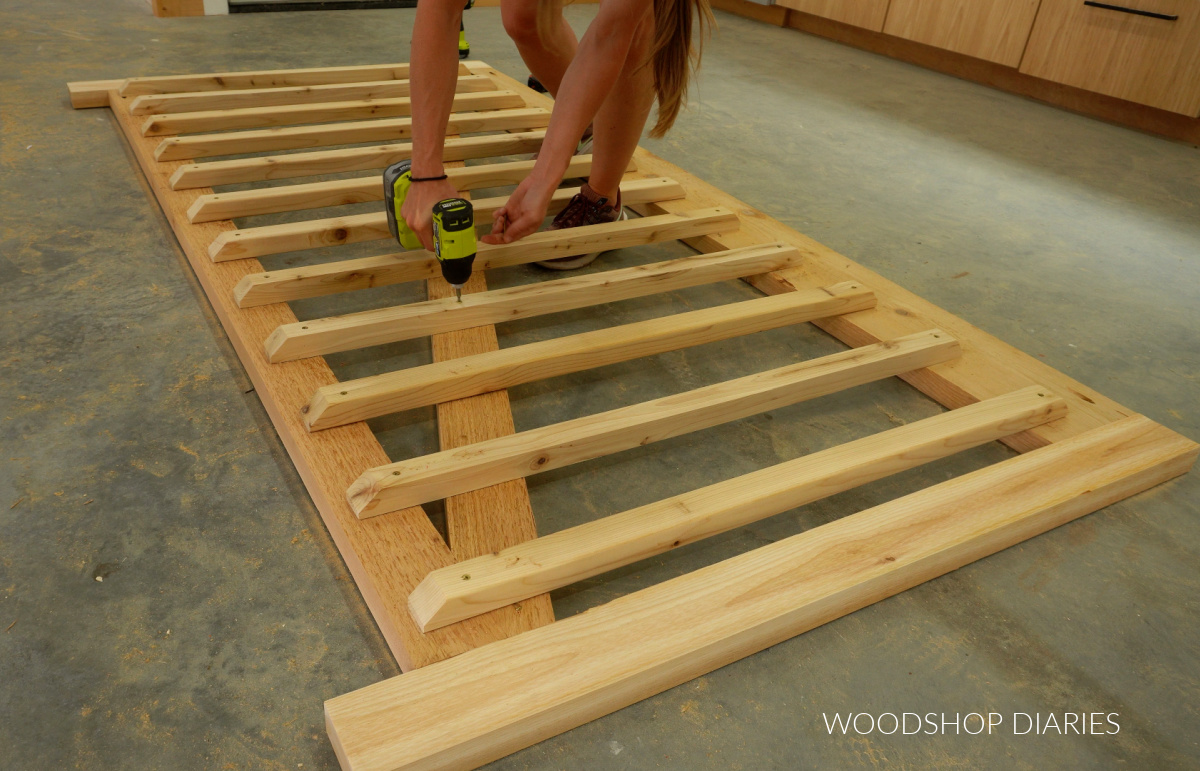
Step 3: Install Gate Slats
Next, I added twelve 2×2 slats onto the back side of each gate. Before screwing them on, I trimmed the ends with a 45 degree angle–not the entire end, but just like the corners like you see below.
After evenly spacing them out, I secured with 2 ½″ screws at the top, bottom, and along the diagonal.
Then, just for one more added detail, I used a router with a chamfer bit to route along the top edges of the two ends of each gate. This is completely optional–it just adds a subtle detail.
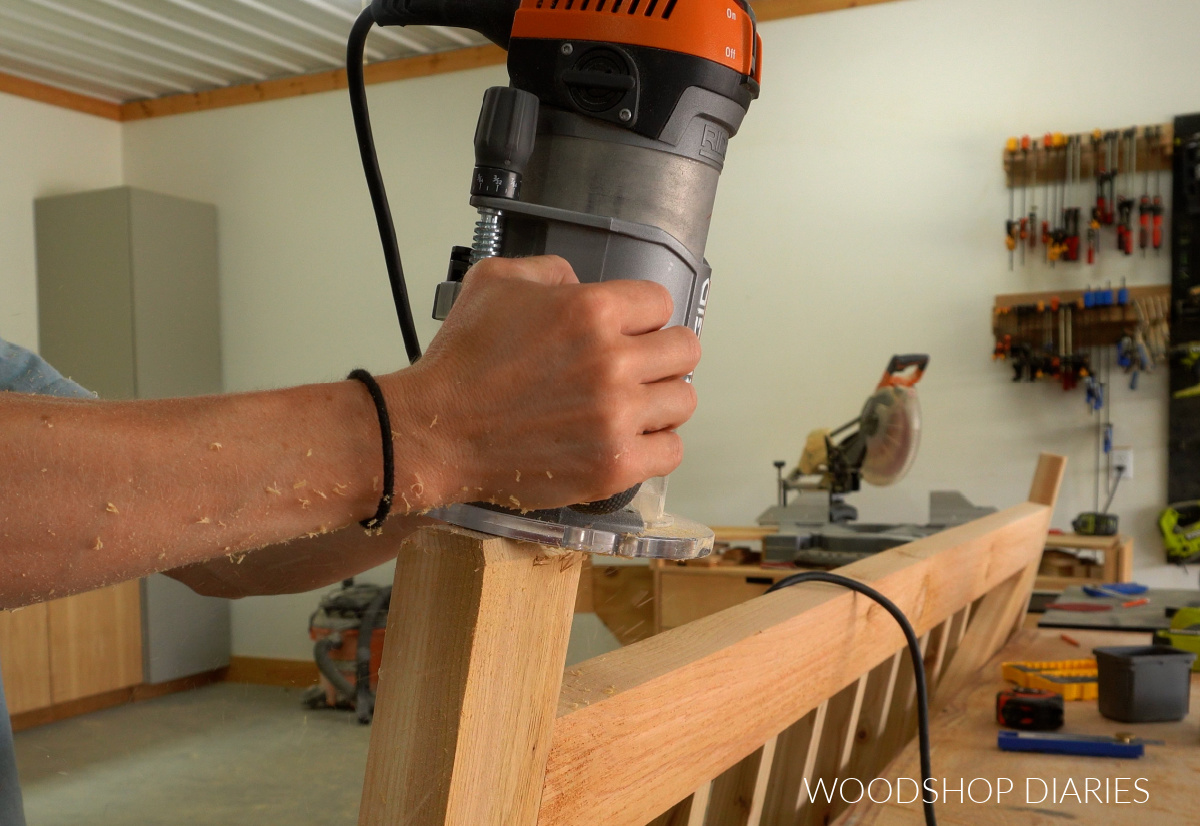
My cedar splintered pretty bad after routing, so I had to give it a good sanding to smooth things out afterward. Whoops…
Step 4: Add Additional Corner Brackets
At this point, the gates are ready for finish. You can finish with any kind of outdoor sealer you’d like–or leave it unfinished and let it age into that worn grey patina (some people love that look!).
I applied a coat of Cabot Australian Timber Oil in Honey Teak to each gate (it’s my favorite outdoor stain and sealer!).
Once that had dried, I added some additional support brackets to the gates. These brackets came in packs of four (find the straight brackets here and find the L brackets here).
So I installed a straight bracket at the top each gate and an L bracket PLUS a straight bracket at the bottom. Basically, I added both on the bottom just because the single L bracket looked a little funny on this wider board. I thought the extra straight bracket looked better proportionally.
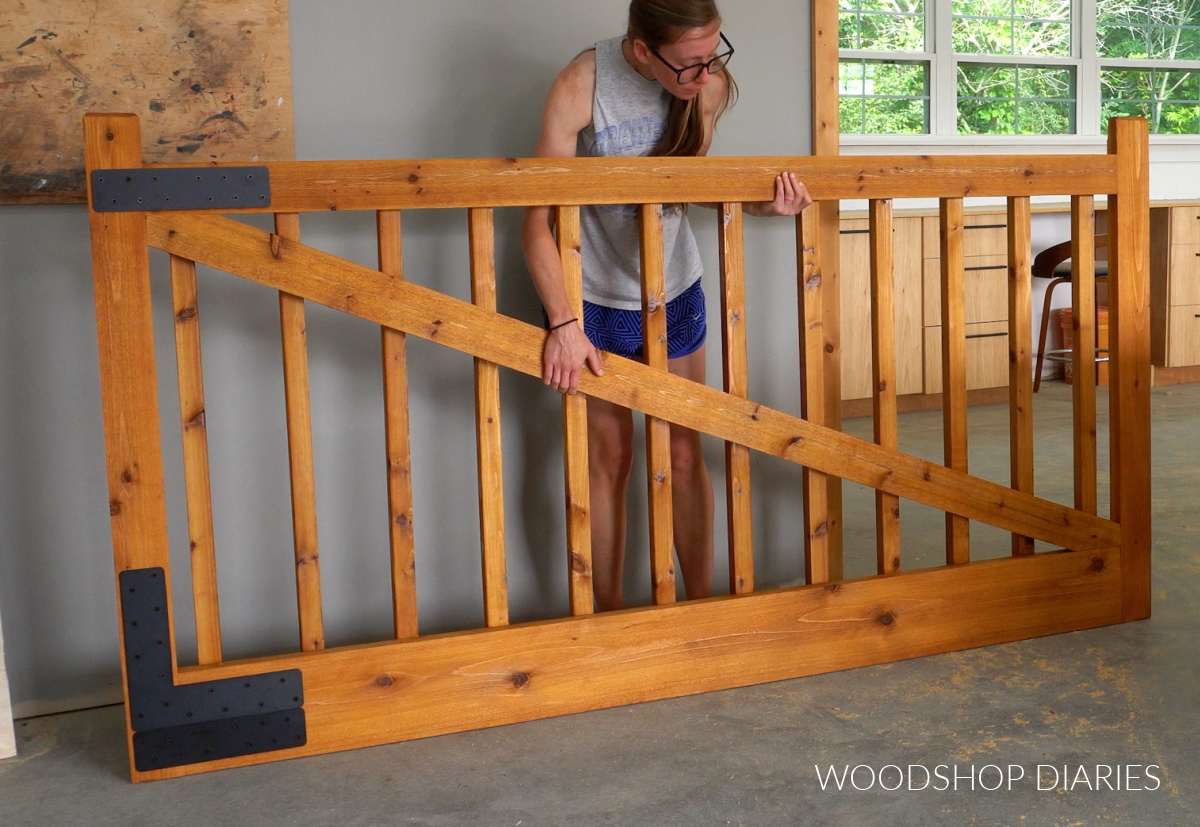
I only wanted to add these brackets on the hinge side of the gates, so I had to choose which way I was going to hang them before installing. There’s a lot of debate on which direction is best to run your diagonals, so you can do your own research.
Some say it’s better to run them from the bottom hinge up (compression), and some say it’s better to run them from top hinge down (tension). In this case, I really don’t think it matters either way, but I ran mine top hinge down.
Step 5: Install Gates to Posts
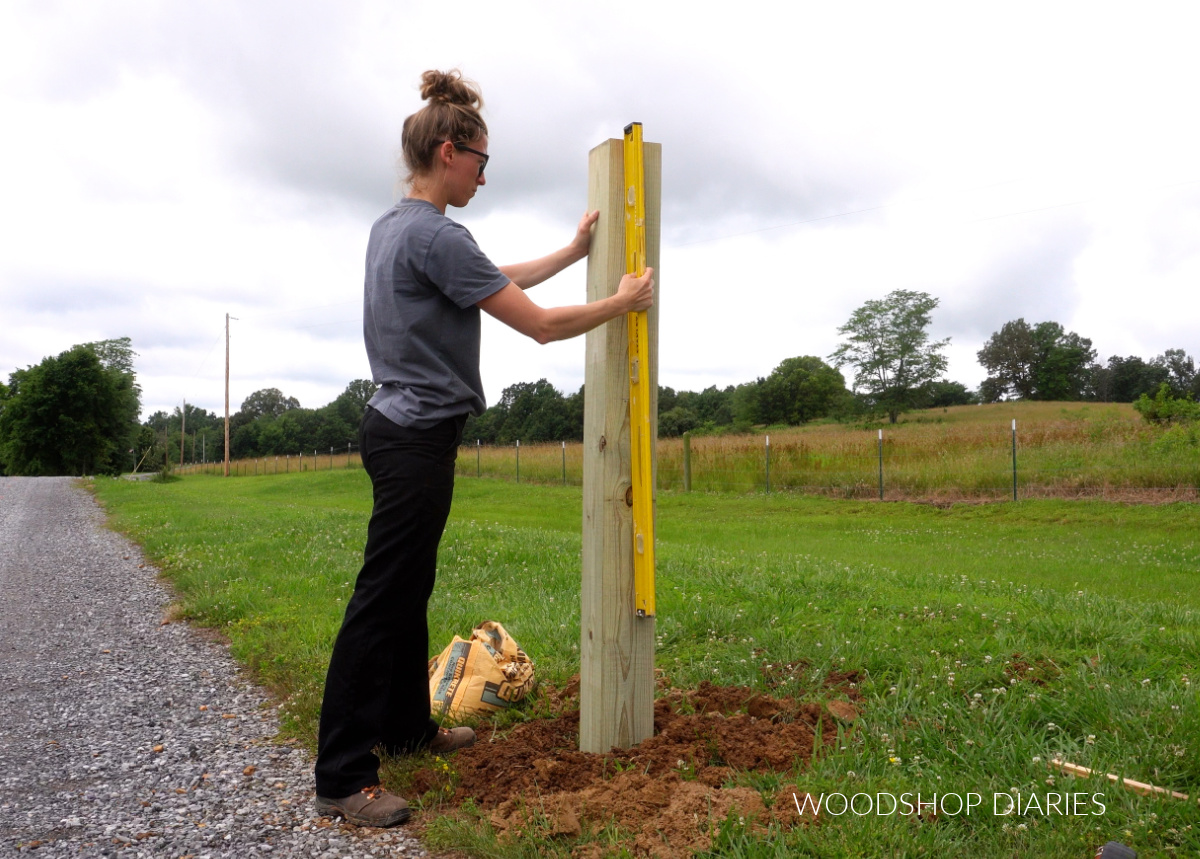
Now the gates are finished and it’s time to hang them. I dug post holes about 36″ deep to set my 6×6 posts in. I made sure to set the posts far enough apart to fit both my gates, plus the hinges, plus a 2″ gap between them.
NOTE: There are a lot of ways to set a post. I just poured dry concrete in the hole after the post was in and made sure they were straight, level, and square to each other, then backfilled on top with dirt. I didn’t add water because the ground was soaking wet already and it was going to rain soon.
However, that may not work in your area if your climate is very dry. So set your posts at the proper depth and the proper method that is recommended for your area.
I installed these heavy duty gate hinges to each gate–one toward the top and one toward the bottom. Then I set the first gate up on spacer blocks (just some scrap 2x4s like you see below) to get it level.
Once level, I used a pencil to mark on the post where my hinge holes landed. Then, I could move the gate out of the way, drill pilot holes at these marks, and attach the gate to the post.
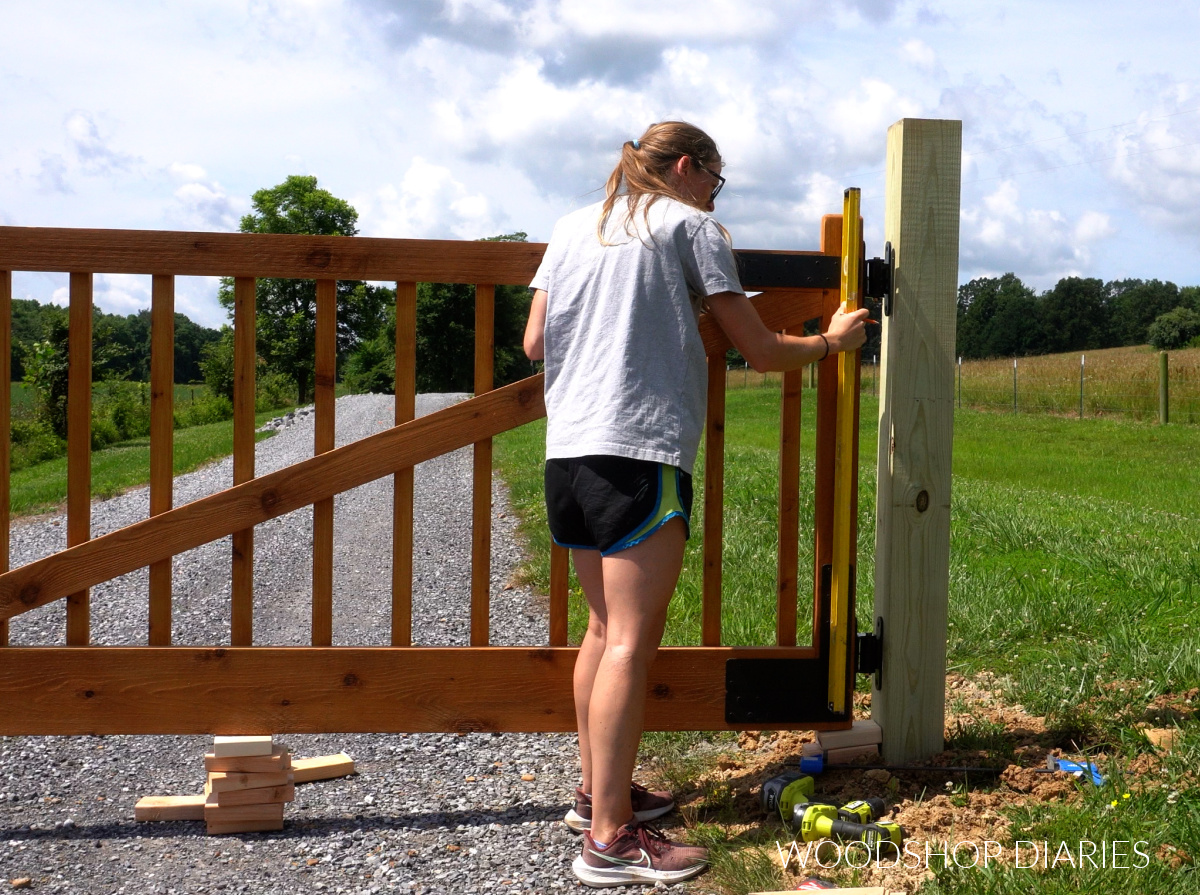
Once the right side gate was on the post, I placed the left side gate up on blocks the same way until it was level to the existing gate. I marked the hinge holes on the post, drilled pilot holes and hung it up the same way.
My driveway slopes at this point, so the gates are level and even to each other…the ground just isn’t. It is what it is haha.
Optional Driveway Gate Upgrades We Added
Once the gates were up, we added a few more optional upgrades to make them a bit more practical.
Solar Lights
To light up the posts/gate when it’s dark, I added a pair of simple solar light post caps to my 6x6s. These simply screw into the top of the post and the solar light twists in place.
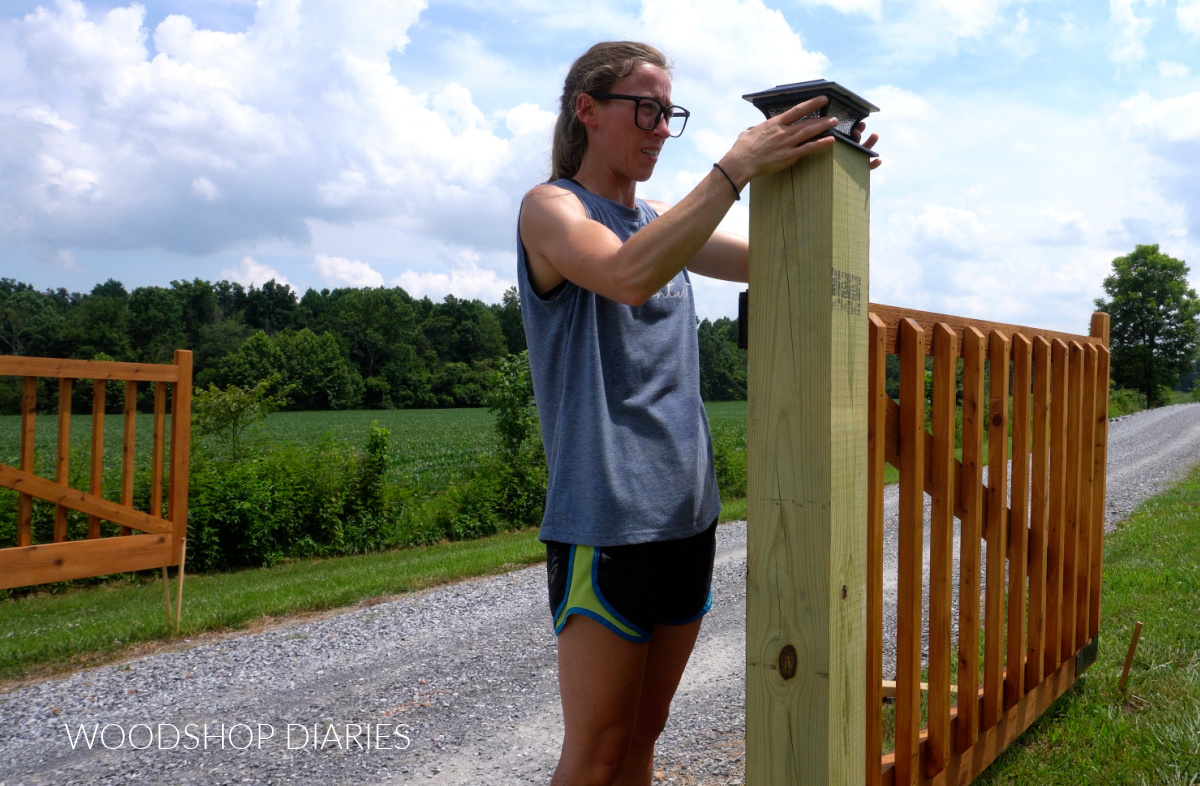
They’re a little small, but we can always upgrade them later if we decide. For now, they work great!
Fencing
To prevent people from just driving around the gates (and to make it look a bit more finished), I added a wooden fence on both sides.
I won’t go into too much detail on how to install a fence–that would be a whole separate post. But, essentially, I set treated 4×4 posts evenly spaced out until it reached the existing barb wire fence. I trimmed them all so they were out of the ground about 54″.
Then, I cut to fit treated 2×6 boards to run between them spaced about 10″ apart (I just screwed these to the front of the 4×4 posts).
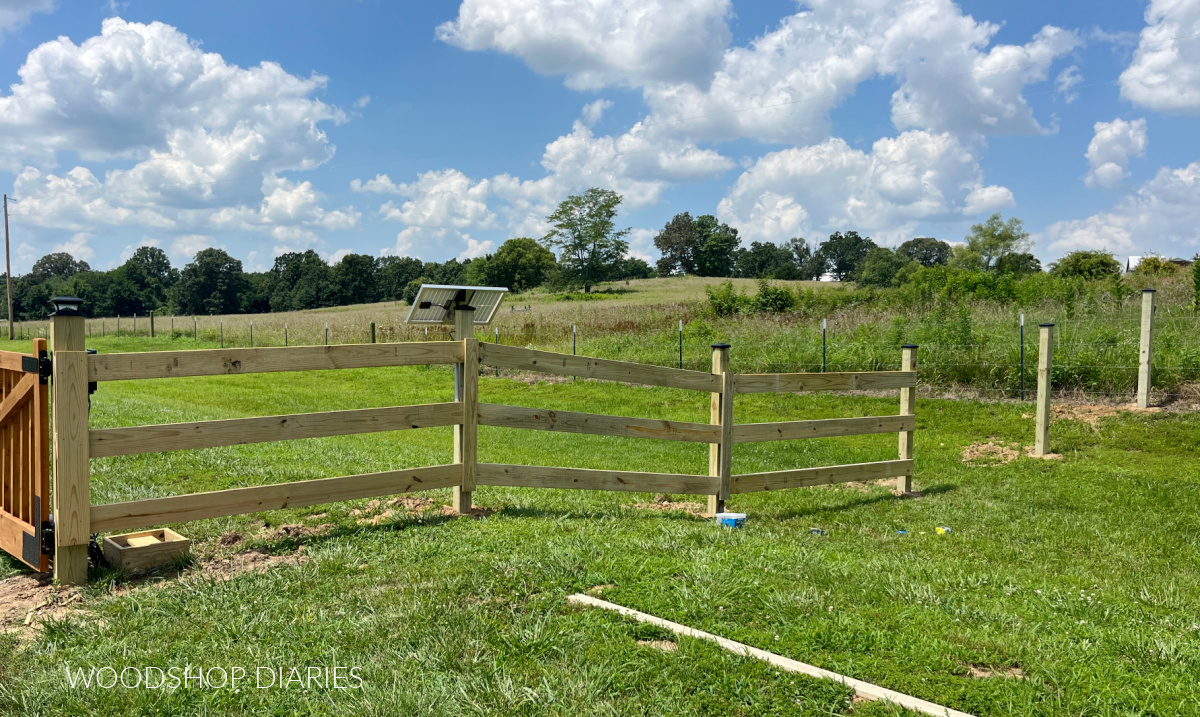
Then, I attached post caps to each post and added treated 1x4s on the front of each post to cover up the joints of the 2x6s. It’s a very simple and common fence style.
Automatic Gate Opener System
And finally, we added an automatic open/closing system to the gates. There are several brands to choose from, but we opted for Ghost Control gate openers. You can power these different ways, but we went with solar.
The system comes with openers (similar to garage door openers), but we also installed a wireless keypad on a post outside of the gates (like you see below) so that guests can enter with a code.
Of course an automatic opener system is totally optional. You can absolutely manually close the gates with a latch, chain, rope, hook, etc.
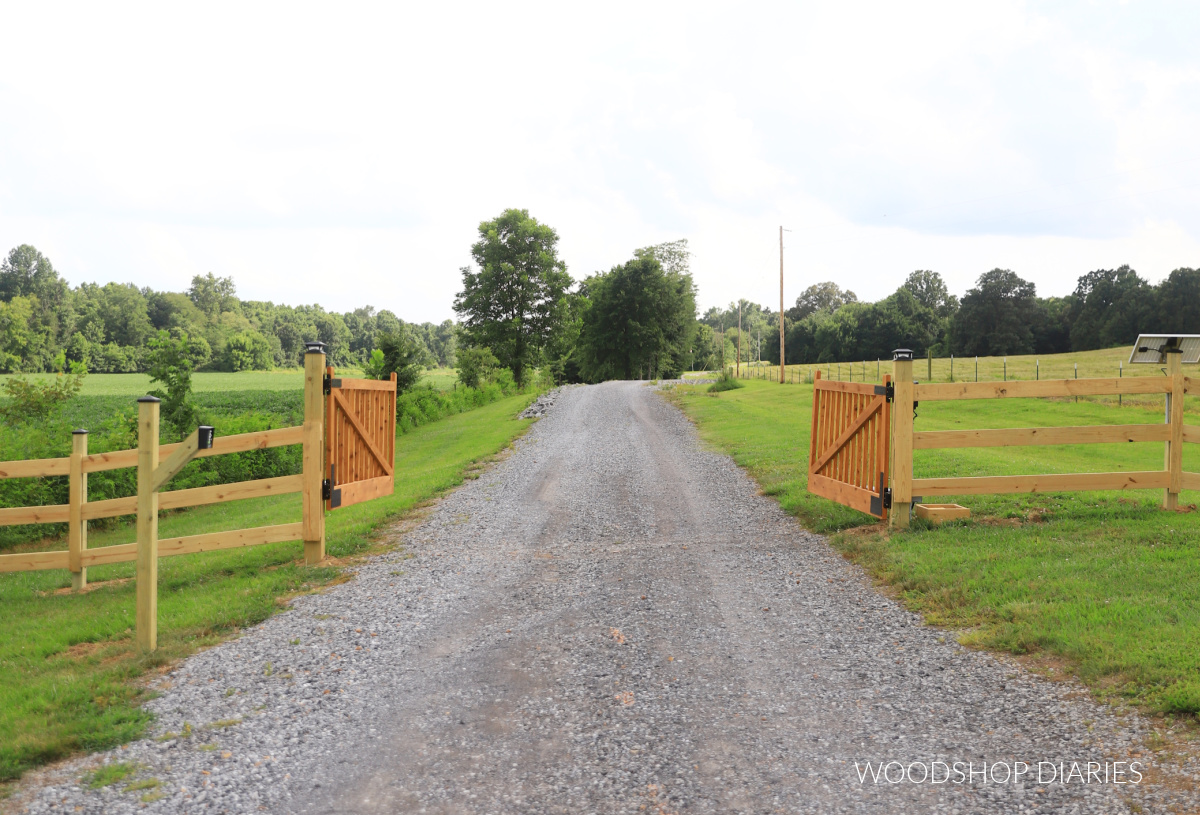
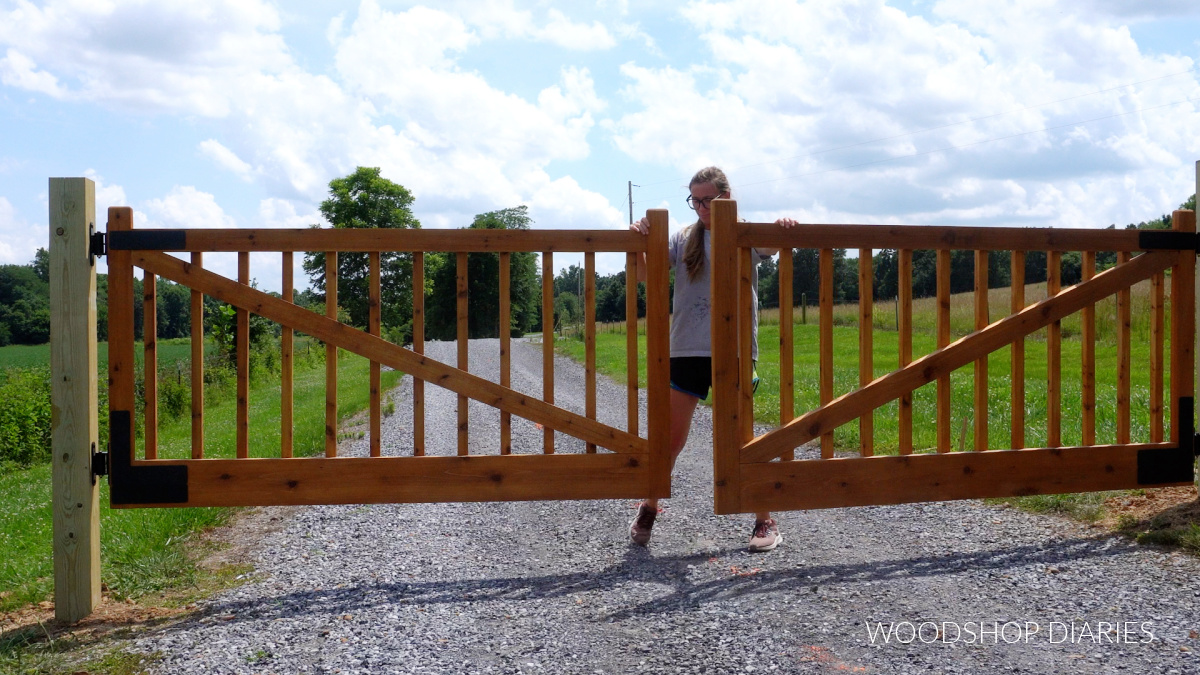
And at this point, the gates are finished and I can finally mark this project off my to do list. I do plan to revisit this and stain the fence black this fall after the treated wood has had time to dry out a bit. And I’ll probably decorate it a bit with planters, or landscape eventually.
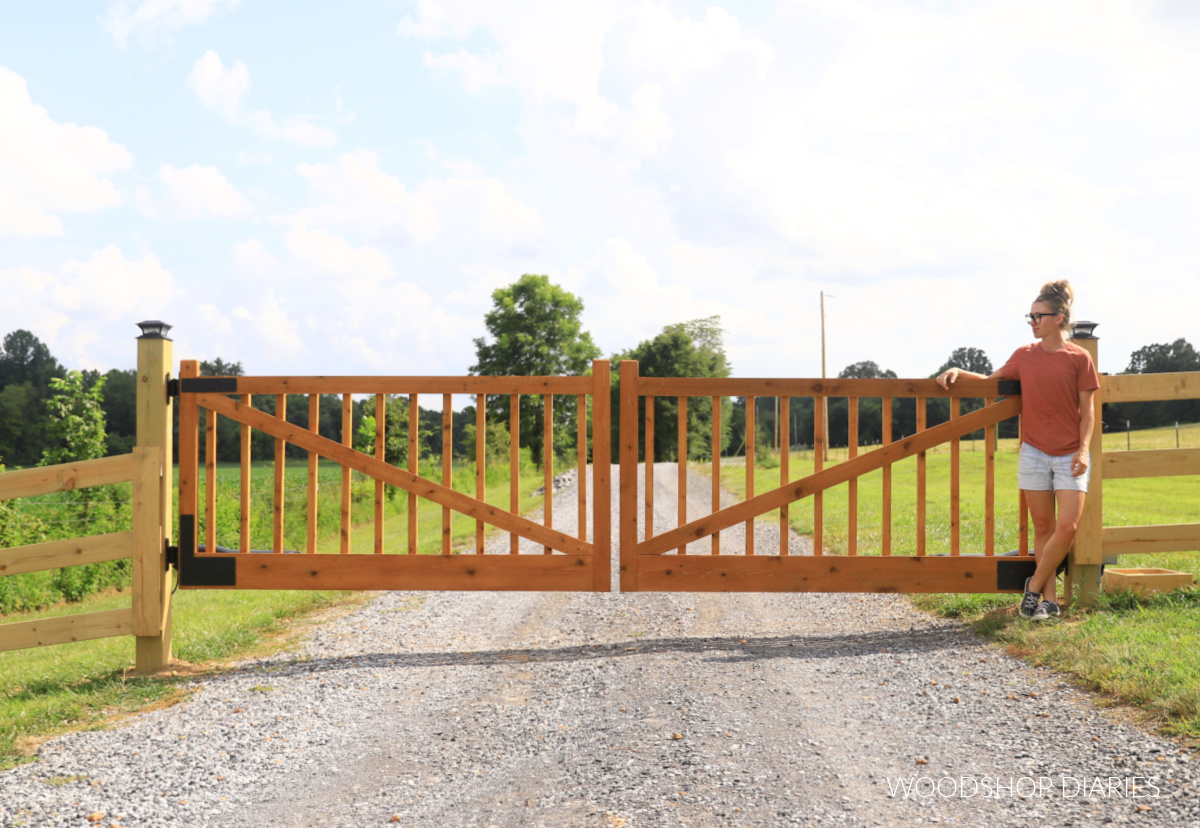
But for now, I’m SO happy with how these turned out and love the elegance this adds to the entrance. It’s hard to believe this was the (WAY) cheaper option!
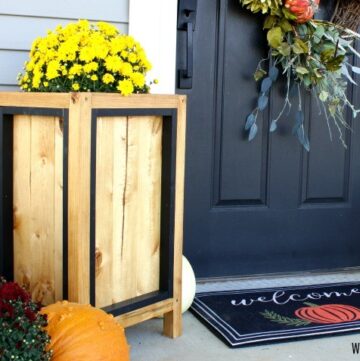
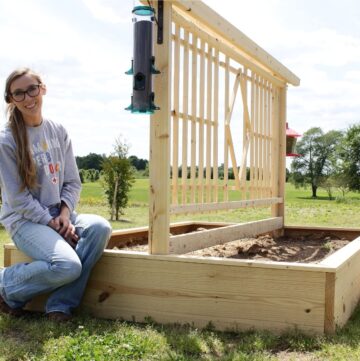
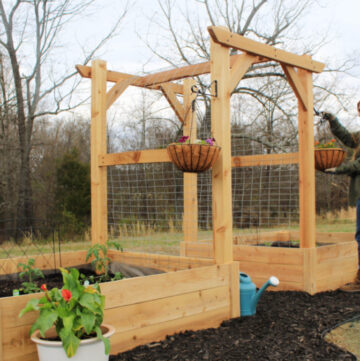
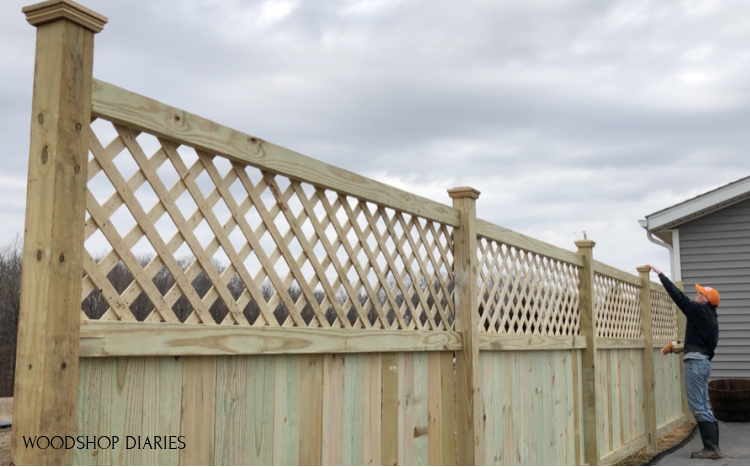
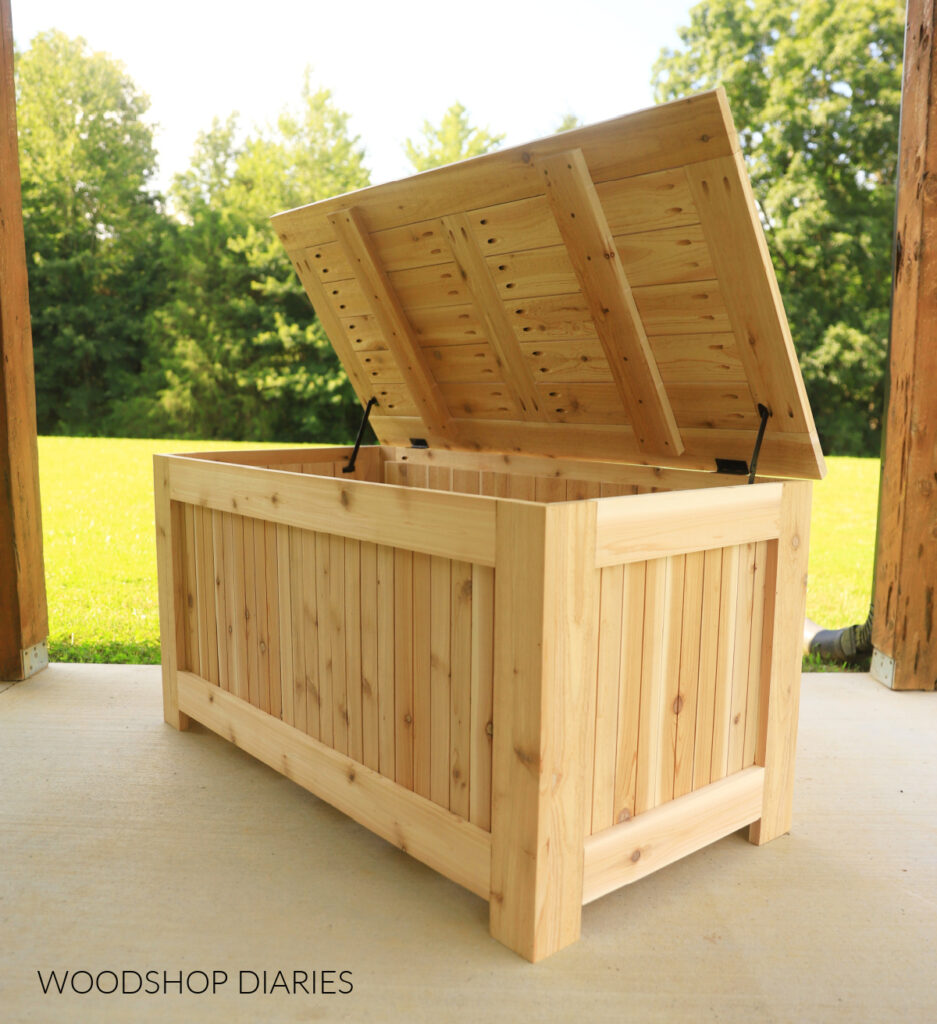
Looking for More Outdoor Project Ideas?
Enjoyed this project and looking for more outdoor builds? Here are a few of my favorite outdoor projects you might enjoy browsing. Click on the image(s) below to see how to build each one:
If you enjoyed this project and want to save it for later, don’t forget to pin it or save to your favorite social channel!
Until next time, friend, happy building!