In this post, I’m sharing how to make an easy DIY lamp post for a solar lantern.
I’ve always joked that we should name our long driveway “Lucy Lane,” after our (very spoiled) dog, Lucy. But giving a driveway an official street name is a hassle.
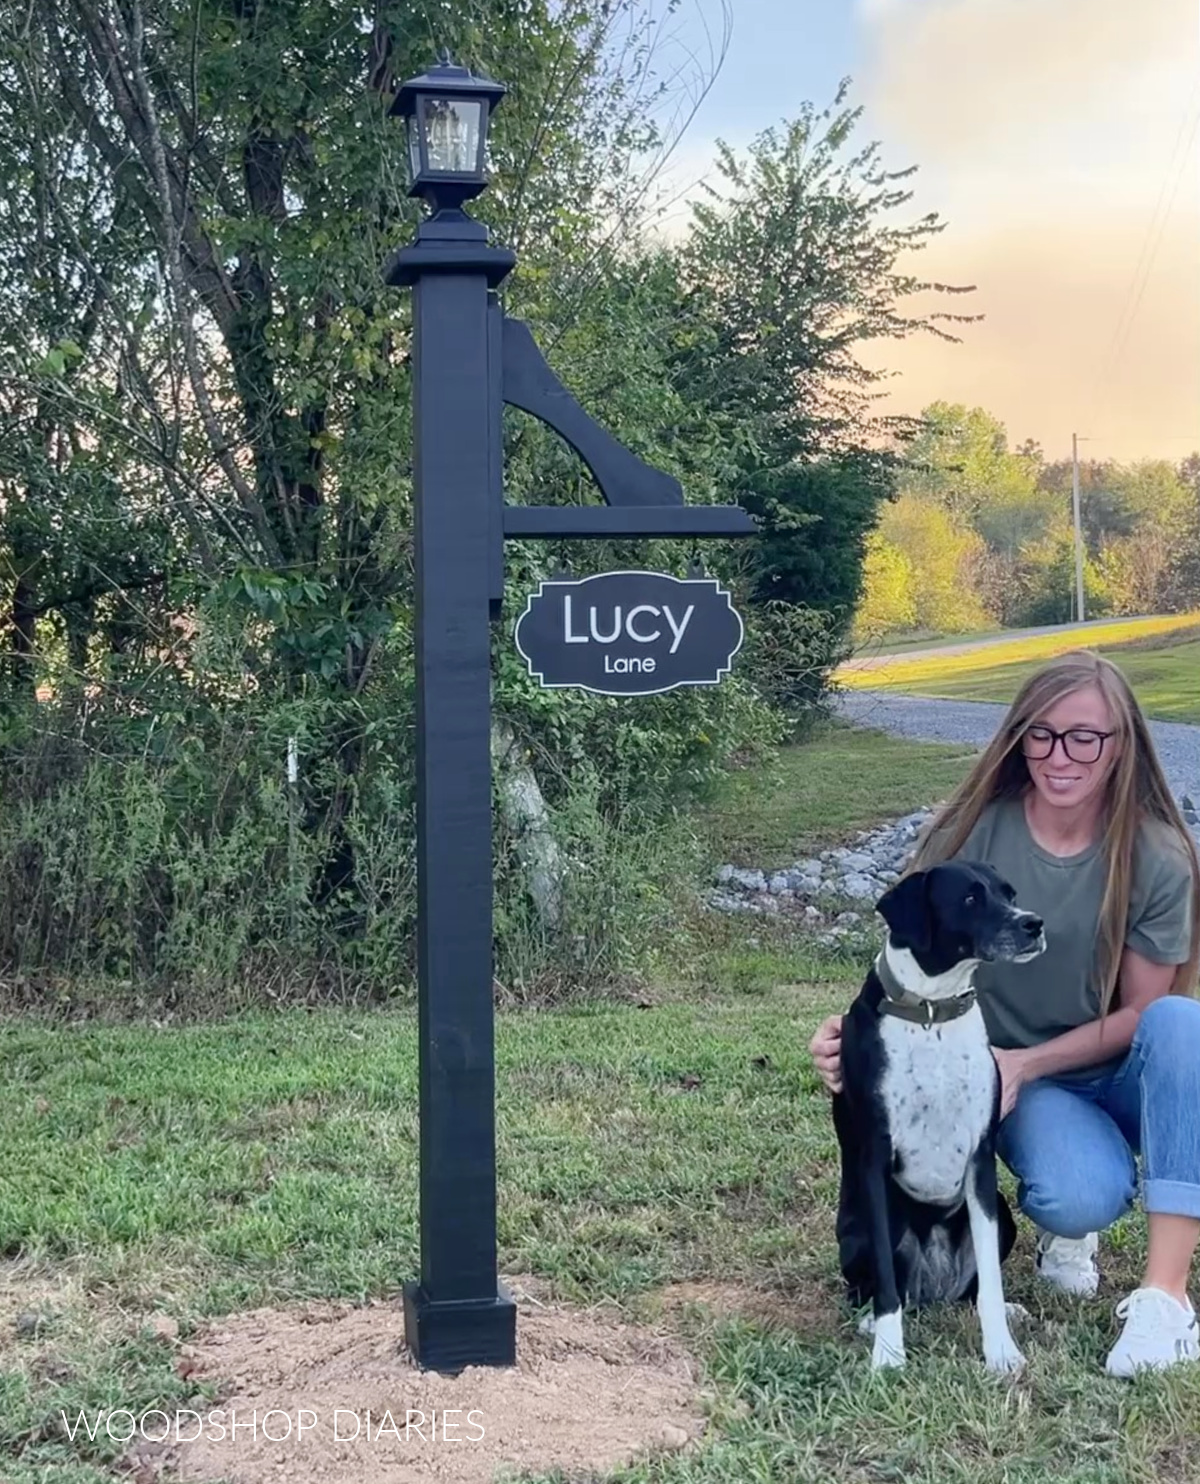
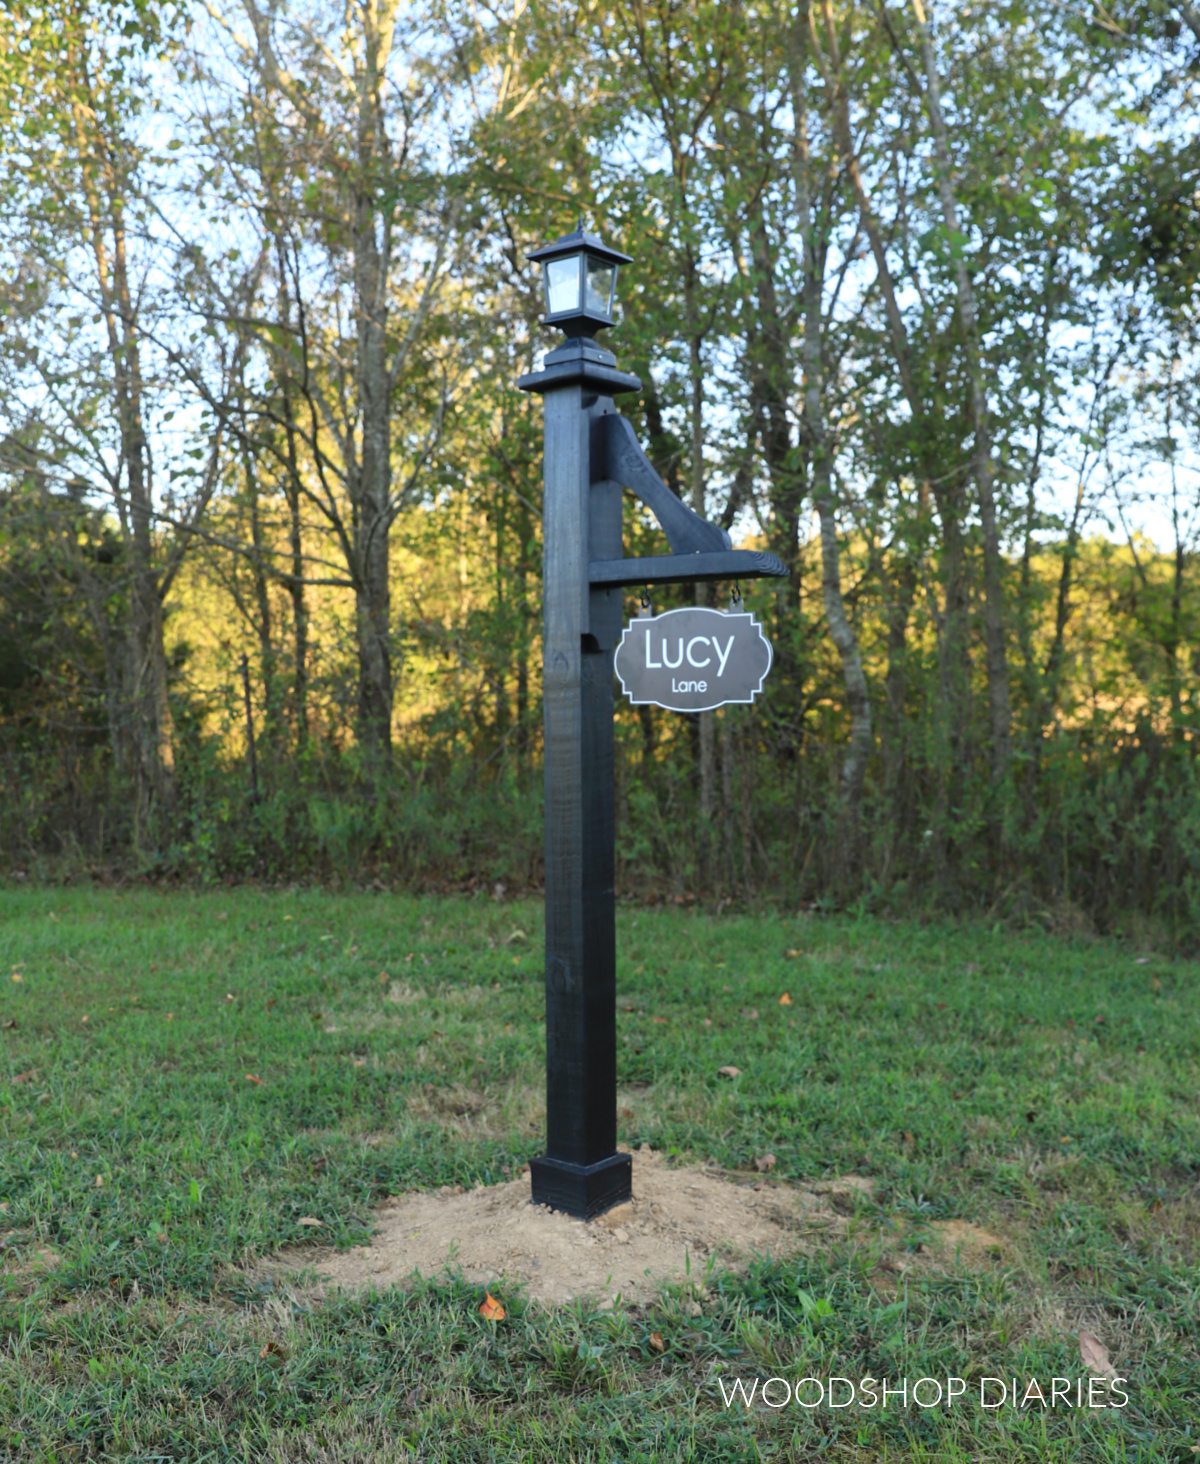
So, instead, I built this lamp post with a place to hang an unofficial road name sign. And let’s be honest, this is way cuter than any official street sign, anyway.
For those wondering, this is placed halfway down our driveway next to a scenic creek, so it’s not confusing (or visible) to anyone driving down the road.
This is a fun project to add to the end of a driveway, in a garden or around a sidewalk. And the attached hanger is a great place to display an address sign or a seasonal flag!
I’ll show you how to build it in the post and video below!
*This post contains affiliate links. See website policies.
What to consider before building
What’s so great about this post is that the lamp on top is solar, so there’s no need to run electricity or gas and it automatically comes on as it get’s dark outside.
It will obviously vary depending on the amount of sunlight your lamp gets, but our light, so far, has lasted all night long on the previous days’ charge.
If you don’t want a light on the post, you can swap the solar light for a basic cap, instead.
Material Choices
For longevity, I recommend using a treated post that is rated for ground contact. For the trim and sign hanger that is added to the post, I recommend using treated pine, cedar or redwood for best results.
I made the post shown using some treated wood scraps leftover from previous projects.

If you don’t have treated wood in your scrap pile, untreated pine can work as well–it just may only last a year or two depending on the weather conditions.
Because I was using scraps, I just kind of used whatever I had. So feel free to mix and match. These pieces and parts don’t have to be specific sizes.
Want to be the first to know about new projects and plans? Subscribe to the newsletter for priority access!
How to Build a Decorative Lamp Post
This is a really quick DIY project that you can easily complete in just a couple hours. The only reason it even takes hours is because a few steps require glue to dry and you need to let the stain dry before setting the post.
If you prefer to watch, I’ve put together a short video of the project here:
Love watching how-to videos? Subscribe to my YouTube channel for plenty more where that came from!
Tools & Materials
Tools:
Materials:
- 4x4x8′ treated post
- Treated Wood Scraps (you can mix and match, but I used 1×4, 2×4, and 1×6 pieces)
- Exterior Rated Wood Glue
- Exterior Screws
- Solar Lamp
- Sign (optional)
- Quikrete (to set post with)
Step 1: Trim Main Post
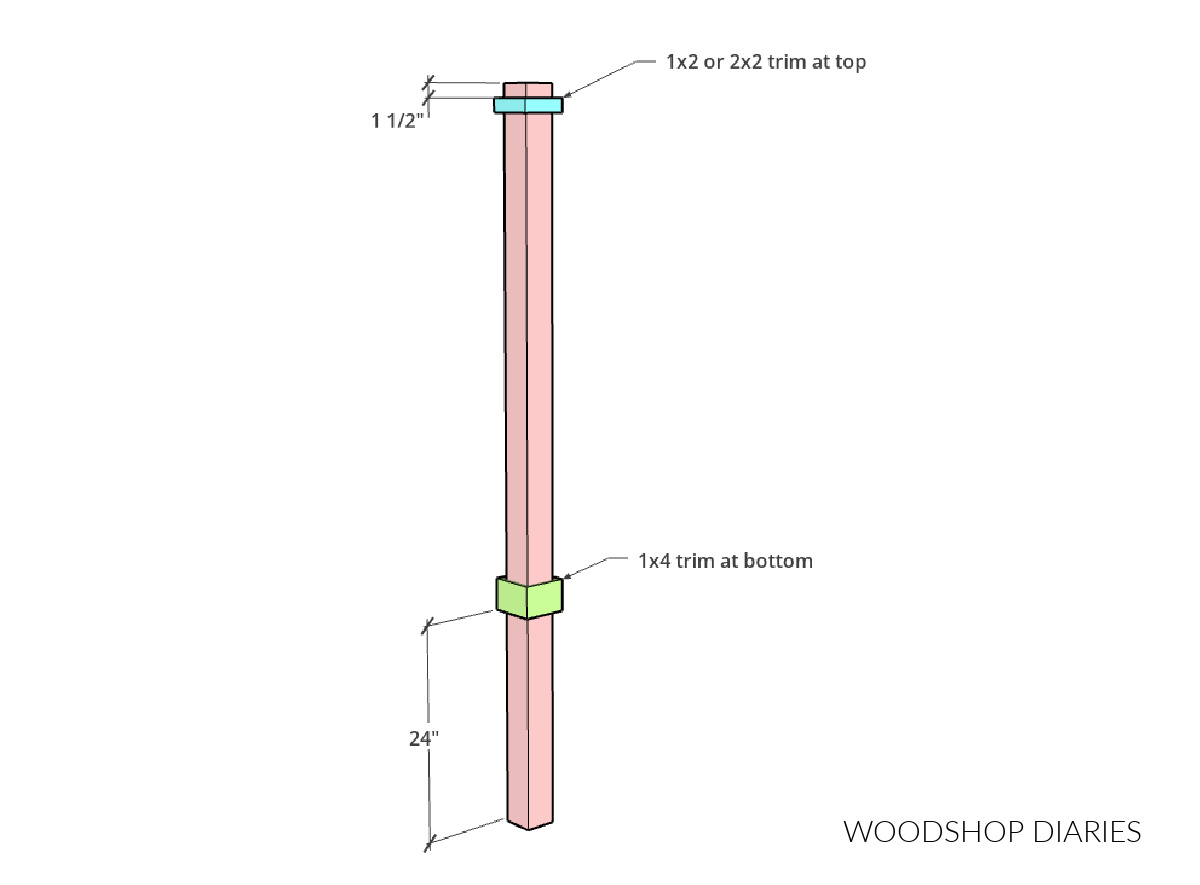
First, I trimmed my 4×4 post to about 80″ long. This post will go into the ground about 24″, so that leaves my lamp post about 56″ tall.
Then, I added some “trim” to dress this boring post up a bit.
I mentioned that I was just using up my scraps and I had some pieces that were about 1″ square. (But 2x2s or 1x2s or any small pieces would work fine here.)
So I cut four pieces of this 1″ square board to wrap around the post with ends mitered 45 degrees. I glued and clamped them on each side about 1 ½″ down from the top end of my 4×4 post.
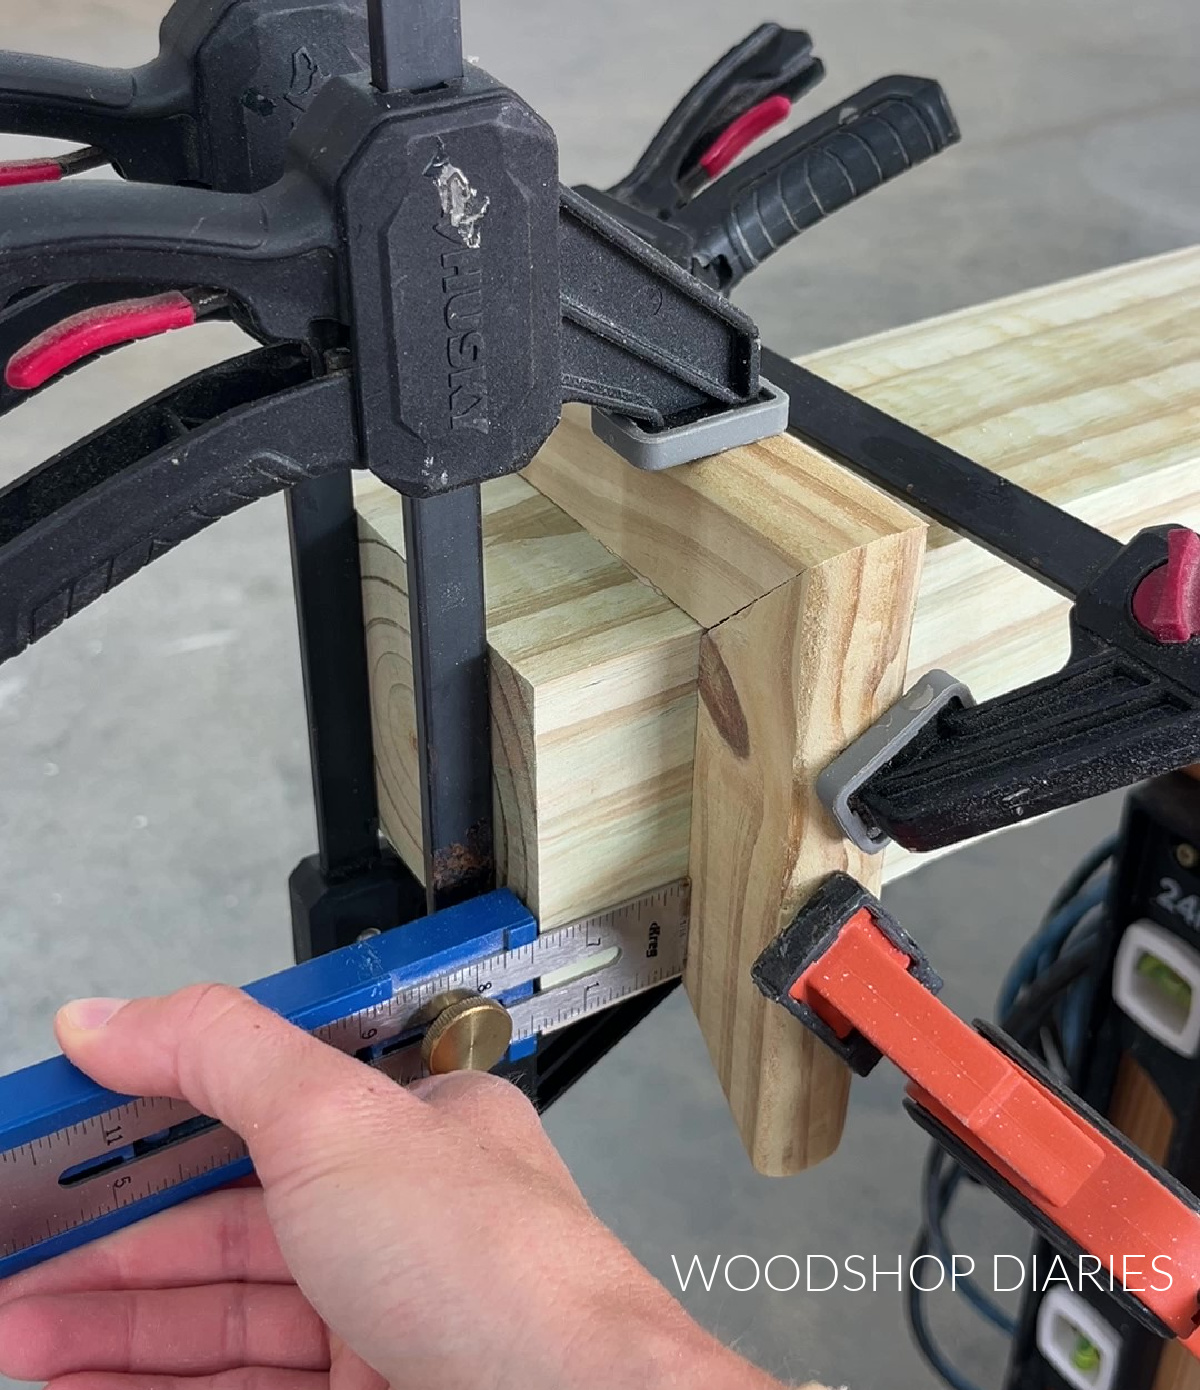
Then, I cut to fit 1×4 pieces around the post with ends beveled 45 degrees. I glued and nailed these pieces around the 4×4 post so that the bottom edge was 24″ up from the bottom edge of my post.
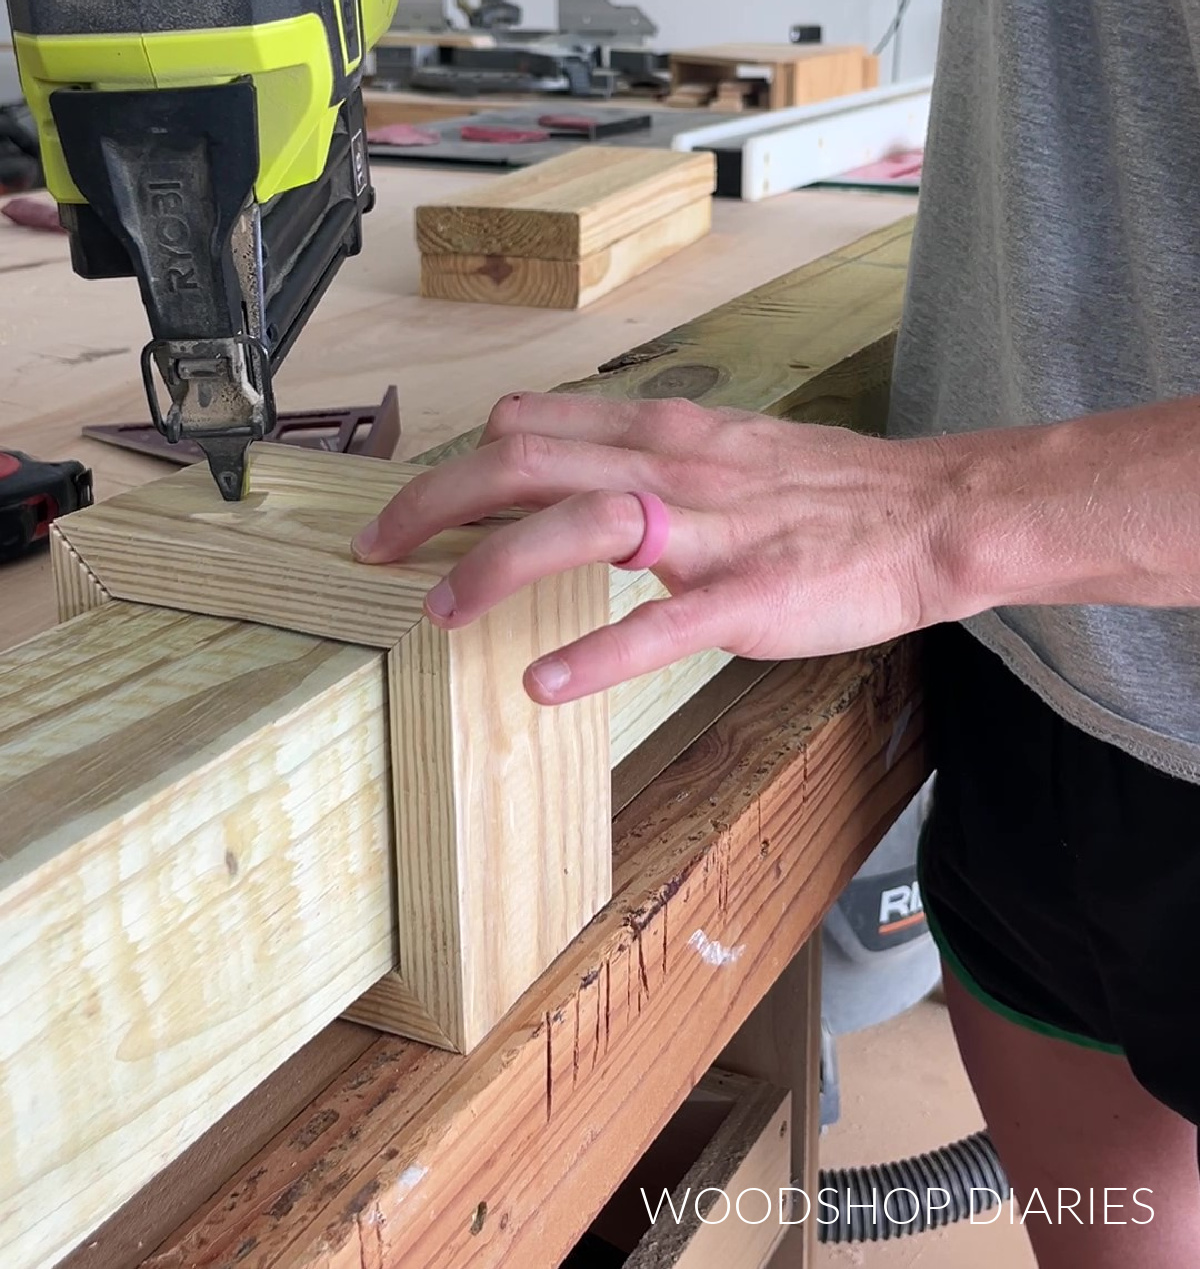
Once installed, these 1×4 pieces will be at ground level (so it’s best to use treated wood rated for ground contact here for longest life).
In hindsight, I wish I’d screwed these 1x4s on instead of nailed, so I recommend using some 1 ¼″ exterior screws to attach these around the post.
RELATED: How to choose the right wood screw
Once the glue was dry, I applied an outdoor stain (Cabot Solid Outdoor Stain in Black), and set this to the side while I worked on the next steps.
Step 2: Cut and Assemble Sign Hanger
Next, I assembled the piece that the sign will hang from. If you don’t want a sign or flag, feel free to skip this step, but it adds a ton of character to the otherwise basic post.
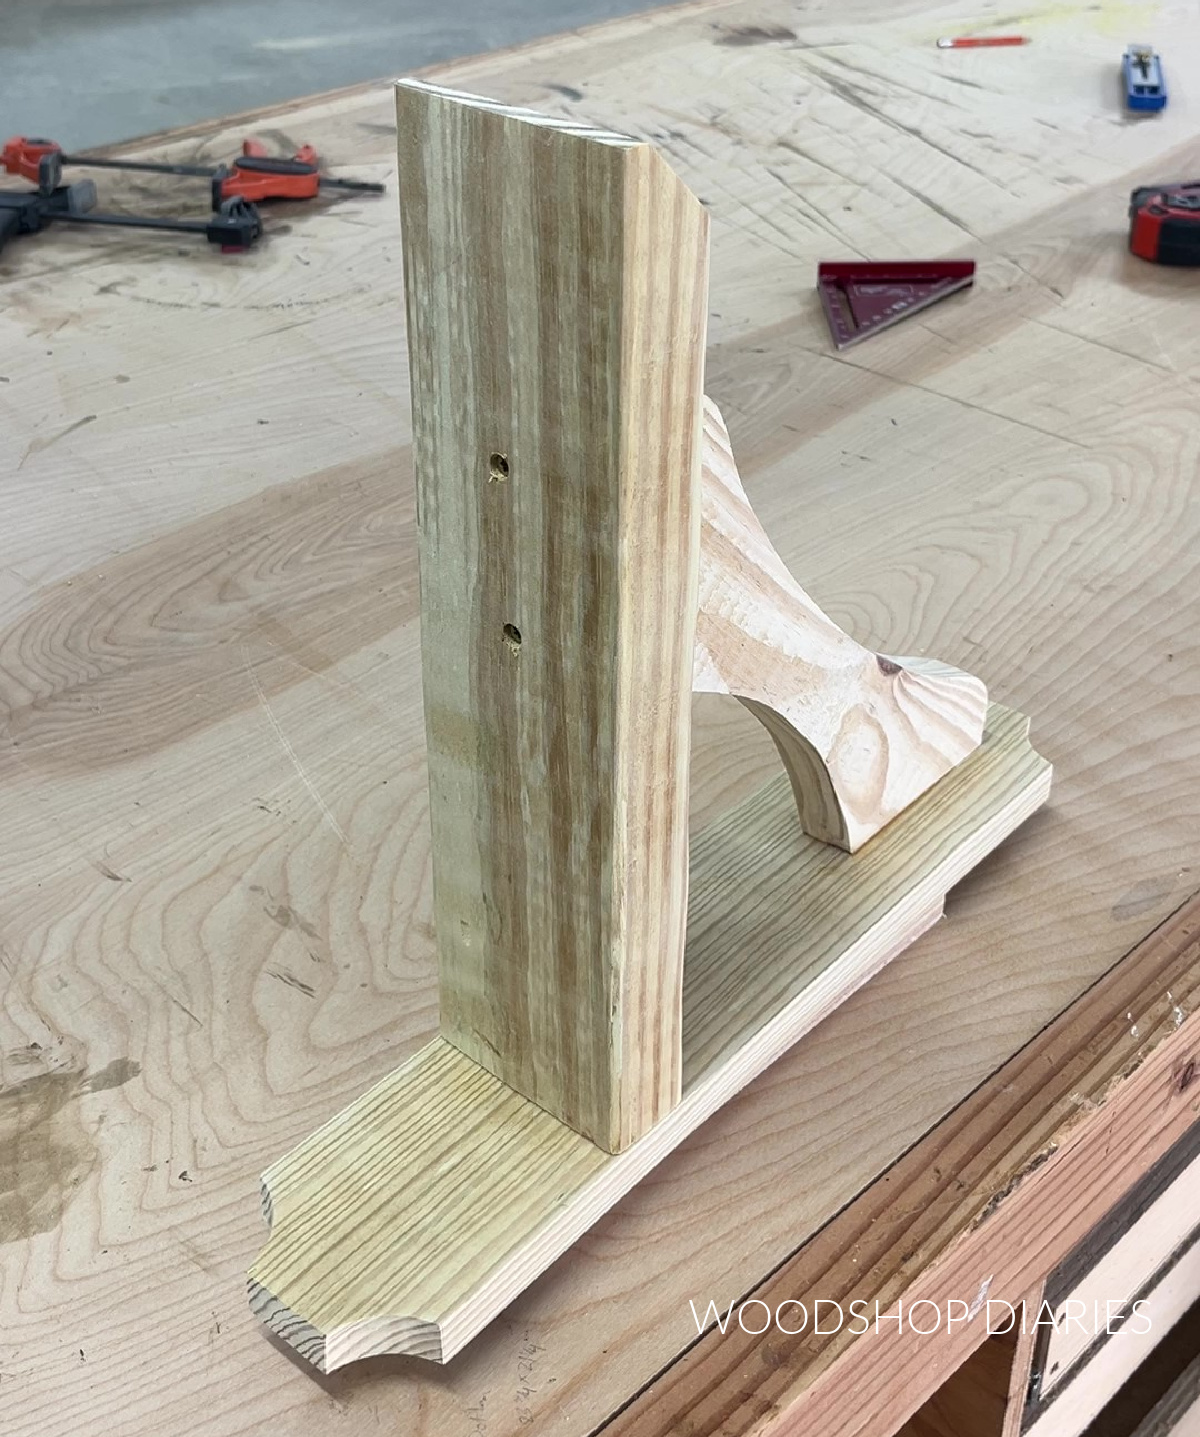
For this, I cut a piece of scrap 1×4 to 16″ long for the back (shown in yellow). I used a jig saw to round the corners in just to give it some extra detail.
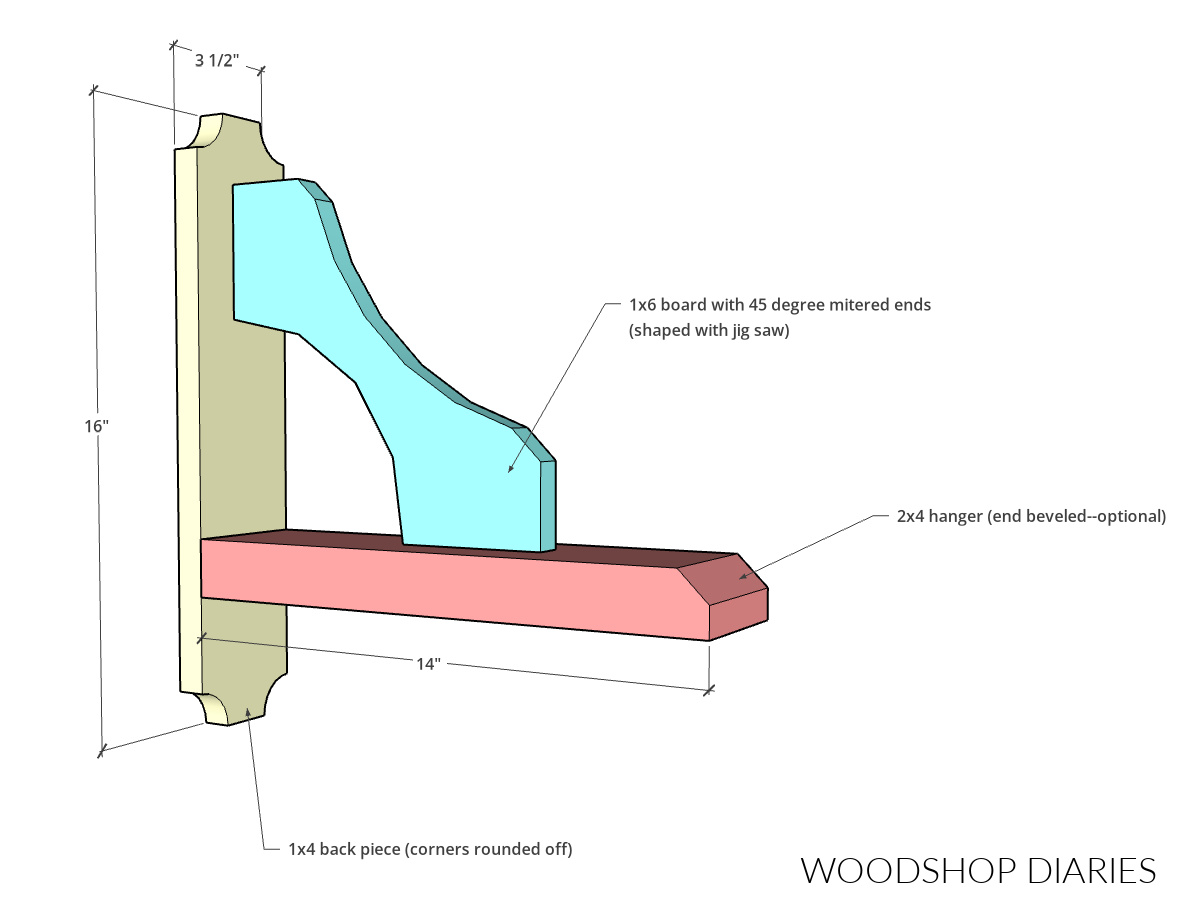
Then, I cut a piece of scrap 2×4 to about 14″ long for the bottom. I beveled one of the corners (shown in pink above), just to give it some extra detail.
I had a piece of scrap 1×6 about 16″ long, so I mitered both ends 45 degrees NOT parallel to each other. This piece will run between the back and bottom like shown above in blue.
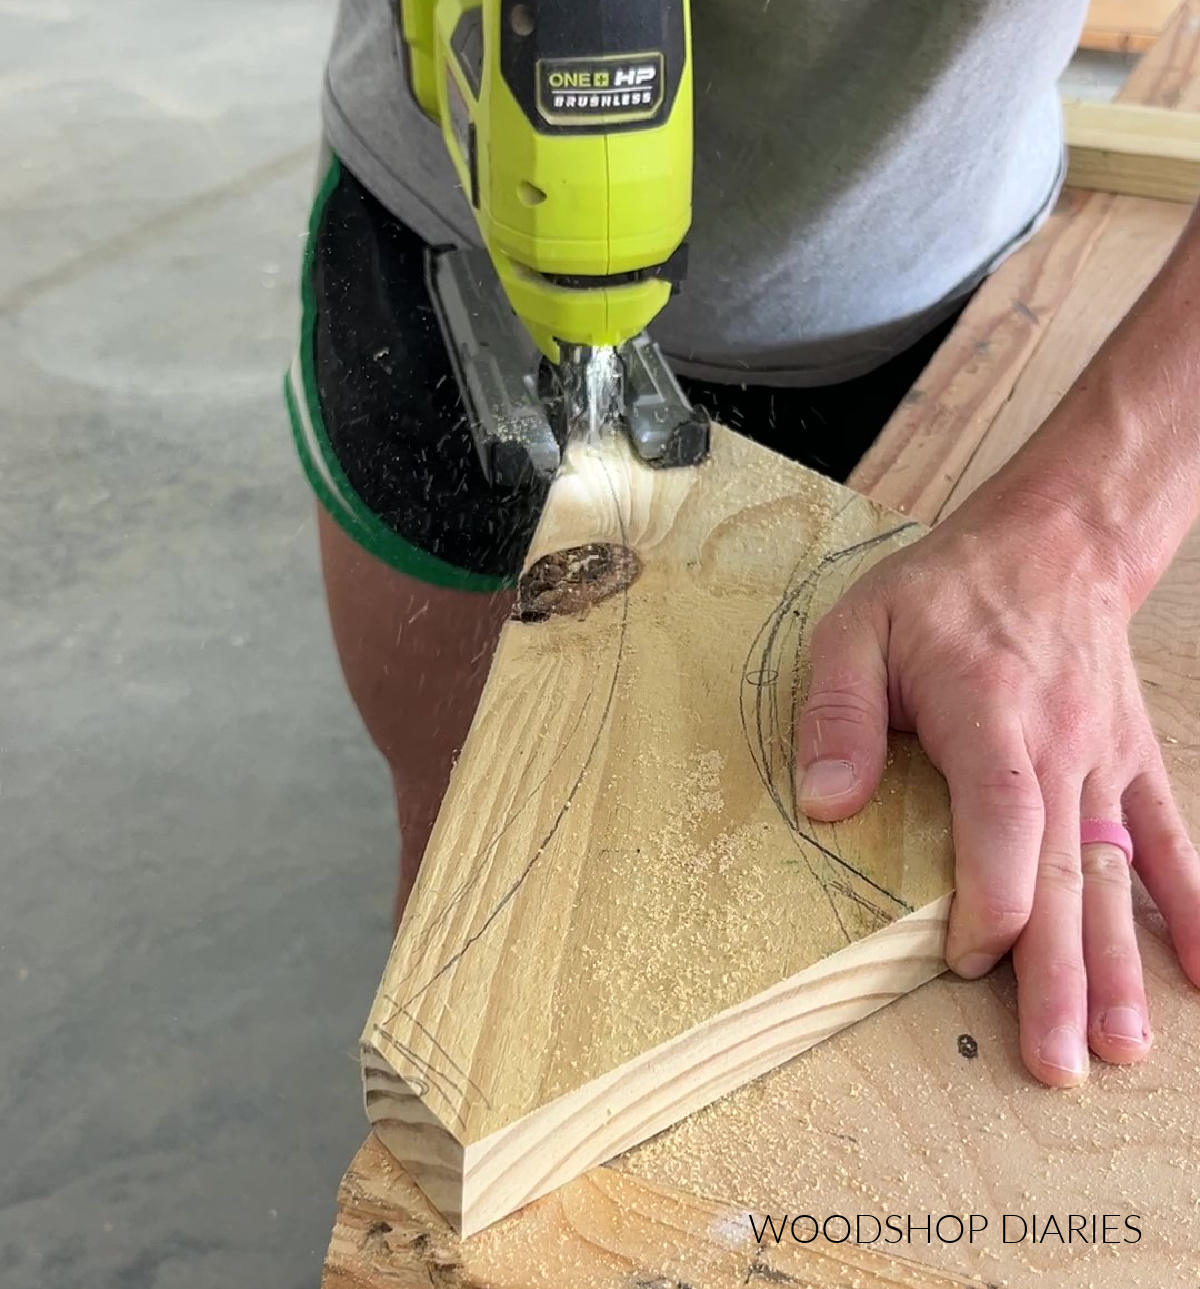
I used a jig saw to trim some curves on this piece to give it a lot of extra shape. I just drew my shape out freehand with a pencil and cut until it looked right. There’s no right or wrong here.
Once all three pieces were cut out, I secured them like shown using 2 ½″ wood screws through the bottom and back pieces.
Then I stained it to match the post, but I didn’t attach it just yet.
Step 3: Set Post in Ground
Now it was time to set the post! I used a battery powered earth auger to dig a hole about 24″ deep. Of course, an old fashioned post hole digger can get the job done, too!
NOTE: In our area, 24″ is recommended for post depth. Your area may differ, so check what your recommended post depth is, call 811, and always check for utilities before digging.
I set the post in the hole, filled it with Quikrete, made sure it was level, then backfilled around with dirt.

I’ve always set my posts with dry, general purpose Quikrete. It rained immediately after setting so I didn’t add any water. But if your ground is super dry and no rain expected, you may want to add a little water around the post to help the concrete set up.
Step 4: Attach Lamp and Sign
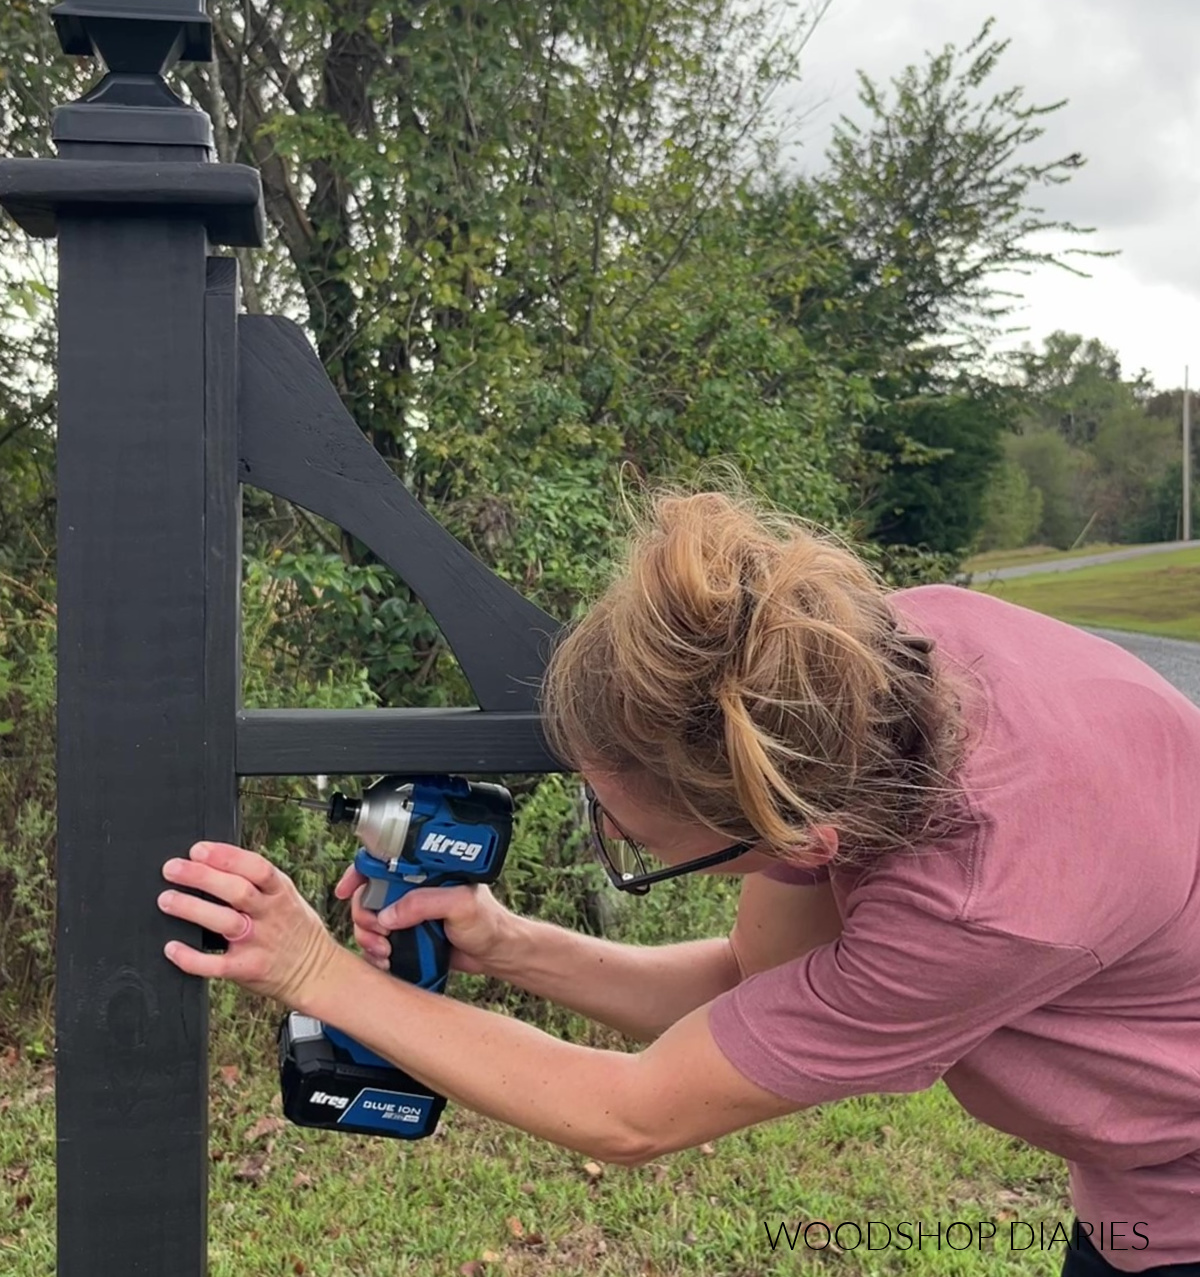
After the post was in, I attached a solar lamp onto the top of it (the lamp comes with the hardware and screws needed to install directly to the post).

Then, I used some 2″ wood screws to secure the sign holder to the post.
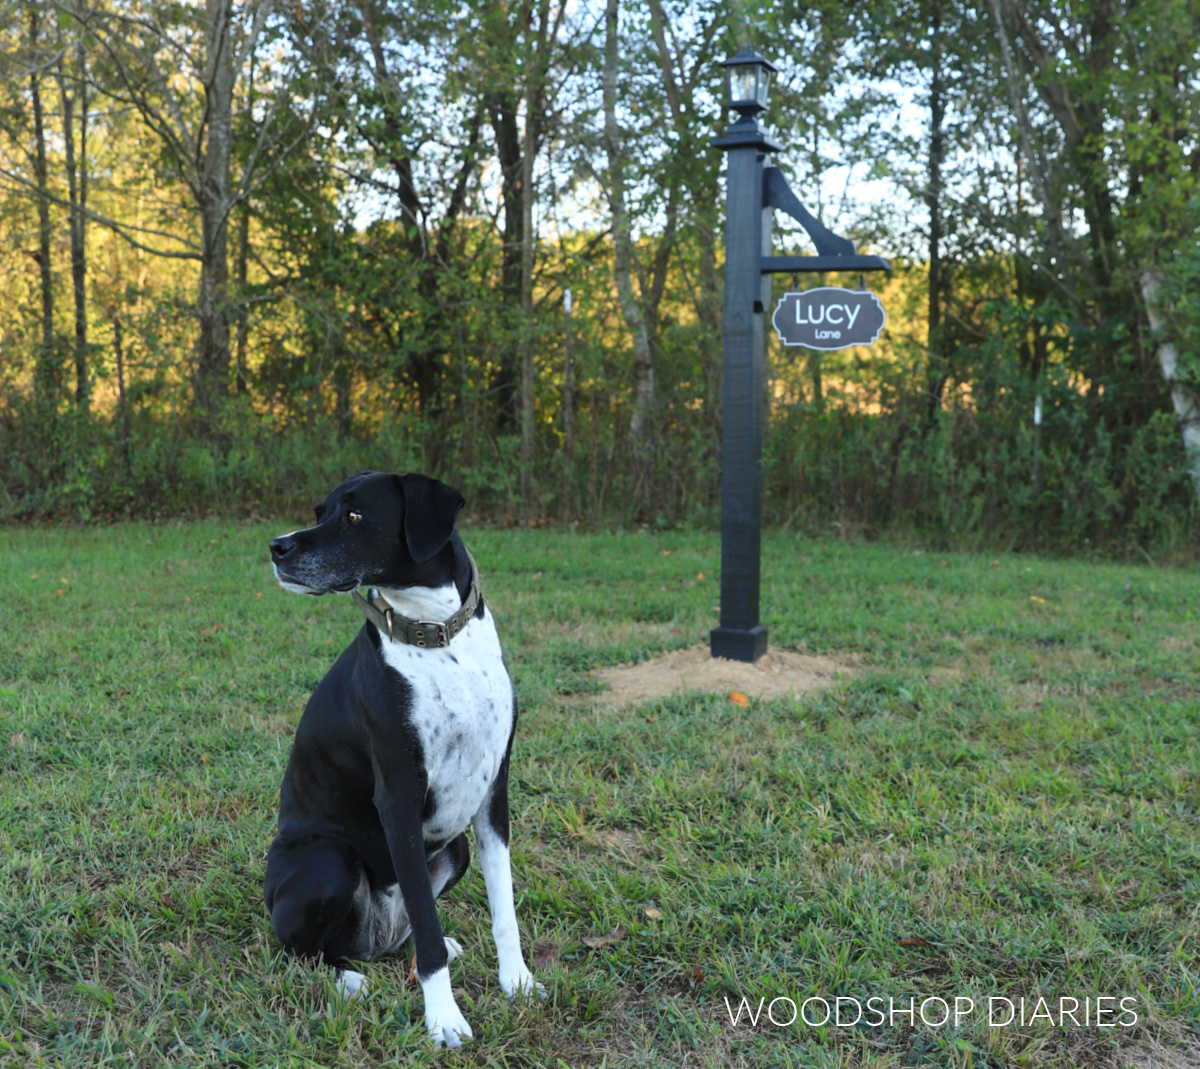
Then all that was left was adding our “Lucy Lane” sign. I bought a customizable address sign and it came with two eye hooks that I secured into the bottom of my 2×4 to hang from.
And now I smile every time I walk down the driveway and see this adorable little post named after my best girl, Lucy.
Everyone who has come down the driveway has commented on how cute it is and it’ll be fun to add a wreath to this Christmas!

Looking for more DIY outdoor projects?
Enjoyed this project, but looking for more ideas? Outdoor projects are some of my favorites to build, so I’ve got several more you will enjoy browsing!
Simply click on the image(s) below to see how to make each one!

If you’d like to save this project for later, don’t forget to pin it or share it to your favorite social channel!

Until next time, happy building!