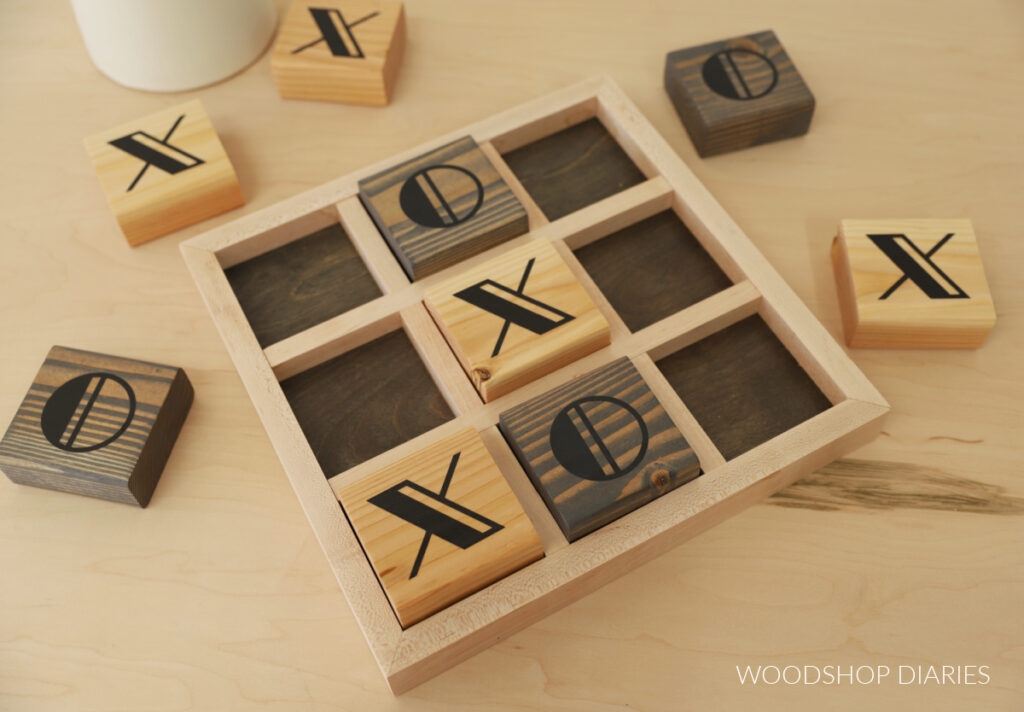
In this post, I’m sharing how to build a scrap wood tic tac toe game!
This easy DIY makes a great handmade gift idea, but is also nice enough to use as functional décor in your home or on your desk.
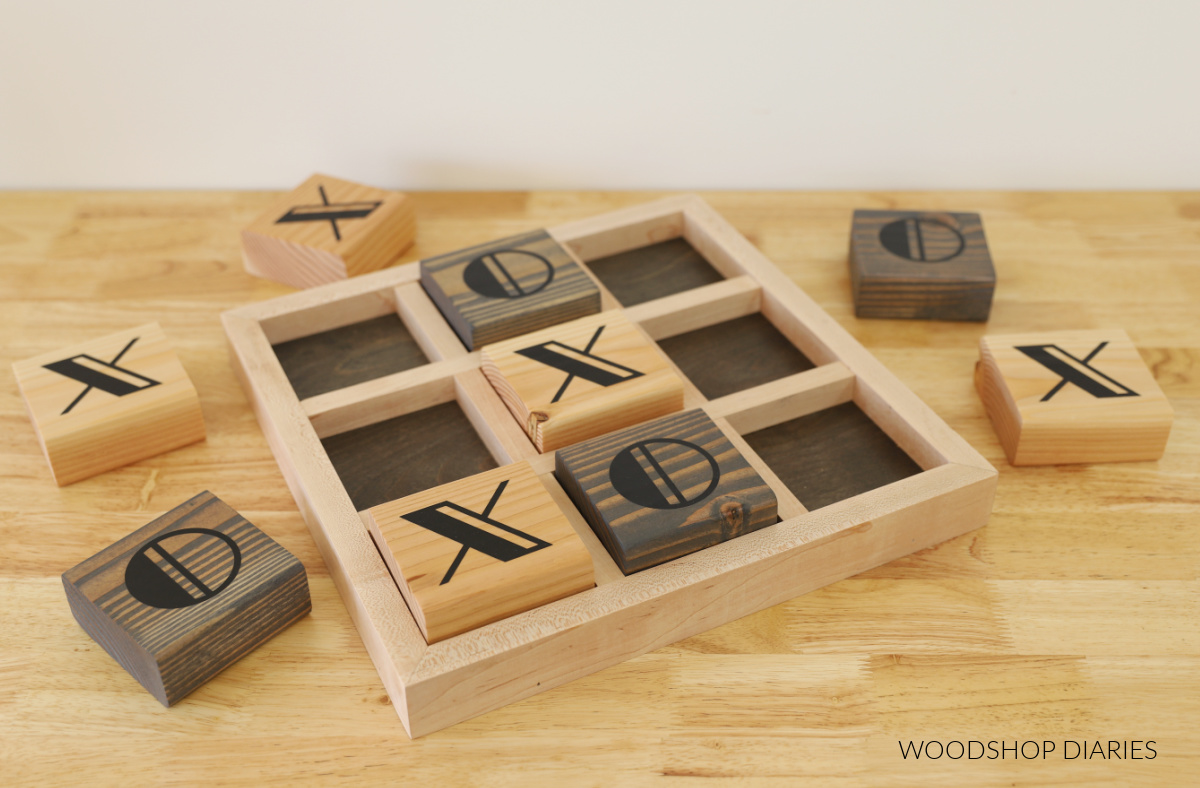
Tic Tac Toe is a classic game that everyone knows and loves. So you can keep this out on your coffee table or console table for spur-of-the-moment gaming fun with your kids or with guests!
You can make this in about an hour using wood scraps and size it up or down to fit your needs. I’m sharing the how to below!
*This post contains affiliate links. See website policies.
What Kind of Wood do you need?
This wooden tic tac toe game can likely be made from scrap wood you already have in your shop.
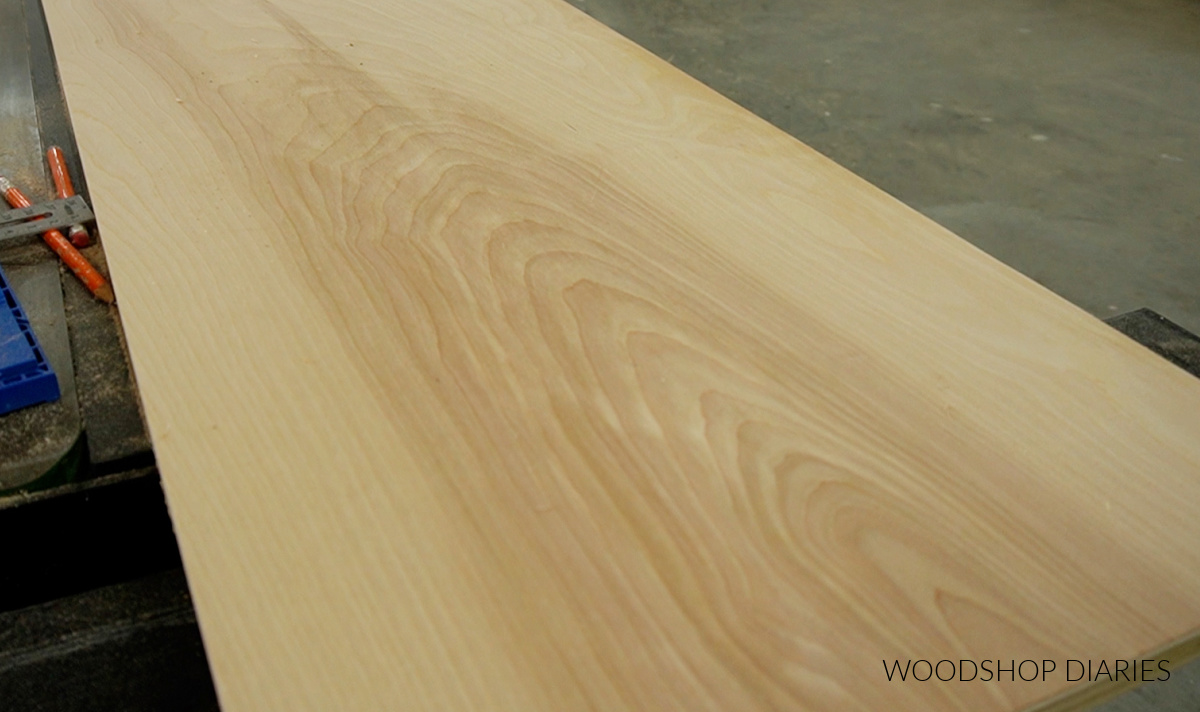
You’ll need a piece of ¾″ plywood about 12″ x 12″ for the bottom. I used some scrap birch plywood, but sanded pine, oak, or maple would work great, too.
Then, you’ll need enough 1×2 board to trim around the sides of the plywood–approximately 48″ worth. I used maple for this, but any wood type would work fine.
TIP: If you have a table saw, you can rip down your own 1x2s from another size board if you don’t have any precut.
To divide the sections, I used some ½″ x ½″ square dowel. You can purchase this precut, OR you could rip your own ½″ square dowel from whatever scraps you already have. You’ll need approximately 48″ of it. Any species of wood would work fine here.
And finally, for the actual tic tac toe game pieces, I used some scrap 2x4s. I just cut these to 3 ½″ square, so you could cut any scraps you have (not just 2x4s) to this size to work for the pieces.
Feel free to get creative here and use what you’ve got in your scrap pile!
Are DIY projects your thing? Sign up for our newsletter for priority access to the latest projects and build plans!
How to Make a Wooden Tic Tac Toe Game
I’m sharing the steps below to make a this wooden tic tac toe board, but if you prefer to watch, I’ve also got a video tutorial here as well.
Tools & Materials
Tools:
- Miter Saw
- Brad Nailer
- Cricut Machine (optional)
Materials:
- Scrap ¾″ plywood (12″ x 12″ piece)
- 1×2 board (about 48″ long)
- ½″ square dowel (about 48″ long)
- 2×4 scraps (9 pieces 3 ½″ long)
- Brad nails
- Wood Glue
- Wood stain/finish
- Cricut Vinyl (optional for Xs and Os)
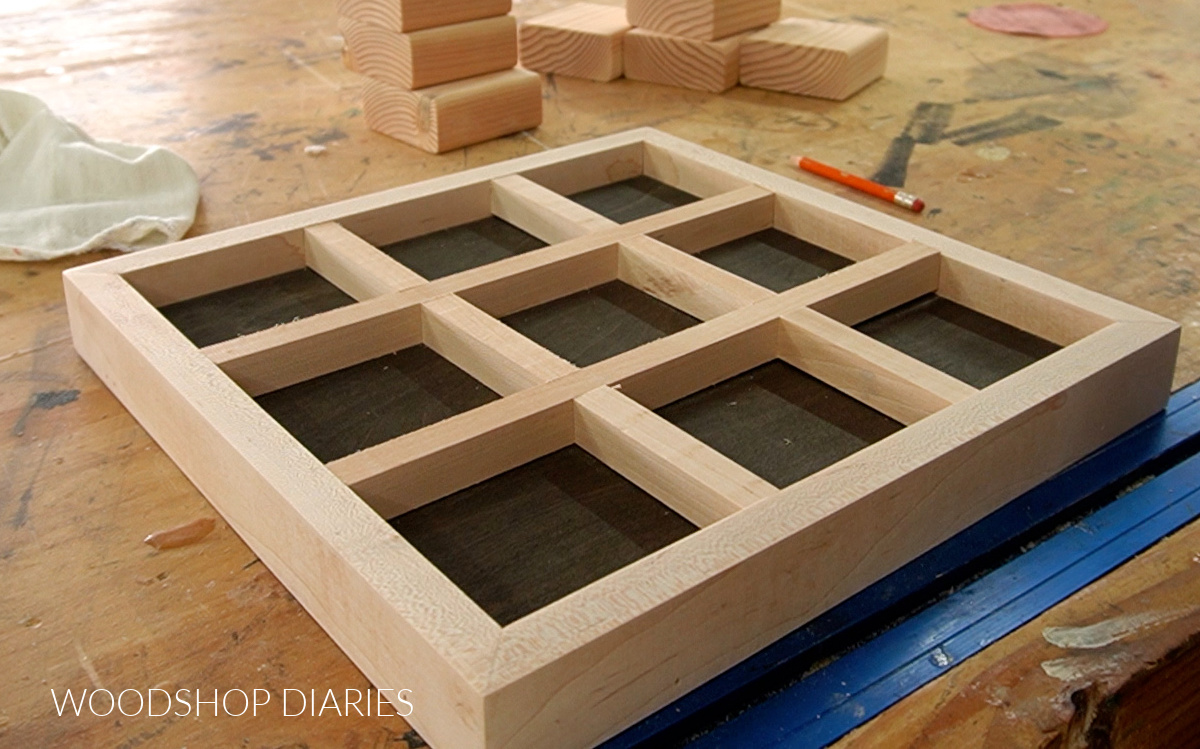
Step 1: Build Tic Tac Toe Tray
First, I cut down a piece of ¾″ plywood to 12″ x 12″ to use for the bottom of the tray and sanded it.
RELATED: How to sand wood
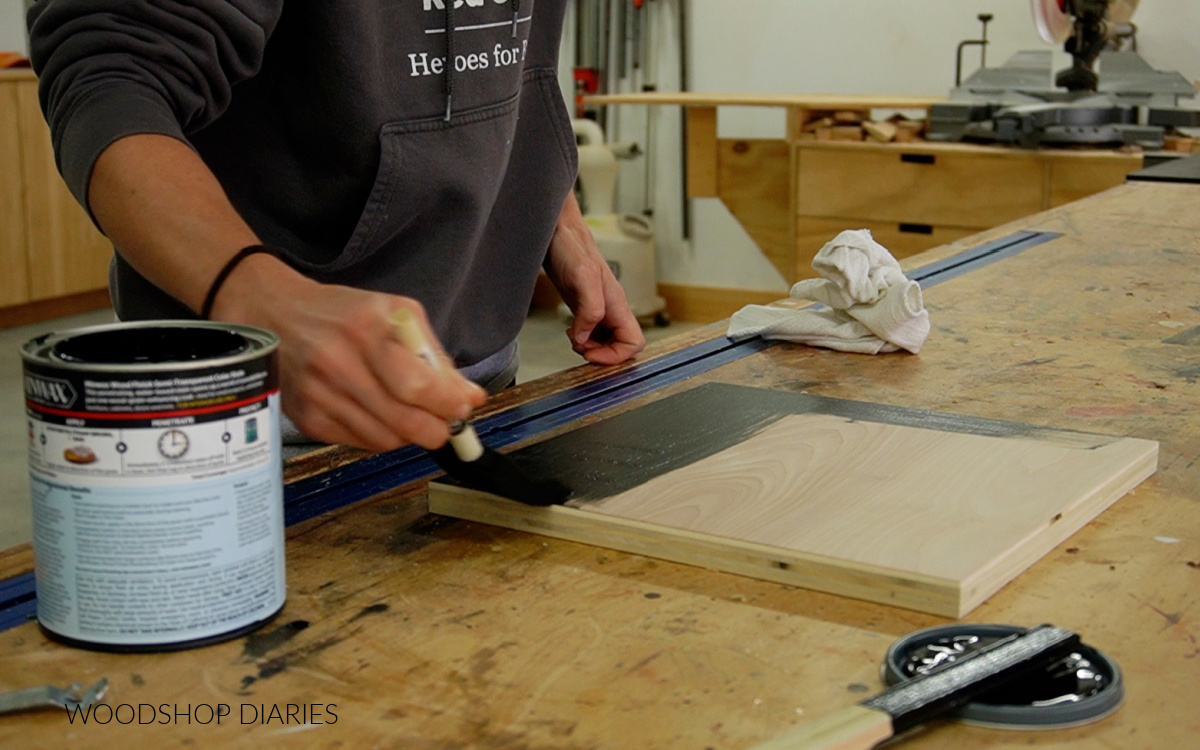
Then, I applied some Minwax Water Based Wood Stain in True Black to this piece. Feel free to stain/paint this any color you’d like.
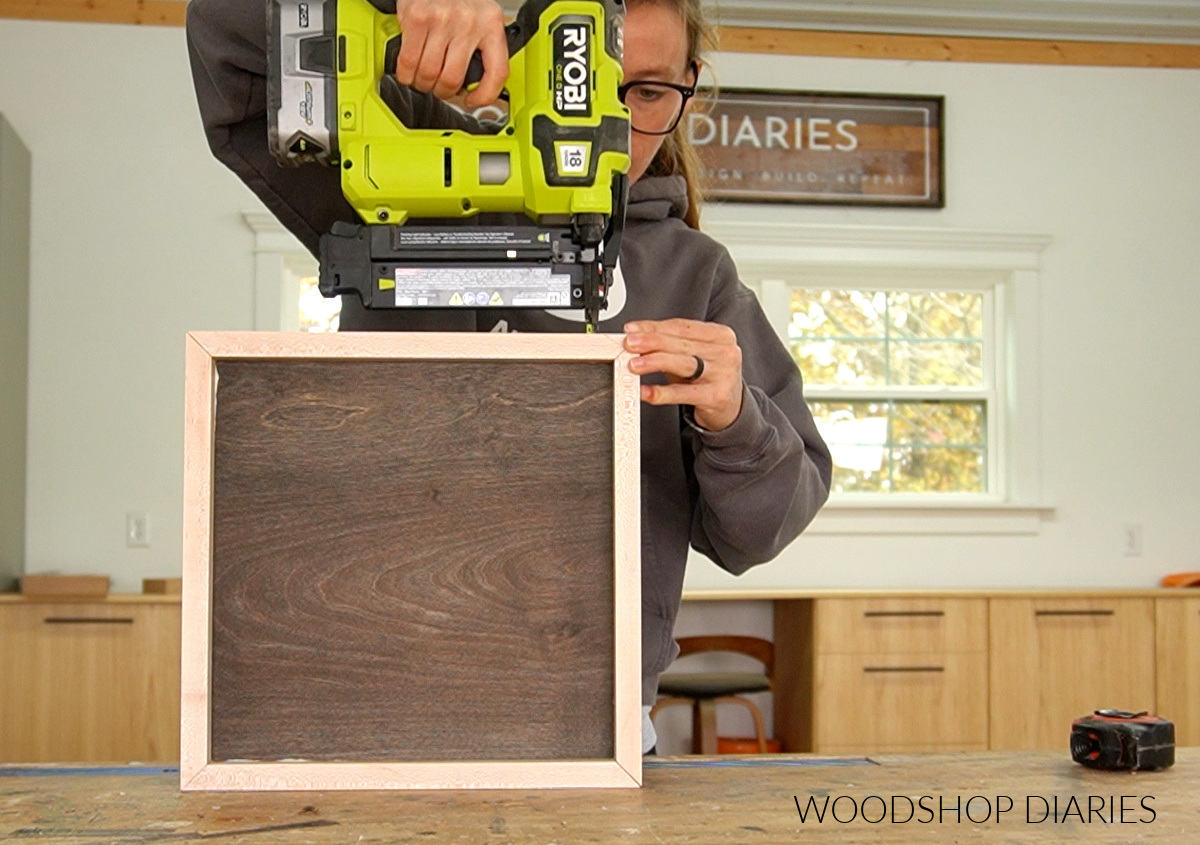
Once dry, I cut to fit 1×2 around it with mitered ends 45 degrees. You don’t have to miter the ends of the 1×2, but it makes the corners look a little cleaner if you do.
RELATED: How to cut angles on a miter saw
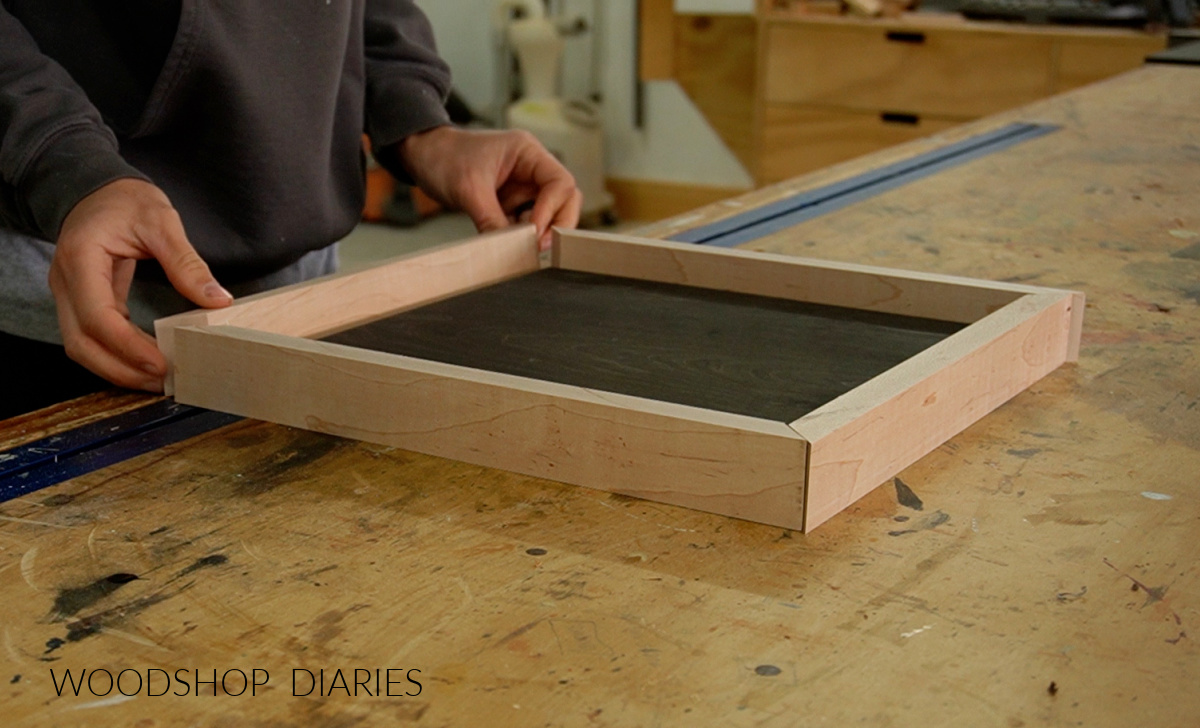
Then, I glued and brad nailed these 1x2s around the plywood panel to trim it out. These pieces should be flush to the bottom edge. This creates a simple square tray.
NOTE: Feel free to paint/stain the 1x2s before attaching if you’d like. I left it natural to contrast the black stain on the bottom.
Step 2: Cut Tic Tac Toe Game Pieces
Next, I cut 9 pieces of 2×4 to 3 ½″ long to make the game pieces. Note that 2x4s are 3 ½″ wide, so cutting them 3 ½″ long creates square game pieces.
RELATED: Understanding lumber sizing

After cutting, I sanded these well and placed them inside the tray.
Step 3: Cut and Install Dividers
I needed to divide the tray into 9 equal sections to create the tic tac toe board. After placing all my 2×4 blocks inside the tray, I found that using a ½″ square dowel as the dividers would fit perfect.
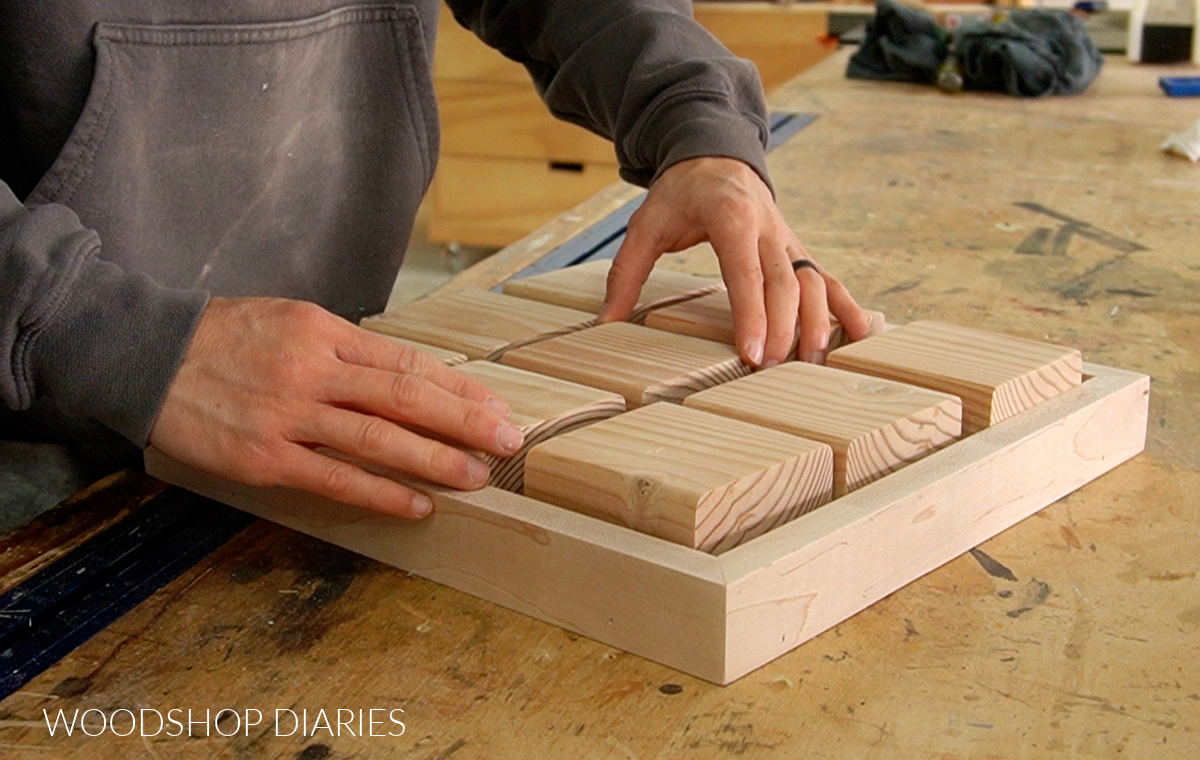
I left my blocks inside the tray, then cut to fit my square dowel around them. Two pieces should be 12″ long to span the whole distance across the tray, then 6 equal length pieces should run between them to divide the tray into 9 sections.
After I cut and test fit these pieces into the tray, I pulled them back out, applied a small bead of wood glue to each one and glued them back in place.
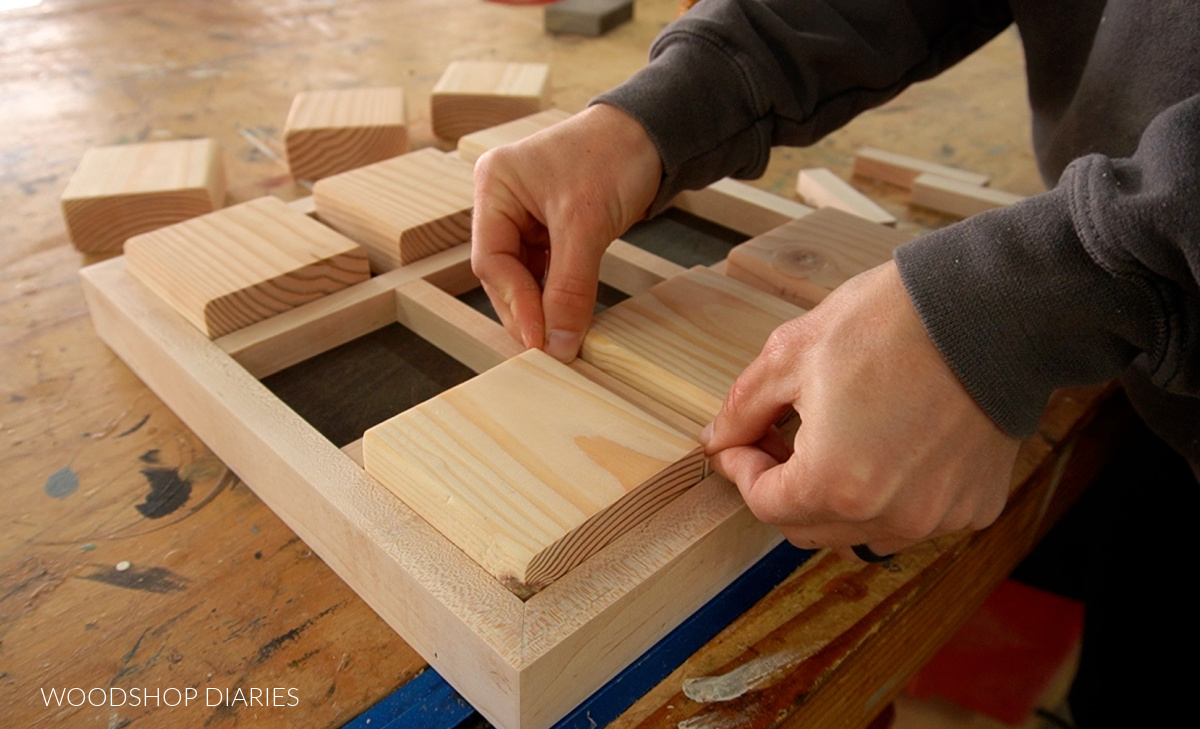
I kept my game pieces inside the tray while gluing to make sure the pieces would fit into each section.
If you wanted to also brad nail after gluing, feel free. But if not, the glue alone should be fine!
Step 4: Add Xs and Os
Once my dividers were glued in, I removed the 2x4s from the tray. I cut out some Xs and Os on permanent vinyl using my Cricut Explore 3 to apply to the pieces–5 Xs and 4 Os.

Then, I stained the Os in Minwax Aged Barrel Wood Stain. I left the Xs their natural color for contrast.
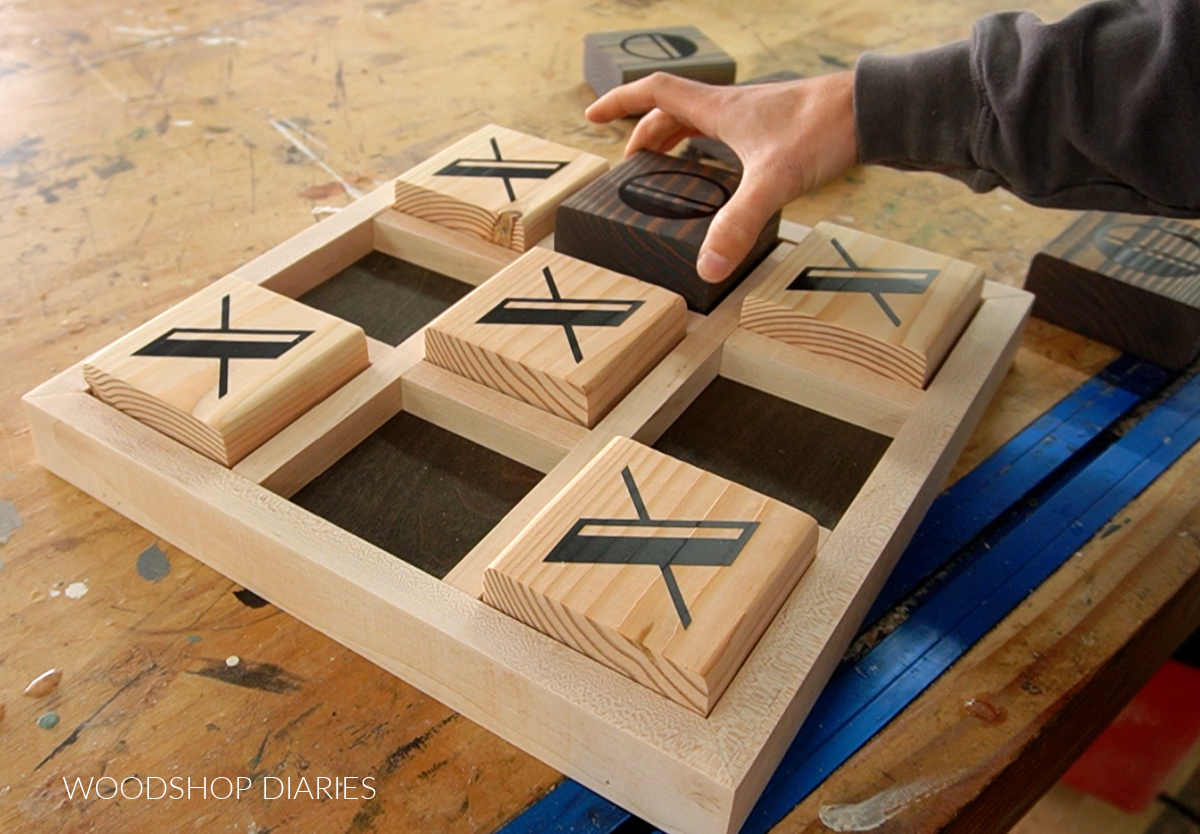
If you don’t have a Cricut, you can simply stain your game pieces two different colors to differentiate between “Xs” and “Os,” or you could draw or carve out Xs and Os on the pieces or use a stencil to paint them.
Vinyl isn’t necessary, but since I had the Cricut, I figured I’d use it. As long as you distinguish 5 of one kind and 4 of another, it doesn’t matter HOW you distinguish them.
Step 5: Finish Wooden Tic Tac Toe Game
The final step was simply applying a clear coat to seal the pieces and give it some protection. I applied two coats of Minwax Polycrylic to the game pieces and the tray, allowed to dry, then it was ready for game time!
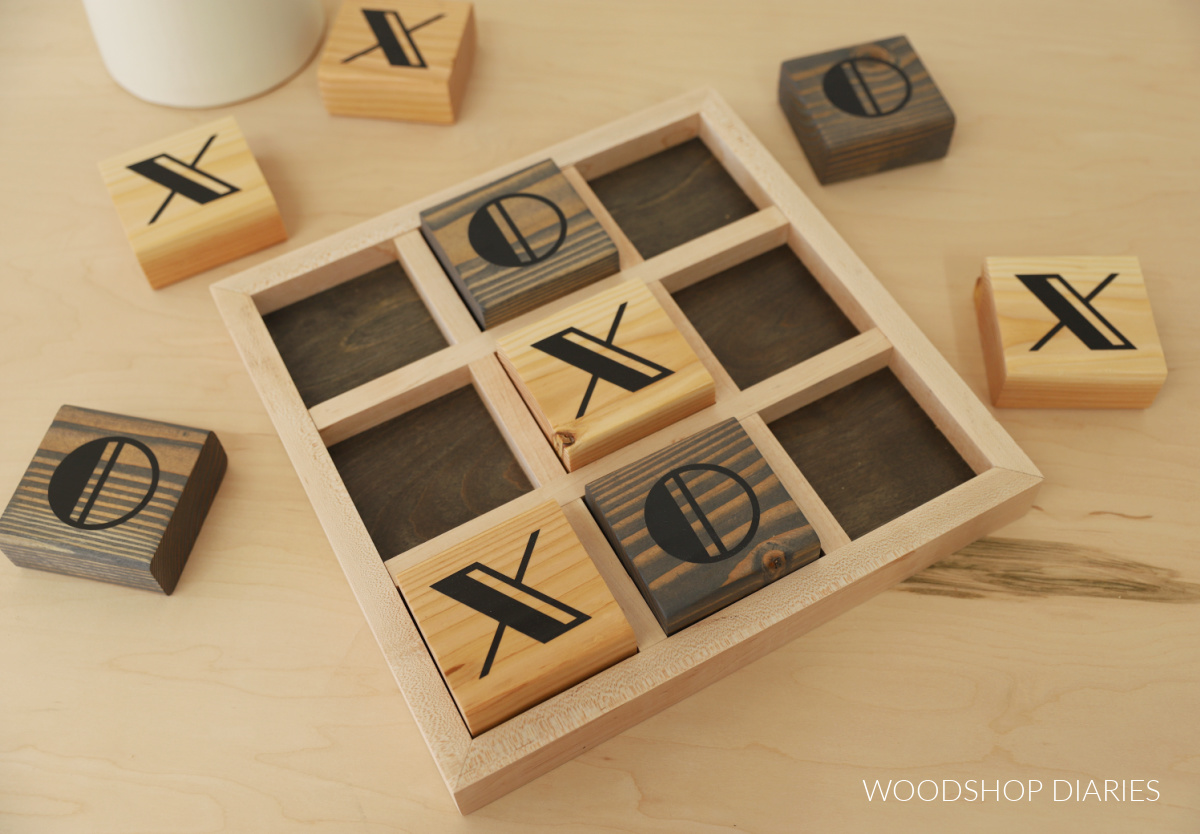
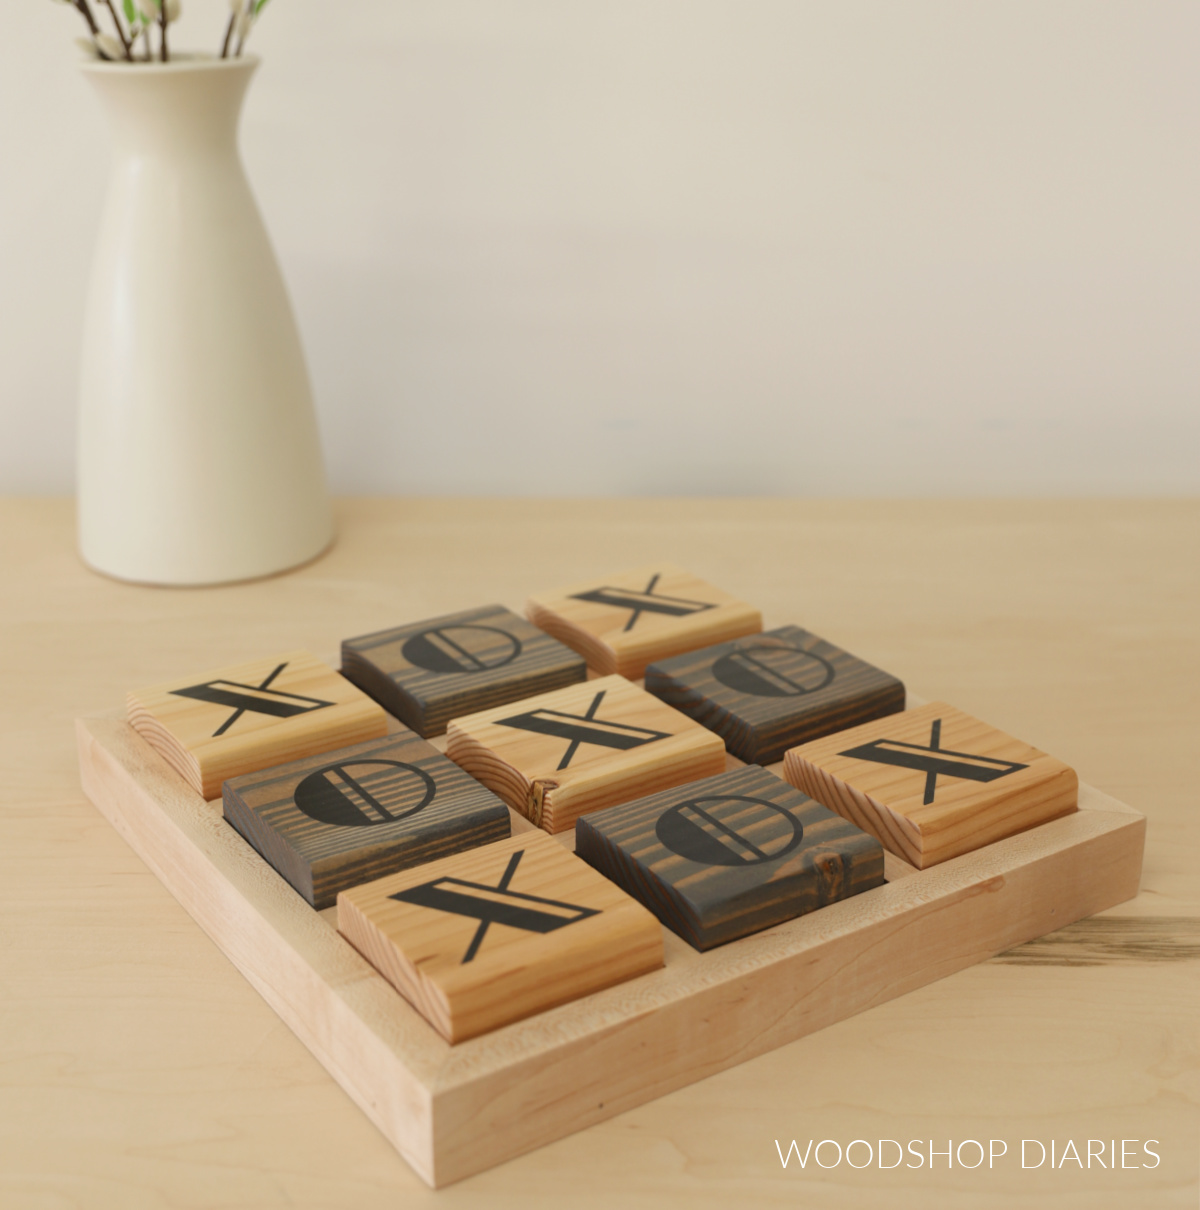
This simple game board is so cute and makes a unique gift that you can customize with initials, fun shapes, colors, etc.
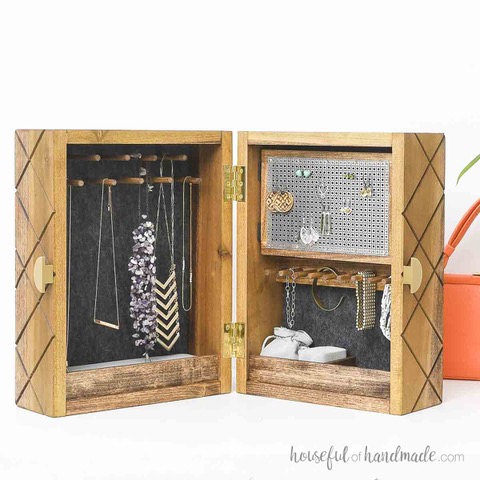
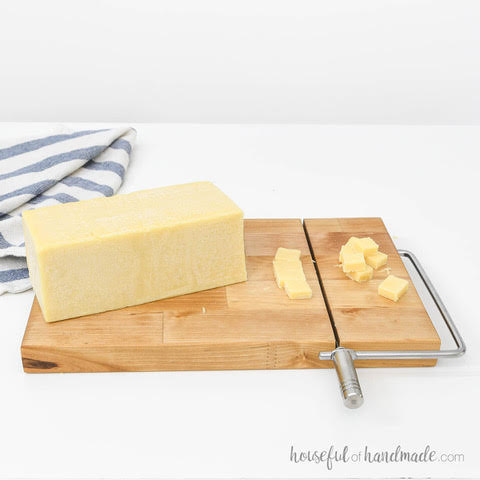
Looking for More Handmade Gift Ideas?
With the upcoming holidays, I’ve teamed up with my friend, Kati, from Houseful of Handmade to share some easy and fun gift ideas you can make this season!
I’ve included our gift ideas in the gallery below (click on the images to see how to make each one). Each day between November 18-22, we will be adding more projects to the list so keep an eye out!


If you’d like to save this project for later, be sure to pin it or share to your favorite social channel!

Until next time, friends, happy building!