In this post, I’m sharing how to make a DIY wooden lazy Susan from a single 2×4 board!
I’ve been making and giving these as gifts for years and everyone always loves them. They’re easy and inexpensive to make and can be customized with an initial or shape!

.*This post contains affiliate links. See website policies.
What to consider before building a wooden Lazy Susan
This wooden lazy Susan is a simple project and can be assembled and cut many different ways.
If you didn’t have the tools needed or are running low on time, you can purchase a precut wooden round for this instead of making your own. Using a precut round allows you to skip all the cutting and sanding and simply stain/finish and add a lazy Susan to the bottom.
But, if you already have the tools, creating your own wooden round allows you to customize the size and wood type and saves quite a bit of money as precut rounds can be a bit pricey.
Wood Type
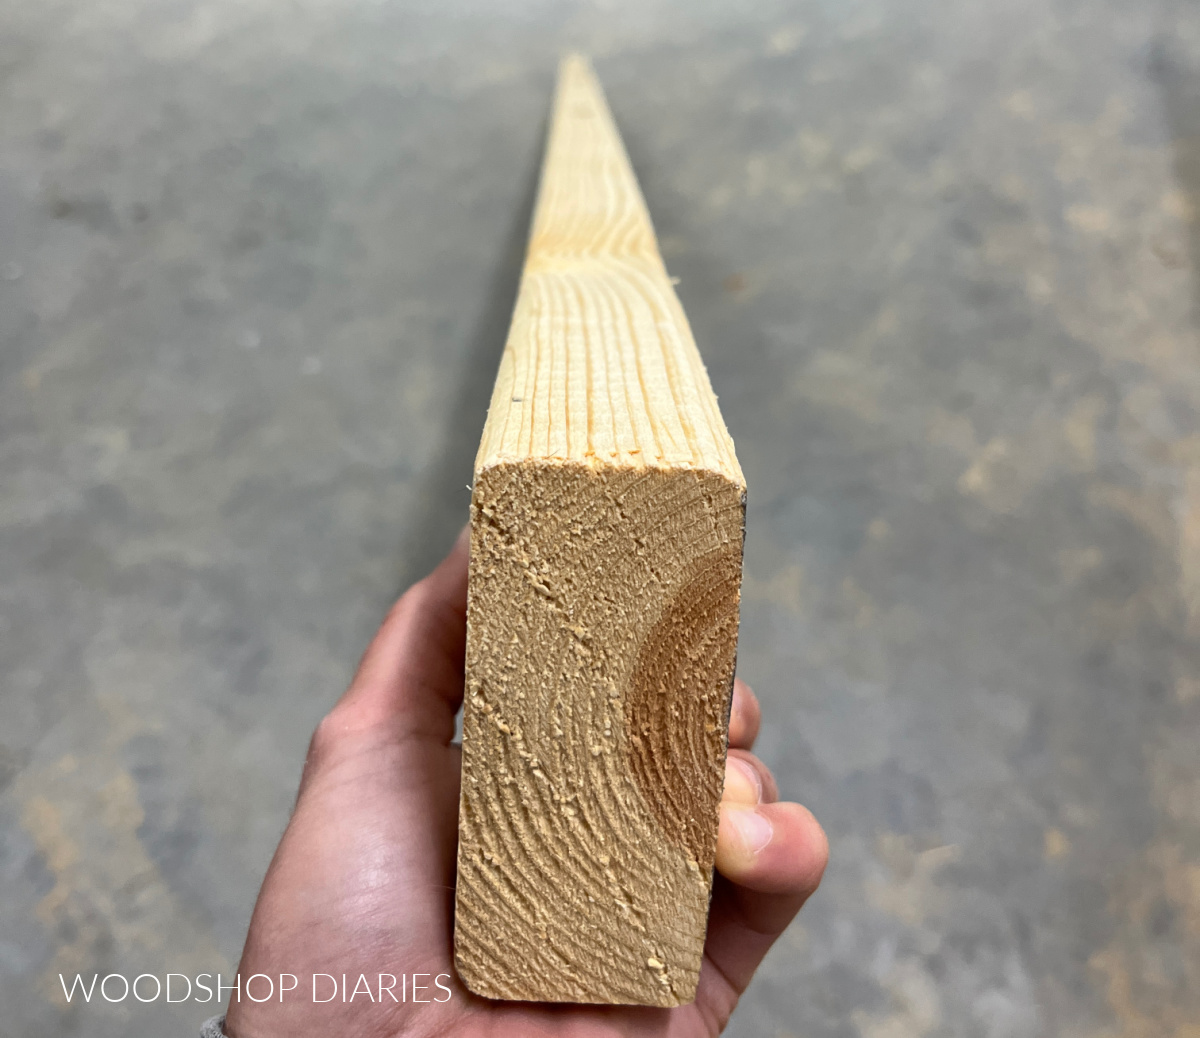
For this project, I used a basic 2x4x8 construction board from Home Depot. Depending on where you live, you typically find 2x4s in pine, spruce, or fir. These are common softwoods and are fairly inexpensive.
RELATED: How to buy lumber
However, if you preferred something different, any wood type would work fine for this simple DIY.
To make these wooden lazy Susans, I rip my lumber into 1 ½″ x 1 ½″ squares on the table saw (these are 2x2s). Then, I glue them back up.
RELATED: How to cut 2x2s from a 2×4
I know this may seem silly and unnecessary, BUT there are a couple of reasons I do it this way:
- Wider boards are more likely to have cups, bows, or twists, which makes glue ups more challenging. Ripping them into smaller pieces makes it easier to get a flat panel.
- These smaller pieces when glued together look more like butcherblock to give it more character.
Overall, this is really about looks, so if you wanted to just use wider boards, feel free.
Cutting a Perfect Wooden Circle
Once the panel is glued up in step 1, it needs to be cut in a circle. You can cut a perfect wooden circle with a router and a straight bit using an easy DIY circle jig.
If you don’t have a router (or you don’t like using one), this post shows you how to draw any size circle and once it’s drawn, you can simply follow the line with a jig or band saw to cut it out.
Cutting the circle with a router is usually a little more accurate than using a jig saw, but it does take a little longer.
Typically, I use my router to cut a few shallow passes to give me my perfect circle shape, then, I’ll cut the remaining material using a jig saw and smooth it out with a router and a flush cut bit.
Learn how to cut perfect wooden circles in this post.
Customizing your Project
You can customize these in a hundred different ways. Here are a few easy ways you may consider making them your own:
- Use different wood types in contrasting colors
- Instead of gluing up pieces of the same wood type to make your circle, consider using two different types (like maple and walnut) for contrast.
- Change up the size
- I made these about 14″ diameter, but feel free to make them bigger or smaller to fit your needs.
- Add an initial or a shape
- Use a Cricut or vinyl cutter to cut a stencil for staining or use a CNC or router to carve a design on top.
- Add a decorative trim piece around the outside
- Add a metal band around the outside for an industrial look (see step 4 below)
Are DIY projects your thing? Sign up for our newsletter for priority access to the latest projects and build plans!
How to make a wooden lazy Susan
I’m sharing the steps below to make a this wooden lazy Susan, but if you prefer to watch, I’ve also got a video tutorial here as well.
Tools & Materials
Tools:
- Table Saw
- Miter Saw
- Drill/Driver
- Router (with straight and flush cut bits) and/or Jig Saw
- Sander
- Clamps
- Cricut Machine or vinyl cutter (optional)
Materials:
- (1) 2x4x8 board
- (1) 6″ lazy Susan Hardware
- (4) 1 ¼″ wood screws
- Cricut Vinyl (optional)
- Wood Finish
Step 1: Glue up Wooden Panel
To kick off this project, I started my cutting down my 2×4 into strips to glue into a panel (see notes above).
First, I ripped about 3/16″ off the edge of the board to give me a nice square edge to start with. (See step 4 for an idea to reuse this ~⅛″ thick strip that’s left!)
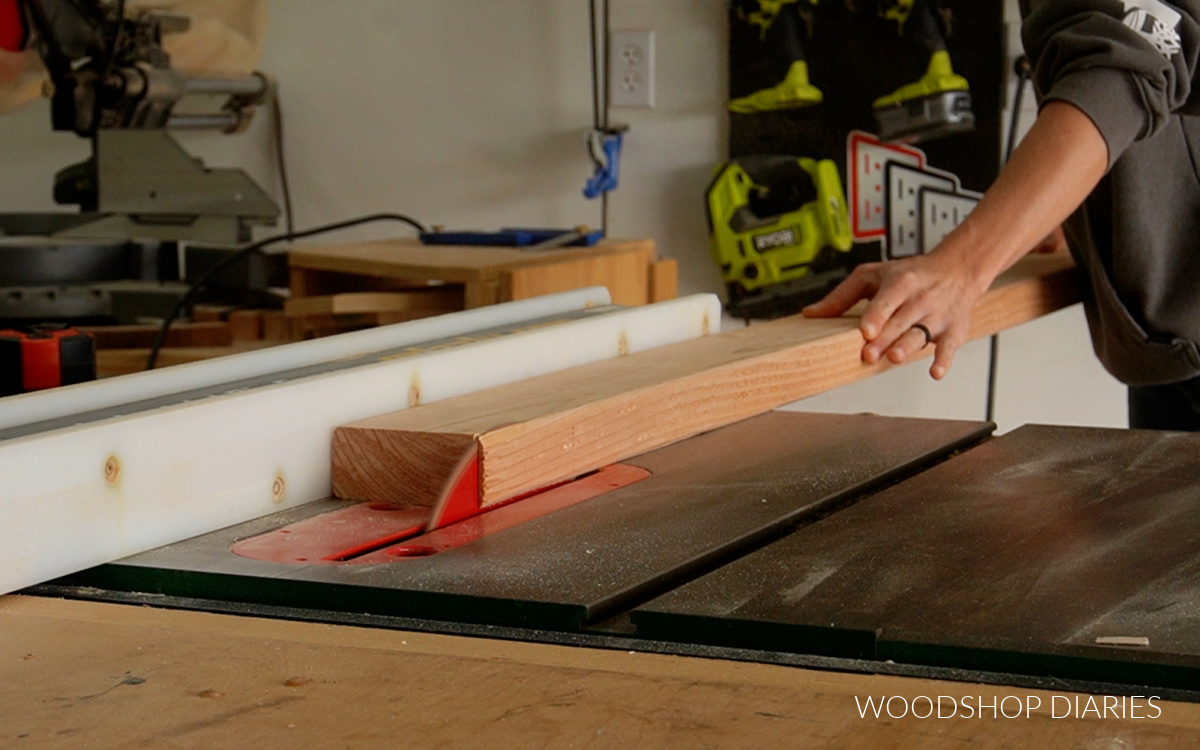
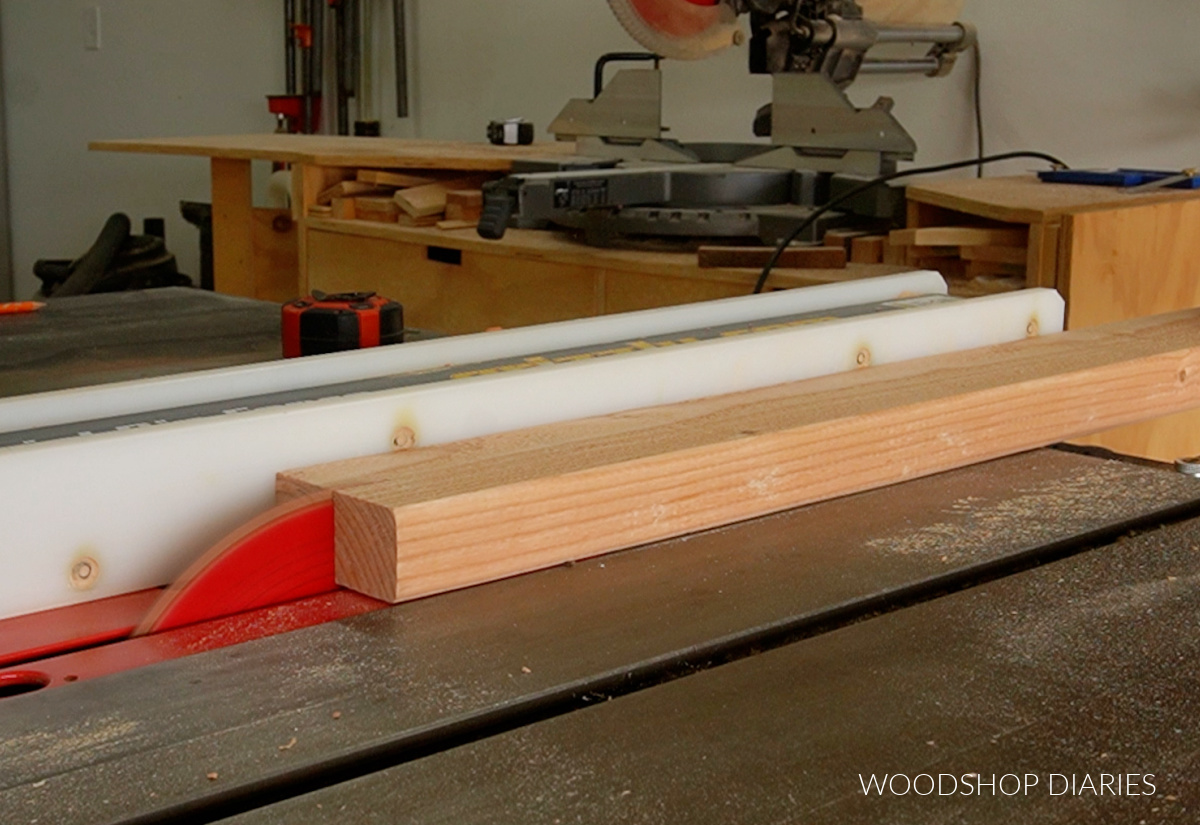
Then, I ripped this board into two 1 ½″ wide strips on the table saw. This essentially gave me two 2x2s with nice square edges.
RELATED: How to square board edges and cut 2x2s.
Again, the reason I ripped this into thinner strips to glue back up was mostly for aesthetics–you can simply glue up wider boards if you want.
Then, I cut these 2x2s down into 10 pieces about 16″ long on the miter saw.
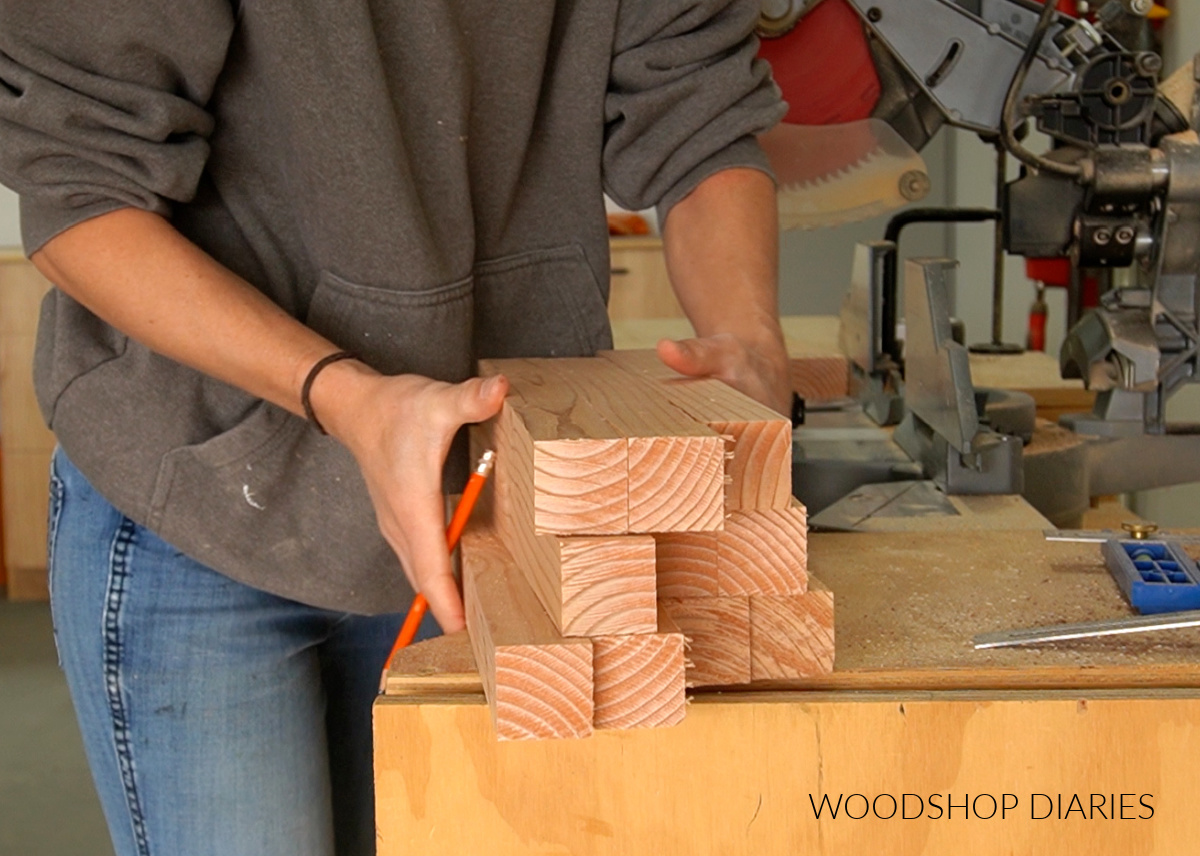
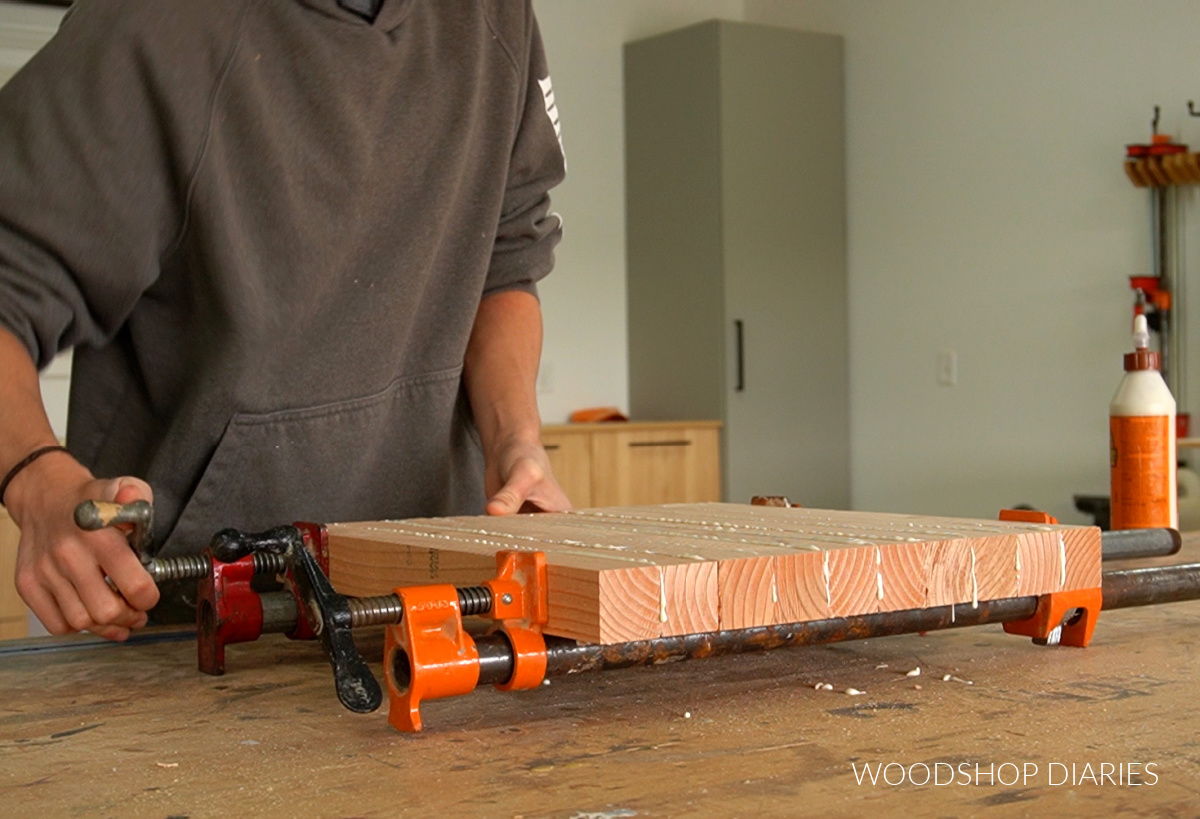
I grabbed a couple pipe clamps and glued these 10 boards together into a panel, keeping the pieces as flat as possible while clamping.
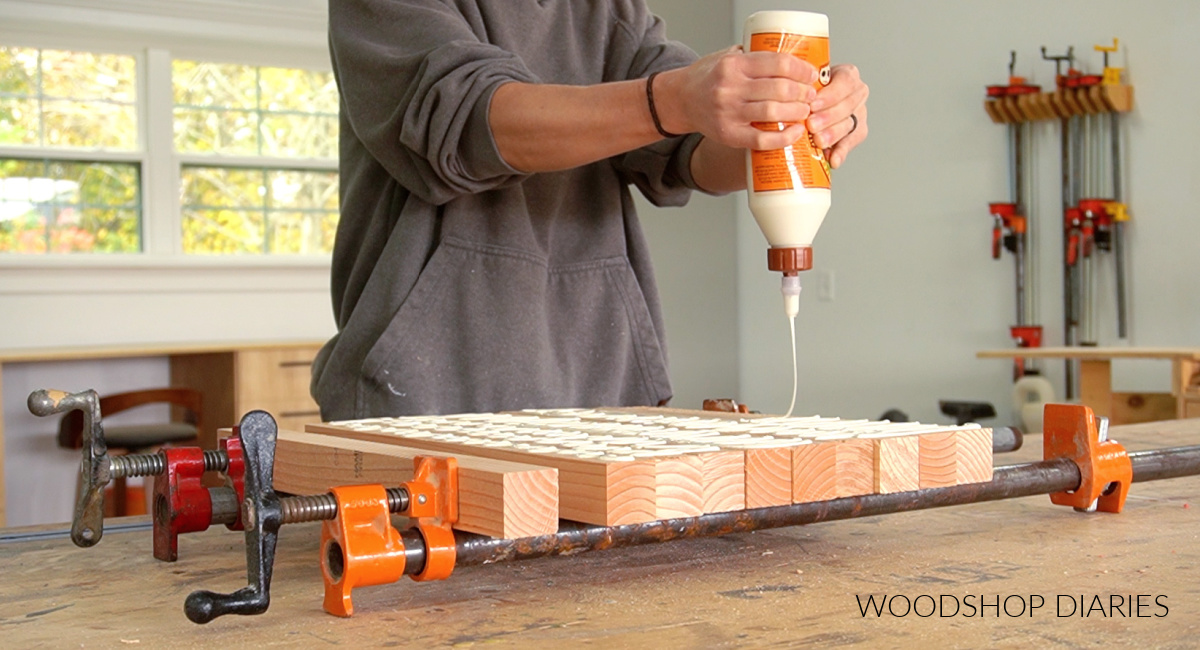
This gave me a 1 ½″ thick panel roughly 15″ x 16″. I allowed the glue to cure before moving on.
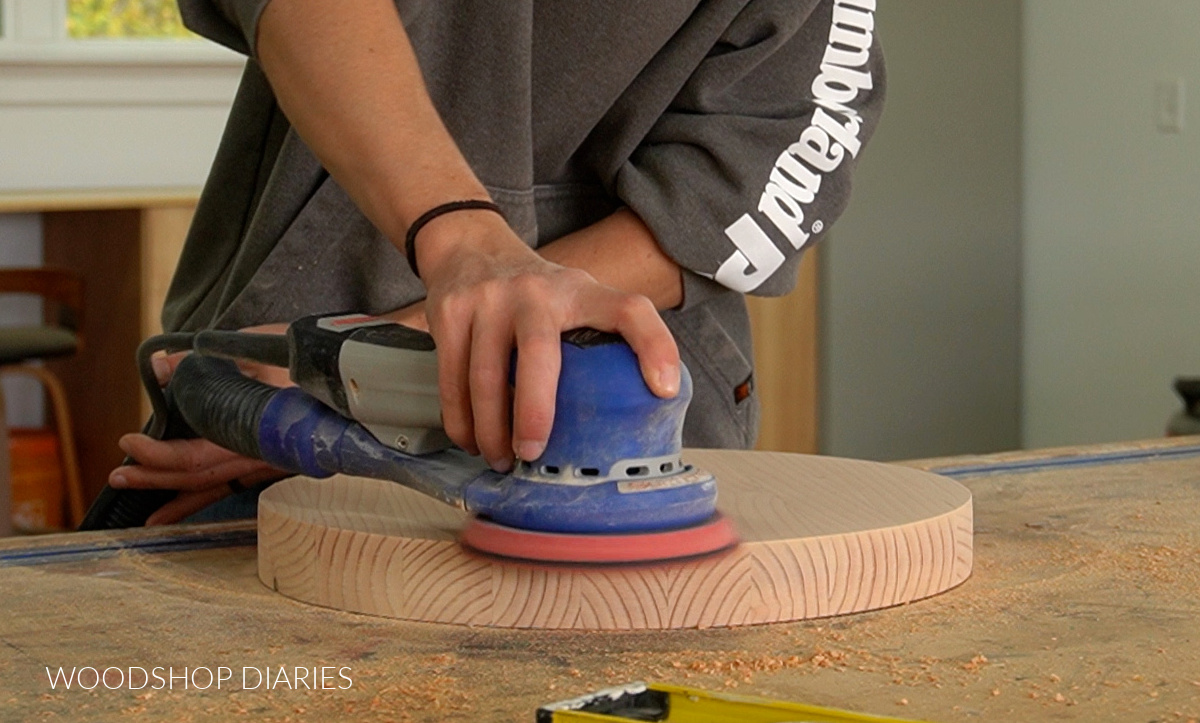
Step 2: Cut Wooden Circle
Once the panel from step 1 was dry, I cut a 14″ diameter circle from it. As I mentioned above, you can draw a circle and cut this out with a jig saw or band saw.
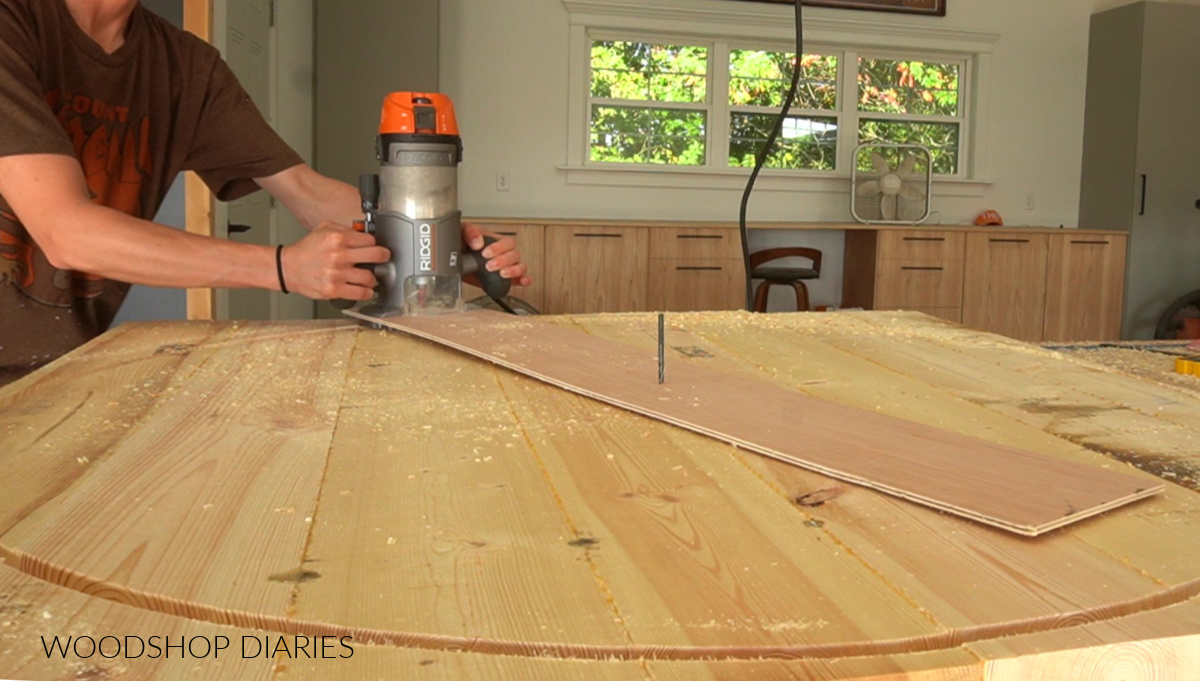
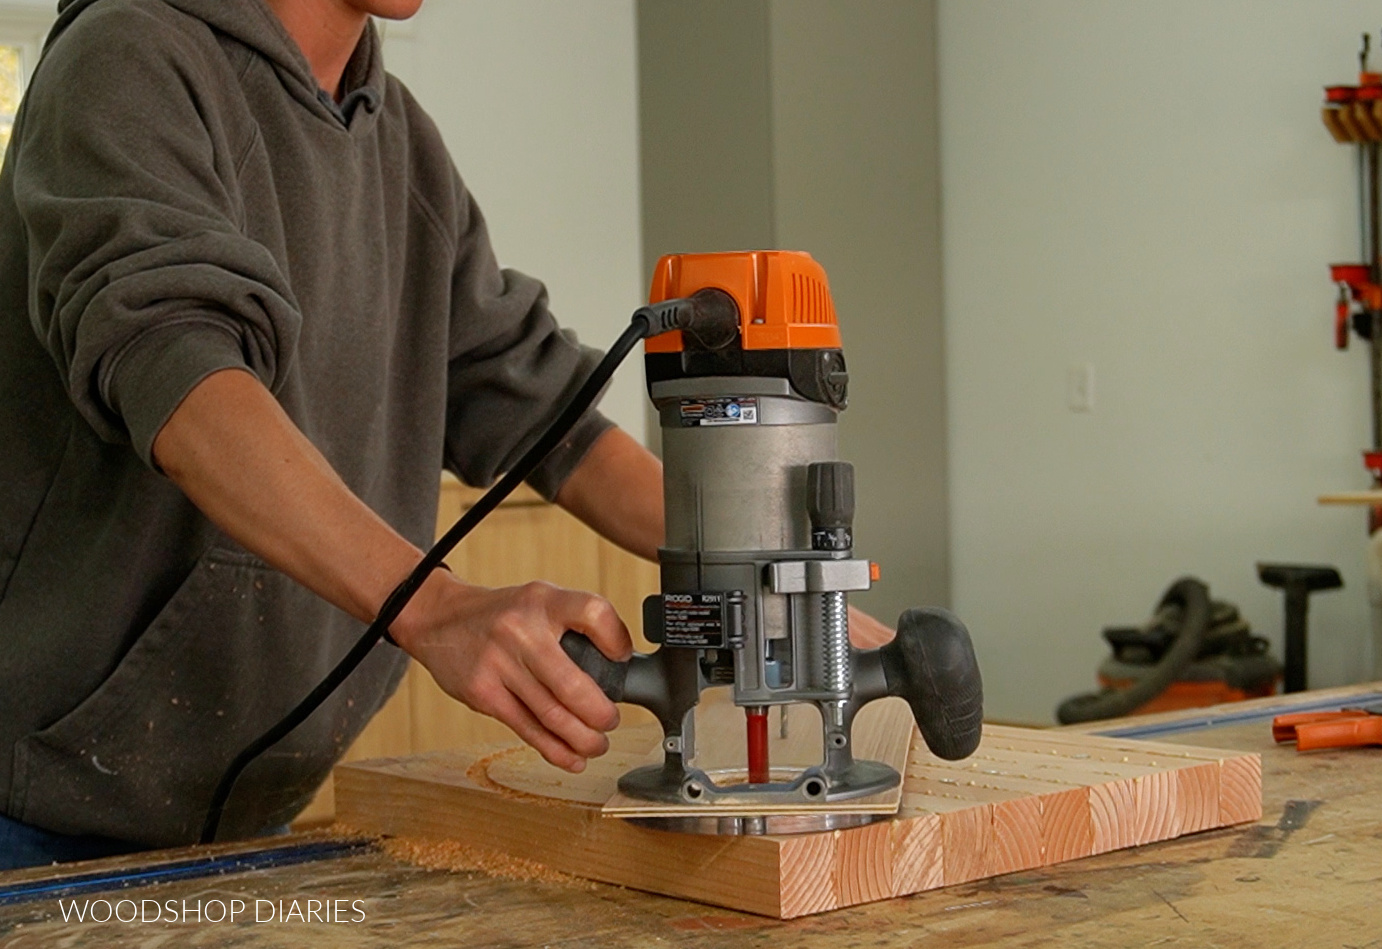
But I opted to cut it first using a router. First, I flipped this panel upside down and found the center.
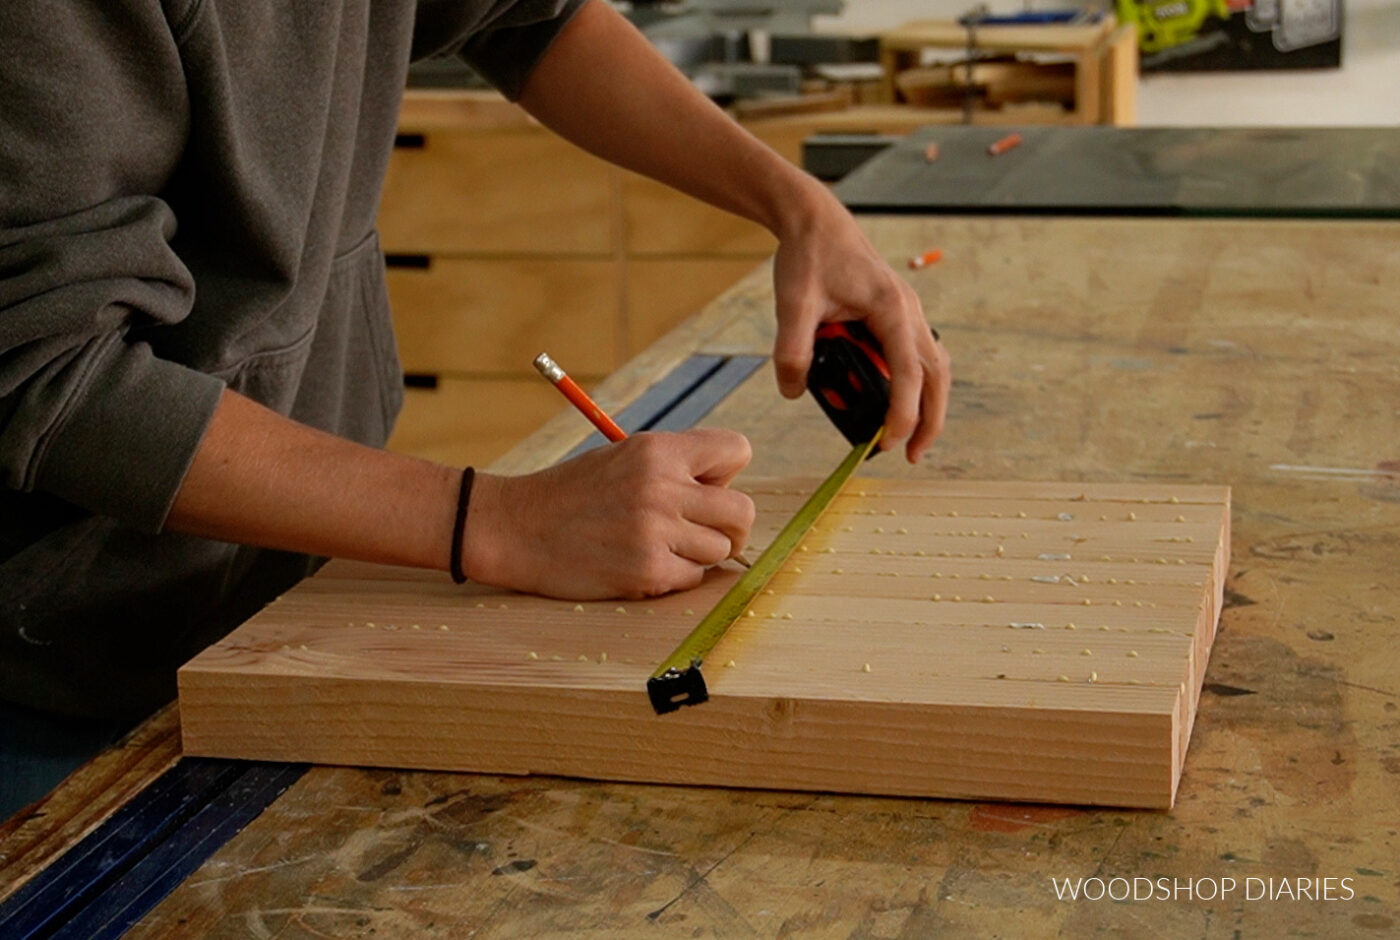
Then I drilled a hole (and left the drill bit in it) in the center to pivot my router and circle jig on. See this post on how to make and use a circle jig with your router.
I used a straight bit in my router to make a few shallow passes in the panel to give me my circle shape.
Then, I cut the rest of the material with a jig saw to save some time.
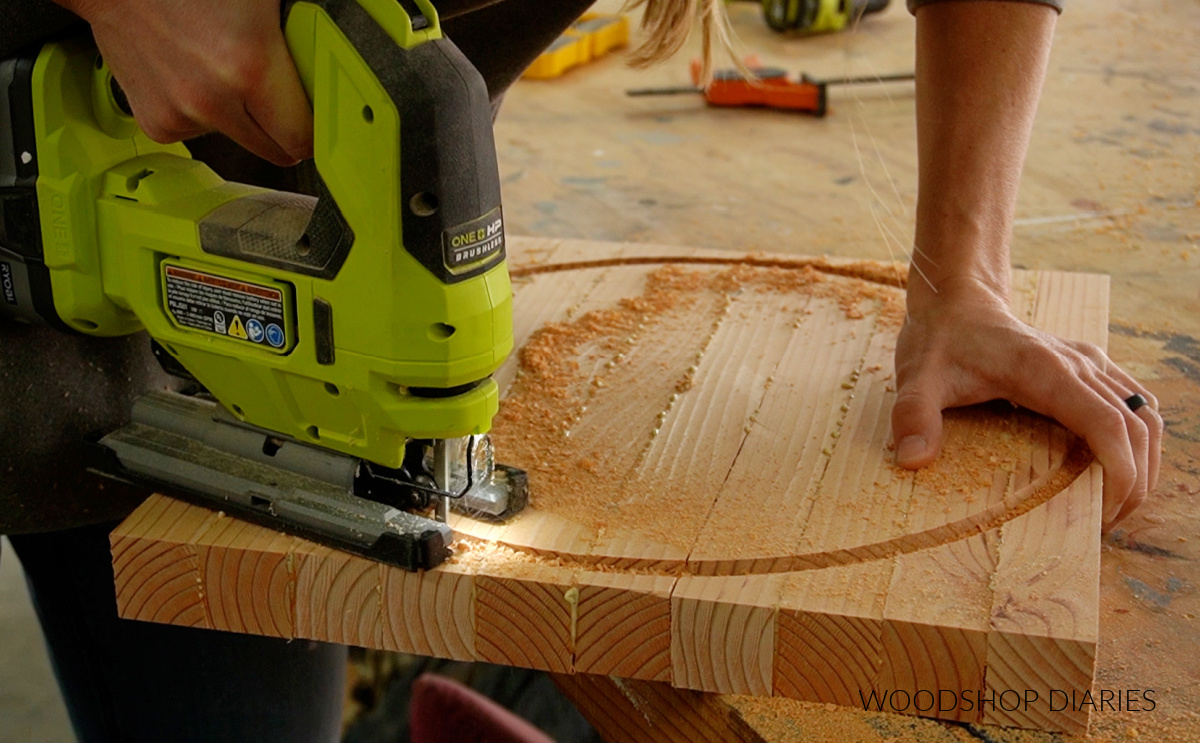
I cleaned up the edges with a flush cut bit in my router, then sanded the panel nice and smooth.
RELATED: How to sand wood
Step 3: Attach Lazy Susan Hardware
After the lazy Susan circle was cut and sanded, I flipped it upside down and centered a 6″ lazy Susan on it like shown below.
I secured this to the bottom using four 1 ¼″ wood screws through the holes in the hardware.
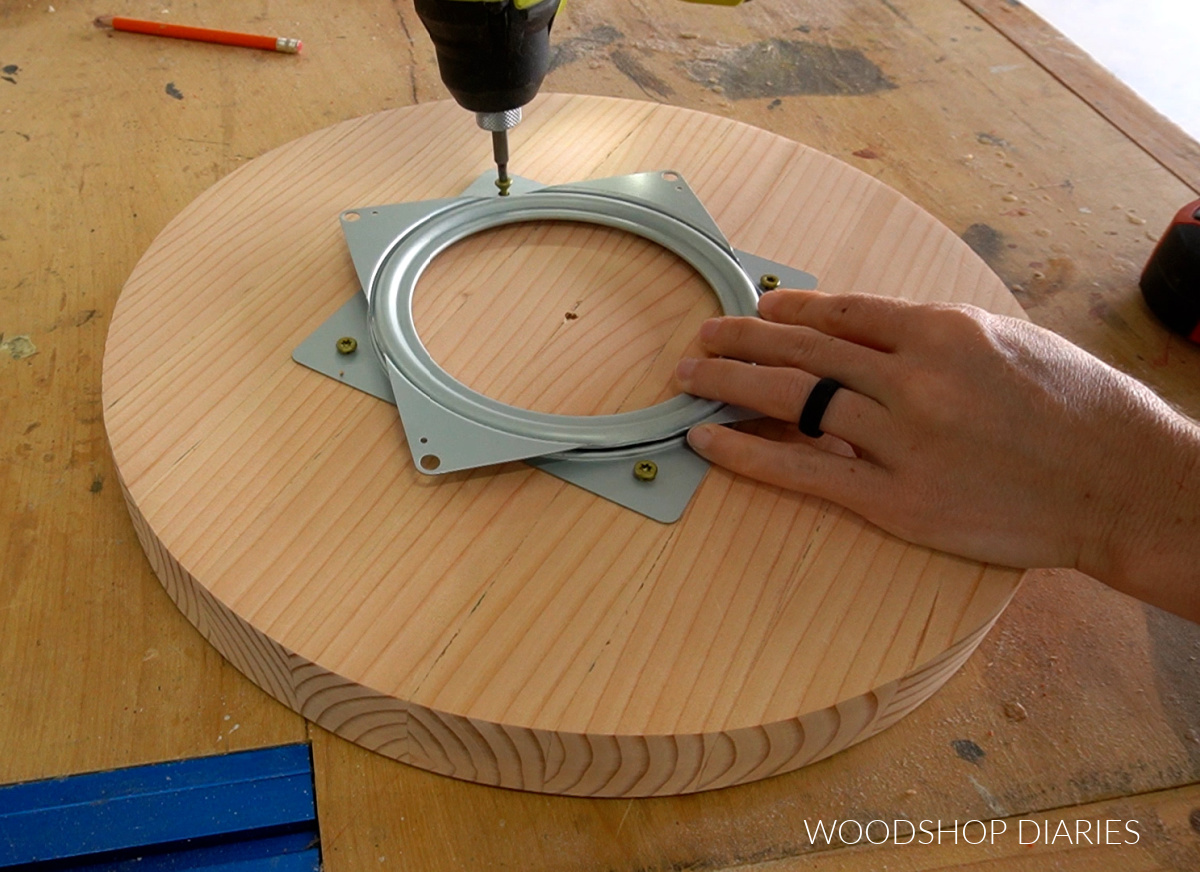
NOTE: If you’d like, add some rubber feet to the corners of the hardware so that when you flip it over, it stays in place and doesn’t scratch the surface of whatever you set it on.
Step 4: Finish and Add Customizations
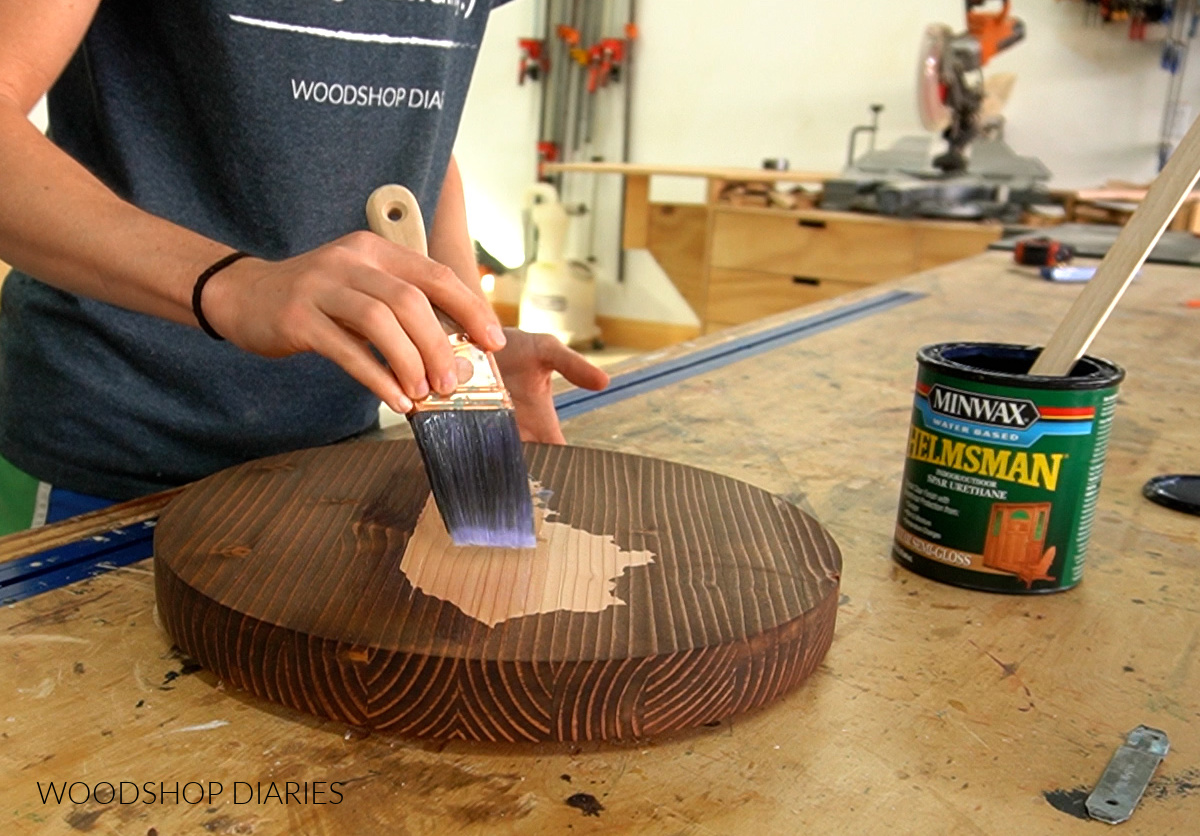
Now it’s time to finish the wooden round. I mentioned earlier there are several ways to customize/personalize this and one of them is a stencil to add a shape or initial.
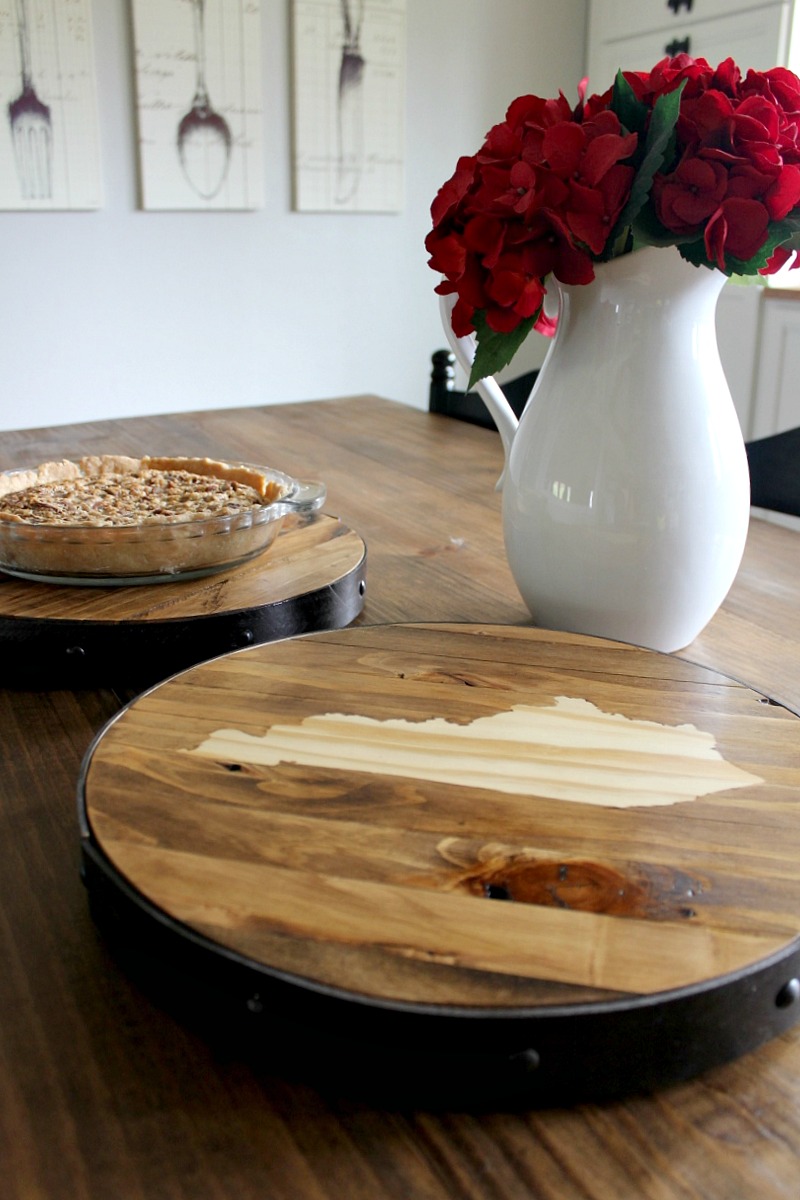
In this case, I used my Cricut Explore 3 to cut a simple Kentucky shape on some black vinyl to use as a staining stencil.
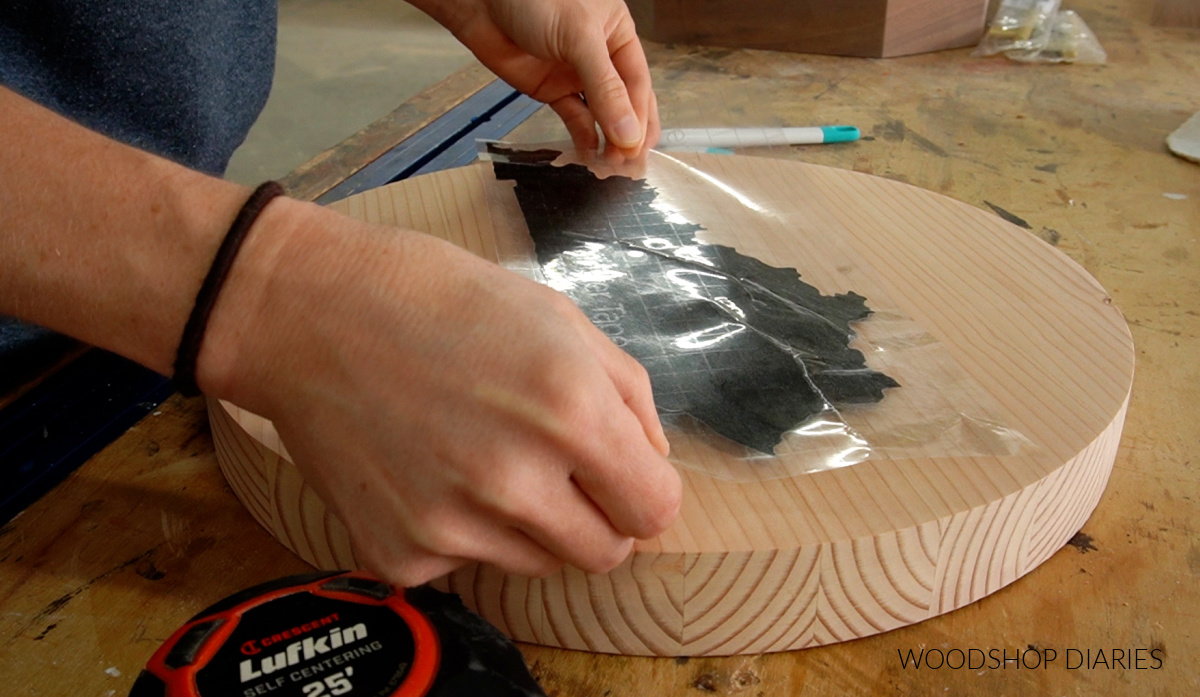
I placed this in the center of my lazy Susan, then stained around it with Minwax Provincial wood stain.
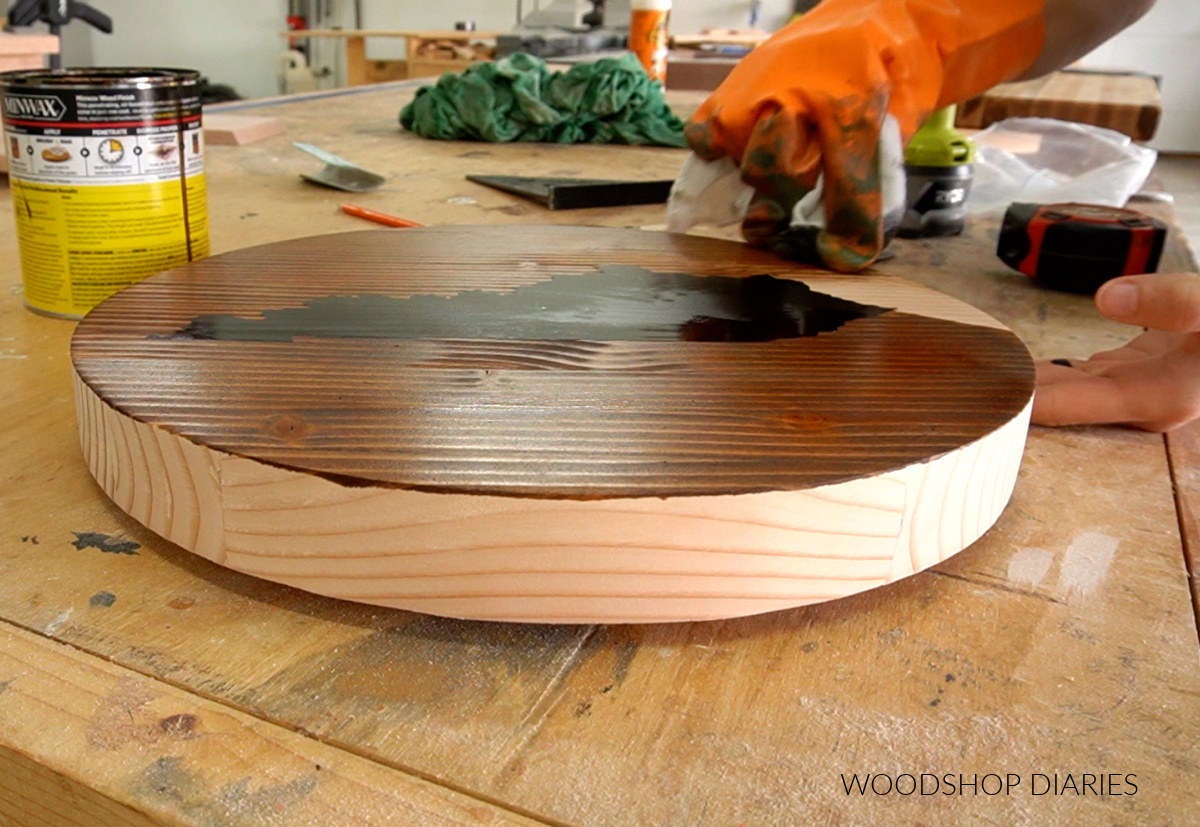
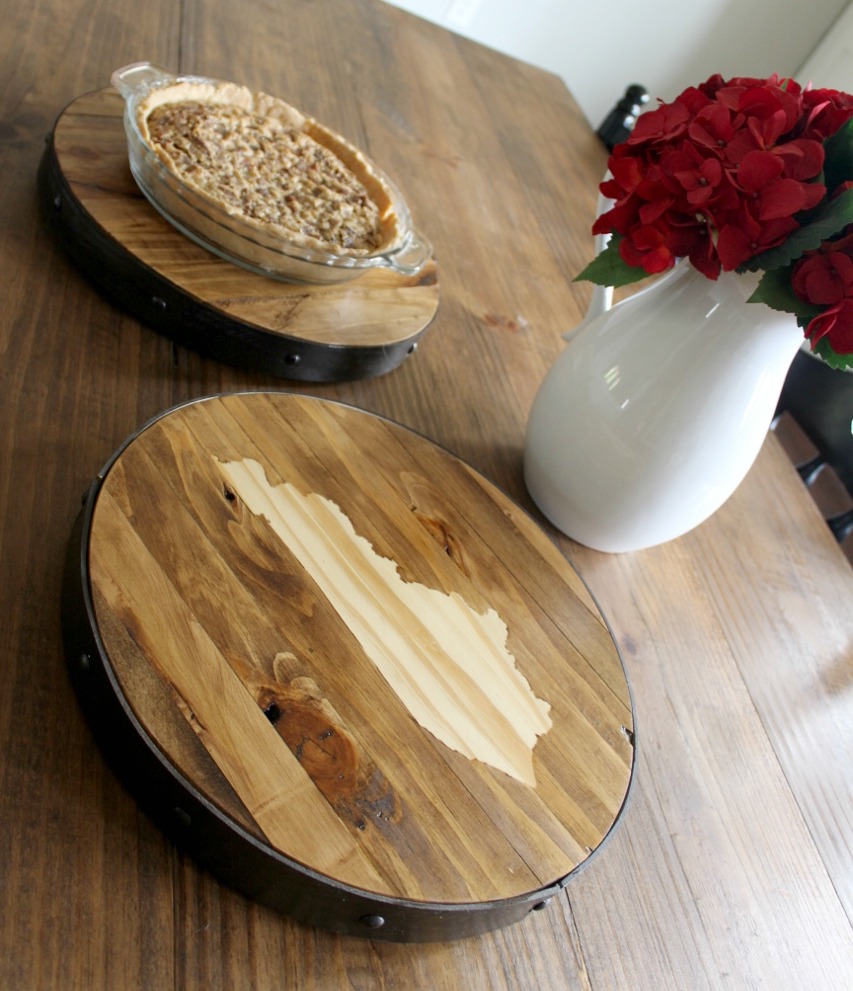
Once the stain was dry, I removed the stencil to reveal the state. You could do this same thing for a monogram, a quote, or another state or shape.
After the stain dried, I applied a few coats of Minwax Helmsman clear coat to seal it.
At this point, it’s ready for use! These would be great on a desk, on a coffee table, as a centerpiece, a serving tray–so many options!
Adding an optional metal band
I have been making these for years and some of my early ones also had one more unique feature/customization you may consider adding–a metal (or faux metal) band around the outside. You can make this from actual metal or from wood.
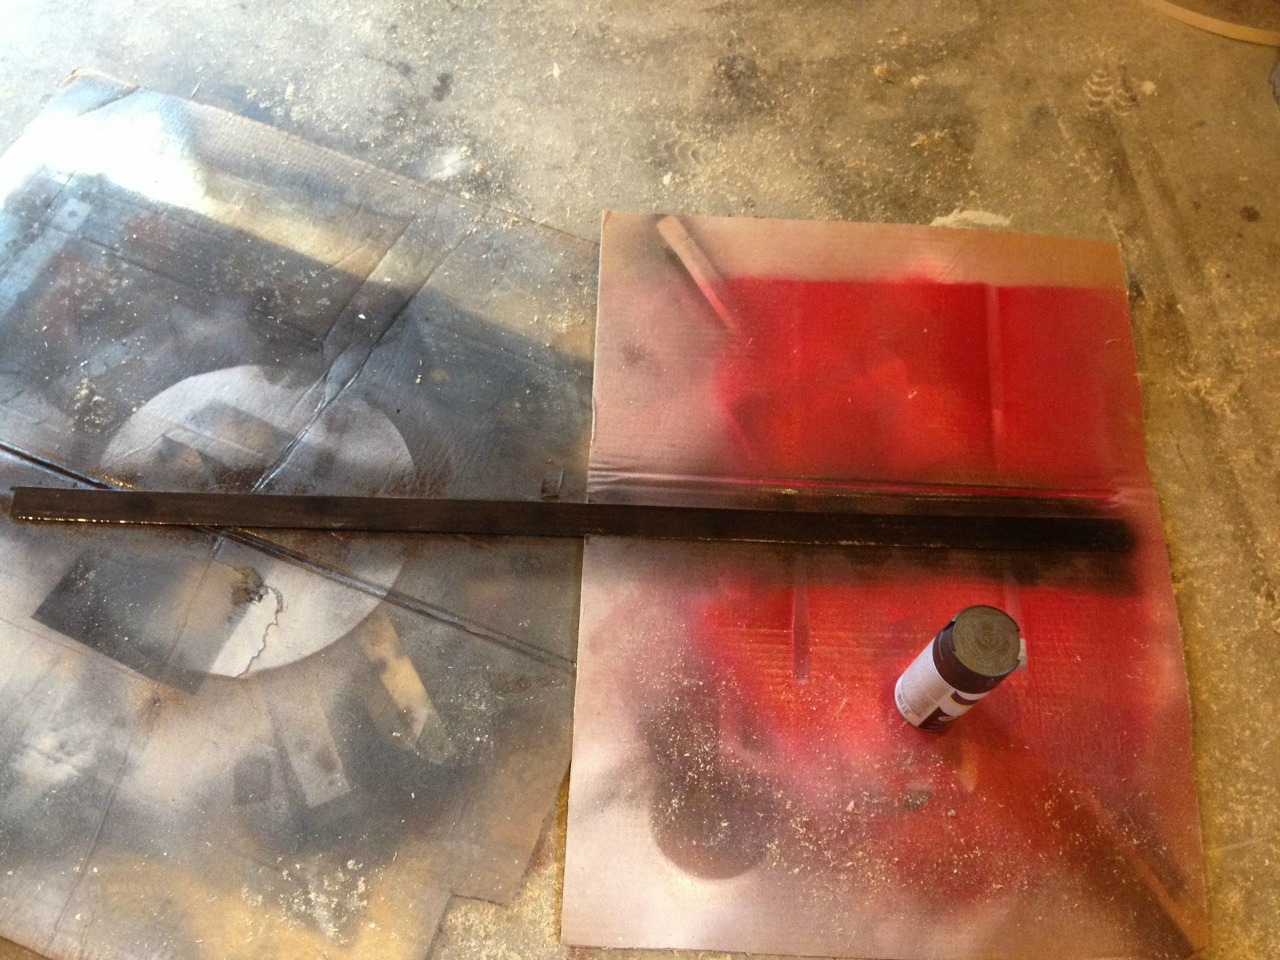
To do this with wood, I used my table saw to rip an ⅛” (or slightly thinner) wide wood strip off some scrap 2x material that I had around the shop. It needs to be long enough to wrap around the edge of the wooden round–about 44″ long for a 14″ diameter circle.
This strip will be challenging to bend smoothly without cracking. I recommend soaking the strip in water (I literally soaked it in my bathtub) overnight, then take it out and CAREFULLY bend it into a circle and clamp the ends together until it’s dry.
OR, if you’re having trouble with that, you could also use 1 ½″ wide edge banding instead and it won’t require soaking. It’s much thinner, so it’s much easier to bend.
OR, skip the wood altogether and use actual metal. You can find ⅛″ thick x 1 ½″ wide flat stock steel or aluminum in most big box stores or local metal shops. This will bend a lot smoother (especially if you heat it with a torch) than a wood strip.
Check out this tutorial for how I bent a metal band in a circle if you want to try this with metal.
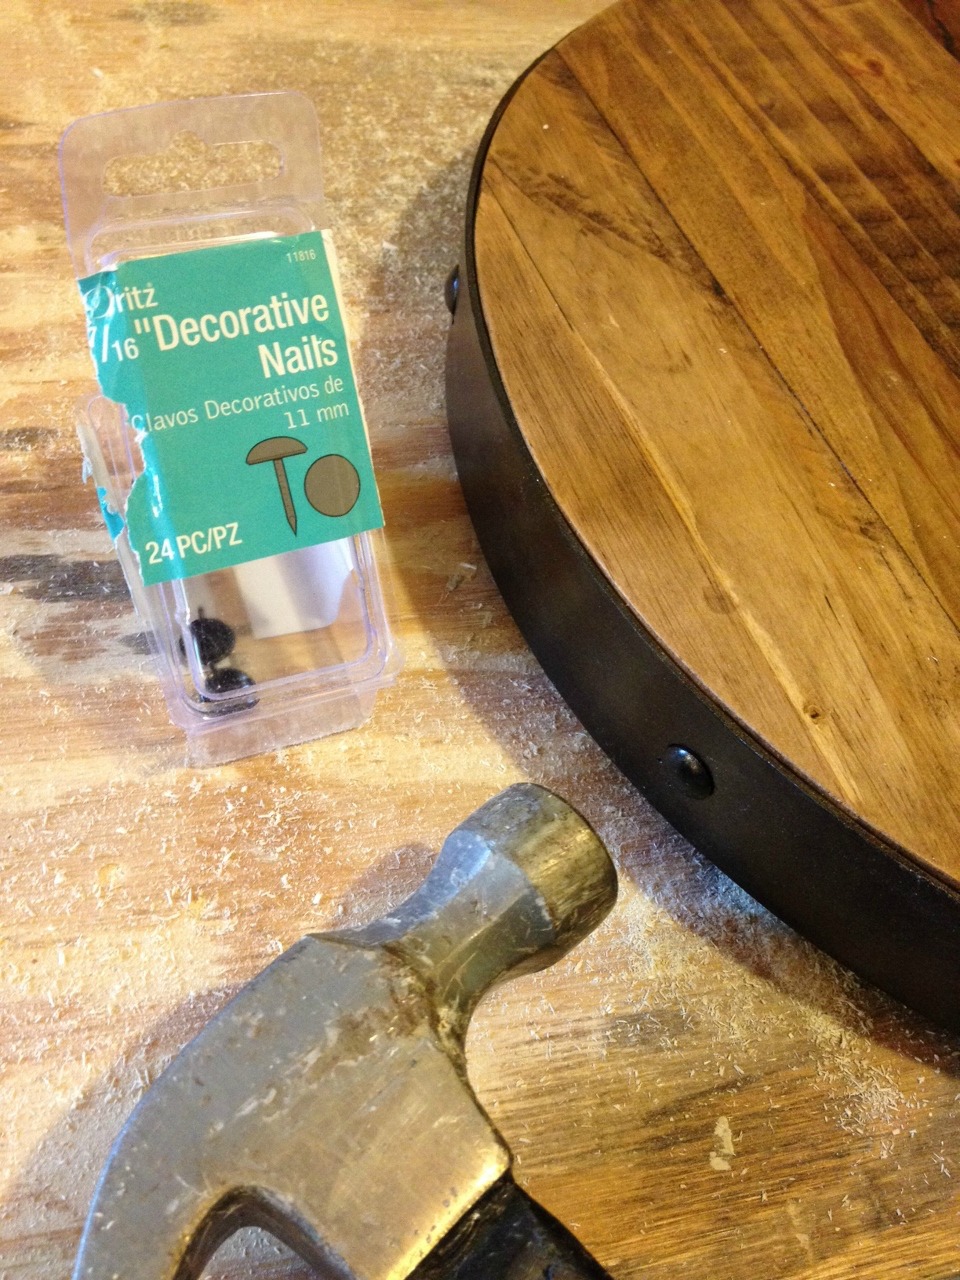
I painted my strip with oil rubbed bronze spray paint so it looked like metal.
Once the paint was dry, I added some wood glue to the back and used a staple gun to staple it around the edge of the round.
I tried to space the staples evenly around the edge. (NOTE: If using metal, you’ll need to drill holes and use screws instead of staples here to secure.)
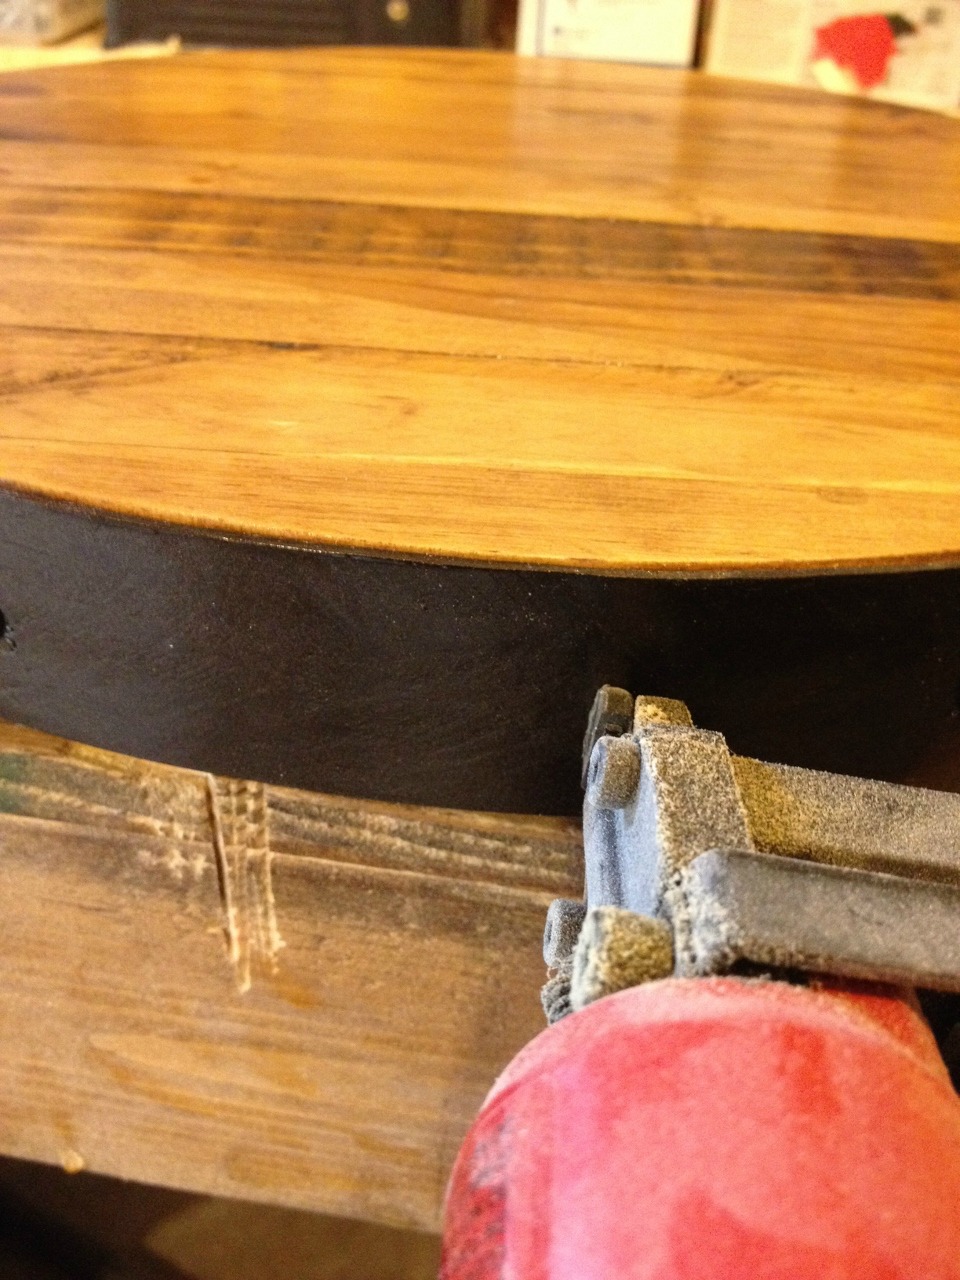
Then, I used a hammer and some decorative nail heads to cover the staples.
This DIY wooden lazy Susan looks great with or without the band and makes such a great handmade gift for Christmas, weddings, housewarmings, or any special occasion.

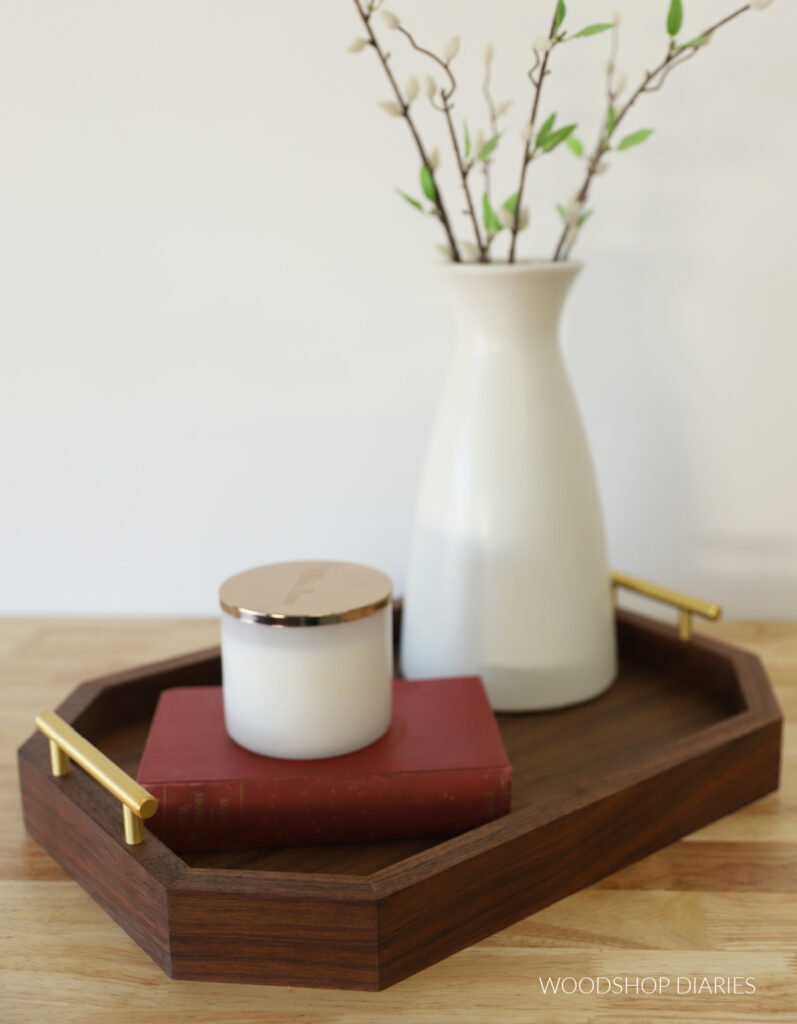
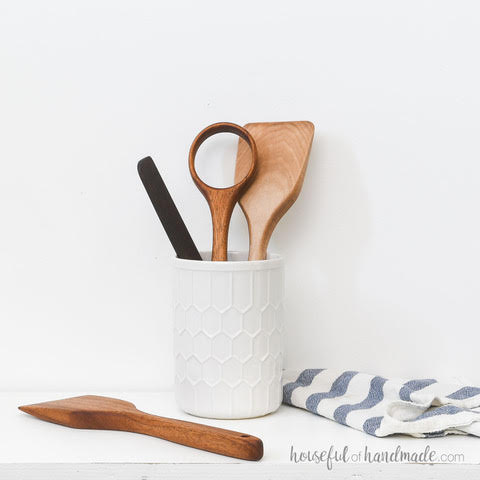
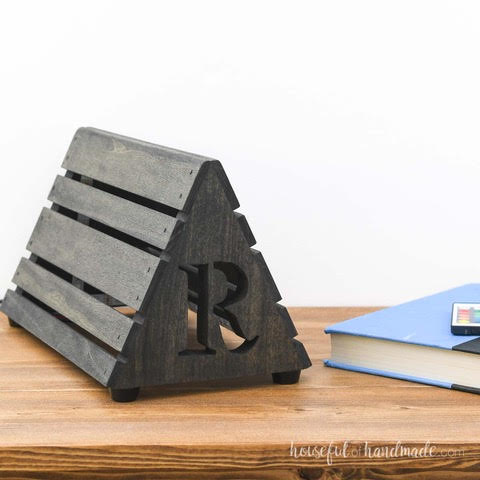
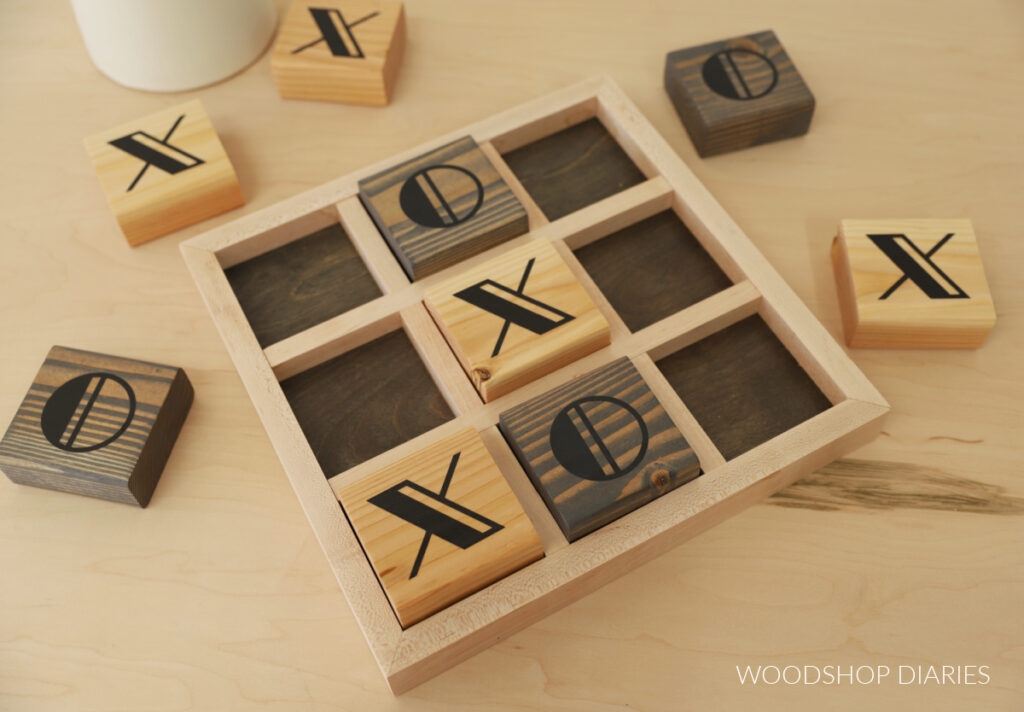
Looking for more Handmade Gift Ideas?
With the upcoming holidays, I’ve teamed up with my friend, Kati, from Houseful of Handmade to share some easy and fun gift ideas you can make this season!
I’ve included our gift ideas in the gallery below (click on the images to see how to make each one). Each day between November 18-22, we will be adding more projects to the list so keep an eye out!


If you enjoyed this project and want to save it for later, don’t forget to pin it or share to your favorite social channel!

Until next time, friends, happy building!