In this post, I’ll show you how to create your own indoor garden with this DIY Plant Ladder Shelf!
I have a terrible habit of collecting plants that I just don’t really have anywhere to actually set around my house. I know I’m not alone in this, right?? Plant hoarding is a real problem.
.
So I’ve been meaning to build somewhere to house all my little plants in one easy to water location.
.
But…the kicker was that I really didn’t want anything that I had to hang on the wall and since we live in a tiny garage apartment, floor space is pretty limited. So it had to take up very little square footage.
.
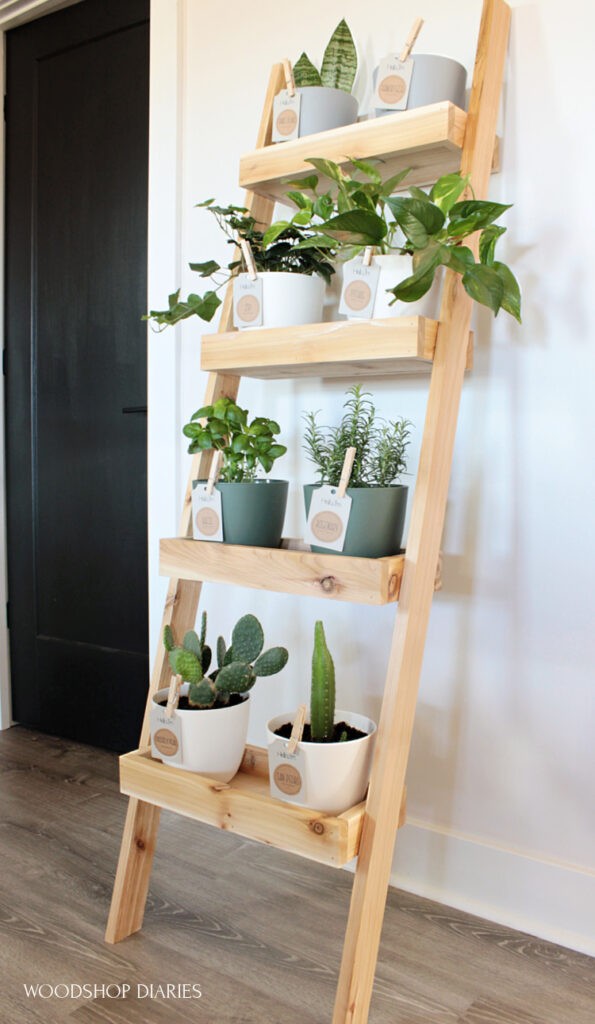
This plant ladder checked all the boxes and is the perfect *renter friendly* solution to give anyone with limited space a fun indoor garden.
.
I’m sharing the video tutorial here and the written step by step tutorial and plans below. I’m also sharing how to make these fun plant labels below as well 🙂
For this DIY Plant Ladder Shelf, You Will Need:
- (1) 1x6x8 board
- (4) 1x3x8 board
- Miter Saw
- Nail Gun
- Drill/Driver
- 1 ¼″ brad nails
- 1 ¼″ wood screws
- Wood Glue
- Planter Pots
For Plant Tags:
- Cricut Joy Machine (cutter and pen are included)
- Cricut Joy Card Mat
- Cardstock
- Writable Sticker Paper
NOTES ABOUT THE BUILD: I built this ladder shelf using a 1×6 and a few 1x3s. I splurged a little and used cedar for this, but any wood type would work fine. All you need to assemble it is a saw, a nail gun, and a drill driver.
Looking for outdoor projects instead? Check out these outdoor and gardening projects and plans!
Step 1: Build Ladder Shelf Trays
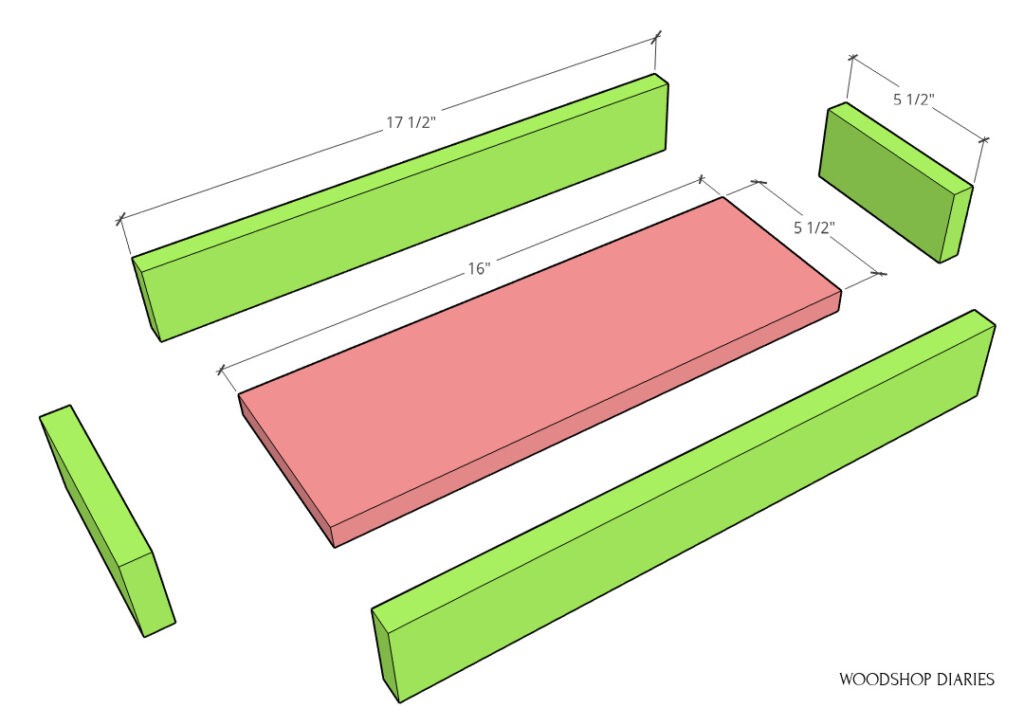
I began by cutting 4 pieces from the 1×6 to the length I wanted my shelves to be. I made mine about 16”, but you can definitely modify your sizing here if you need longer shelves.
.
These will be the bottom of each plant shelf (shown below in pink).
.
Once those pieces were cut, I cut 1×3 pieces (shown below in green) to wrap around the sides of each of these four shelves.
The cedar boards I used were smooth on one side and rough on the other, so I did give them a good sanding before assembly just to prevent splinters later.
.
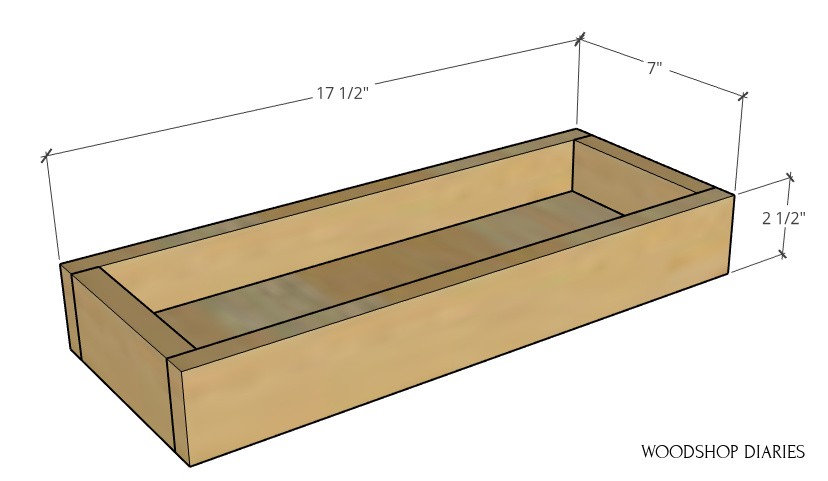
Then, I just glued and nailed the 1x3s around the edges of the 1×6 boards to make four identical sized trays. If you didn’t have a nail gun, screws would work fine here, too. Nails are just quicker.
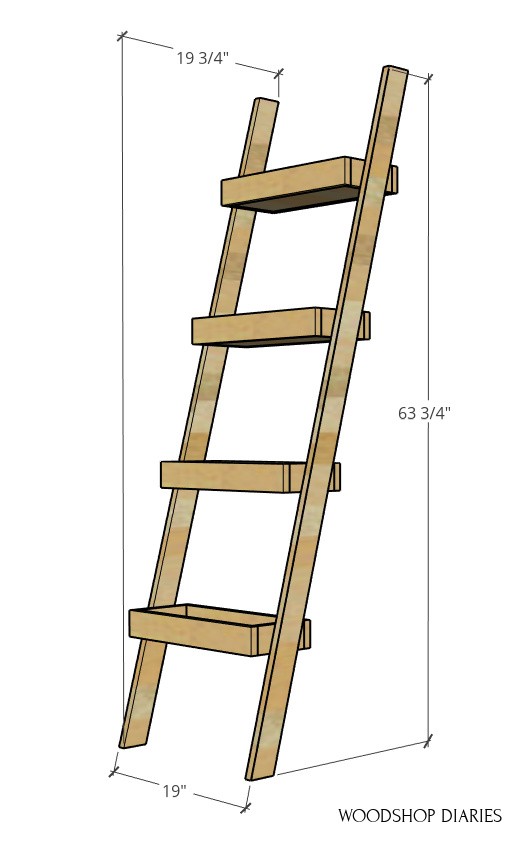
Step 2: Cut Plant Ladder Sides
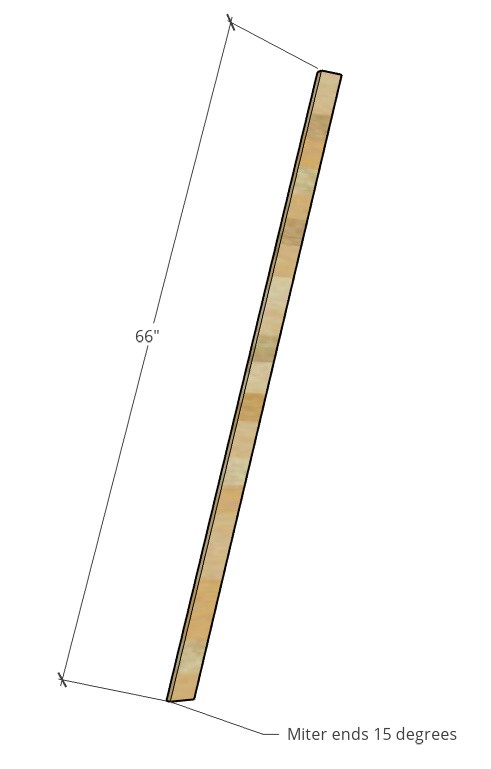
Once the four trays were together, I went back to the miter saw cut the sides of the ladder. I wanted the bottom edge angled so it would lean back against the wall, so I adjusted my miter to about 15 degrees to make these cuts.
.
I cut the two side pieces about 5 ½ foot long, but again, this project is easily customizable and you can cut them however long you wish. The longer you cut the sides, the taller your shelf will be.
Now, I just had to attach the trays between the sides.
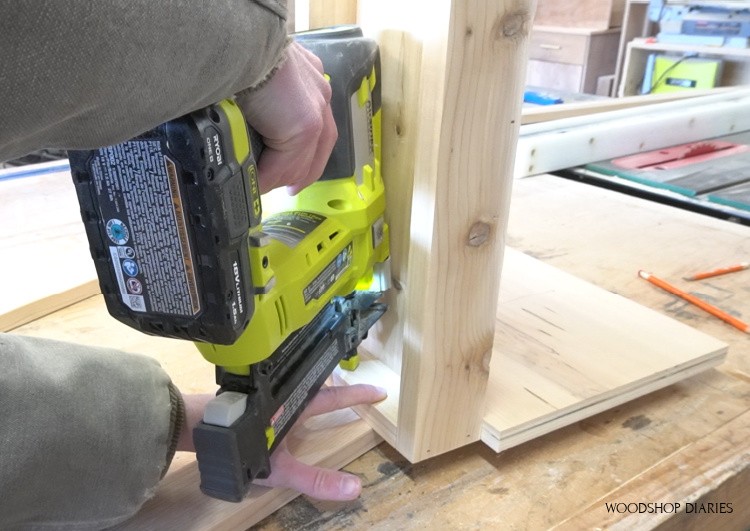
Step 3: Attach Trays to Ladder Sides
To make spacing easy, I used a scrap piece of plywood cut to about 10 ½” x 11 ½”. I placed the bottom shelf 10 ½” from the bottom edge of the side using this scrap block. (PS…if you don’t have scrap wood, a notebook would work well, too!)
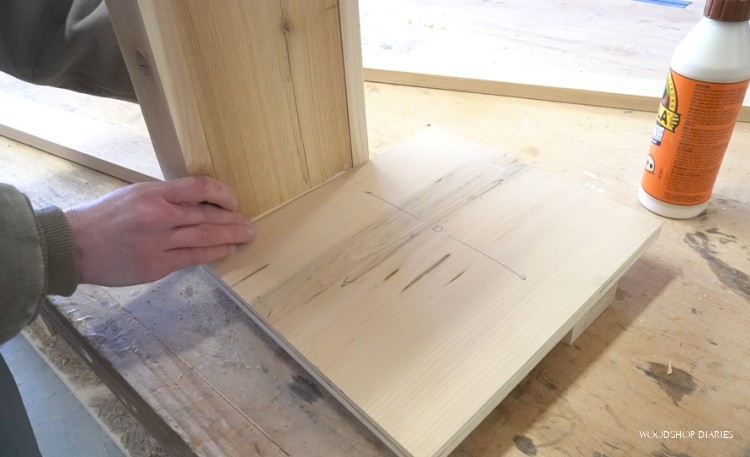
I just centered it front to back (I didn’t measure, I just eyeballed it) on the side board and glued and nailed the tray in place for now.
Then, I turned my scrap piece the other way and spaced the trays 11 ½” apart. This is totally customizable if you wanted to use different spacing or sizes.
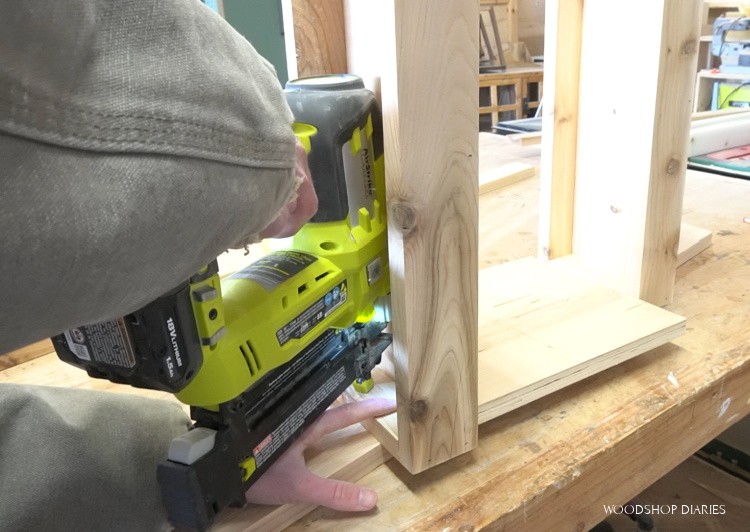
But, I do recommend using a scrap block for this as it made things really easy to keep the shelf angles and spacing consistent.
.
Once I had one side assembled, I flipped it over and repeated for the other side. Keep in mind to match the angle direction on the bottom edge of the sides before attaching everything.
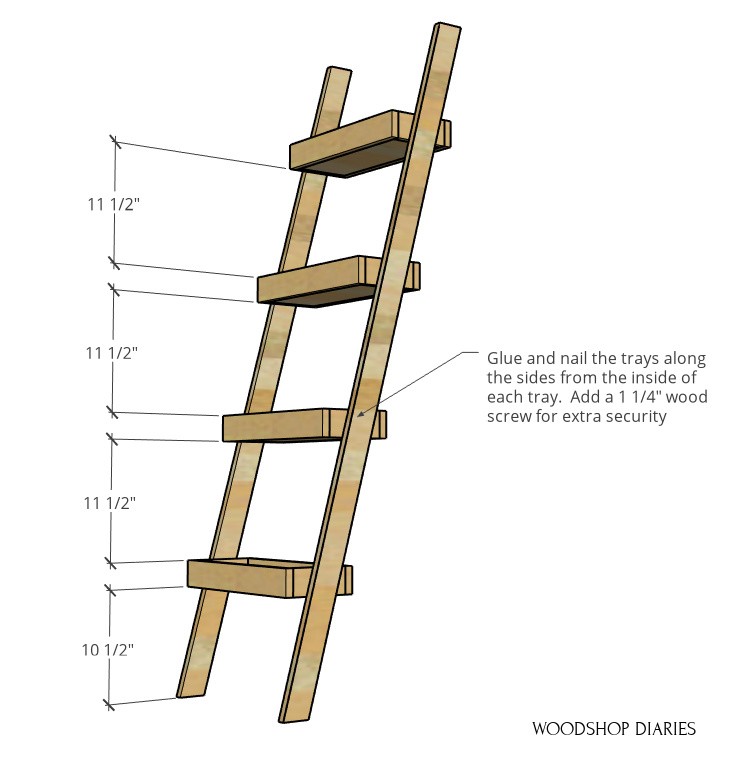
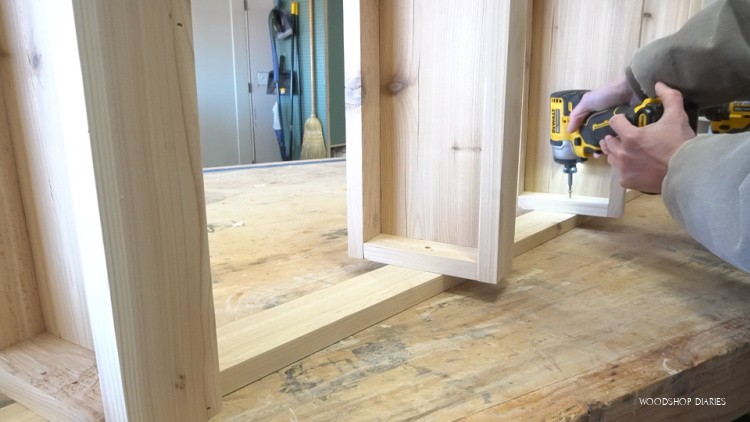
Now, once the glue dries, this should be plenty strong to hold a few plants, BUT just for a little extra security, I went back and added a 1 ¼” wood screw on each side of each tray.
I gave it a clear coat poly and brought it inside to add my plants.
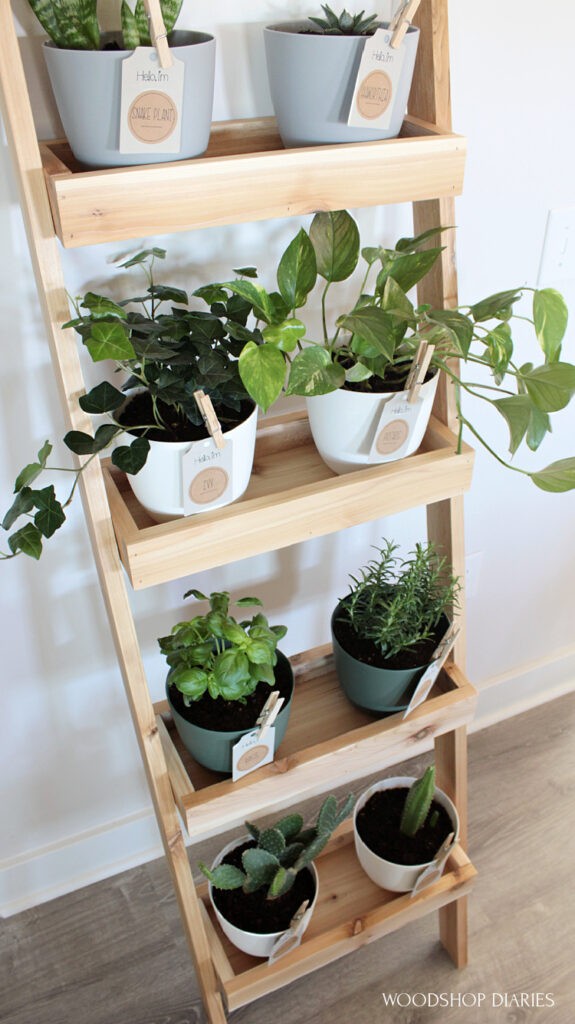
Step 4: Add Plants to Ladder Shelf and Create Plant Tags (Optional)
This DIY plant ladder shelf just leans against the wall and you can set your plants inside however you want.
.
To keep things visually consistent, I used these simple plastic planters for all my plants, but your planters don’t have to match–I’m just weird like that, so I wanted them the same size.
.
They were pretty inexpensive, so I ordered multiple colors (white, grey, dark green) and I’ve got plenty leftover to use outside this summer.
I really like that this plant ladder shelf doesn’t have to attach to the wall because I rearrange everything in our tiny house all the time and I don’t want to deal with puttying holes and rehanging it all the time.
.
Now, I’m a big believer in adding small, subtle details to dress up an otherwise basic project…Like adding these plant tags!

Cricut recently sent me their new Cricut Joy cutting machine to try out. Now, full disclosure here…I’m not a super crafty person. I don’t scrap book or get into small craft projects.
.
But, even to a non-crafty person, I have to admit, this little machine is pretty nifty. I can see using this for personalizing projects or using the vinyl for some unique staining and painting details.
.
To make these tags, I just took the Cricut Joy out of the box, and designed some super basic labels in the Cricut Design Space software (it’s free, FYI).
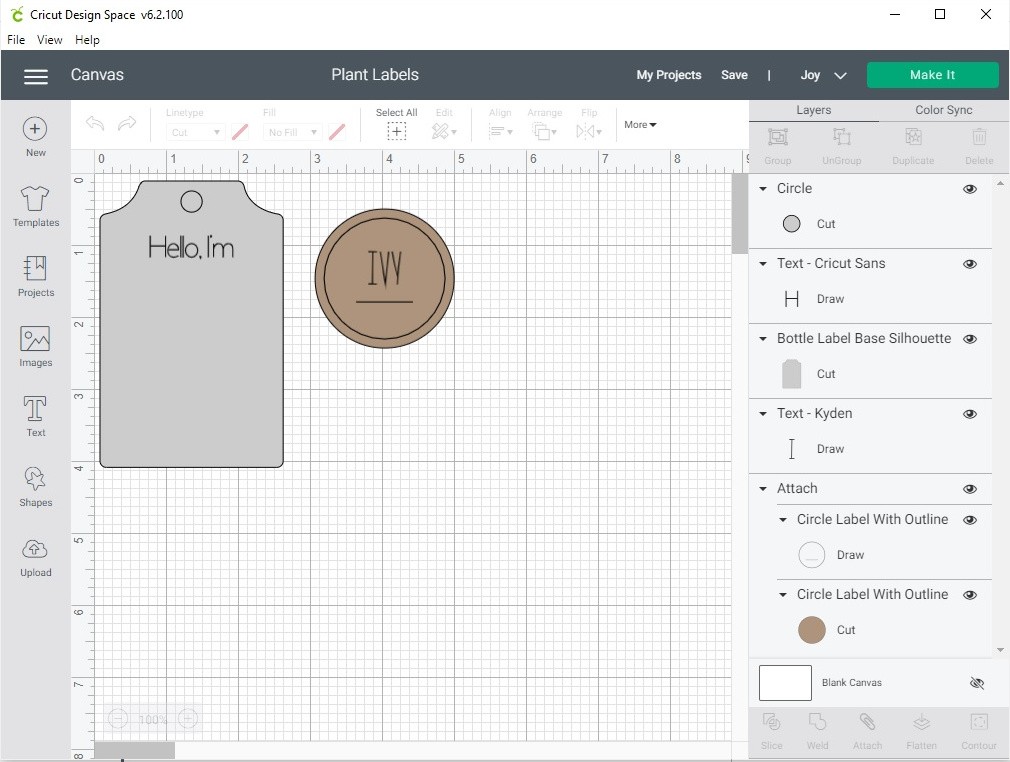
If you go to images on the left side and search “label,” you can find both the tag and the sticker labels that I used pretty close to the top. You can add text and size everything as needed. (NOTE: The names of the graphics and fonts I used here are all listed there on the right in the screen shot above.)
.
There are a TON of tutorials for how to use Design Space on Cricut’s website…so play around with it and check those out. It’s easy to figure out once you play around with it!
.
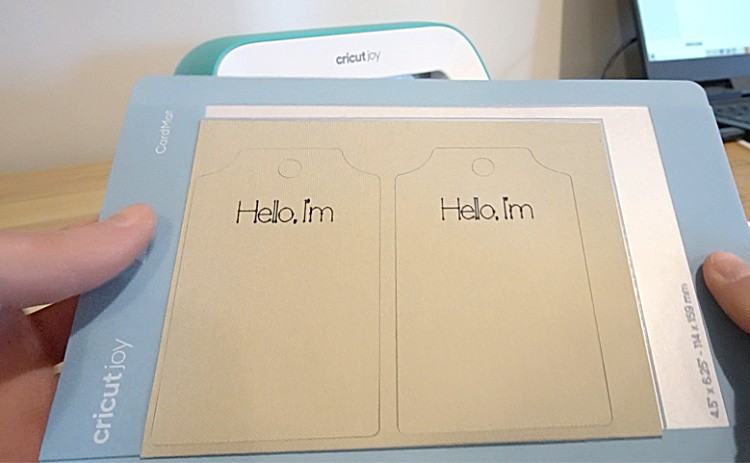
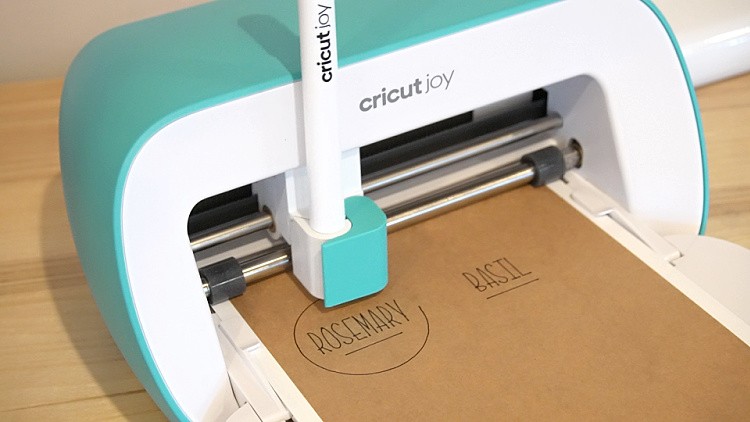
When I was ready to print, I loaded some cardstock onto my card mat and followed the prompts on the software to write “Hello, I’m” on the card.
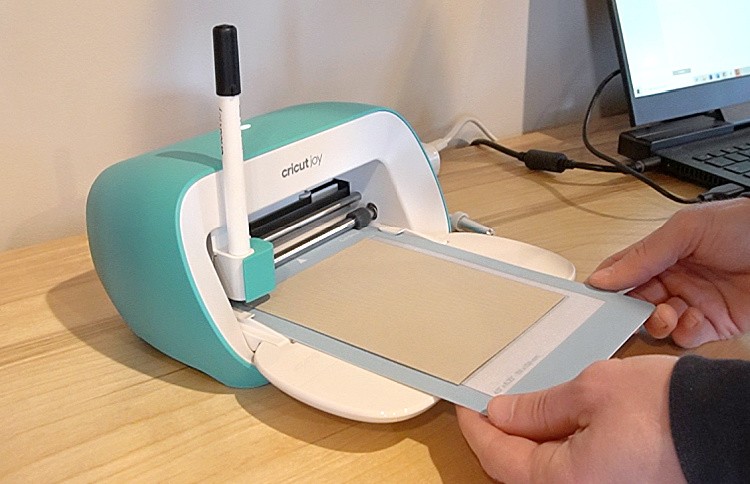
The software tells you when to swap out the pen for the cutter (both the pen and cutter are included with the Cricut Joy, FYI!) and then it cuts the tag shape out.
Then, I repeated the process on this writable adhesive backed paper and make labels with each plant’s name.
I peeled the stickers off and placed them on the tags.
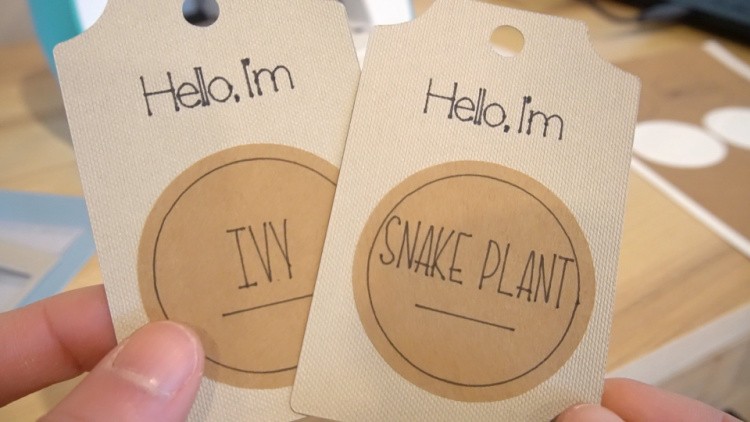
Then, used a clothes pin to clip the tags on each planter pot.
.
Since I’m a black thumb, I may write watering and sunlight instructions on the back of the tags so I can hopefully keep them alive and well for a while haha.

And now my indoor garden DIY plant ladder shelf is complete and in one easy to water location! This is a great way to add an indoor garden to a small space or an apartment and one you can complete with limited tools in just a couple hours.
.
So I hope you’ve enjoyed this quick build and are looking forward to more projects coming at you soon. Be sure to subscribe to my newsletter below if you aren’t already so you don’t miss out on what’s coming next!
.
If you’d like to save this project for later, don’t forget to pin it!

Until next time, friends, happy building 😊