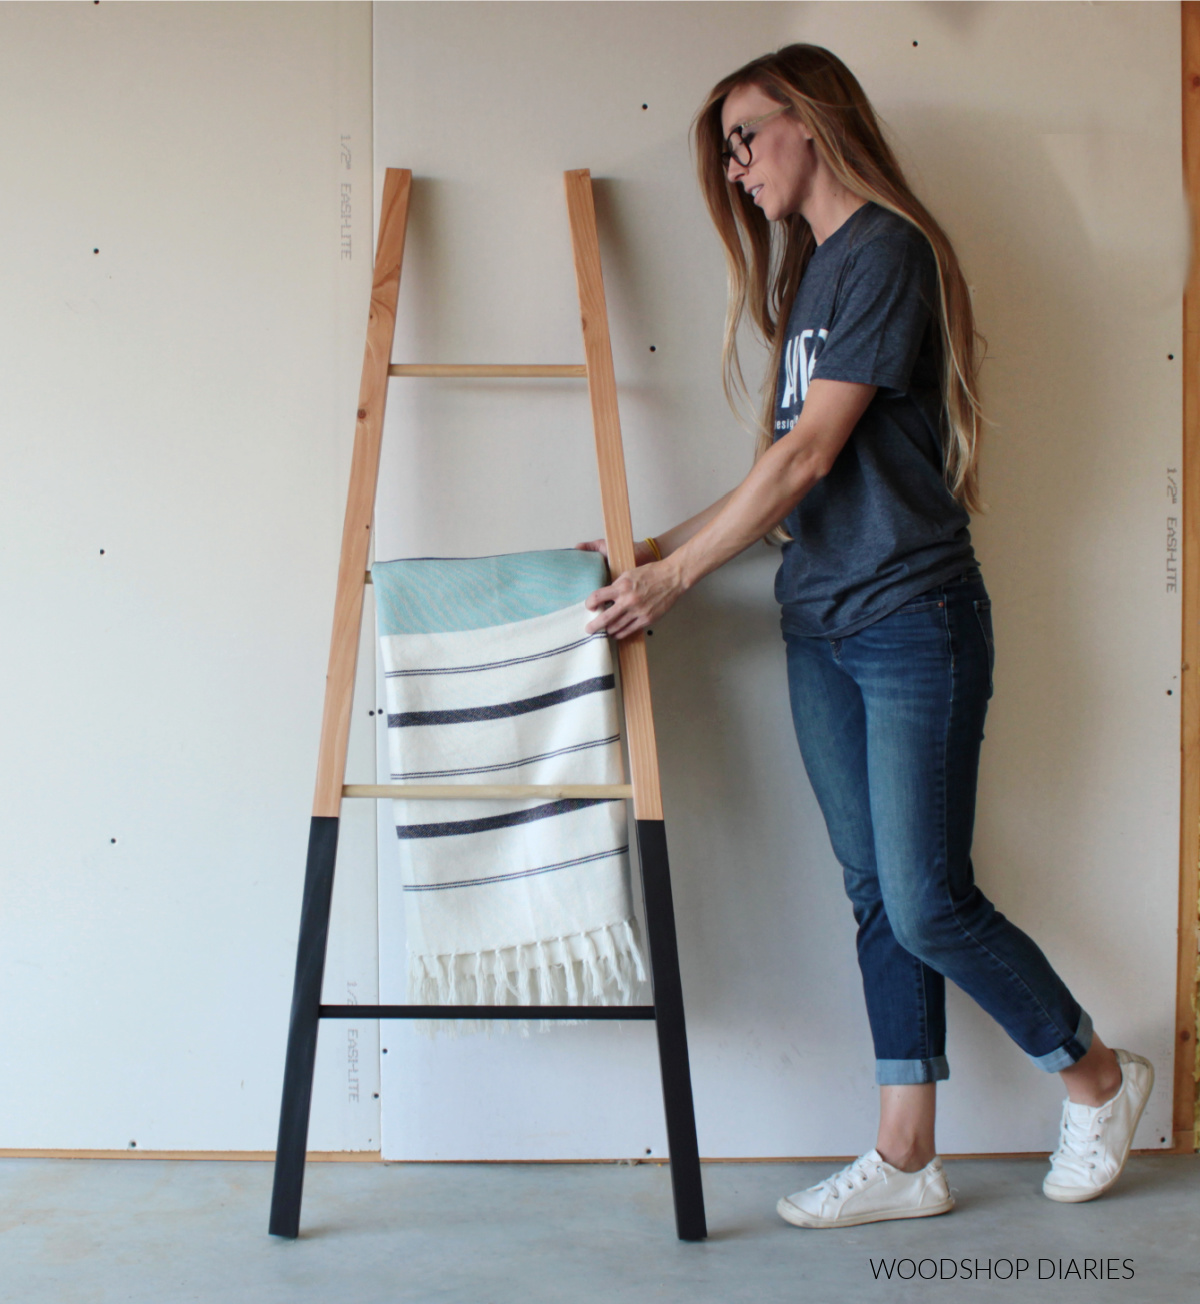
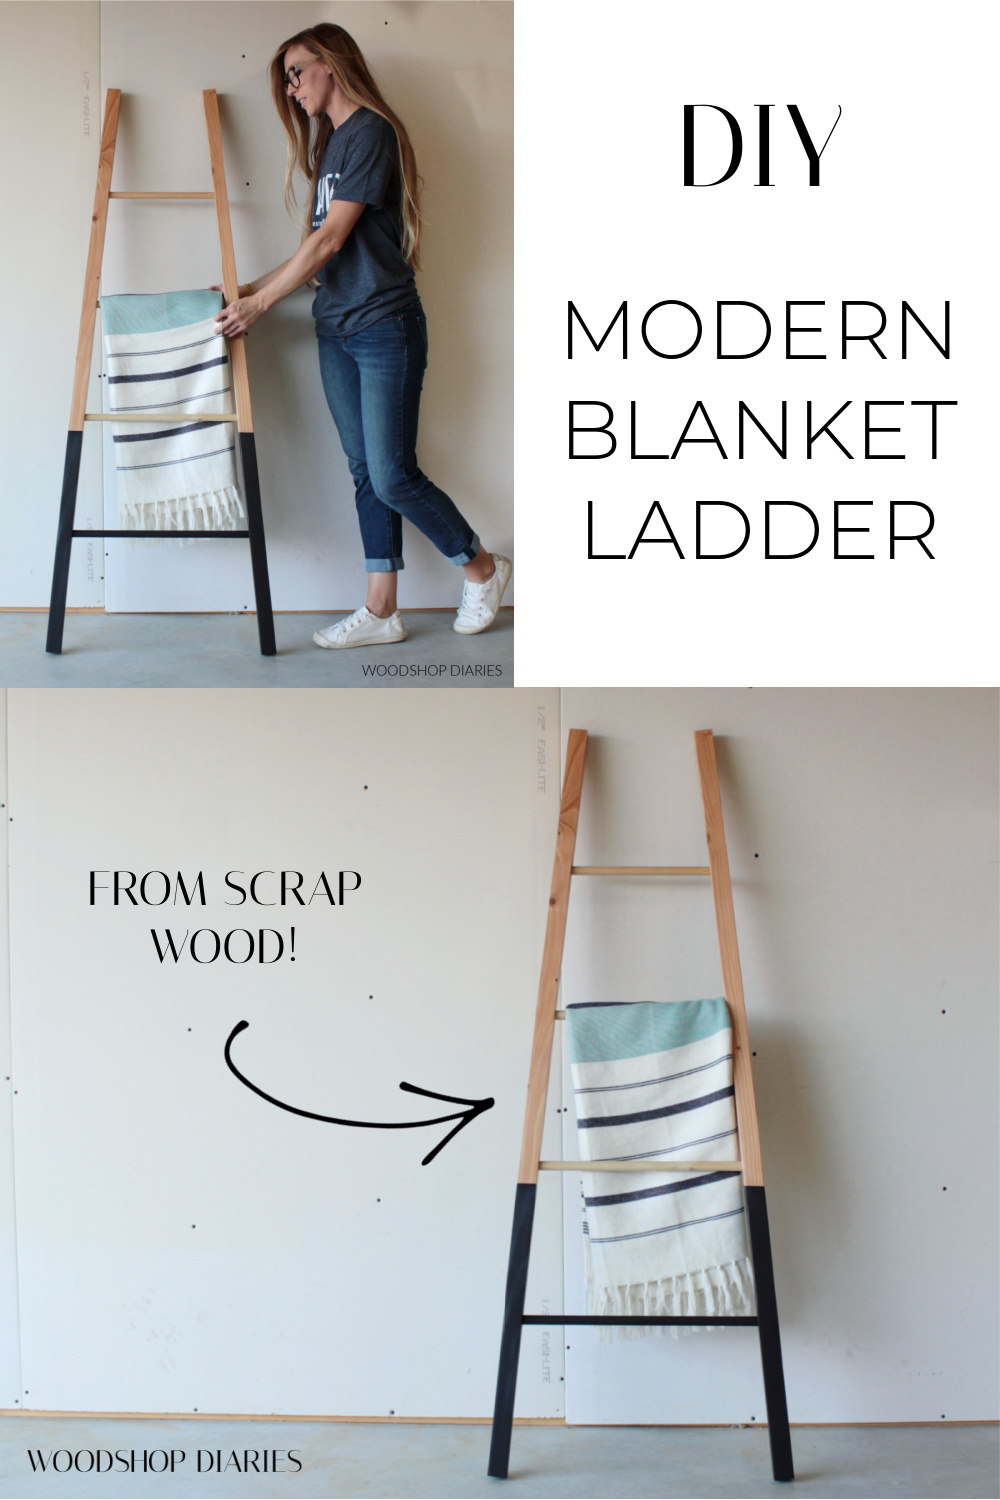
In this post, I’ll show you how to build this simple, modern DIY blanket ladder from some 2x2s and dowel rods!
A blanket ladder is a practical, simple, and creative way to add some style, storage, and life to a room.
.
You can use it in the bathroom for hanging towels, the living or bed room for storing and displaying blankets. Or think way out of the box and decorate it with wreaths, greenery, etc. and use it as part of your seasonal décor!
.
Whatever you use it for, this easy modern DIY blanket ladder is a great weekend scrap wood project and would make the perfect DIY gift idea for your next party as well.
.
I’m sharing a video tutorial here with 3 easy scrap wood ideas that you can tackle this weekend–including this blanket ladder project! And I’ve got the step by step tutorial for you to build it below.
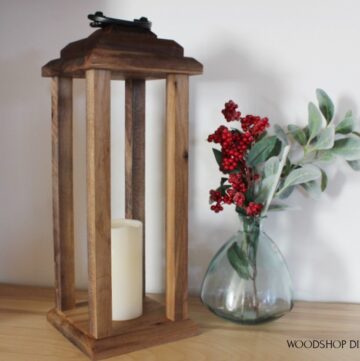
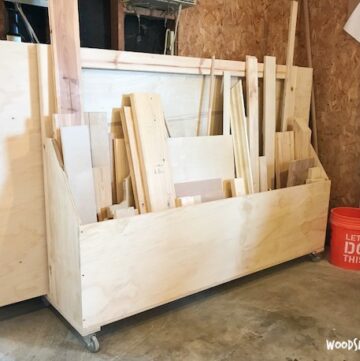
Check out the other two project tutorials here:
This post contains affiliate links. See website policies.
Tools & Materials:
Materials:
- (2) 2x2x8 boards (See notes below)
- (2) ¾″ diameter dowel rods
- Wood Glue
- Painter’s tape (optional)
- Paint (optional)
Tools:
- Saw (any saw that can cut basic straight lines is fine)
- Drill
- ¾″ diameter forstener bit
- Clamp, tape, or ratchet strap (to hold pieces together while glue dries)
Some notes about the Blanket Ladder Project:
This DIY blanket ladder is a great project to use up some scraps you may have on hand.
.
This is a great opportunity to use up some 2x2s that you may have deemed “inadequate” for a nicer furniture project. So if you have one tucked away that’s slightly bowed, twisted, or just not the best to look at, this is a great project to use it on because those issues may not be super critical in a small project like this.
.
Also, I had scrap ¾″ diameter dowel pieces in my scrap pile (leftover from this DIY toddler floor bed build!) to use up. You don’t have to use ¾″ if you have another size on hand or if you prefer something different.
.
Any size dowel between about ½″ up to 1 ¼″ would work well here. Just make sure whatever size you use that you have a forstener bit size to match it so you can drill your holes.
.
And lastly, you’ll notice I built this blanket ladder so that it tapers towards the top. You can adjust your taper (I’ll show you below), or not taper it at all if you don’t want to. Feel free to get creative for your own project 🙂
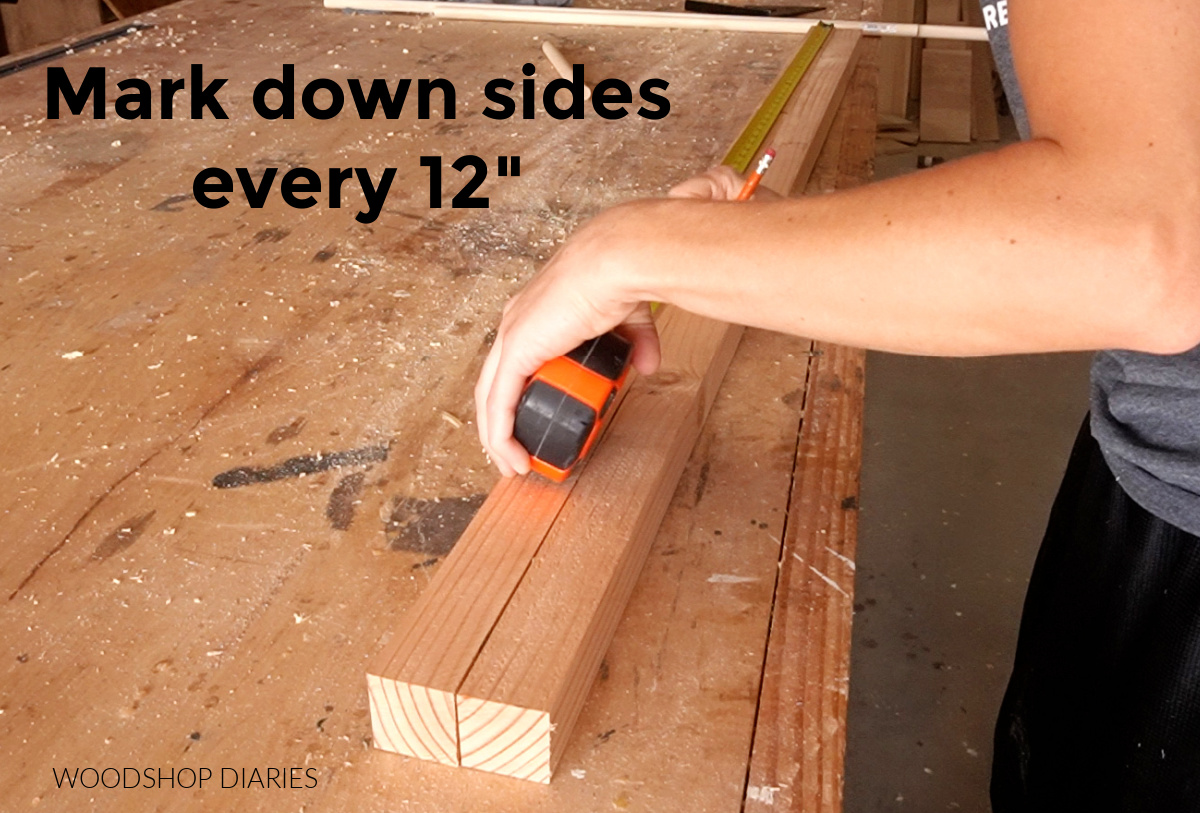
Step 1: Cut and Mark Blanket Ladder Sides
First, I cut two 2x2s down to the height I wanted my ladder to be. I cut my pieces about 60″ (5 foot) long. However, if you want a taller ladder with more rungs, feel free to make this longer.
.
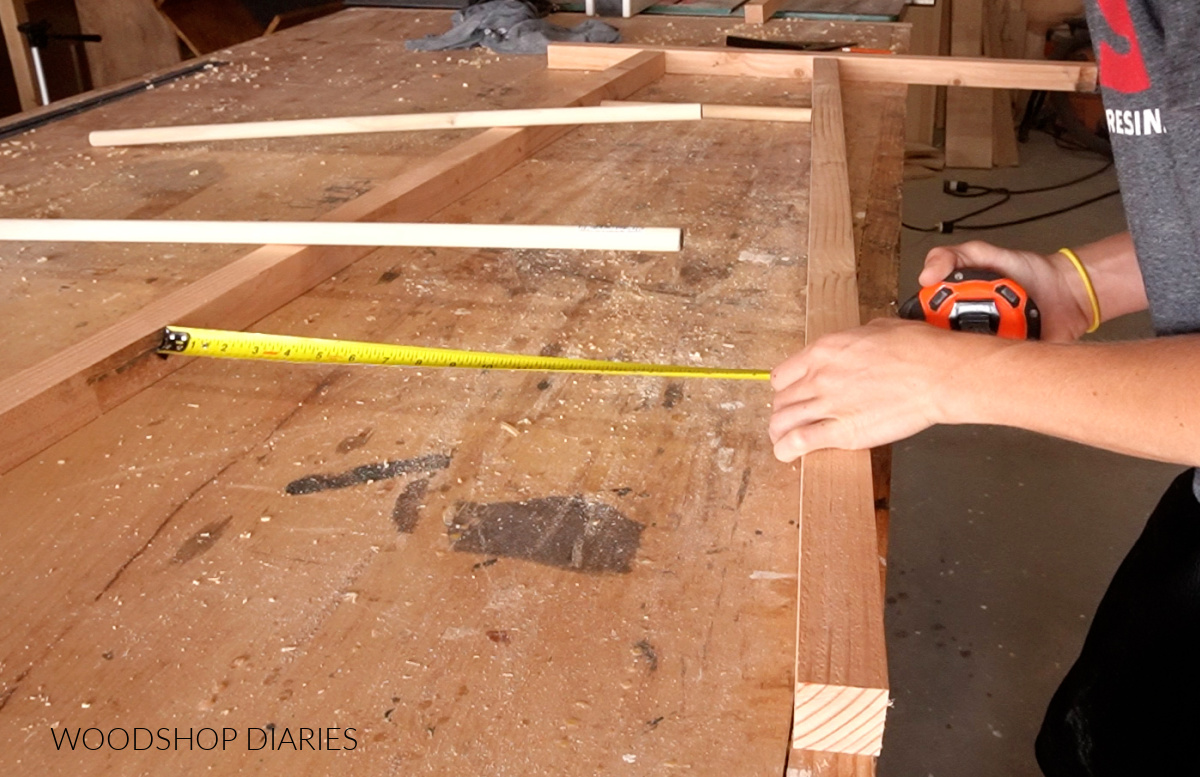
Once these two 2xs were cut, I laid them together on the workbench and used a measuring tape to mark out every 12″ down the length because this is where I planned to place my dowel rungs.
Step 2: Measure and Cut Dowel Rungs
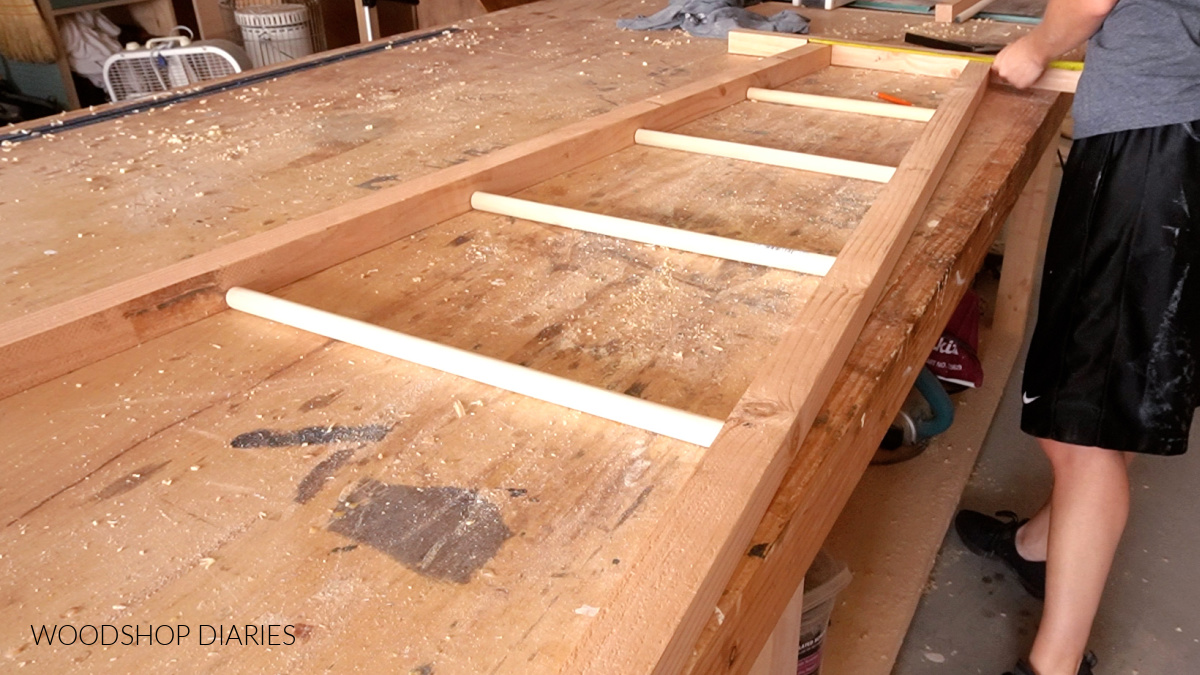
I chose to taper my ladder towards the top, but this is totally optional. I didn’t measure any angles or do any fancy math for this.
.
I simply laid a scrap board on my workbench and butted my 2×2 pieces up against it and laid them out how I thought it looked good.
.
Since I already marked my dowel locations in step 1, I measured across these pieces and found that at whatever angle this was, each dowel would need to be 2 ¼″ longer than the one above it.
So I started my top dowel at 12″, and cut the next 14 ¼″, then 16 ½″, and finally 18 ¾″.
.
If you don’t want to taper yours, you can cut them all the same length. And if you want a different taper than what I did, just lay yours out how you like it and measure your own dowel lengths from your marks.
Step 3: Drill Out Holes For Ladder Rungs
I laid out my dowels between the sides to check that they fit and measured the width at the bottom and the width at the top. Mine ended up being 13″ wide at the top and 24″ wide at the bottom.
If you do some simple math, here, 24″ – 13″ = 11″. So, 11″ divided by 2 is 5 ½″, so that’s how much each side tapers in from the bottom to the top.
.
So I found some scrap blocks that stacked together would be about 5 ½″ tall and rested one end of the 2×2 on it.
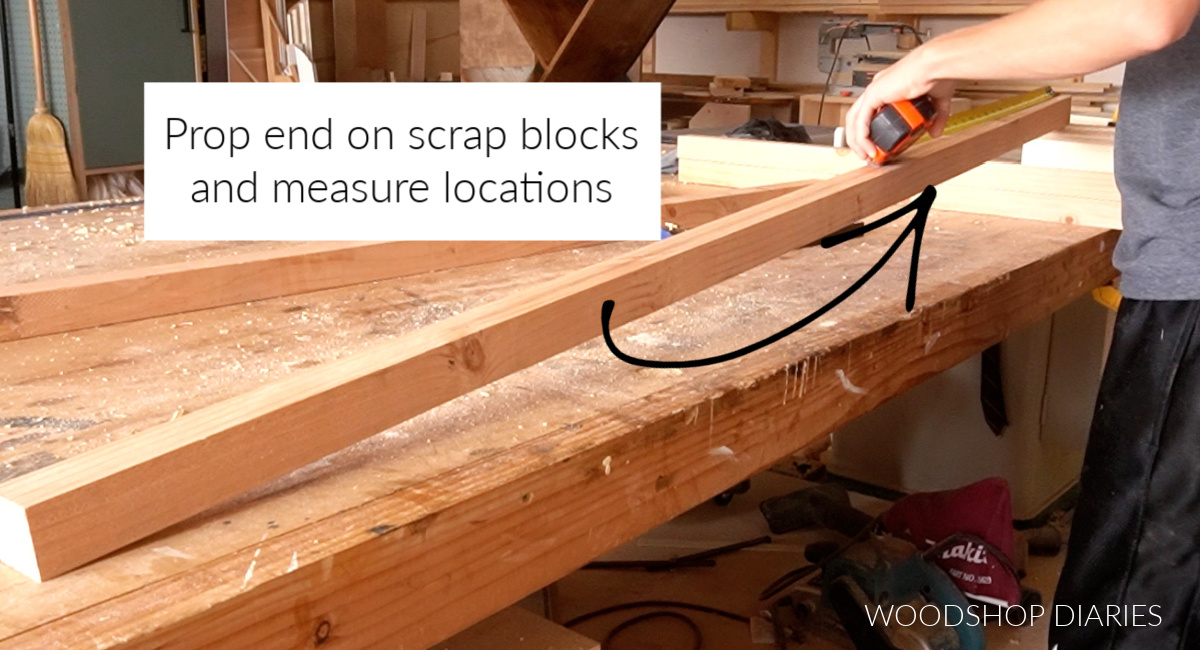
I measured and marked out my dowel locations on the edge here (centered side to side and all 12″ apart), then used a forstener bit to drill out each hole. Use a forstener bit that matches the size dowel you’re using.
.
I only drilled until the cutter head was flush to the top of the board and tried to keep it as straight vertically as I could.
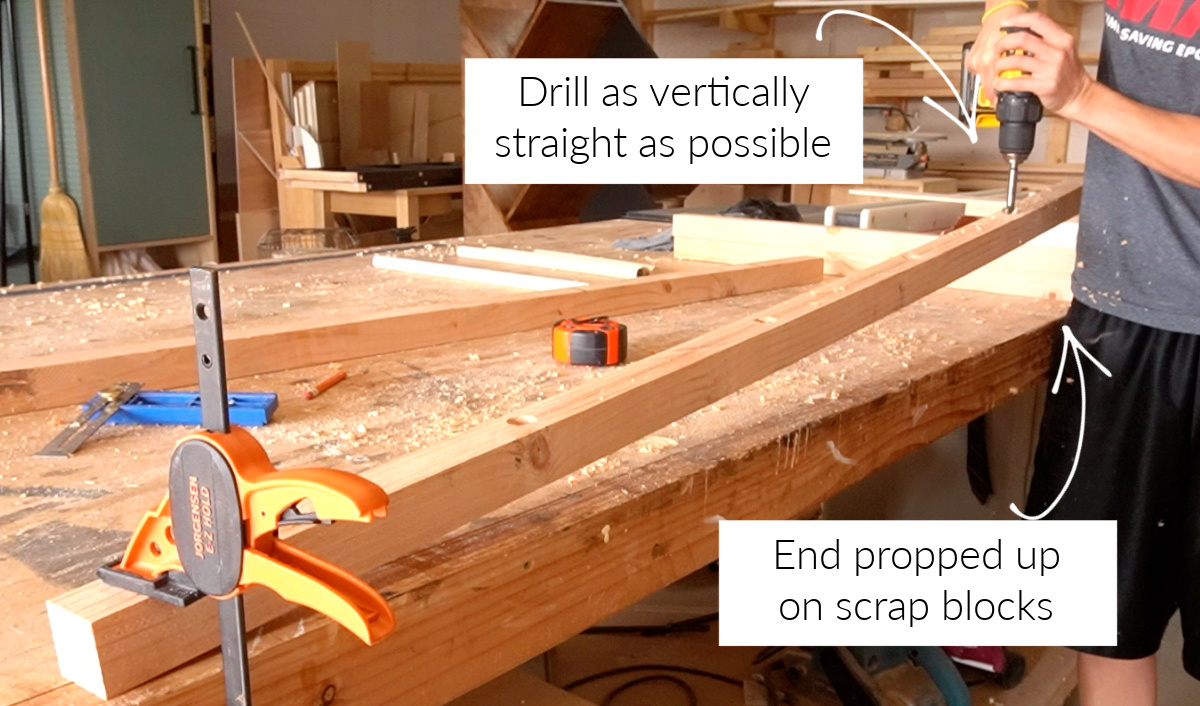
Ideally, you would want to use a drill press for an application like this where you need to drill the hole as straight as possible, but there is enough wiggle room in this project, that it doesn’t have to be perfect.
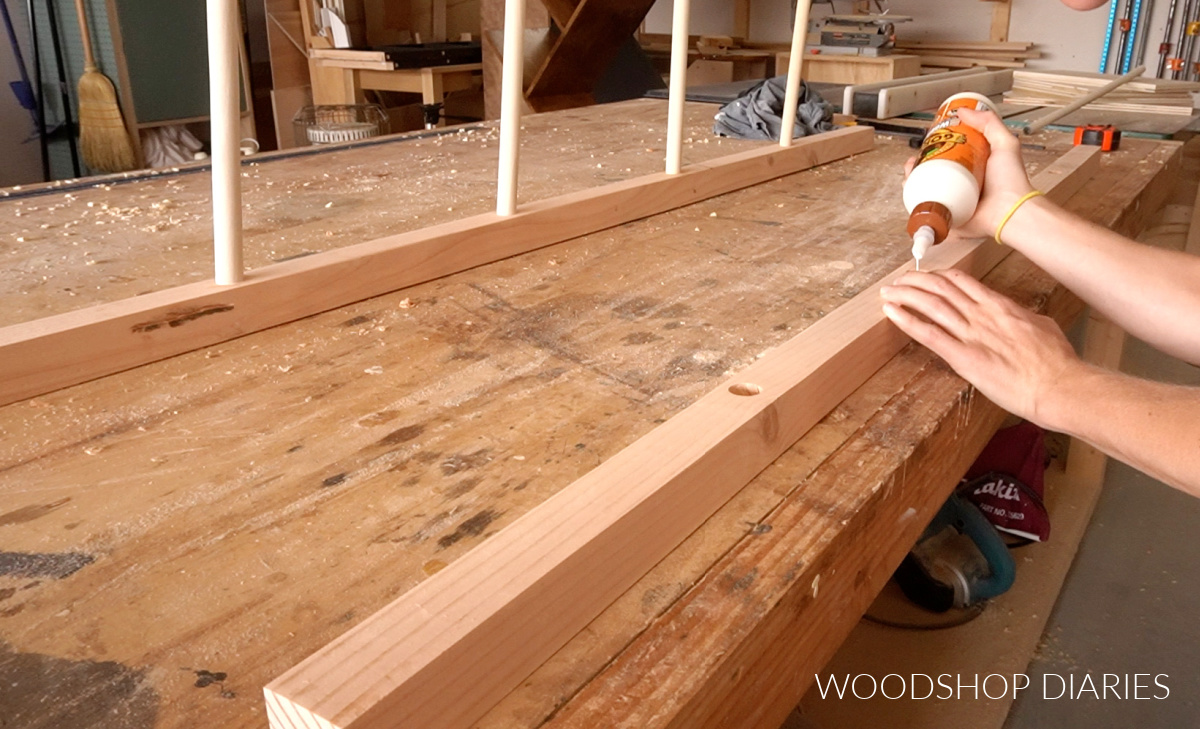
Step 4: Glue DIY Blanket Ladder Together
Now that the pieces were all cut and the holes were drilled, I applied some wood glue into the holes on one side and inserted the dowels.
.
Then, I applied some wood glue into the holes on the other side, and flipped the first side over and inserted the other end of the dowels into their holes.
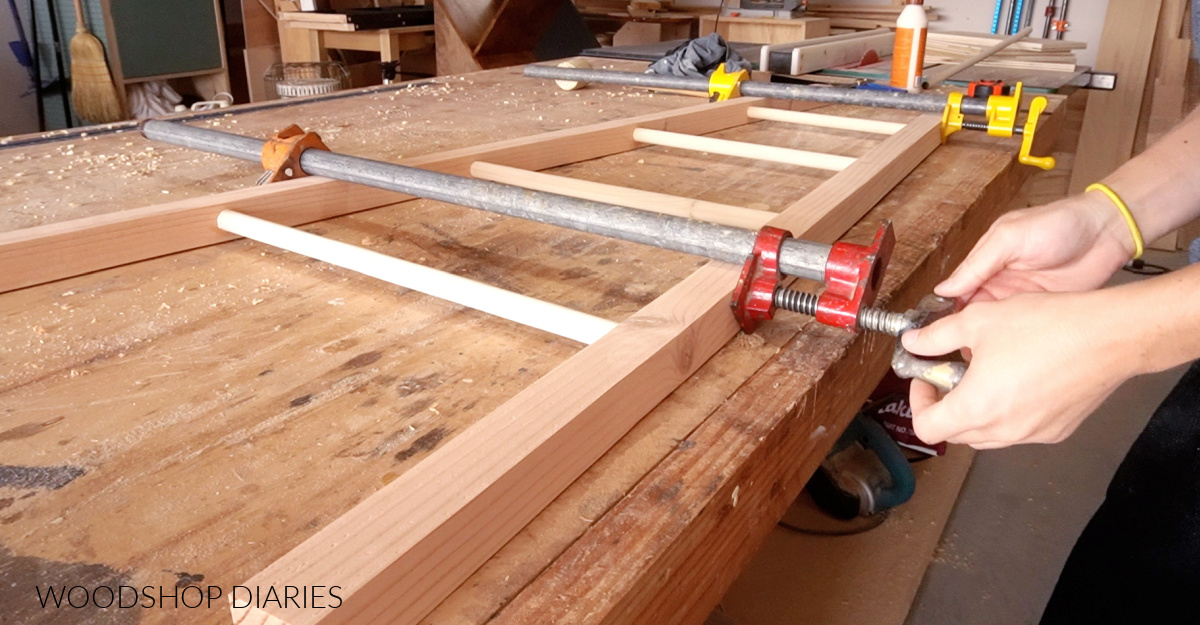
I used some pipe clamps to clamp it snug until the glue dried, but you could also use a ratchet strap, or wrap some painters tape around it to hold it in place until it’s dry.
Step 5: Finish as Desired
I wanted to give this blanket ladder a two tone or “dipped” finish, so once the glue was dry, I wrapped some painters tape along the sides, and covered the top section well.
.
Then, I applied some matte black spray paint onto the bottom section below the tape. (PS don’t laugh at my dog and cat food bags to catch my overspray HAHA!)
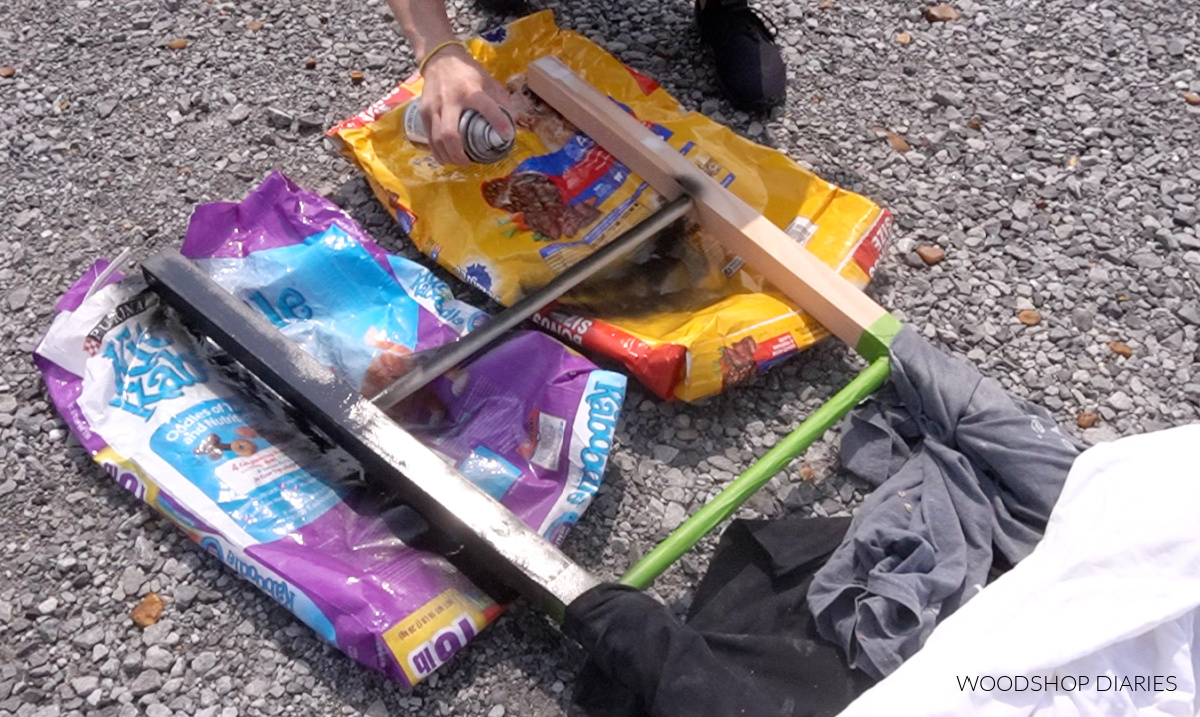
You could use spray paint or simply brush paint this section. Feel free to get creative with your own colors and design!
.
Once it was dry, I gave the entire ladder a clear coat (I used Minwax Polycrylic) and it was ready to use!
.
I love how simple and quick this project was and how easy it is to customize.
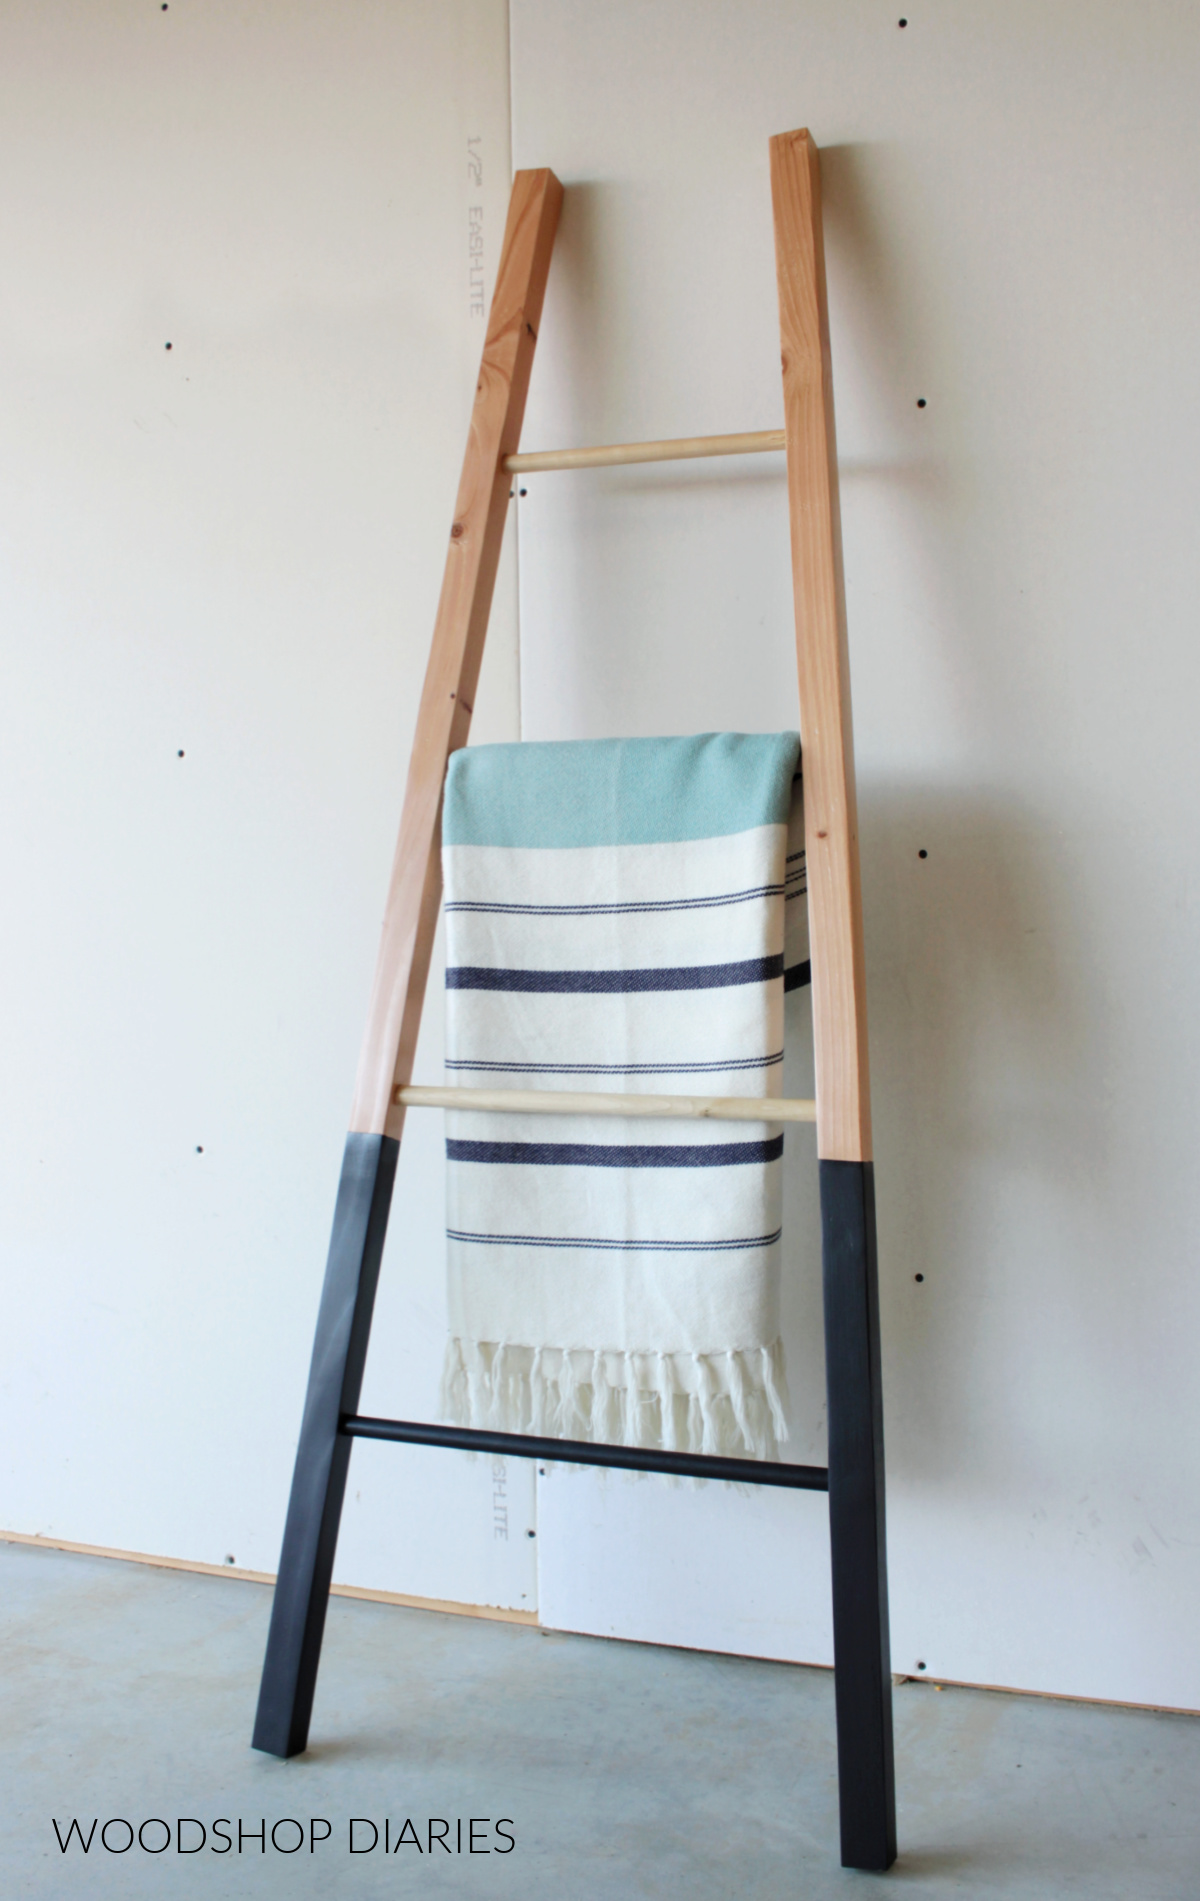
I also love how simple, yet unique it is and how it fits in with my modern style!
.
I hope you enjoyed this fun little scrap wood blanket ladder project as much as I did and if you can’t wait to see what projects are next, join the newsletter below to stay up to date on all the latest tips, tricks, and projects on Woodshop Diaries!
And if you want to save this project for later, don’t forget to pin it or share it on your favorite social channel!
Until next time, friends, happy building!