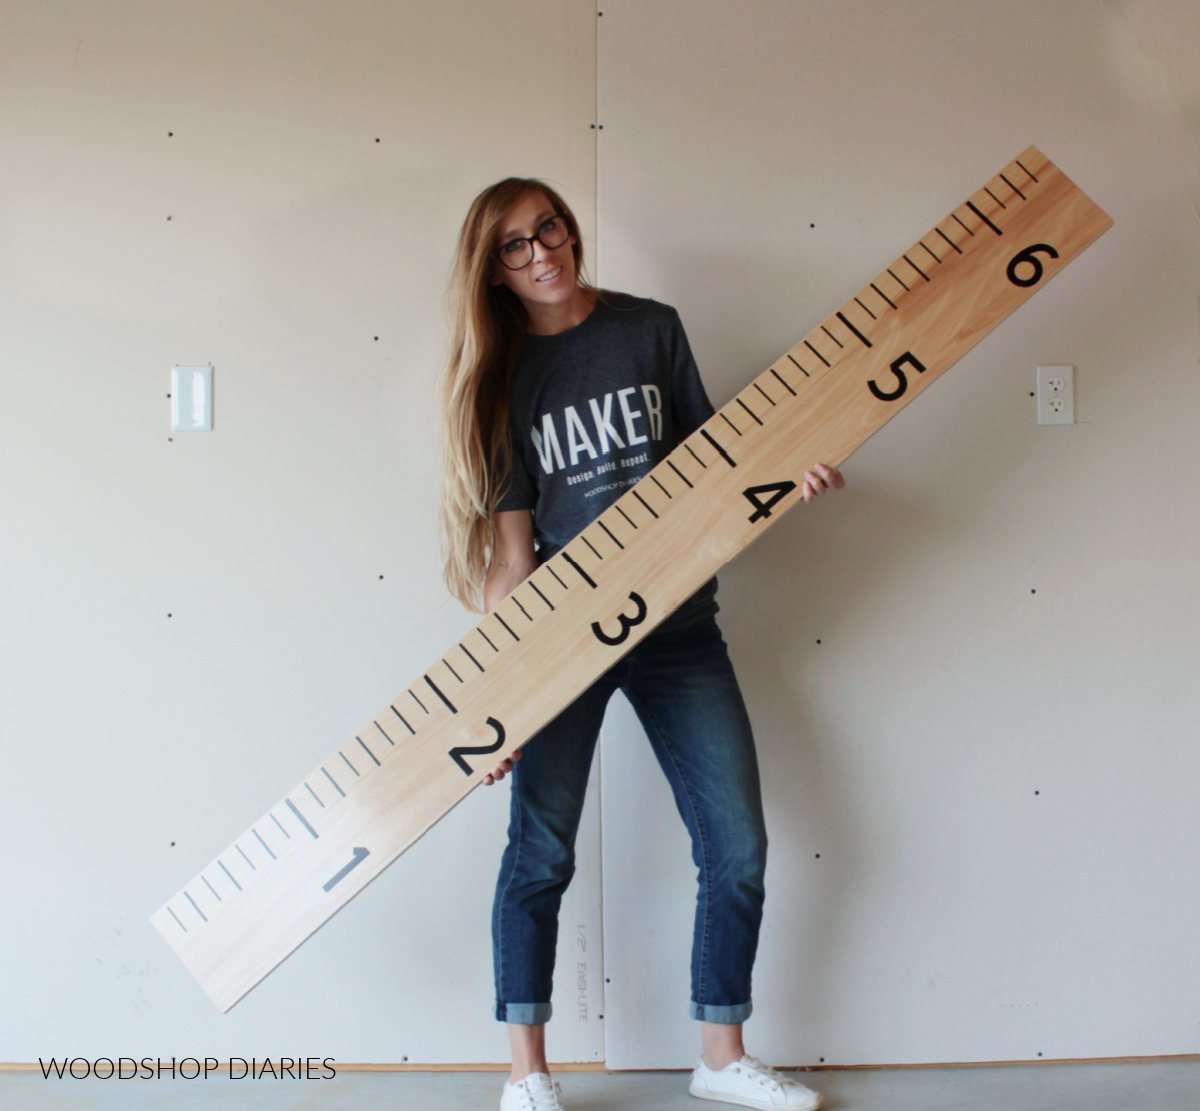
Have you seen those adorable life size ruler boards?? In this post, I’ll show you how easy it is to make your own from a single board of any size!
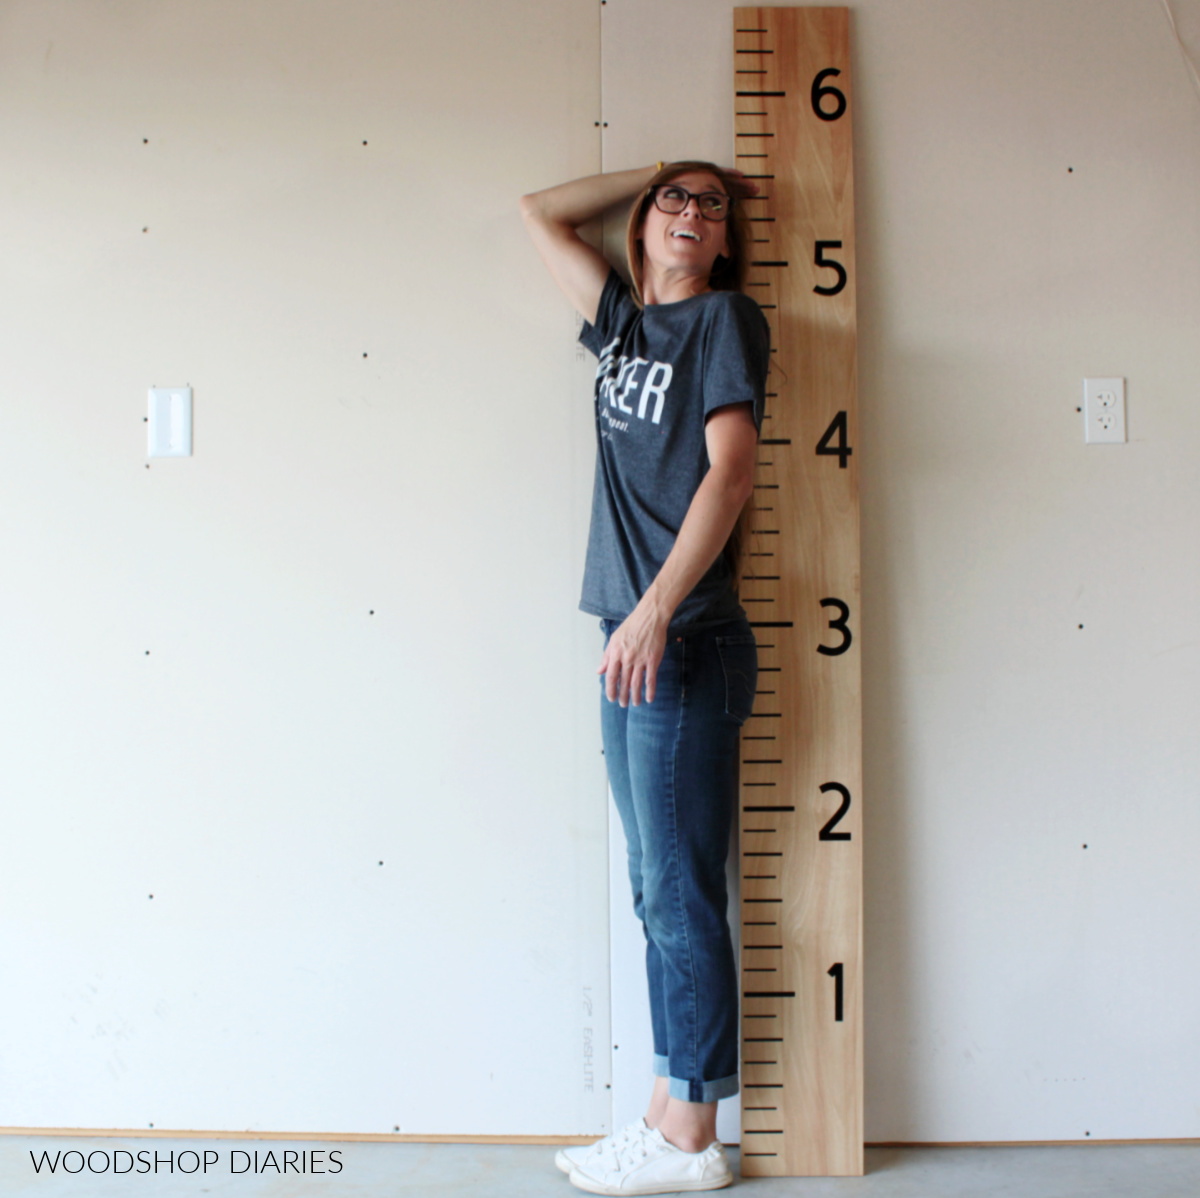
These big wooden rulers are great to use as growth chart boards in kid’s rooms.
.
But I think they would also be cute in a home gym, really useful in a workshop or garage, or great for some whimsical décor in any room of the home.
.
This is the perfect one board project, makes an excellent gift idea, and can easily be completed in a weekend.
.
I’m sharing a video sharing 3 fun and easy scrap wood projects (including this life size ruler tutorial!) in this video and I’ll share the step by step tutorial below.
Check out the other two project tutorials here:
This post contains affiliate links. See website policies.
Tools & Materials:
Tools:
- Saw to cut board to length
- Cricut Joy (or other vinyl cutting machine)
- OR, you can free hand cut your own stencil if you don’t have a cutting machine
- Scissors
- Tape measure
- Cricut Starter Tool Kit (optional, but helpful)
Materials:
- (1) board
- You can use 1×4, 1×6, 1×8, etc. or a scrap strip of ¾″ plywood however long you want your ruler to be
- Vinyl for cutting stencil (I used Cricut Smart Vinyl with my Cricut Joy Machine)
- Transfer tape (to transfer the vinyl to the board)
- Painters Tape
- Spray paint
- Poly or clear coat to seal the wood
Some Notes About this Life Size Ruler Project:
Ruler Size
For this project, all you need is a single board…it can be scrap plywood a 1×6, 1×8, whatever.
.
I used a strip of ¾” plywood that was about 7” wide. You can make this however tall you want, but I made mine about 78” or 6 ½ feet long.
Paint vs. Vinyl
I used a Cricut Joy machine to cut a vinyl stencil, removed the line marks and numbers, and transferred this “blank” to the board so that I could paint these on.
.
However, if you want to, you can do the opposite and remove everything from the vinyl stencil EXCEPT the lines and numbers and actually just stick these vinyl pieces on instead of painting.
.
My concern with using the actual vinyl stickers was that with excessive handling, over time, they might peel off. I felt that paint may be a little “longer lasting.” But honestly, either method would probably be fine for this.
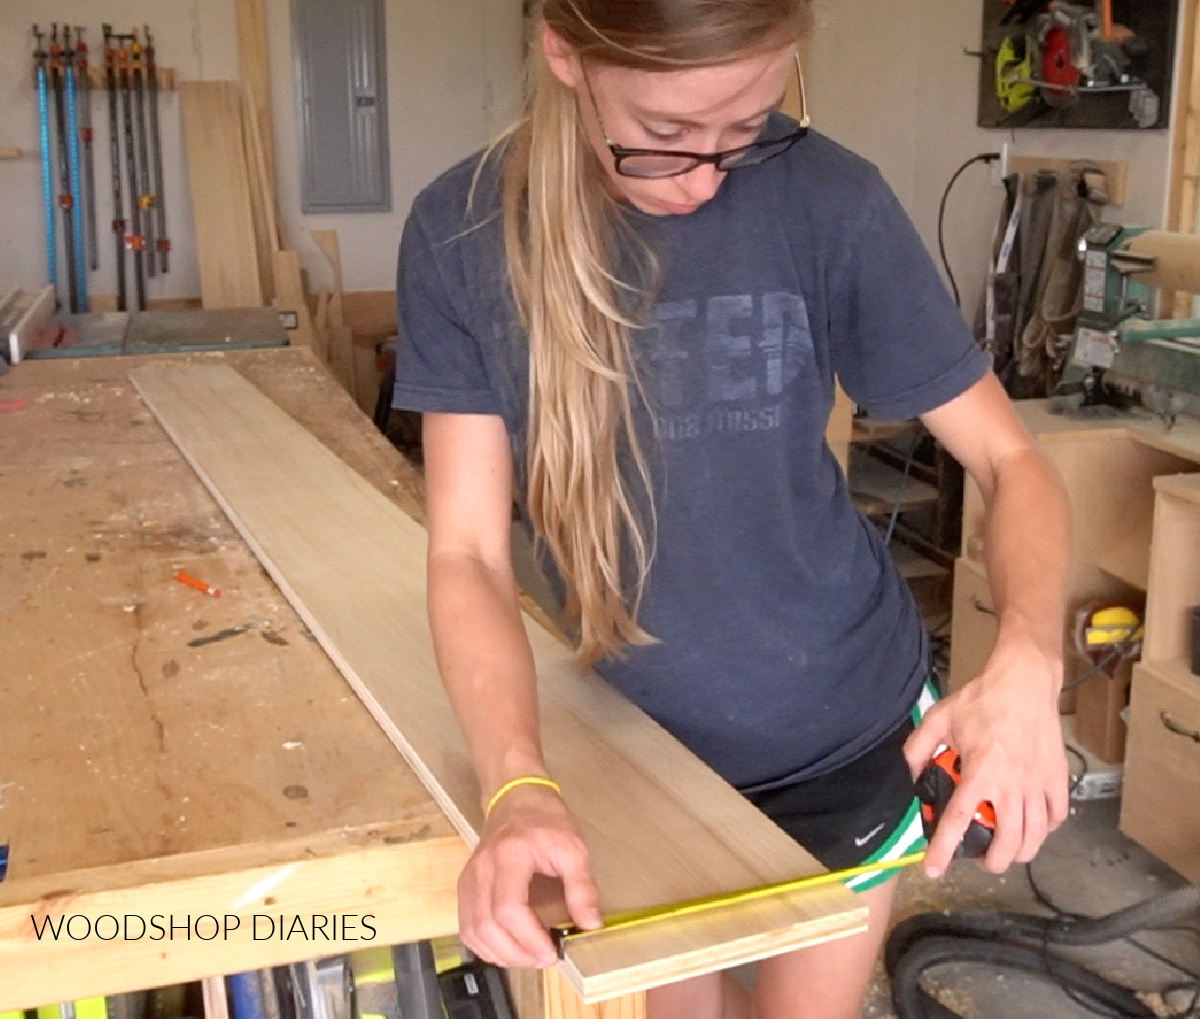
Step 1: Cut Ruler Board to Length
First, I cut my board to the length I wanted my ruler to be. You can make yours any size you want, but I chose to make mine about 78″ long (which is 6 ½ feet).
.
I cut this with a miter saw, but any saw that can cut wood would work fine for this.
.
Because I was using ¾″ plywood, I edge banded the sides, but if you’re using a solid board or you don’t mind seeing the edges, this step is totally optional.
RELATED: How to apply edge banding to plywood
Step 2: Pre-Finish the Giant Ruler Board
For the ruler marks, I was going to use a stencil and paint them on. So, to prep the wood, I gave it a few coats of poly beforehand.
.
I could have waited and polyed after the fact, but I thought sealing it before would help prevent bleed through and allow for a more even paint job.
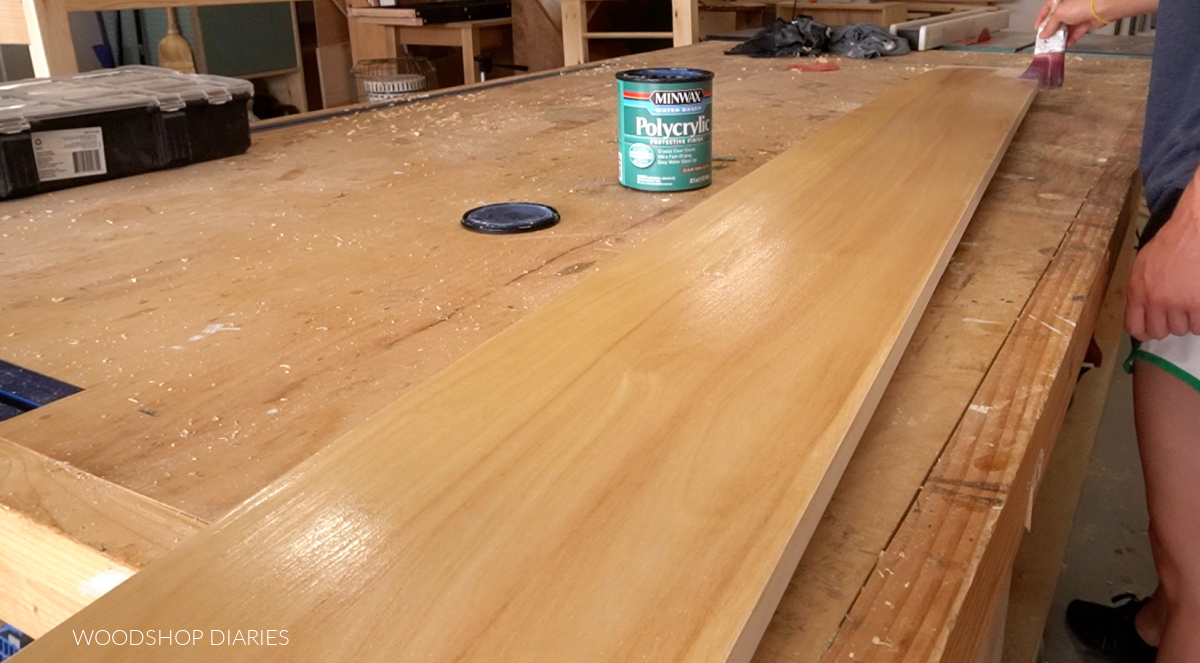
If you want to stain or paint the board, it’s best to go ahead and do that before painting/applying vinyl.
.
Allow finish to cure at least 24 hours before applying a sticky vinyl to it.
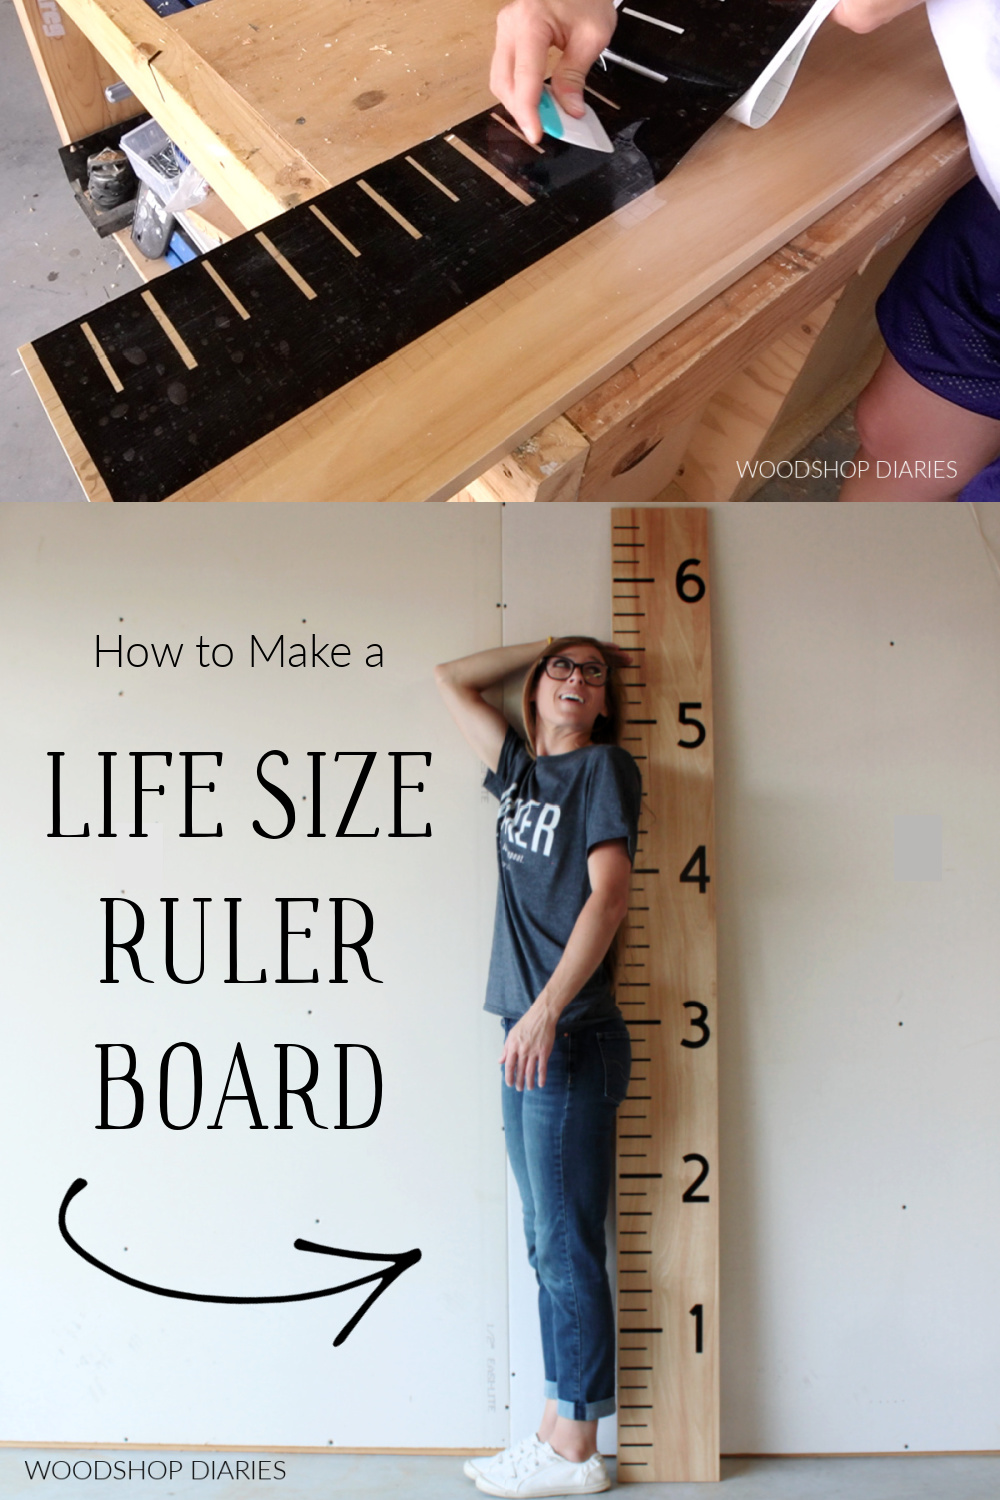
Step 3: Cut and Apply Life Size Ruler Stencil
For the stencil, there are a ton of options. You can cut out your own stencils from paper or vinyl, purchase premade stencils, or, if you’re good at freehand, you can simply hand paint the lines and numbers.
.
I’m not good with any of the above, so for this, I used my Cricut Joy machine to cut a vinyl stencil.
.
The Cricut Design Space software allowed me to perfectly space all the lines with the ruler on the sides so they’re accurate.
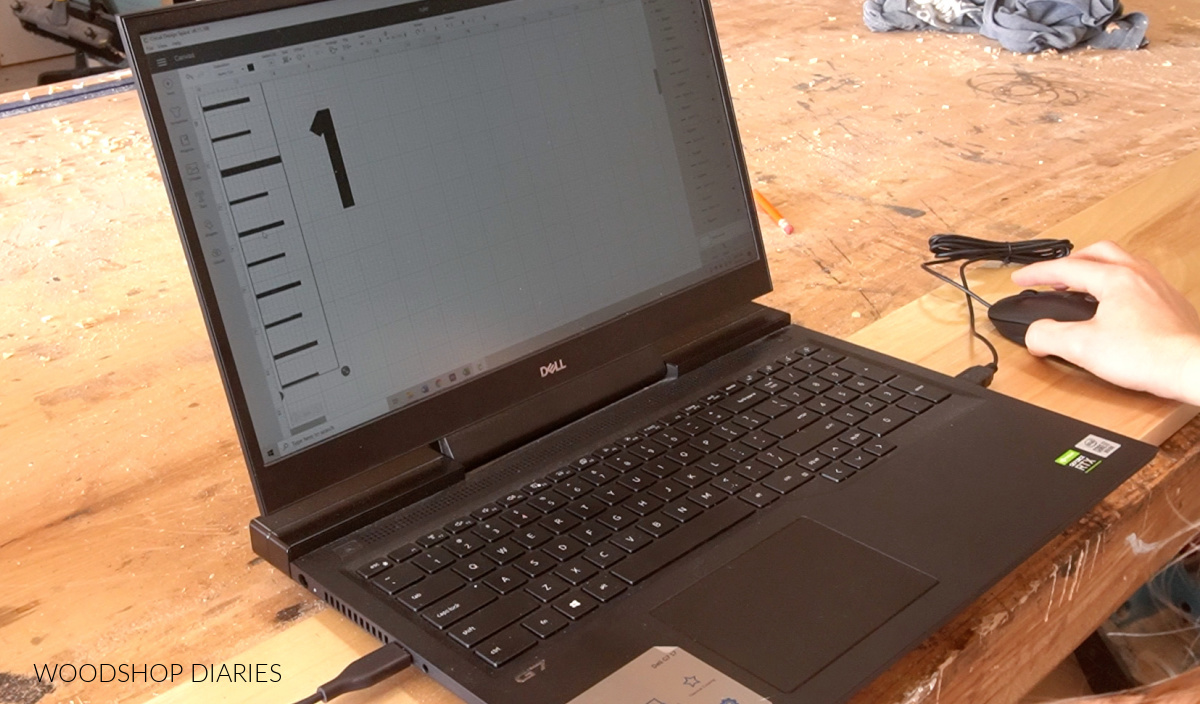
NOTE: I simply made rectangles here for these ruler marks–a larger one for the foot markers, slightly smaller ones for the ¼ foot markers, and slightly smaller for the ⅛ foot markers.
.
You can size these however you think looks best to fit the size board you are working with.
.
The large marks should be centered every 12″. The medium sized marks should be centered every 3″ between them. And the small marks should be centered every 1 ½″ between those.
.
My ruler was 6 ½ foot long, but the Cricut Joy would only cut a design up to 48” long. So I simply cut out two of them.
.
The Cricut Joy is designed to cut small things, so my design with the numbers was too wide to fit on one cut, so I actually cut my marks out first, then cut my numbers out separately and pieced them together on the board. This is so easy, so don’t panic!
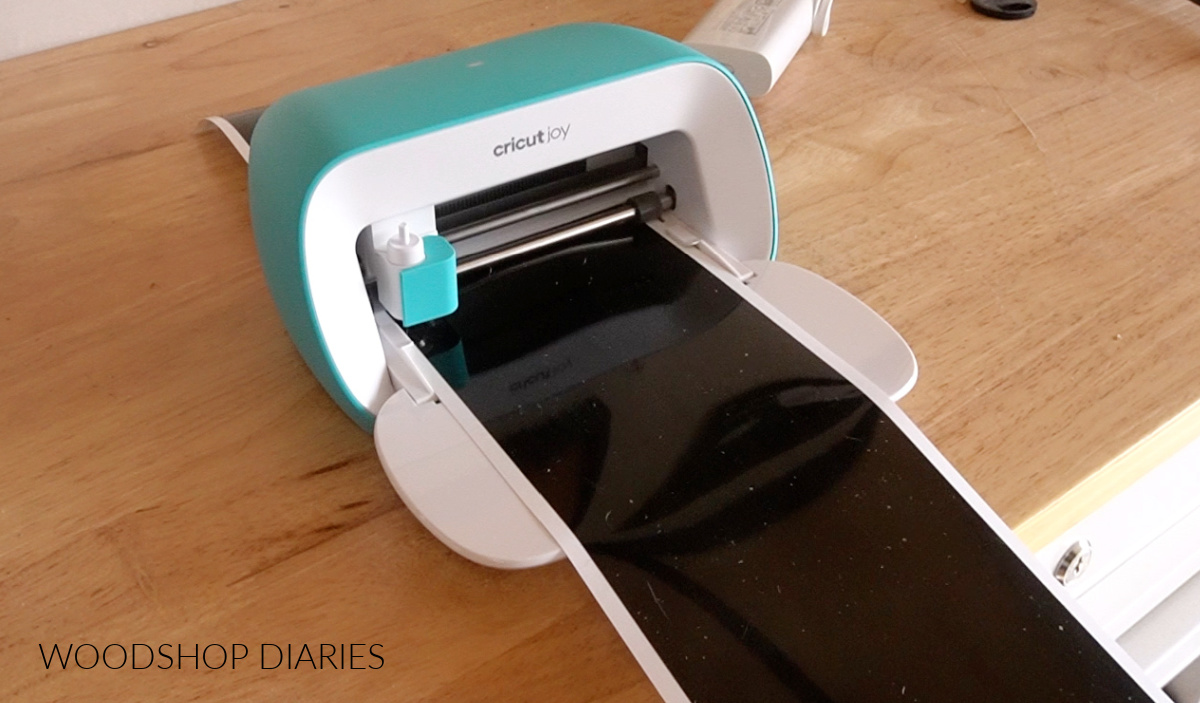
I used black Cricut Smart Vinyl because that’s what I had plenty of. Since I was going to be painting, I didn’t care what color I used for this.
.
However, if you decide to use the vinyl sticker for your marks instead of painting, you’d want to use whatever color vinyl you want your lines and numbers to be.
.
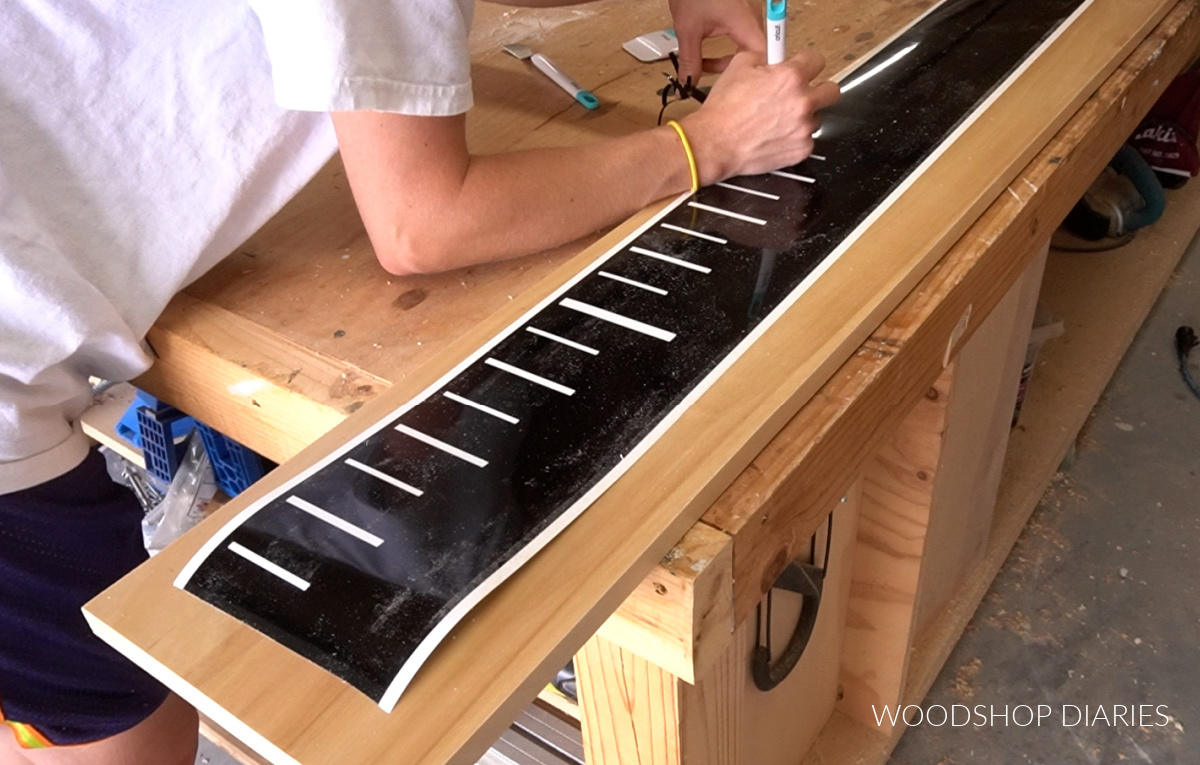
Once it was printed, I cut my two 48″ long sections apart (remember I had to print 2 of these??), then, I removed the marks with a picker tool.
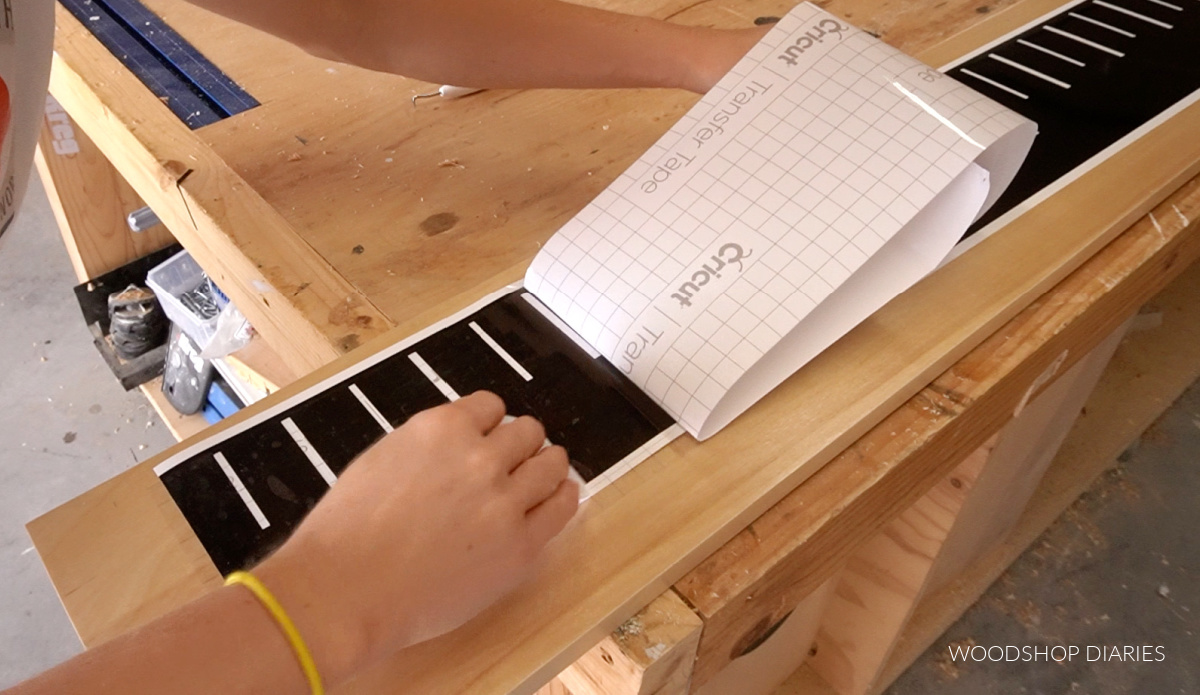
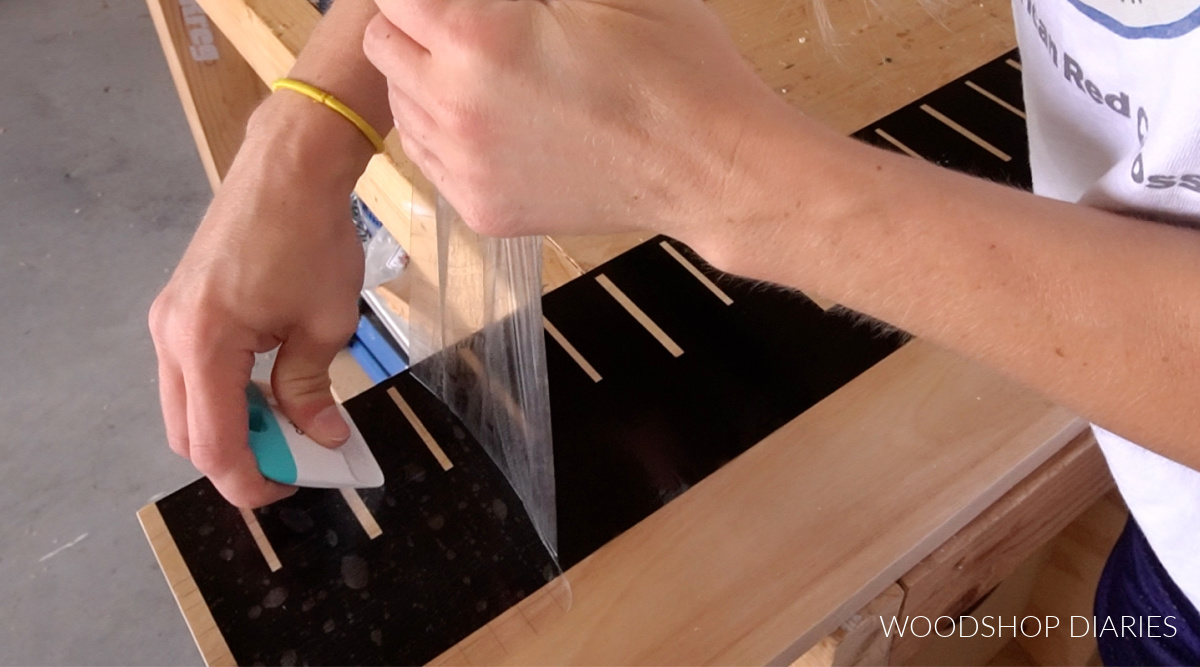
Once the parts I wanted to paint were removed, I used some transfer tape over the top of the vinyl to allow me to transfer the vinyl to the board.
.
Transfer tape is basically just a clear tape that goes over the top of the vinyl to keep everything in place as you remove the back and stick it onto the board.
With the transfer tape applied, I peeled the backer off the vinyl on the bottom and positioned it on the board so that the first line was 1 ½” from the bottom.
.
All of these lines are spaced 1 ½” on center.
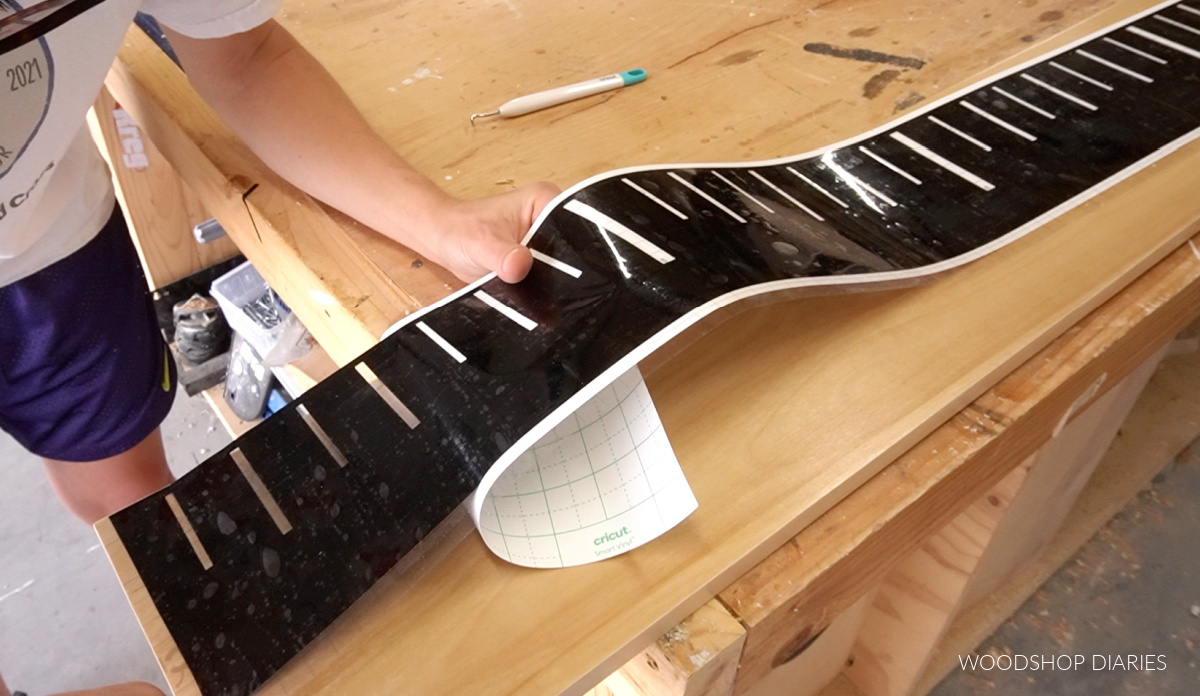
Then I continued pulling the backer off in small sections and smoothed it out on the board.
.
When I got to the end of the first 48” piece, I repeated with the second making sure to keep the marks spaced 1 ½″ apart on center.
.
Then, I simply removed the transfer tape from the top.
I cut and applied the numbers the same way and used painters tape to cover over any exposed wood that I didn’t want to get paint on.
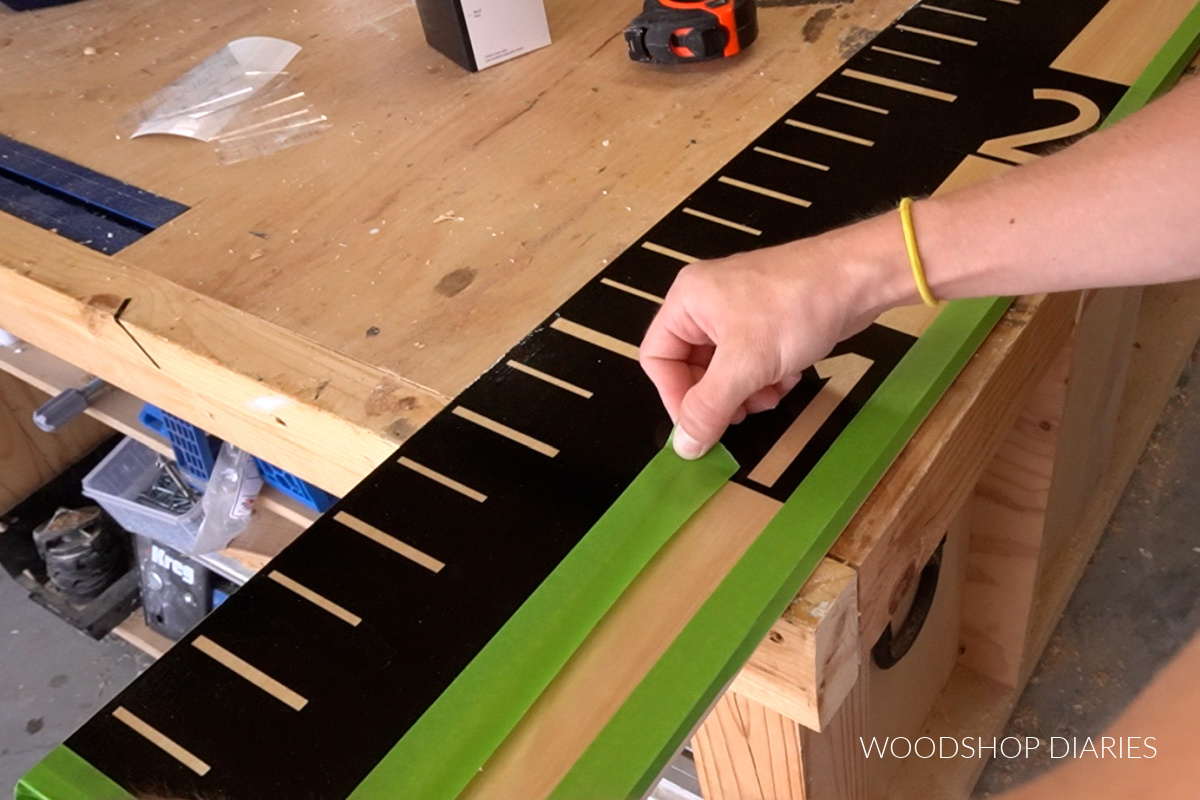
Of course, you could have skipped the paint and done this opposite from how I did it by transferring the lines and the numbers to the board instead.
Step 4: Paint Giant Ruler Board Marks
I took it to the yard and gave it a good coat of matte black spray paint and let it dry well.
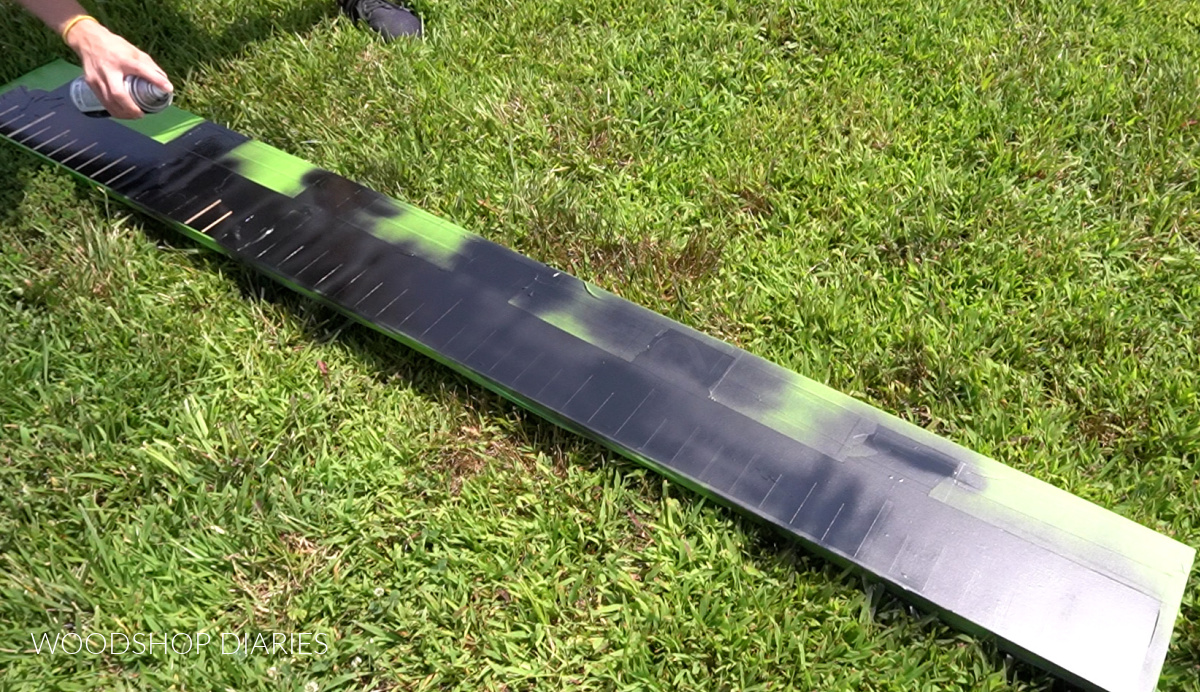
You could brush paint this as well, but spray paint is quick and gives great results.
.
Once the paint was good and dry, I removed the stencil and it was complete!
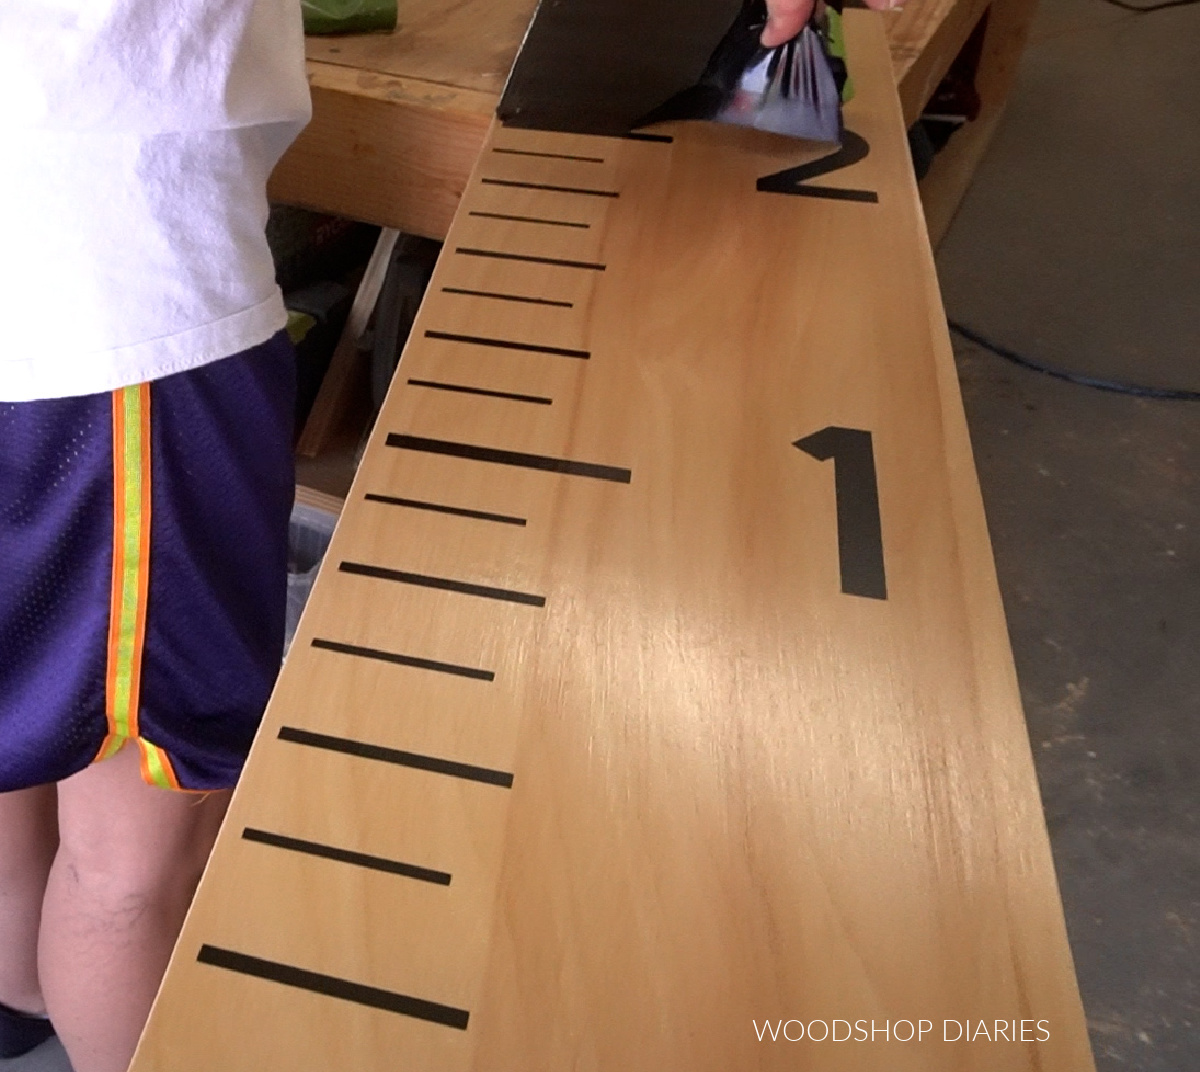
Now, at this point, you can definitely apply a clear coat protectant on top if you’d like…that’s optional. Either a brush on poly or a spray poly would be fine.
.
And now you have a life size wooden ruler to use as a growth chart, a huge measuring tape, gym décor, whatever 🙂
SIDE NOTE: Do you like this new MAKER shirt?? Grab your own here!
I hope you enjoyed this easy and fun one board project! This post is in no way sponsored by Cricut, but if you are looking for a fun, new tool to add to your shop, a vinyl cutting machine is a great option to make customizations and professional looking signs and décor.
.
I’ve gotten way more use out of this machine than I ever expected in the short time I’ve owned it. The Cricut Joy is a relatively inexpensive option compared to many other cutters and is SUPER quick to set up and get started cutting…simply plug in, design, and cut.
.
For more Cricut Projects, check these out!

DIY Plant Ladder with Tags 
DIY Custom Wooden Sign

Anyway, this was such an easy project and I hope you enjoyed it! If you’d like to keep up with all the latest tips, videos, and DIY projects on Woodshop Diaries, be sure to subscribe to my newsletter to be the first to know about new posts!
And if you’d like to save this for later or share with a friend, don’t forget to pin it or share to your favorite social channel!
Until next time, friends, happy building! 🙂