In this post, I’m sharing how to turn a closet into built in shelves!
We are remodeling our basic builder grade bathroom into a unique, custom, modern space and part of that remodel involved ditching our tiny linen closet for something a little more eye catching!
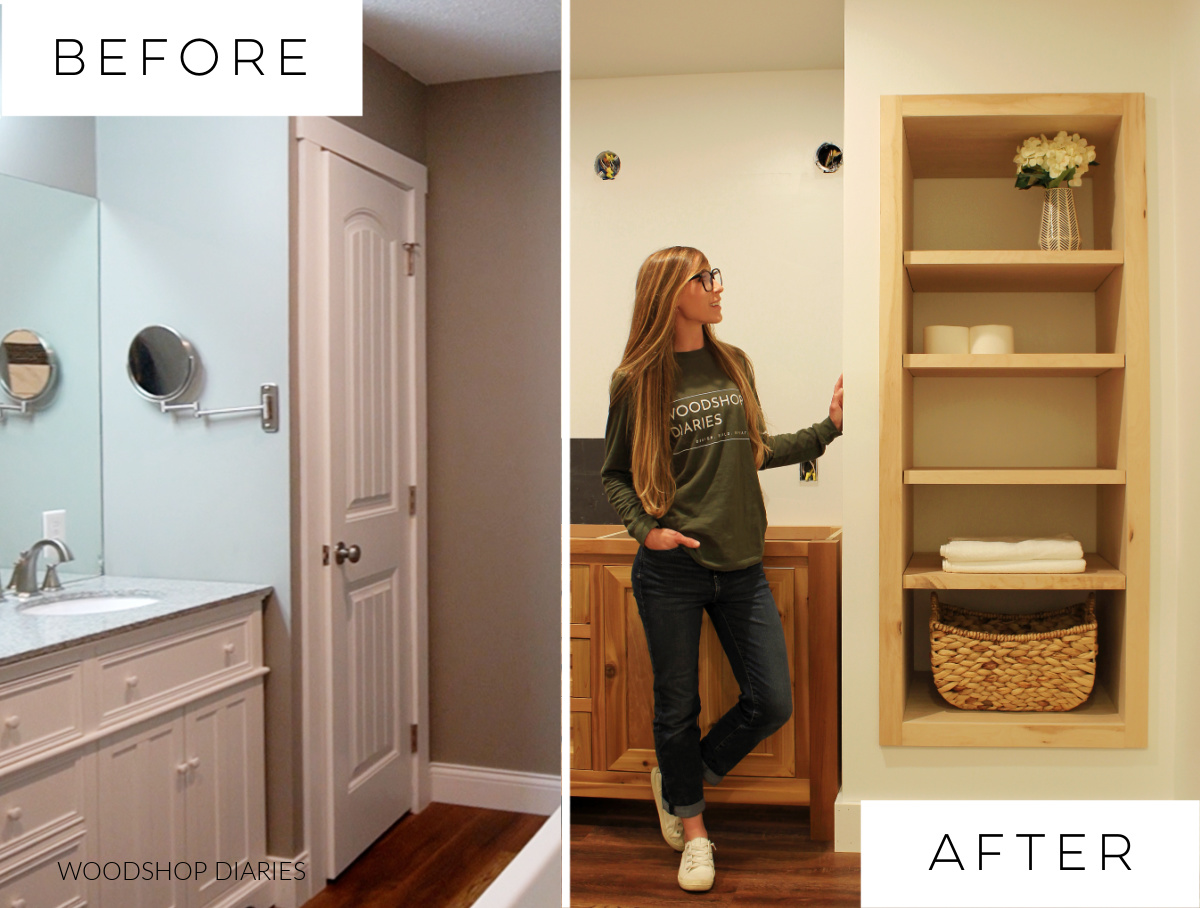
Originally, I wanted to completely remove this closet altogether, but since the ceiling was textured, removing the walls would involve trying to patch and match the ceiling texture and, honestly, it was just more hassle than it was worth.
.
So instead of removing it, I decided to just rework the existing structure into something more visually appealing with built in open shelves.
.
Now, granted, it’s not always feasible to turn a closet into open shelves because sometimes you just need somewhere behind closed doors to hide the “not so pretty things.”
.
But in this case, we had plenty of storage elsewhere so this particular closet wasn’t a necessity.
.
So if you’re looking for a simple way to turn one of your closets into built in shelves, I’ve got you covered with all the details in this post 🙂
.
Check out the full project video here and the step by step written tutorial below.
**This post contains affiliate links. See website policies.
Tools & Materials:
Tools:
- Circular saw
- Cutting Guides (optional)
- Miter saw (optional)
- Pocket hole jig
- Drill/Driver
- Shelf Pin Jig (optional)
- Drywall finishing tools (to patch drywall if needed)
- Nail Gun (to attach/replace baseboard)
Materials:
- ¾″ plywood
- 2×4 scrap (roughly the length of your closet width)
- Small piece of drywall for patching
- ¾″ Iron on edge banding & 1 ½″ iron on edge banding (optional)
- Shelf Pins
- 1 ¼″ pocket hole screws
- 2 ½″ wood screws
- Drywall Screws
- Drywall tape/spackling for patching
- Wood finish as desired
Some notes about the project:
It’s impossible to figure up how much material you need as every closet built in every house can come in every size imaginable.
.
I used two sheets for mine just to give you a rough idea. My closet was roughly 24″ deep, and the opening for the shelves was about 27″ wide and 68″ tall.
.
Yours will very likely vary, so you’ll have to figure your own materials based on your sizing.
.
This design is definitely not an efficient use of space. It is intended to look nice, not provide the most storage possible.
.
You’ll notice that this design basically covers up a large section of the bottom of the closet. We didn’t need that space, so that was fine with me.
.
But, if you prefer to keep as much storage space as possible, you can definitely skip covering up this bottom section and run your cubby shelf box all the way to the floor.
.
OR, you can cover it up like I did here, but build in an access in the bottom of the cubby box and use this space below as “hidden storage.”
.
Feel free to get creative 🙂
Step 1: Remove the Existing Closet Door and Trim
I removed everything from the closet first—most of which could be thrown away anyway haha.
.
I removed the shelves and the shelf brackets inside.
.
Then, I removed the door, the trim, and the door frame. Basically, I removed everything down the the studs and drywall.
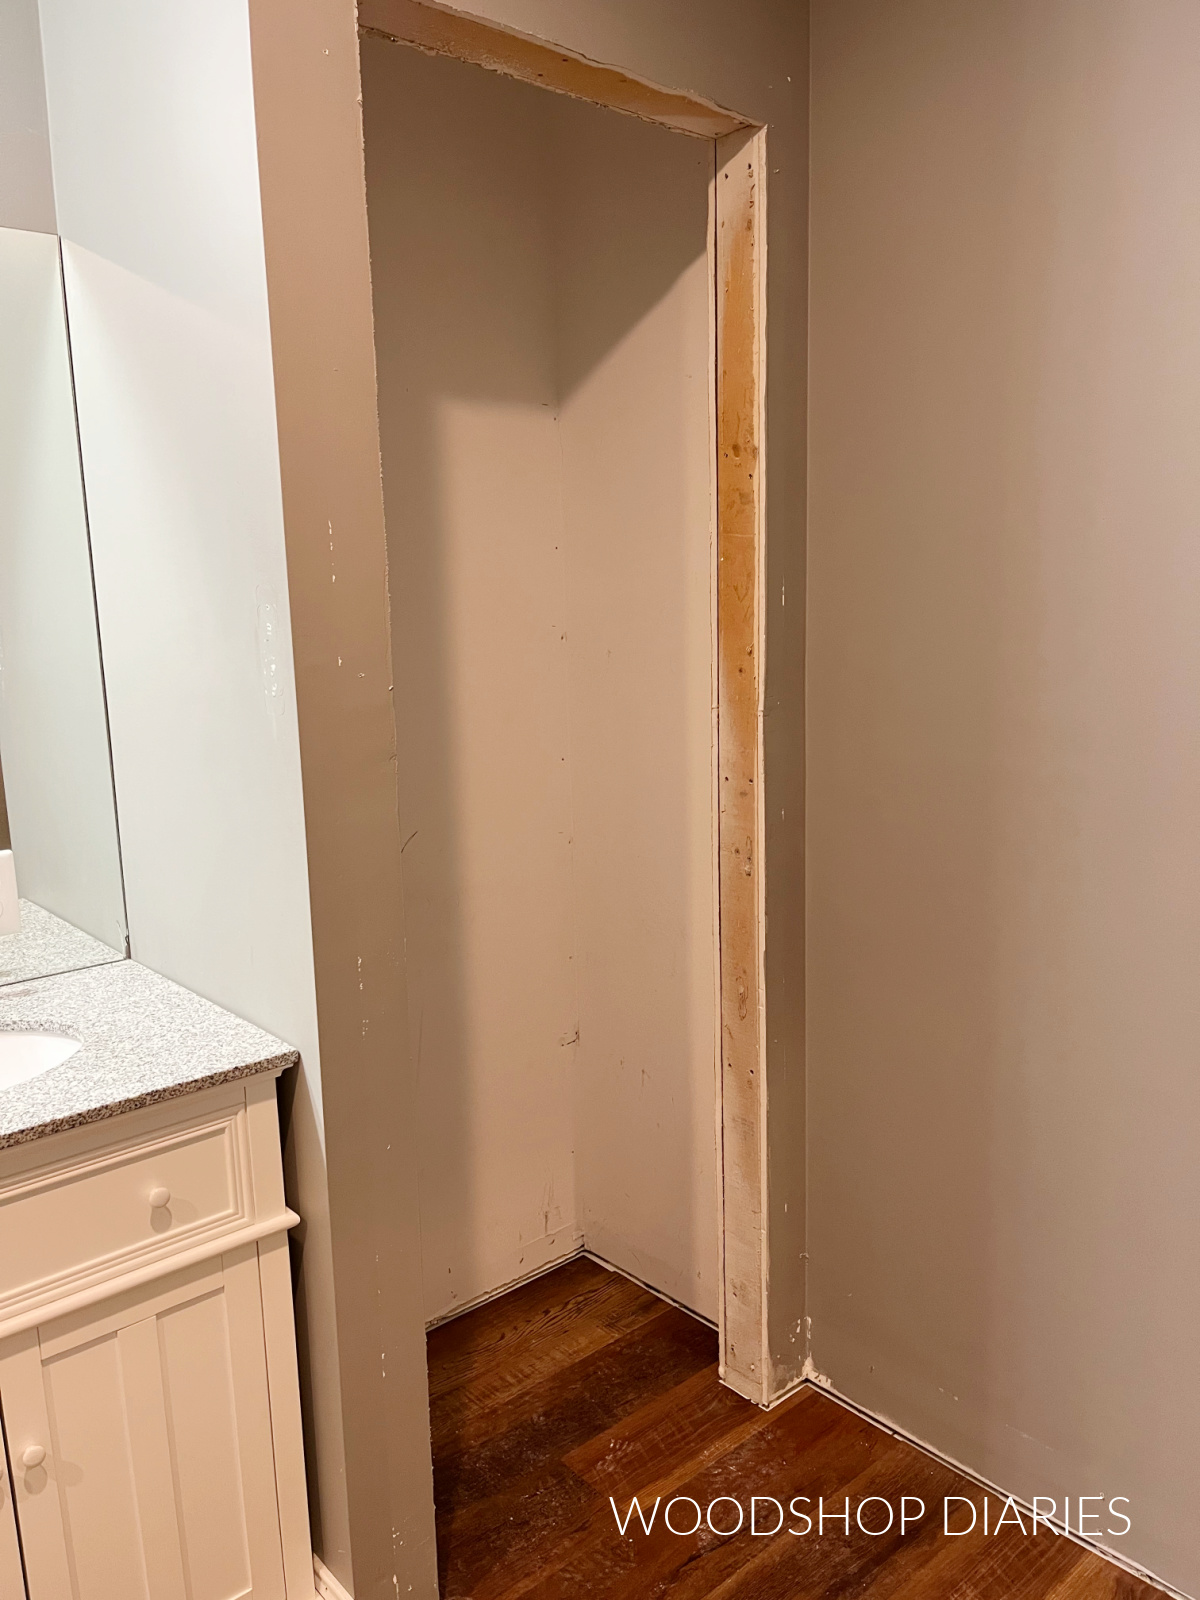
Now that everything was gone, I could start rebuilding it.
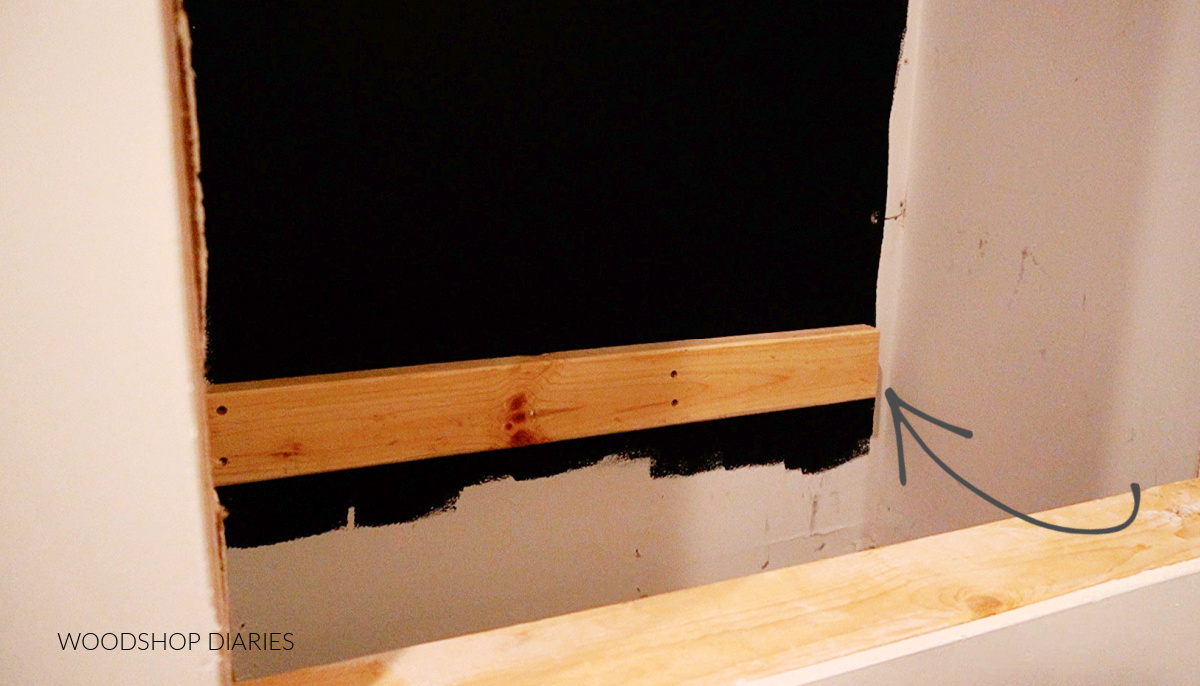
Step 2: Add Bottom Frame and Drywall Patch
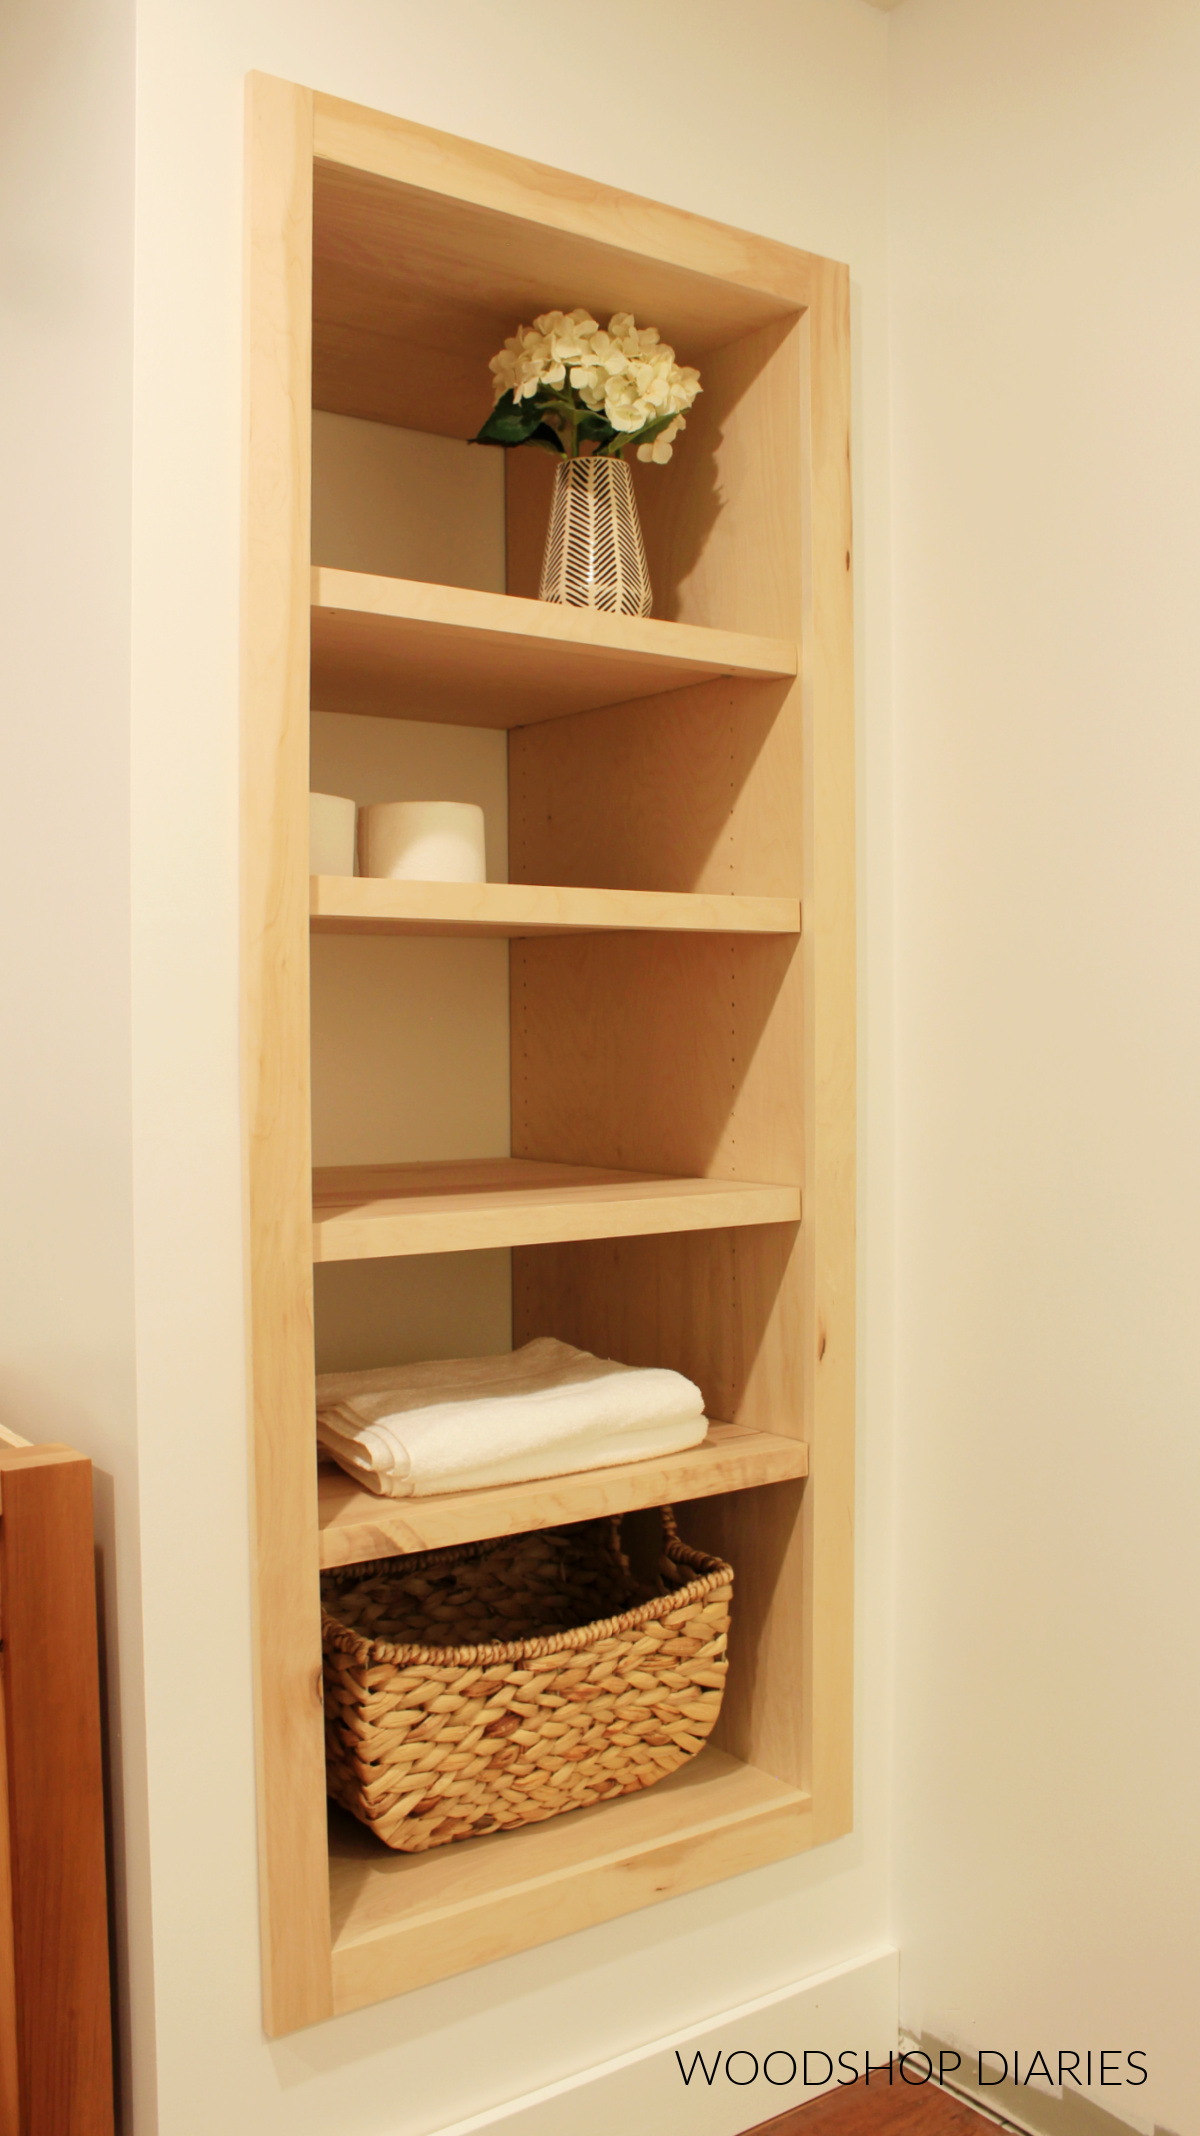
I wanted these open shelves I was making to look like they were a big built in cubby. So, I didn’t want them to go all the way to the floor.
.
And with that, I wanted it to be centered up and down on the wall. So I measured the height of the drywall section above the door and built a simple 2×4 frame this same height to fit into the bottom of the doorway.
.
That way, the drywalled section at the top would be the same size as the one at the bottom, so the cubby would look centered vertically.
.
I secured this frame between the studs where the door frame was at the bottom of the closet.
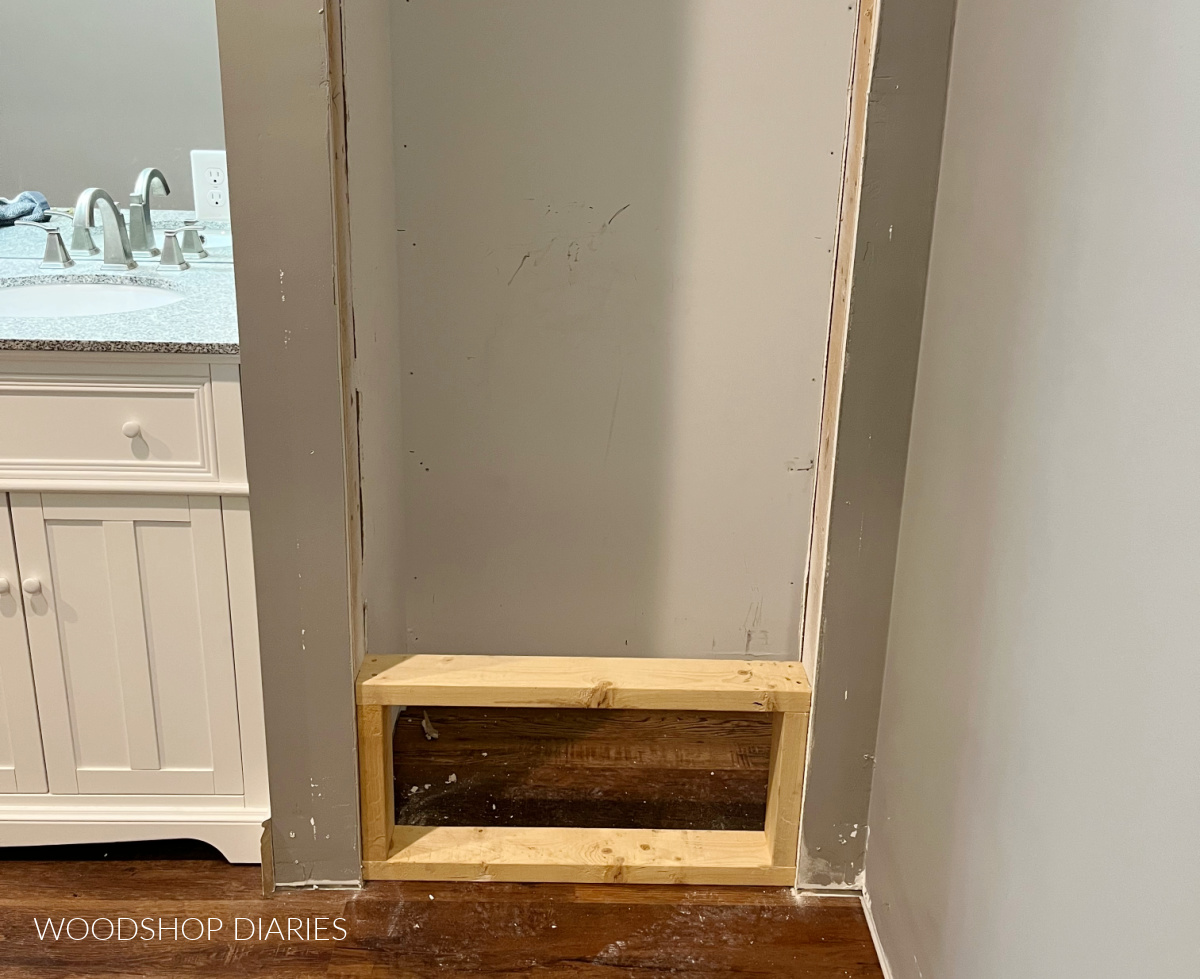
Then, I cut a piece of drywall to cover it and screwed it in place.
.
And you all know what comes after patching drywall—then you have to mud and finish it haha. This was the worst part of the entire project.
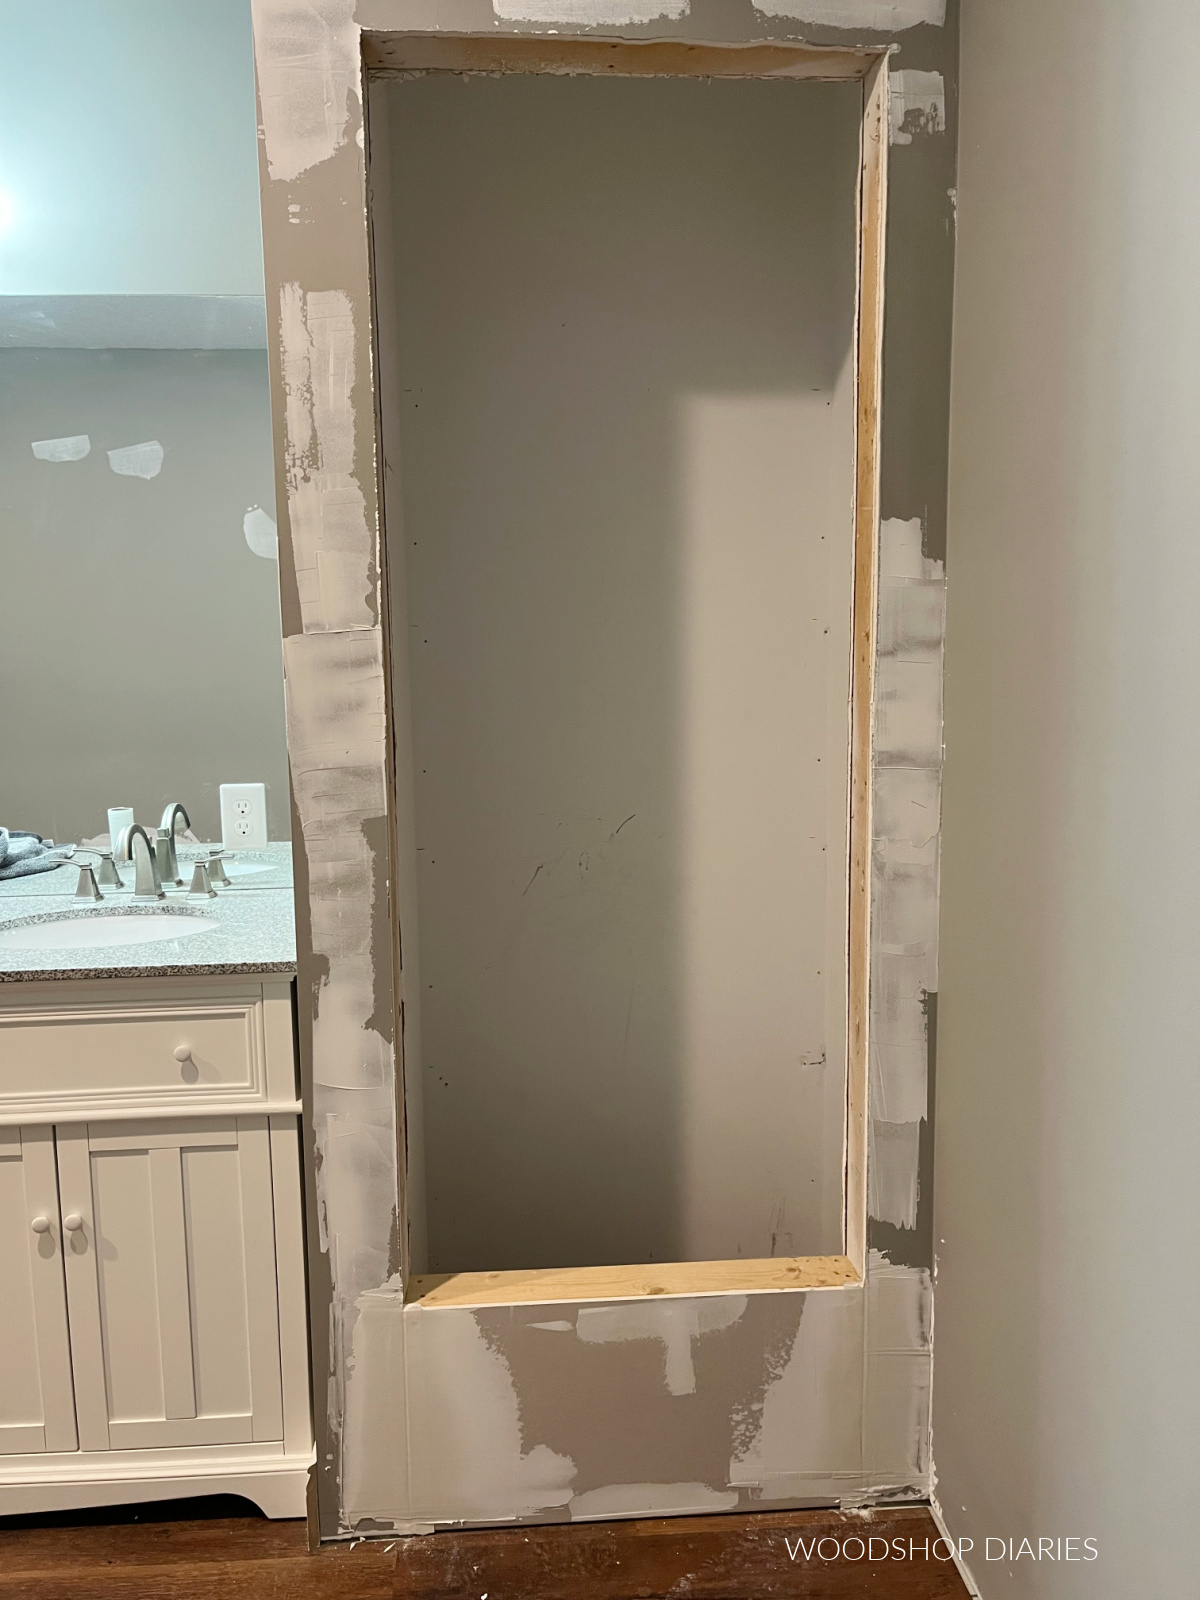
Once the drywall patch was mudded, sanded, and finished smooth (which takes a few coats of mud with a day between them to dry), I painted the walls.
.
In addition to painting the outside walls of the old closet, I also painted the inside back wall black as I thought this would be a cool way to accent it.
.
But you’ll see later that I changed my mind and painted it back to white—I’m a hot mess of indecision ha.
Step 3: Build Open Shelf Cubby Box
My closet was about 24” deep from the back wall to the front edge of the outside drywall. So I was able to rip a sheet of ¾” plywood in half to use to build my big cubby box that I’ll slide into the old closet.
.
Obviously, if your closet is deeper or more shallow, you’d adjust how wide you rip your plywood strips to accommodate.
.
SIDE NOTE: If you wanted to make your cubby shallower than your full closet depth, you certainly can…and you can simply staple a back panel on your cubby instead of butting it all the way to the back wall. Plenty of options here 🙂
.
I cut my plywood down to build the main cubby box where the shelves will go.
RELATED: How to cut plywood sheets with a circular saw
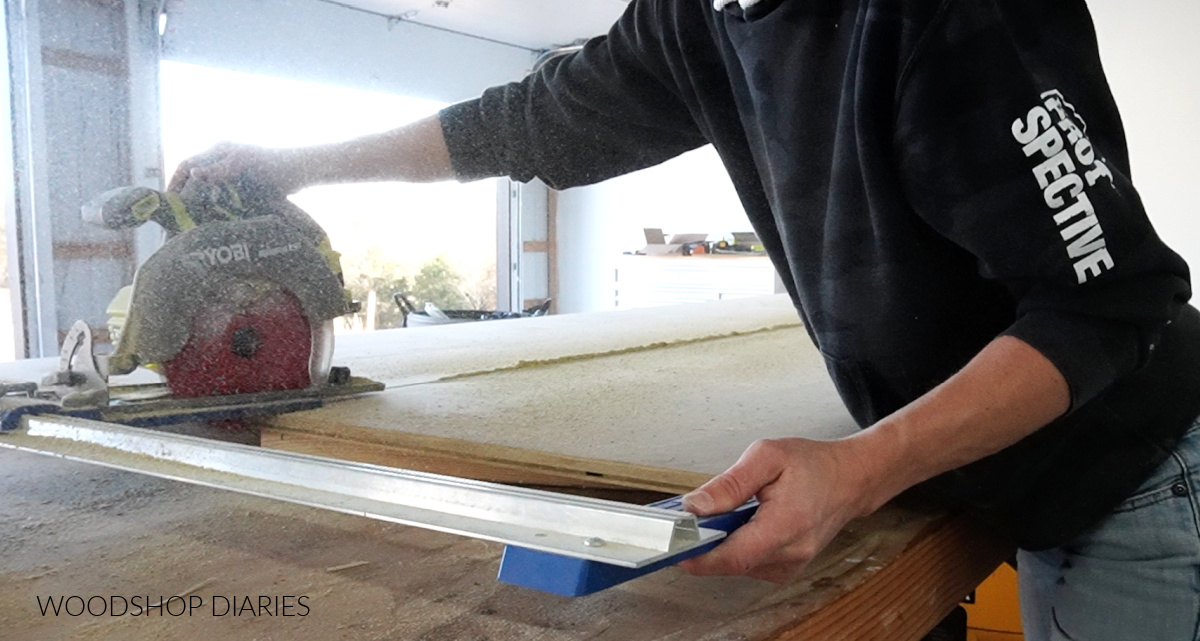
Your closet measurements will surely be different than mine, but the goal here is to cut four pieces to build a simple plywood box that will fit inside the opening in the drywall.
.
I made my box 1″ shorter and 1 ½″ narrower than the overall opening to allow for plenty of wiggle room to slide it in place.
.
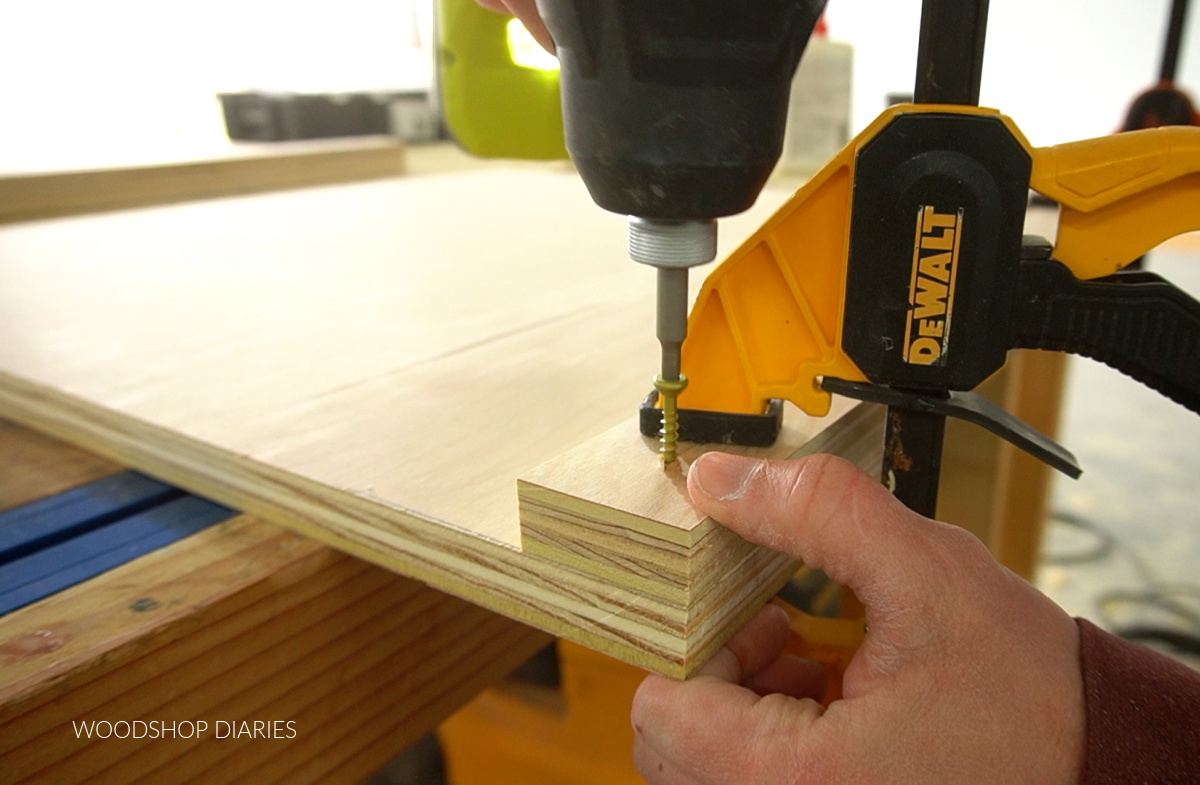
Once I had my pieces cut, I assembled the box using pocket holes and screws.
RELATED: How to Use a Kreg Pocket Hole Jig
.
You’ll notice in the image below that I not only drilled pocket holes in the ends of the short piece, but also along the front edge of all four pieces.
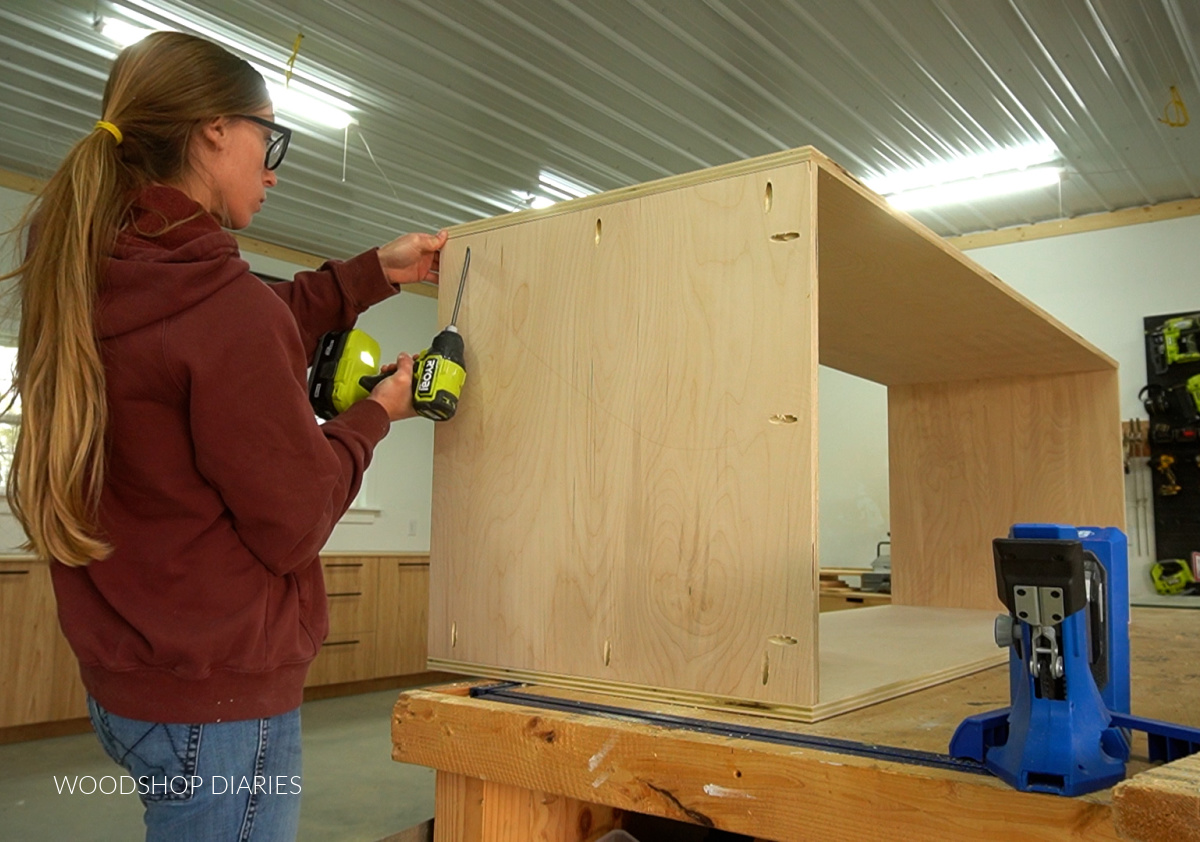
I’ll attach the face frame later through these pocket holes.
.
I screwed the main cubby together using pocket hole screws making sure to position the pieces so the pocket holes on the front edge were in fact facing the front.
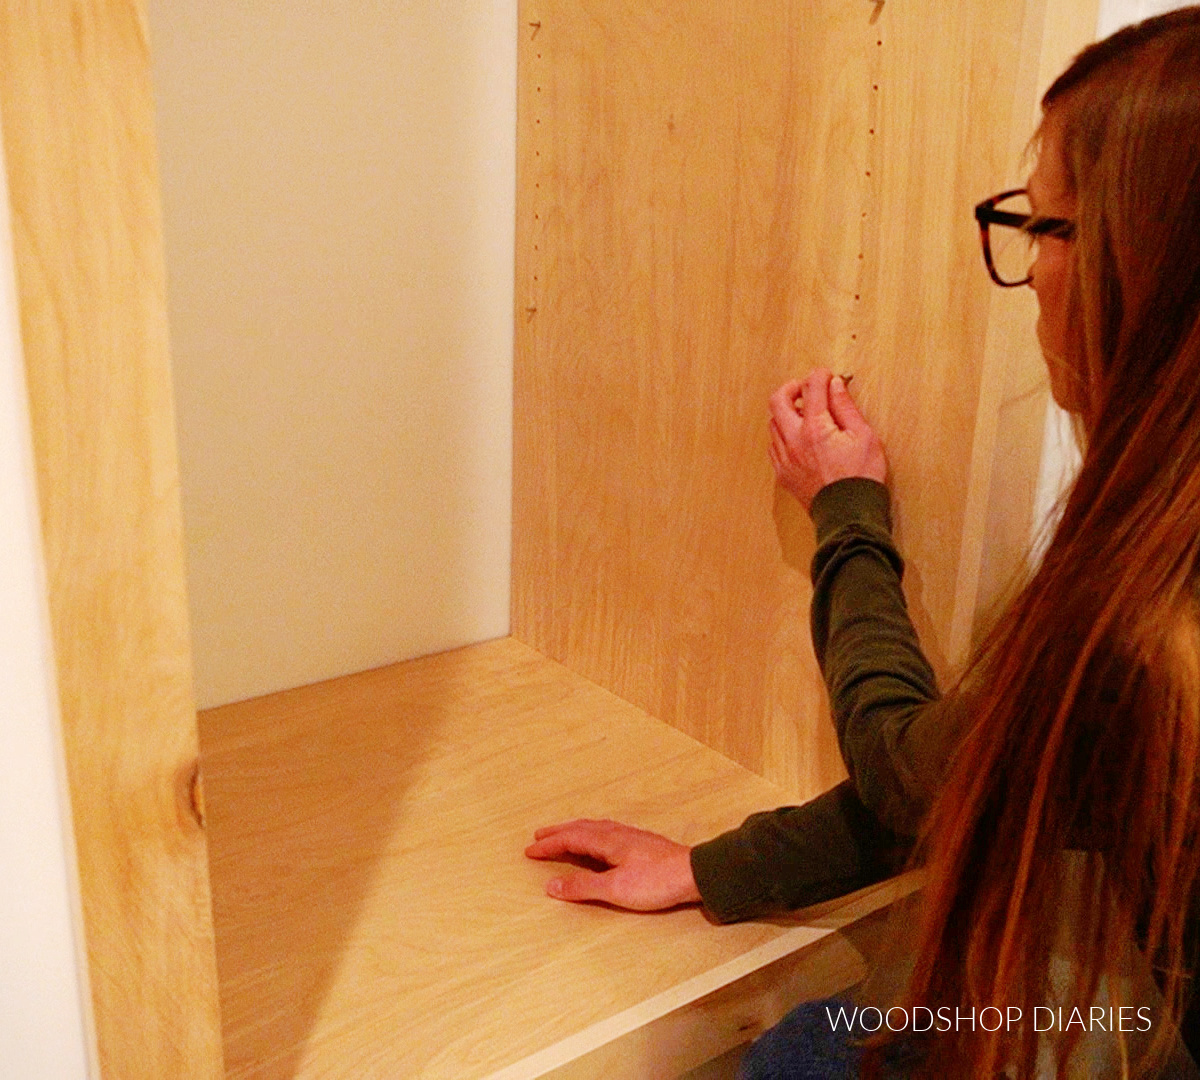
Step 4: Drill Shelf Pin Holes for Adjustable Shelves
Once the box was together, I used a shelf pin jig to drill shelf pin holes up and down the tall sides of the box—this is so that I can add adjustable shelves later.
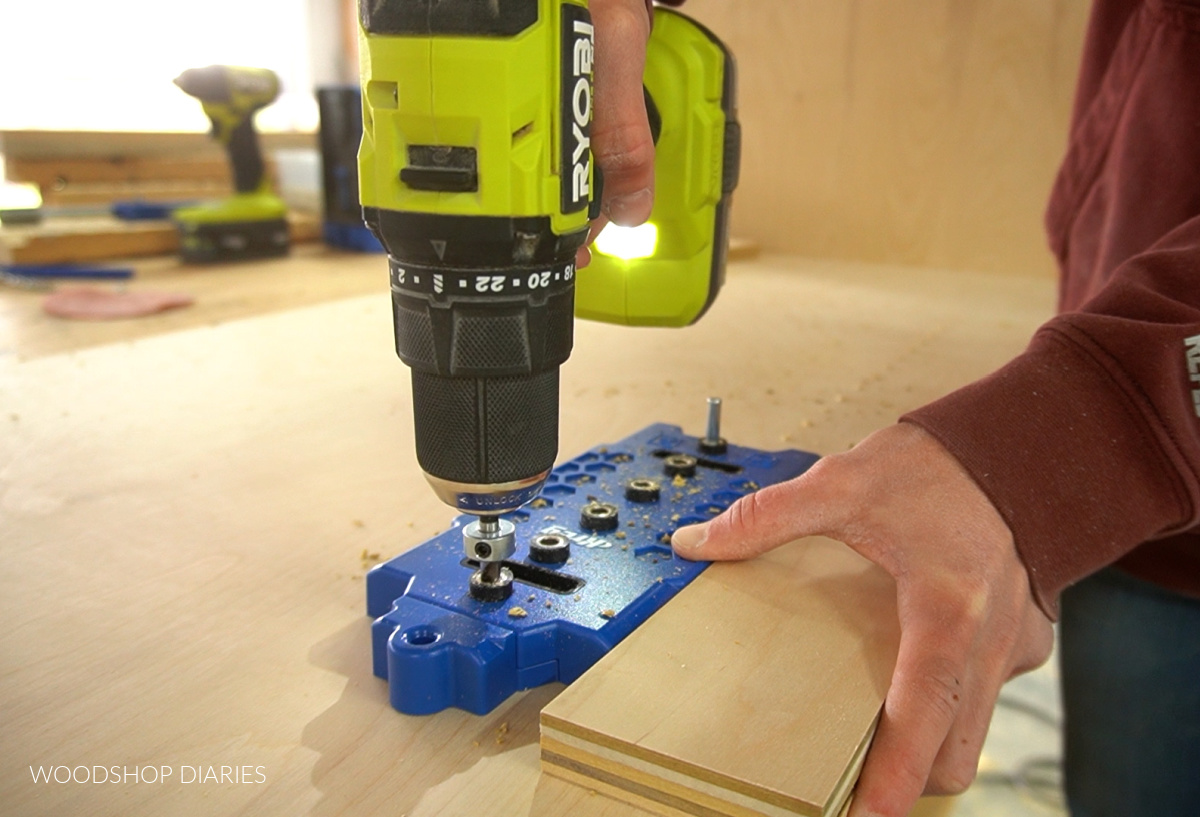
I drilled my front shelf pins about 4-5” from the front edge—which I’ll discuss why later.
.
Of course, if you didn’t want the option to adjust your shelves, you can skip this part and screw your shelves in so they’re stationary.
Step 5: Add Face Frame to Shelf Cubby
I ripped two strips of ¾″ plywood to 2 ½” wide to use as the face frame.
.
Obviously, you can use solid wood for the face frame instead of plywood if you prefer—I just went with plywood since it had some pretty coloring on it to match the shelves.
.
I trimmed four pieces to make a face frame that would cover the plywood edges on the front of the cubby box.
.
I applied iron on edge banding to cover the edges of these pieces and hide the plys, but that’s totally optional.
RELATED: How to apply iron on edge banding
.
Then, I screwed the face frame together using pocket holes and screws and placed it on the front edge of the cubby box.
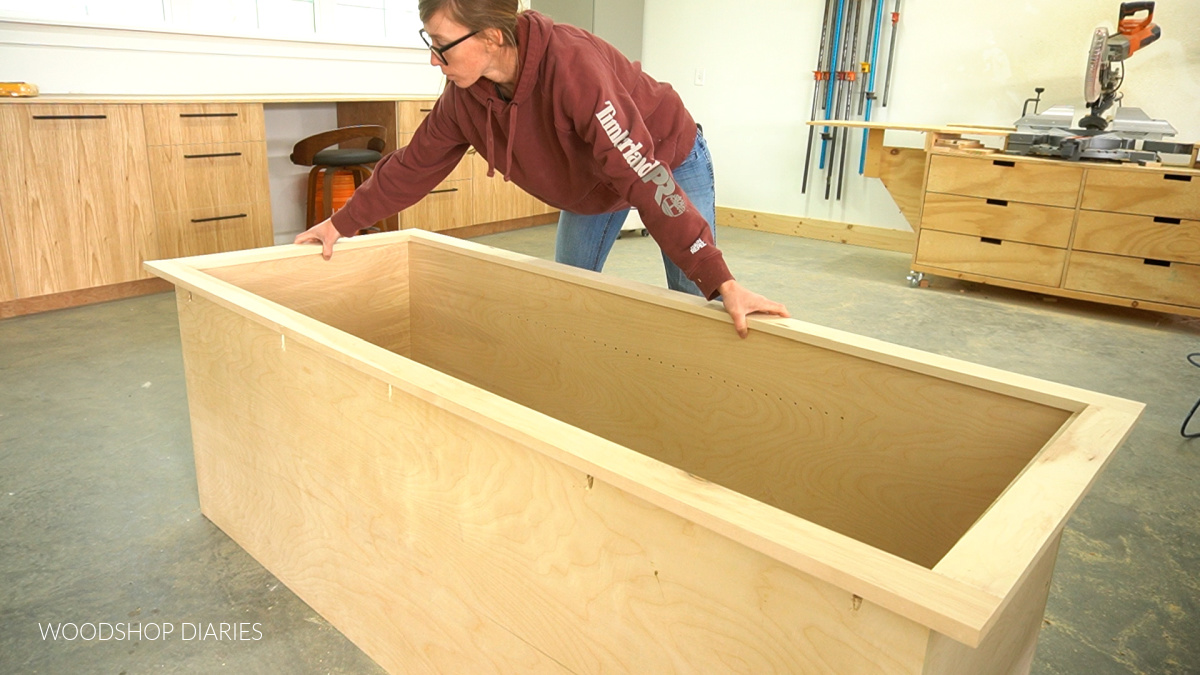
Notice that the face frame is flush to the inside of the shelf cubby box, and overhangs all sides.
.
I worked my way around the box using pocket hole screws to secure the face frame.
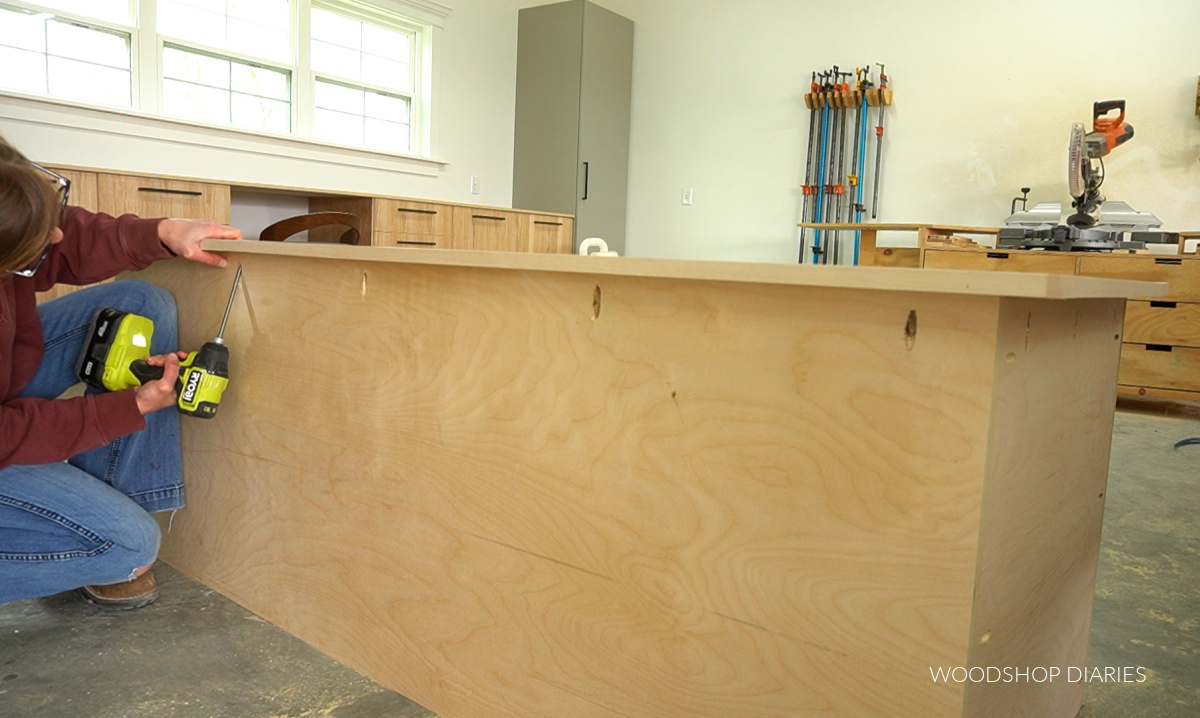
Step 6: Install Back Support and Place Shelf Cubby Inside
The frame at the front (the one from step 2) will support the front of the cubby, but I needed to add something in the back to hold up the box.
.
So I cut a piece of 2×4 to add at the back of the closet. I installed this at the same height as the front frame, made sure it was level, and screwed it into the wall studs.
Then, I carried the cubby box inside and slid it into the opening. The back of the shelf should rest on the 2×4 that is screwed in on the back wall and the front of the shelf should rest on the frame at the front.
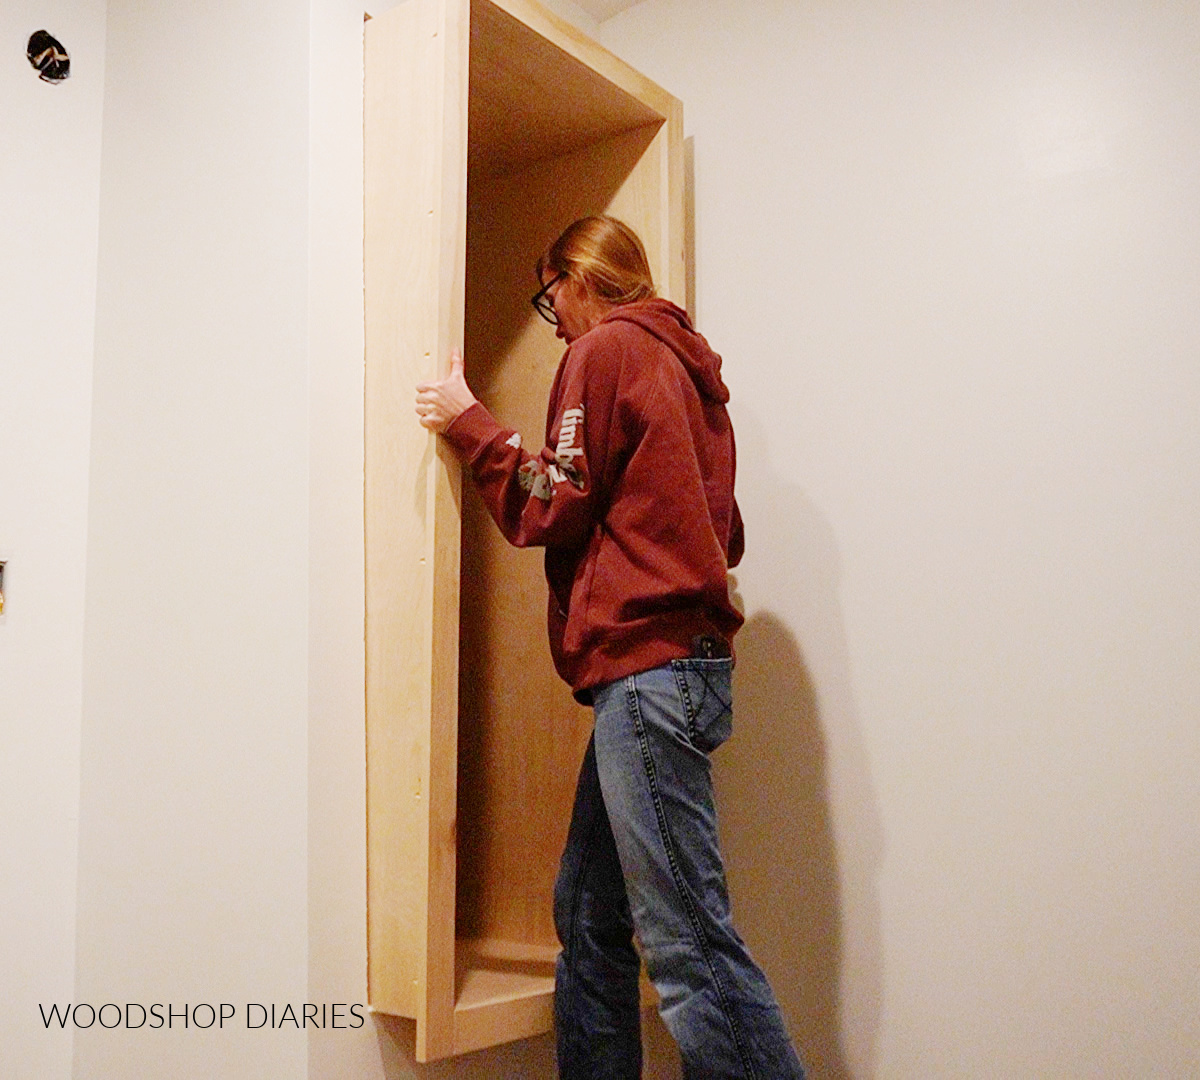
After I made sure the cubby fit, all that was left was adding the shelves.
Step 7: Cut and Install Open Shelves
I cut four shelves from my remaining plywood the same depth as the cubby box (24″ in my case).
.
Just as a side note, when cutting adjustable shelves, I typically cut them ⅛”-¼” shorter than the opening they’re going into so that they have some wiggle room to go in and out.
.
Ex. If your cubby opening is 24″ wide, cut your shelves 23 ¾″ – 23 ⅞″ wide so you have some wiggle room to place them in and remove them so they aren’t scraping the sides.
.
Now—this is a totally optional part—but I wanted my shelves to appear thicker than just ¾”, but I didn’t want to double up on plywood for the entire shelf.
.
So I headed to my scrap plywood pile and found some thin strips I could cut and glue along the front edge of each shelf.
I glued and screwed these strips on the bottom of each shelf, then used some 1 ½” wide iron on edge banding on the front edge to “fake” a thicker shelf.
.
This is optional, I just liked how it looked. However, when adding these strips, make sure that they aren’t wide enough to interfere with the shelf pin holes. This is why I mentioned that I drilled my front shelf pins 4-5” from the front edge earlier.
.
And if you didn’t want to use adjustable shelves, you can drill pocket holes into the bottom of these shelves and screw them into the cubby.
.
I gave the shelves and the cubby a couple coats of clear poly, then installed the shelves using shelf pins and it was done!
Now I didn’t secure this cubby—it’s huge and heavy and it’s not going anywhere. However, you CAN certainly screw it into the back support, the front supports and into the stud frame surrounding it for extra security if you’d like.
.
I’m obviously not finished with this entire room yet, so I still have to do all the other trim work, but I did go ahead and add some baseboards here at the bottom of this section so it looked a little more complete haha.
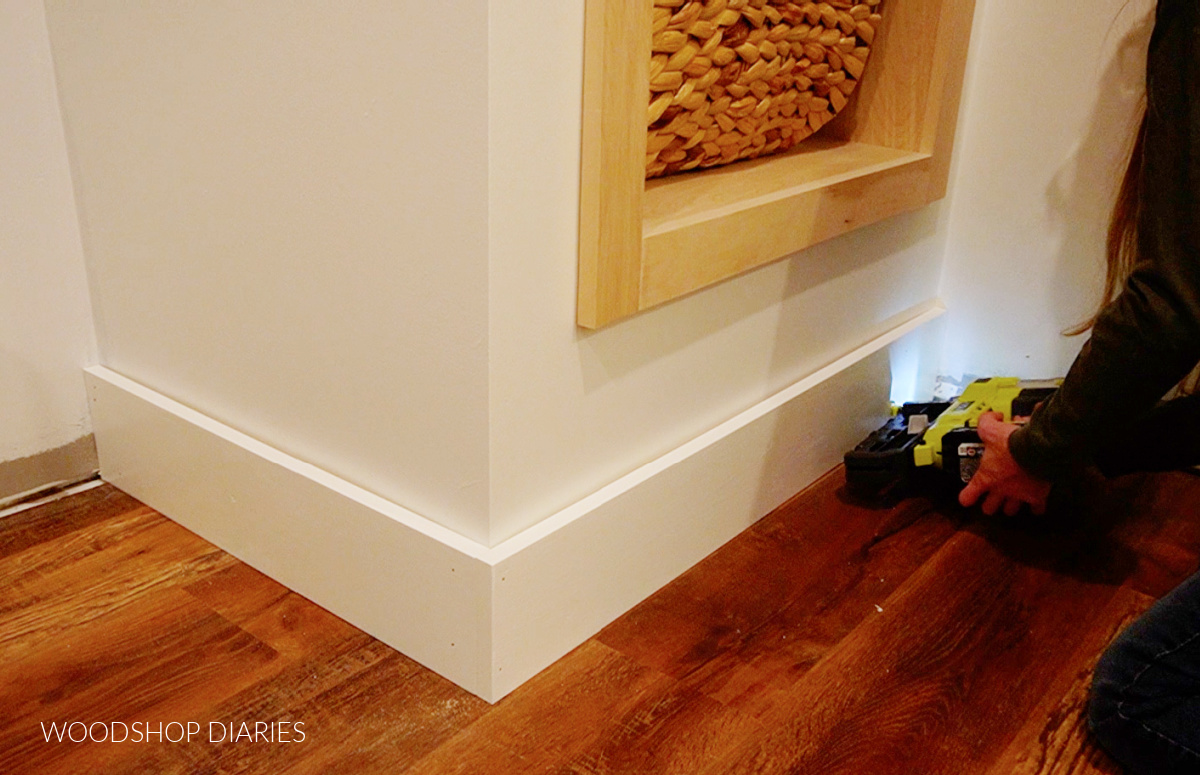
You will need to replace the baseboard piece or cut a “patch” piece to fit over the new drywall section as well.
.
Simply cut and nail into the stud framing, then putty, caulk, and paint to match the rest of your trim.
I can’t wait to share all the other parts of this bathroom remodel as they come together, so if you want to make sure you don’t miss them, be sure to subscribe to the newsletter and follow along!
I’ve spent the last two weeks tearing out our old bathroom, so honestly, I’m just glad this week I got to put something together again haha.
.
I really hope you enjoyed this simple project and maybe it gave you some ideas you can try on a closet or two in your own home.

Until next time, friends, happy building 😊