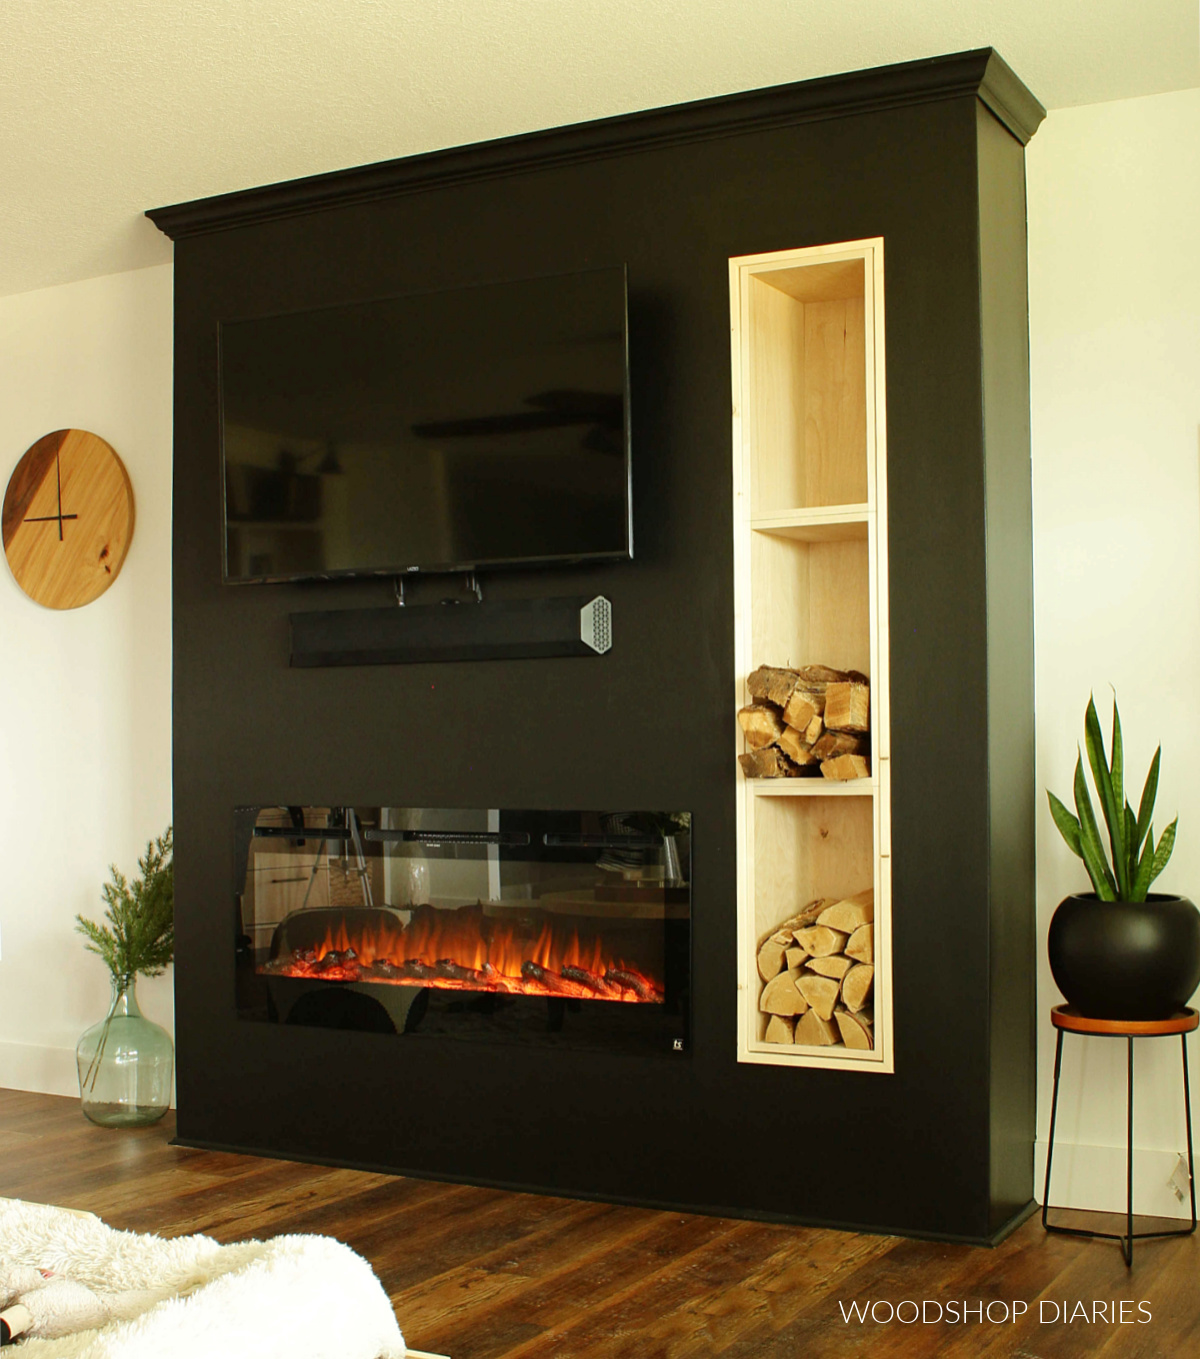
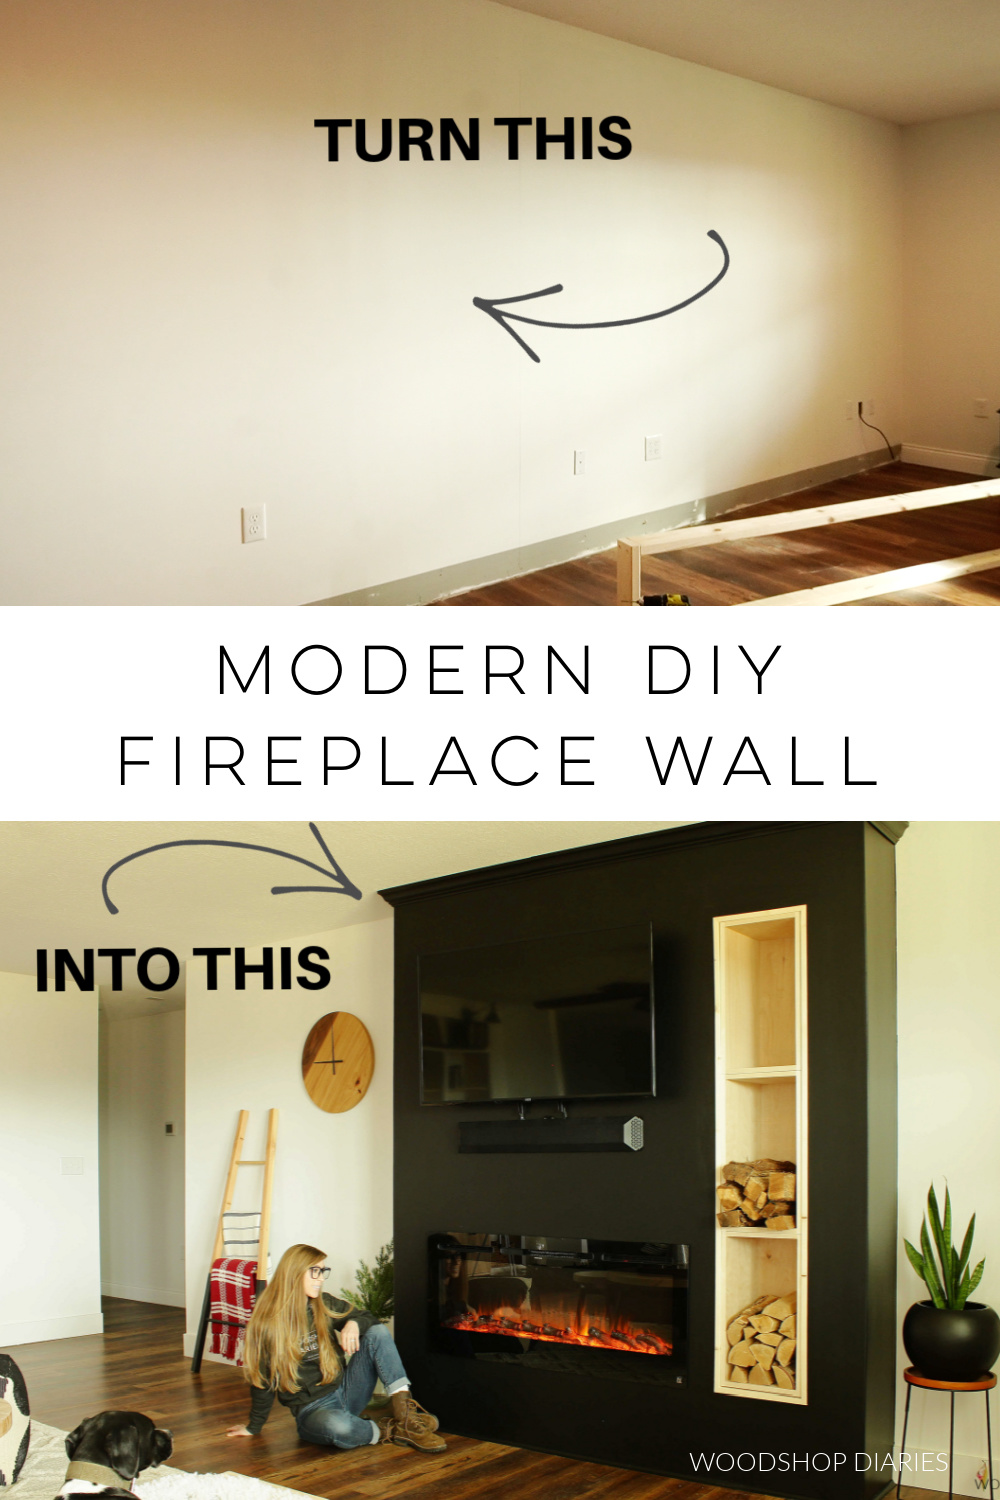
In this post, I’m sharing how to make an modern DIY electric fireplace wall. Like this one!
When we moved into our home, this living room was just empty—it had no built ins, no features, nothing to give it any character—just empty, dark grey walls.
.
After being here for a couple months, I painted the walls white (SW Pure White in case you wondered) to brighten things up, and you may remember seeing me add this library desk area to the back wall a few projects ago.
.
But, this past week, I added a DIY electric fireplace wall with removeable cubbies and I’m so excited to share it with you here 🙂
.
I’ve got a video of the project from start to finish here and the step by step tutorial to make your own below:
*This post contains affiliate links. See policies page.
Tools & Materials:
Tools:
- Miter saw
- Drill/driver
- Stud Finder
- Utility Knife (to cut drywall)
- Nail gun
- Table Saw (optional to cut your own corner trim)
- Level
Materials/Supplies:
- Recessed Electric Fireplace
- TV
- TV Mount Kit
- 2x4s (for framing–amount depends on size you build)
- ½″ Drywall (could use shiplap, etc to cover the box–amount depends on size)
- 1 ¼″, 2 ½″ & 3″ wood screws
- Drywall screws, Drywall mud, drywall finishing materials
- Moldings for top and bottom (I used crown molding and cove molding)
- Scrap plywood (to build cubby boxes)
- Corner trim (can make your own if desired)
.
*Note: Material amounts depend on the size fireplace wall you build. Room layout, ceiling height, and other details differ and may require modifications, so this is a general overview. Each specific project may require adjustments.
The Living Room BEFORE
The living room wall was pretty much blank. We had this console that I built years ago with our old tv, this blanket ladder, and some odds and ends sitting around.
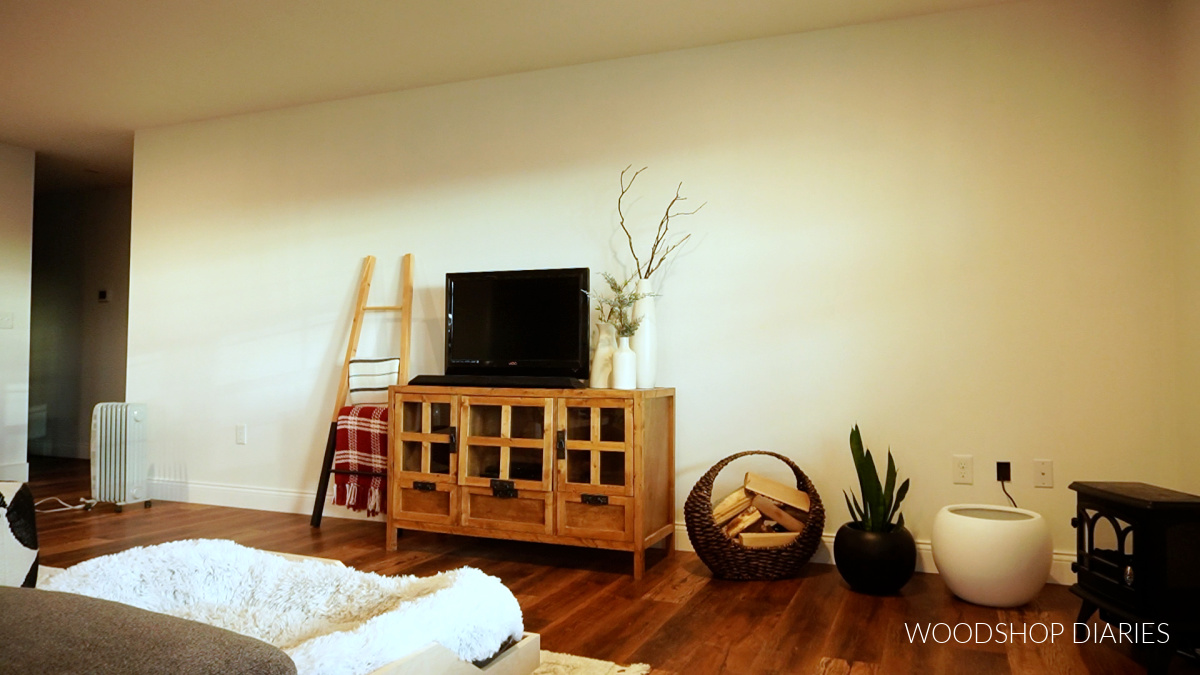
But it was pretty basic and we wanted something that looked a little more “built-in” and something that could kind of “anchor” our living room and give it some eye catching character.
Step 1: Demo and Layout Fireplace Wall
Since there wasn’t anything already here, there wasn’t much to this step.
.
I just moved the existing console and decor out of the way, and removed the baseboards on the wall I was working on.
.
I didn’t like these existing baseboards, so I planned to replace them later, but if you like yours, try to keep them in good shape when you remove them and you can reuse them later at the end.
.
I located the wall studs and marked them using a pencil and a level, then tried to lay out where I wanted to install the fireplace wall.
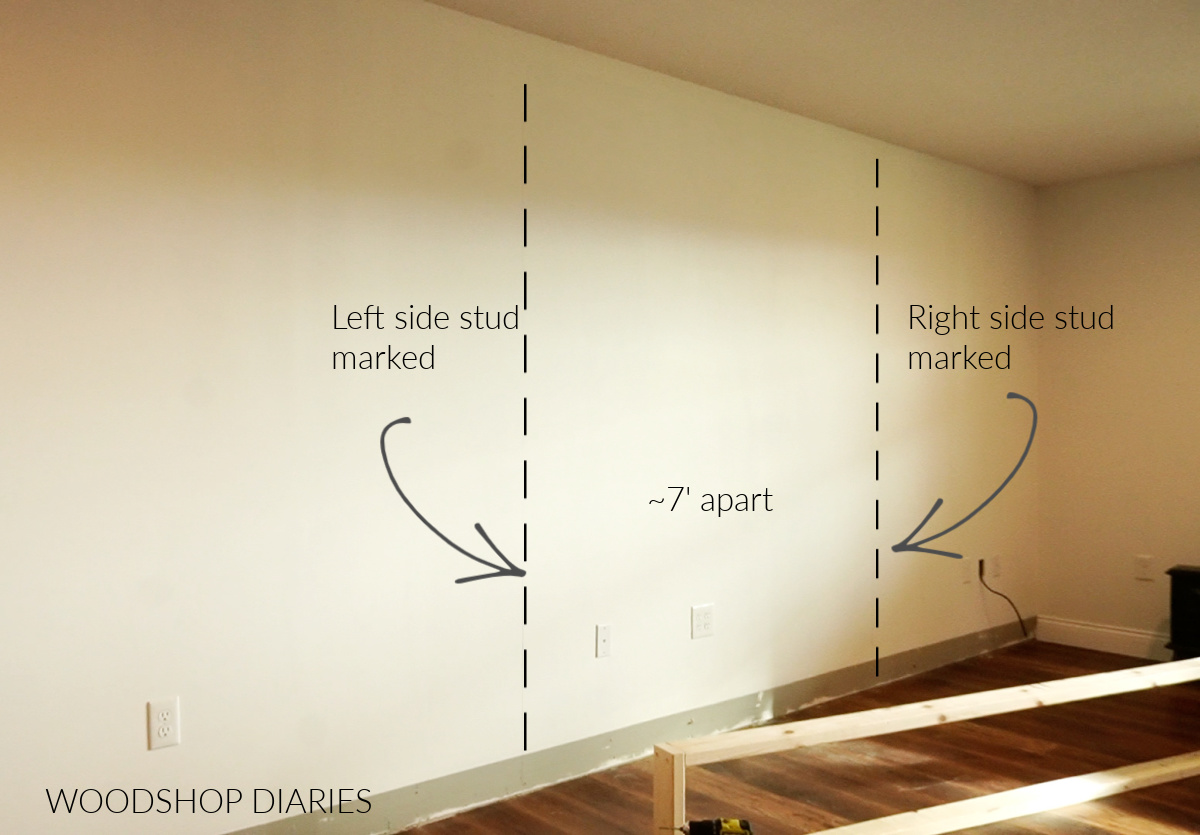
Based on the design I had planned in my head, I knew I wanted my DIY electric fireplace wall box to be 7 ft wide. Luckily, I was able to find two studs about 7 foot apart that I could screw the sides of my wall box into.
.
But if you don’t have studs at the ends of where you want to place your new walls, you can attach a couple 2x4s horizontally on the wall into the studs and screw your side walls into these boards instead of directly into the studs.
Step 2: Frame out DIY Electric Fireplace Wall Box
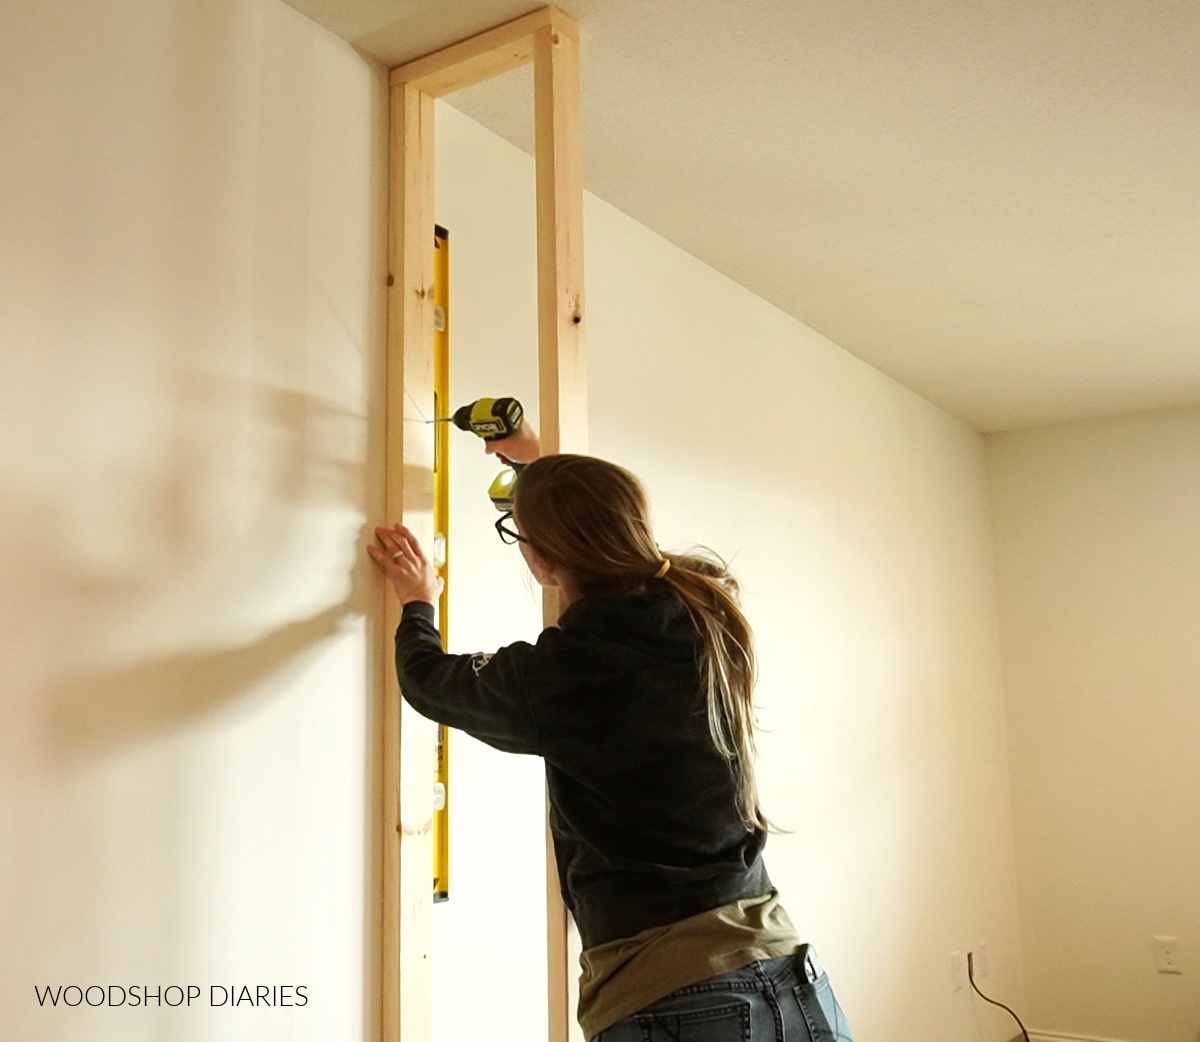
I screwed together two “side walls” made of 2x4s about 96″ tall and 14″ deep.

Then, I used a level to ensure they stayed straight up and down while attaching them to the studs.
Since this would be 84” wide overall, I took 84” – 2x 3 ½” for the 2×4 side walls and cut a 77” 2×4 to space the second side out evenly.

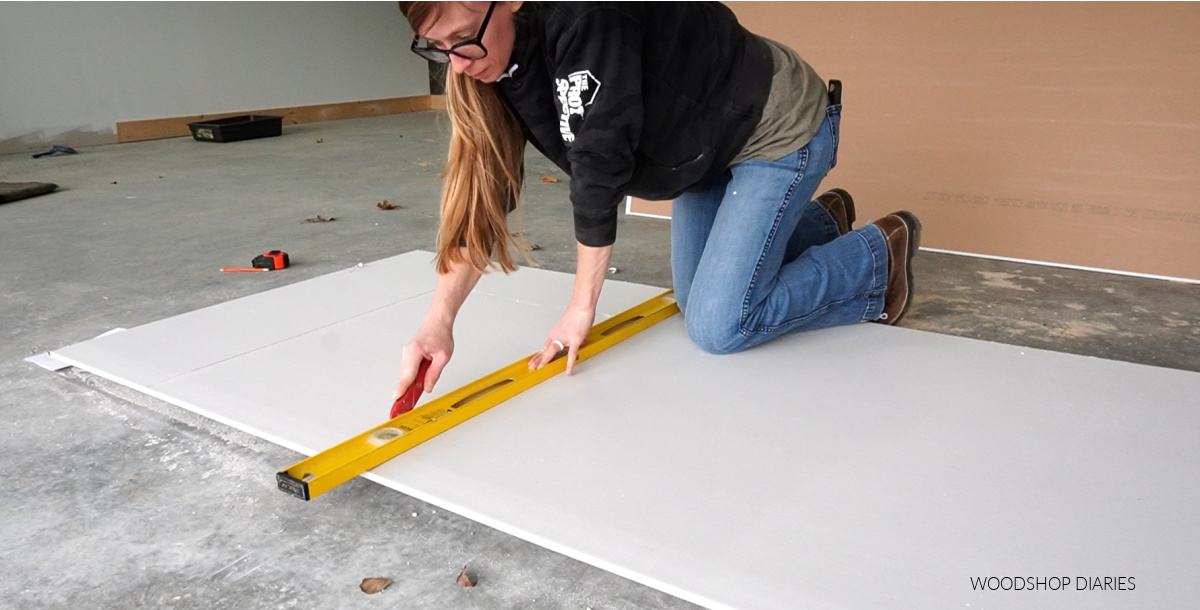
Then I headed back to the shop to lay out the front wall.
.
The front wall was a little more complicated because I needed an opening for the fireplace and an opening for the cubby I was building on the right side. Note that it’s shown laid out upside down on my shop floor in the image below.
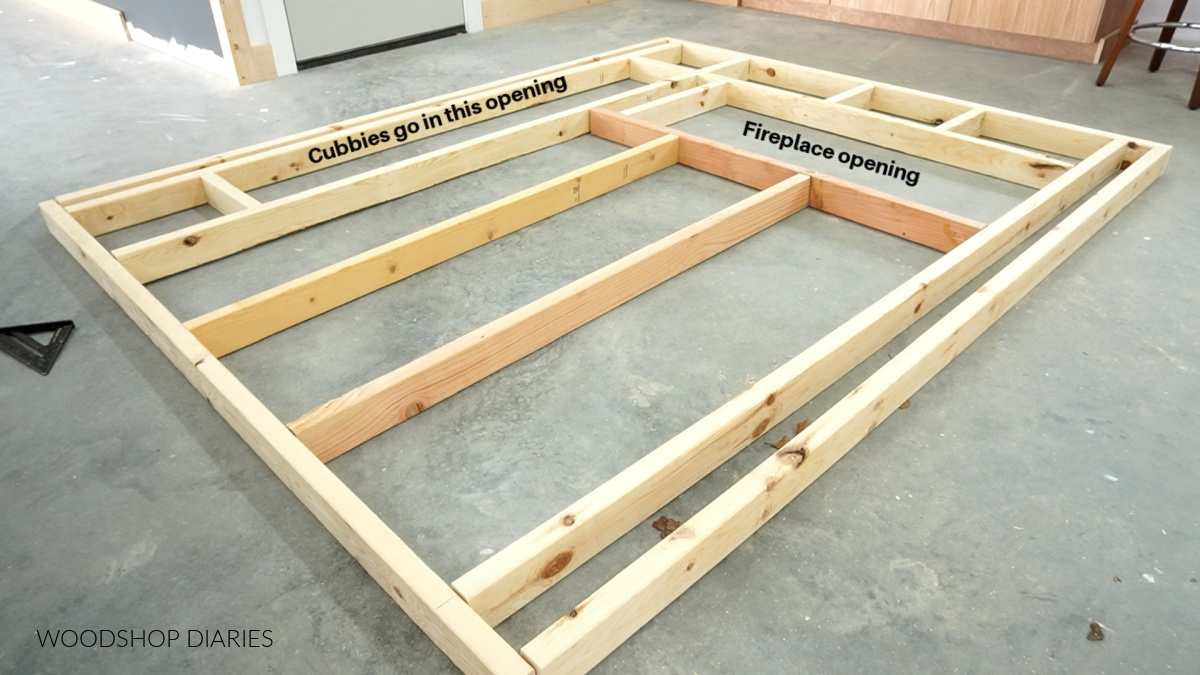
Depending on the specific size and brand of fireplace box you’re using, the instructions should tell you the size to make your rough opening so it’ll fit.
.
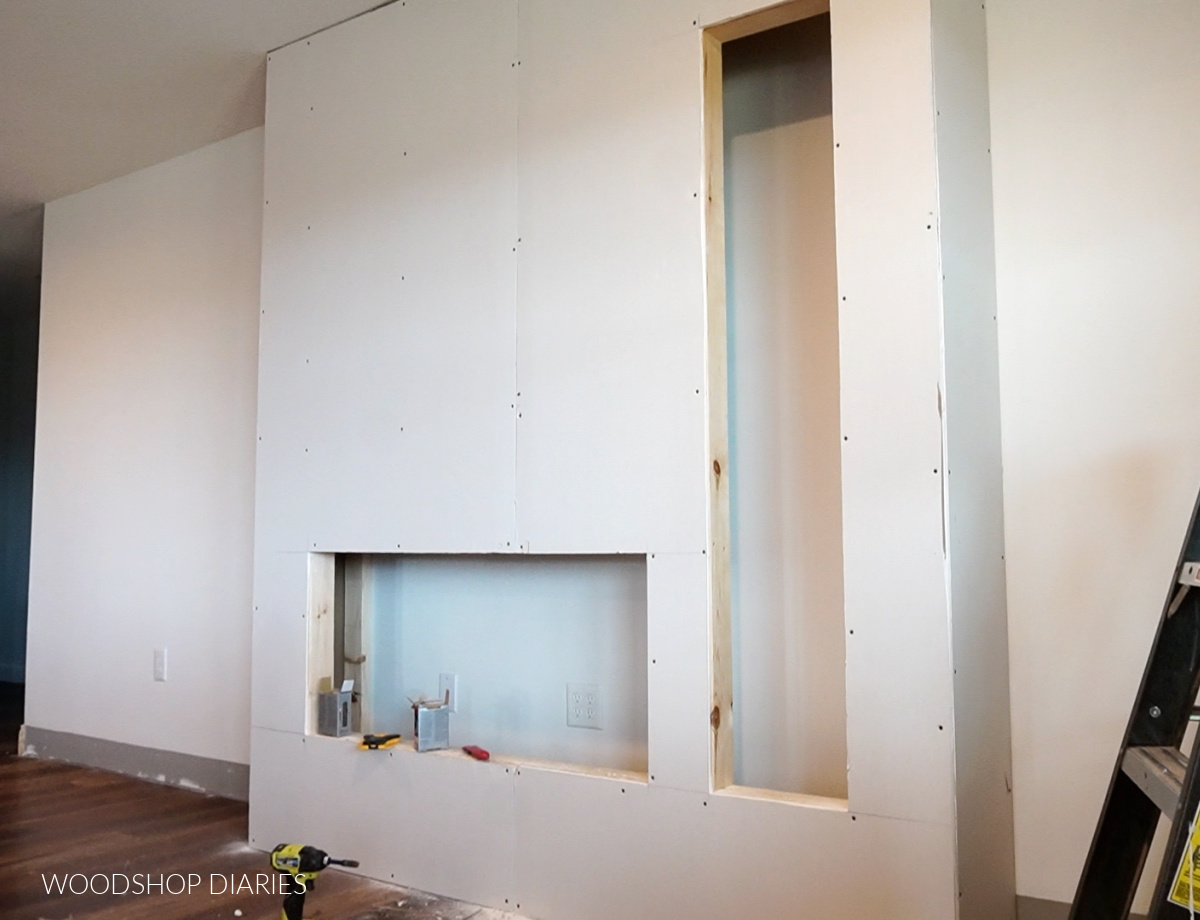
I made my opening about 14″ off the floor, and centered 2x4s above it on 16″ centers to mount the TV later.
.
Check out the video for more details on the front frame layout.
.
The tall opening on the right side is for removeable cubbies. This cubby is optional, but it serves two purposes—1: Because I just liked the look of stacked wood here. And 2: So we can have access to outlets, and to add/remove tv cables, etc behind the new wall.
.
We are using an electric fireplace and it pulls so much power for the heating element that it really needed it’s own circuit to safely run the heat. So we need access inside here to add that designated outlet later, but for now, we can use the existing outlets to just enjoy the lights 🙂
.
Once the wall was assembled, I carried it inside and screwed it between the sides.
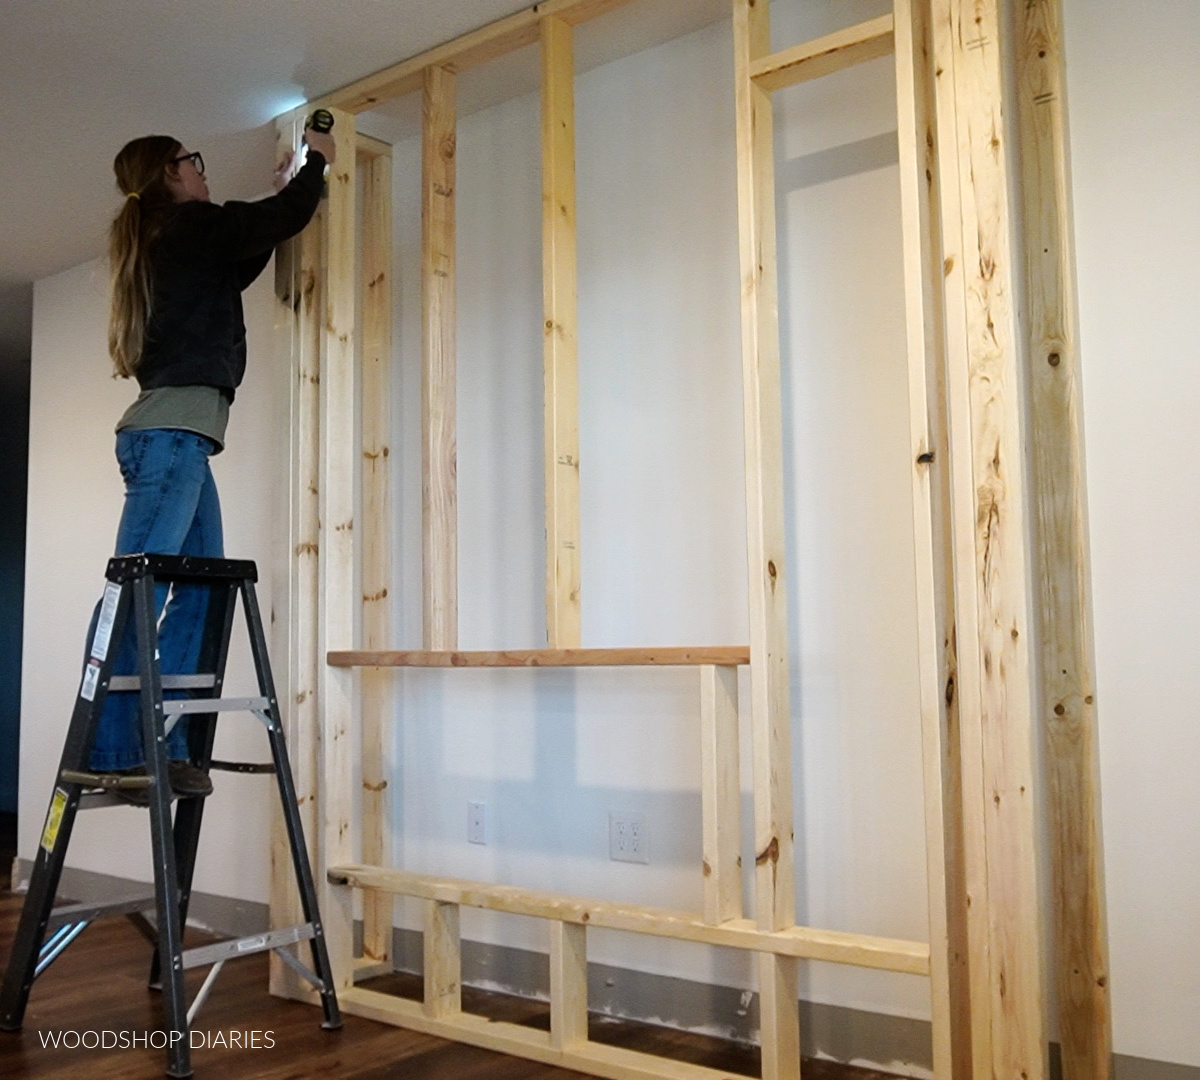
I secured the bottom of this framed box in two places at the floor–one on the left and one on the right.
.
Then, I added some corner braces at the top between the sides and the front to secure the top from wiggling. See video for more details.
Step 3: Add Drywall to Electric Fireplace Box
I cut to fit drywall pieces to cover this box making sure to leave openings for the fireplace and the cubby.
Side note—I used drywall because I wanted a smooth surface for this. However, shiplap, or tile would work great for this too.
.
I mudded the joints and the corners and just did my best. I’m no drywall expert and I don’t want to be haha.
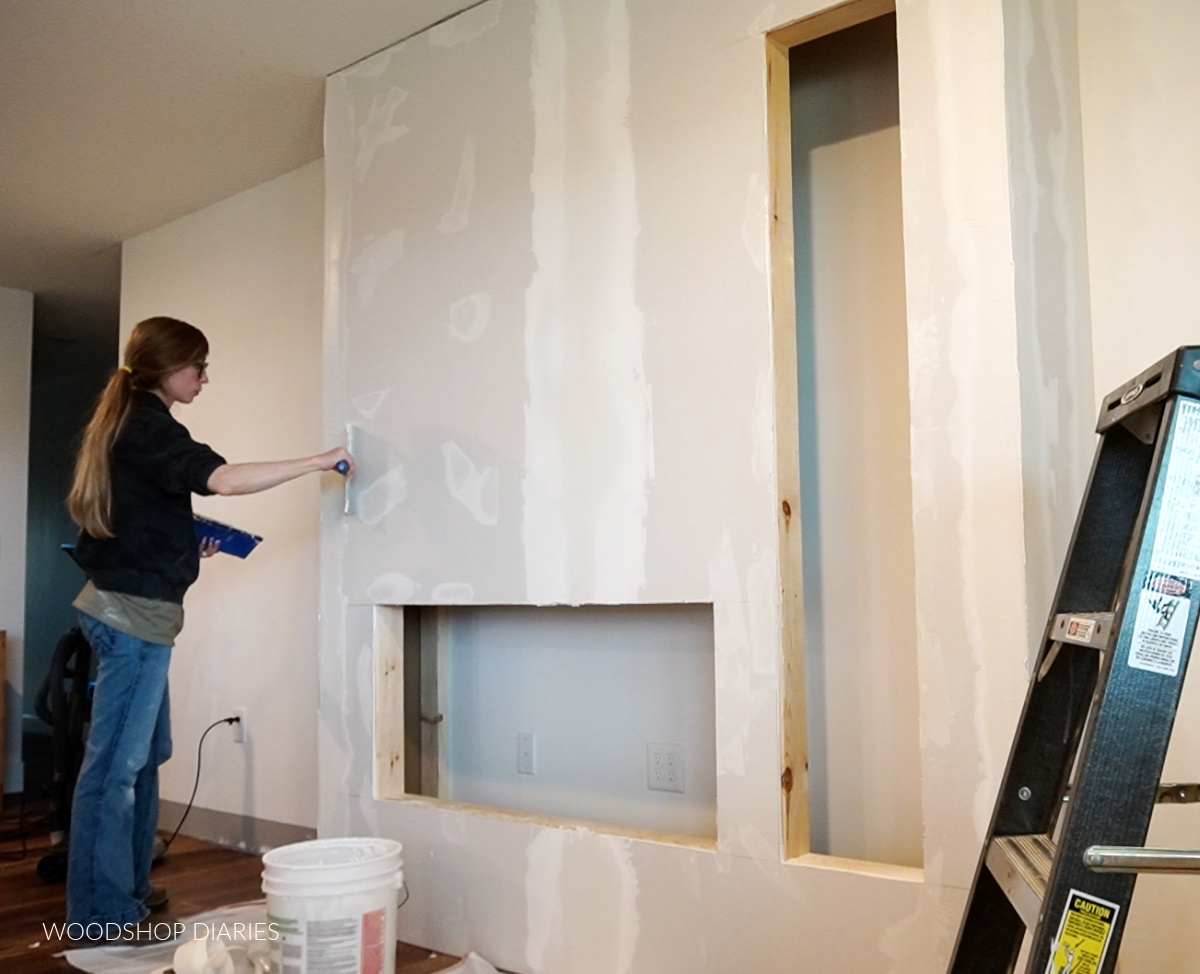
If you’re looking for drywall tips, you may want to search for videos and tips on that because I don’t have much expertise to share here ha.
.
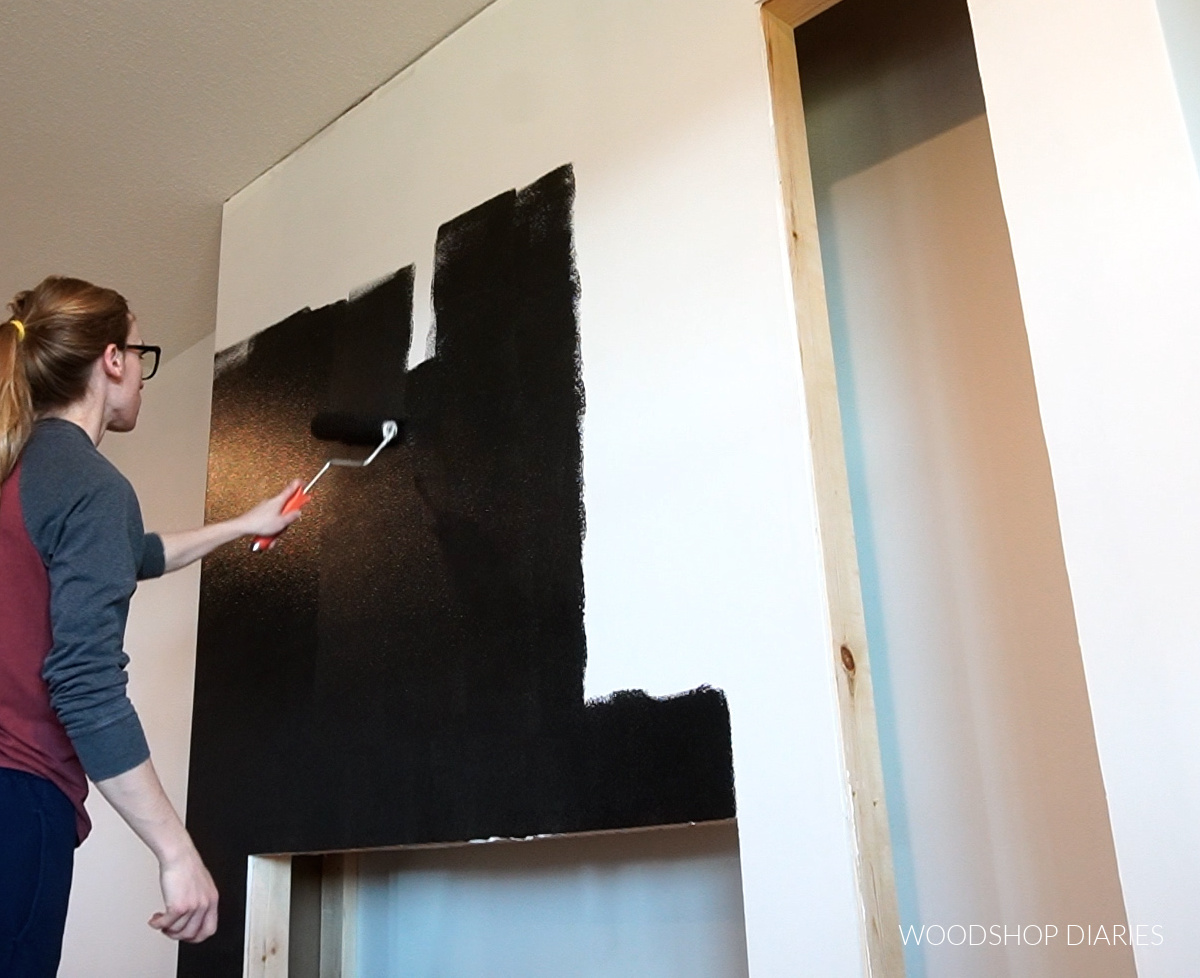
But after three coats of mud and lots of sanding, I primed and painted the box. I primed with KILZ 3 (check out this post on why I love KILZ 3 primer) and painted SW Tricorn Black (the same color I painted my kitchen island here).
Step 4: Install Fireplace (and TV–Optional)
After the paint was dry, I was eager to install the fireplace and make sure everything fit and see how it looked.
.
So we installed the fireplace box into the opening and secured it in place according to the instructions that came with it.
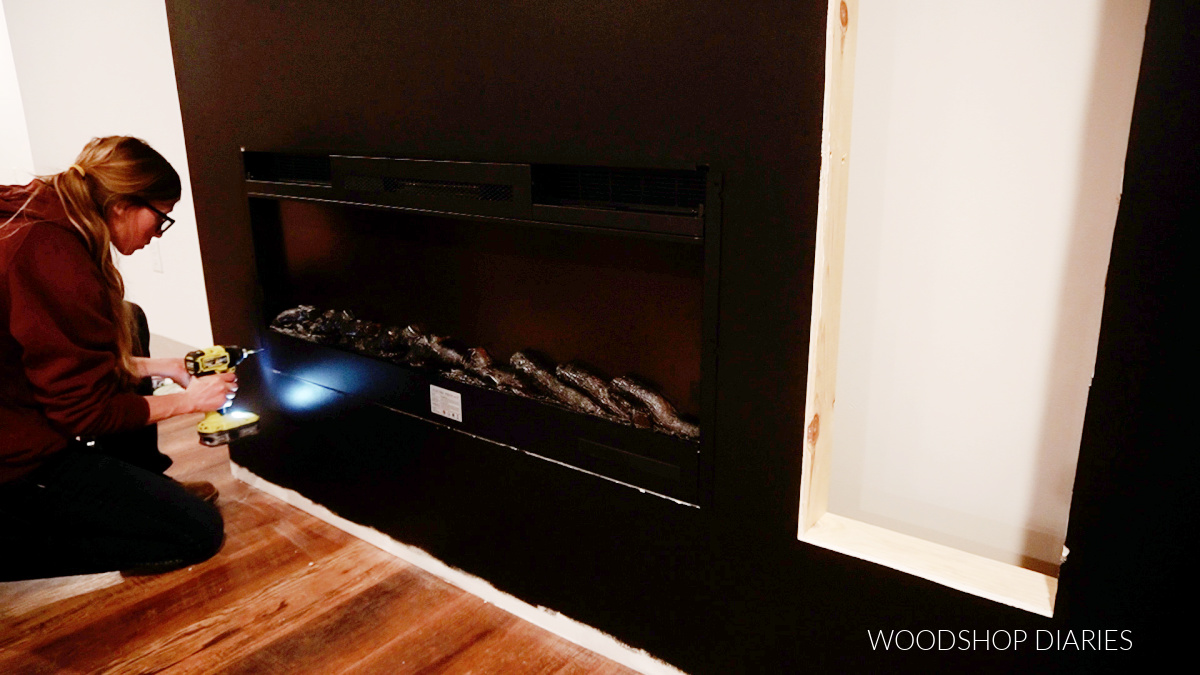
We used a basic TV mount and hung up the new TV, too.
.
Now, you can do this before or after trimming everything else out. I actually installed the crown molding first, then came back and hung the TV so it wouldn’t be in the way and I’d take a chance on knocking it off (I’m clumsy ha!)
Step 5: Trim out Fireplace Wall
I cut to fit, painted, and then nailed crown molding around the top.
RELATED: How to Cut Crown Molding
.
Then I replaced the baseboards and added cove molding along the bottom. You could just wrap your baseboards around the new wall and skip the cove molding, but I used cove because I didn’t want any “big” trim around the bottom–I wanted to keep it minimal.
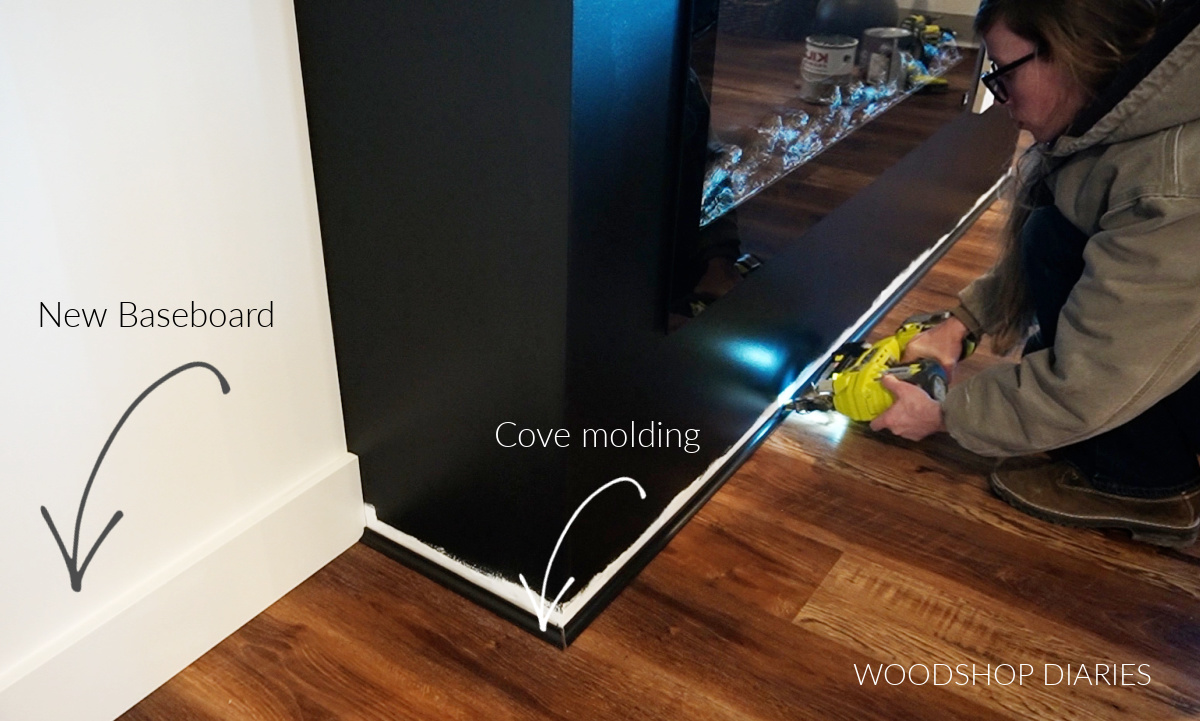
I puttied the nail holes on all the trim and touched up the paint as I went–it was a lot of paint touch ups here and there ha!
Step 6: Trim and Add Cubby Boxes
To trim out the cubby opening, I cut my own corner trim. However, you could purchase some corner trim already cut if you don’t have a table saw.
.
I ripped two 2” wide strips from a 1×6 board and cutting out a rabbet to make a little corner trim piece (see image below). This doesn’t have to be specific dimensions–the goal is just to cover up all the rough drywall edges to make the corners look nice and clean.
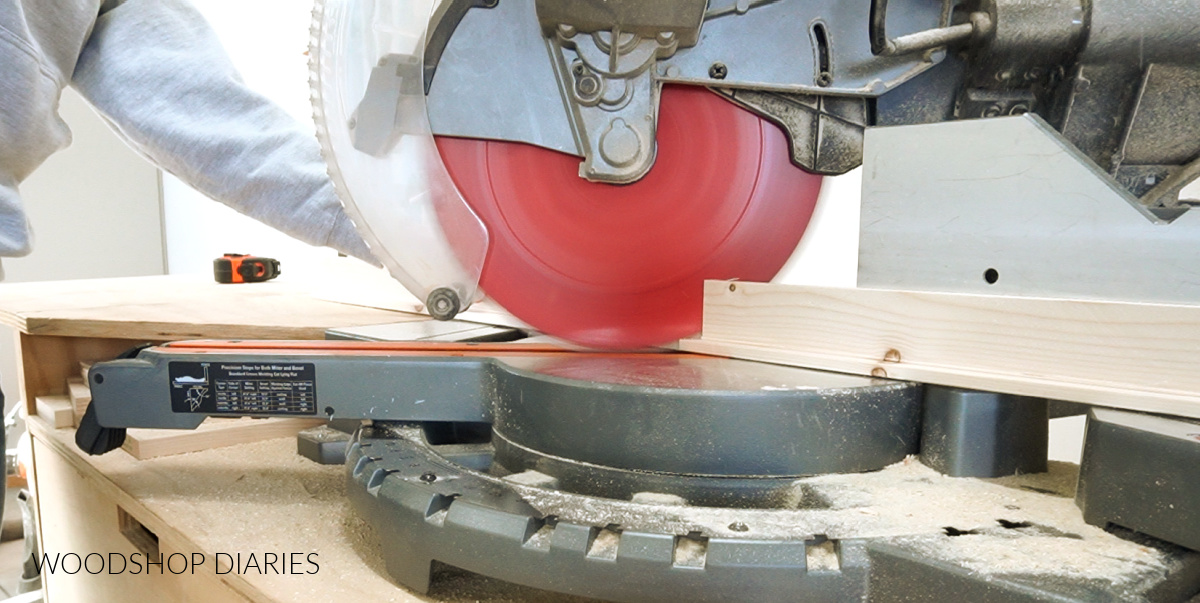
I cut these to fit inside the opening mitering the corners 45 degrees.
.
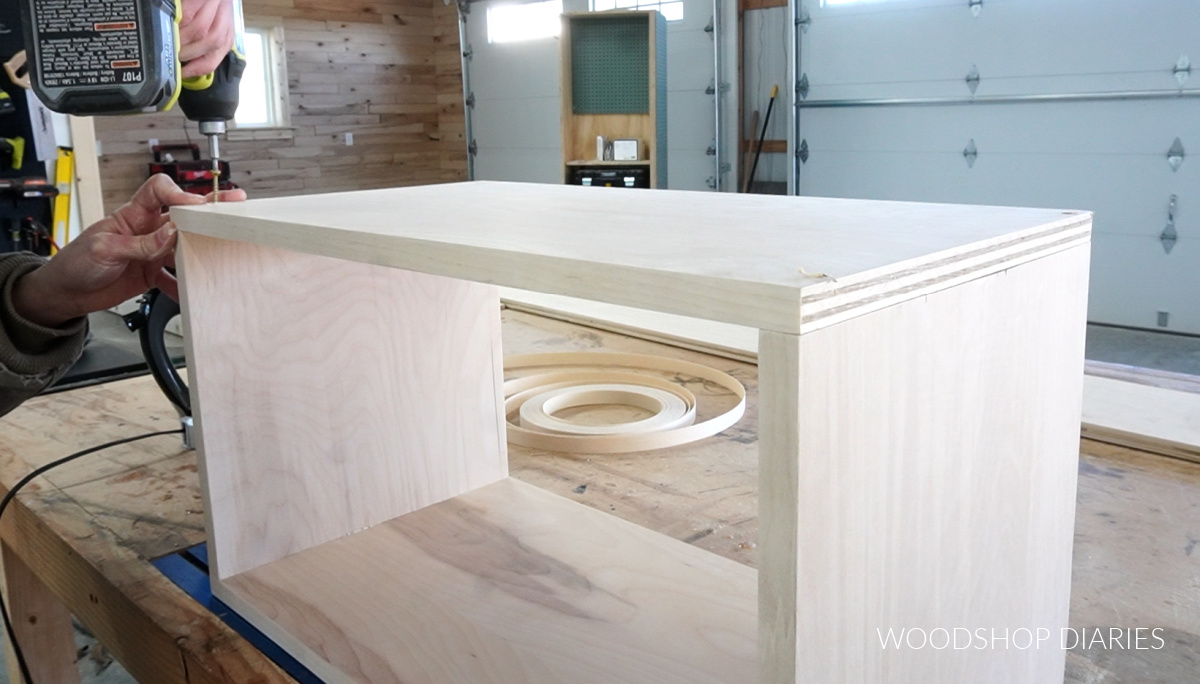
I was pleasantly surprised how clean this looked, so I nailed it in place, took some measurements and headed to the shop to rummage through my scrap plywood pile to build some simple boxes.
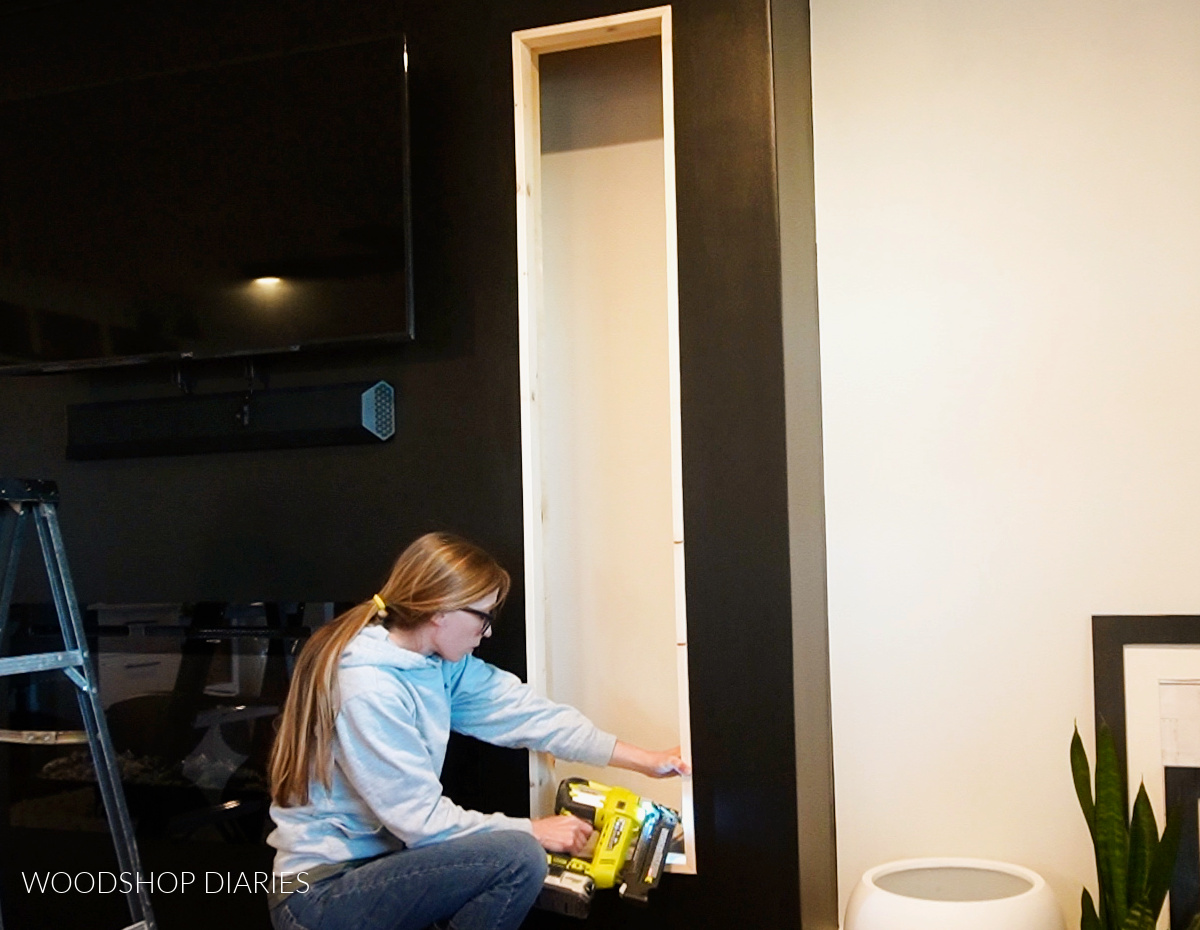
I screwed together three identical sized plywood boxes to fit inside this opening between the trim pieces and stapled ¼” plywood on the back side.
.
Simple as could be. I did edge band the front edges of the plywood that will be seen to make them look a little cleaner.
RELATED: How to Apply Iron On Edge Banding
To “install” the boxes, I screwed together some scrap 2×6 blocks to sit in place between the existing wall and the fireplace wall.
.
These will support the weight of the boxes sitting on top and can be easily removed if needed.
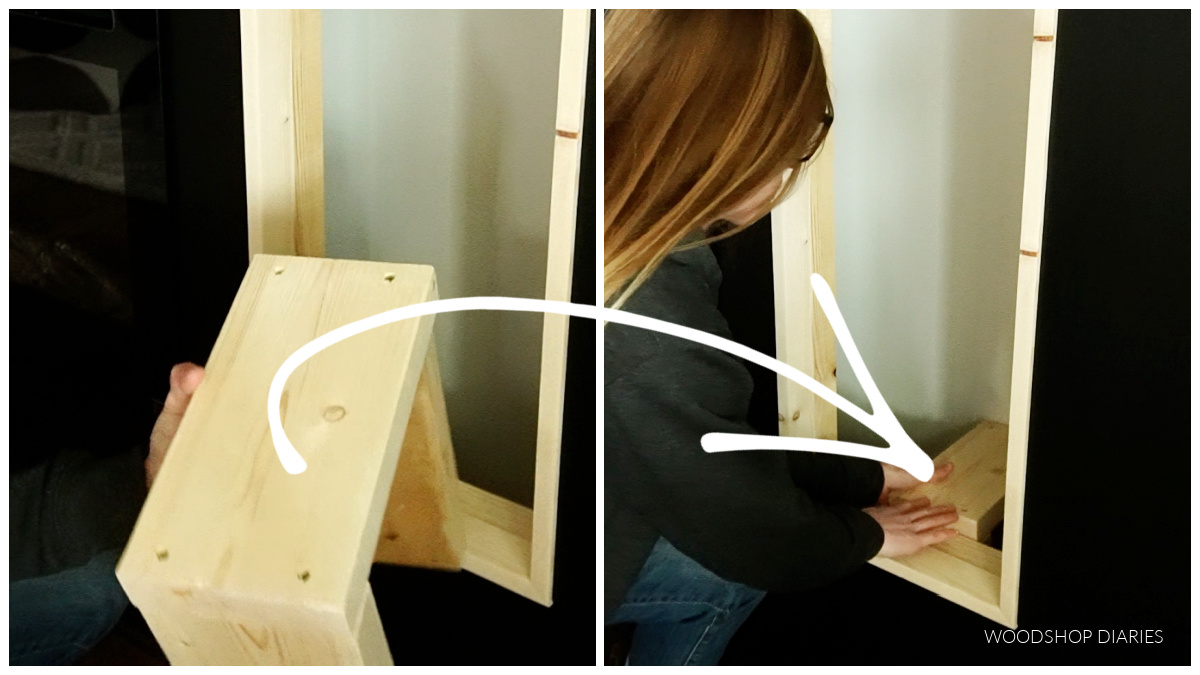
Then, I simply stacked the plywood boxes into the cubby on top of it.
.
These aren’t really heavy, so if and when we need to remove them, I can simply slide them out and crawl inside, then replace them once I’m done hanging out behind my fake wall box haha.
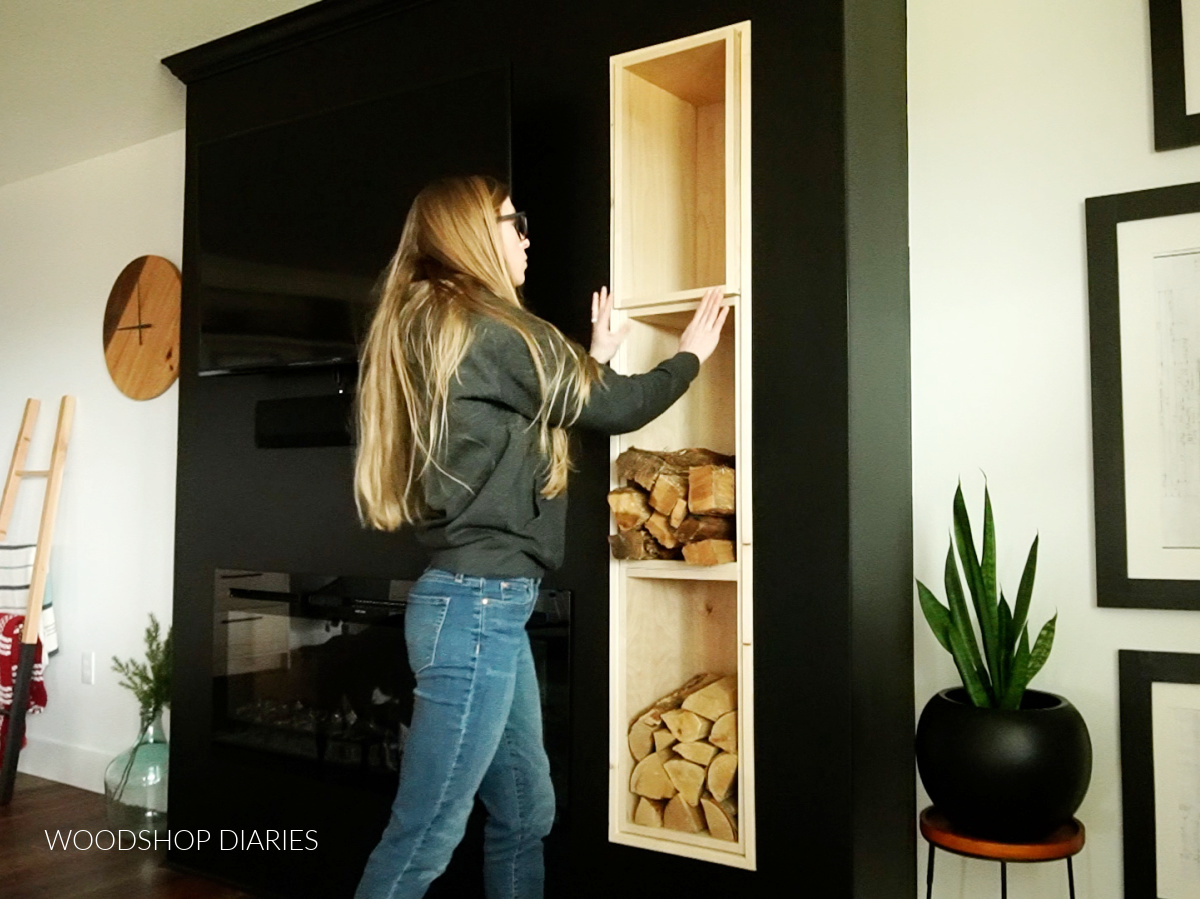
At this point, all was complete—except for adding the extra outlet, which we will do later since we have access to get back there whenever we need *wink wink*
.
And now we have this nice fireplace feature wall to “anchor” our living room space and give it some character.
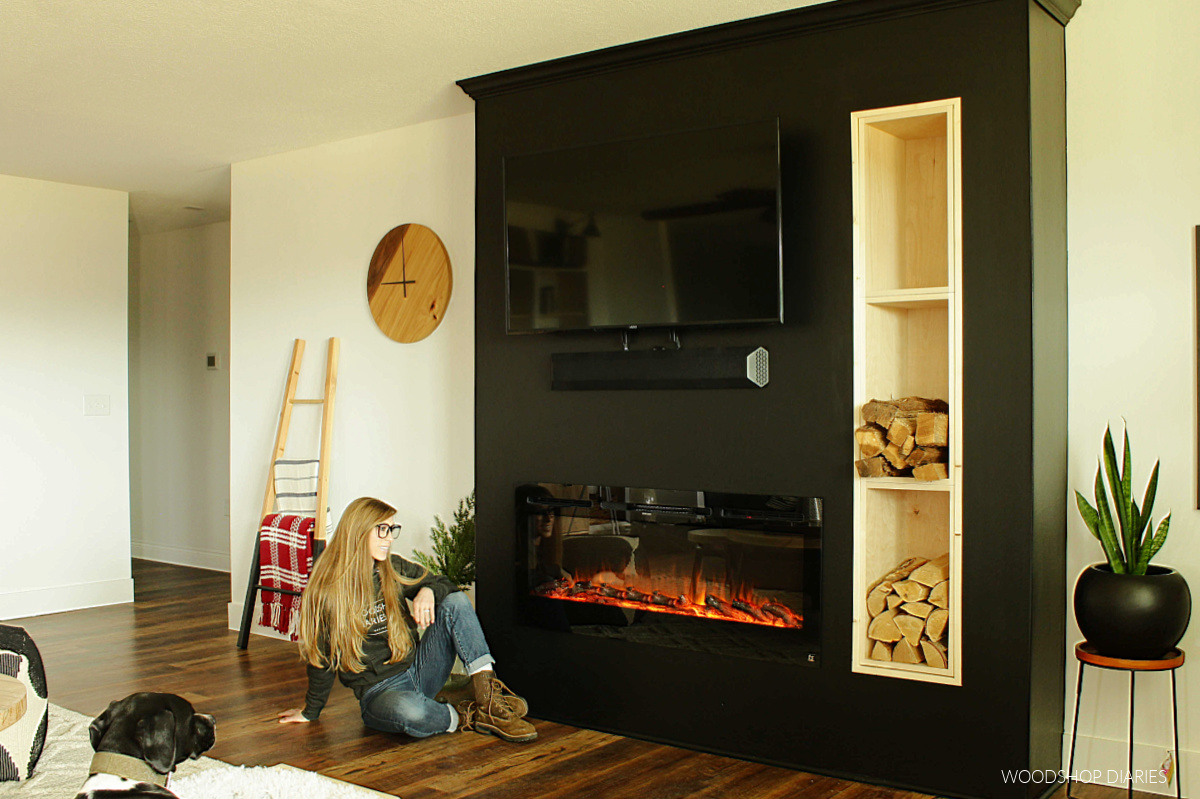
Honestly, my favorite part is being able to sit back and watch the flames—I don’t even care if they’re fake—it’s still mesmerizing. Lou seems to enjoy them, too ha.
.
I hope you enjoyed watching this DIY electric fireplace wall come to life and if you aren’t already subscribed, I’d love if you’d follow along so you don’t miss out on all the upcoming projects and plans coming soon.
If you’d like to save this project for later, be sure to pin it or share it to your favorite social channel!
Until next time, friends, happy building!