I spoiled our girl, Lucy, with another modern dog project to match her modern dog bed. It’s a DIY modern dog bowl stand!

Lucy is a pretty important part of the family these days. She’s my faithful shop dog, my sole co-worker now that I’m working at home full time, and my truck ride companion pretty much everywhere I go.

Oh, and she keeps Danny company when I’m out of town haha.
.
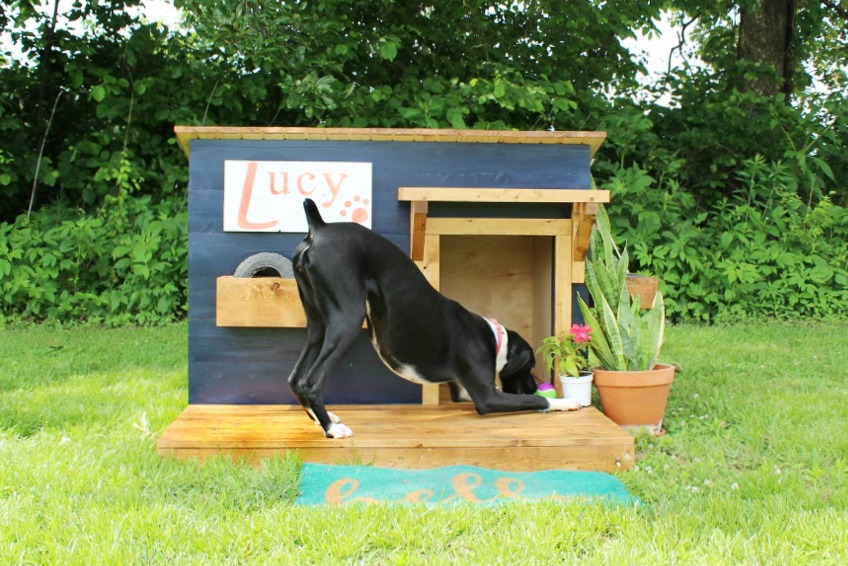
So, obviously, she’s spoiled. She get’s all the good stuff…I made her a nice modern dog house a few years ago. But since she’s inside, she gets quite a bit more use out of the modern dog bed I built her last fall.
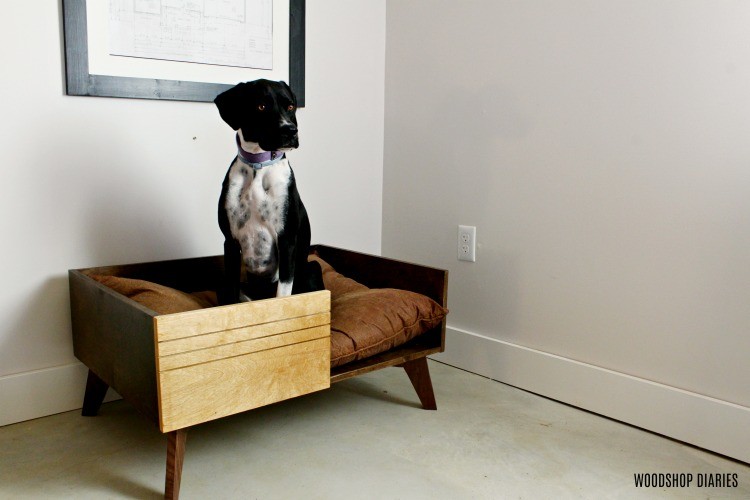
So, what do you make a dog who has it all? Well, this time, I made her a DIY dog bowl stand to match her modern bed! And I’m sharing the how to with you AND a video below 🙂

NOTE: the overall height of my stand ended up being about 15″ tall. If you want a taller or shorter one, simply adjust the height of the sides of the box or the height of the legs in this tutorial.
This post contains affiliate links. See policies page.
What you need to build a DIY dog bowl stand:
Step 1: Gather Wood Scraps to Build Bowl Stand
I had some leftover walnut scraps from when I built my recent walnut top dining table and I had some white oak left over from when I built my resin leg desk.

Because Lucy’s dog bed was two toned with the darker body and the lighter front, I used these scraps to create the same color scheme as her bed. But, if I didn’t have these scraps, I could have/would have used plywood instead and stained it the same as I did her bed.
.
So, if you’re digging around in your scrap pile, just find whatever you’d prefer to use–but for my project, I needed:
- (2) 9″ x 21″ boards for top and bottom
- (2) 6″ x 10 ½″ boards for the sides
- (1) 6″ x 21″ board for the back
- (1) 6″ x 22 ½″ board for the front
- (4) legs cut to template shape shown below in step 3

Step 2: Cut Out Holes for Bowls
I ordered these simple white bowls to use with my dog bowl stand. The bottom lip measured 4″ diameter, so I wanted the holes I cut to sit these into to be slightly larger than 4″.

I measured where I needed the center of my circles to be and found a 4 ½″ angle grinder sanding disc to draw as my template. If you don’t have a sanding disc, search around for a round object 4 ½″-5″ diameter to use instead. Small paint or stain cans could work for this as well.

I used a drill and a large bit to drill a starter hole into each circle and used my jig saw to cut them out. My circles were far from perfect (my jig saw blade was really dull and wasn’t cutting well). But since the bowl sits down into, and kind of overlaps it, you don’t really notice. So cut as well as you can, but if it isn’t perfect, don’t worry too much.

Step 3: Cut and Attach Bowl Stand Feet
Because I wanted this food bowl stand to match the bed I made Lucy a few months ago, I used the same template to cut out the legs so they’d be the same size and the same shape.

I drew out this template onto a piece of scrap wood and cut it out with a jig saw. Then I used this leg to trace out three more and cut those out so that I had four total legs.

I flipped the board I was using for the bottom upside down and positioned these legs where I thought they looked best. Then, I predrilled two holes in the bottom of each leg and attached them using 2″ wood screws.

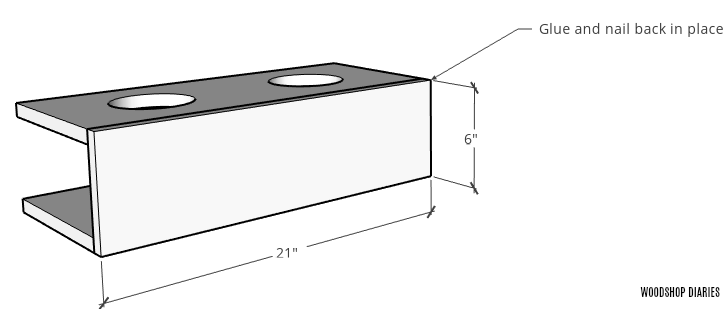
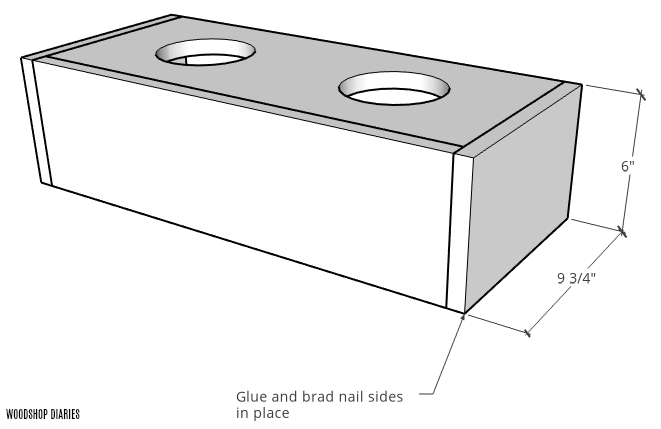
Step 4: Assemble Food Bowl Stand Box
Once the holes are cut for the top, and the legs attached at the bottom, it’s time to put everything together. To assemble, I simply glued and brad nailed using my nail gun. This stand won’t be holding a lot of weight, and I was using ¾″ thick boards, so I didn’t think it needed any heavy duty joinery, but feel free to use screws or dowels as well if you want extra strength.
.
I attached the bottom and top boards to the back piece first, then added the sides, and finally, added the front piece. NOTE: I forgot to draw in the legs…so just pretend they are there haha.
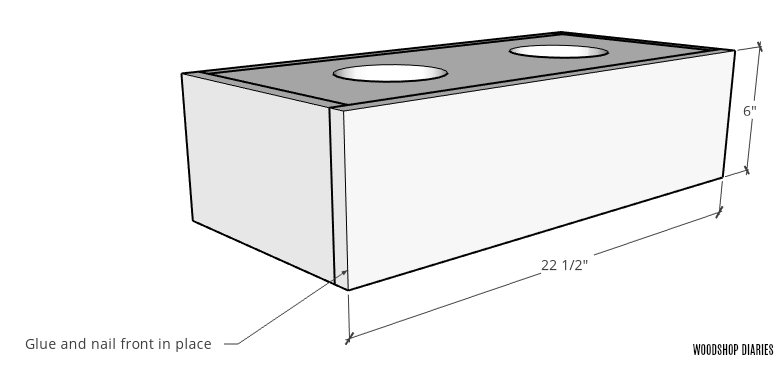
Because Lucy’s dog bed had a little detail on the front piece, I went ahead and added a little detail on the front of this food bowl stand as well before attaching it. I just set my table saw blade height to ¼″ and ran two strips across the front for some visual interest. That’s totally optional.

The last thing to finish everything up was to give it a good sanding and apply a finish. Because I was using walnut and white oak, I let the natural colors come out by just applying a couple coats of Minwax Polycrylic. But feel free to paint or stain as desired. I do advise applying a poly after stain, however, just to seal it in.

And easy as that, I made a cute little food bowl stand for my rotten little shop buddy 🙂 She was SO over this photoshoot…so just ignore her facial expressions haha. She was ready for her after dinner nap.

Lucy is a really well behaved girl, so I never have to worry about her chewing on things she’s not supposed to. But, if your furry friend has a habit of chewing, maybe just leave it unfinished so you don’t have to worry about them eating paint chips or anything haha.
.
Anyway, I’ve got a few more spoiled dog projects coming soon, but in the meantime, if you’re interested in a few more pet projects, be sure to check out a few of my favorites here:

DIY Modern Pet Photo Art 
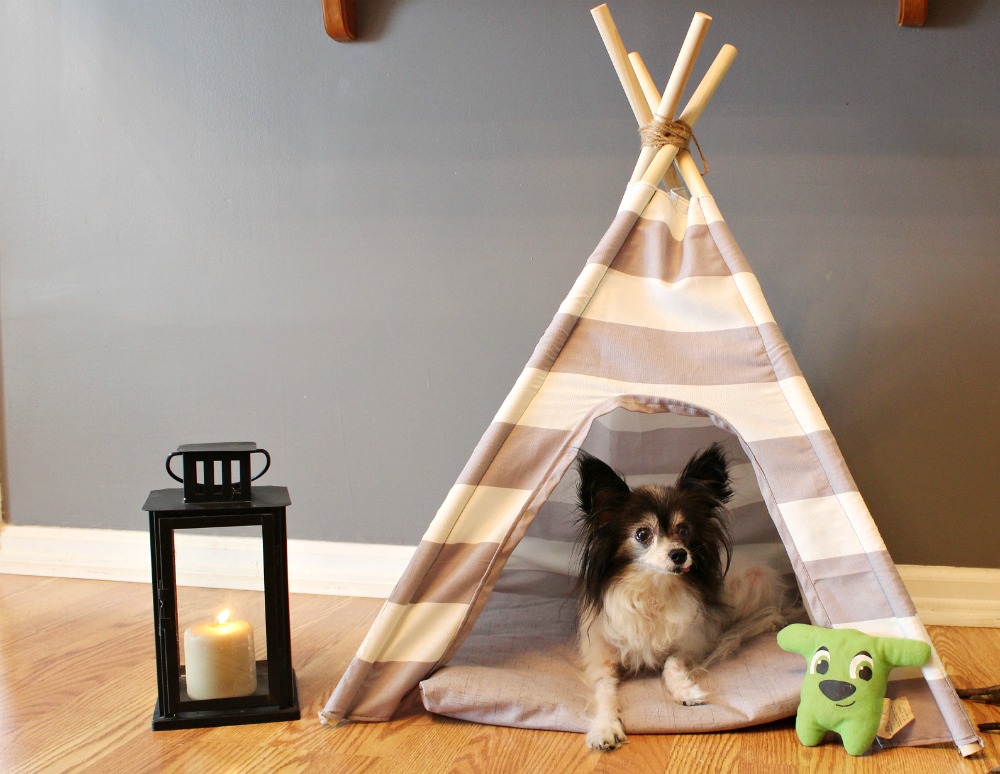
DIY Dog TeePee 
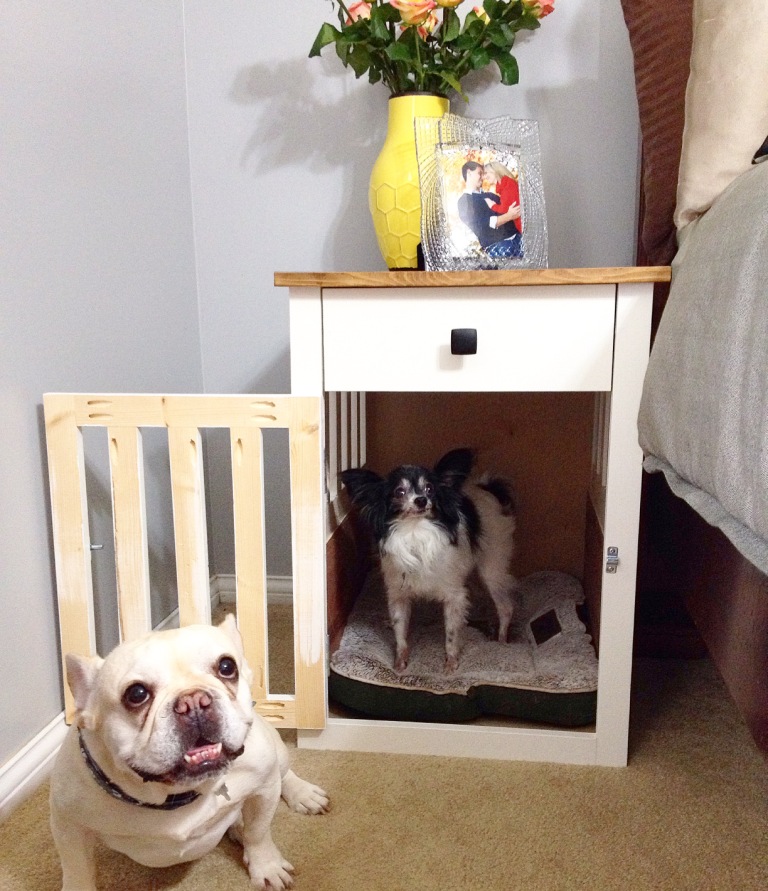
DIY Dog Crate Nightstand 
DIY Dog Bed 
DIY Dog House
And be sure to pin this for later!

Until next time, happy building 🙂