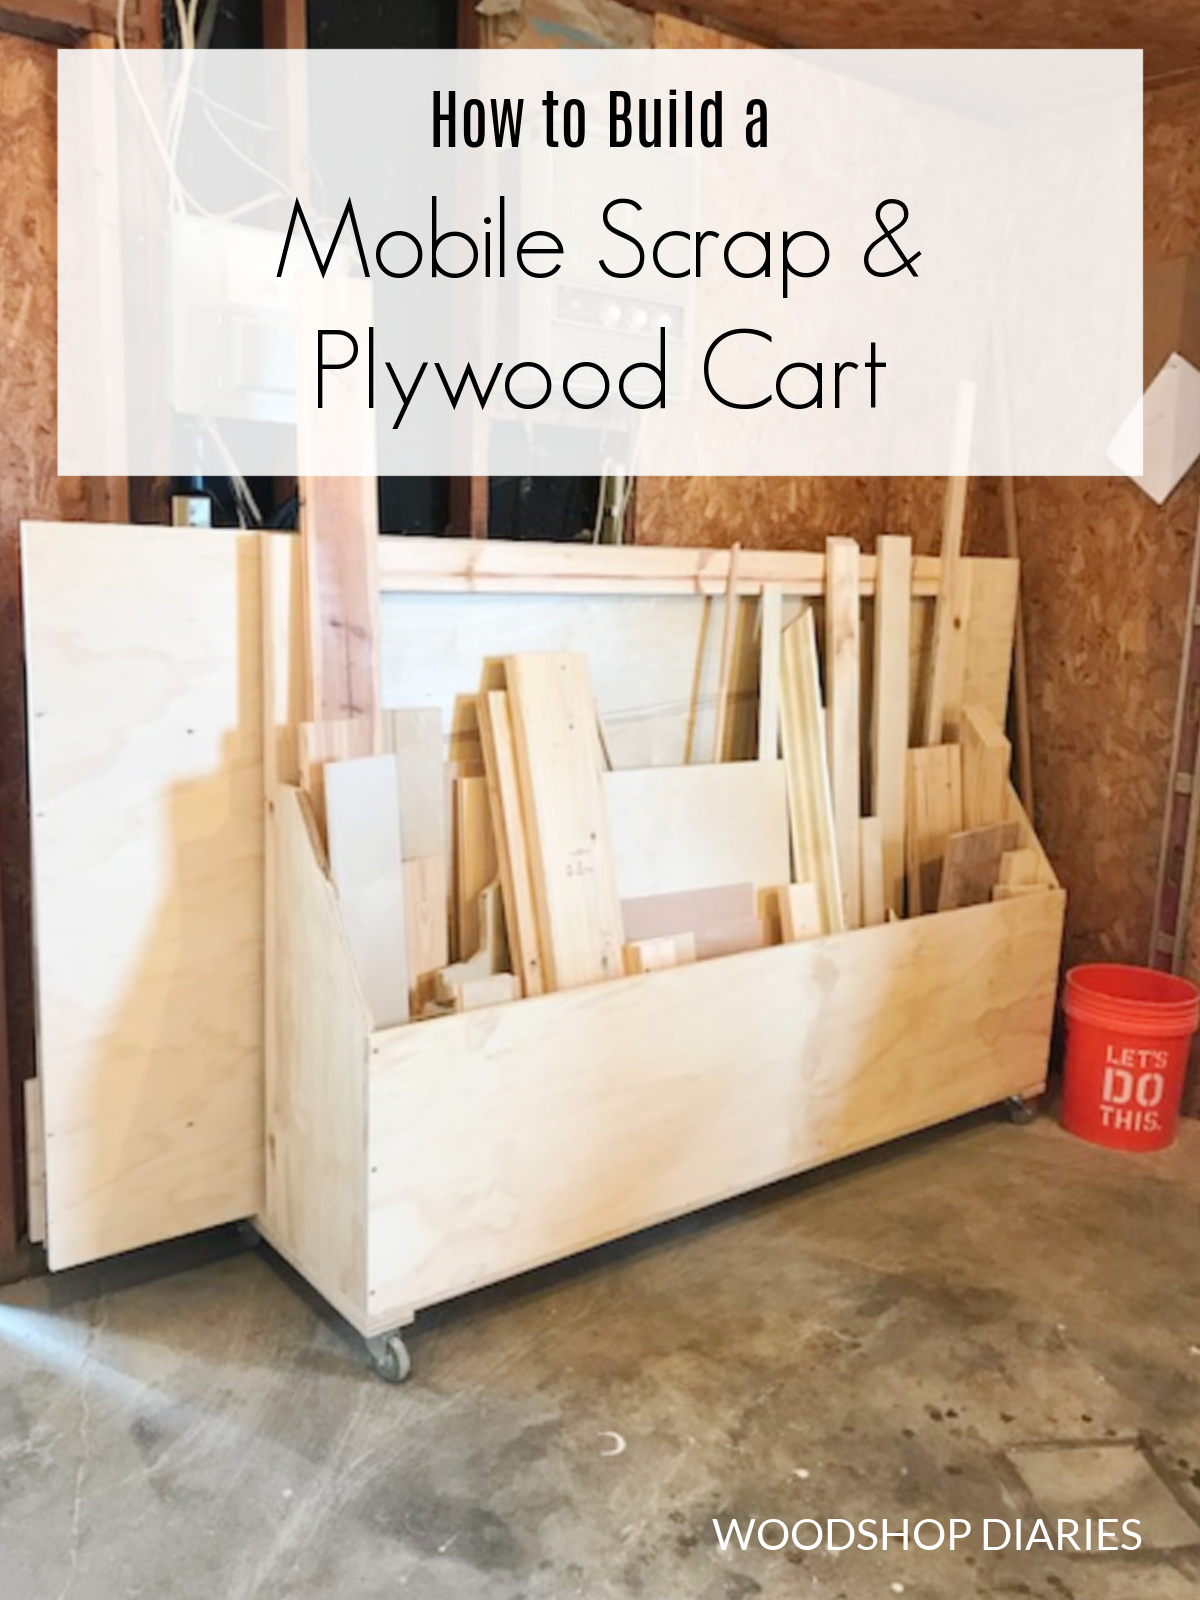
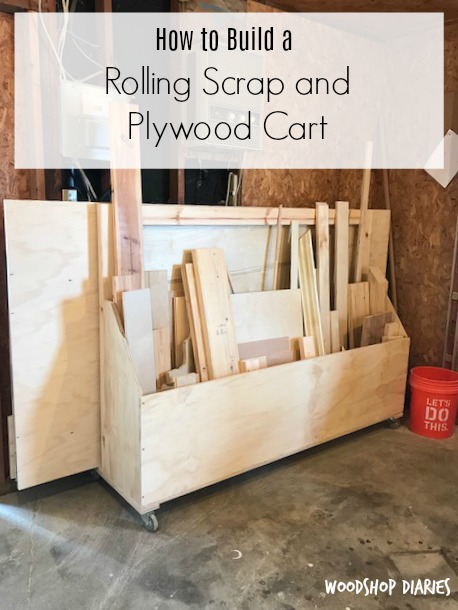
In this post, I’m sharing how to build a simple scrap wood and plywood storage cart for your garage or workshop!
Everyone’s workshop is different. But if you take a look in mine, it’s always full of scrap wood and plywood sheets.
For a long time, I just leaned my plywood sheets up against my ever growing scrap piles.
And it was a dangerous and chaotic mess and I could never get to what I needed. Here’s a glance at it when I considered it “organized” HA!
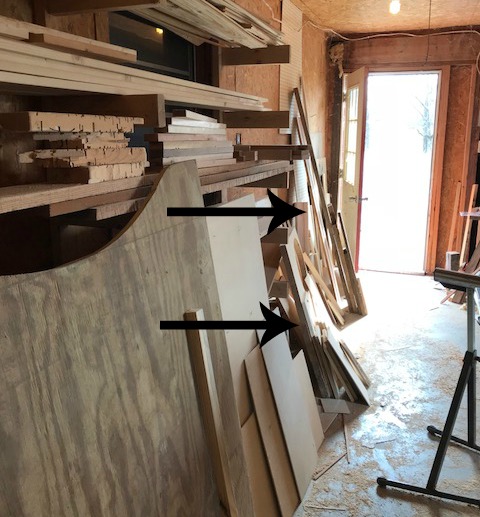
My workshop was really small so I needed to get this wood up off the floor and on wheels so I could move it around when I needed the extra space.
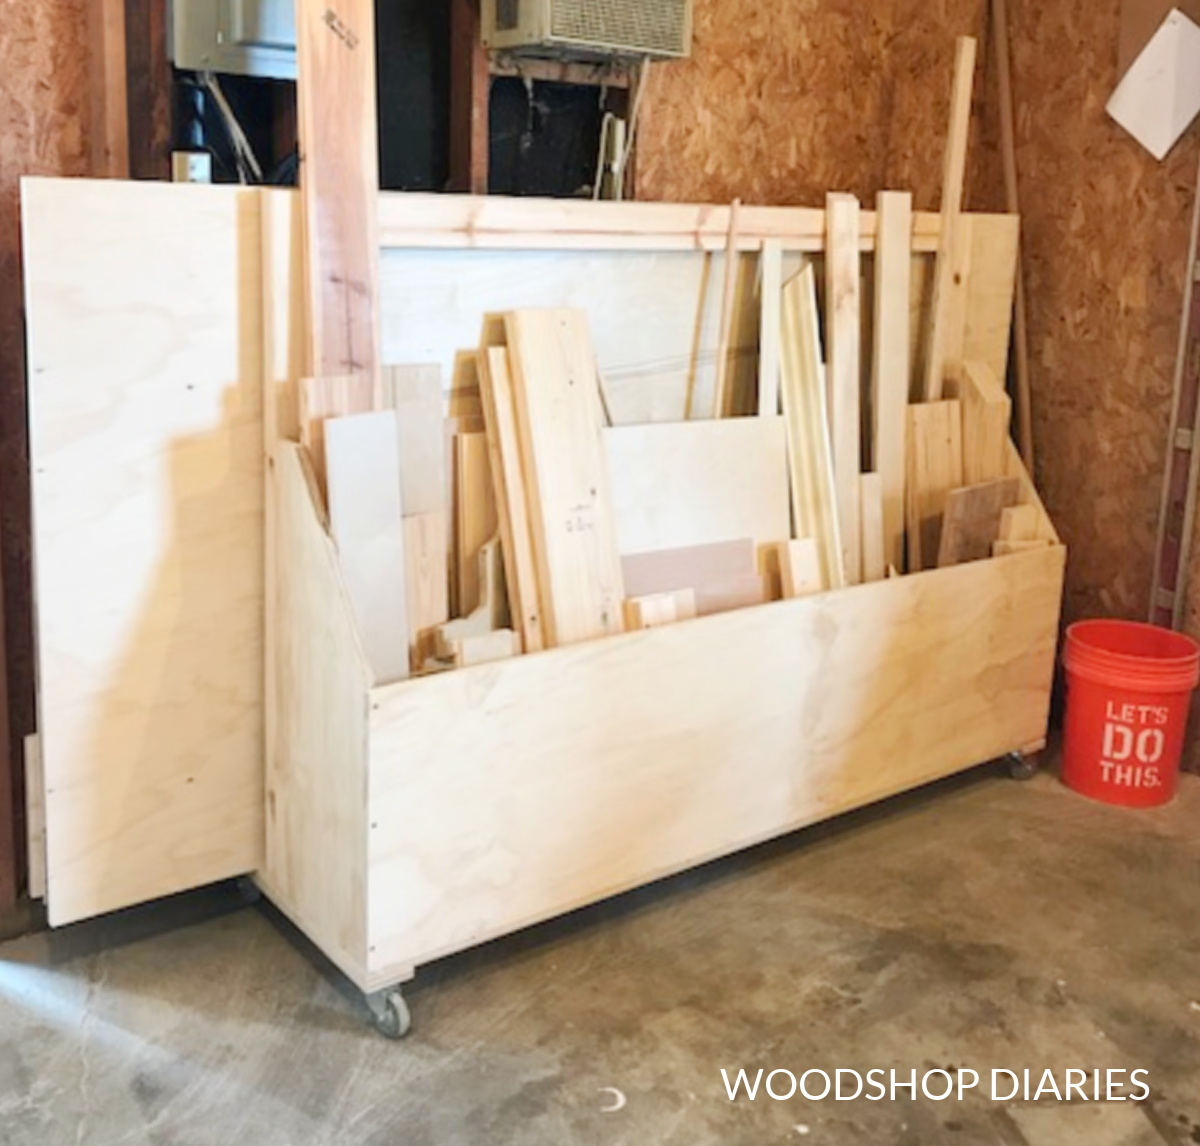
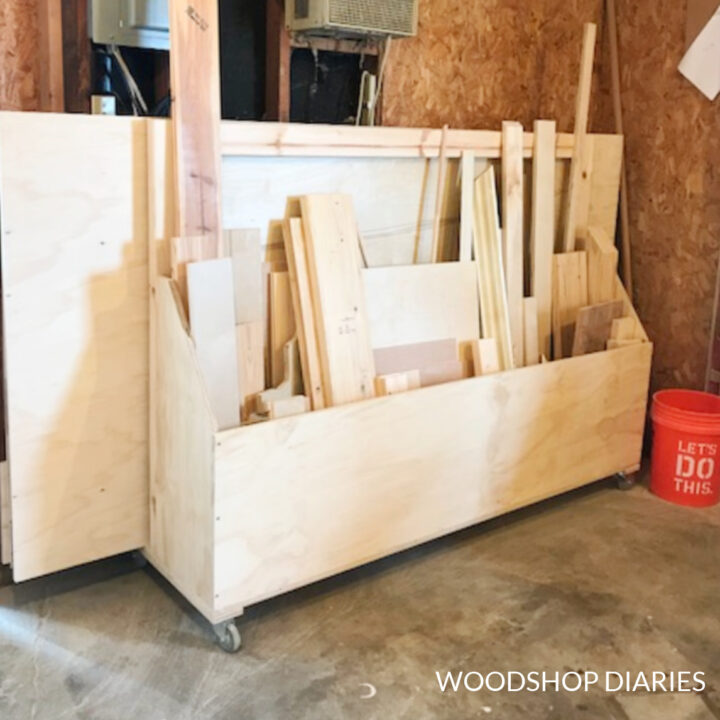
So I built a mobile workshop cart that could store my scrap wood and my plywood sheets! And it has been a game changer in my workshop space!
If your shop looks like the photo above, and you need a way to round up all your scraps and plywood, I’m showing you how to build your own in the plans below.
Just an FYI & an Update: I built this cart over 5 years ago. It’s moved with me to three other locations since then and I still use it in my workshop today.
As a side note, the fact that it’s on wheels has made it SO MUCH EASIER to move to different shops over the years.
*This post contains affiliate links. Please see disclosure policy for details.
Tools & Materials:
Tools:
- Drill
- Circular Saw
- Kreg Rip Cut (optional)
- Kreg AccuCut (optional)
- Pocket Hole Jig
Materials:
- 1 sheet ¾″ plywood
- 1 sheet ¼″ plywood
- (3) 2x4x8 boards
- 4 casters
- 1 ¼″ pocket hole screws
- 1 ¼″ & 2″ wood screws
- 2 ½″ pocket hole screws
What to Know Before Building This Scrap Wood Storage Cart
This is an easy beginner build that you can complete in just a few hours.
So it makes a great weekend woodworking project to help organize your garage or workshop! And you can easily modify the sizing to fit your space.
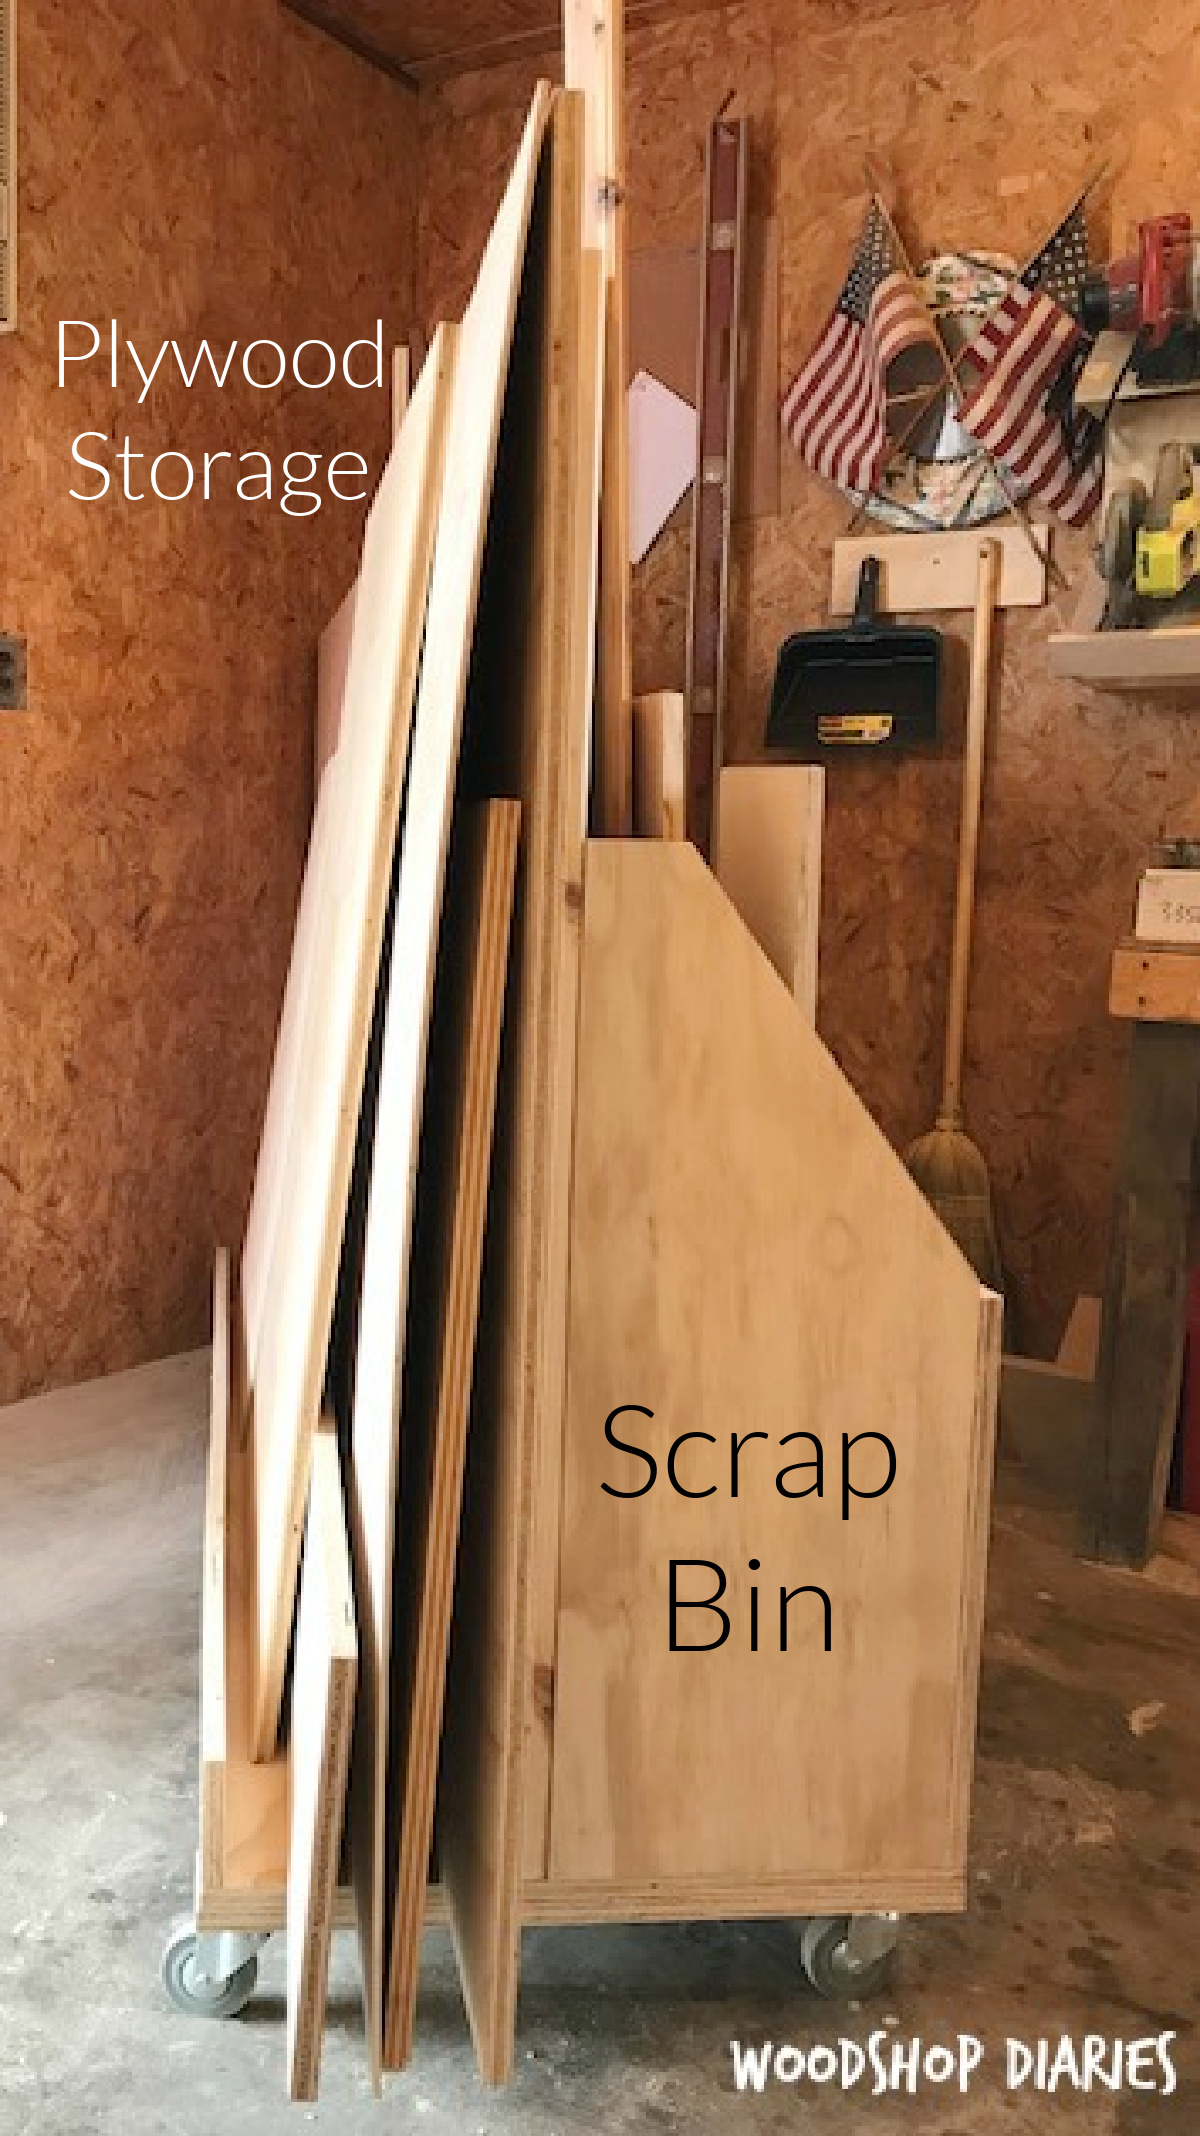
It’s made for storing both Scraps and Plywood
One side is designed as a “bin” to contain smaller pieces of scrap wood and the other side is open to hold full 4×8 sheets of plywood.
Since the plywood is stored so that it’s upright, it takes up less floor space. However, this does mean that there is potential for it to tip over.
So if you load down the cart with several sheets, use a clamp to simply clamp the sheets to the frame of the middle divider.
This will keep things from shifting while rolling and moving the cart.
Use Heavy Duty Caster Wheels
This project is intended for lumber storage…which can get quite heavy.
You are free to use whatever style, size, and color of caster wheel you’d like. The one’s I used here are no longer available, but here is a similar option.
However, I recommend making sure to get heavy duty wheels that are rated for at least several hundred pounds.
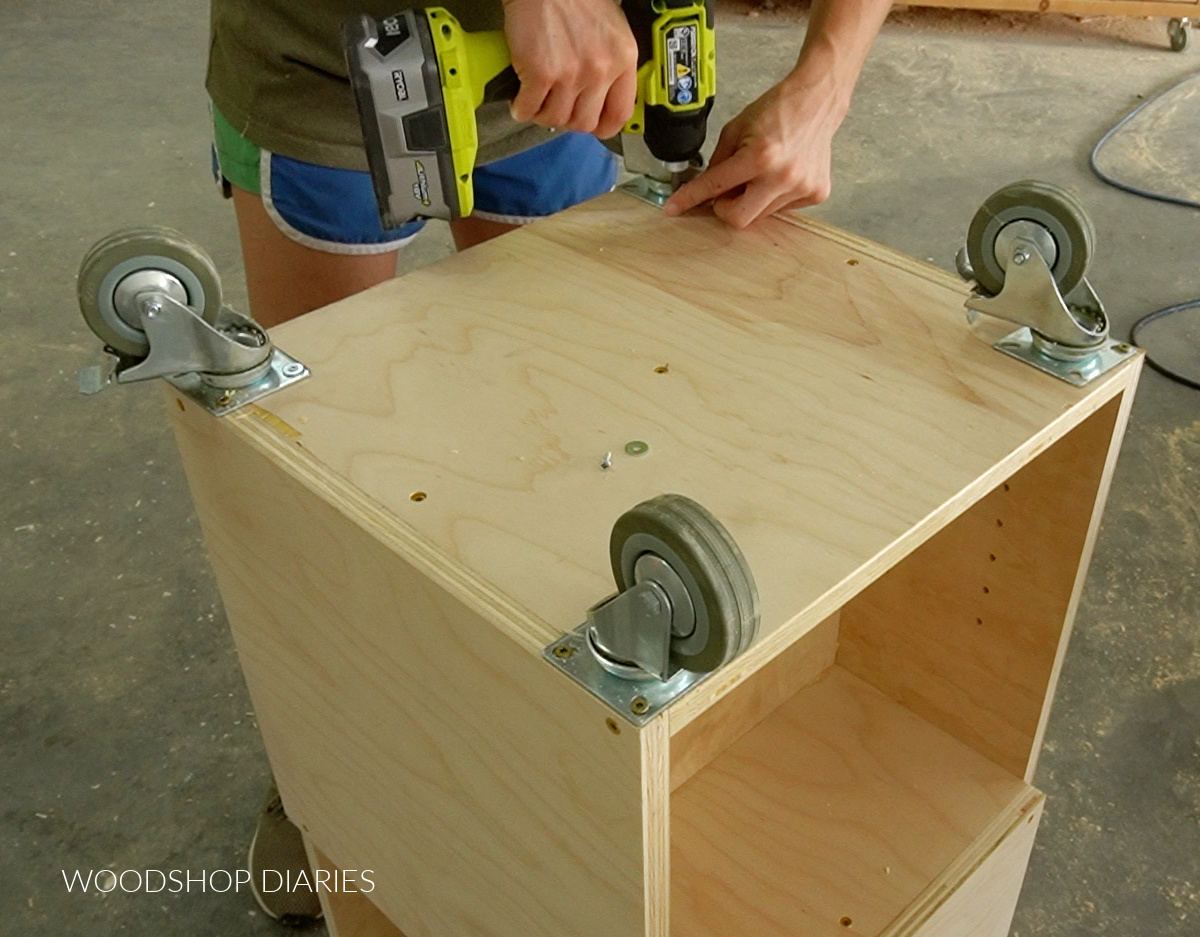
I also recommend using caster wheels that come on a mounting PLATE like shown above vs a threaded rod.
This allows you to simply screw the plate to the cart vs having to install an insert.
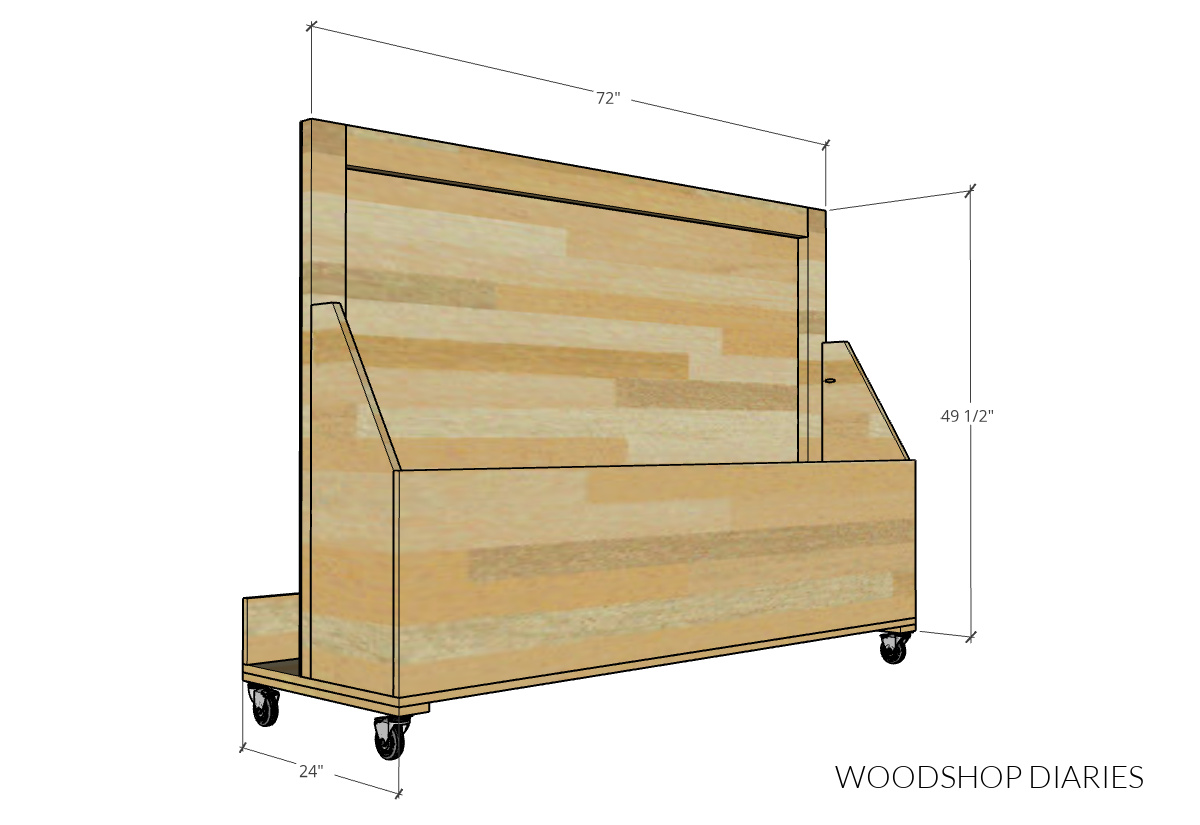
Overall Dimensions
The overall project dimensions for this scrap wood storage cart are 24″ deep x 49 ½″ tall (not including the caster wheels) x 72″ wide.
Helpful Resources for the Build
You may find these guides helpful throughout the build:
How to Build a Scrap & Plywood Storage Cart
You can find the step by step instructions to build your own lumber storage cart below.
But if you prefer to print your instructions, I’ve got the printable building plans with dimensions, detailed diagrams, cut and materials list here:
Step 1: Assemble the Bottom of Scrap Wood Cart
To start this project off, I assembled the bottom section of the cart.
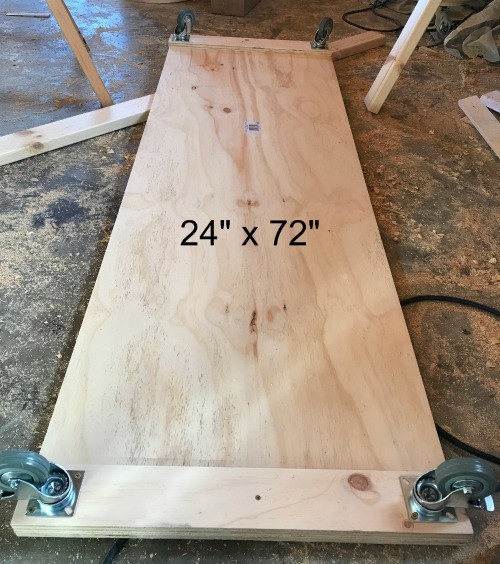
I used a circular saw with Kreg cutting guides (I used the Rip Cut and AccuCut) to cut a piece of ¾″ plywood to 24″ x 72″.
RELATED: How to cut plywood sheets with a circular saw
Then, I ripped two 3″ wide strips of ¾″ plywood to 24″ long and glued and screwed this onto the bottom along the outside edges.
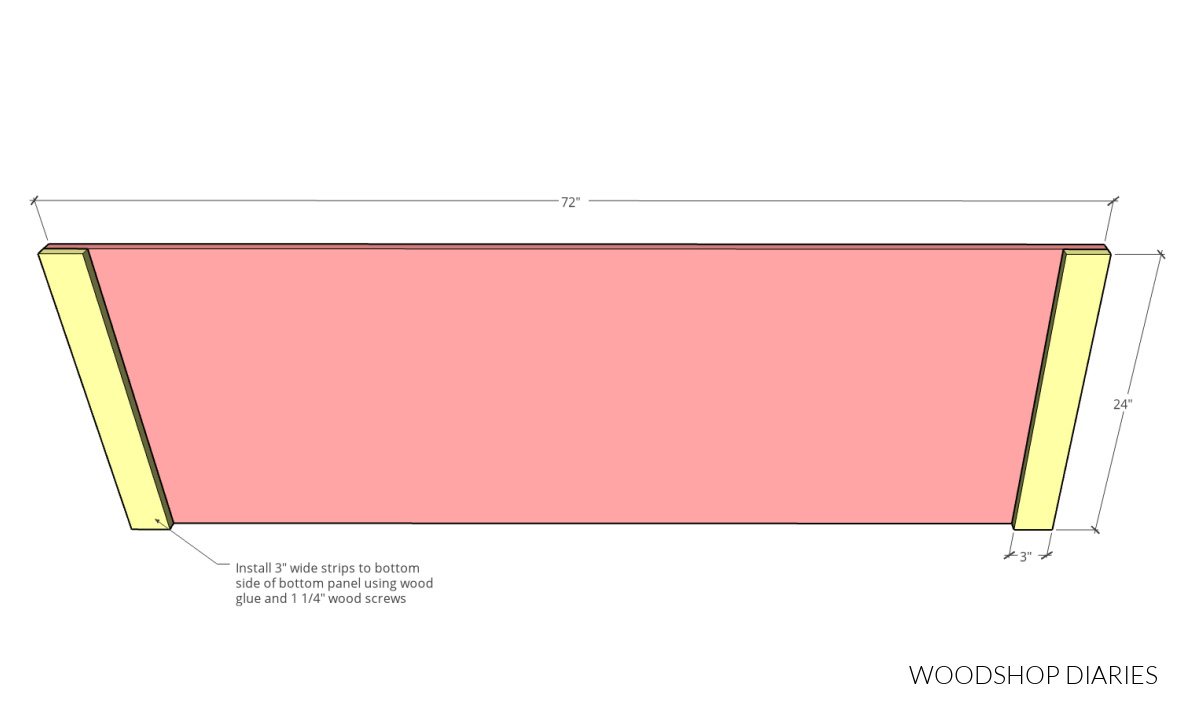
I used 1 ¼″ wood screws to secure these pieces.
These extra strips “thicken up” the corners where the caster wheels will go. This allows me to use longer screws, but also gives me a sturdier base to mount to.
Step 2: Add Caster Wheels
I attached the casters on the corners on the bottom side of the thin strips from step 1 using 1 ¼″ wood screws like shown.
Depending on the brand and type of caster wheel you purchase for this, it may come with it’s own mounting hardware.
Mine did not, so I used some washers (because my screw heads were smaller than the holes) and 1 ¼″ screws to secure them at each corner.
Step 3: Assemble Divider Frame
I assembled a “frame” of 2x4s that was 4 ft tall and 6 ft wide overall to use as the cart divider.
So I cut (2) pieces of 2×4 to 48″ long and (2) pieces of 2×4 to 65″ long. I drilled 1 ½″ pocket holes into both ends of the 65″ long pieces.
RELATED: How to use a pocket hole jig

But I also drilled 1 ½″ pocket holes into ONE end of each 48″ long piece–this will be for the next step.
Then, I assembled the frame together using 2 ½″ pocket hole screws through the 65″ long pieces, making sure the pocket holes on the 48″ long pieces all faced toward the bottom.
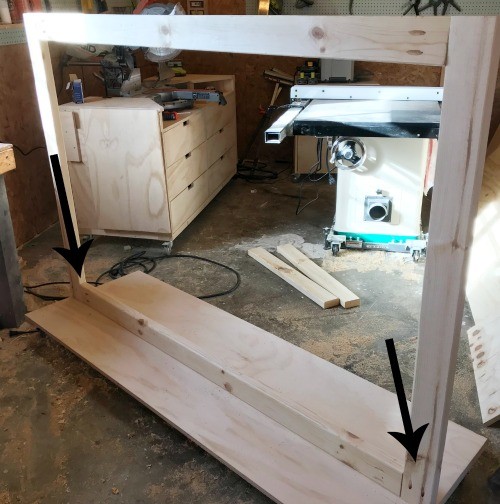
Step 4: Install Divider Frame
I placed the frame from step 3 onto the bottom panel of the cart like shown so that there was about 9 ¾″ space on one side and 12 ¾″ space on the other side.
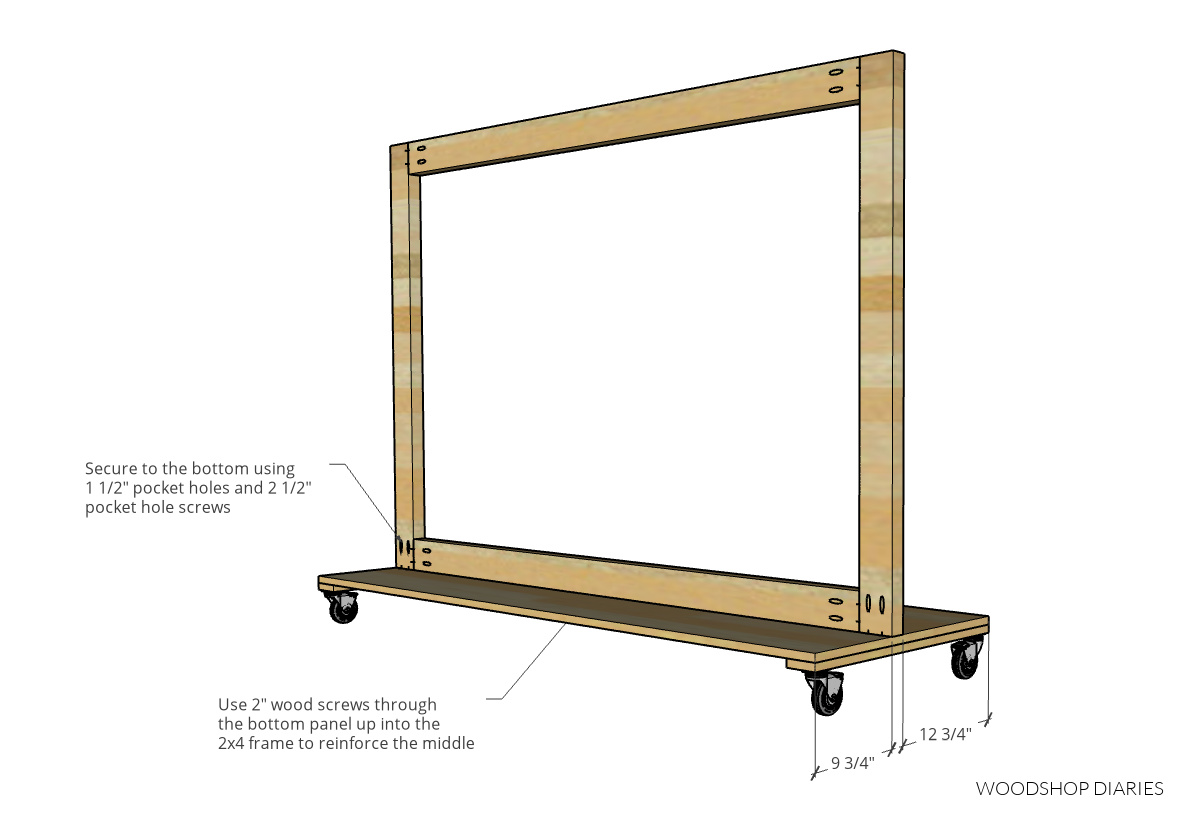
I faced the pocket holes toward the 9 ¾″ side and used 2 ½″ pocket hole screws to secure the frame to the plywood panel.
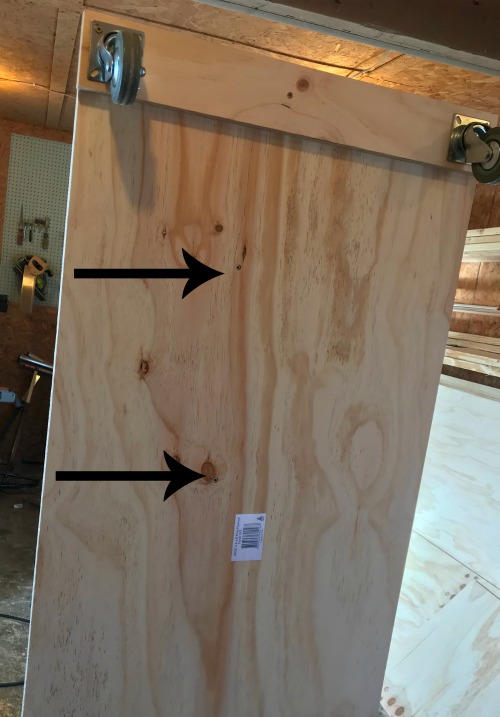
After attaching the frame with pocket hole screws, I flipped the cart on its side and added few 2″ wood screws from the underside up into the frame.
This will help hold the bottom plywood to the frame and prevent sagging in the middle.
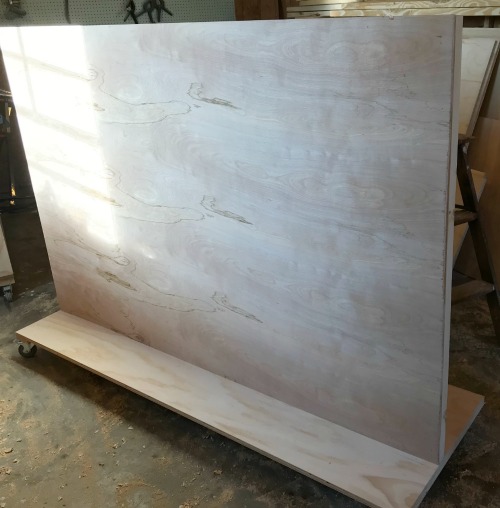
Step 5: Attach Divider Panel
To help separate the two sections of the cart, I added a piece of ¼″ plywood to cover one side of the frame. This piece should be cut to 48″ x 72″.
You could use ¾″ plywood if you wanted, but the thicker the plywood, the more “real estate” you are going to waste on the cart.
I used wood glue and staples to secure the panel on the side where the pocket holes were. But wood glue and 1 ¼″ screws would work fine if you didn’t have a stapler.
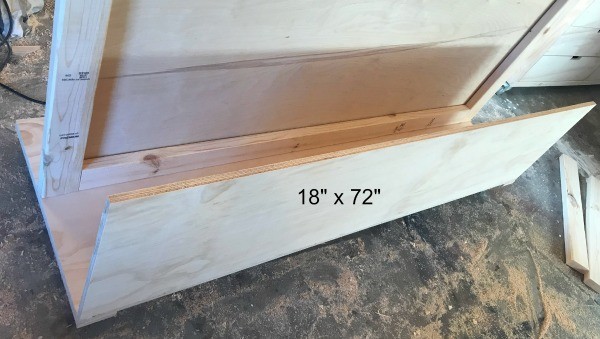
Step 6: Add Scrap Bin Front Panel
Next, I cut a piece of ¾″ plywood 18″ wide x 72″ long and drilled ¾″ pocket hole screws along one long end.
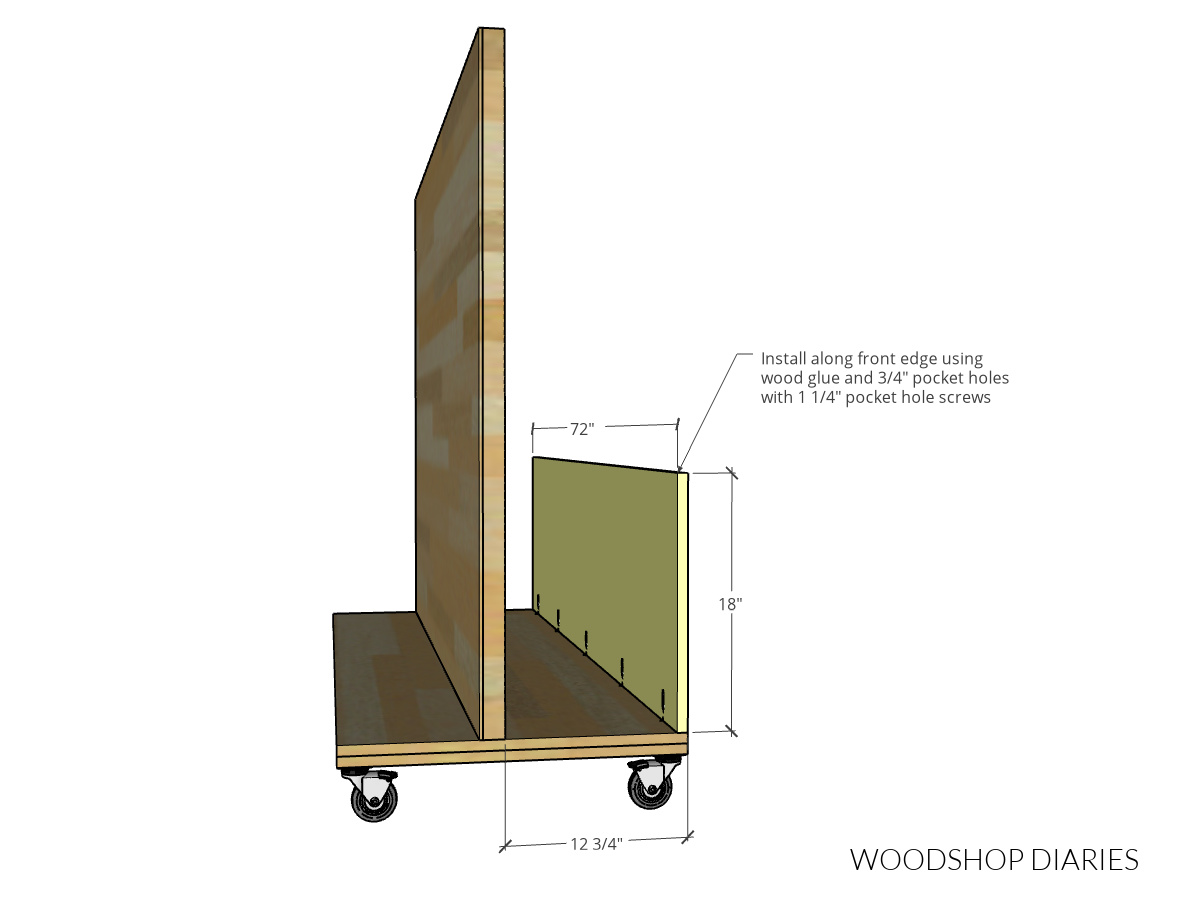
I attached this panel using wood glue and 1 ¼″ pocket hole screws along the front edge of the scrap side of the cart like shown.
I faced the pocket holes toward the inside so you don’t see them from the outside of the cart.
Step 7: Add Scrap Bin Side Panels
Next, I added the side panels to finish out the scrap wood bin.
You could make these simple rectangles, but I liked the look of the sloping sides. I cut two pieces of ¾″ plywood to 32″ tall x 12″ wide and cut a “slope” down to 18″ on the front edge.
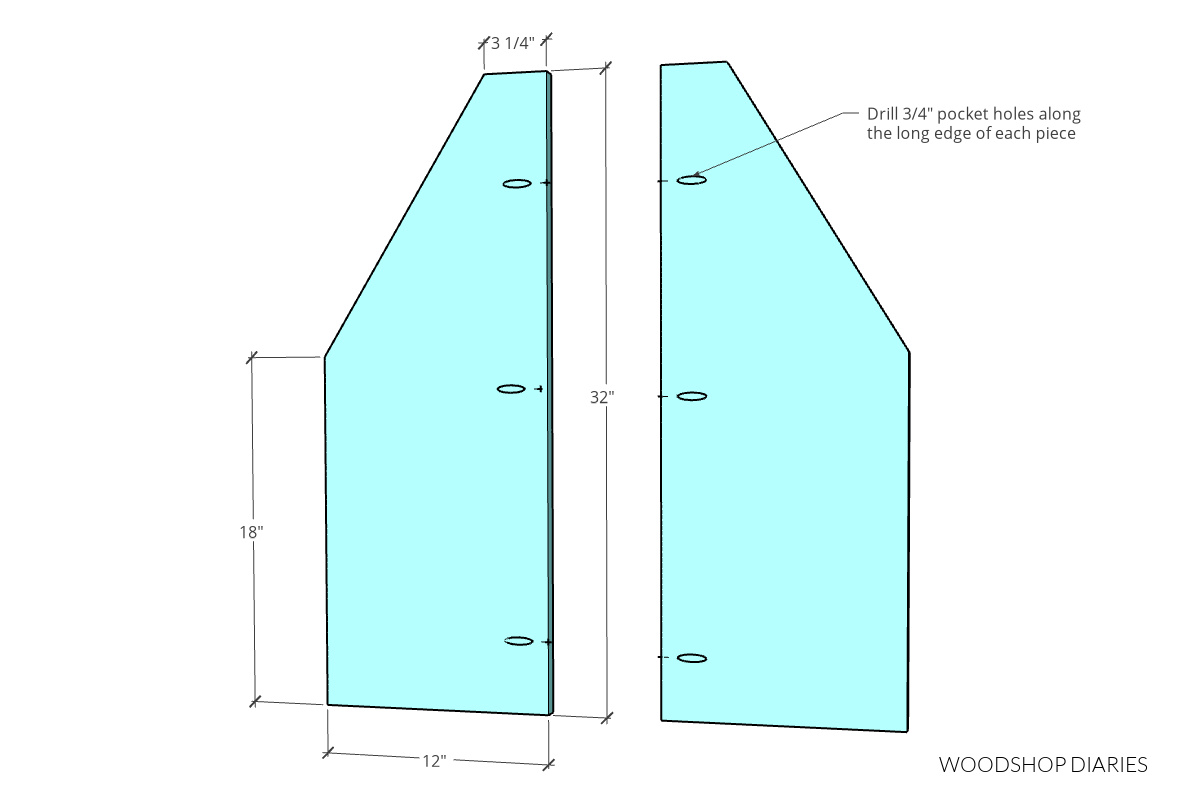
Then, I drilled ¾″ pocket holes along the back (the 32″ long) edges.
I installed these between the 2×4 frame and the front panel from step 6.
I used 1 ¼″ pocket hole screws to secure it on the back side to the 2×4.
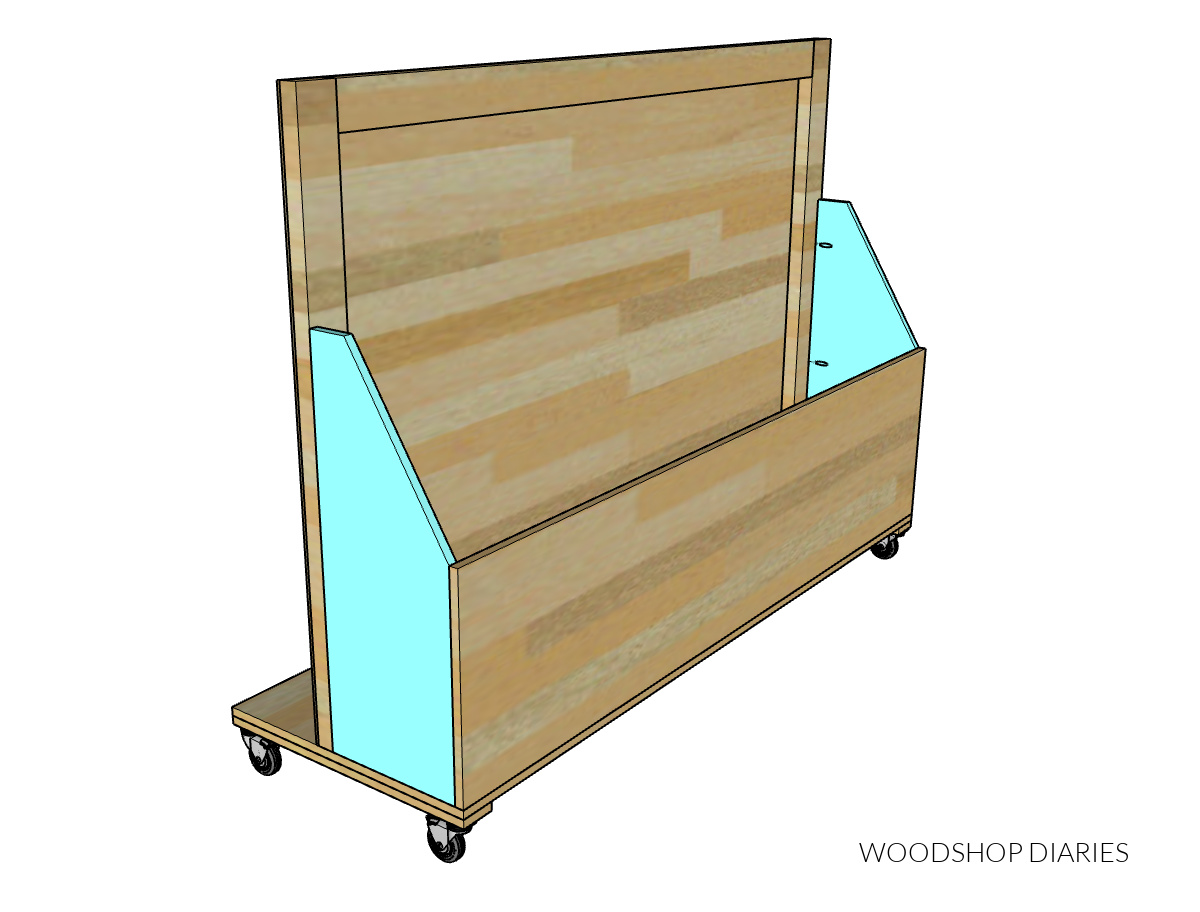
Then, I used 1 ¼″ wood screws through the front panel to secure the front sides of these pieces.
Step 8: Add “Lip” on Plywood Storage Side
Finally, to finish off the cart, I added a short “lip” onto the plywood side of the cart to keep the plywood from sliding off the edge.
NOTE: This won’t prevent the plywood from falling over–you will need to slant your plywood toward the middle frame. But this little rail will help keep slanting boards from slipping off the bottom of the cart.
For this, I cut a 6″ wide piece of ¾″ plywood 72″ long and attached just like I did the scrap bin front panel from step 6 using ¾″ pocket holes and 1 ¼″ pocket hole screws.
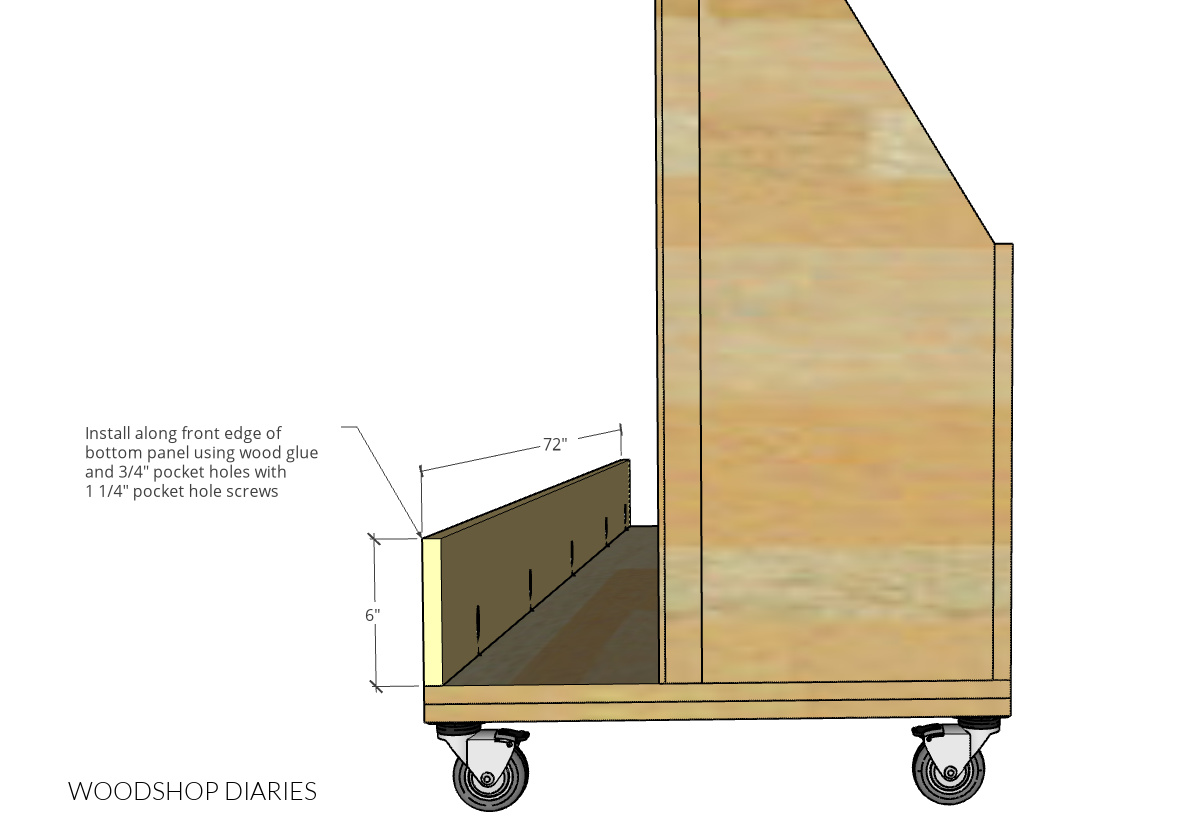
Except that this piece went on the opposite side of the cart, of course.
And, now, you have a mobile plywood and scrap wood storage cart!
All you have to do now is load it up and roll it out of the way!
Don’t forget to grab the printable plans here to build your own.
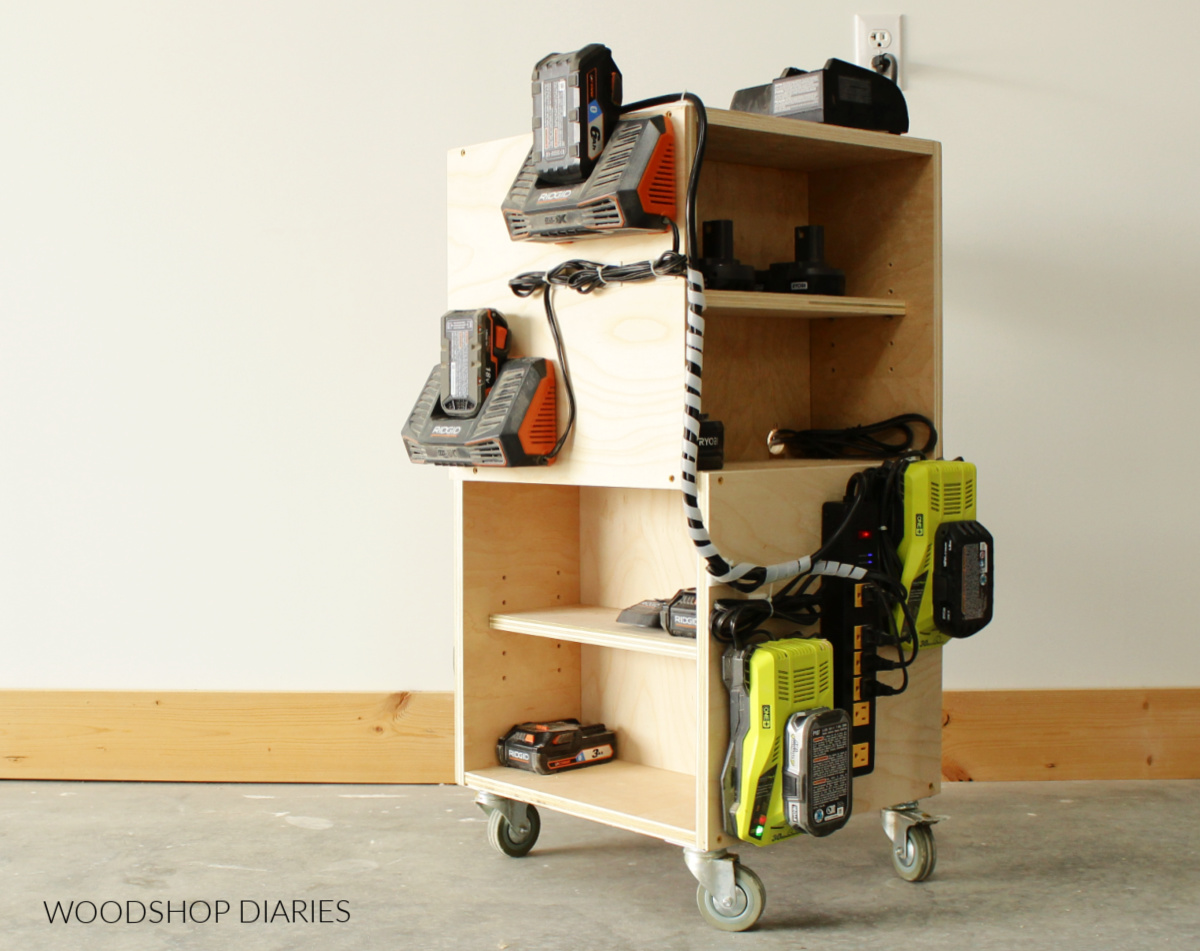
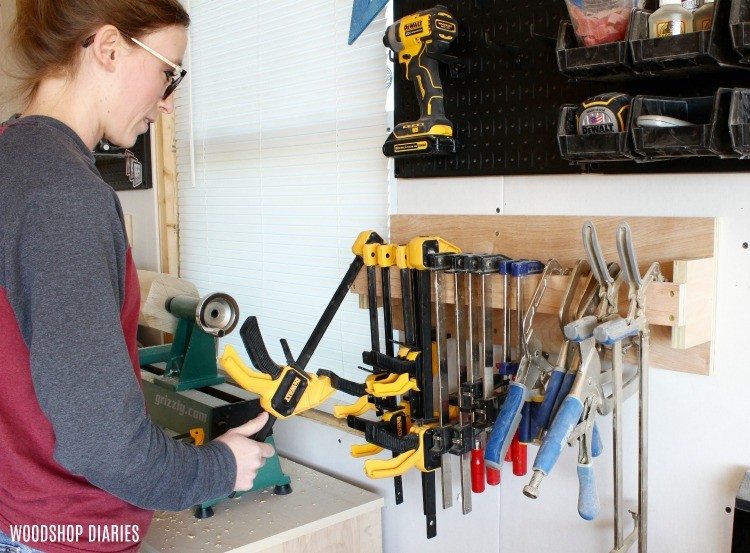
Looking for more workshop storage and organization ideas?
I hope you enjoyed seeing this scrap and plywood storage cart come together and if you would like to check out more workshop project ideas, here are a few favorites!
If you want to stay up to date on all the latest projects, plans and ideas, be sure to subscribe to the newsletter for priority access to the latest posts and videos!
And if you want to save this for later, be sure to pin it or share it to your favorite social channel!
Until next time, friends, happy building 🙂
HOW TO BUILD A PLYWOOD AND SCRAP WOOD SHOP CART
Learn how to build a simple scrap wood and plywood storage cart for your garage or workshop!
Materials
- 1 sheet ¾″ plywood
- 1 sheet ¼″ plywood
- 2x4x8 boards
- 4 casters
- 1 ¼″ pocket hole screws
- 1 ¼″ & 2″ wood screws
- 2 ½″ pocket hole screws
Instructions
- Assemble the bottom of scrap wood cart using a circular saw.
- Add caster wheels using wood screws.
- Assemble divider frame.
- Install divider frame using pocket hole screws.
- Attach divider panel using wood glue and staples.
- Add scrap bin front panel using pocket hole screws.
- Add scrap bin side panels using pocket hole screws.
- Add 'lip" on plywood storage side.
- Load it up and roll it out of the way!Scrap Wood & Plywood Shop Cart