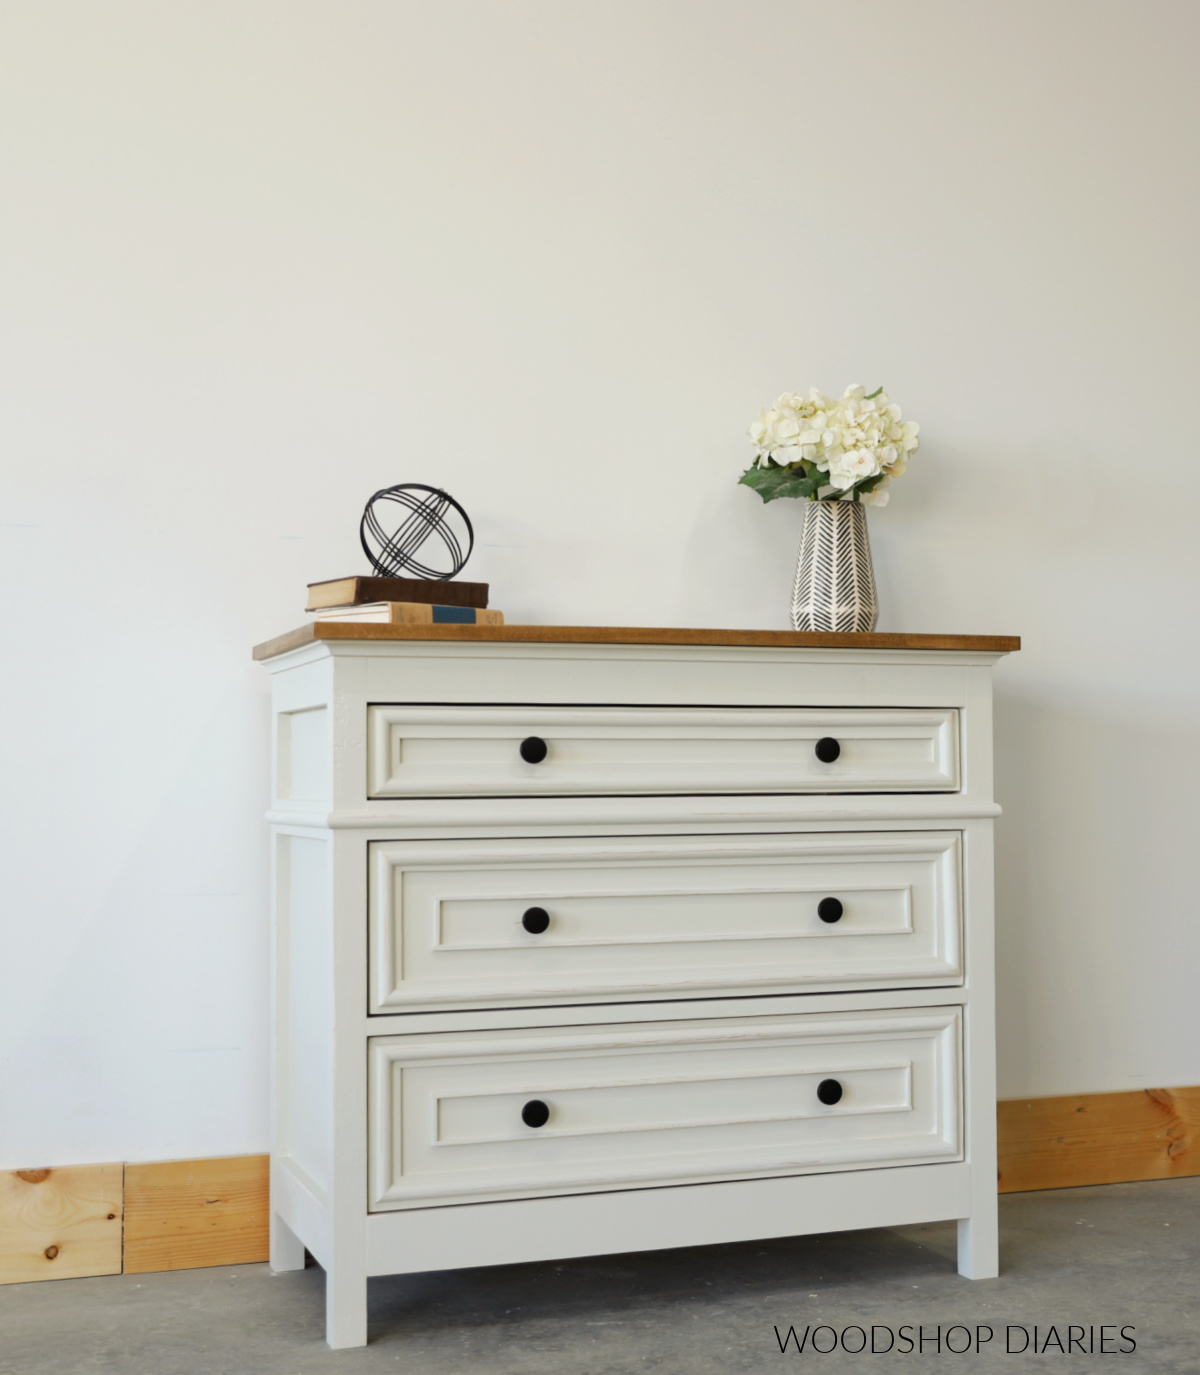
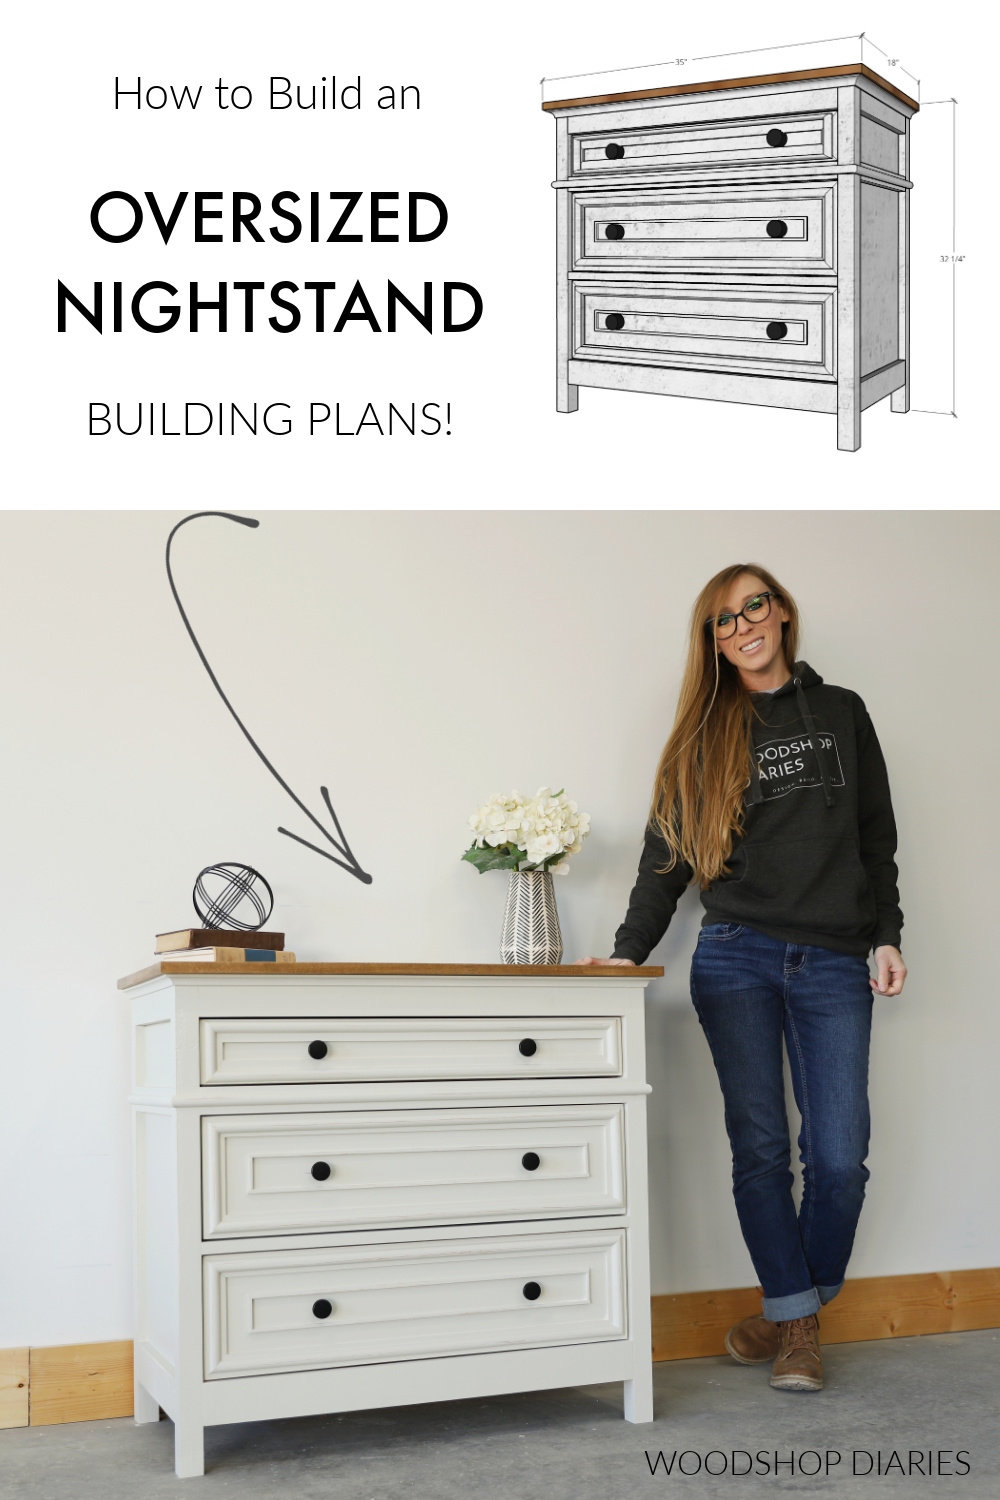
In this post, I’m sharing how to build a DIY oversized nightstand with 3 drawers!
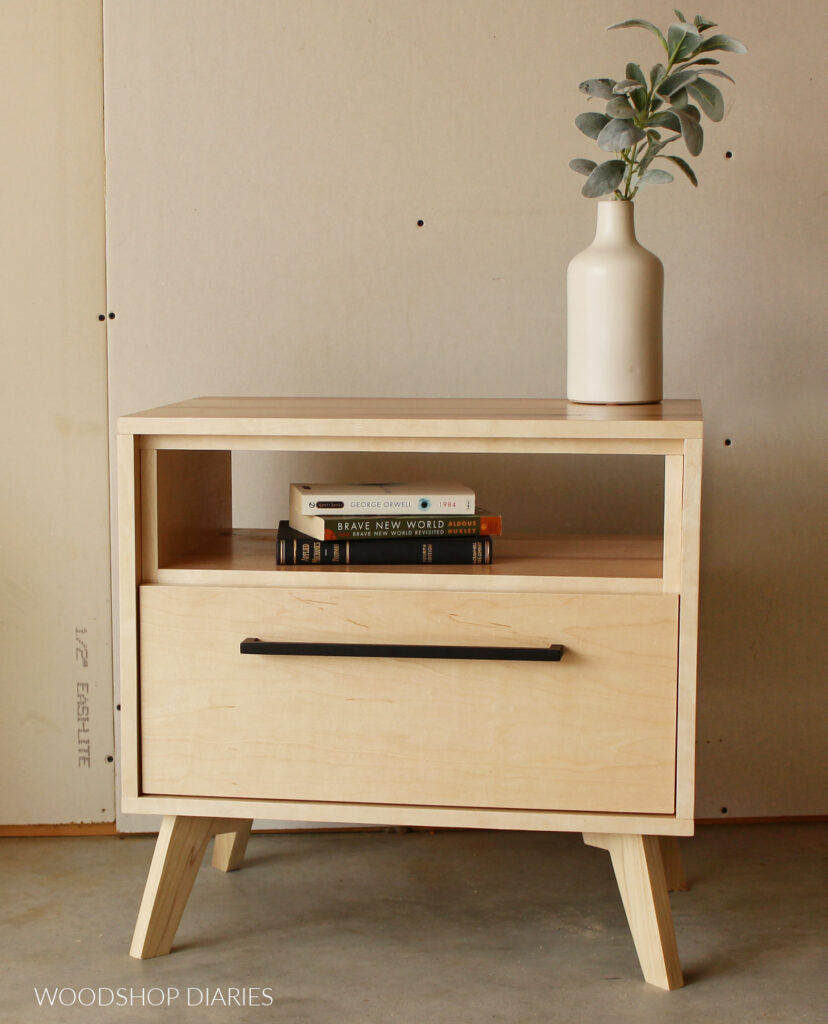
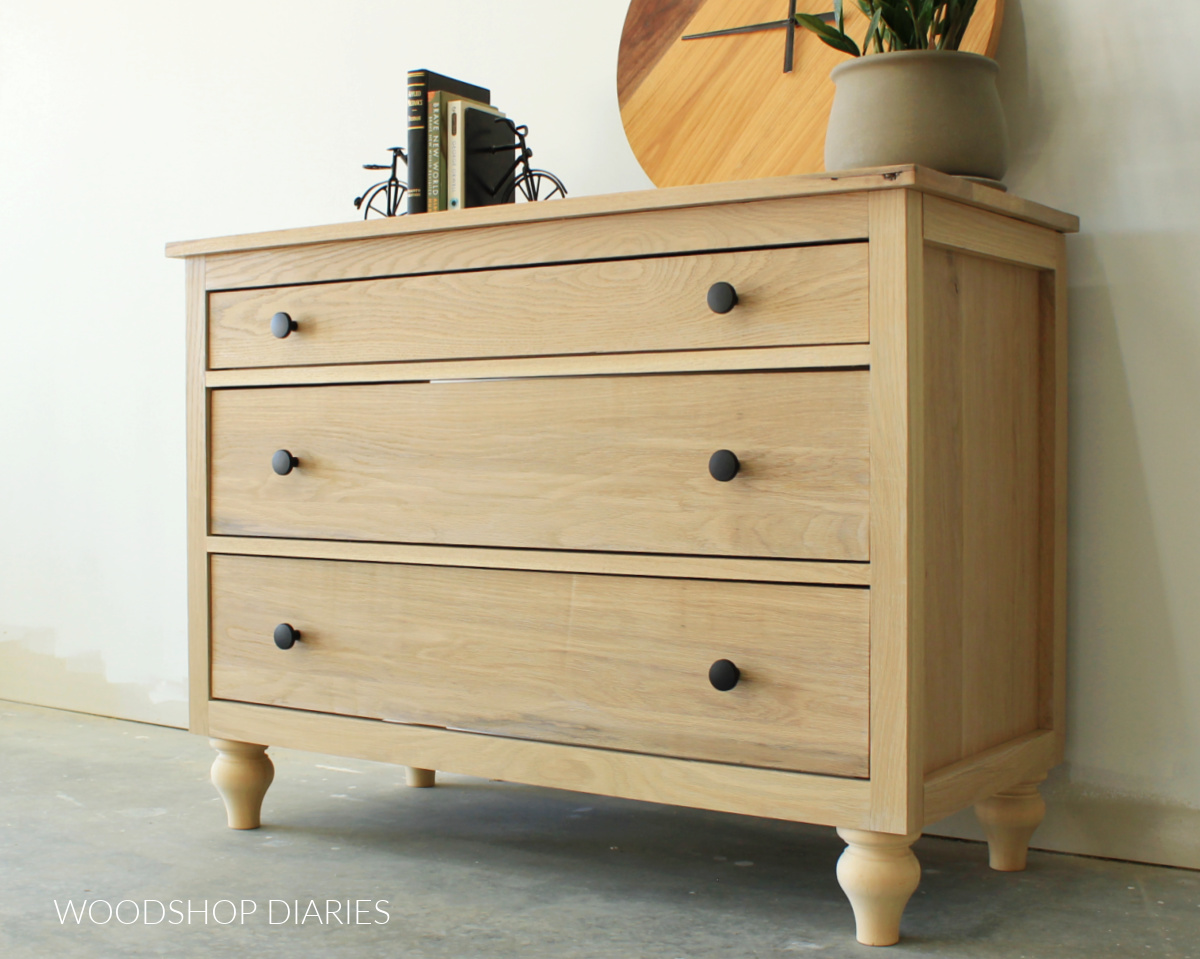
You can use this as a large nightstand, small dresser, or a basic console–anywhere you need a little extra storage.
My parents recently bought a new bed and matching dresser. But the nightstands that came with them were a bit too small for what they needed.
So, my mom asked me to make her a custom DIY oversized nightstand pair that would match her new set.
I studied the dresser so I could see what I needed to match and I immediately noticed lots and lots of decorative trim.
So, that’s what I added to these nightstands as well! This is a really fun design and you can customize the trim details however you’d like.
And even if you don’t need a large nightstand, this makes a great little dresser, console, or coffee bar for the kitchen.
So if you’re ready to build it, let’s go!
**This post contains affiliate links. See website policies.
What to Know Before Building This DIY Oversized Nightstand
This project is a great intermediate build! It’s not difficult, but there are a lot of trim details to work with, so it may not be the best option for a beginner.
The materials list below is what you need to build ONE oversized nightstand. If you need two, you’ll need to double it.
Trim Details:
The trim on this nightstand build is completely customizable (and optional), so if you want to skip some of those or change things up, feel free!
The plans call for using cove molding around the top and half round on
the front and sides below the top drawer.
They also call for adding lattice trim and half round molding on the drawer fronts and ¼″ square dowels, additionally, on the two larger drawer fronts.
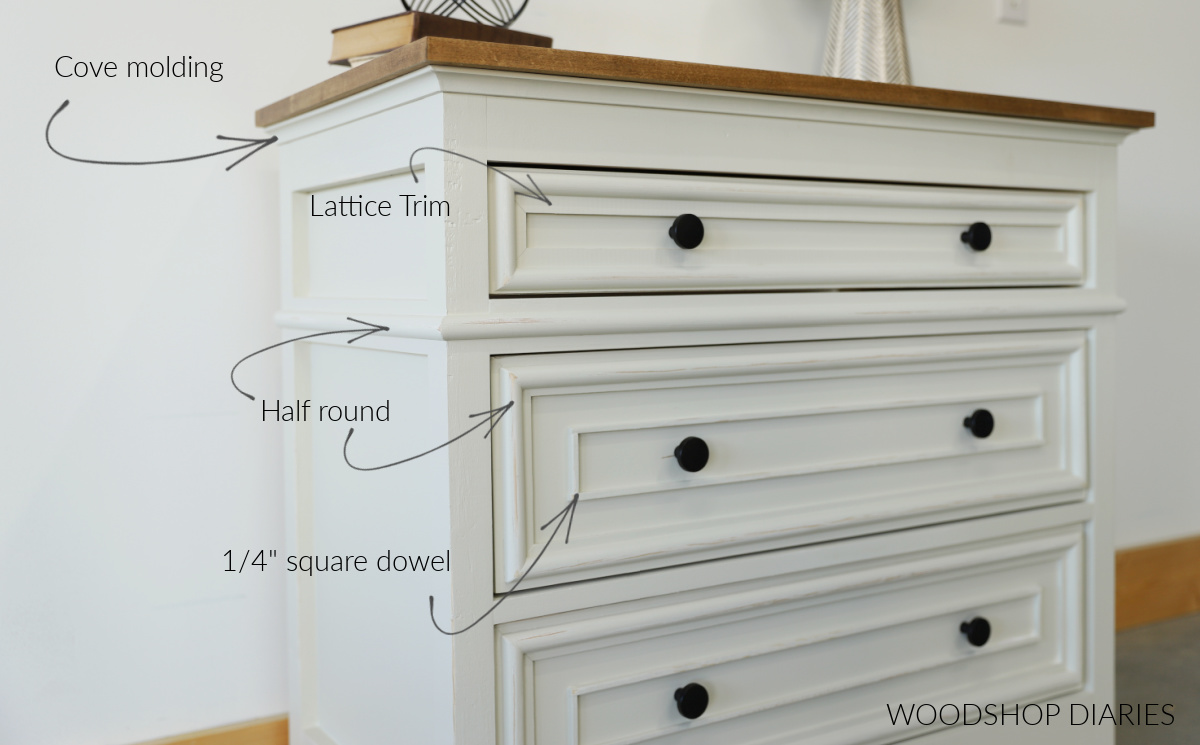
If you decide to do without the trim or change it up, you may want to adjust your drawers a little closer to the front edge of the nightstand if your drawer fronts end up not being quite as thick.
Attaching the Top:
The top of this nightstand is plywood, so there are several options for attaching it.
I used figure 8 fasteners here because that’s what I already had handy in the shop, but I suggest using L brackets (90 degree corner brackets) if you have them.
These are simple, quick, and plenty strong for this application and don’t require the use of any additional tools.
Overall Dimensions:
The overall dimensions of this DIY oversized nightstand are approximately 18″ deep, 32 ¼″ tall, and 35″ wide.

Helpful Resources for the Build
You may find these posts and how-tos helpful in the building process:
- How to cut plywood sheets
- How to use a pocket hole jig
- How to apply iron on edge banding
- How to build and install drawers
- Tips to Professional Looking DIY Projects
- How to finish raw wood furniture
Tools & Materials
The materials list below is a little long. Don’t let that scare you! A large portion of the materials are trim details–which are optional.
Take a look at the list and the design notes above and feel free to modify how you’d like. Don’t get overwhelmed by the list! You got this 🙂
Tools:
- Miter Saw
- Circular saw and cutting guides
- Drill/Driver
- Pocket Hole Jig
- Brad nailer
- Table Saw or Router (optional–for cutting dadoes in drawers)
Materials:
- (1) 4×8 sheet ¾″ plywood
- (1) 4×8 sheet ¼″ plywood
- (2) 2x2x8 boards
- (3) 1x3x8 boards
- (1) 1x2x8 board
- (1) 8ft piece cove molding (optional)
- (4) 8ft pieces half round molding (optional)
- (3) 8ft pieces ¼″ x 1 ½″ lattice trim (optional)
- (2) 8ft pieces ¼″ square dowel (optional)
- 1 ¼″ pocket hole screws
- 1 ¼″ brad nails
- (3) pair 14″ drawer slides
- 90 degree corner brackets OR figure 8 fasteners
- Iron On Edge Banding
- Wood Glue
- Wood Finish as desired
- Knobs/Drawer Pulls
How to Build a DIY Oversized Nightstand with 3 Drawers
If you prefer to watch, I’ve got the video for you here and if you prefer to read, I’m sharing the plans below.

I’ve provided the step by step instructions to build this oversized nightstand here in this post along with some helpful tips within each step.
However, if you prefer to print your plans, you can grab the printable version here:
Step 1: Assemble Nightstand Sides
I started by assembling the sides of the nightstand. These were made from 2x2s and ¾″ plywood.
So I cut (4) 2x2s for the legs and two pieces of plywood for the panels.
RELATED: How to cut plywood sheets

TIP: You can use precut 2x2s for this if you’d like, but I like to make my own 2x2s using this tutorial.
I drilled ¾″ pocket holes along the edges of the plywood panels and secured them between the 2×2 legs using 1 ¼″ pocket hole screws.
RELATED: How to use a pocket hole jig
The plywood panel is flush to the inside of the legs and I made two identical sides this way.
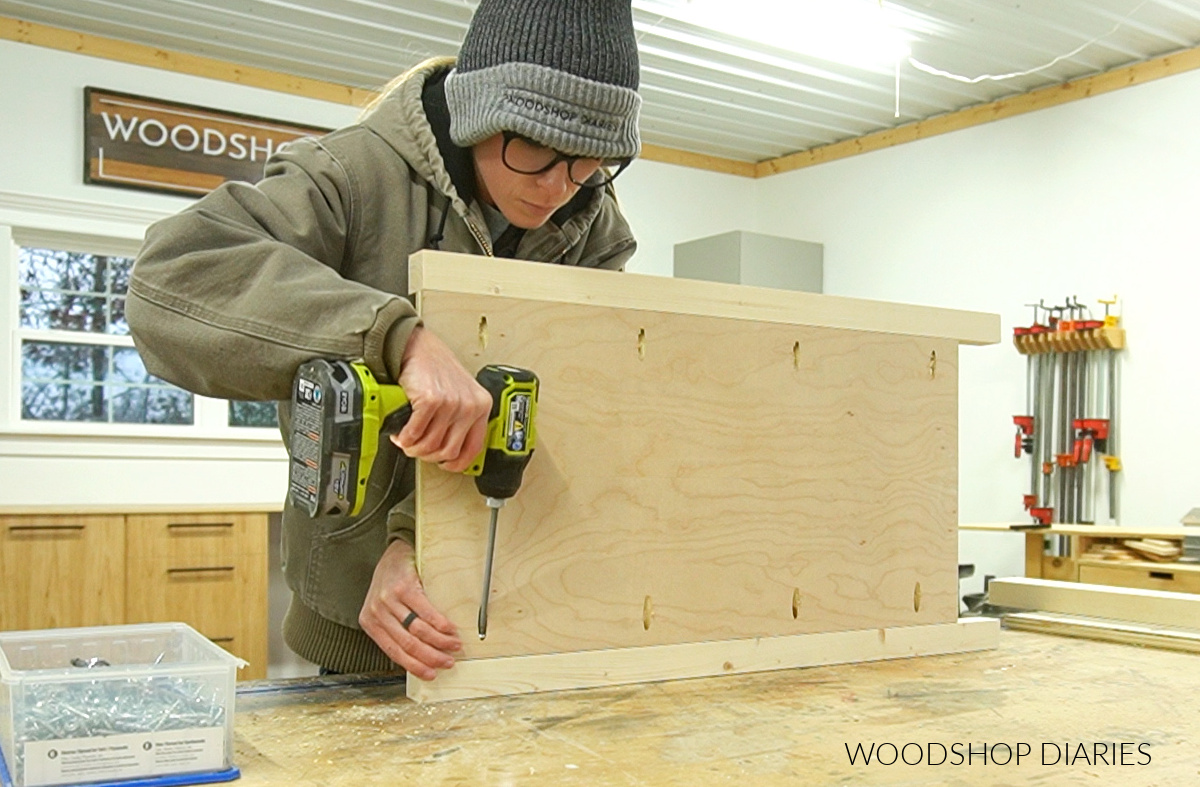
Step 2: Build Oversized Nightstand Frame
Once the sides were assembled, I moved on to making the rest of the frame.
For this, I cut four pieces of 1×3 to 30″ long and drilled ¾″ pocket holes into the ends of each one.
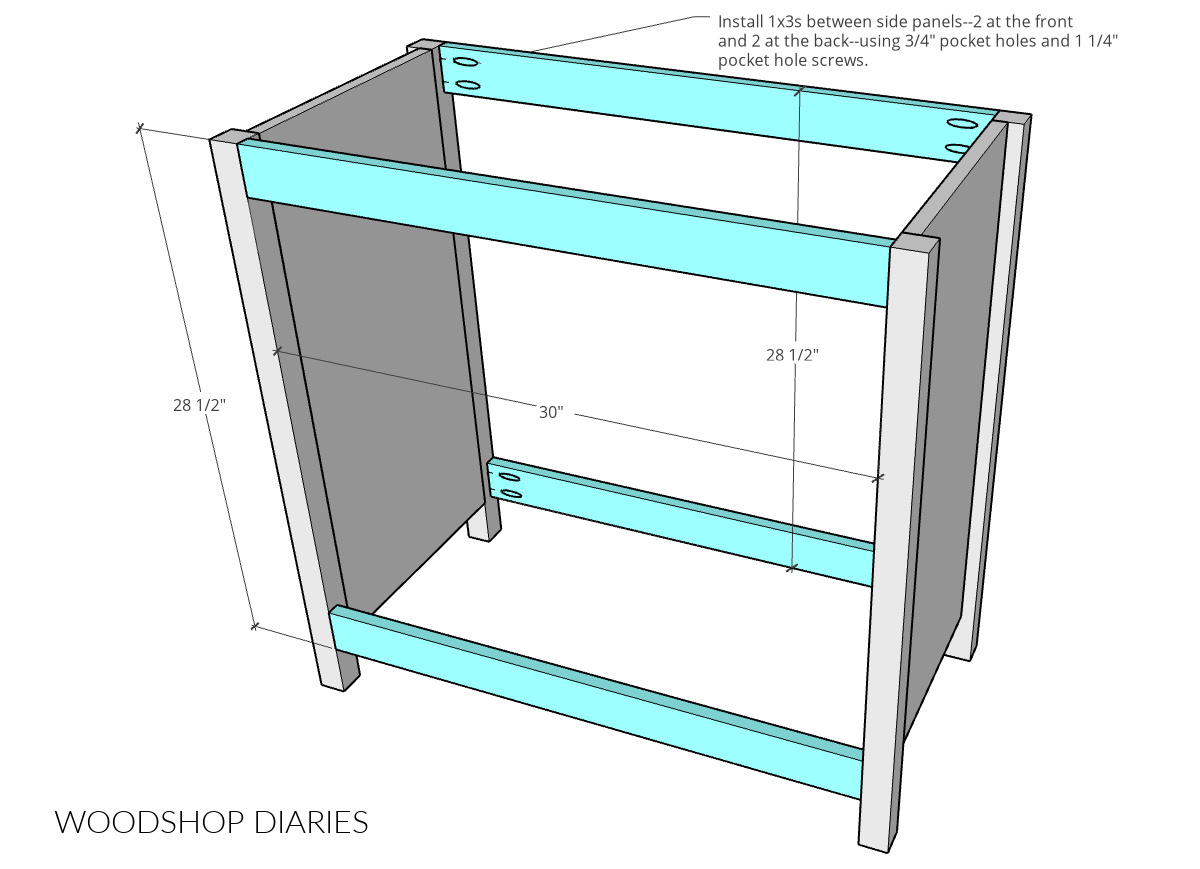
I used 1 ¼″ pocket hole screws to secure these between the two side panels–2 at the top and two toward the bottom, even with the bottom edge of the plywood sides.
To hide the pocket holes, I faced them all toward the inside.
Prefer to print your plans? You can grab the printable plans for this DIY oversized nightstand here.
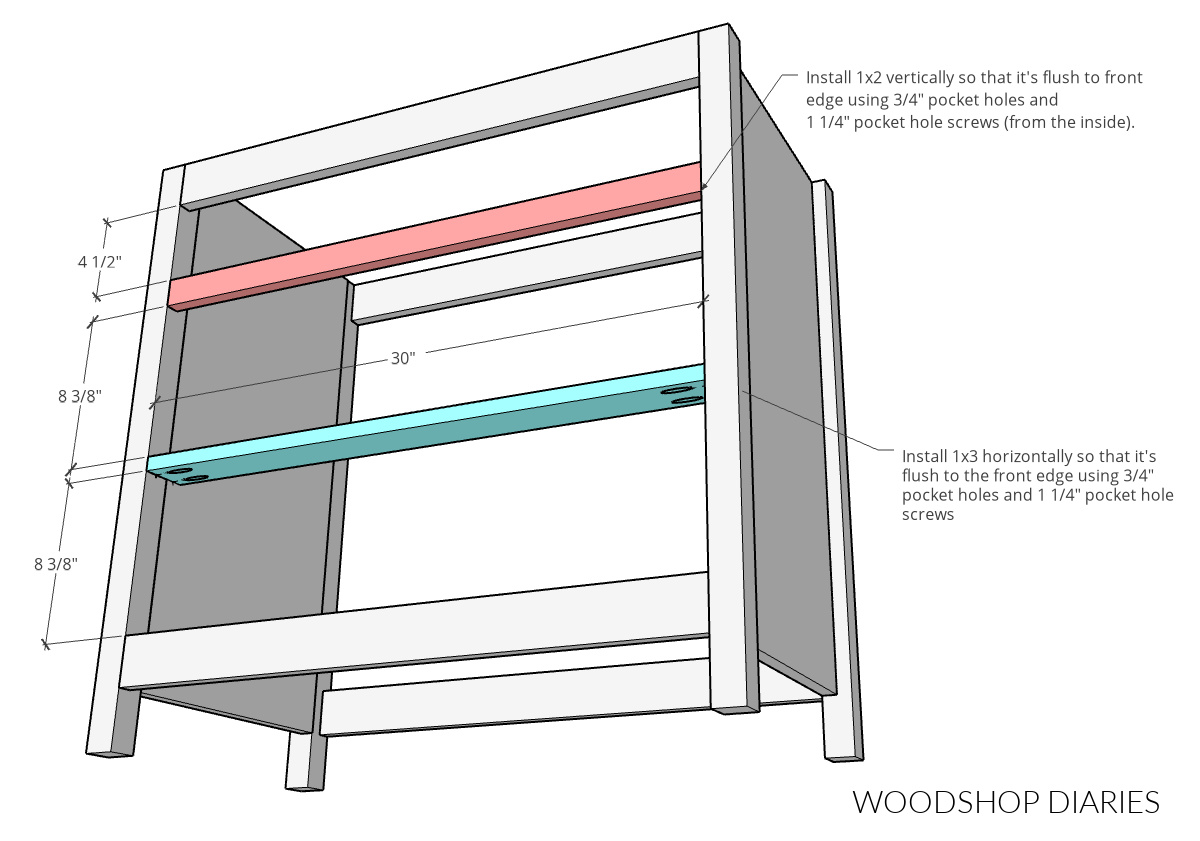
Step 3: Install Drawer Dividers
To separate out the three drawers, I added additional dividers on the front to kind of “frame” them out.
For this, I cut one 1×2 and one 1×3 to 30″ long and drilled ¾″ pocket holes into the ends of each.
I installed these into the frame along the front edge.

The 1×2 goes under the top drawer and runs vertically. But the 1×3 runs horizontally so that it equally divides the two bottom drawers.
You can space these however you’d like if you need different sized drawers, but this is the spacing I used.
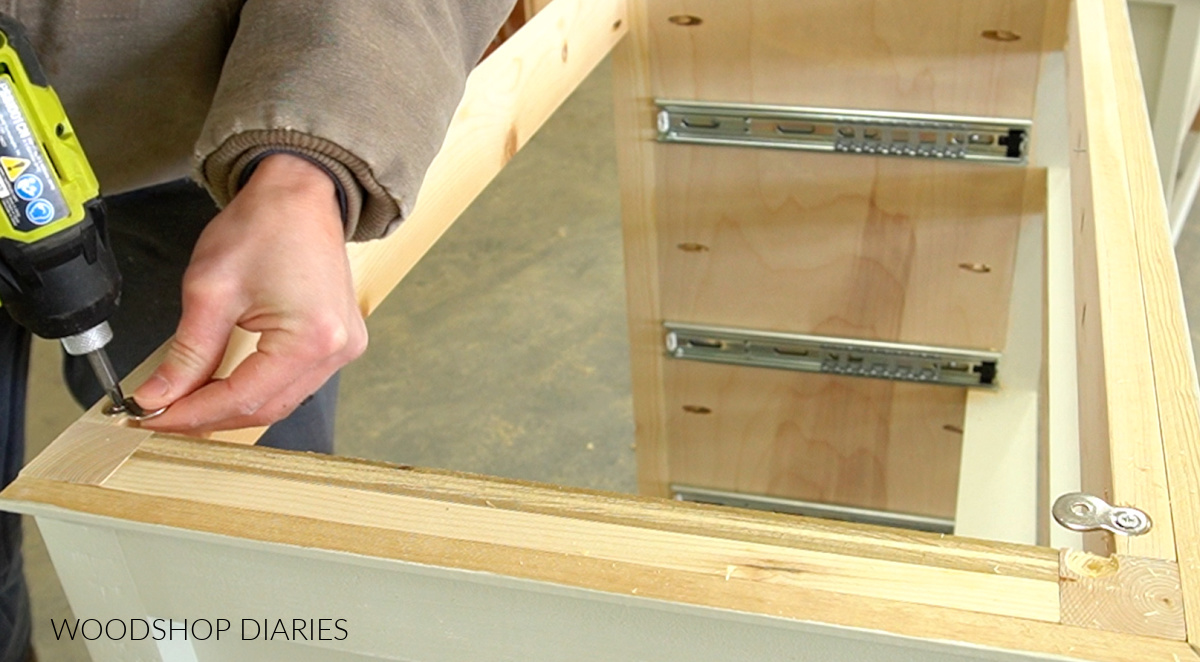
Step 4: Install Drawer Slides
Next, I installed the drawer slides into the nightstand frame.
I used 3 pair of 14″ ball bearing drawer slides for this and installed them 1 ½″ inset from the front edge.
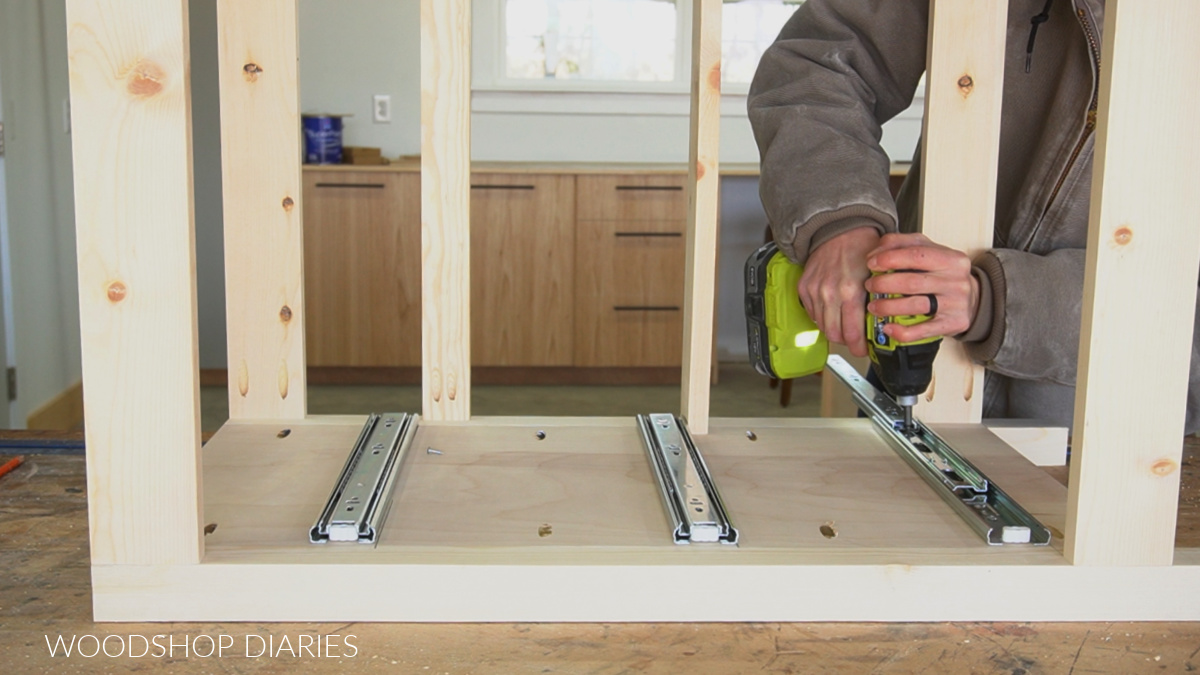
I spaced them so that the bottom edge of the slides was even with the top edge of the divider/frame piece below it.
TIP: Check out this detailed guide for how to install drawer slides.
Step 5: Build Drawer Boxes
Building drawers is always my favorite part, so this is my pick step haha.
I cut all the drawer box pieces from ¾″ plywood and cut the drawer bottoms from ¼″ plywood.

I like to cut dadoes in my drawer boxes to install the bottom into, but if you don’t want to cut dadoes, you can certainly just glue and staple the bottom instead.
RELATED: How to build drawer boxes
I built two deep and one shallow drawer using ¾″ pocket holes and 1 ¼″ pocket hole screws to assemble.
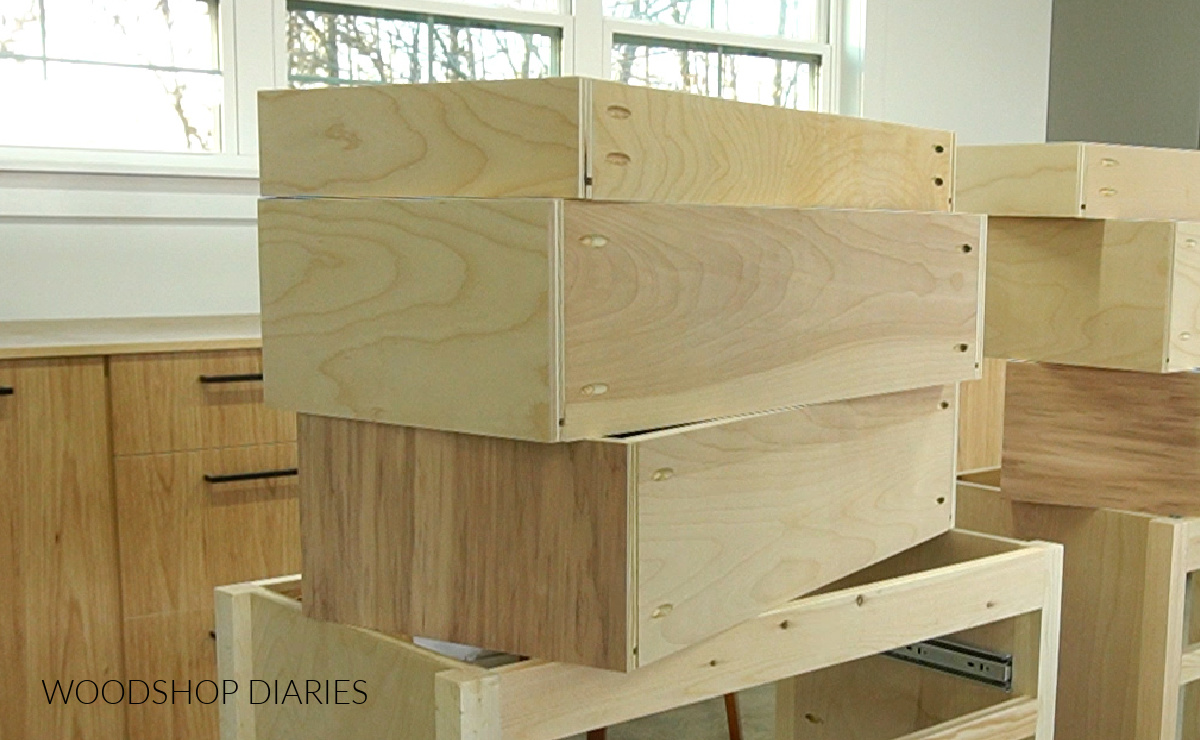
The deep bottom drawers were 7 ½″ tall. The shallow top drawer was exactly the same size, except only 3 ½″ tall.
Step 6: Install Drawers into Nightstand
Once the drawer boxes were built, I installed them onto the slides in the nightstand.
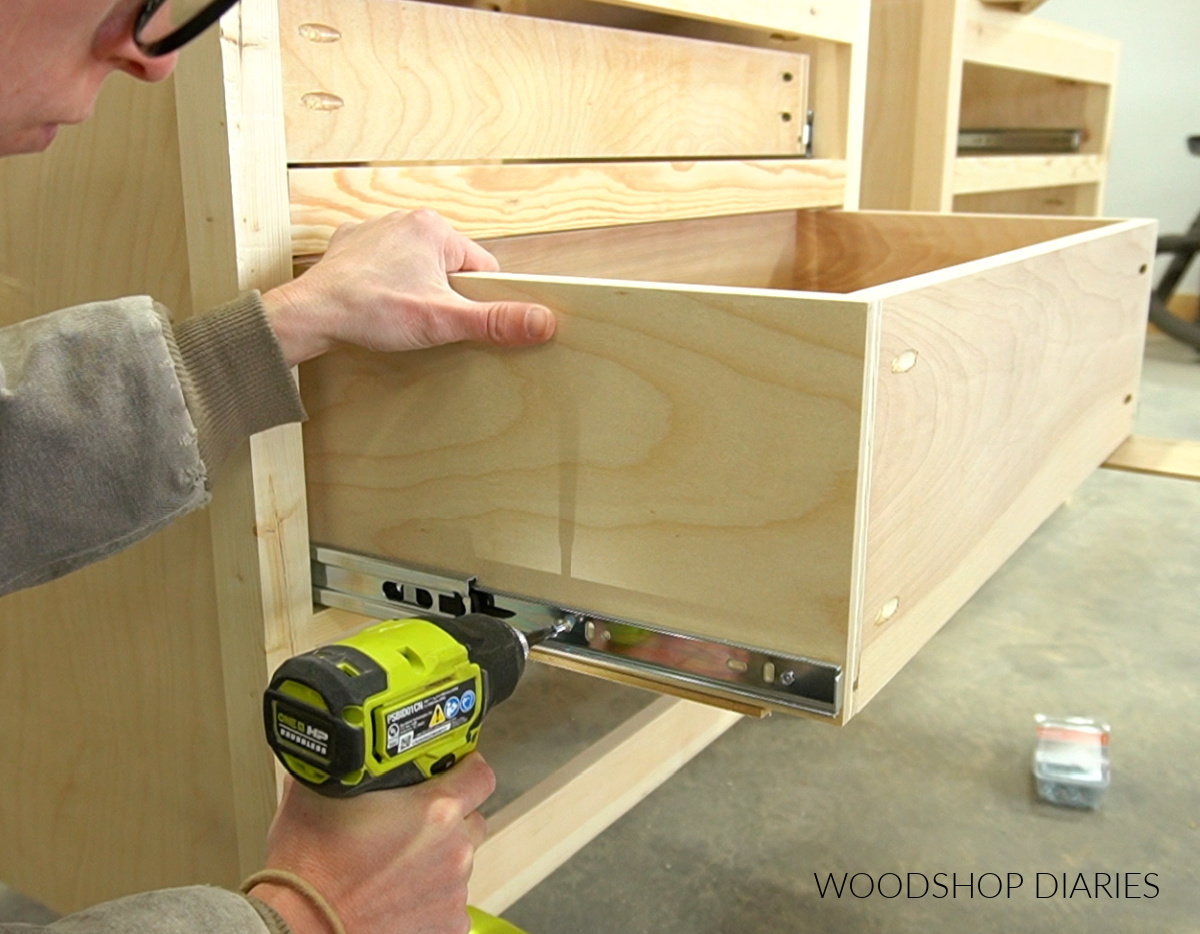
I used some scrap ¼″ plywood to space these ¼″ up off the framing below so that they wouldn’t rub when they slide back and forth.
RELATED: How to install drawers onto slides
Step 7: Assemble Drawer Fronts
The drawer fronts were probably the most time consuming part of this build simply because there were a lot of trim details added.
Feel free to modify your trim as you’d like if you want a different style or want to keep things a little simpler.
I cut three pieces of ¾″ plywood for the drawer fronts–one smaller one for the shallow top drawer and two larger ones for the deeper bottom drawers.
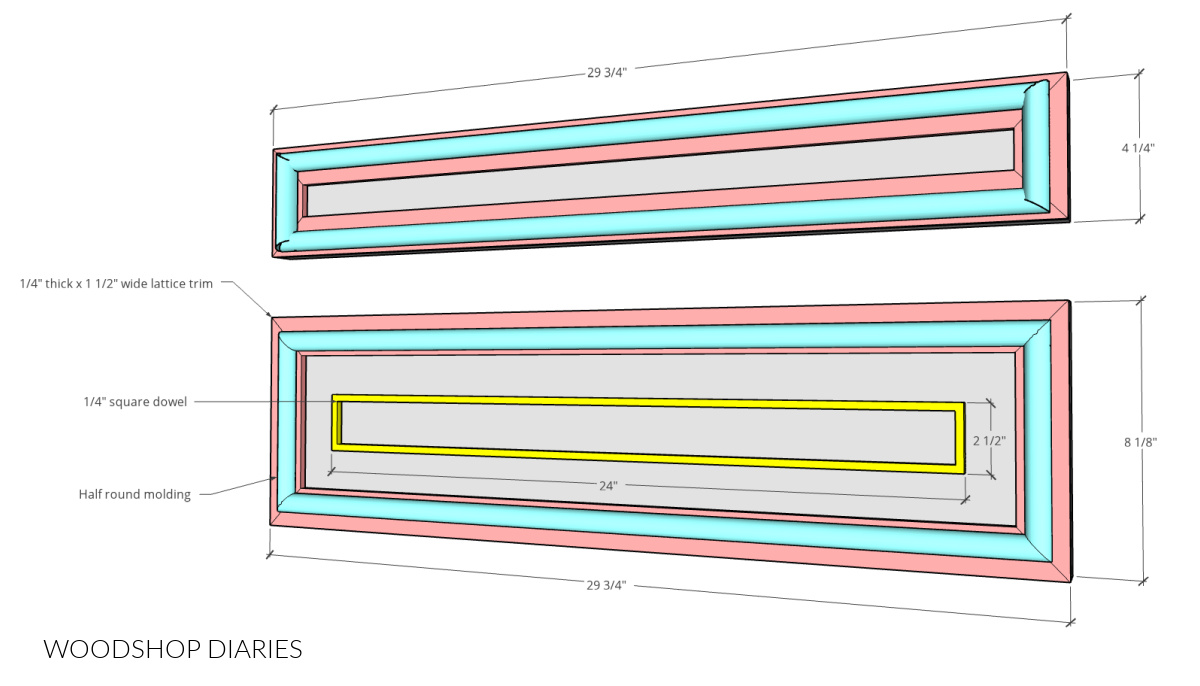
These should be ¼″ smaller in height and width than the openings on the dresser frame–this allows for ⅛″ gaps around all sides once installed.
Then, I cut to fit ¼″ x 1 ½″ lattice trim with 45 degree mitered corners to glue along the front, flush to the outside edges.
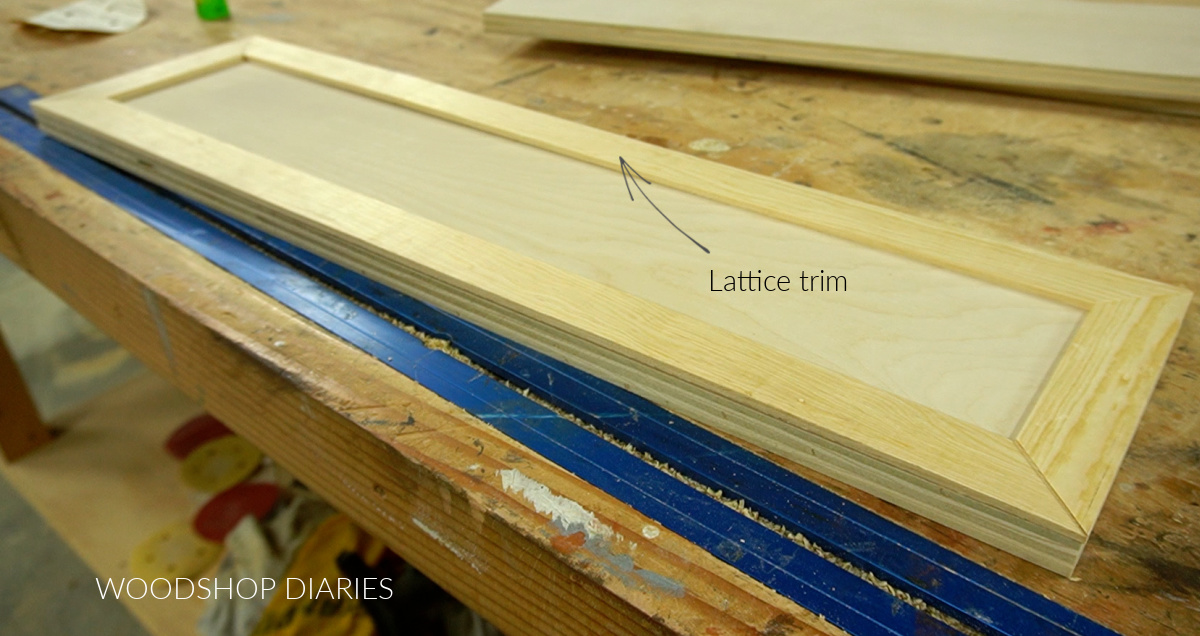
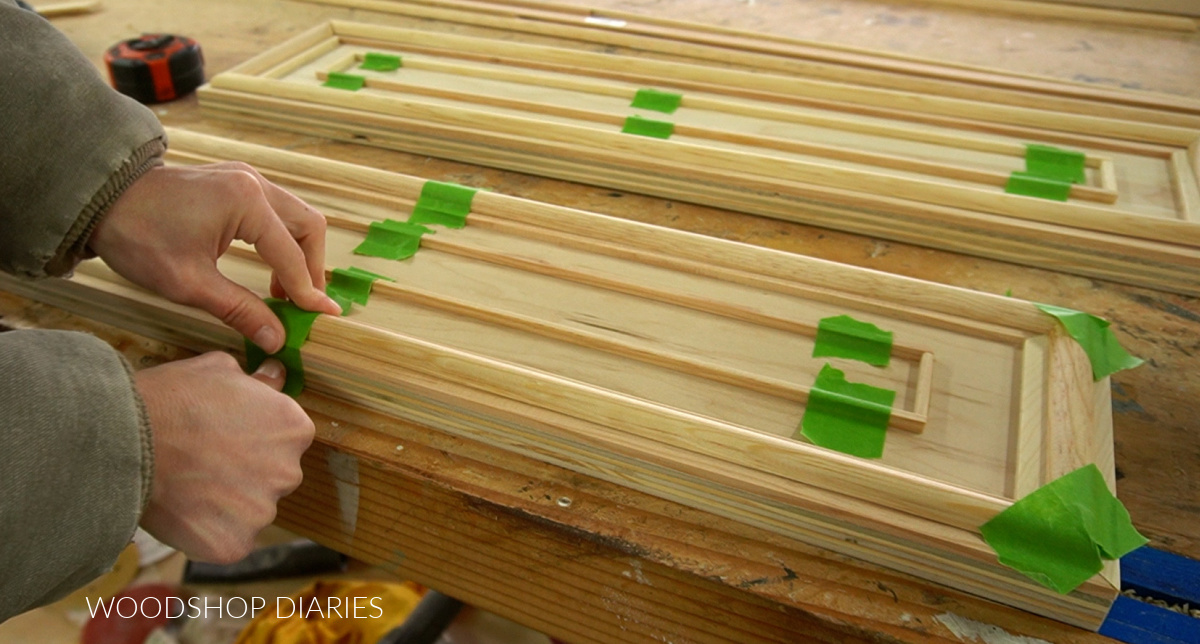
HELPFUL TIP: Use painters tape to hold small trim pieces in place while the glue dries.
For the larger drawer fronts, I also cut and glued on pieces of ¼″ square dowel to form a rectangle inside this lattice trim.
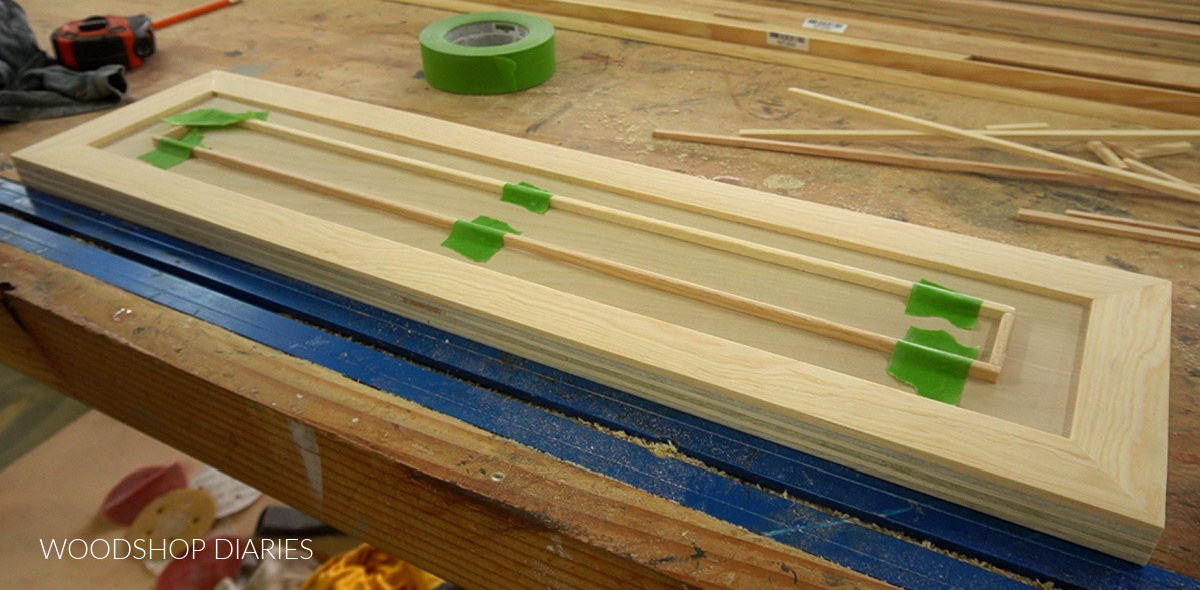
I didn’t add this onto the small drawer front because there just wasn’t enough space.
And finally, I followed up with cutting half round molding with 45 degree mitered ends to glue over the lattice trim.
I cut the half round so that it would run about ¼″ in from the outside edges of the drawer front. But, that’s not a critical measurement.
Step 8: Add Trim to Nightstand Frame
While the glue dried on the trim details, I moved on to adding some trim to the sides of the nightstand.
I cut 1x3s to go on the top and bottom and a 1×2 to go between them even with the the 1×2 on the front.
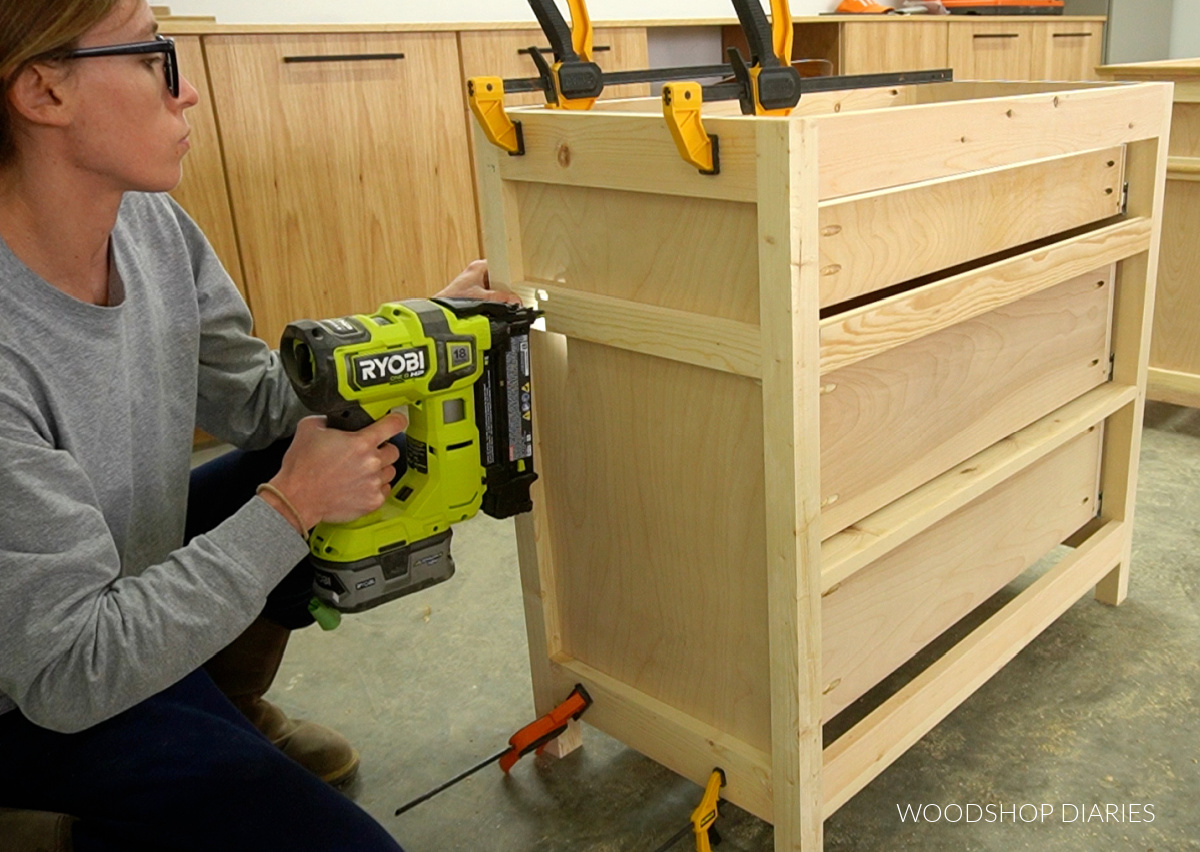
I glued and brad nailed these pieces in place on both sides of the nightstand frame.
Then, I cut to fit cove molding to line the tops and half round to run along the 1x2s on the sides and front.
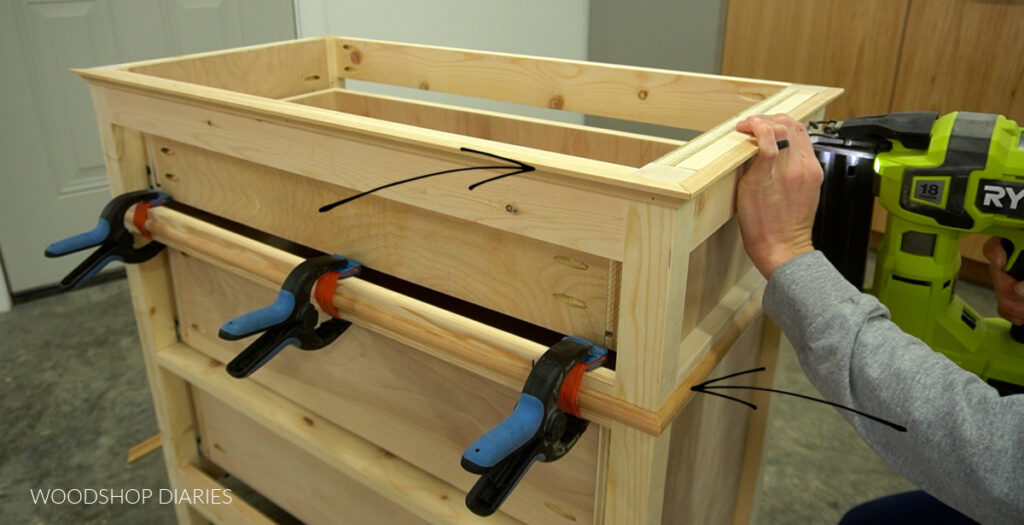
I glued and brad nailed each piece of trim in place, then puttied over the joints and nail holes.
Step 9: Attach Drawer Fronts
At this point, the glue was dry on the drawer fronts, so I installed them onto each drawer box.
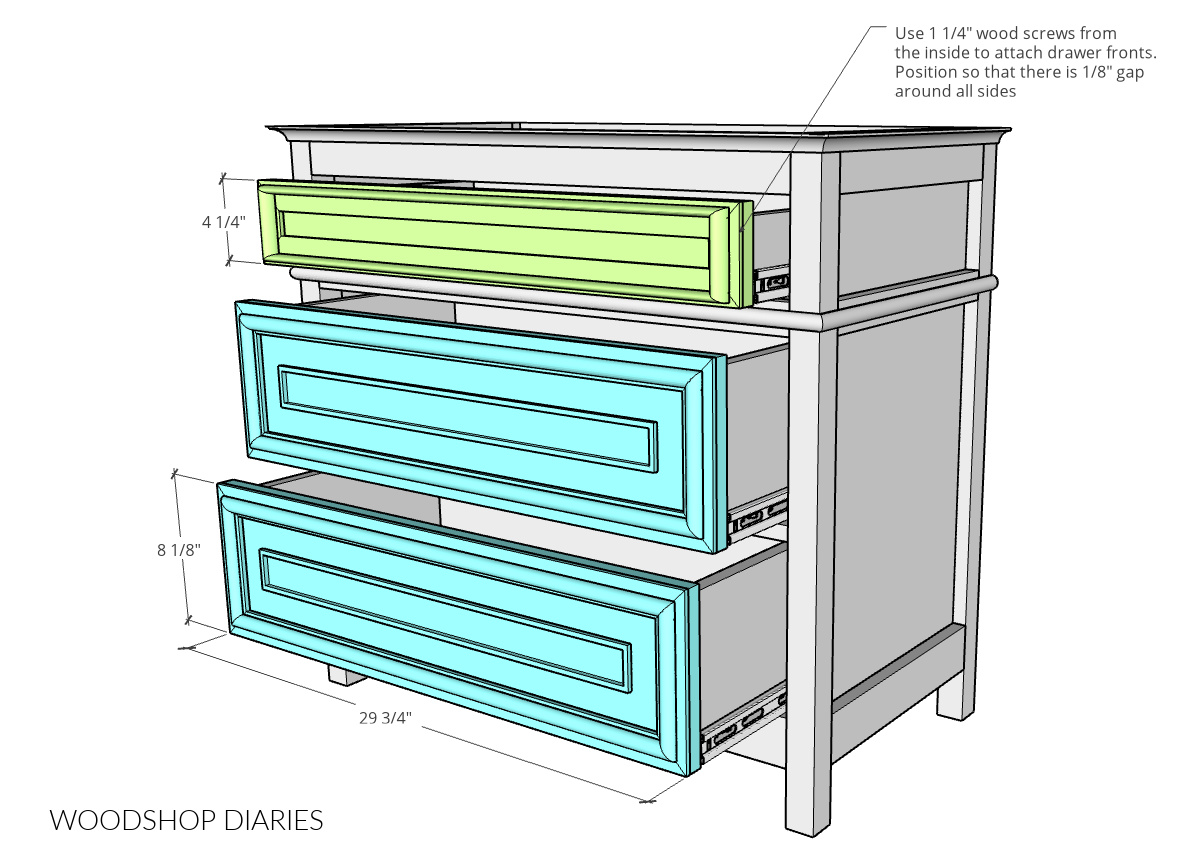
I used 1 ¼″ wood screws through the front of the inside of each box, making sure to leave ⅛″ gap around all sides once the drawer was slid back in place.

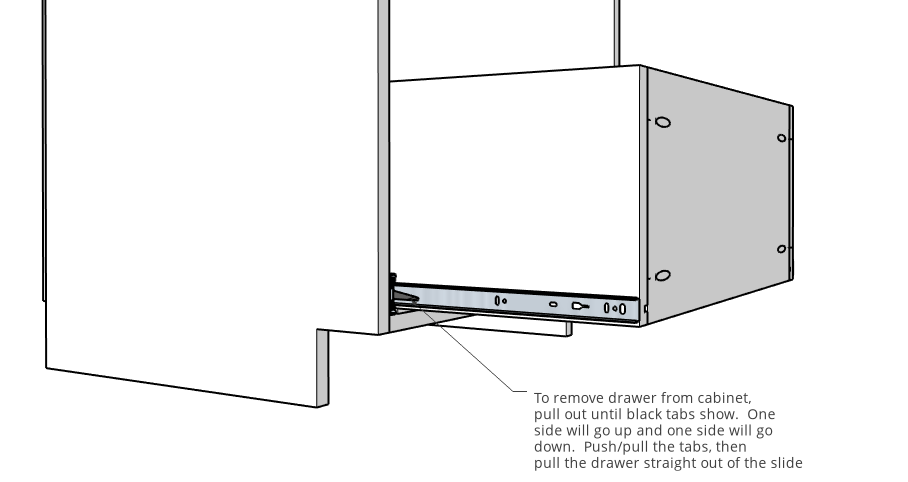
Step 10: Add Top to Nightstand Base
To add the top, you’ll need access to the inside of the nightstand.
So I used the tabs on the sides of the drawer slides to remove the drawer boxes from the frame.
I cut the top of this nightstand from ¾″ plywood and applied iron on edge banding to the front and sides to make it look a little cleaner.
NOTE: Edge banding is optional, but if you’d like to add it, here’s a guide to applying iron on edge banding.
I stained the top before attaching it. This color is a combination of Minwax Early American and Weathered Oak.
Then, I installed figure 8 fasteners to the top of the nightstand frame.
As mentioned in the notes earlier in this post, you can use corner brackets instead–which is what I’d recommend.
Once the fasteners were attached, I flipped it upside down and secured these fasteners to the top panel.

Then, I flipped it back over and reinstalled the drawers back onto the slides.
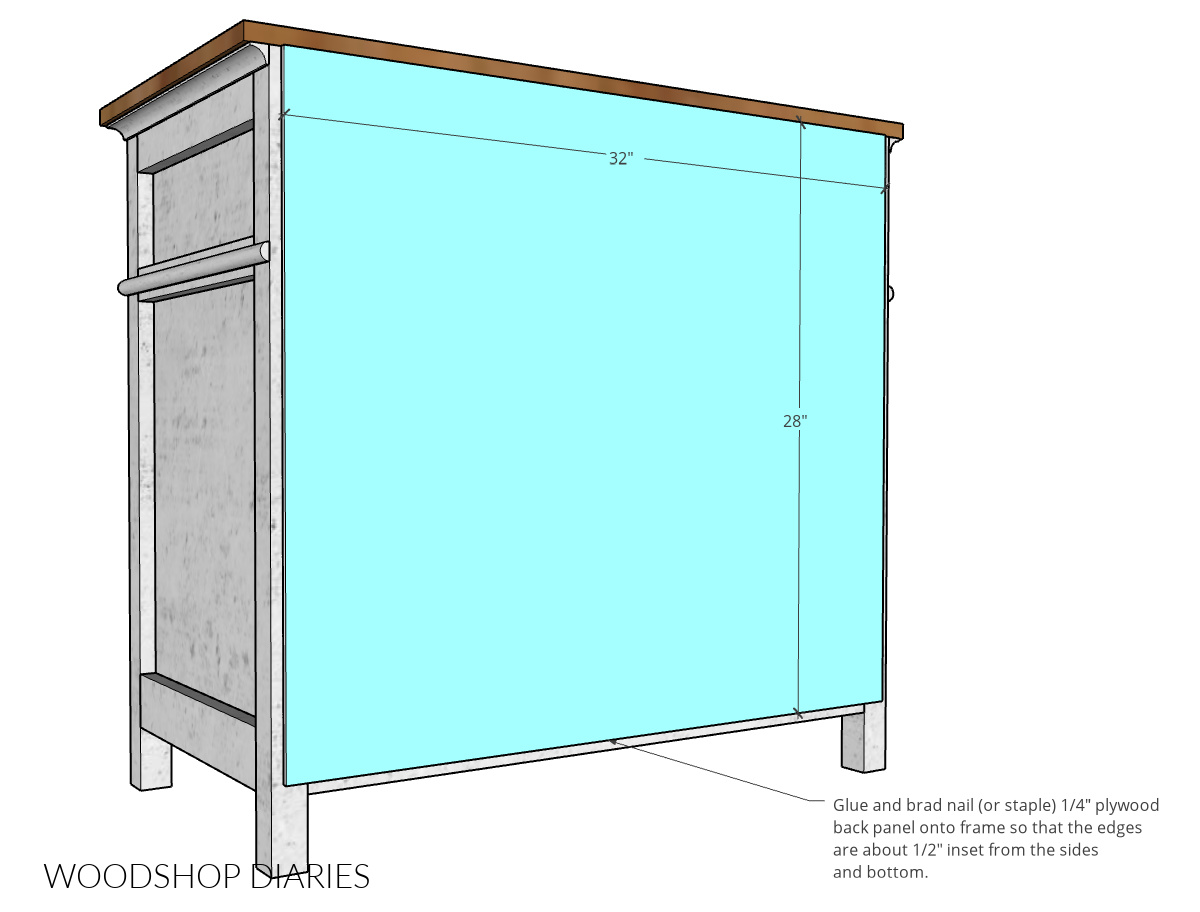
Step 11: Add Back Panel (optional)
The back panel is optional. I personally have a pet peeve about adding back panels on projects with drawers, so I didn’t add a back here.
However, if you’d like to add a back panel, you can simply cut a piece of ¼″ plywood to fit over the back side and staple in place.
Step 12: Finish Oversized Nightstand Build
At this point, it’s ready to final putty, sanding, and finishing as desired. If you enjoyed the tutorial and would like a printable copy, grab the building plans here.
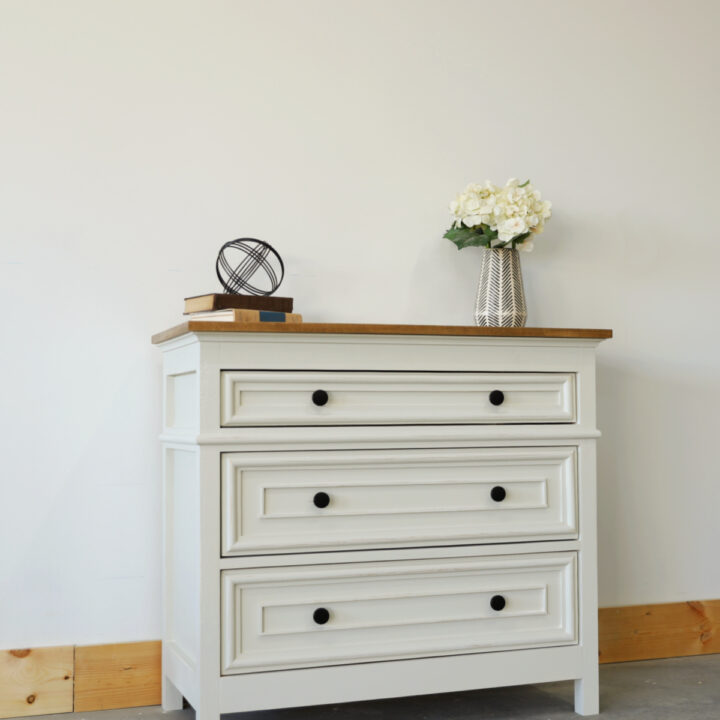
Since I was matching this to my parent’s existing furniture, I had my paint color matched, so this isn’t a specific color name.
But I applied a coat of primer and two coats of paint to finish this up and added these simple, modern, black knobs.
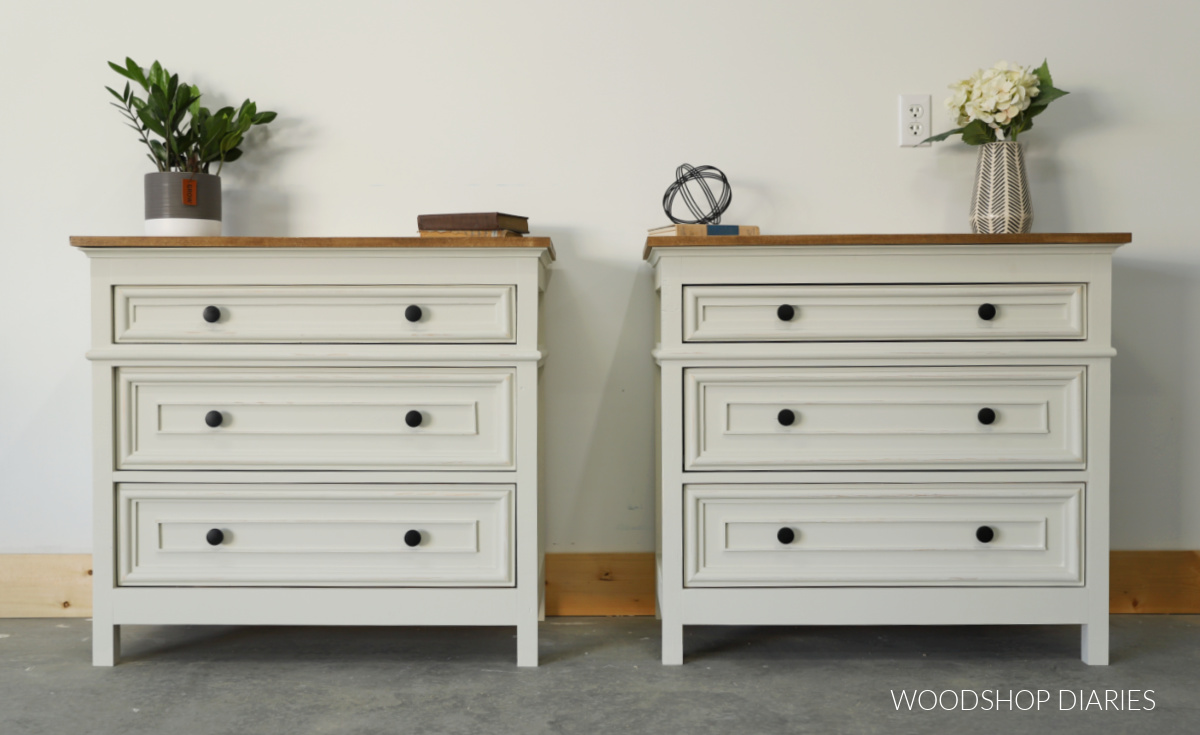
And now it’s ready to deliver to my parents’ house!
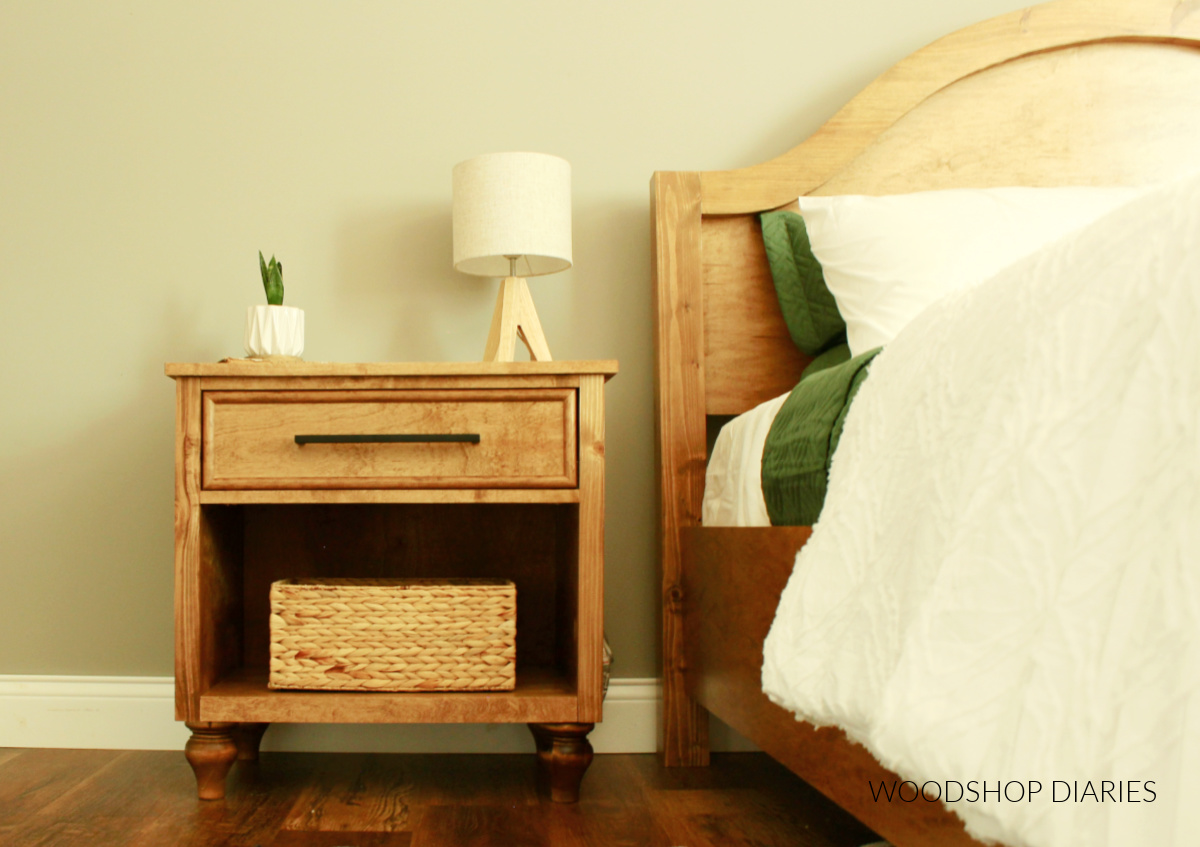
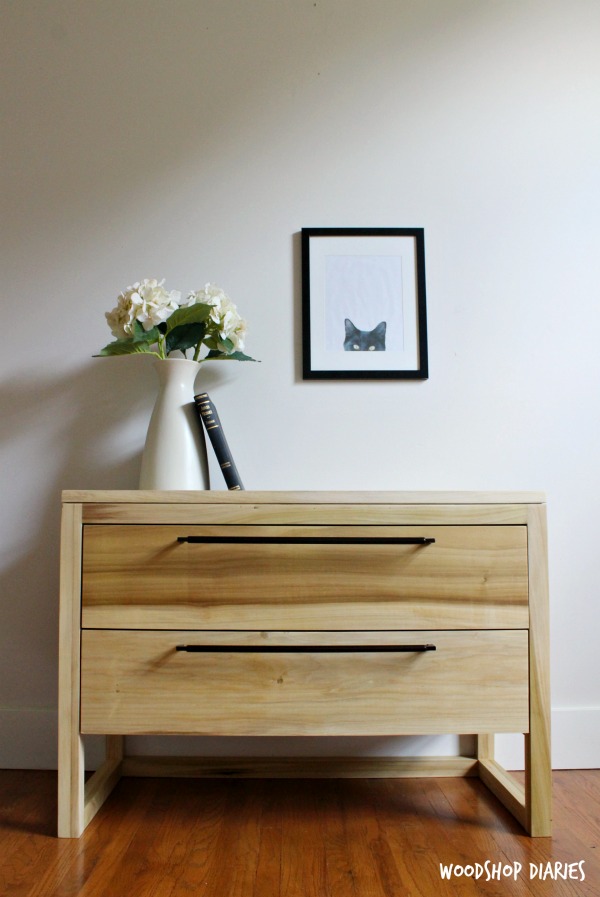
Looking for More Nightstand and Dresser Projects?
If you’re searching for more nightstand ideas or small dressers, here are a few favorites you might like to check out!
If you enjoyed this DIY oversized nightstand project and want to stay up to date on all the latest projects and plans, be sure to subscribe to the newsletter below!
And if you’d like to save this project for later, don’t forget to pin it or share it to your favorite social channel!
Until next time, friends, happy building!
DIY OVERSIZED NIGHTSTAND WITH 3 DRAWERS
Learn how to build a DIY oversized nightstand with 3 drawers! You can use this as a large nightstand, small dresser, or a basic console–anywhere you need a little extra storage.
Materials
- 4×8 sheet ¾″ plywood
- 4×8 sheet ¼″ plywood
- 2x2x8 boards
- 1x3x8 boards
- 1x2x8 board
- 8ft piece cove molding (optional)
- 8ft pieces half round molding (optional)
- 8ft pieces ¼″ x 1 ½″ lattice trim (optional)
- 8ft pieces ¼″ square dowel (optional)
- 1 ¼″ pocket hole screws
- 1 ¼″ brad nails
- pair 14″ drawer slides
- 90 degree corner brackets OR figure 8 fasteners
- Iron On Edge Banding
- Wood Glue
- Wood Finish as desired
- Knobs/Drawer Pulls
Tools
- Miter Saw
- Circular saw and cutting guides
- Drill/Driver
- Pocket Hole Jig
- Brad nailer
- Table Saw or Router (optional–for cutting dadoes in drawers)
Instructions
- Assemble nightstand sides with plywood.
- Build oversized nightstand frame using pocket hole screws.
- Install drawer dividers.
- Install drawer slides using ball bearing drawer slides.
- Build drawer boxes from plywood.
- Install drawers into nightstand.
- Assemble drawer fronts using plywood and glue.
- Add trim to nightstand frame.
- Attach door fronts using wood screws.
- Add top to nightstand base.
- Add back panel (optional)
- Finish oversized nightstand build by sanding and painting.Oversized Nightstand with 3 Drawers