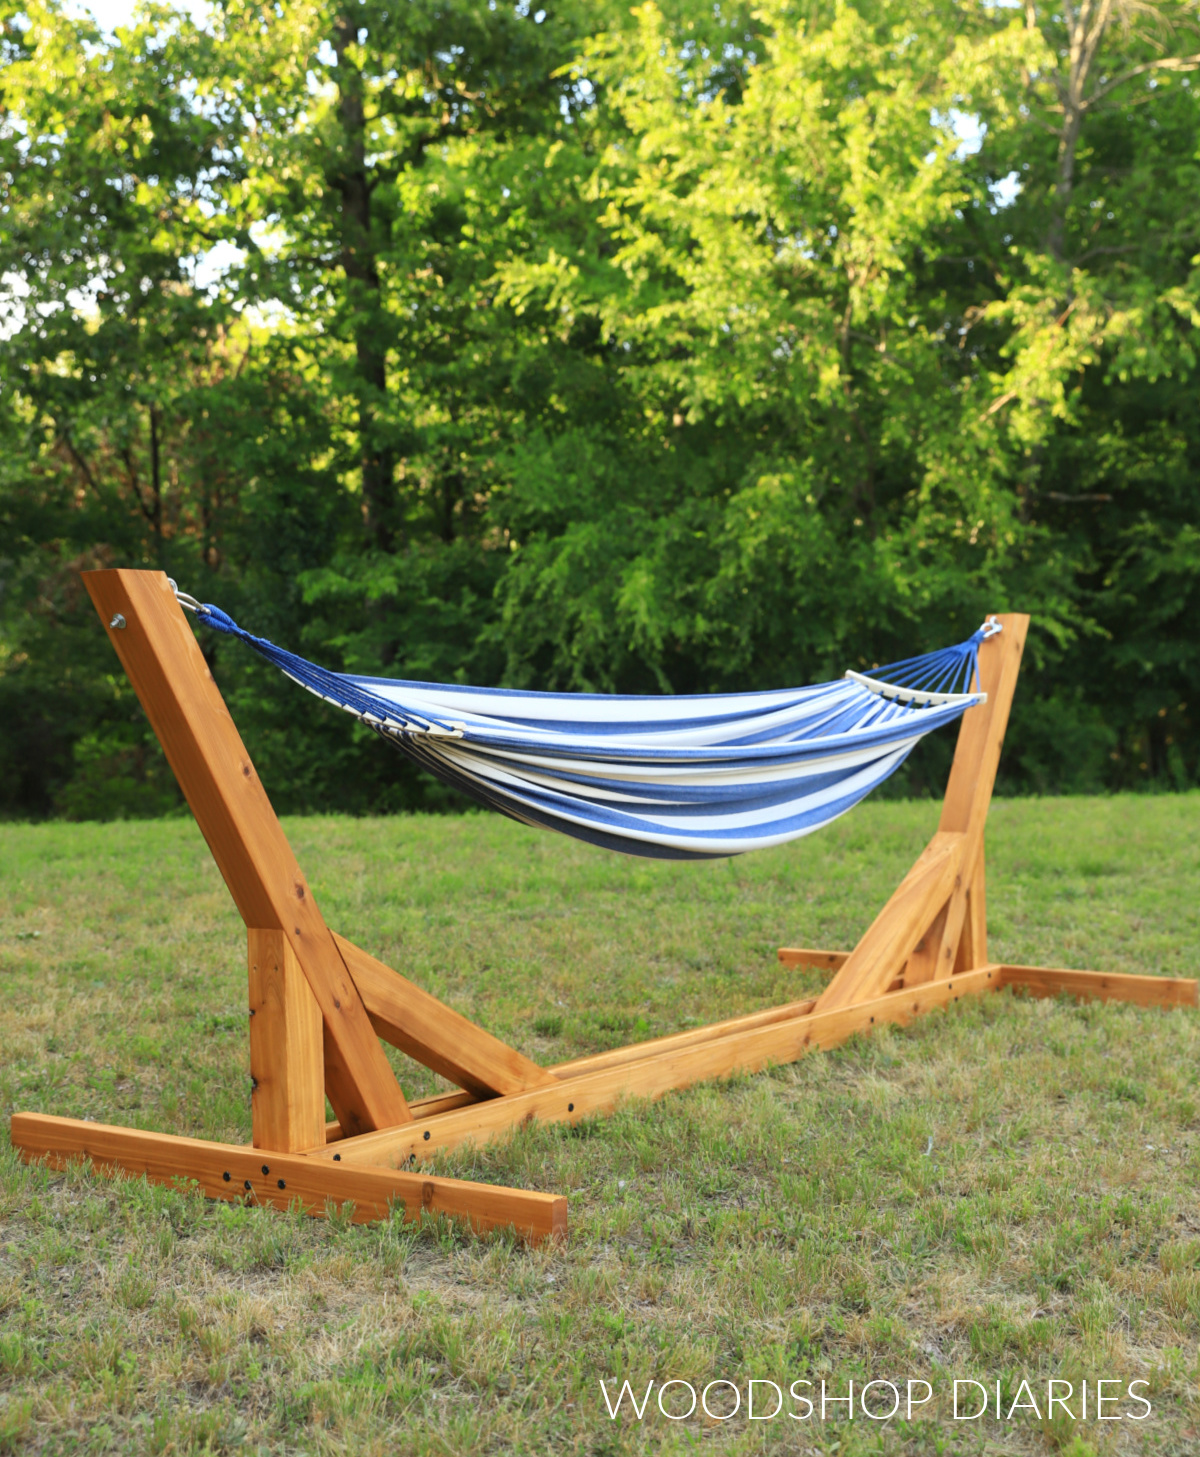
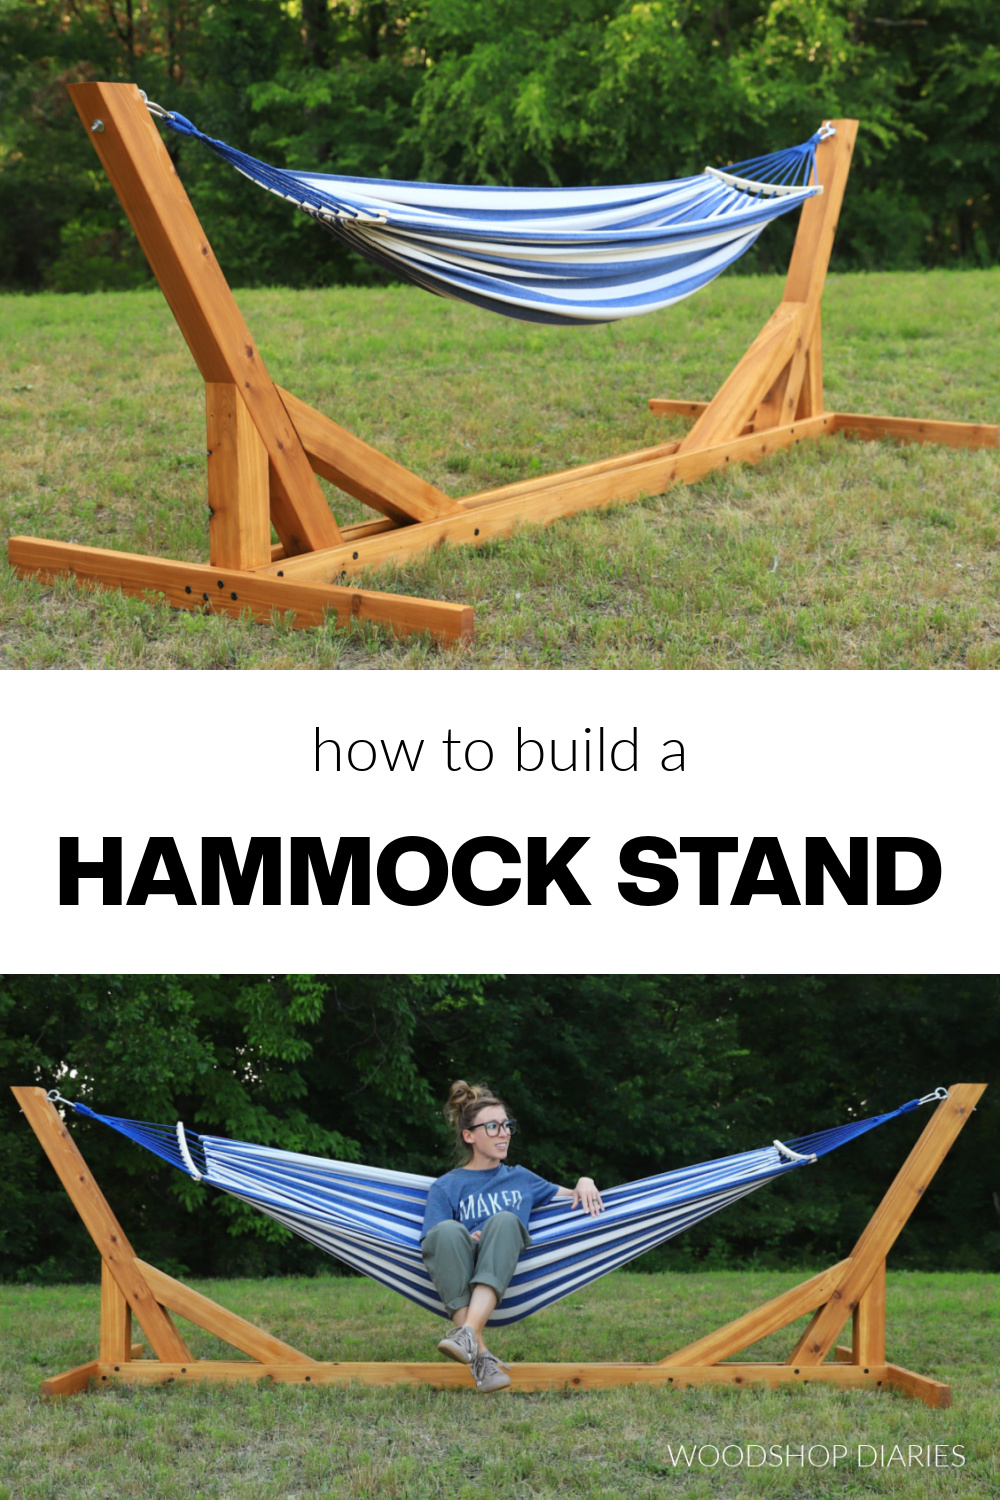
In this post, I’m sharing how to build an EASY DIY hammock stand to enjoy the outdoors this season!
Picture this: it’s a breezy summer afternoon and you’ve got a big glass of ice cold lemonade. Where’s your ideal place to enjoy it? If you said “in a hammock,” I’m right there with you!
But if you don’t have any trees to hang a hammock from…or maybe you’re like me and you do have some trees, but it’s just a bit too “snake-y” in there for you…I’ve got the perfect project to help!
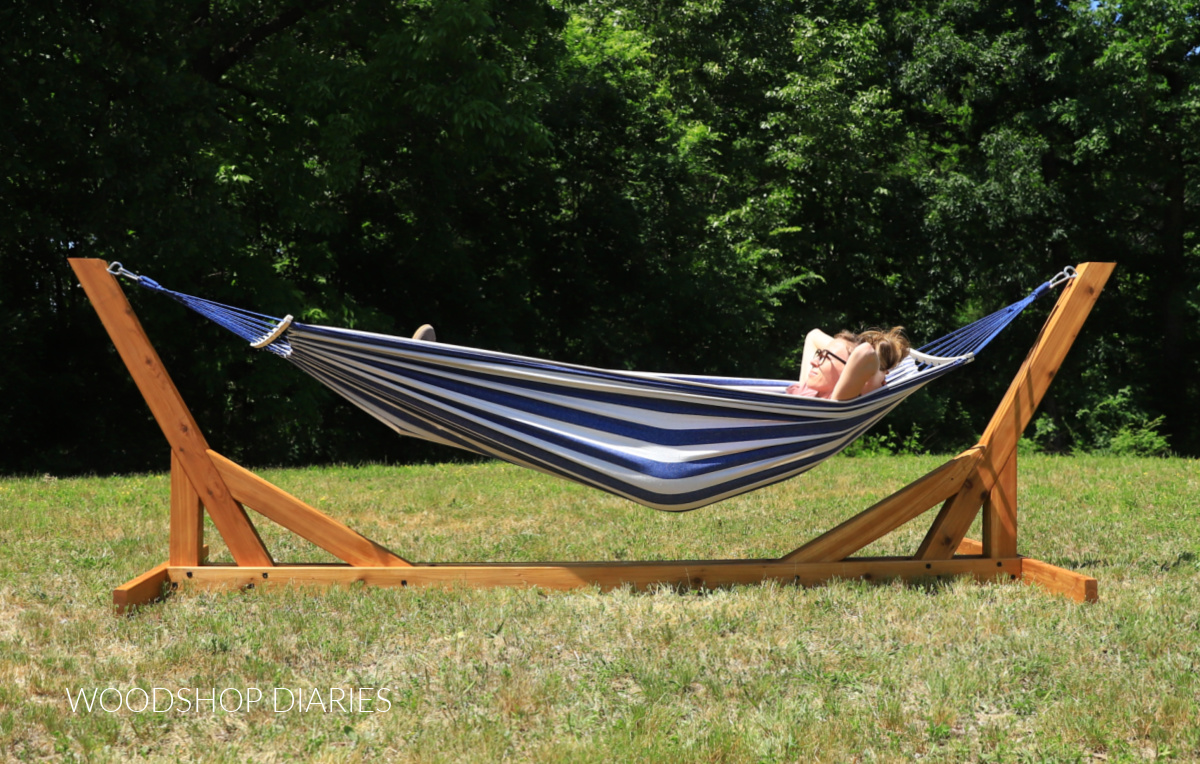
This simple, sturdy DIY hammock stand is SO EASY to build from just a few basic boards and with just a couple common tools.
And while it’s quite hefty, it’s still small enough to be able to move it around the yard or the patio so you can find the perfect place to enjoy it in or out of the sun.
The best part? You can build it in just about an hour, so if you’re ready to dive in, I’ve got all the details below.
*This post contains affiliate links. See website policies.
What to know before building
This stand is designed to be used with a standard 9′ hammock. If your hammock is longer, you’ll need to make your stand longer to accommodate the extra length.
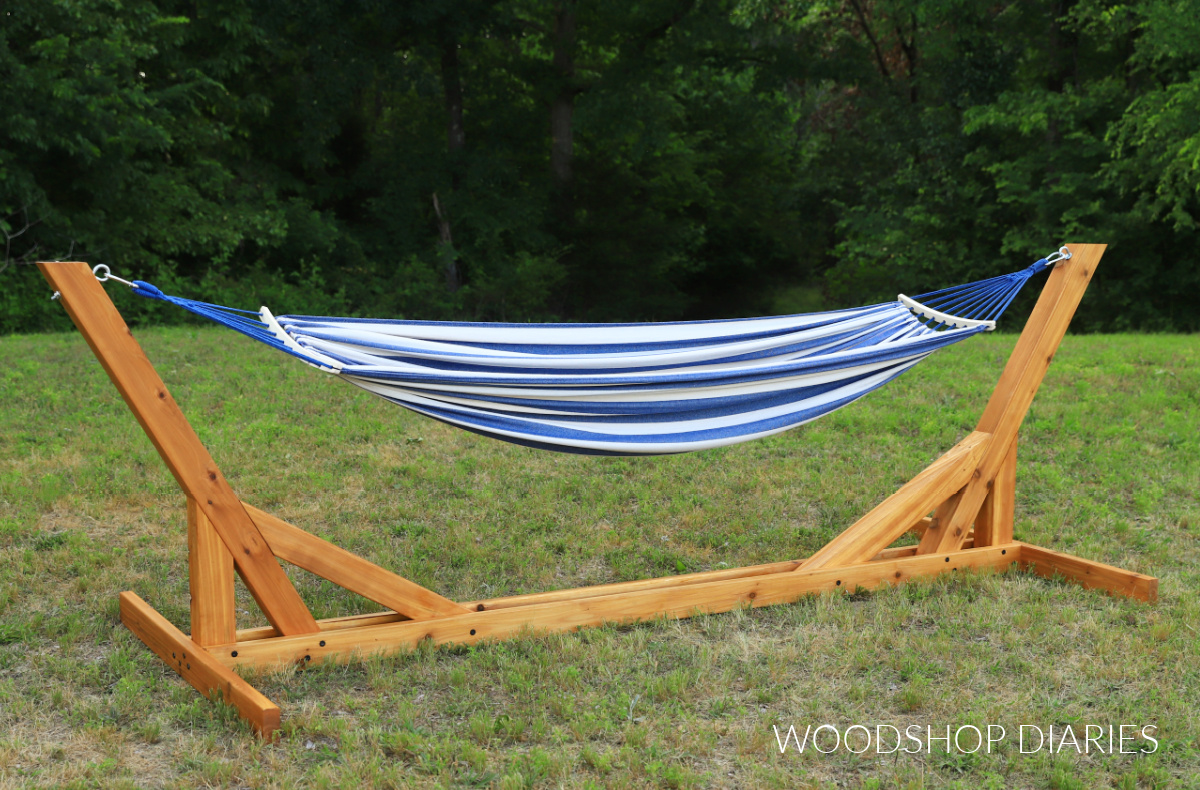
This is the hammock I used and it was rated for 450 lbs, so theoretically, the stand needs to hold at least 450 lbs. I didn’t have 450 lbs to test it, but it held just fine for 350 lbs in the hammock (we both crammed into it and added the dog to see if it would hold haha).
I don’t expect any issues with 450 lbs (which is the max the hammock would hold anyway), BUT, I’m not a structural expert. So, if you are in doubt as to the structure’s integrity for your application, consult a professional.
Overall Dimensions
The overall dimensions of this hammock stand are approximately 40 ¾″ tall x 47 ⅞″ wide x 132″ long.
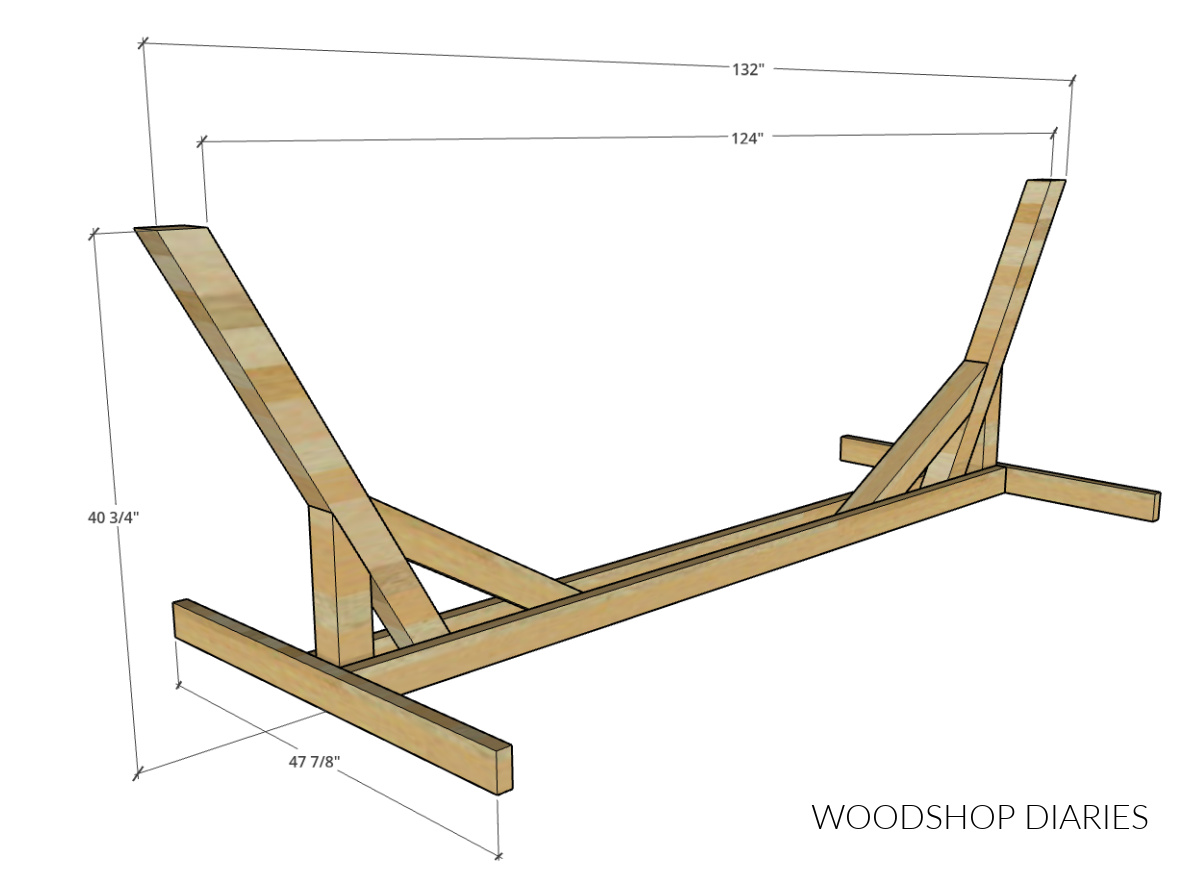
The distance between posts is about 124″ which, by the time you add the eye bolts and the carabiner hooks to hang the hammock, works out well for a 9′ long hammock.
What Type of Wood to Use for Hammock Stand
You can build outdoor projects from any wood type, but some will last MUCH longer than others.
RELATED: How to shop for lumber
Untreated pine (basic construction lumber) will work okay for outdoor furniture, but is best for projects that will be under cover–like on a porch. If exposed to a lot of sun and rain, it will deteriorate quickly.
It’s the most budget friendly option, but may not be the most durable for outdoor use.
Pressure treated pine is a little more expensive, but is made specifically for outdoor use. It’s a very common material to build decks with.
It’s treated with chemicals to make it more rot resistant and will usually last SEVERAL years outdoors even if left uncovered.
While durable and budget friendly, this material is heavy and can take a while to dry out.
Cedar, red wood, and teak are all naturally decay and insect resistant wood options that look really nice.
But, these wood types can be quite expensive and sometimes hard to find depending on where you live.
So when building for outdoors, consider your budget, availability, and the pros and cons of each option before choosing your wood type. I opted to use cedar for this project.
Don’t forget when building outdoor projects–make sure the hardware (screws), glues and finish you use are rated for exterior use.
Helpful resources for this project
You may find these posts helpful throughout the project:
Enjoy DIY projects and woodworking plans? Sign up for priority access for the latest posts on Woodshop Diaries!
How to build a hammock stand
If you prefer to watch, I’ve shared the full build video with tons of tips, behind the scenes, and additional details on my YouTube Channel here.
Love watching how-to videos? Subscribe to my YouTube channel for plenty more where that came from!
Prefer to print? Grab the printable hammock stand building plans available here:
Tools & Materials
Tools:
- Miter Saw
- Drill/Driver
- Circular Saw (optional if miter saw isn’t large enough to cut pieces)
- Various Size Drill Bits (for drilling pilot holes)
Materials:
- (2) 4x4x8′ posts
- (1) 2x4x8′ board
- (2) 2x4x10′ boards
- (2) ⅜” x 6″ long eye bolts with nut
- (4) ⅜” washers
- (40) 2 ⅞ OR 3″ long HeadLOK or ⅜″ lag screws
- 9′ hammock
Step 1: Cut Hammock Stand Posts
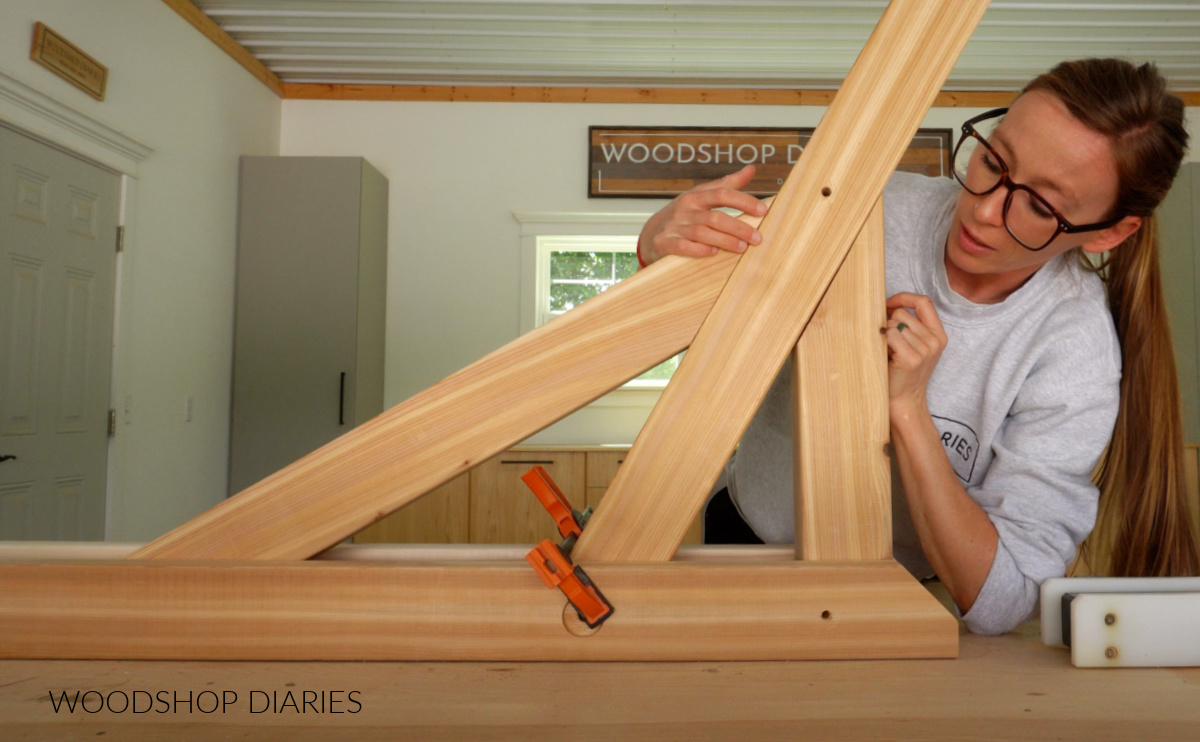
To get started with this project, I cut my 4x4s into two longer posts (about 47″ long) with ends mitered 30 degrees. These will be the posts the hammock actually hangs from and they’ll tilt outward.
Then, for each of these posts, I cut two 4×4 supports, one short and one long, so that they fit together like you see below (I’ve clamped them between 2x4s to make sure everything fits together well).
You can find the complete cut list, cut diagrams, and detailed dimensions for this project in the printable plans here.
Since the main post was mitered 30 degrees, these supports have 60 degree mitered ends so that they fit together snug. My miter saw goes to 60 degrees, so I was able to cut these with it.
But if your miter saw doesn’t go to 60 degrees, check out this video for a tip on using a simple scrap wood jig to cut large angles on your miter saw.
RELATED: How to cut angles on a miter saw
Step 2: Assemble Posts to Runners
To assemble, I used these 2 ⅞″ HeadLOK screws. I like the black accents. But, if you wanted to use regular ⅜″ x 3″ lag screws (exterior rated), that would work just as well.

Now, I had my posts cut and fit together, but I also needed to cut two 2x4s for the bottom runners to kind of “sandwich” these posts. This will make more sense in the photos below.
I cut these runners from my 10′ long 2x4s because, for the hammock length, they needed to be roughly 105″ long.
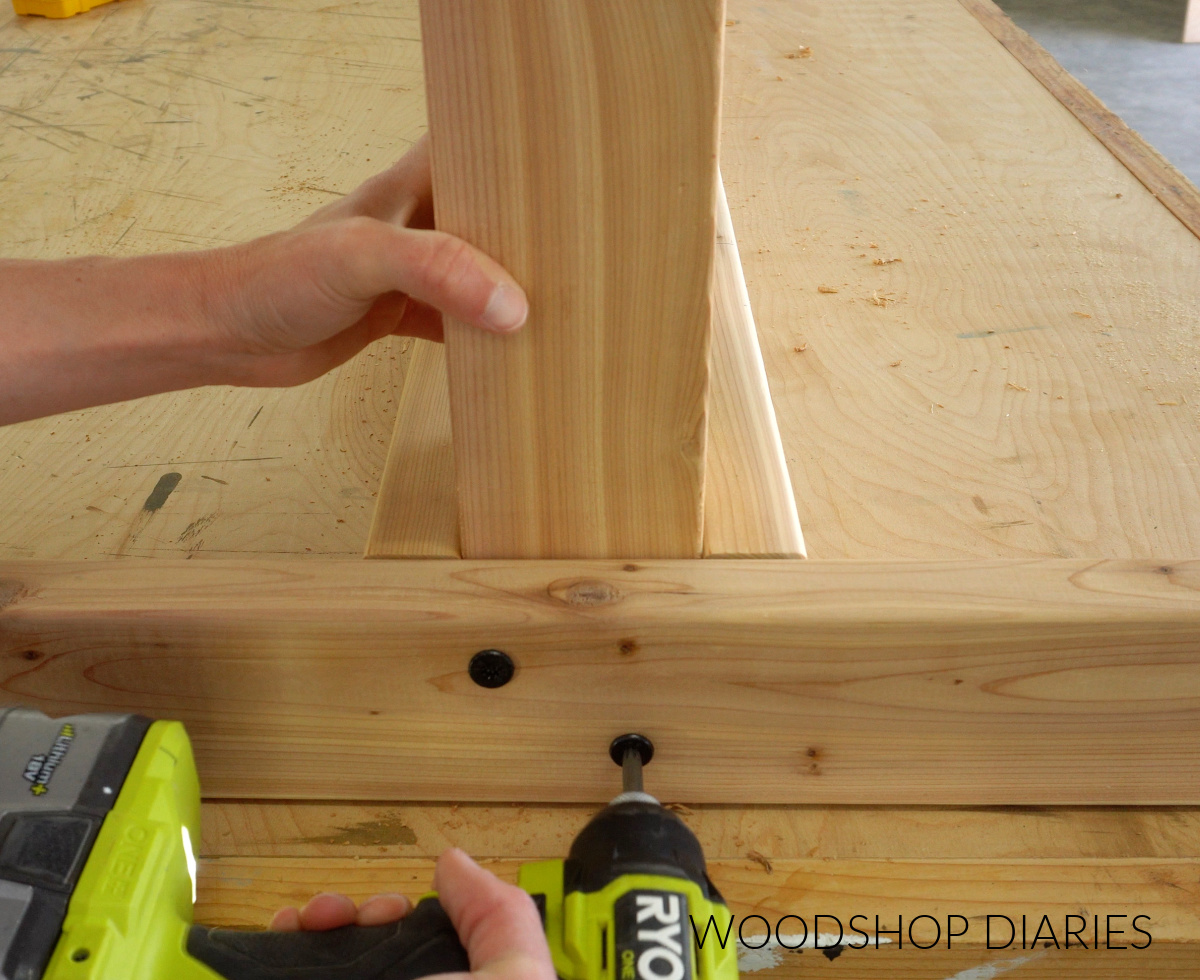
I screwed my 4×4 posts and supports between these 2×4 runners, starting with the short support on the end first. Then, I added the longer hammock post making sure the mitered ends at the top fit together flush.
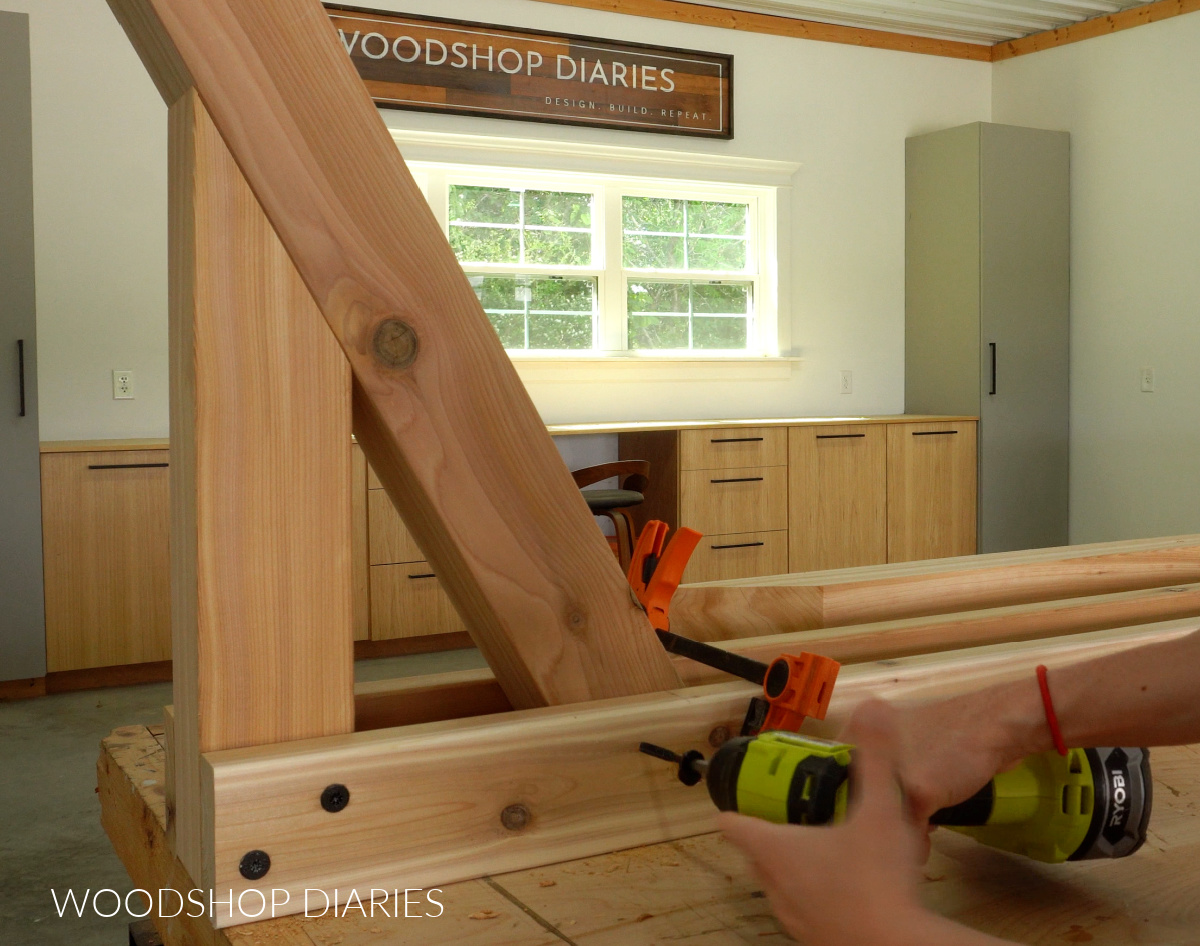
Then, I added my longer support, again, making sure the mitered ends at the top fit together well and were aligned (you don’t want gaps where the posts come together).
TIP: These large screws can easily split the wood, especially when driven close to the board ends. Make sure to predrill pilot holes before driving to help prevent wood splits!
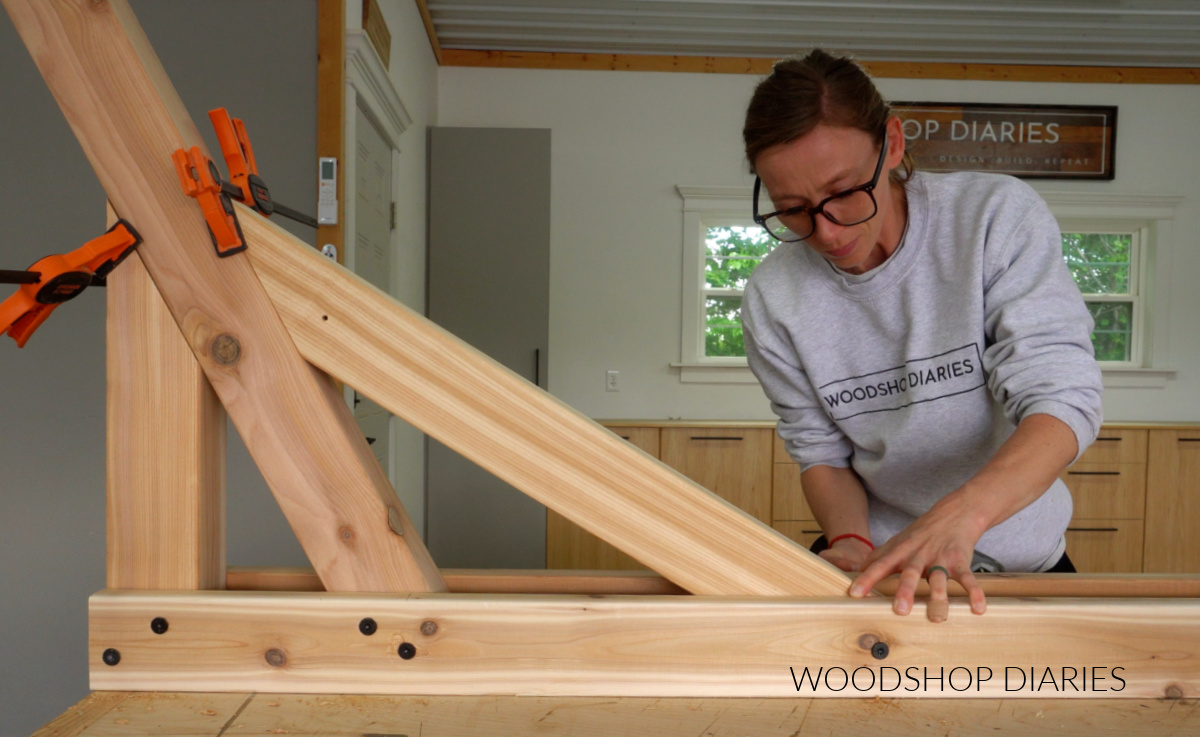
After these three pieces were installed on one end of the runners, I repeated for the other side so that my two posts and four supports were all secured to the hammock stand runners.
Then, I screwed the supports to the post at the top on each side. In the video, I mentioned that I used 3″ decking screws instead of the larger lag screws for this part.
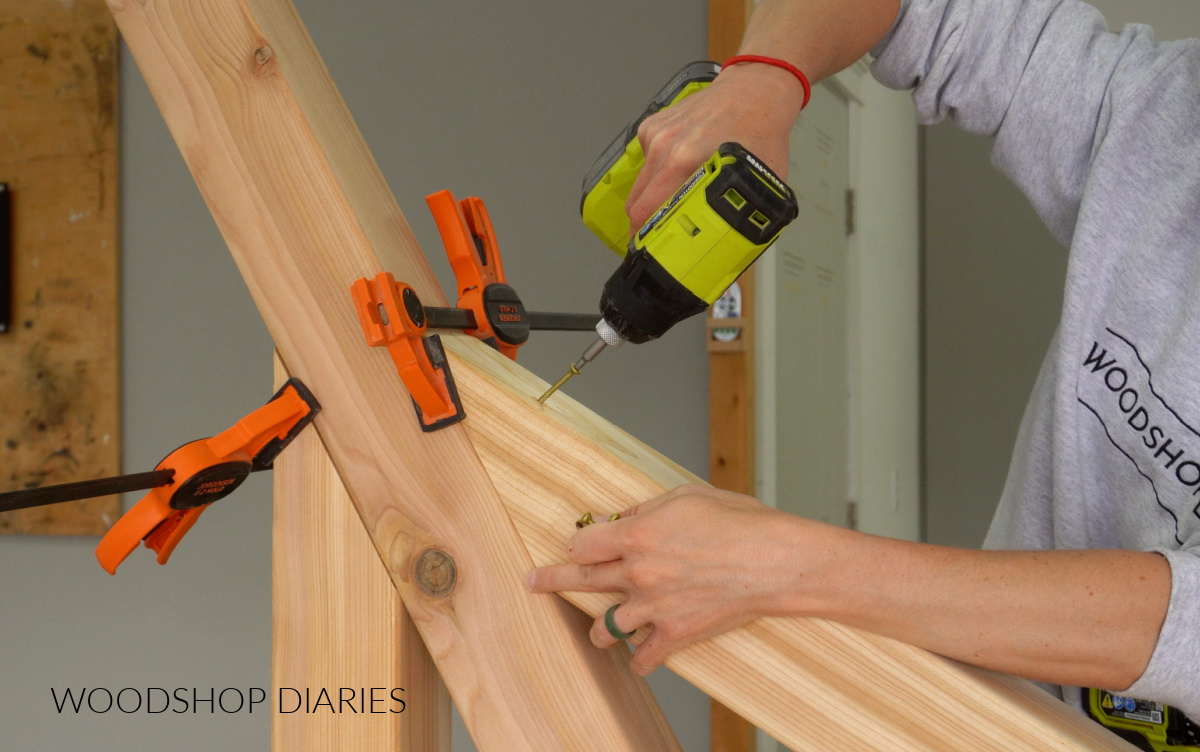
However, in hindsight, I think using the larger lag screws would have been a better option, so that’s what I’d recommend.
Prefer to print? Grab the printable hammock stand building plans here.
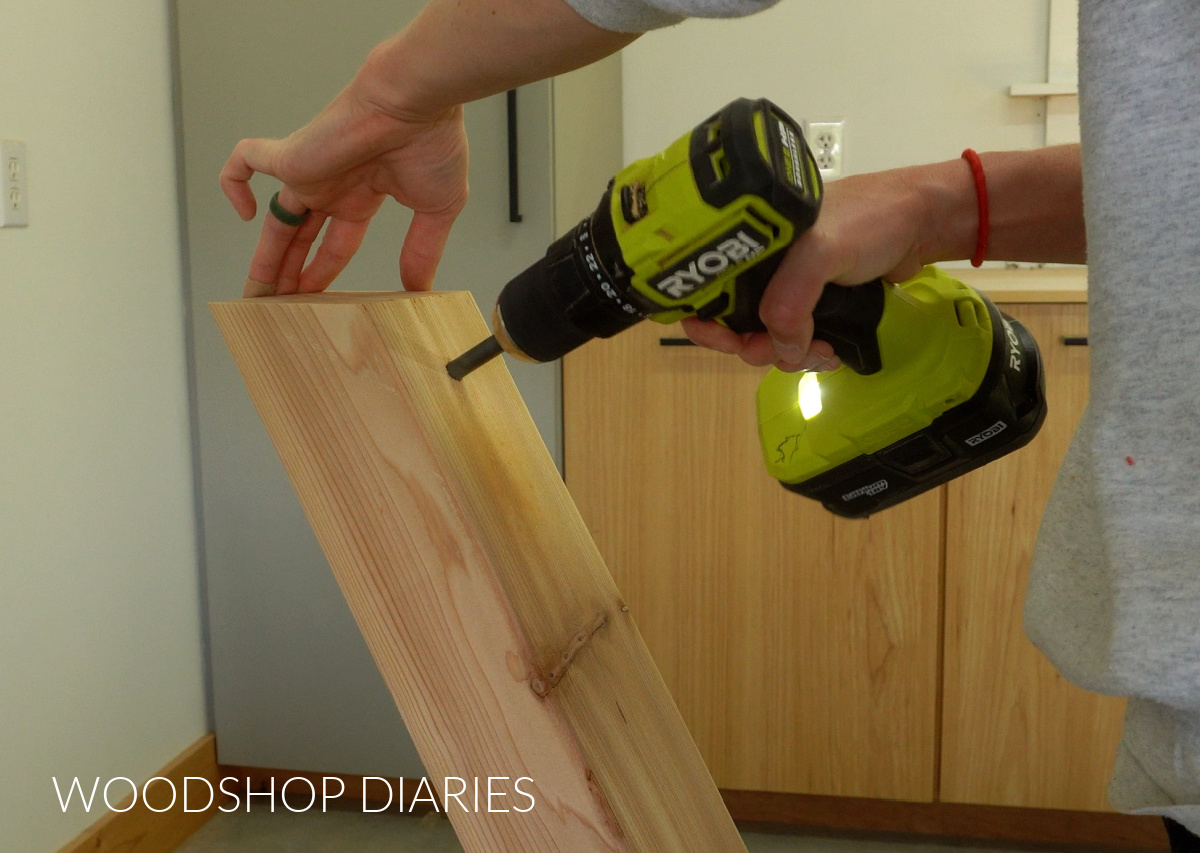
Step 3: Install Hammock Stand End Braces
At this point, the hammock stand can stand up, but it needs some braces on each end to keep it from tilting, rocking, or falling over.
So I cut two 2×4 braces to go on each end of the stand. I centered these side to side like you see below.
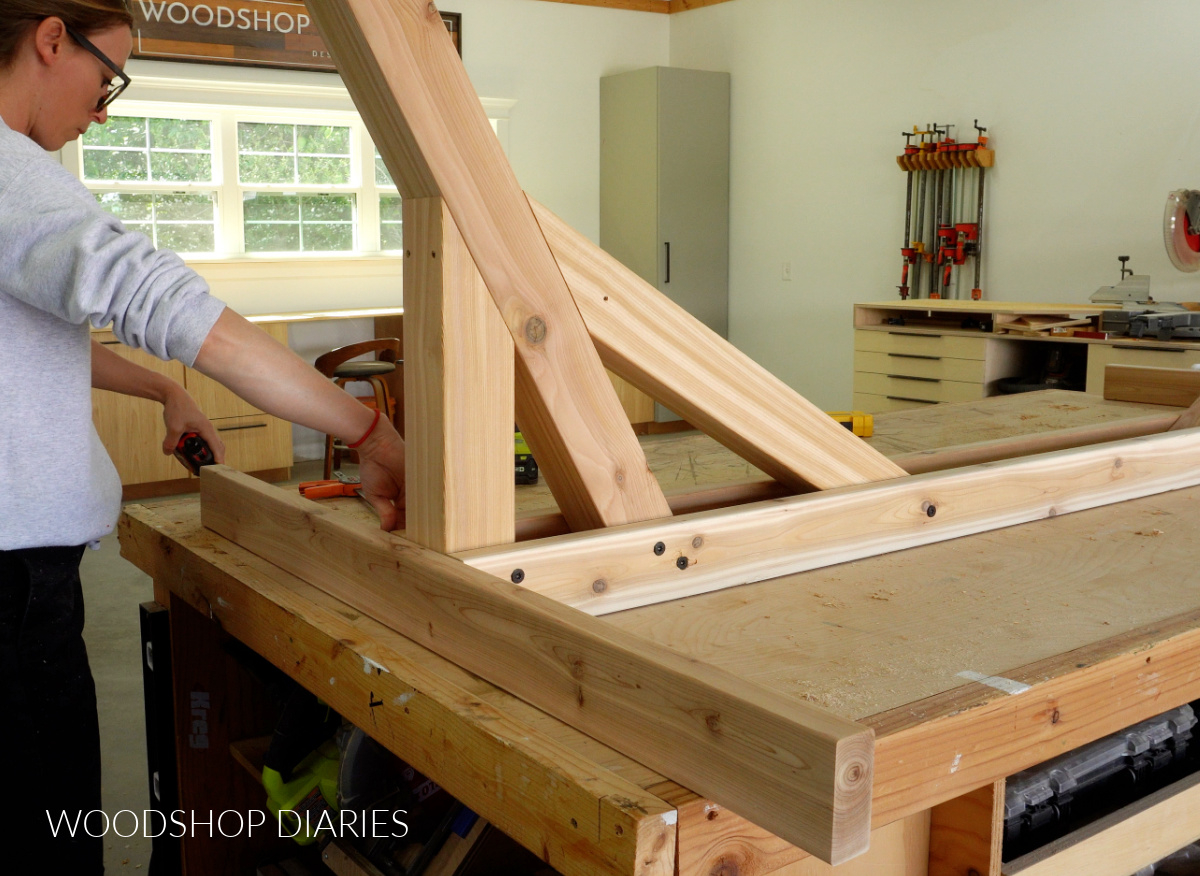
Then, I screwed it into the short 4×4 support and into the ends of the runner boards.
TIP: Again, don’t forget to predrill before driving to prevent wood splits. These large screws tend to crack or split, especially when used close to the board edge.
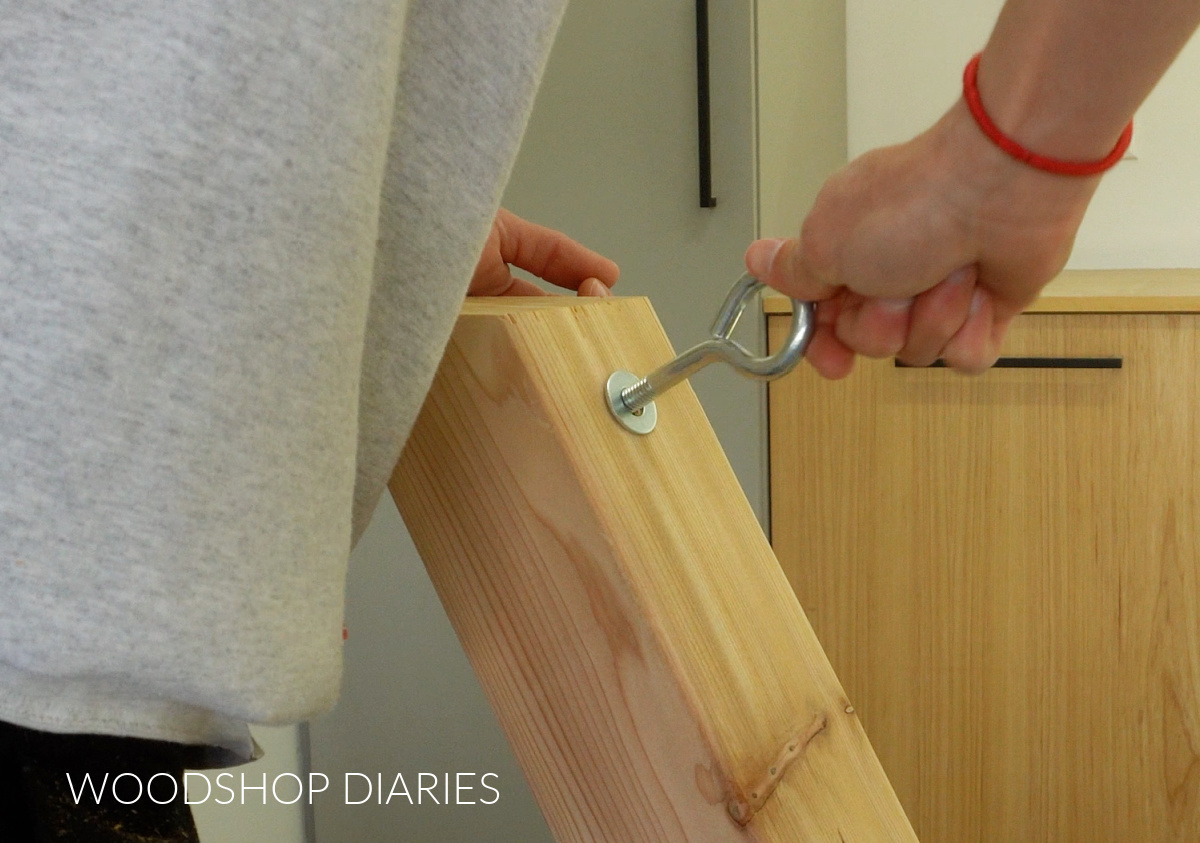
Step 4: Add Hammock Hanging Hardware
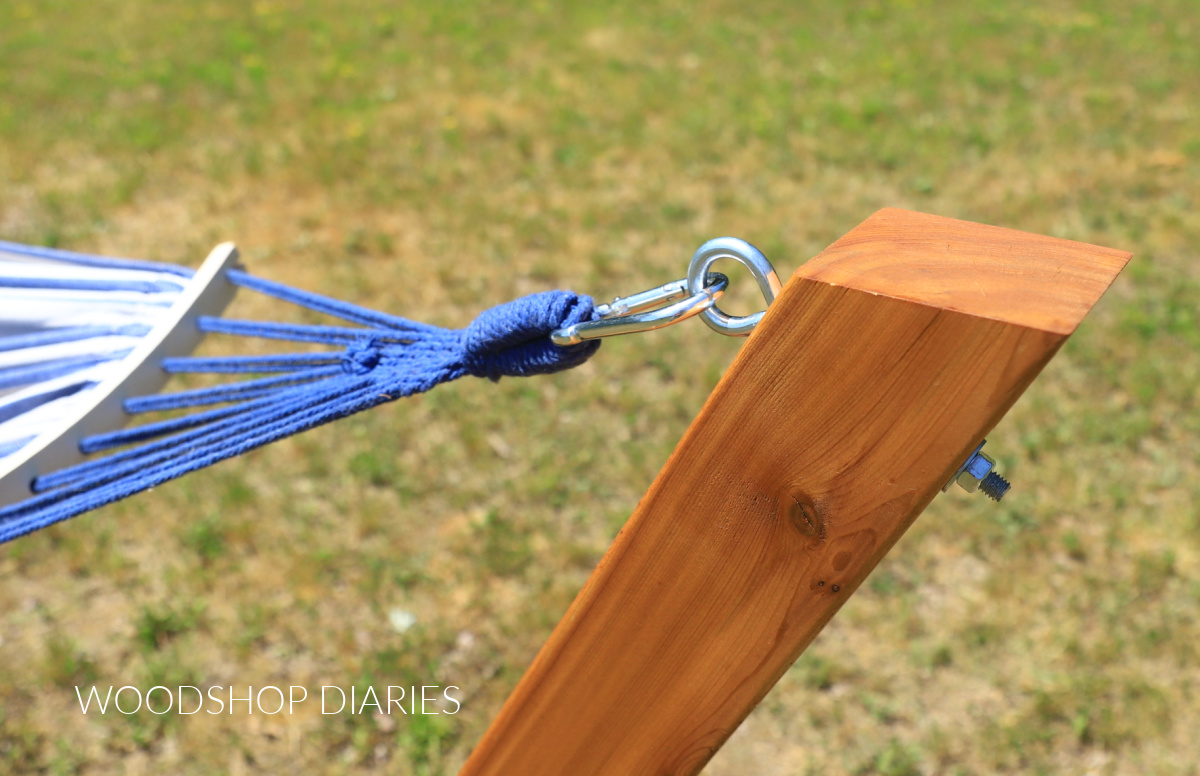
Now the hammock stand is assembled, but we need a way to actually hang the hammock. So I drilled holes toward the top of each post to install a ⅜″ x 6″ eye bolt.
The eye bolts I bought from the hardware store came with a nut, but I grabbed some washers to add on each side of the post.
The regular style nut can work fine, but it may loosen over time and need to be retightened ever so often, so you may consider grabbing a lock nut for these eye bolts instead.
Step 5: Finish & Enjoy
At this point, the build is complete, but I gave my hammock stand a coat of Cabot Australian Timber Oil in Honey Teak to seal and finish it. (That’s my number 1 favorite outdoor sealer.)
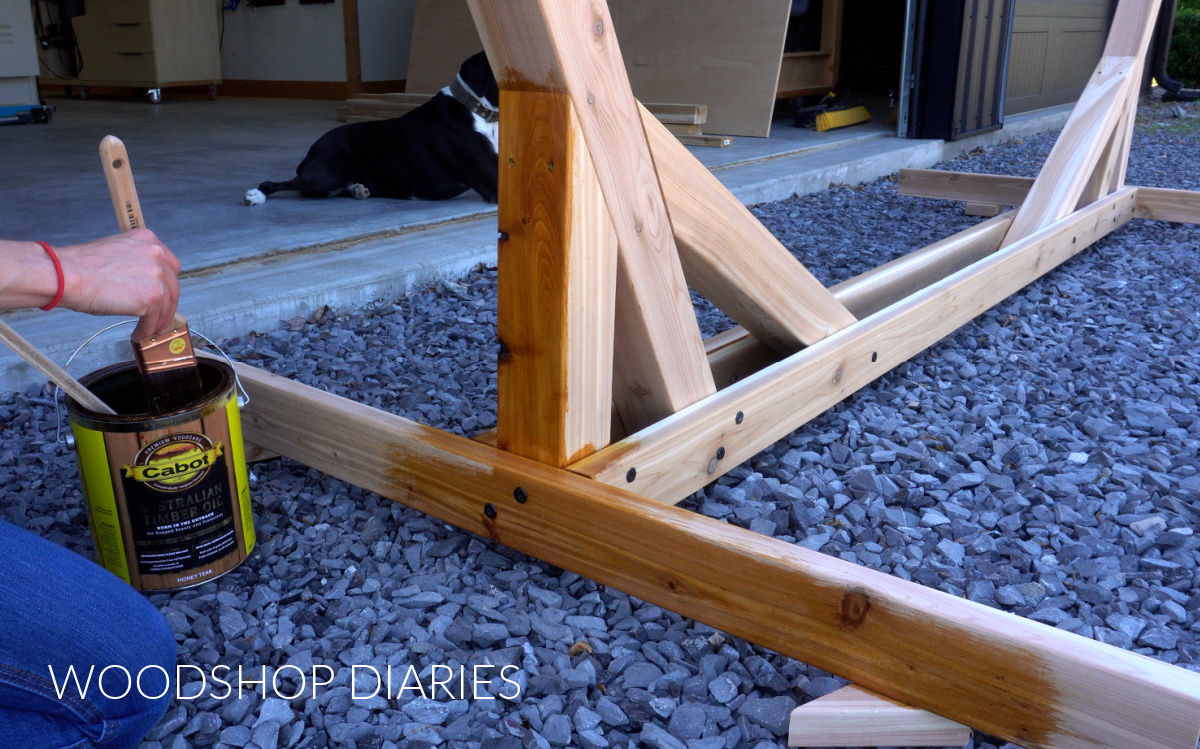
Then, I could clip the carabiner clips to my hammock (the hammock came with these clips) and onto my eye bolts to hang up my hammock and enjoy.
I am in LOVE with this simple stand. I built a hammock stand several years back, but we left it behind when we moved and I’m so glad to finally have one again!
This is the perfect place to enjoy the sunshine in the spring and fall (when it’s not too warm!), and enjoy the shady breeze in the summer.
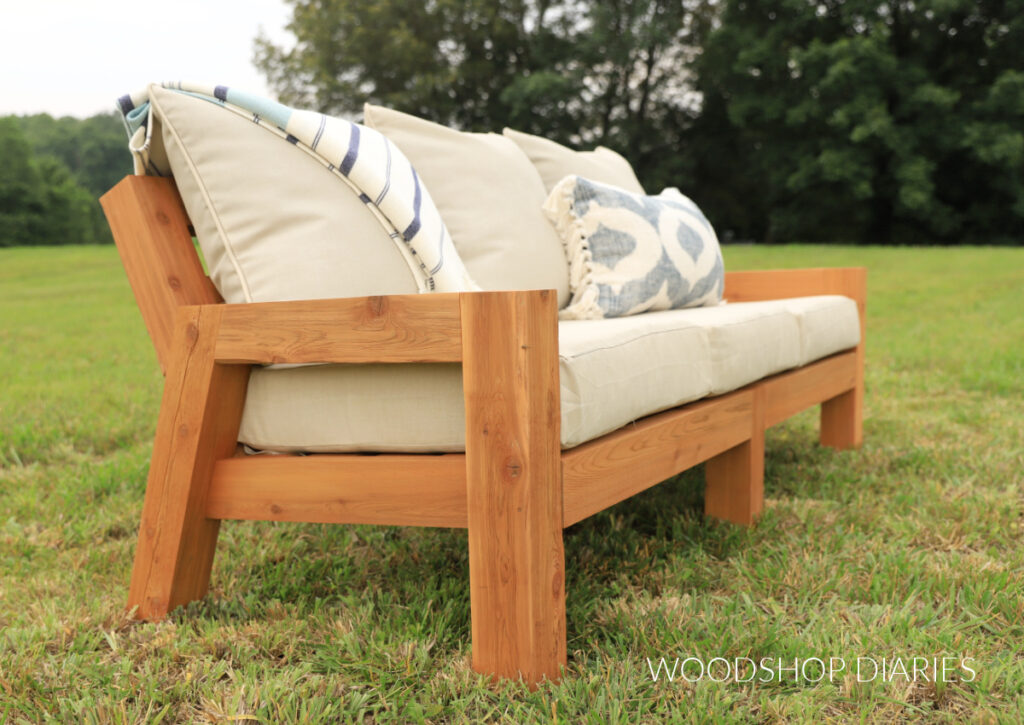
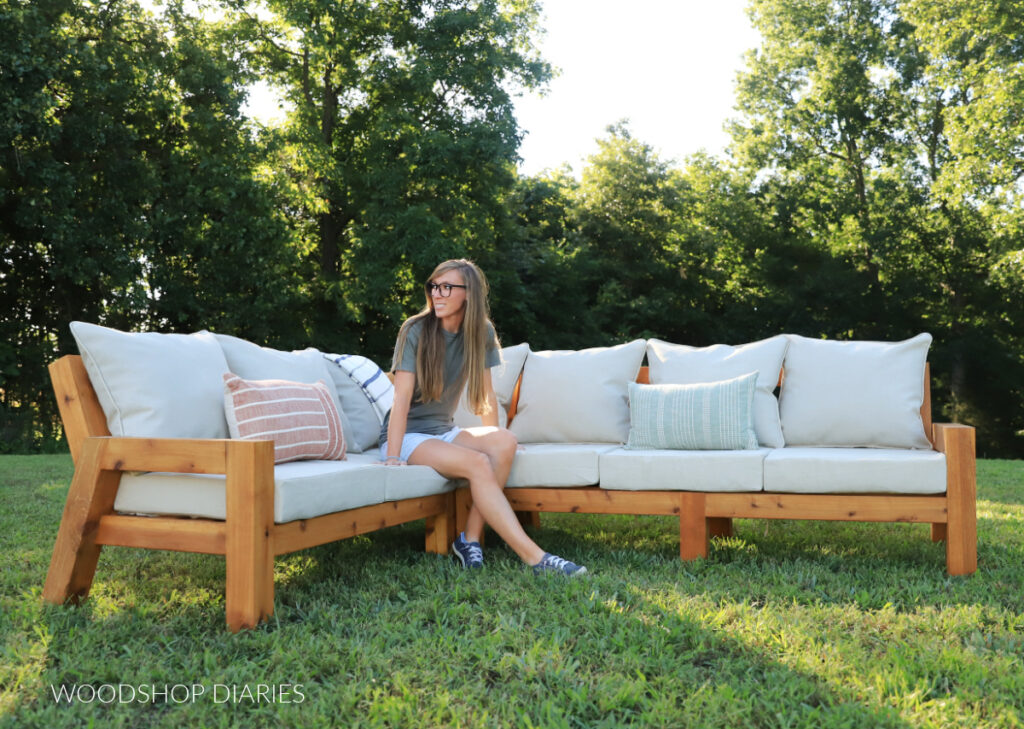
Plus, the chunky modern style matches my DIY outdoor furniture, too!
If you’d like to build your own, don’t forget to grab the printable building plans here!
Looking for more Outdoor DIY projects?
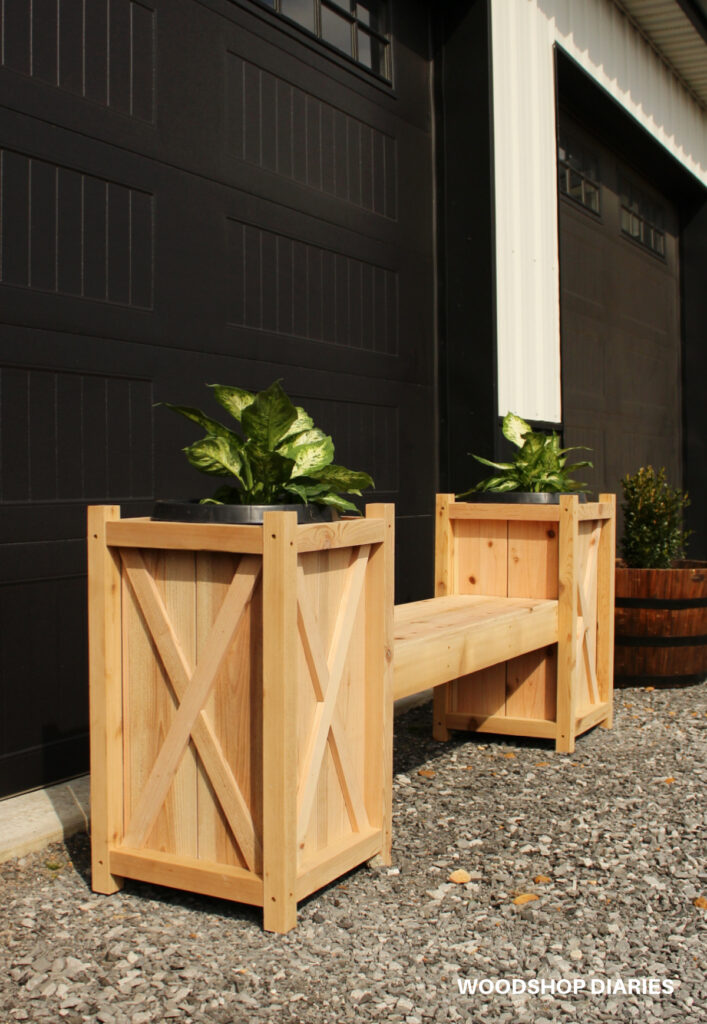
Enjoyed this project, but looking for more outdoor DIYs? Outdoor projects are some of my favorite to build, so I’ve got you covered with plenty more!
Click on the image(s) below to see how to build each one:

If you enjoyed this post, be sure to save it for later by pinning or sharing to your favorite social channel!
Until next time, friend, happy building!