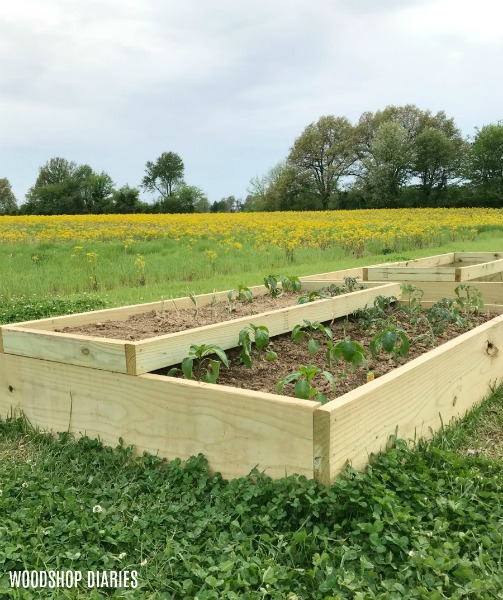
Spring is right around the corner and if you want to get a head start on your garden, now is the time. These DIY raised garden beds can be built in just a few hours so you can be on your way to deciding what all you want to plant–personally, I’m a fan of the tomatoes and the squash. But, hey, to each their own.
.
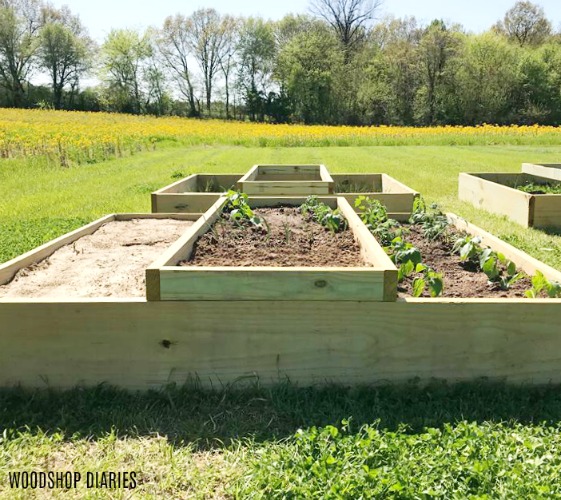
Either way, these raised garden beds are great no matter what you decide to plant 🙂
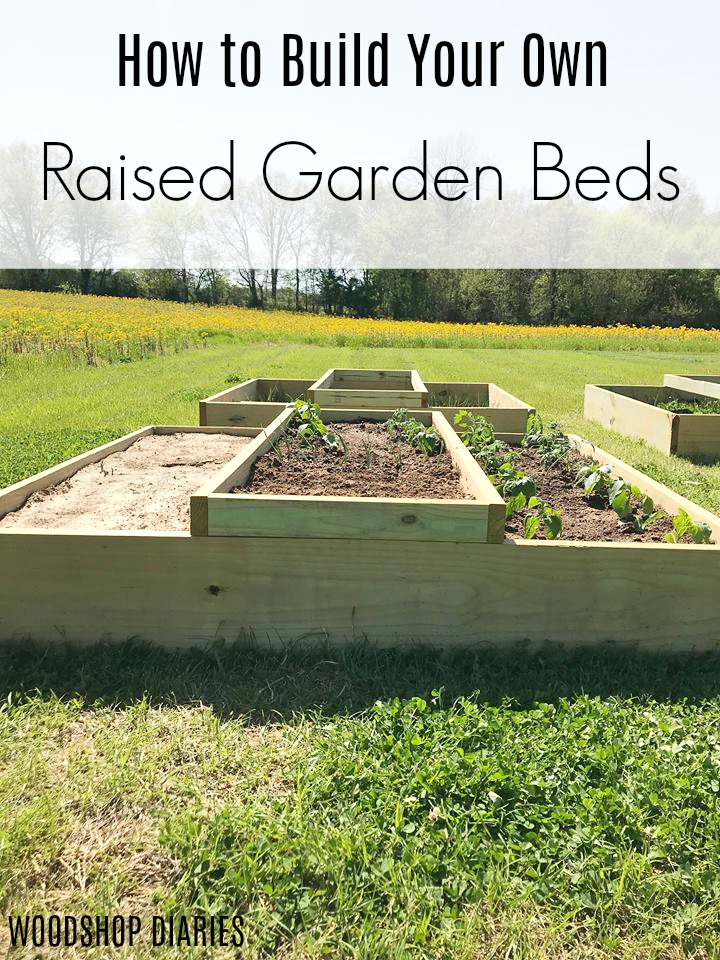
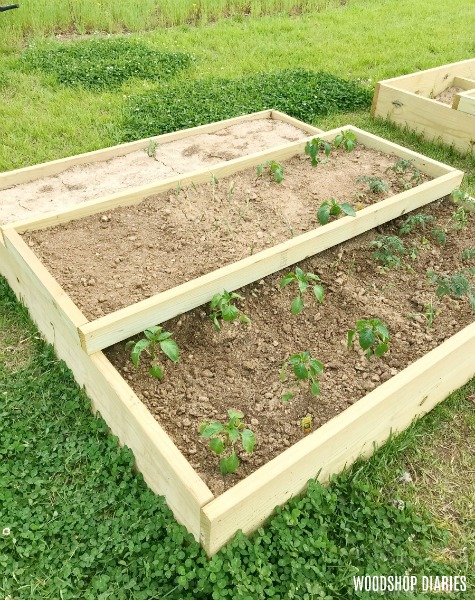
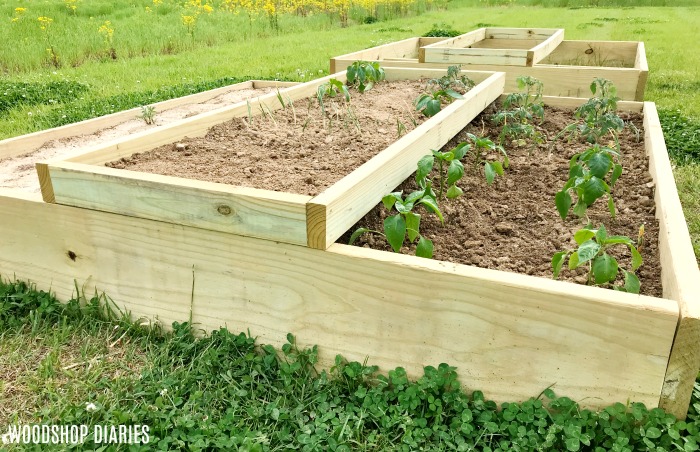
.They are 6’x6′ garden beds with an extra section on the top in the middle. You can build it with or without the top piece, but it adds a little bit more visual interest and helps keep your plants separated–tomatoes on the left, zucchini in the middle and squash on the right 🙂 Or whatever combination you like.
.
I’d just plant squash in each section and call it done. YUM! I’m a squash-a-holic when we have a garden haha.
.
You can have one made in just a couple short hours and you’ll only need a drill and a miter or circular saw. Easy. So if you want to build one–or four–check out the video below and the tutorial below!
This post contains affiliate links. Please see disclosure policy for details.
For this build, you will need (PER RAISED GARDEN BED):
(2) 2x12x12′ treated boards*
(2) 2x4x12′ treated boards*
3″ wood screws
Wood glue
Drill
Miter saw
OR
Circular saw
.
*NOTE: People have used treated lumber for this kind of thing for years. However, it’s recently been found that the chemicals found in treated lumber may be unsafe to use for a garden. Do your own research before determining whether this is right for you. An alternative would be using standard lumber and just knowing that it’ll need to be replaced fairly quickly OR using a naturally water resistant lumber like cedar.
.
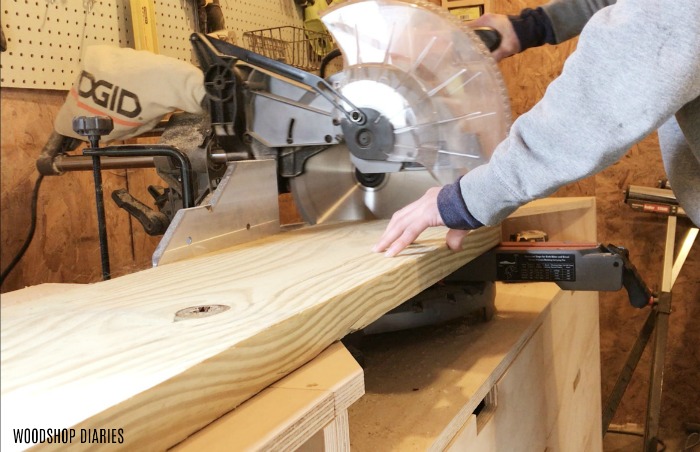
Step 1: Cut Boards Down for DIY Raised Garden Bed
This build is SOOOOO simple, I’m not even sure how to start, here haha. First, I cut my two 2×2 boards in half to get four 6′ long 2x12s. I did this with my miter saw, but you could also do it with a circular saw. Since this is just a raised garden bed, it doesn’t have to be a PERFECT cut.
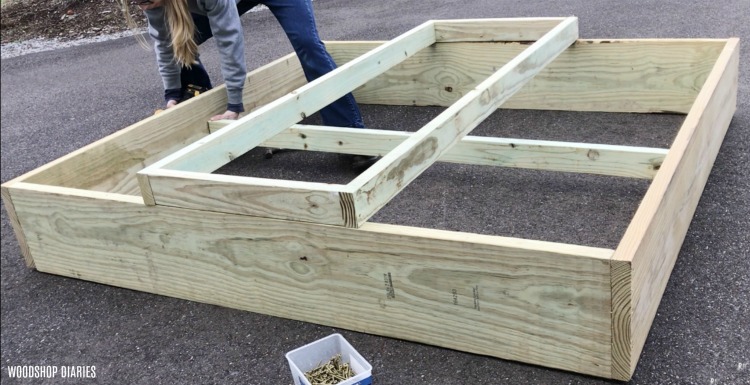
Step 2: Assemble Main Box of Raised Garden Bed
Now that I had four 6′ long 2x12s, I began assembling them using wood glue and several 3″ long wood screws like shown.
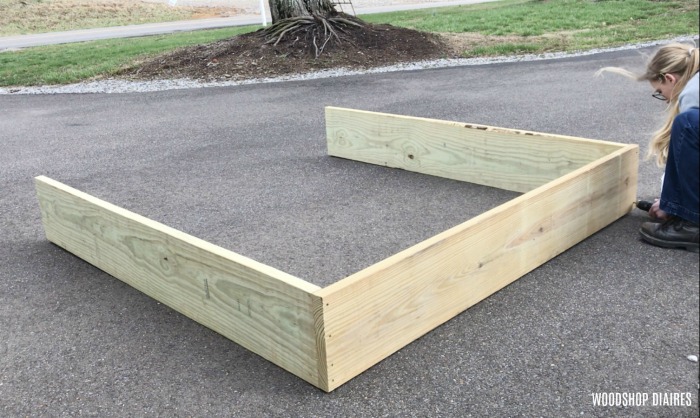
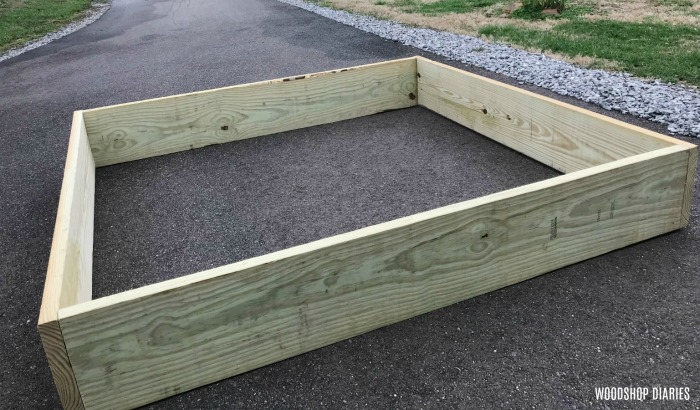
Notice here that two of the 6′ boards run between the two on the ends. So the overall size is actually 6′ on one side and 6′ 3″ on the other since you add the width of the two 2x12s on the ends.
Step 3: Cut Boards for Small Top Section of Raised Garden Bed
Next, I used my miter saw to cut down my 2×4 boards into two 6′ pieces and two 2′ pieces.
Step 4: Assemble Small Top Section of Raised Garden Bed
Using 3″ wood screws and wood glue, I assembled the top section box just like shown here screwing the 2′ boards between the two 6′ boards.
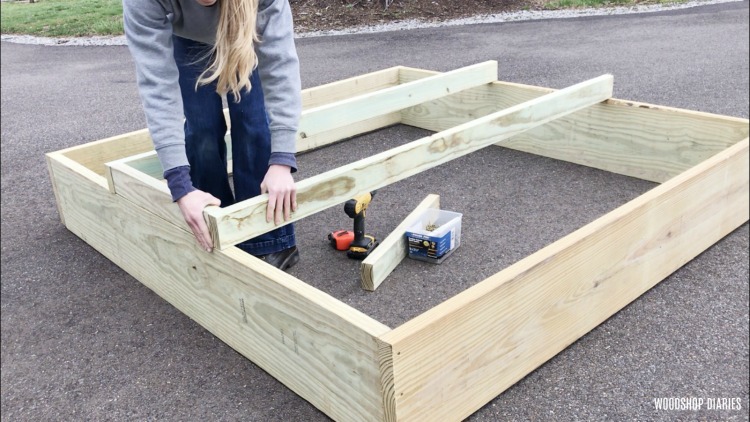
Step 5: Attach Top Section of Raised Garden Bed
Using wood glue and 3″ wood screws again, I centered this top section on the main box, then toenailed (screwed in at an angle) them into the side of the main box.
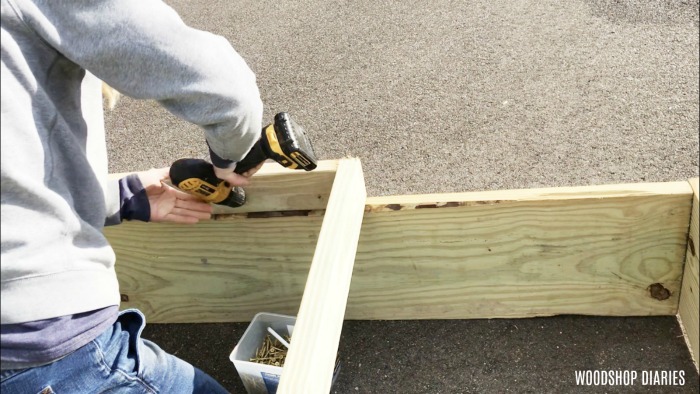
I used several (I think four) screws per side to attach the small section. Now just one more thing before it’s ready to plant!
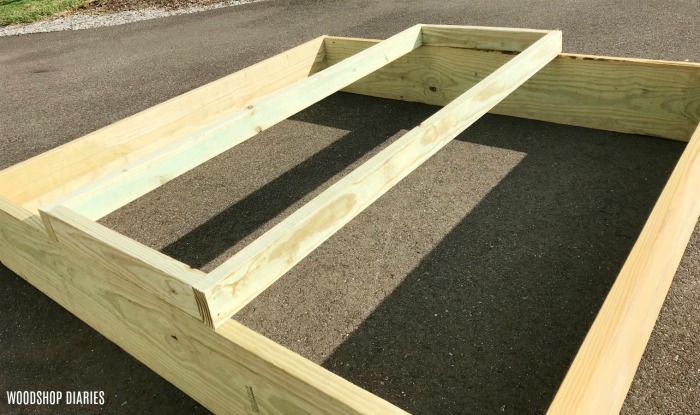
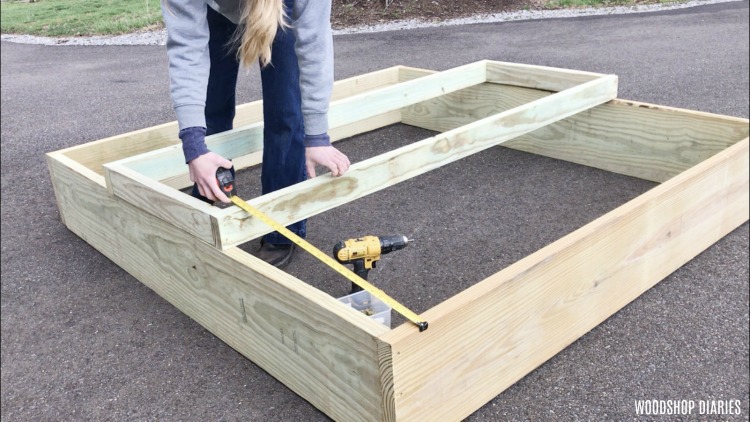
Step 6: Add Stretcher Support in Middle
I have no idea what to call this piece, but I added it to keep the sides from bowing once the beds get full of soil. The top piece will hold it in one direction, but I wanted to add something else to help it in the other direction. So I cut another 6′ long 2×4 to screw like shown so that it was centered and running perpendicular to the top section.
Honestly, I don’t know that this is really necessary, but I don’t think it hurts anything. But you have to be sure to use treated lumber, otherwise this will rot quickly.
.
And that’s it! Just add soil, seeds, water, and a little time and you got yourself a garden.
One thing to note about this build is that it will only take a couple hours max–that’s the pro. The con is that this uses treated lumber, which sometimes is a little smelly AND keep in mind it’s much heavier than standard untreated pine. But, treated lumber will hold up A LOT longer outdoors than untreated, so it’s highly recommended for this project.
So what are you waiting for? Spring will be here before you know it, so get out there and get building…and planting. Be sure to pin this for later and also check out the video tutorial as well before getting started 🙂
.
And for more outdoor and/or plant projects, check out some of these:
Until next time, happy building! 🙂