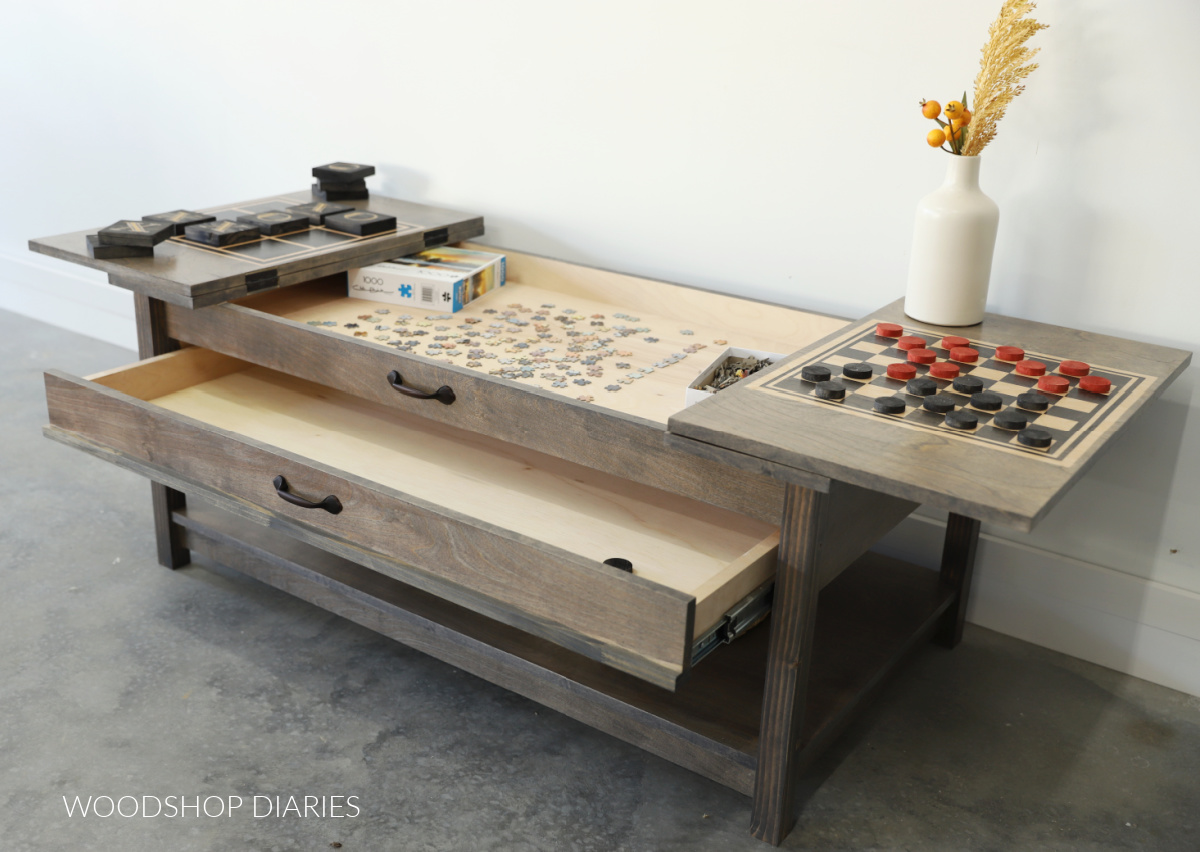
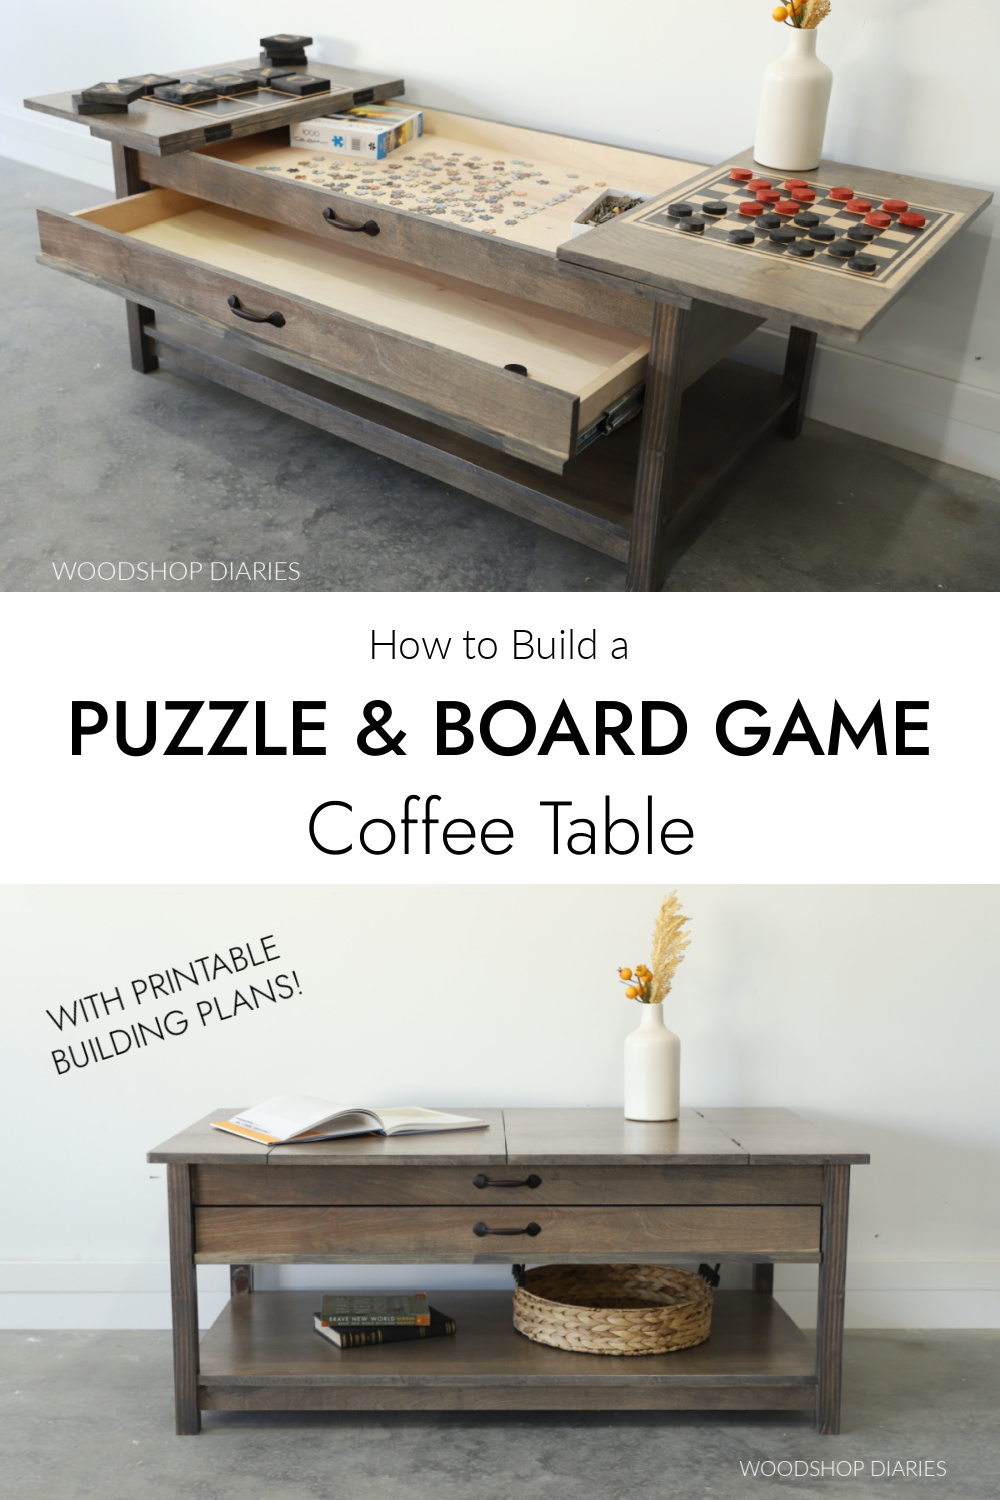
In this post, I’m sharing how to build a hidden puzzle coffee table with a storage drawer and open shelving!
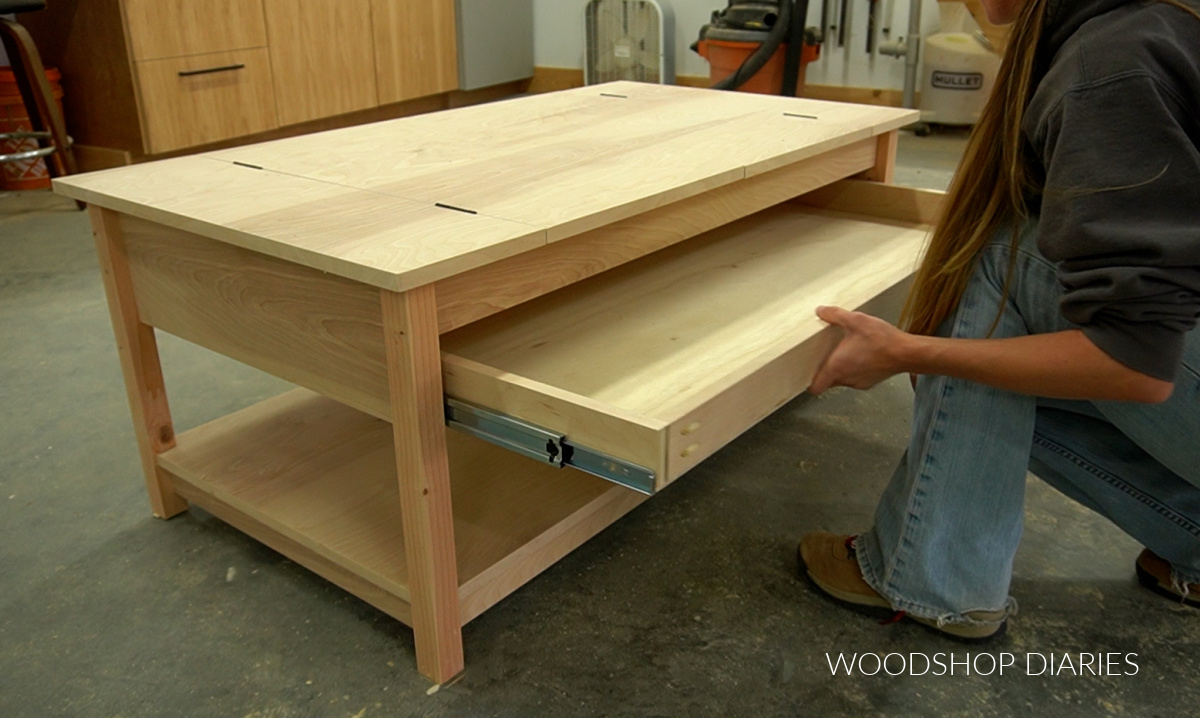
This fun take on a basic coffee table features two flip tops that also have built in board games–tic tac toe on the left and checkers/chess on the right.
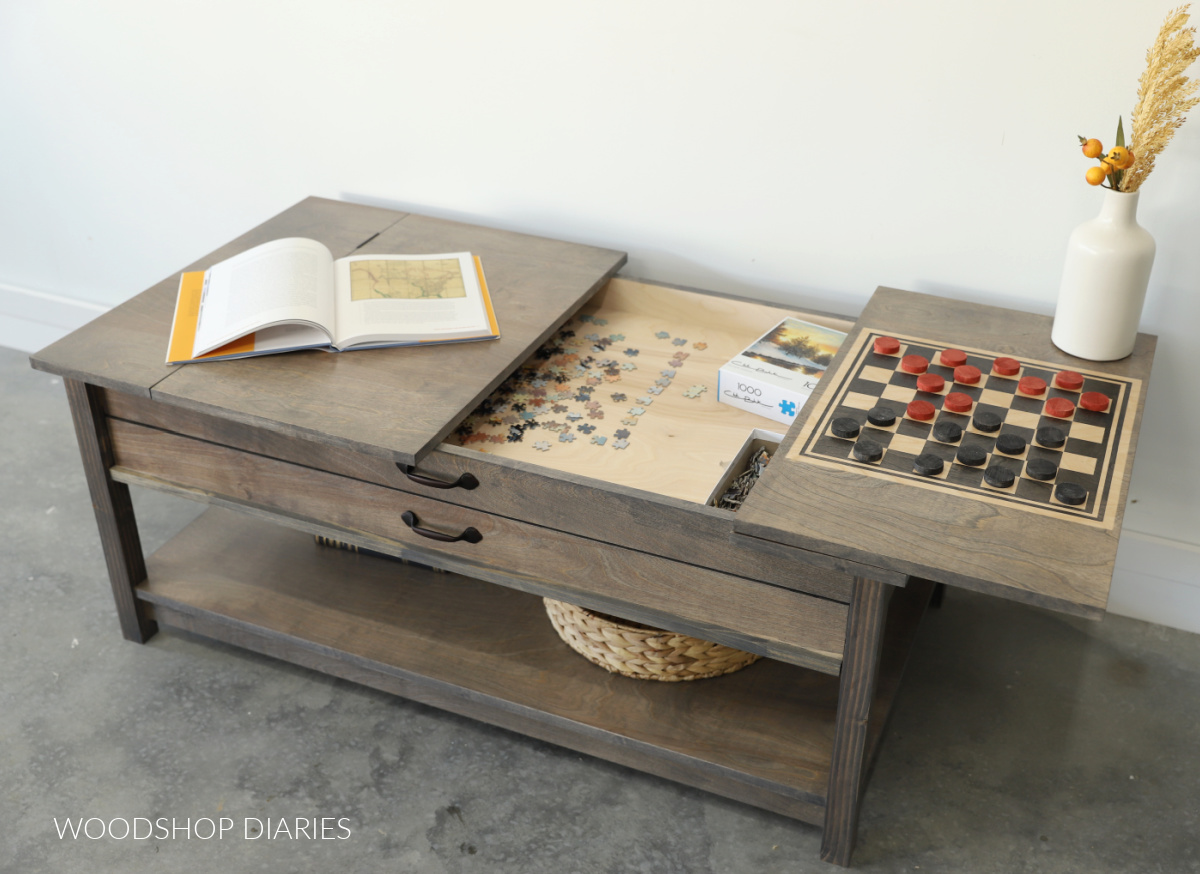
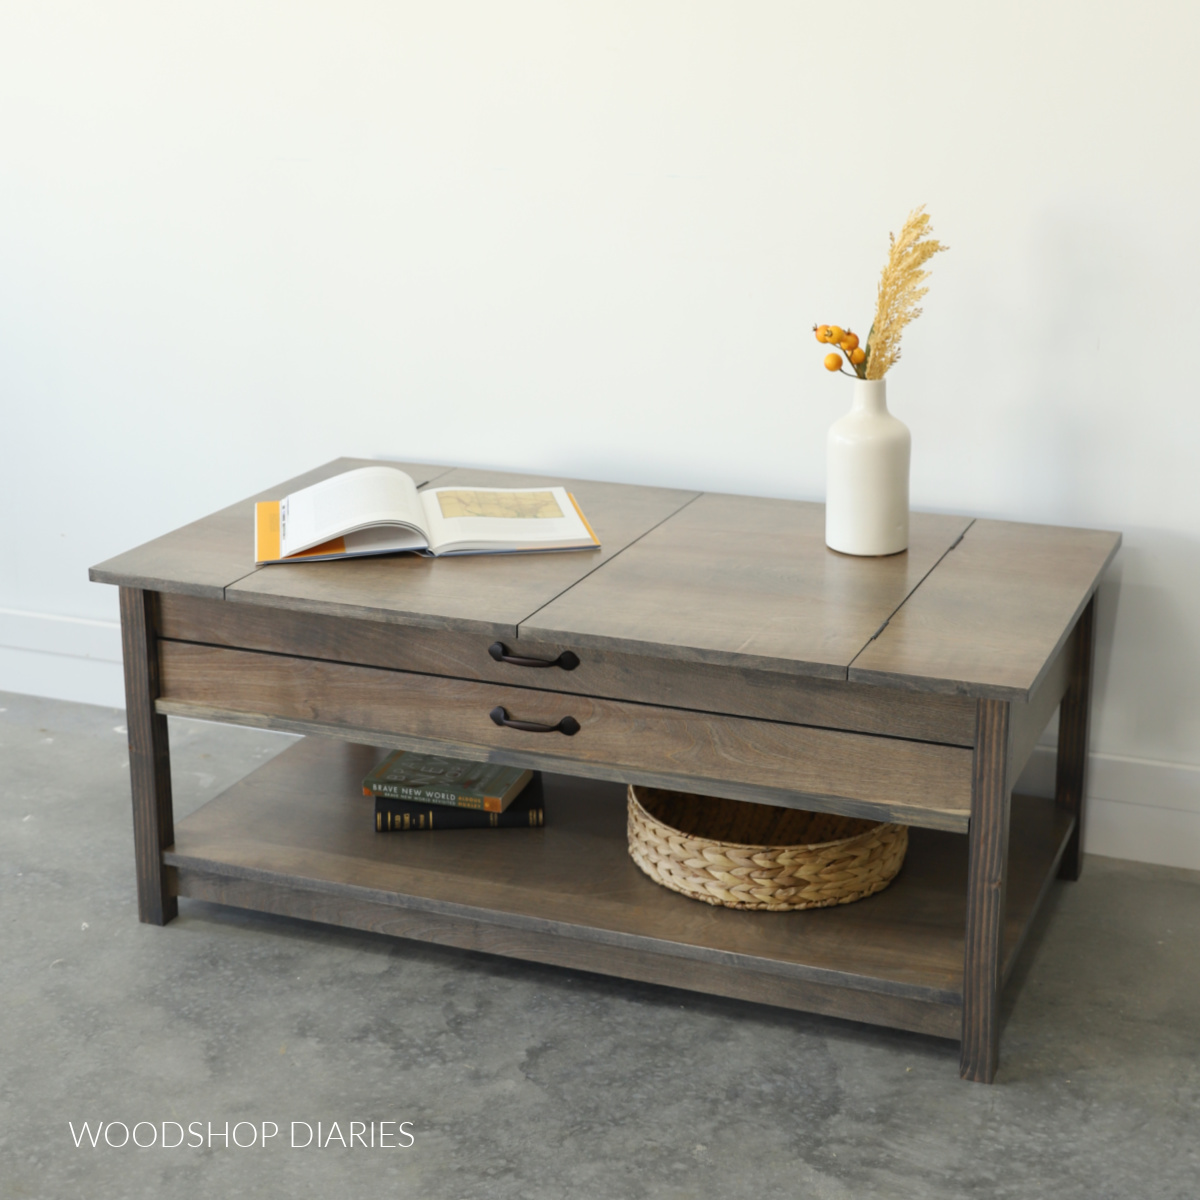
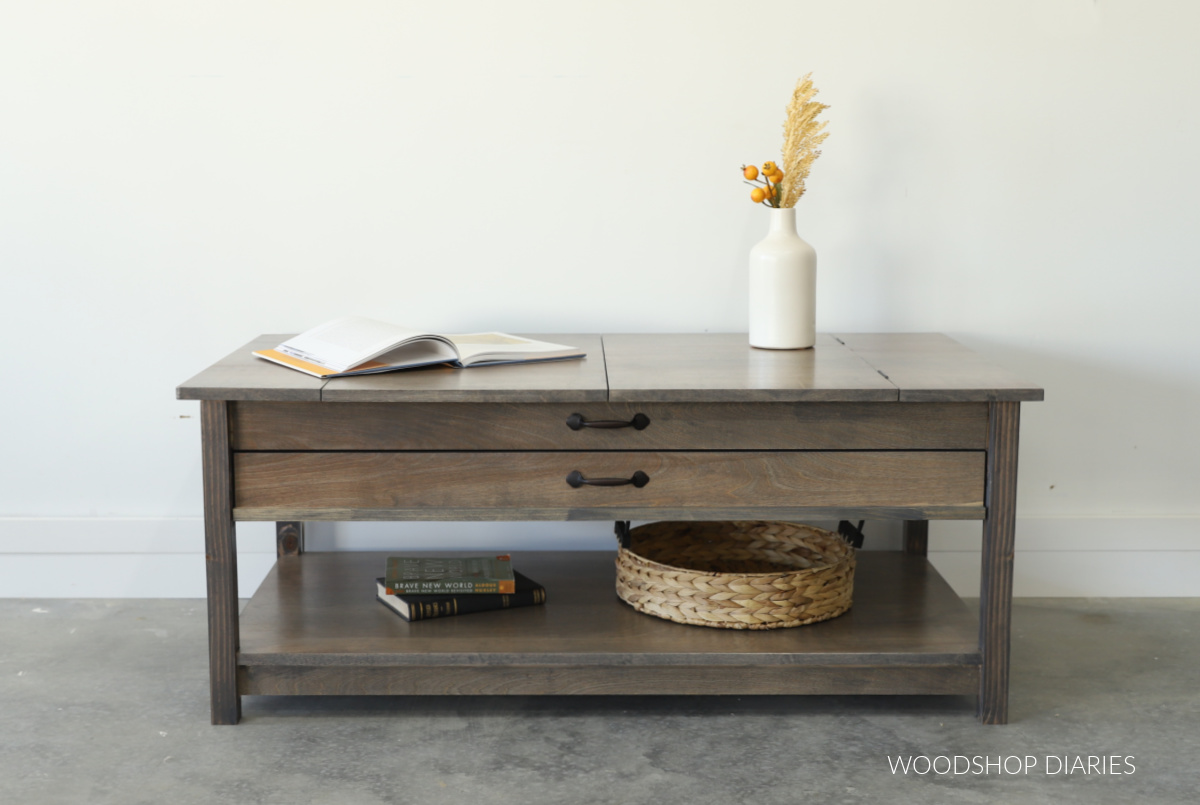
When it’s closed up, this table is simple and clean and classy. Even if you didn’t want this as a puzzle table, the design makes the perfect DIY coffee table for any living space.
And the shallow bottom drawer is handy for storing game pieces, cards, magazines, books, and remotes.
This project was SO much fun to put together, and I can’t wait to show you how to build your own in the plans below.
*This post contains affiliate links. See policies.
What to know before building a Puzzle Coffee Table
This project was made almost entirely of plywood–except for the legs and a couple trim pieces. I used birch ply for this build, but maple, oak or any other cabinet grade plywood would work well, too.
RELATED: How to choose the right plywood for your project
It’s a great intermediate level build–certainly not difficult, but does have several parts and pieces.
If you check out the video below, you’ll notice that I ran into some issues installing the bottom panel because I attached the top supports first.
After building it, I recommend installing the bottom supports and shelf first, then installing the top supports.
Overall Dimensions
The overall dimensions of this puzzle coffee table are 19 ¾″ tall x 26 ½″ deep x 48″ wide.

Puzzles come in various sizes, but many 1000+ piece puzzles are roughly 20″ x 26″ when finished. So when the top two sections of the table are flipped over, the opening is about 21 ½″ x 32″. This allows plenty of room to work most standard size puzzles.
Are DIY projects your thing? Sign up for our newsletter for priority access to the latest projects and build plans!
A Tip on Installing the Hinges
The table top was assembled in four pieces. The two outside pieces are stationary and attach to the table base. The two center pieces are hinged to these outside pieces and are not attached to the base. This allows them to flip open and close freely.
For this project, I used some simple cabinet butt hinges for the flip tops. They’re great, but they have a downside–once installed between two pieces, it creates a rather large gap (about ¼″).
The gap doesn’t affect the function of the table, but I just didn’t love how it looked. So, to help close the gap a little, I used a router to cut about ⅛″ mortise into my stationary top pieces for these hinges to recess into.
This is not a necessary step of the build, but this does make it look a little nicer if you’d like smaller gaps at the hinged joints.
HELPFUL RESOURCES TO USE DURING THIS BUILD
- How to cut plywood
- How to apply edge banding
- How to use a pocket hole jig
- How to build a drawer box
- How to install drawer slides
- How to add board games to table top
How to Build a Puzzle Table
If you’re ready to build your own unique puzzle coffee table, I’m sharing the plans and step by step tutorial below.
But if you prefer to watch, check out the build video on my YouTube channel here. The video contains additional details on adding the game boards plus tips for the build.

Love watching how-to videos? Subscribe to my YouTube channel for plenty more where that came from!
Prefer to print? Grab the printable puzzle table building plans here:
Tools & Materials
Tools:
- Circular Saw
- Cutting Guides (Kreg Rip Cut and Kreg AccuCut used here)
- Pocket Hole Jig
- Drill/Driver
- Miter Saw (optional)
- Jig Saw
- Brad Nailer (optional)
- Router & Straight Bit (optional)
Materials:
- (1) 4×8 PLUS (1) 2×4 sheet ¾″ plywood–1 ¼ sheet total
- (1) 2×4 sheet ¼″ plywood
- (1) 2x2x8
- (1) 1x2x8
- 1 ¼″ pocket hole screws
- (1) pair 20″ drawer slides
- (2) pair butt hinges OR (2) 24″ piano hinges
- Wood Glue
- Edge Banding
- (2) drawer pulls/knobs
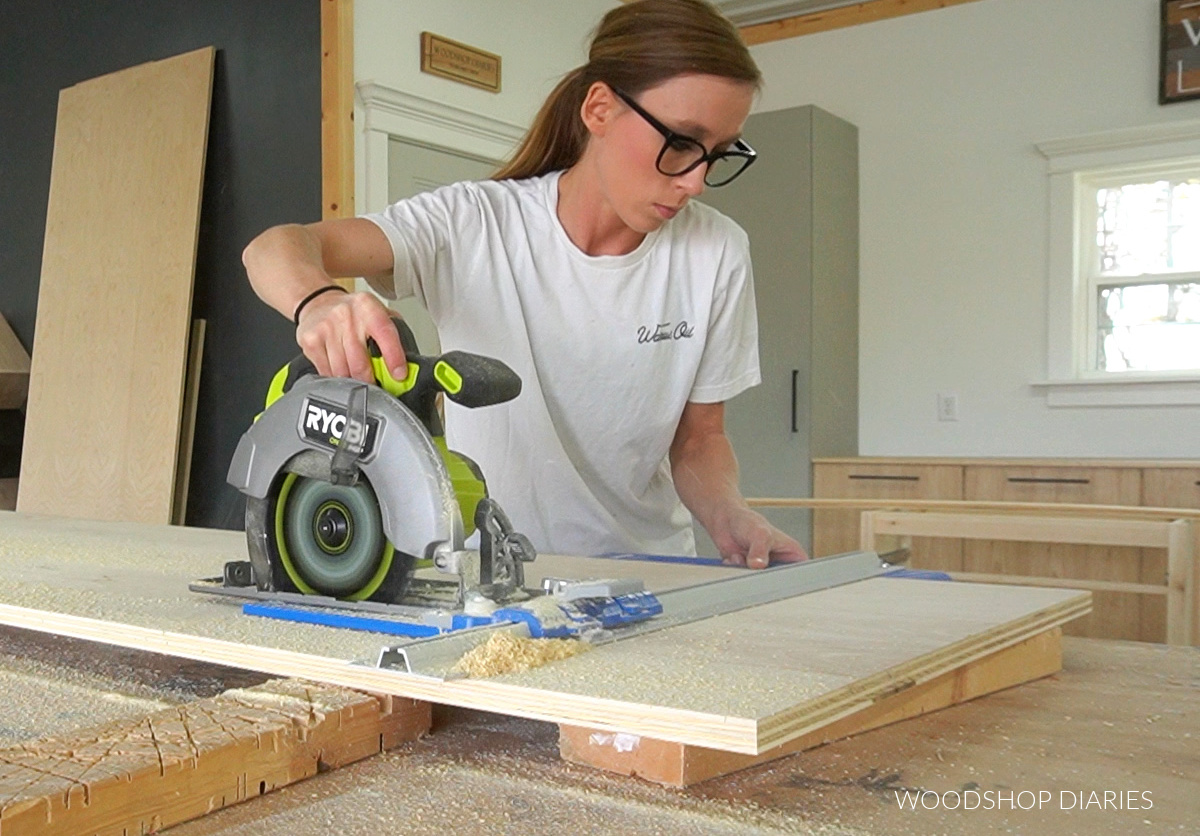
Although it’s not really a “step,” the first part of this project was cutting down my plywood sheet(s). This project used 1 ¼ sheets of ¾″ plywood and I began by cutting down my pieces according to the cut list in the printable plans.
I cut my plywood down using my circular saw and Kreg Rip Cut and AccuCut. You can learn more about them and how to cut down plywood in this post.
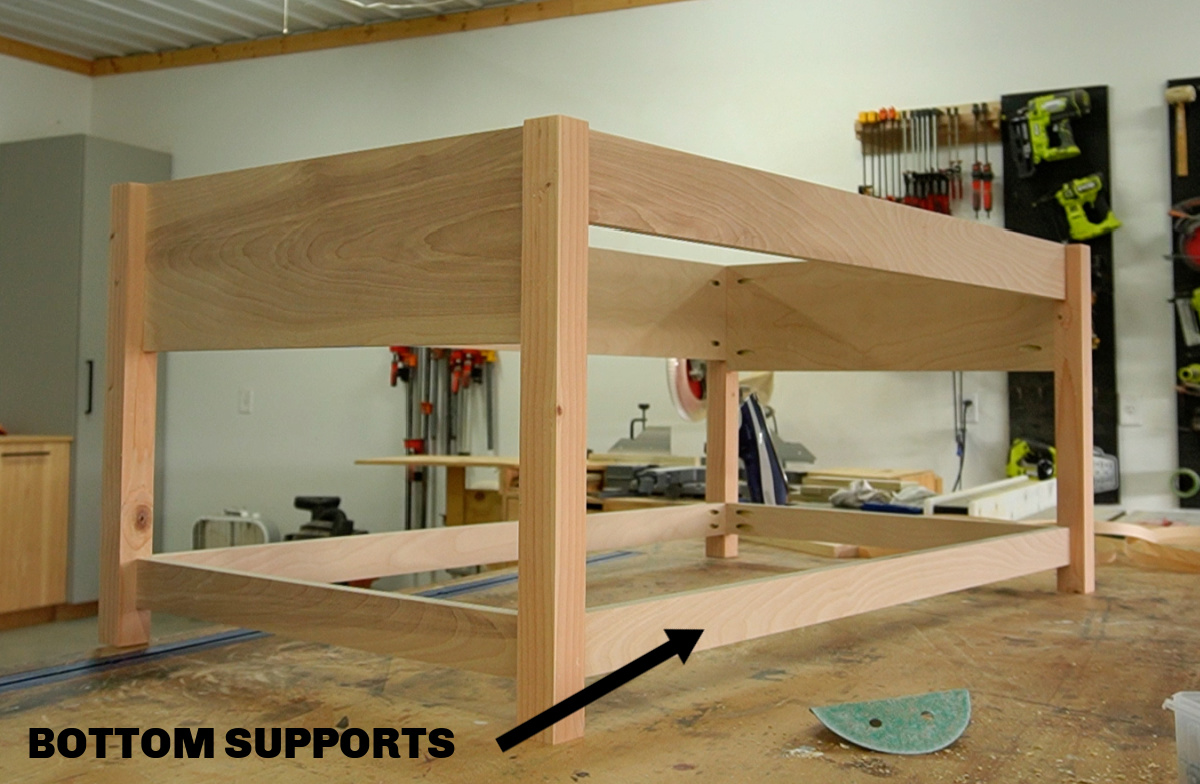
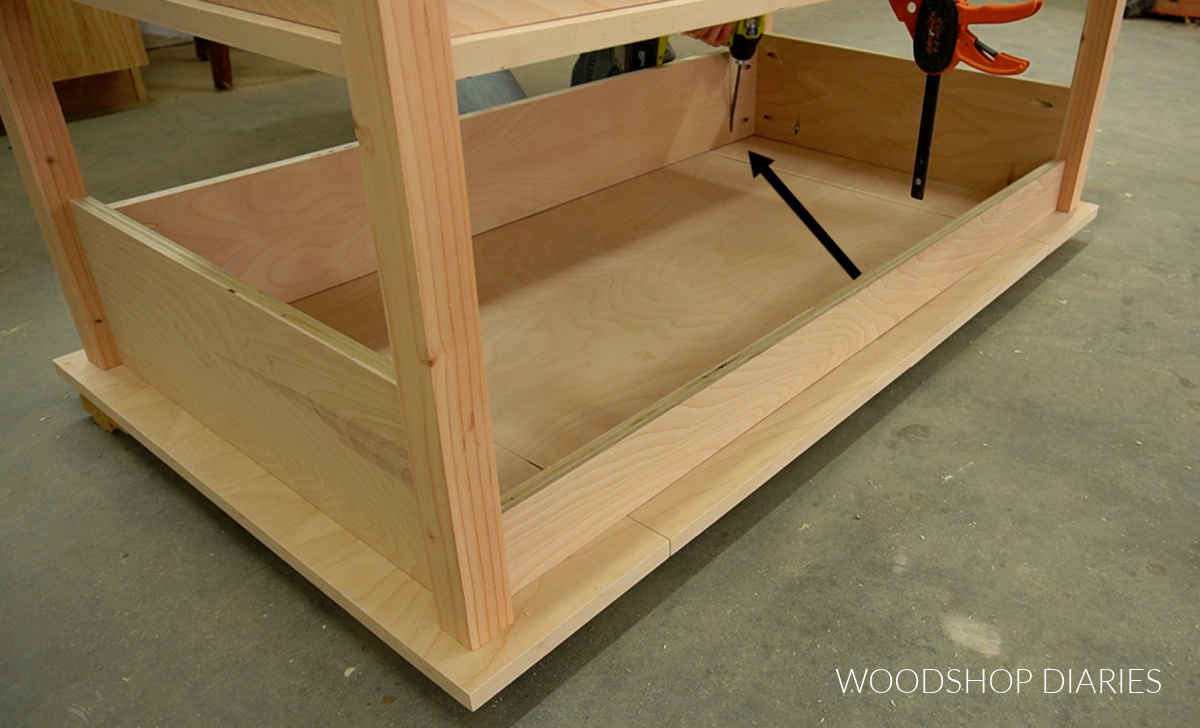
Step 1: Install Bottom Shelf
I mentioned earlier that when I built this, I installed the top supports first, but when I got ready to install the bottom panel, I had to remove two sides in order for it to fit.
So in hindsight, I recommend installing the bottom supports and panel first. The next step will be installing the top pieces. Just ignore them in the pictures for now.
I installed 2″ wide plywood strips between the 2×2 leg posts using pocket holes and screws. All the supports should be flush to the inside about 2″ up from the bottom of the legs.
RELATED: How to use pocket holes to build furniture
Then, I cut a plywood panel to place on top of these. I cut this about ½″ smaller in both dimensions than the overall size of the base. That will allow the panel to sit INSET the legs about ¼″ on all sides.
In order to fit around the legs, each corner will need to be notched out about 1 ¼″ square. I used a jig saw to carefully cut each corner.
TIP: Use a fine finish blade on the jig saw to help prevent tear out when cutting plywood.
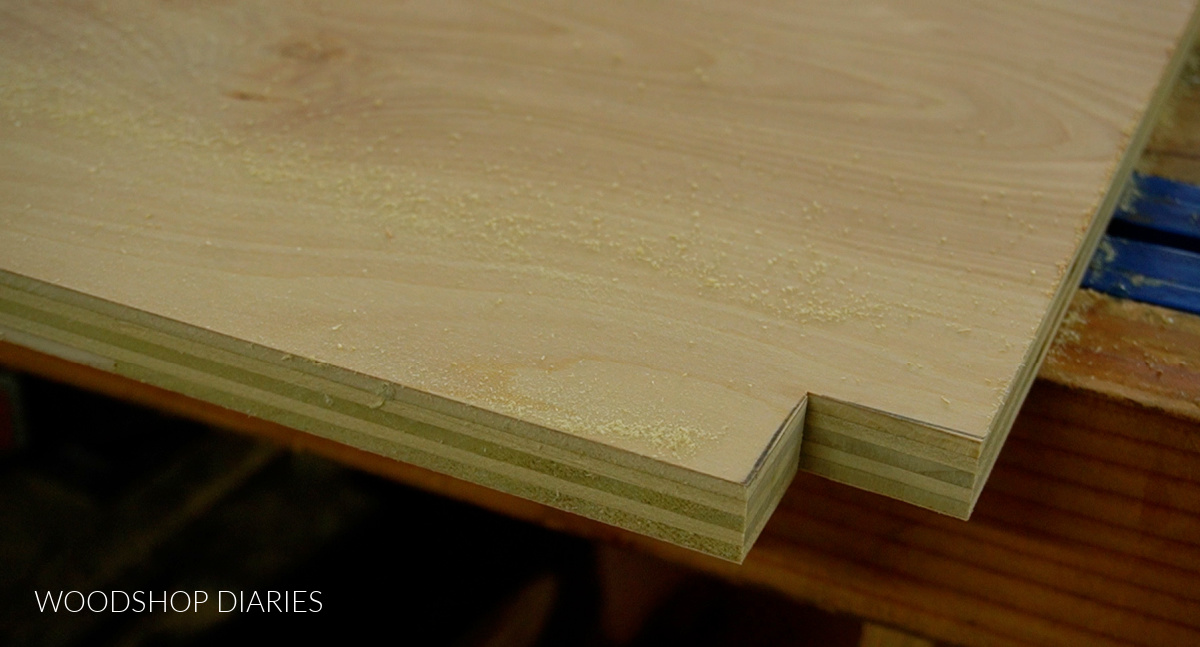
Once cut, I applied edge banding to the long edges of the panel. These long sides will be exposed in the finished project, so edge banding makes these plywood edges look more finished.
RELATED: How to apply edge banding
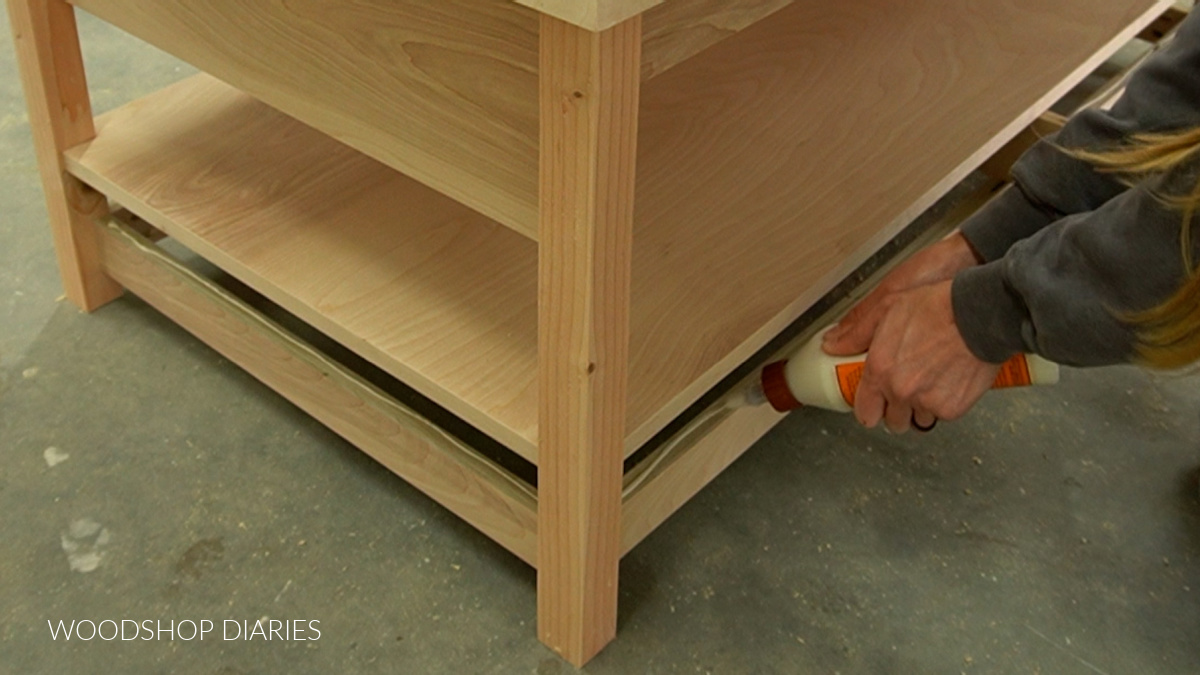
I test fit to make sure this panel will properly fit along these bottom supports. After I made sure it fit, I applied a bead of glue along the top edges of the bottom supports, placed the panel on top, and clamped until dry.
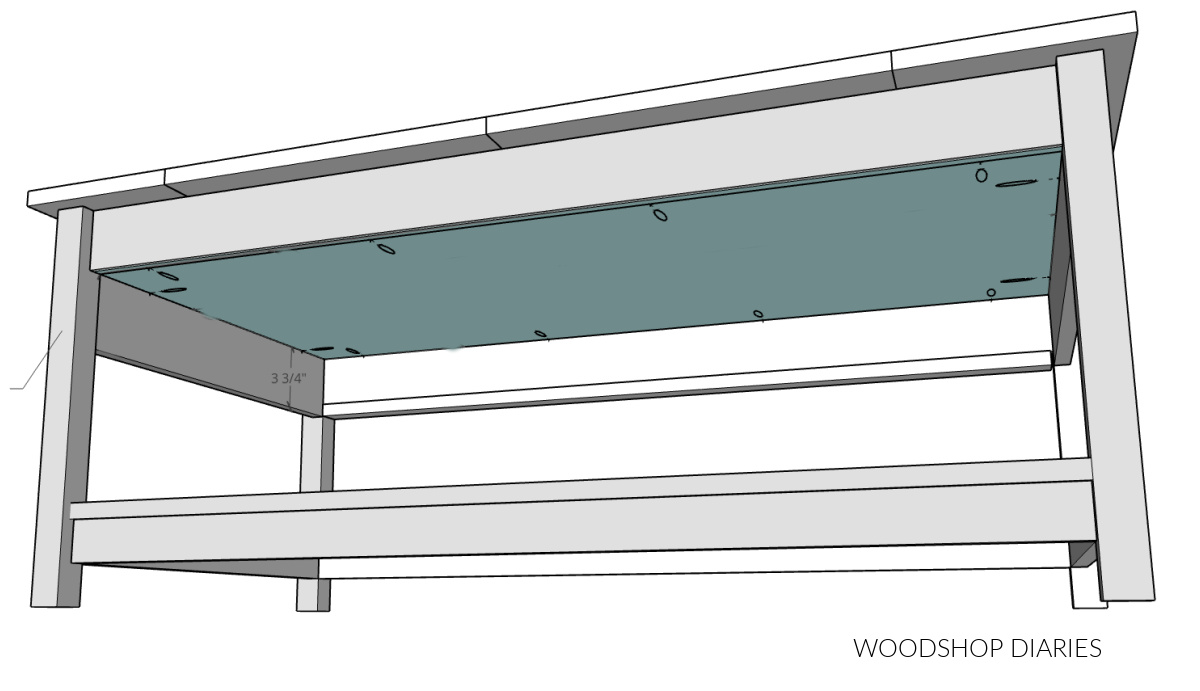
Step 2: Install Top Supports
This is the point where I recommend actually attaching the top supports. I cut the top supports from ¾″ plywood according to the cut list in the plans.
Note that the front piece is only half as tall as the back piece (about 3″) because I’ll be adding a drawer below it later.
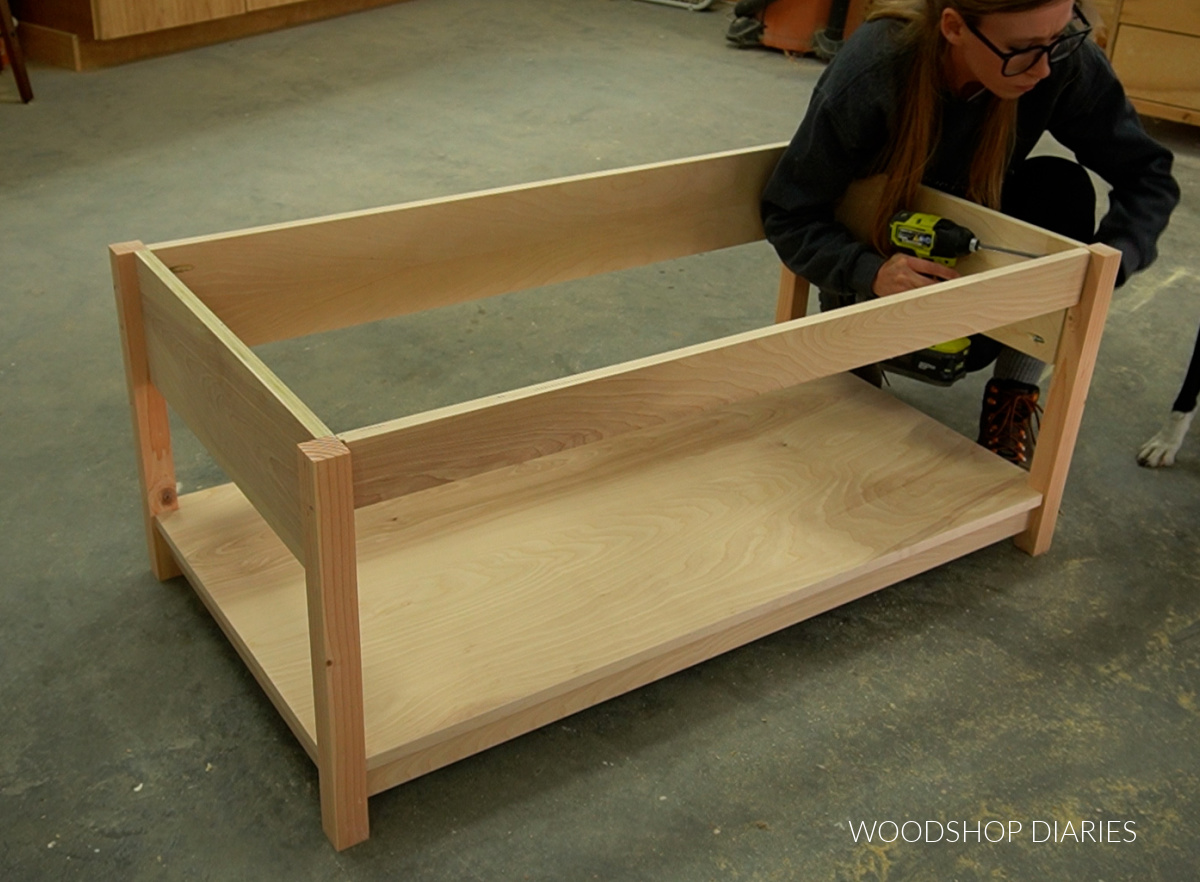
I drilled pocket holes into the ends of the supports and installed them even with the top of the legs using pocket hole screws, making sure to keep them flush to the inside.
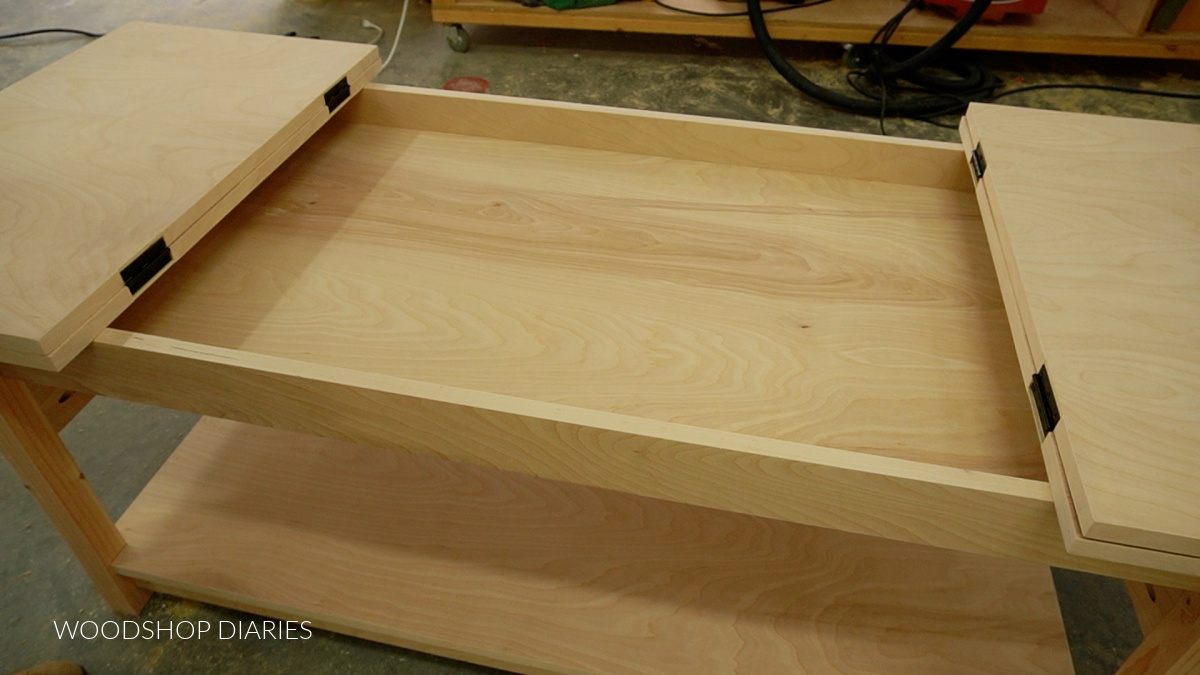
Step 3: Attach Puzzle Table Top
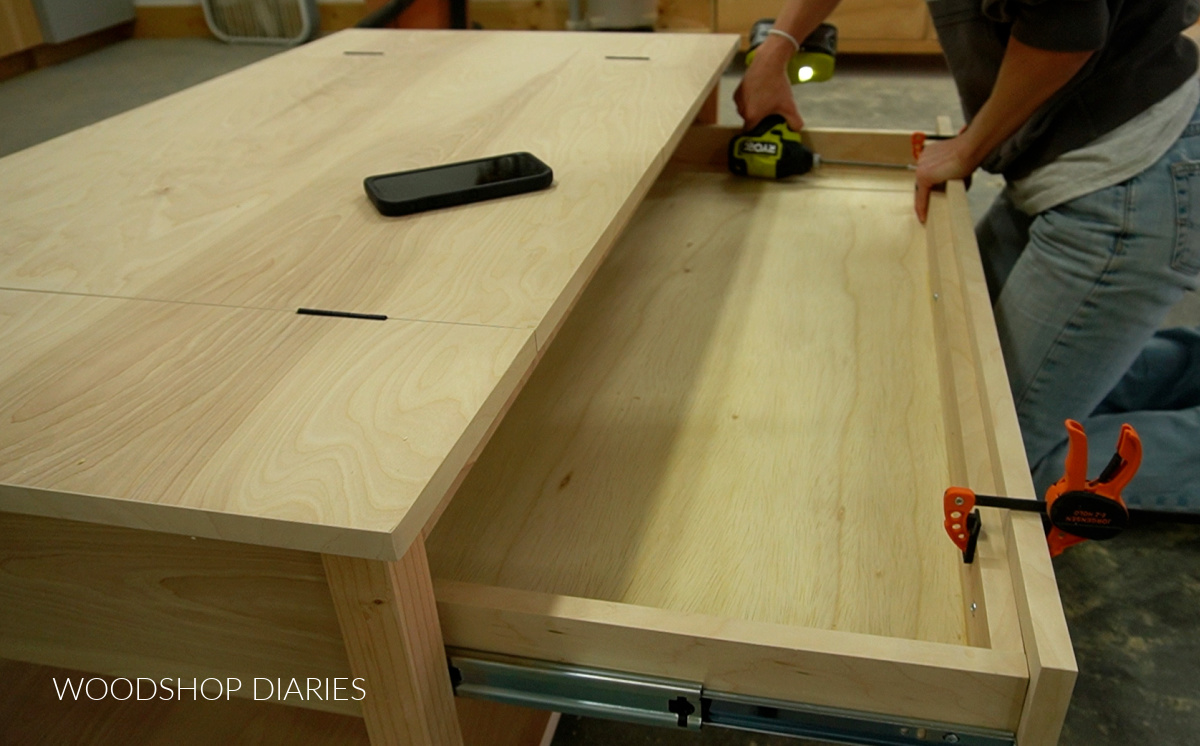
I cut a piece of ¾″ plywood to 26 ½″ x 48″ for the top. Then, I trimmed this piece into four pieces like shown below.
The two outside pieces will be stationary (attached to the table base), and the two middle pieces will be the parts that flip open to reveal the puzzle compartment.
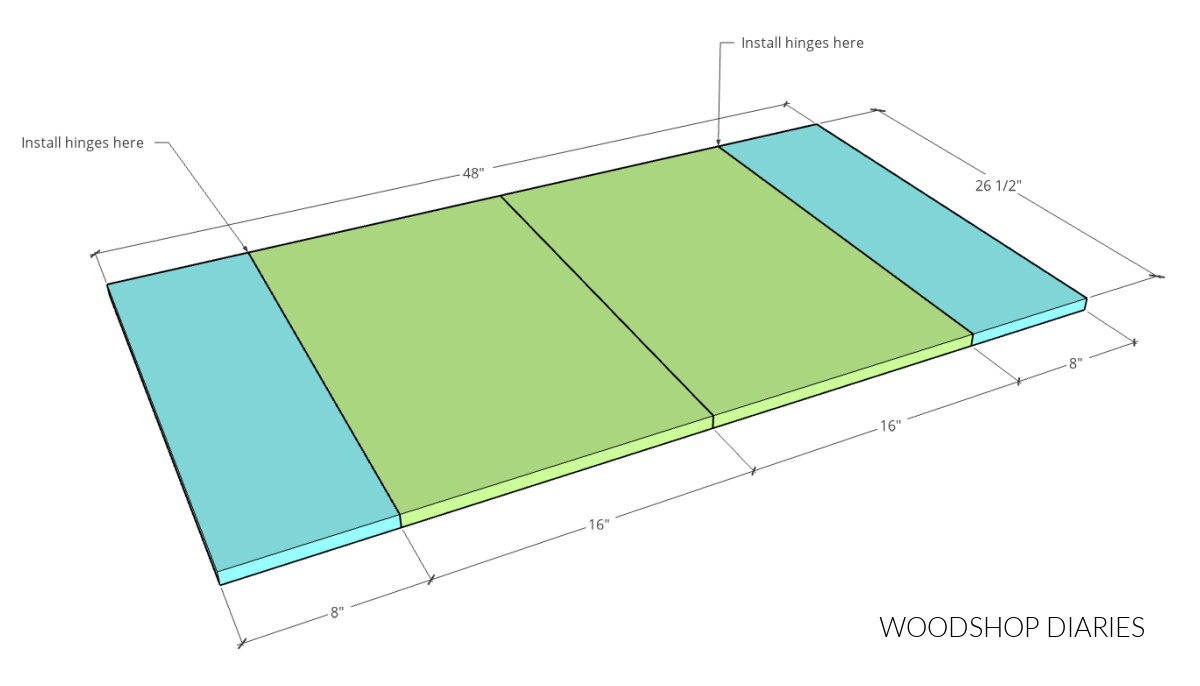
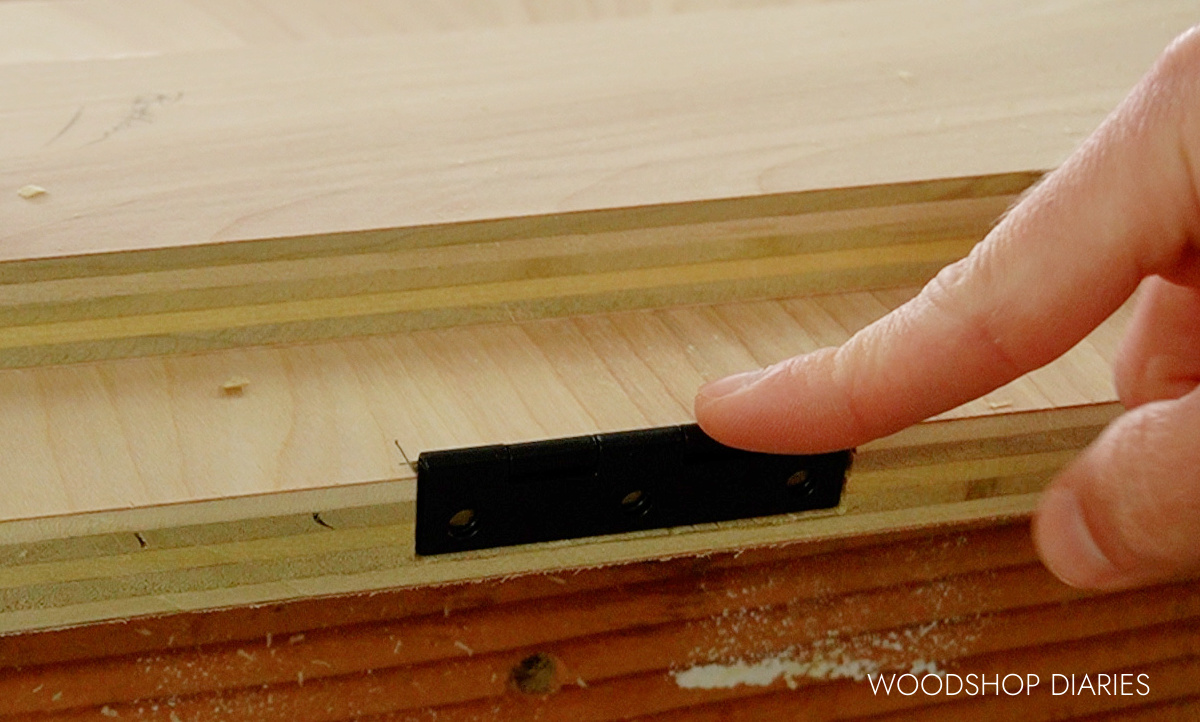
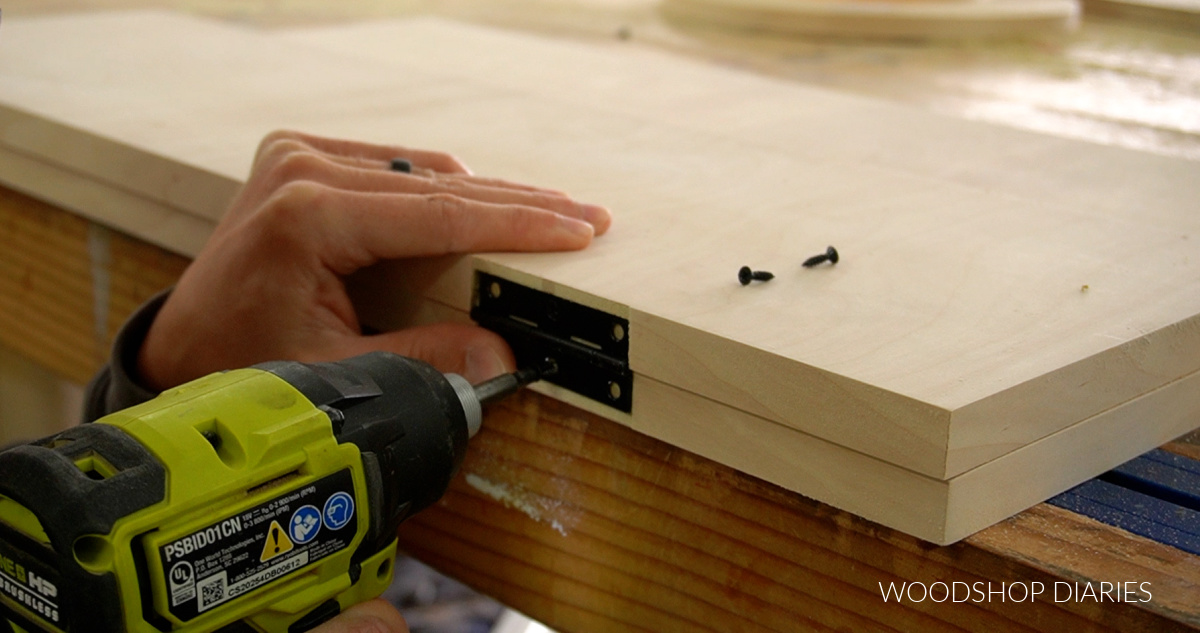
Once this was trimmed into 4 pieces, I installed the hinges between the outside and middle pieces. I used some simple cabinet butt hinges for this, but piano hinges would also work really well.
NOTE: These hinges are super easy to install, however, the downside is that when you put them between the boards, the gaps are fairly large (about ¼″).
If you wanted to minimize the gaps, you could use a router to cut about ⅛″ mortise into the edge of one piece to kind of recess the hinges into. See video for more details.
I applied edge banding to the four pieces of the top everywhere EXCEPT where the hinges will go (see image below). The edge banding will help fill the gaps caused by the hinges.
Once the hinges are installed between the two outside sections and the inside sections, I made sure when they were placed flat across the table base, they were flush across the top. Adjust as needed to the top lays as flat at possible (the hinges will stick up slightly).
After the hinges are adjusted, I flipped the pieces upside down leaving about ⅛″ between the two middle sections. Then I drilled ¾″ pocket holes around the top supports and flipped it over on the top pieces.
Make sure the pocket holes are only drilled where they will be only on the outside sections of the top are. Then I secured with pocket hole screws.
I flipped the table back upright and made sure the flip tops open and close properly without rubbing.
Prefer to print? Grab the printable puzzle coffee table plans here.
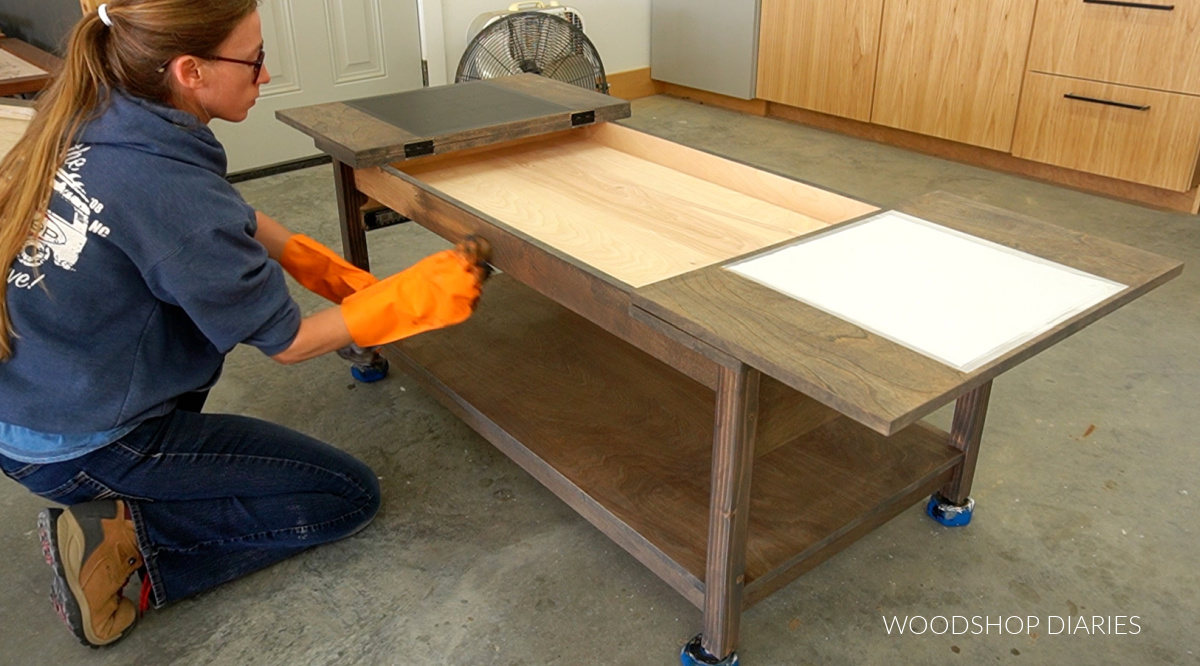
Step 4: Install Puzzle Compartment Panel
Once the top is installed, I could add the bottom panel of the “puzzle compartment.” I cut a ¾″ plywood panel to fit into the opening between the top supports and drilled ¾″ pocket holes around the edges.
Then, I inserted this panel into the table base so that the bottom edge was flush to the bottom of the front top support and secured with pocket hole screws.
This is the part you’ll see when you flip open the table top. This is where you can work your puzzles or play a board game. Or, if you aren’t into games, hide away your remotes, books, etc.
Step 5: Install Drawer Into Coffee Table
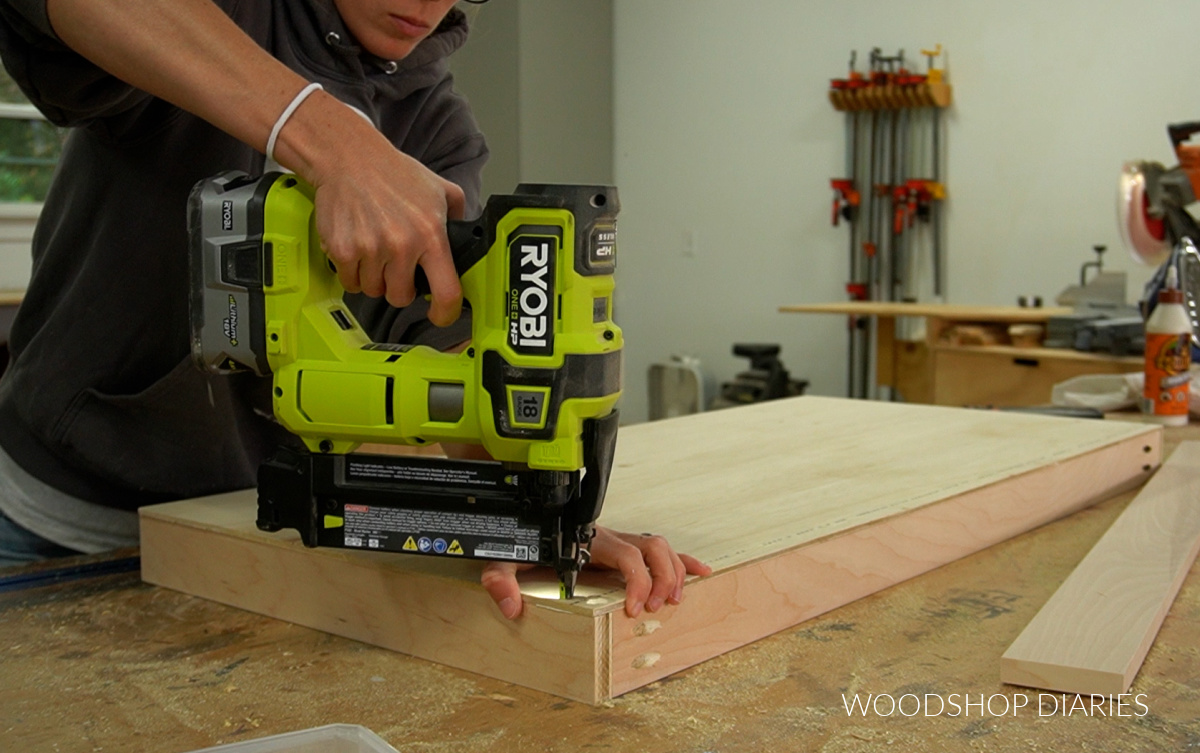
Finally, the last part of the build is adding the drawer box. I assembled this drawer box with ¾″ plywood for the drawer box sides and ¼″ plywood for the bottom.
All the dimensions can be found in the plans. I usually cut dadoes in my drawer box pieces to install the bottom panel.
But, since this drawer was already so shallow, I didn’t want to take up any drawer space with the dado. So instead, I assembled the box with pocket holes and screws, then glued and nailed the plywood bottom onto it.
RELATED: How to build a drawer box
Then, I installed 20″ ball bearing drawer slides into the table so that they were 1 ½″ inset from the front edge of the legs.
RELATED: How to install drawer slides

I installed the drawer box onto these slides, then added a ¾″ plywood drawer front using screws from the inside.
RELATED: How to install drawer fronts
To add some extra dimension and detail to the build, I cut and glued 1x2s to run along the bottom edge of the back top support and the drawer front.
Step 6: Finish Coffee Table
Finally, I finished the table with a final sanding and applied Minwax Aged Barrel stain before a few coats of Minwax Helmsman poly.
Then I added some drawer pulls to the top fake drawer and the real bottom drawer.
If you’re interested in how I added the checkers and tic tac toe sections to the bottom side of the flip tops, be sure to check out the YouTube video and this post where I show the process and link the Cricut files so you can try it out for yourself!
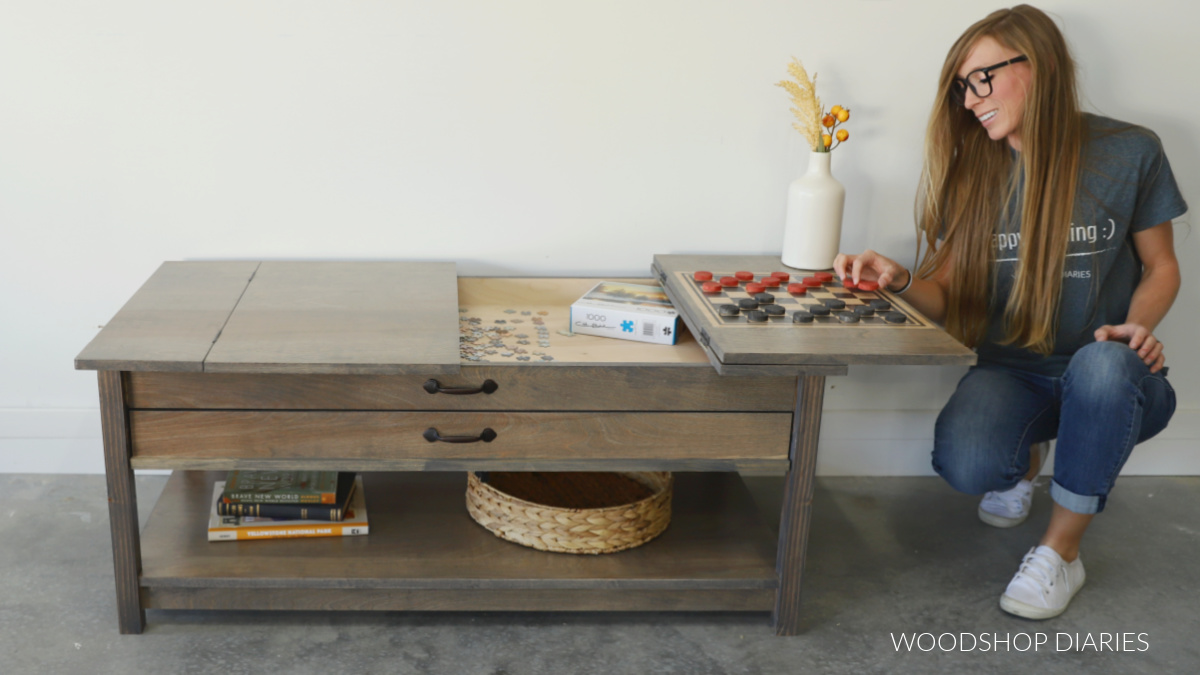
And with that, this table is ready for play! I absolutely love how this turned out and I think it’s safe to say this is one of my all time favorite builds ever!
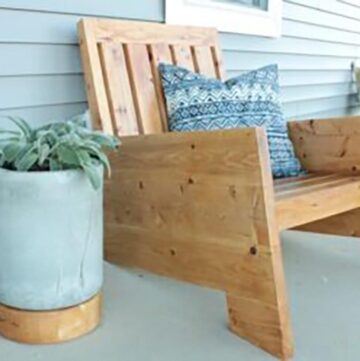
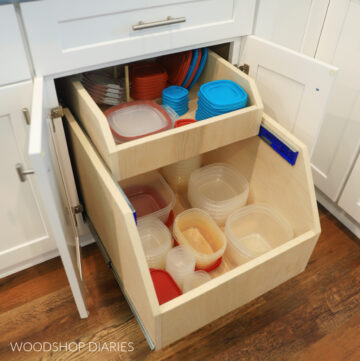
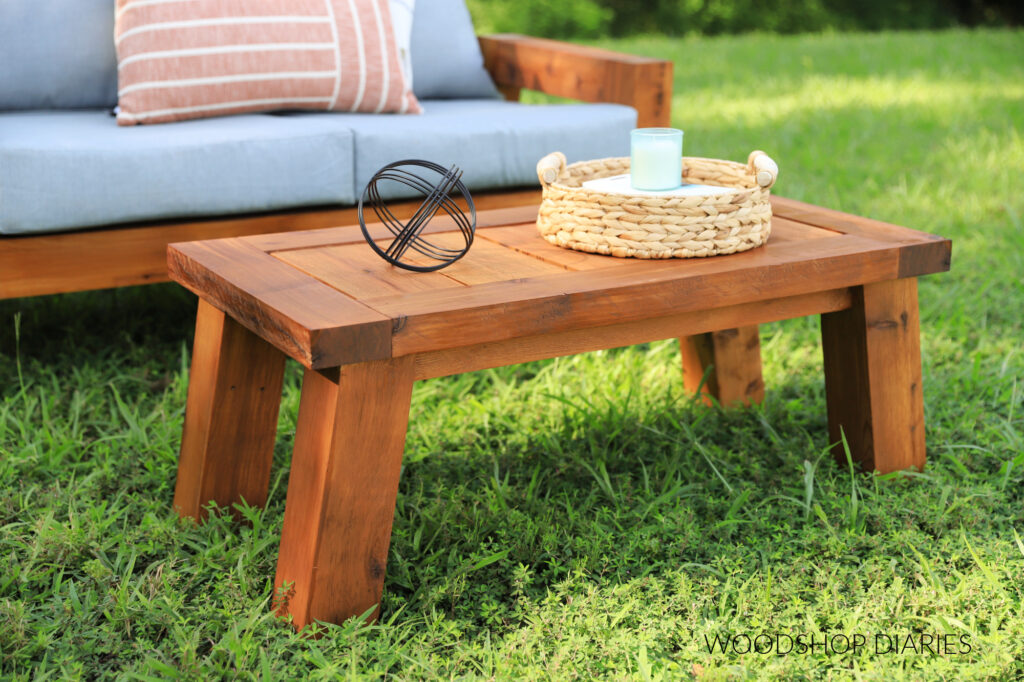
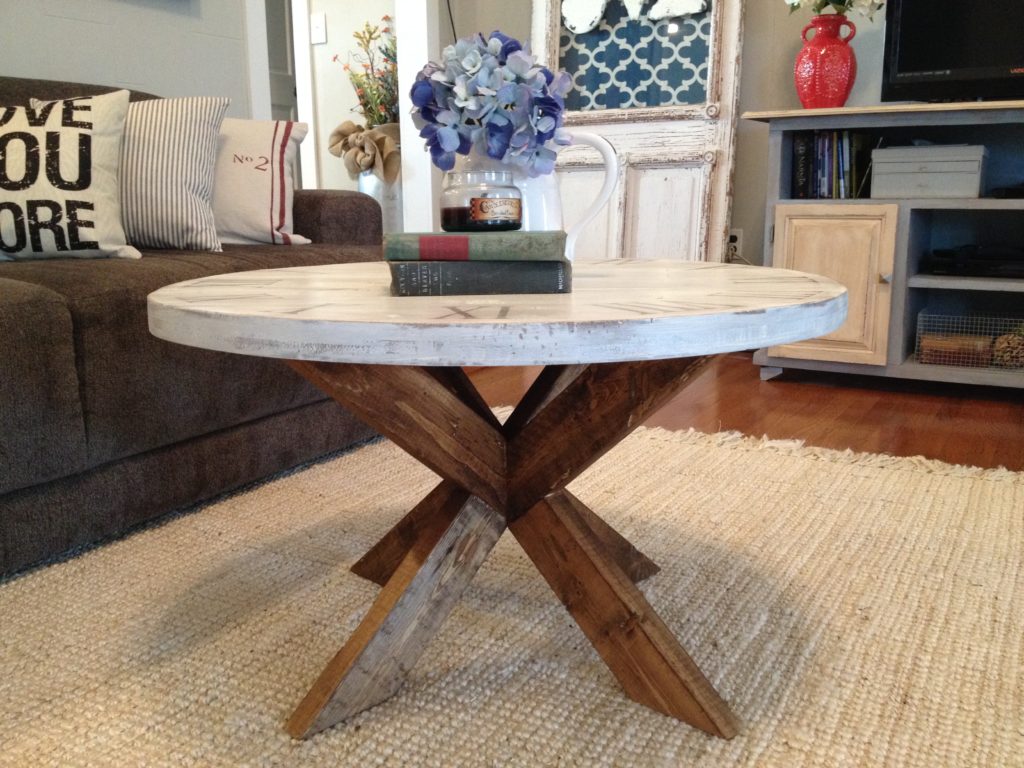
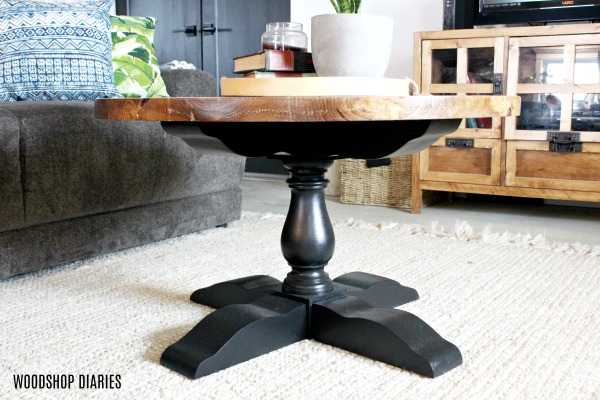
Looking for more coffee table ideas?
Enjoyed the build and looking for more coffee table ideas? Here are a few favorites!
If you enjoyed the project and want to save it for later, don’t forget to pin it or save to your favorite social platform!
Until next time, friends, happy building!