In this post, I’m sharing how I helped my parents transform their cluttered garage into an organized and practical workspace packed with storage!
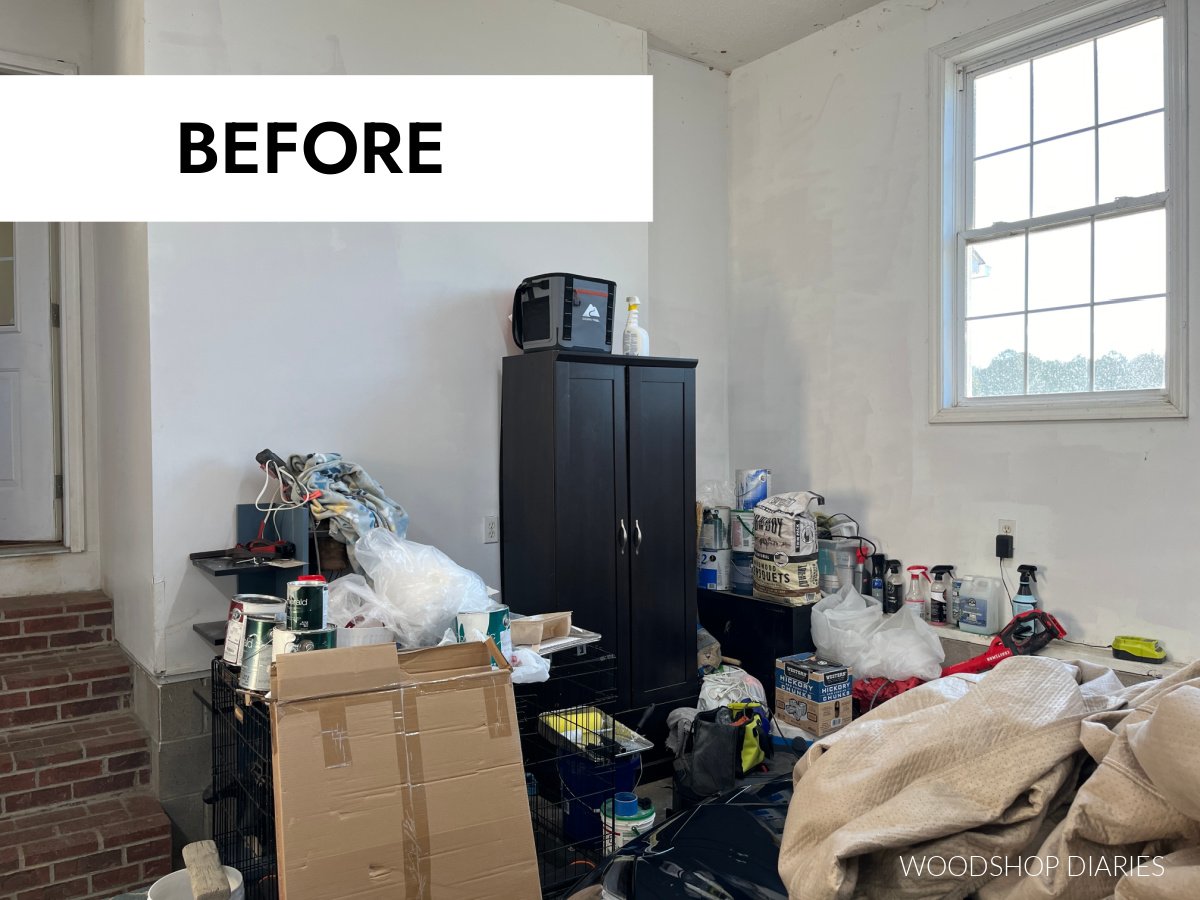
This corner of the garage was out of control. Without anything to really store or hang these items in, they all just ended up piled on the floor.
And that’s exactly why we are here–to fix that!
So the goal with this project was to add some storage to get these items up off the ground (and behind doors!). And add a functional workspace since this is, after all, a garage.
If you’re ready to dive into this garage remodel and see the before and after, I’m sharing all the details below.
*This post contains affiliate links. See website policies.
Cleaning out the Garage
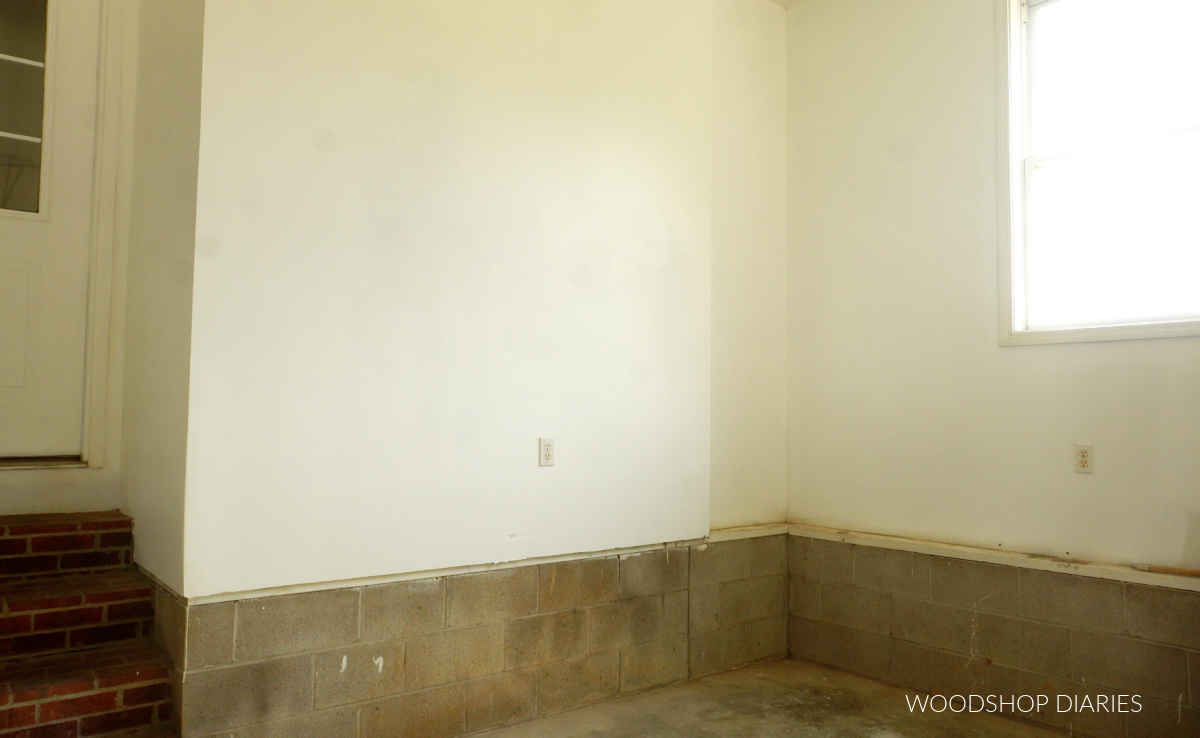
The first step to any kind of cleaning and organization project (at least for me) is always to clear everything out.
I like to remove everything from the space so it’s a completely blank slate to work with.
This is a great opportunity to clean the walls, remove spider webs and dust bunnies, and give the area a good general cleaning and maybe even a fresh coat of paint.
Then, we sorted through the stuff to see what all we really needed storage for. A lot of what we sorted through could be thrown away (or combined–like multiple cans of the exact same paint).
After I took inventory of what all needed to go back into the space, I began designing.
Garage Cabinet Design & Layout
This space had a few “non negotiables.” So I made a list of must haves that needed to be included in the design.
Must Haves:
- Customizable storage for paint, cleaning supplies, etc (hidden behind doors)
- A worksurface/workbench
- Tool storage
- A place to charge tool batteries
- Room for dog food bowls
This wall was approximately 9′ long and I didn’t measure the ceiling, but it was well over 8′ tall.
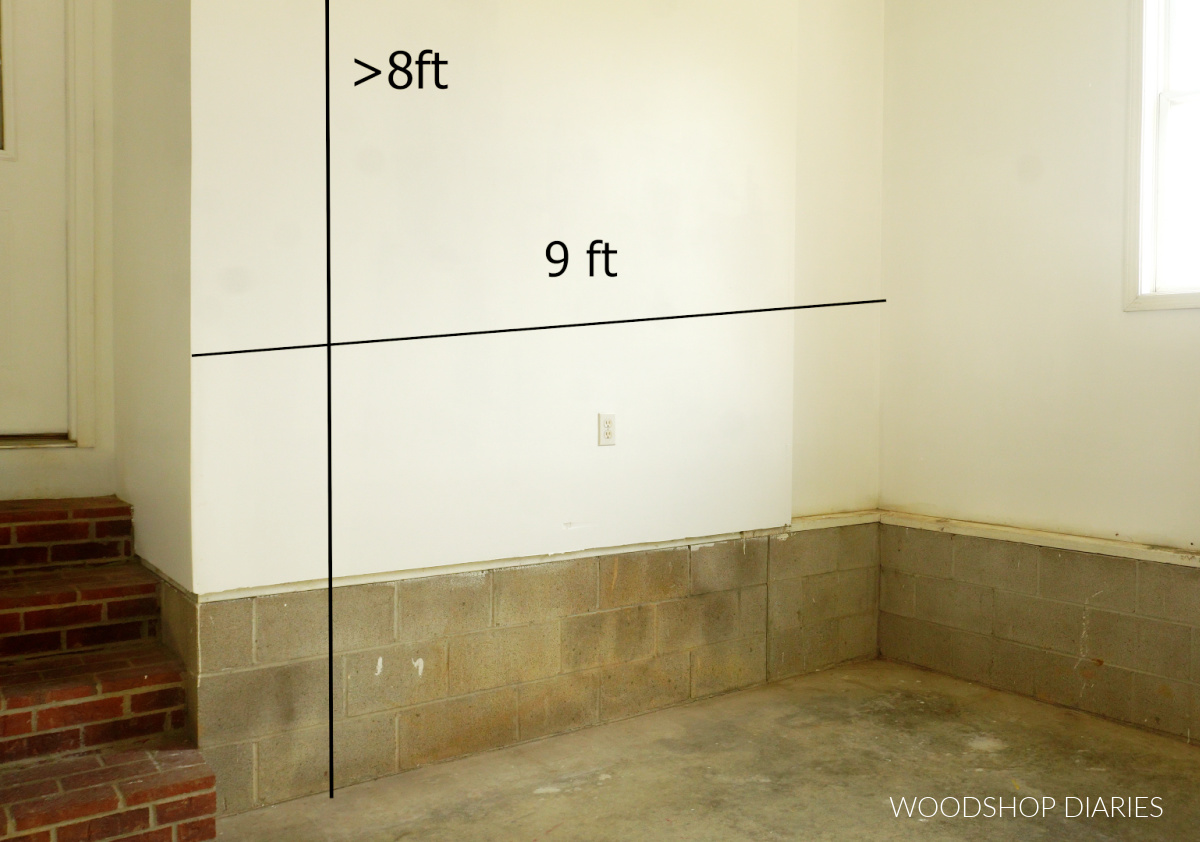
And with the car pulled in, we had about 4′ of space to work with out from the wall. I only used about 2′ of that space, though, so there would still be plenty of room to stand and/or walk between the cabinets and the car.
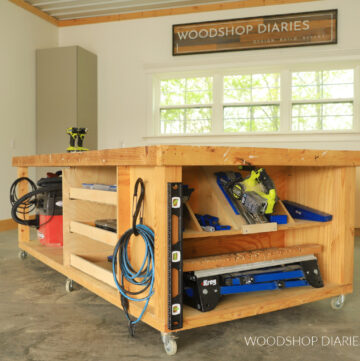
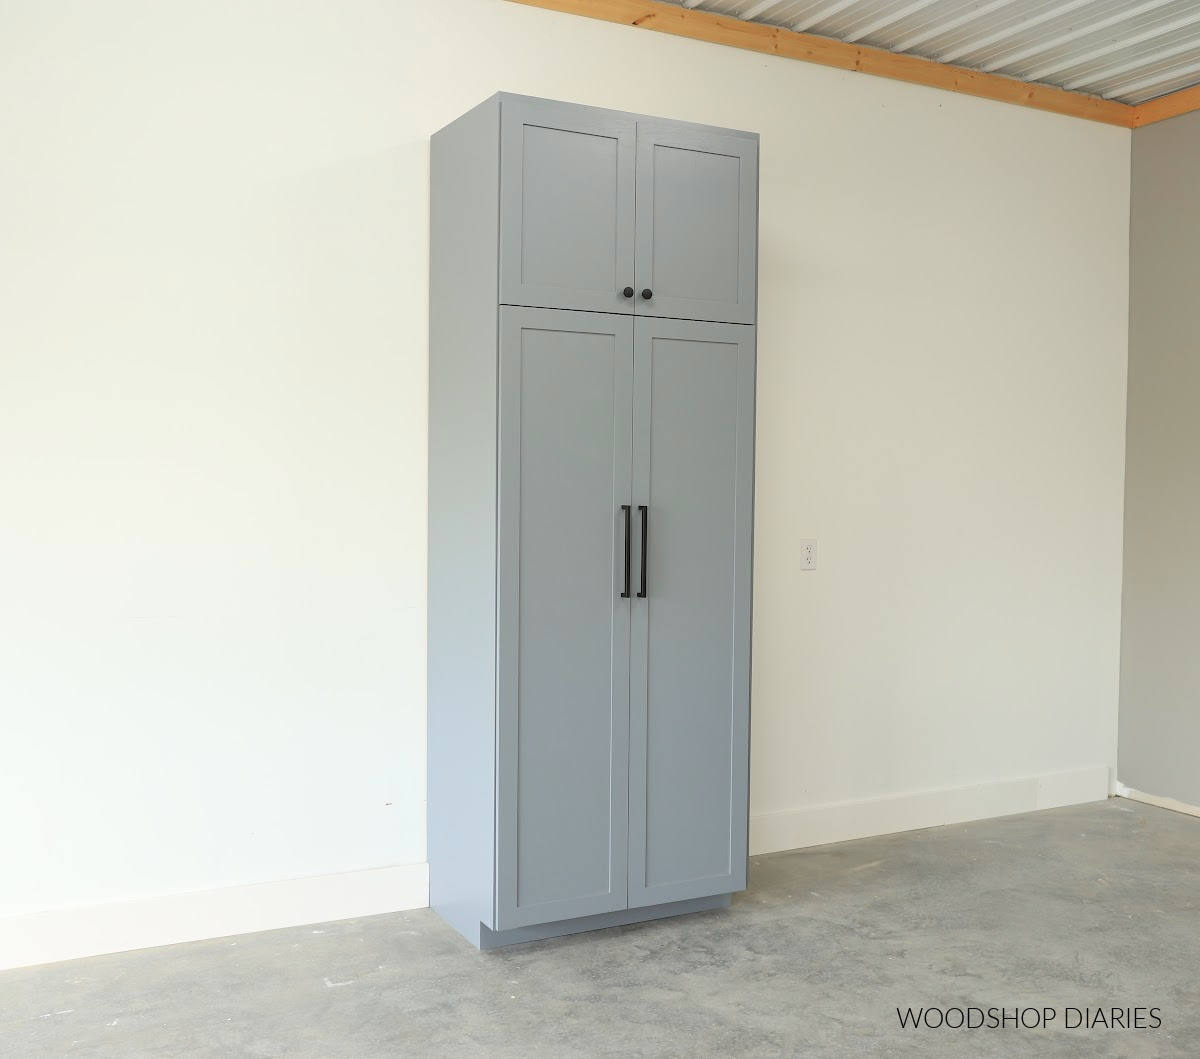
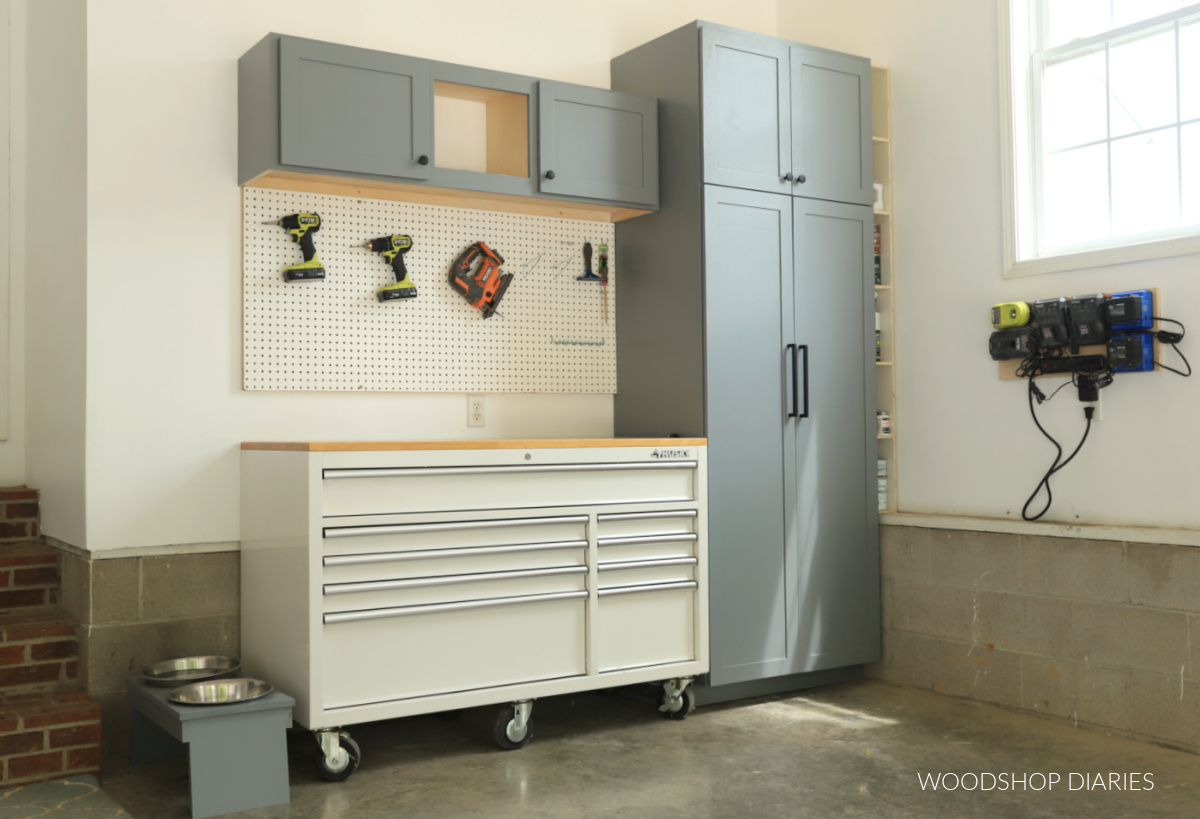
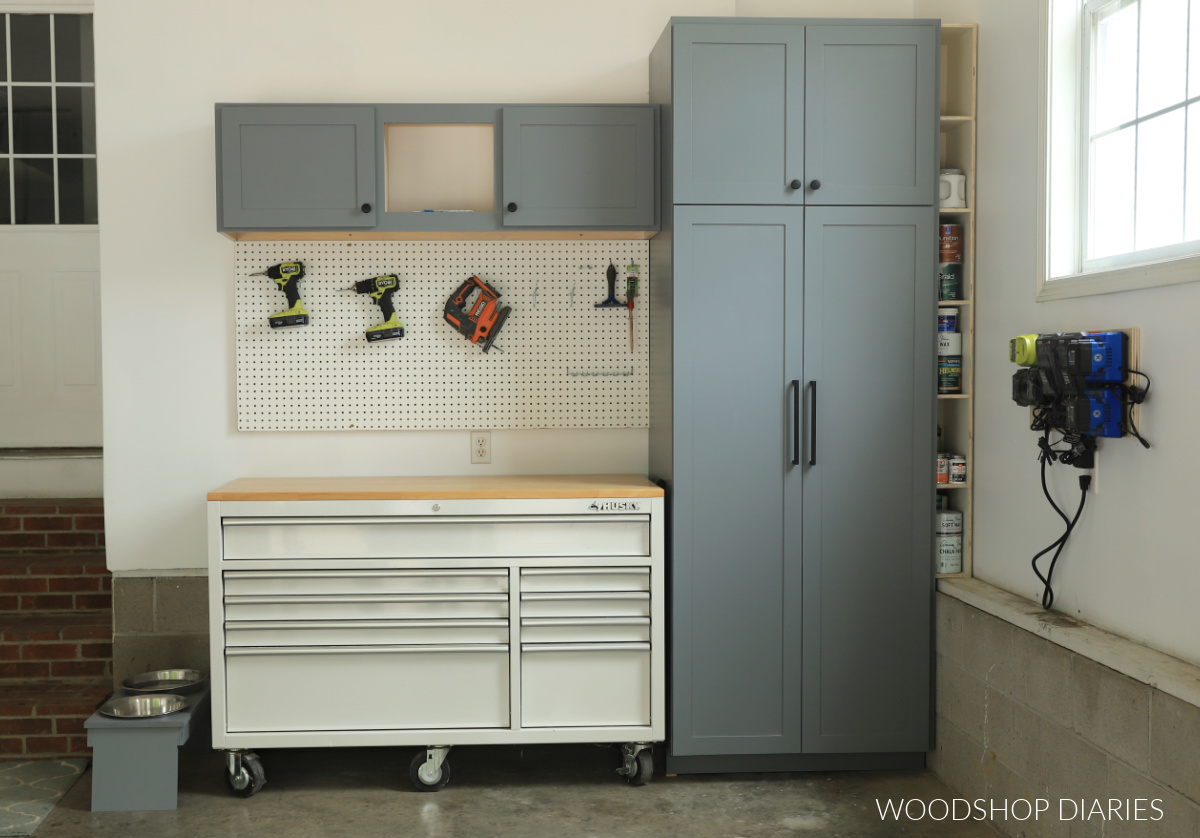
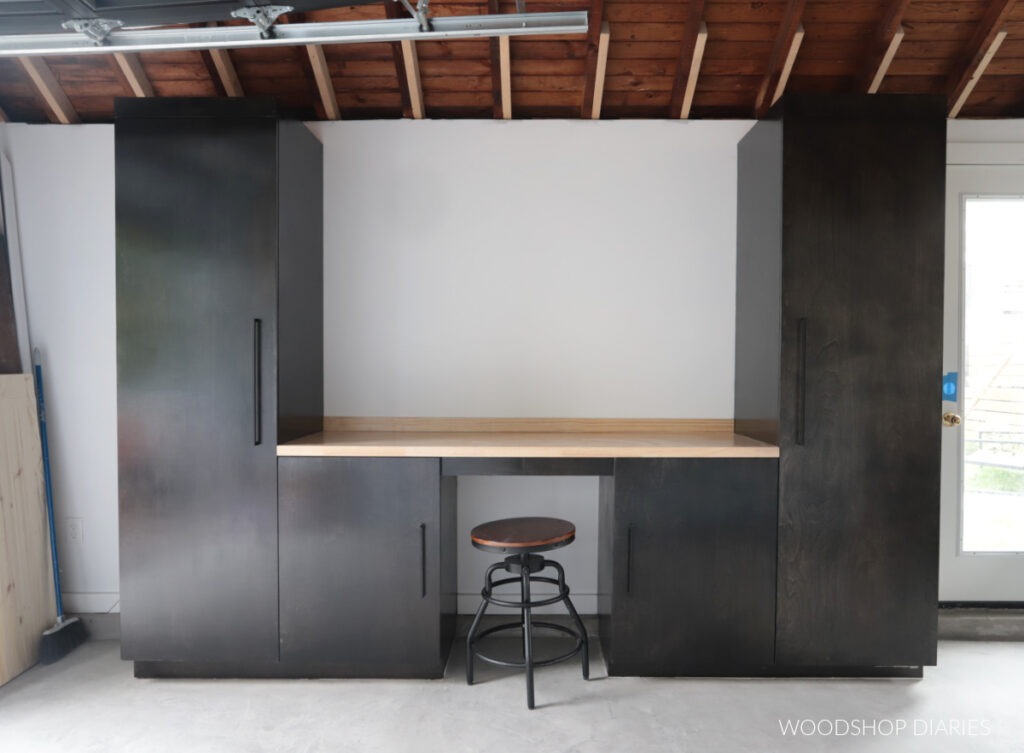
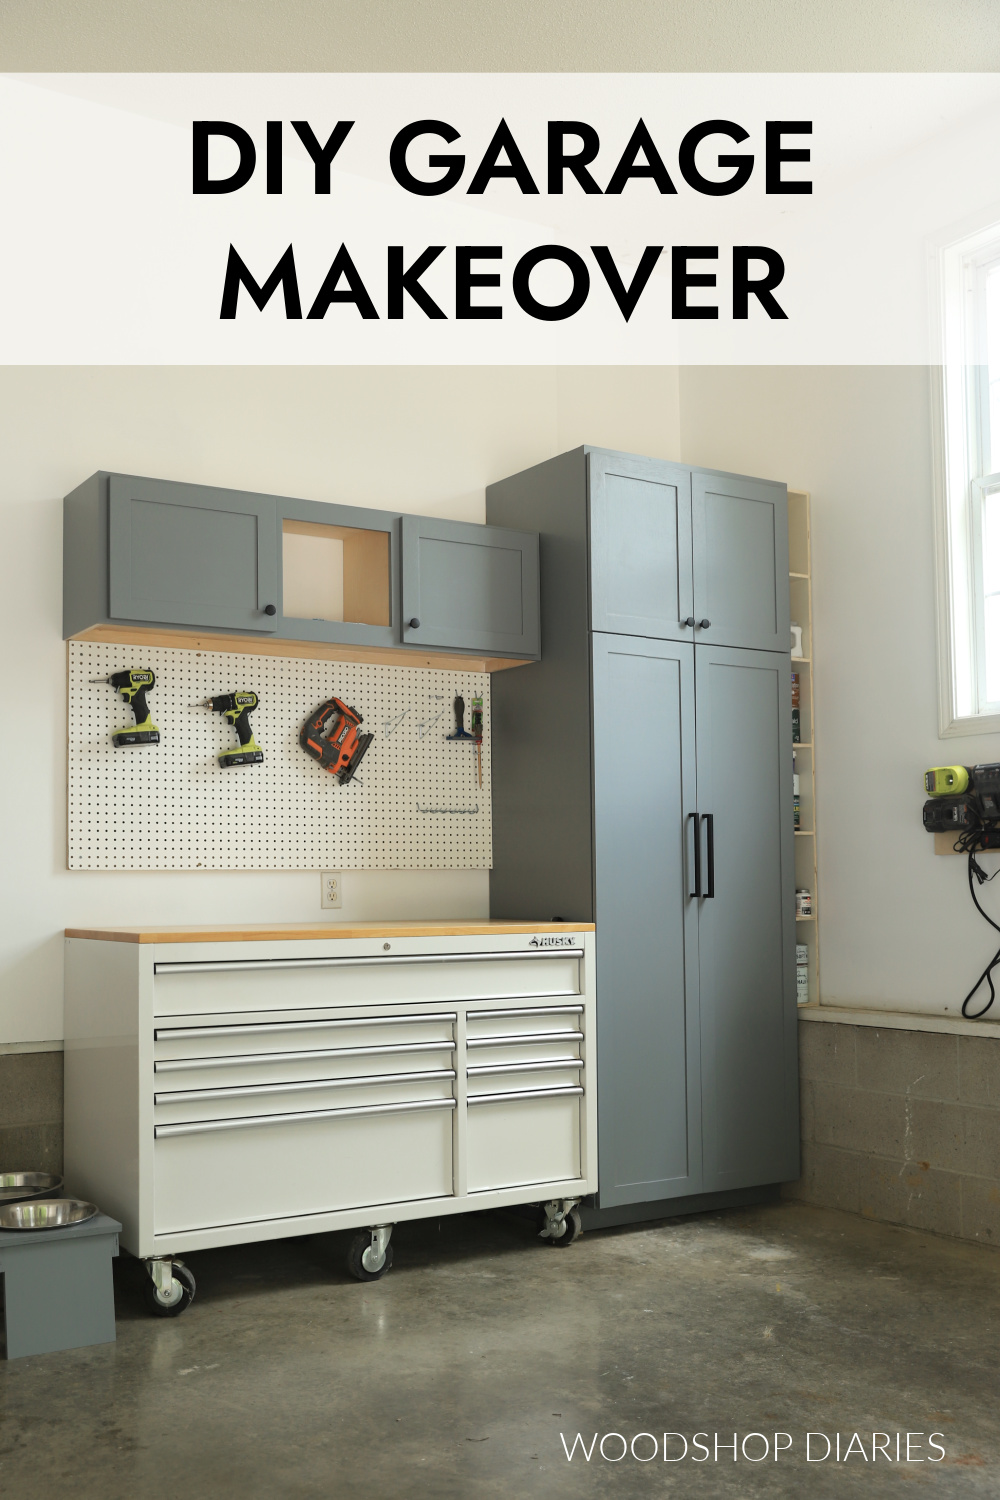
My idea was to add a tall pantry-style cabinet in the corner and a small upper cabinet next to it. This would provide a ton of storage space and keep everything hidden neatly behind doors.
Then I’ll add some narrow cubby/shelves to the right of the pantry to fill the gap above the lip on the concrete blocks.

For a worksurface and additional tool storage, I’ll add a tool chest next to the pantry and some pegboard above.
This will leave room for Hank’s (my parents’ dog) food bowls next to the steps and I can create a simple battery charging station to hang on the adjacent wall.
Are DIY projects your thing? Sign up for our newsletter for priority access to the latest projects and build plans!
Building the Garage Storage
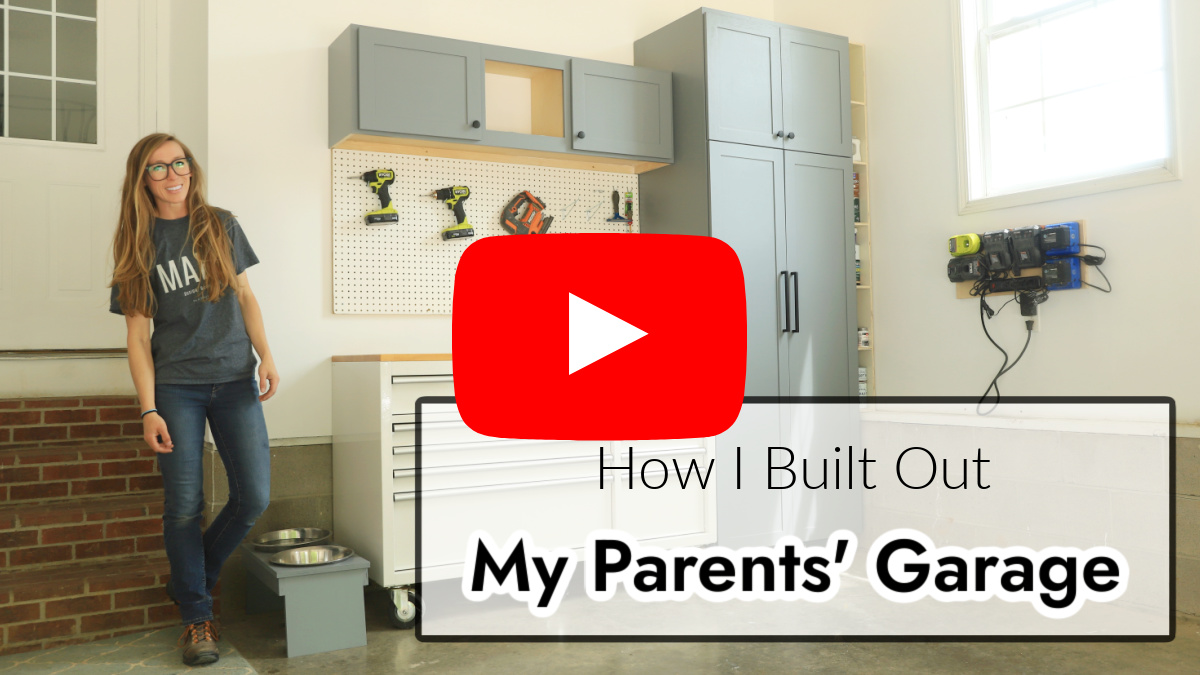
If you prefer to watch, check out the full before and after video of this transformation on my YouTube channel.
Love watching how-to videos? Subscribe to my YouTube channel for plenty more where that came from!
Assembling the Garage Cabinets
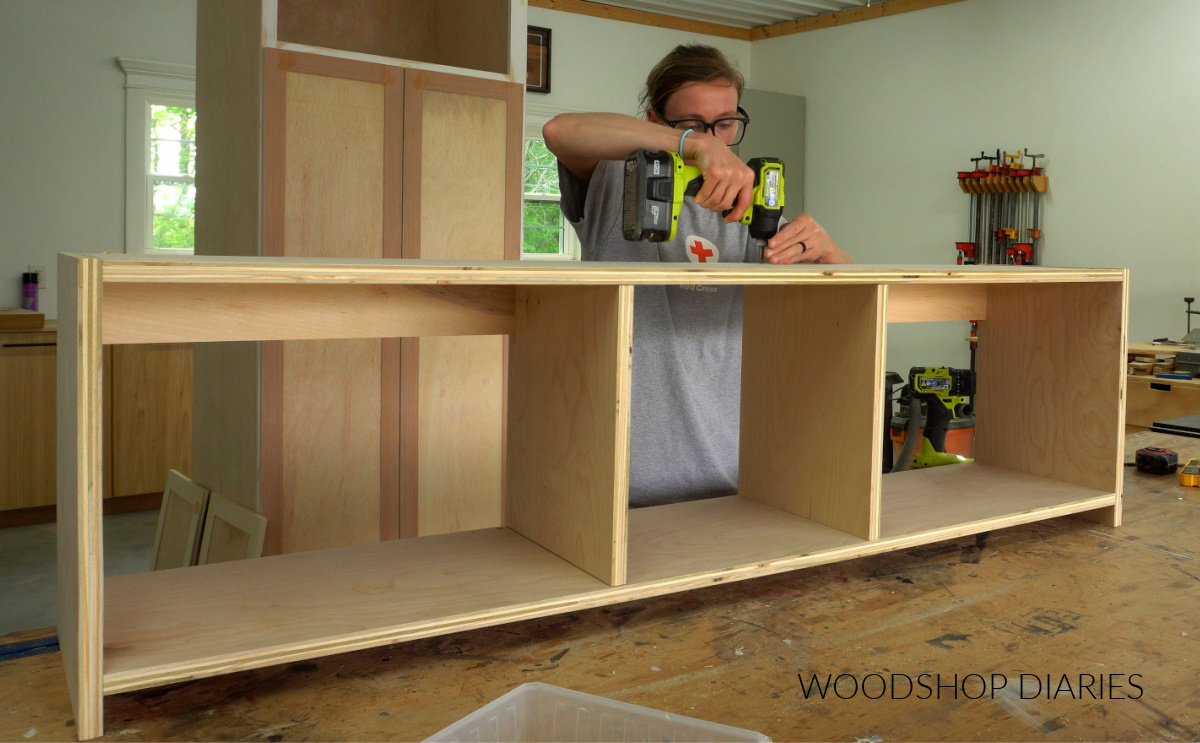
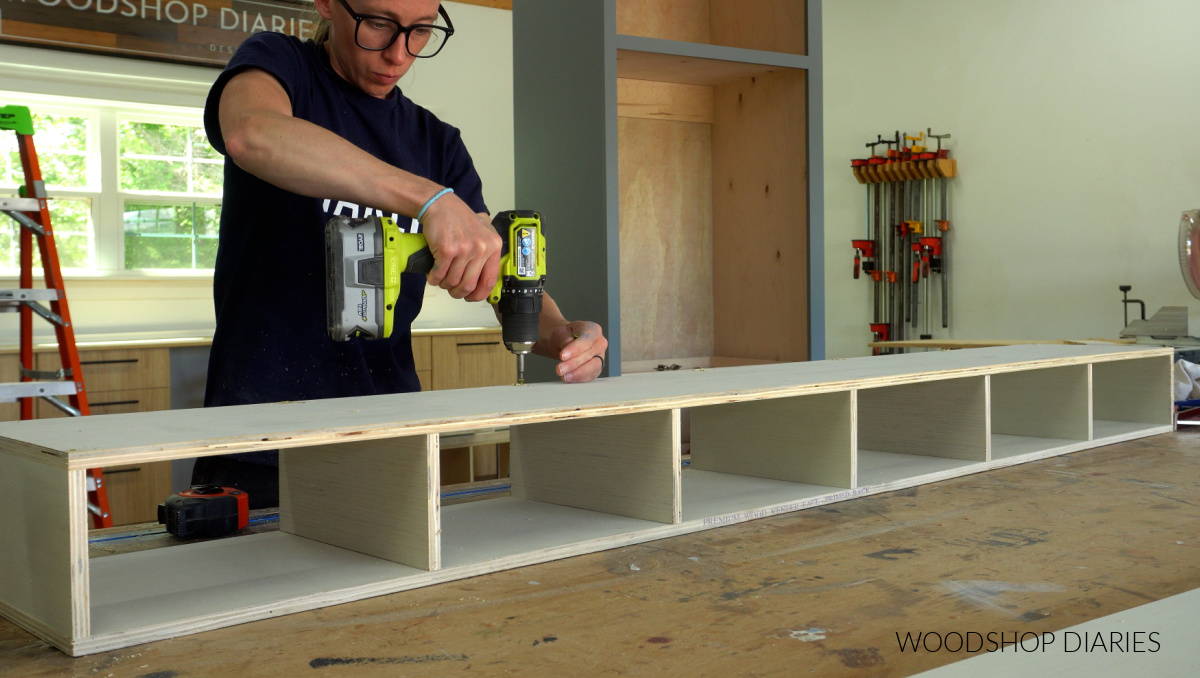
I started by building the pantry cabinet since it was the largest piece. This will be kind of the “anchor piece” of the space.
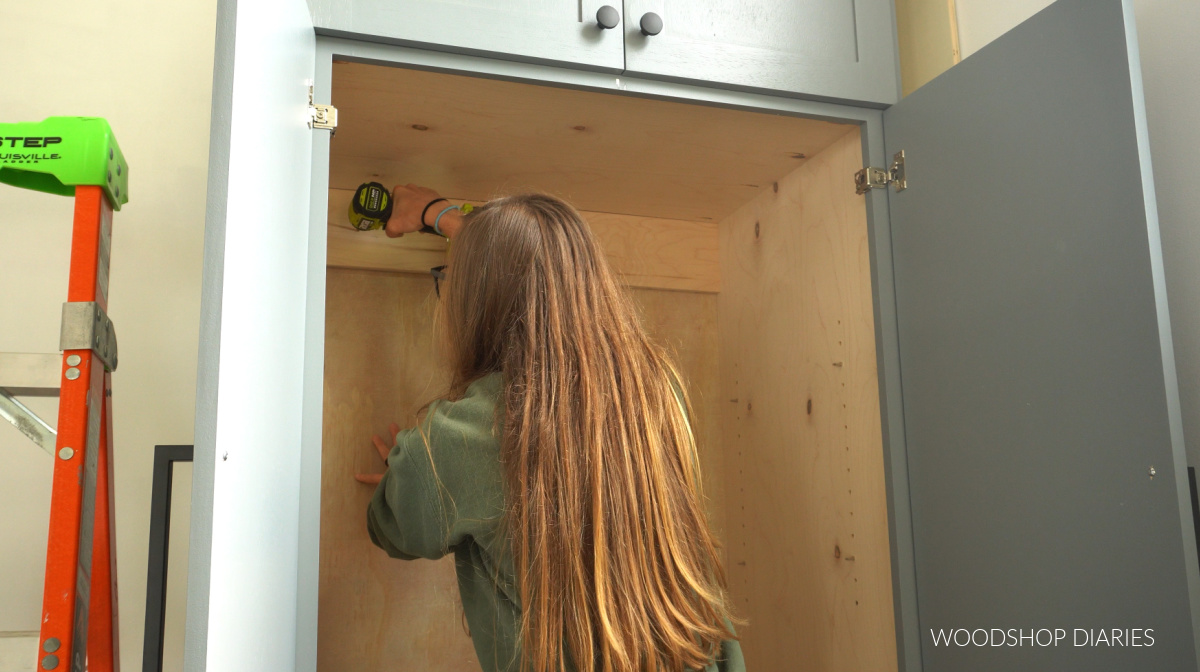
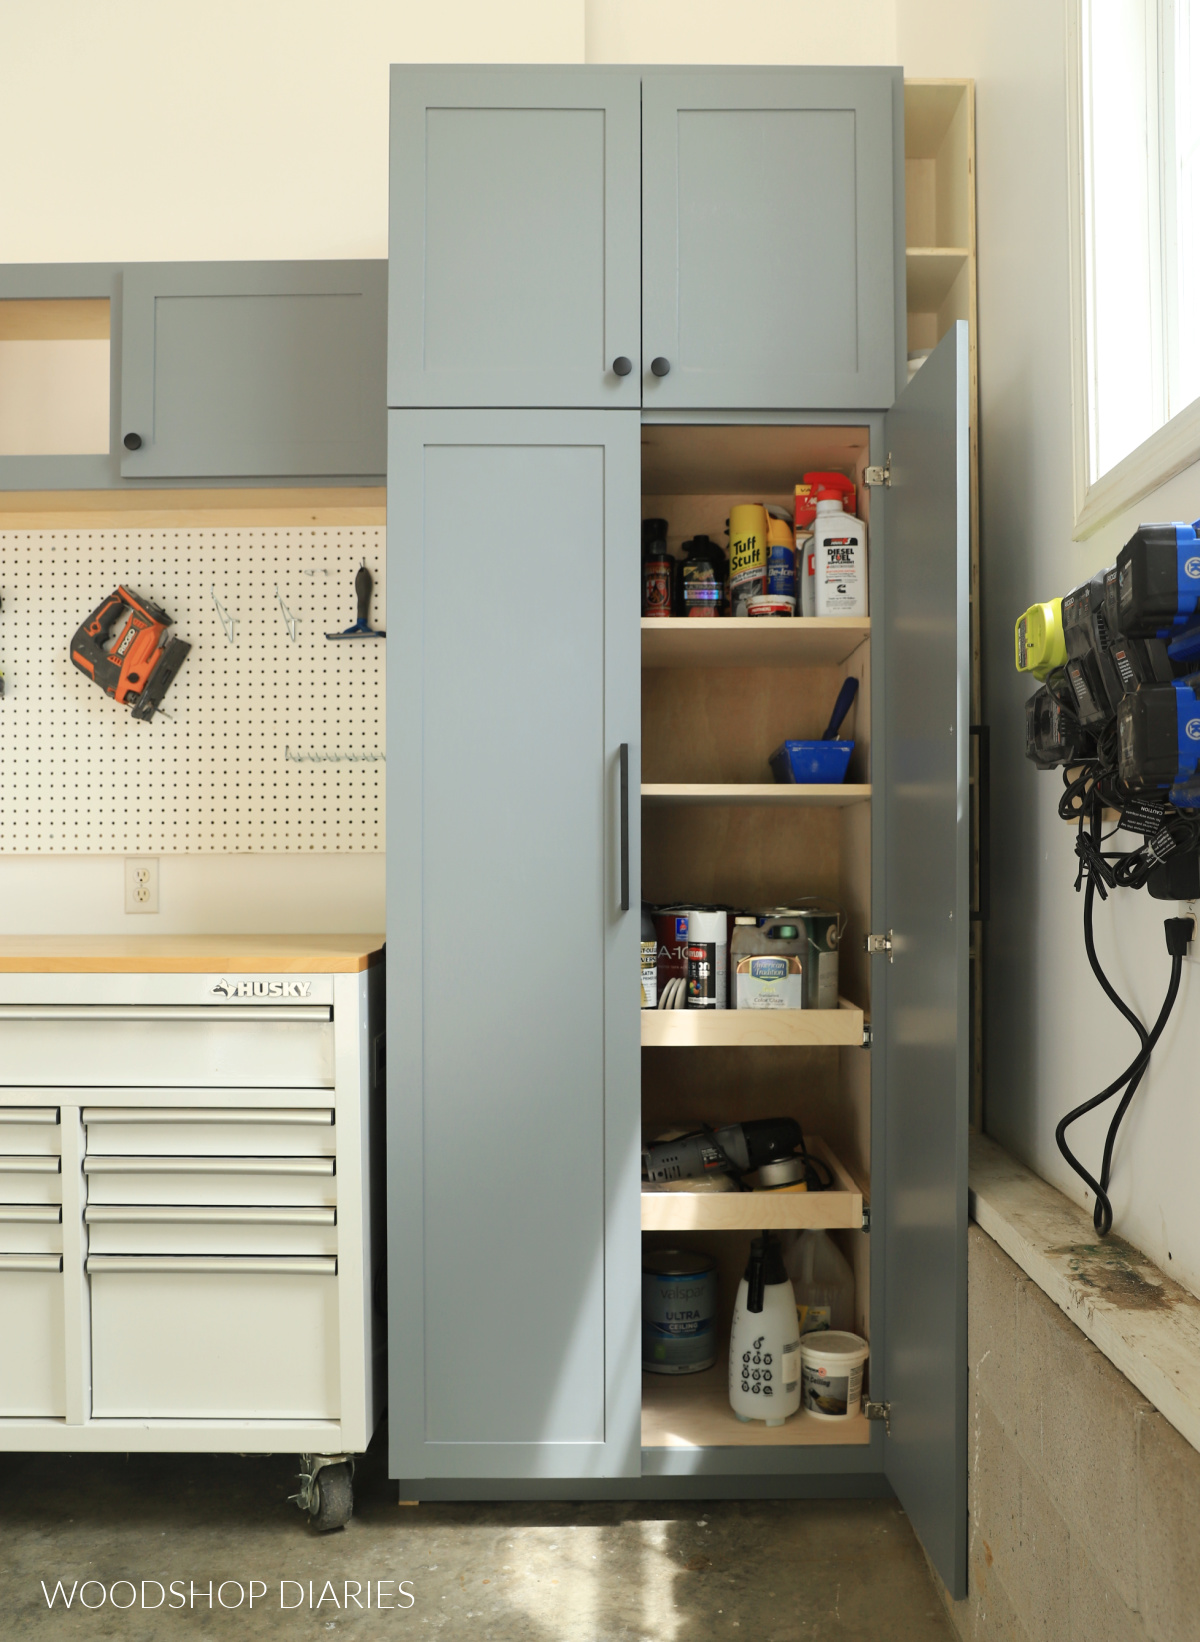
Essentially, this is just a large box (like most cabinets). I divided it into a smaller top section and a larger bottom section and made it a full 8′ tall, about 30″ wide and about 24″ deep.
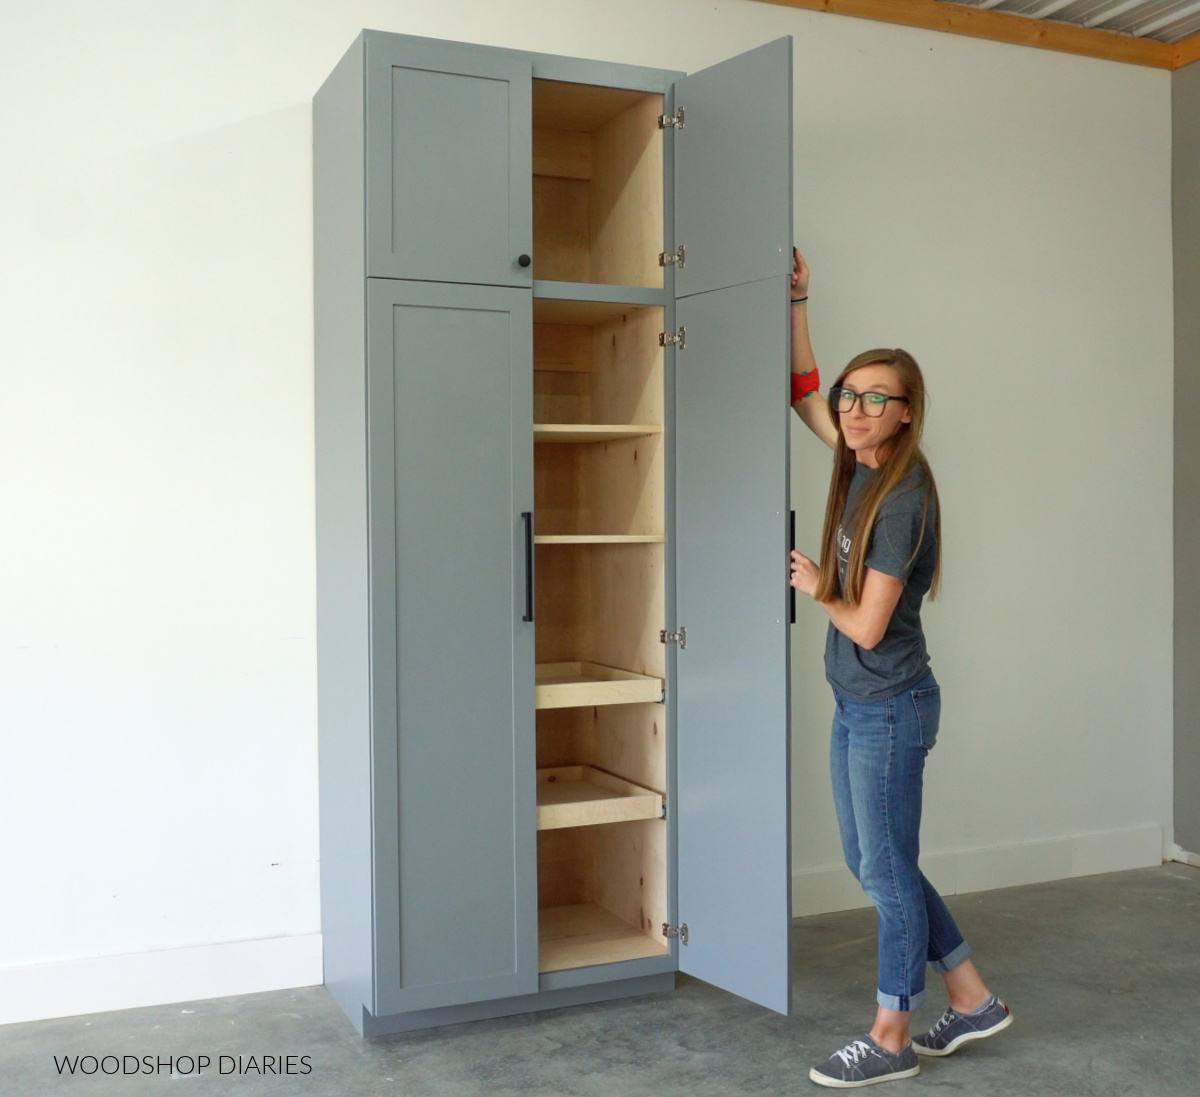
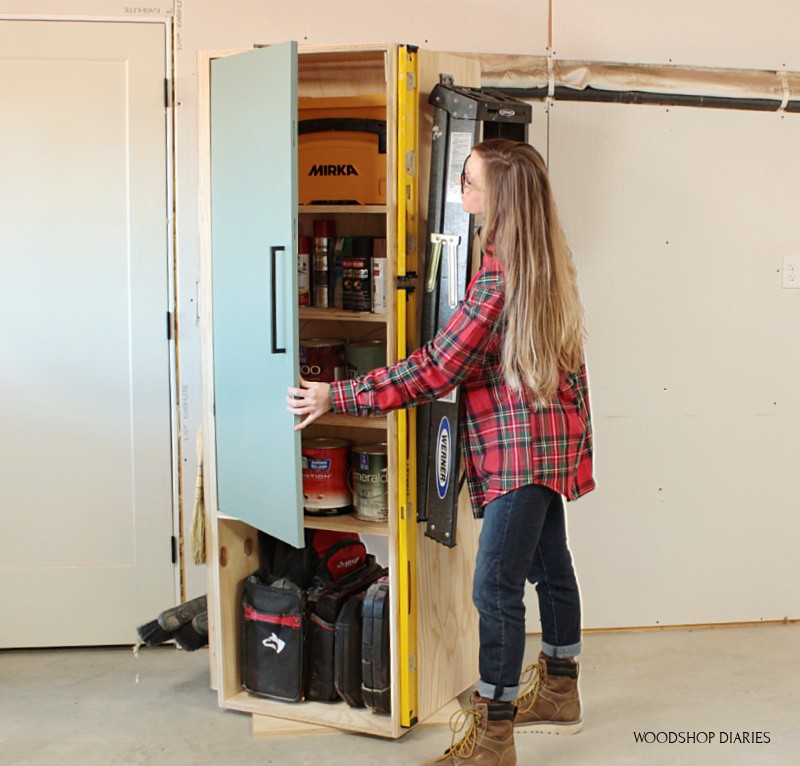
I left the top section as is for storing larger, bulkier items, but in the bottom, I added a couple adjustable shelves and pull out drawers toward the bottom.
I always like having various options for storage, so I liked the idea of both adjustable shelves for random odds and ends and pull out drawers for things like paint cans and cleaning supplies.
I shared the details and plans for how to build a basic pantry cabinet here.
Once that was built, I moved on to building the simple upper cabinet that will go above the tool chest.
If you saw my DIY mudroom cabinets from last year, this upper cabinet is almost identical to the one I built for that. (At the end of the day, most cabinets are pretty much the same.)
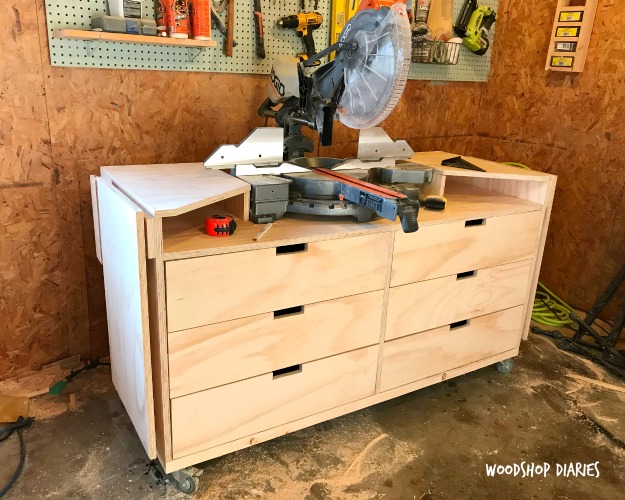
The tool chest that will go underneath was about 56″ long. So I made this cabinet about 57″ long. That leaves a little wiggle room on each side.
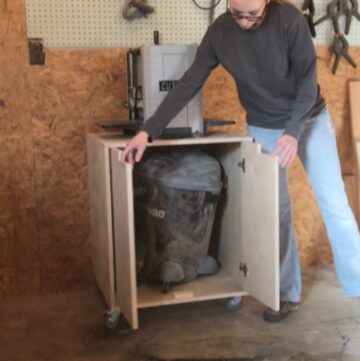
Side note: The 56″ long tool chest I gave my parents here is my old one. It’s since been discontinued, so it’s no longer available. But, you can find the exact same tool chest, only in a 52″ long version here.
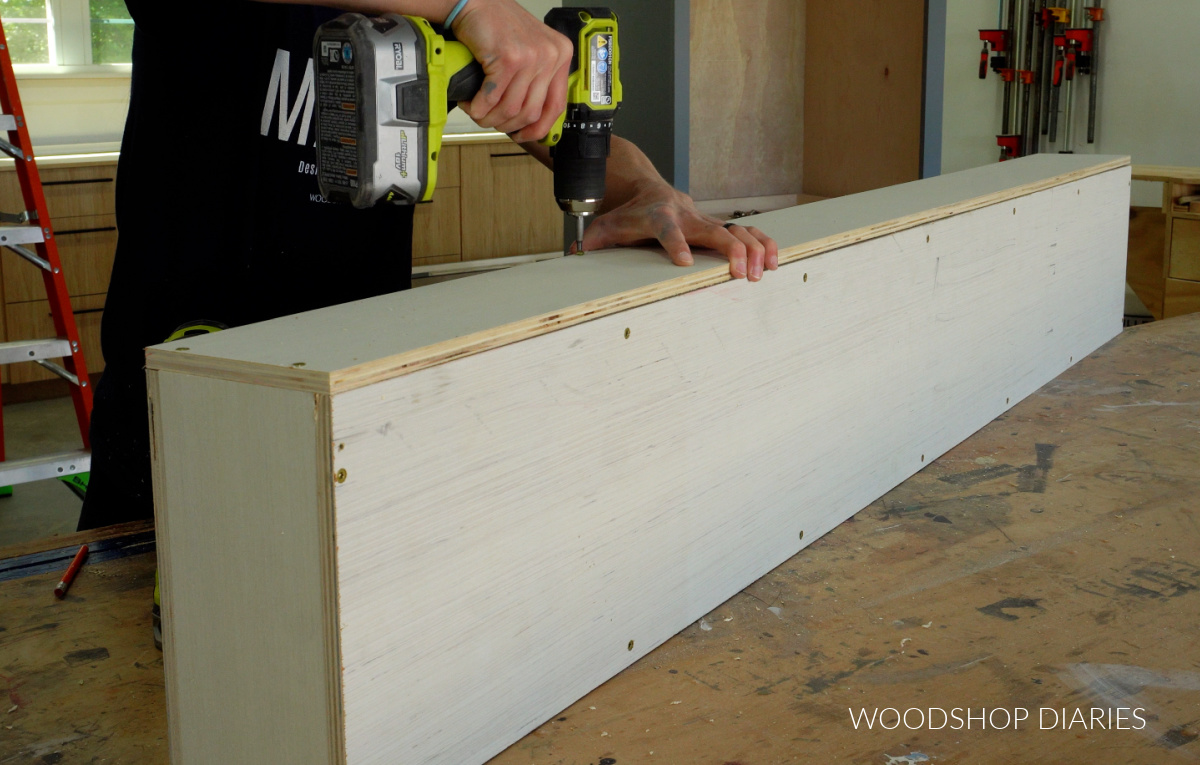
I assembled this cabinet from ¾″ plywood using pocket holes and screws. Learn how to use a pocket hole jig here.
Then I added two dividers to separate the cabinet into three sections and added two supports at the back to be able to screw this into the wall later.
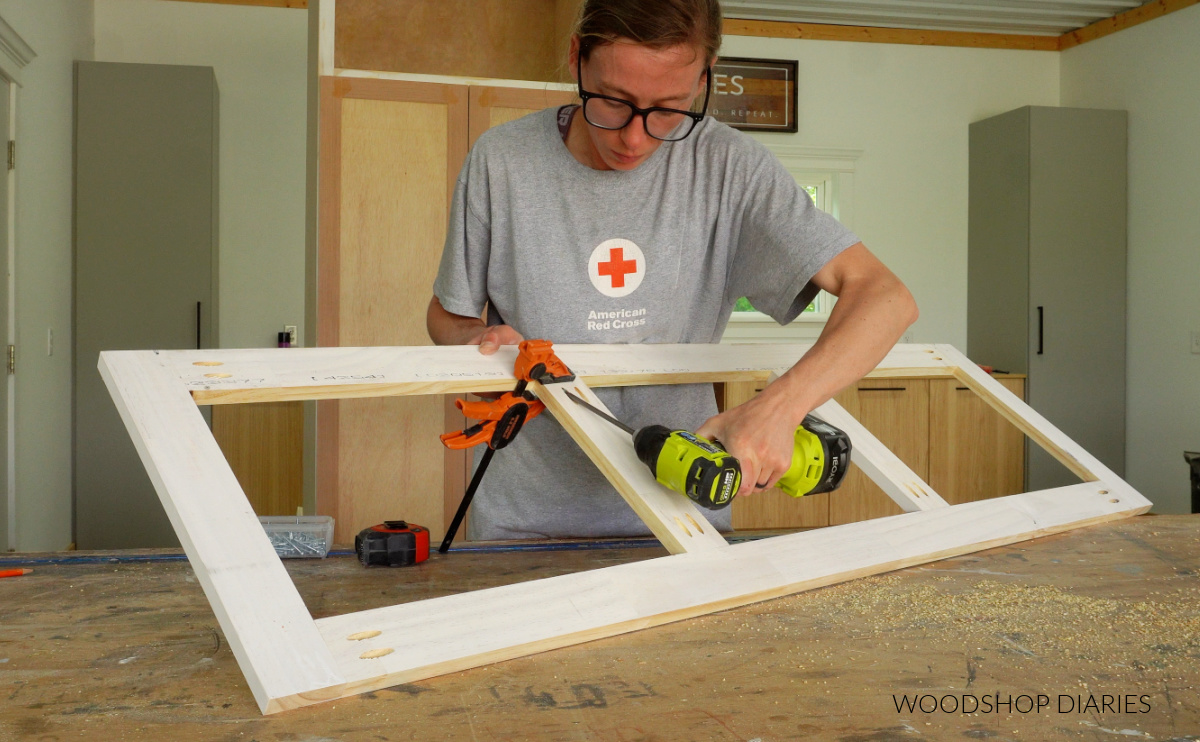
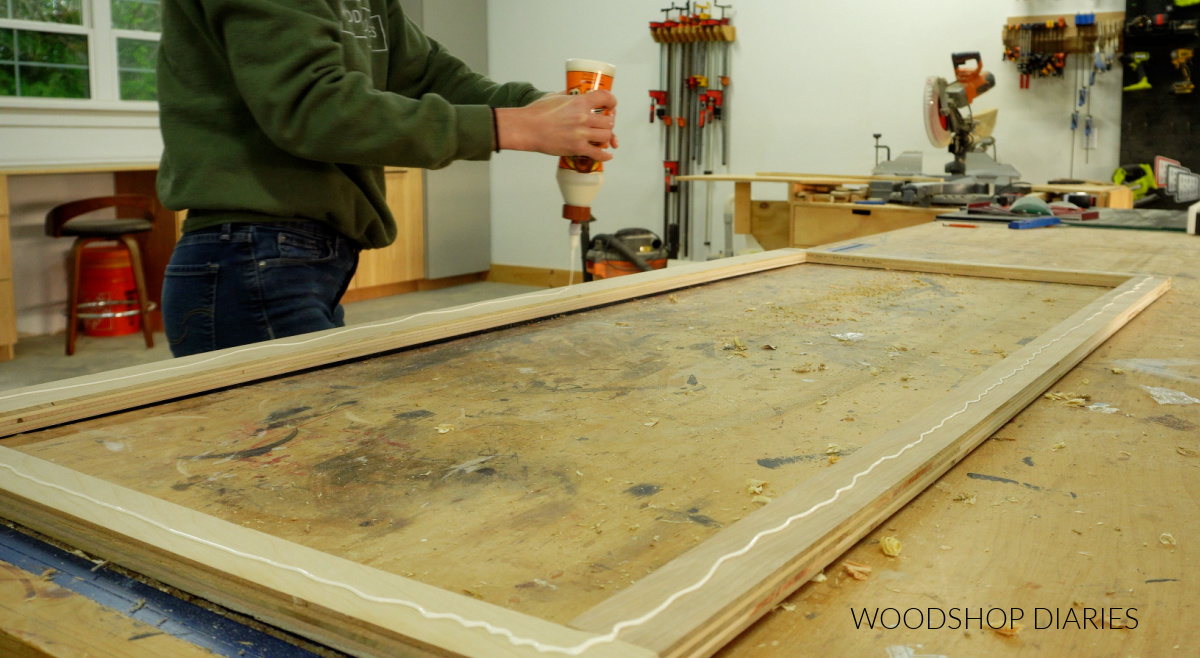
Once the box was assembled, I assembled a face frame from 1x3s to glue and nail onto the front.
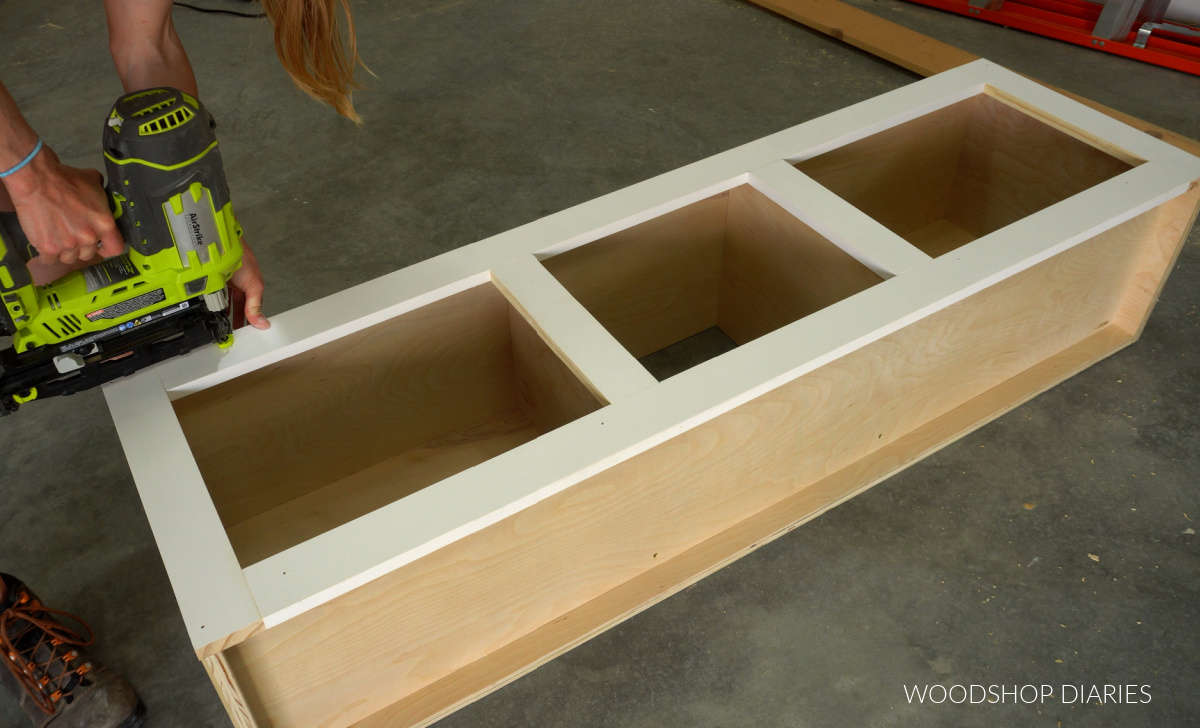
This cabinet had three sections, but I chose to leave the middle section open and only add doors onto the left and right.
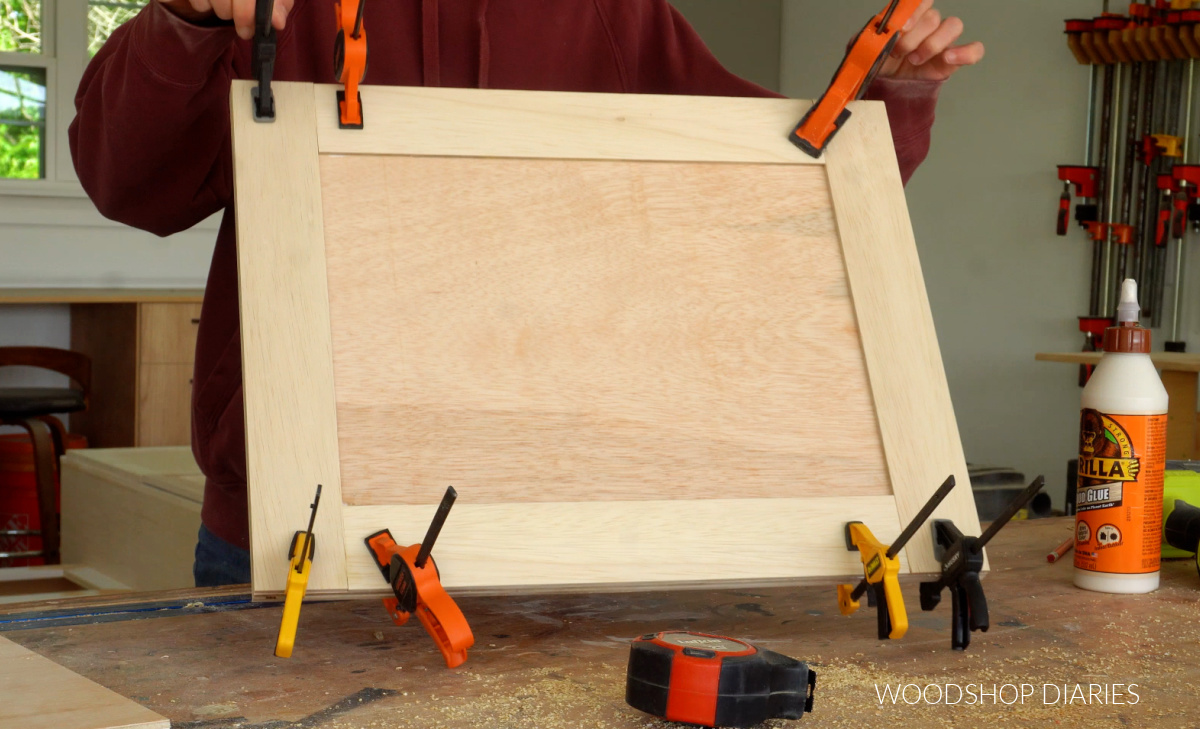
So I assembled two cabinet doors to fit the cabinet. Check out 7 ways to build a cabinet door here. For this cabinet, I used method number 2.
I painted both of these cabinets in SW Software, attached the doors and set them aside for now while I built the other pieces.
RELATED: How to install cabinet doors with concealed hinges
Assembling Paint Can Cubby
Earlier, I mentioned this little lip on the concrete blocks in the garage. This space above will be empty when the pantry is in place, so I wanted to fill it with something useful.
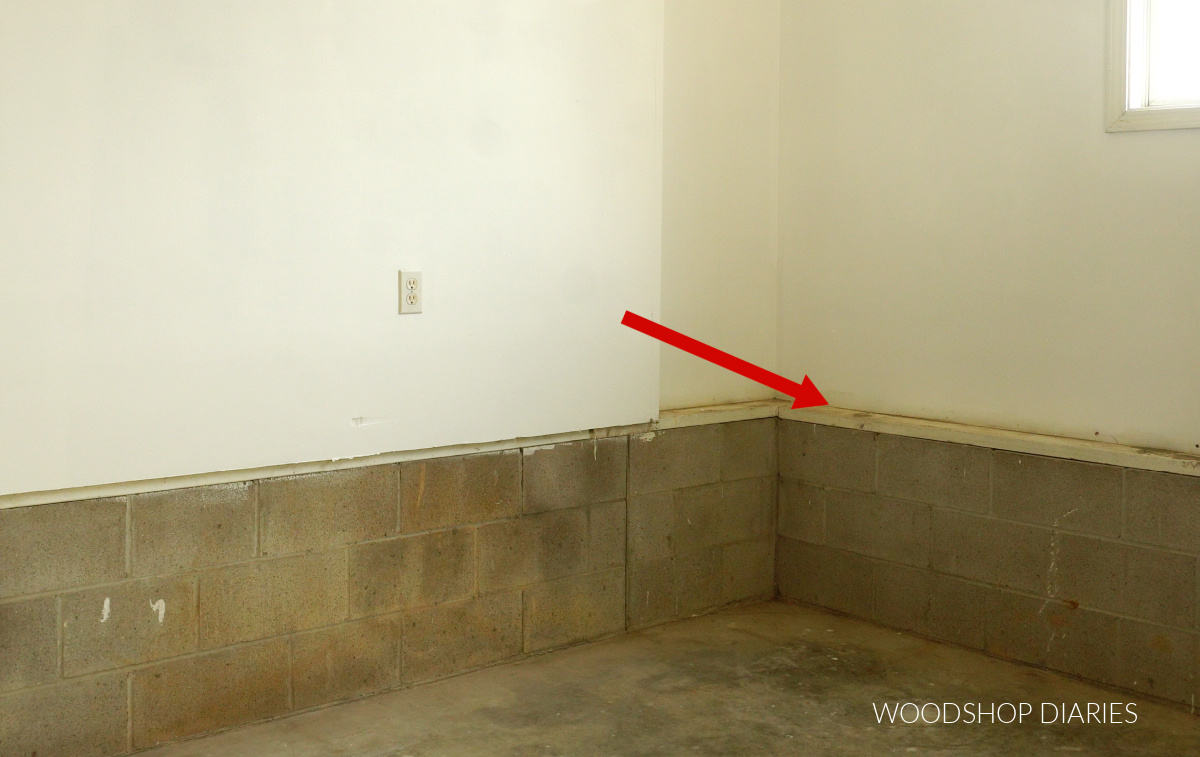
It’s a narrow space, but it’s the perfect size for spray paint cans, caulk tubes, or quart size paint cans.
So I built a simple little shelf with cubbies from some scrap ½″ plywood I had in the shop already. You could build something similar from ¾″ plywood or 1x material, too.
I didn’t want to make this really deep since it was so narrow, I felt like it might be difficult to reach very far back. But I made it about 10″ deep and tall enough to come to the top of the pantry when it sits on the blocks.
I carefully screwed together a shelf like you see above with wood screws.
Then, I cut a piece of ½″ plywood to go across the back side to finish it up. I didn’t paint or stain this shelf–I just left it as is.
Assembling Peg Board Panel
Above the tool chest, I thought some peg board might give my dad somewhere to hang a few of his most used tools like the drill, driver and hammer.
So I cut some scrap ¾″ plywood strips and assembled a simple rectangle frame using pocket holes.
Then I cut to fit some pegboard (I had a scrap piece I brought with me from my previous shop) over this frame. I glued and screwed it onto the front.
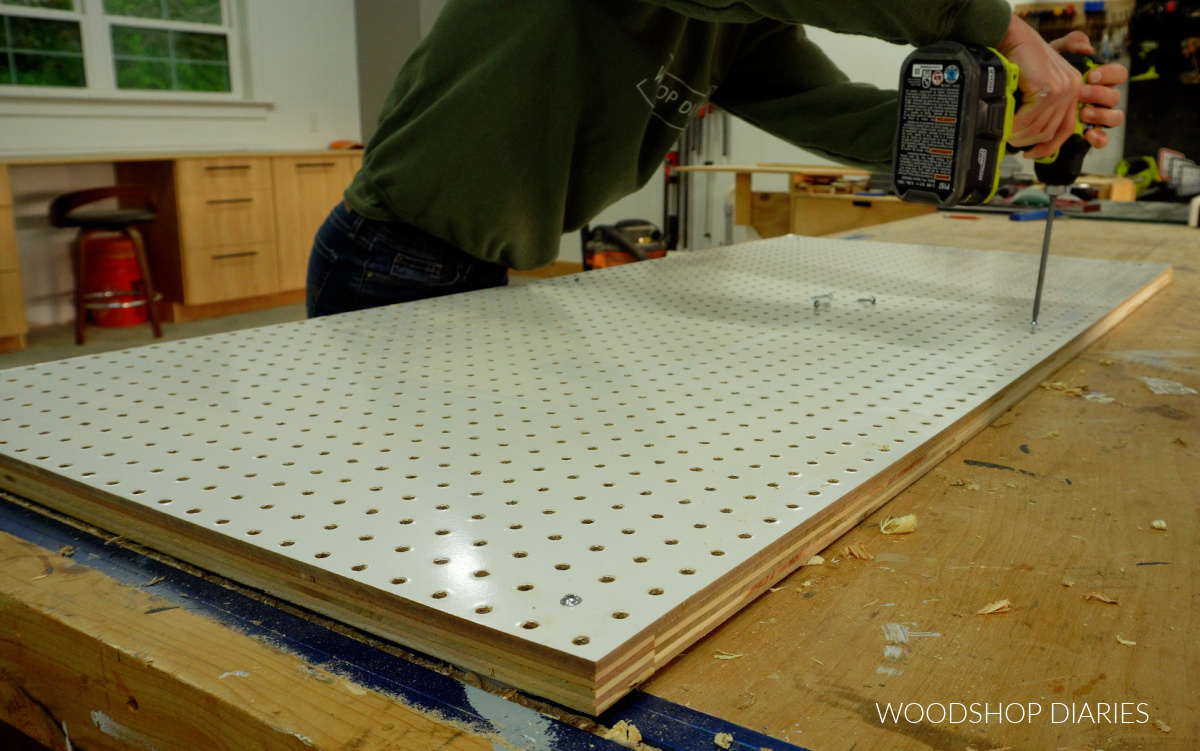
FYI: In case you were wondering why I attached the pegboard onto a frame, it’s because pegboard can’t be installed flat to the wall. There needs to be open space behind it to be able to insert pegs.
Making a Simple Battery Charging Station
This battery charging station may not be the most fun or attractive piece of this garage makeover, but it might just be the most practical.
RELATED: Check out this mobile battery charging station on wheels
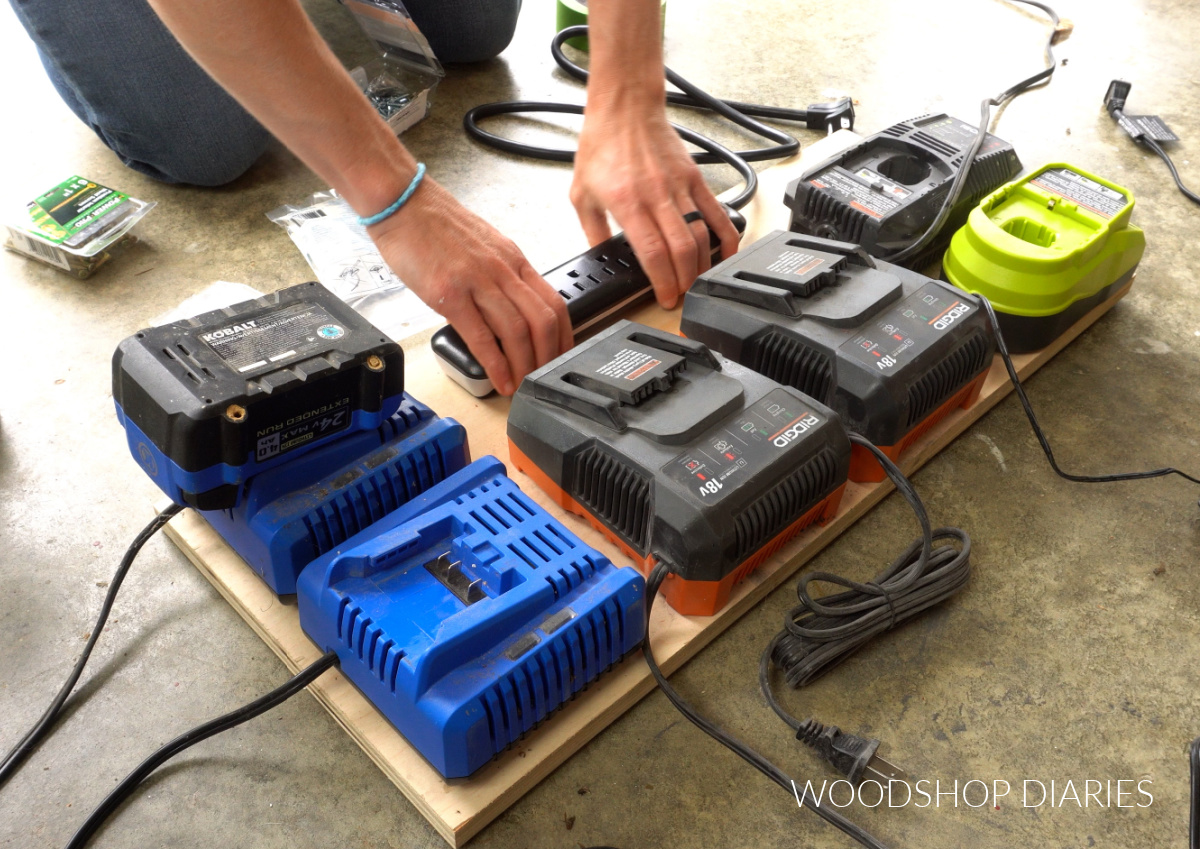
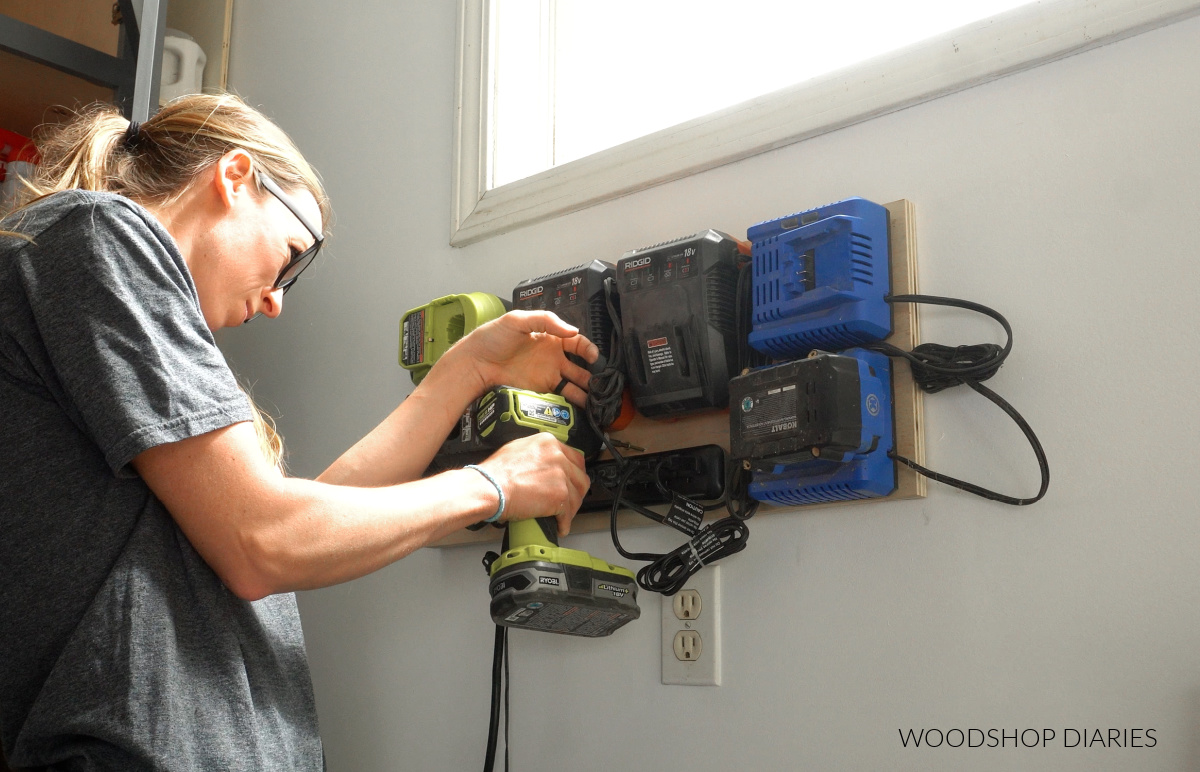
It’s literally just a piece of ¾″ plywood scrap that I mounted all the batteries and a power strip to. So simple, but it works!
First, I arranged all the chargers so they’d all fit on the board.
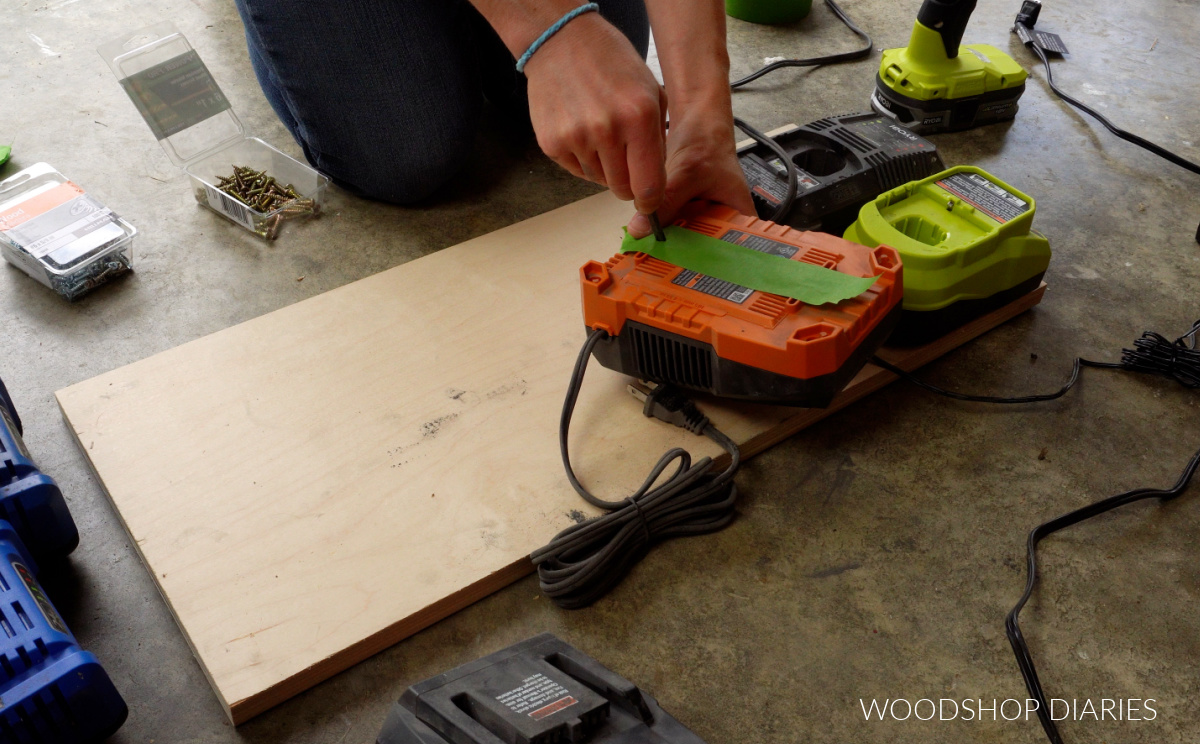
On the back of most battery chargers are some slots for mounting. I placed painters tape across these slots and made holes in the slots so I could use this as a template for screw spacing.
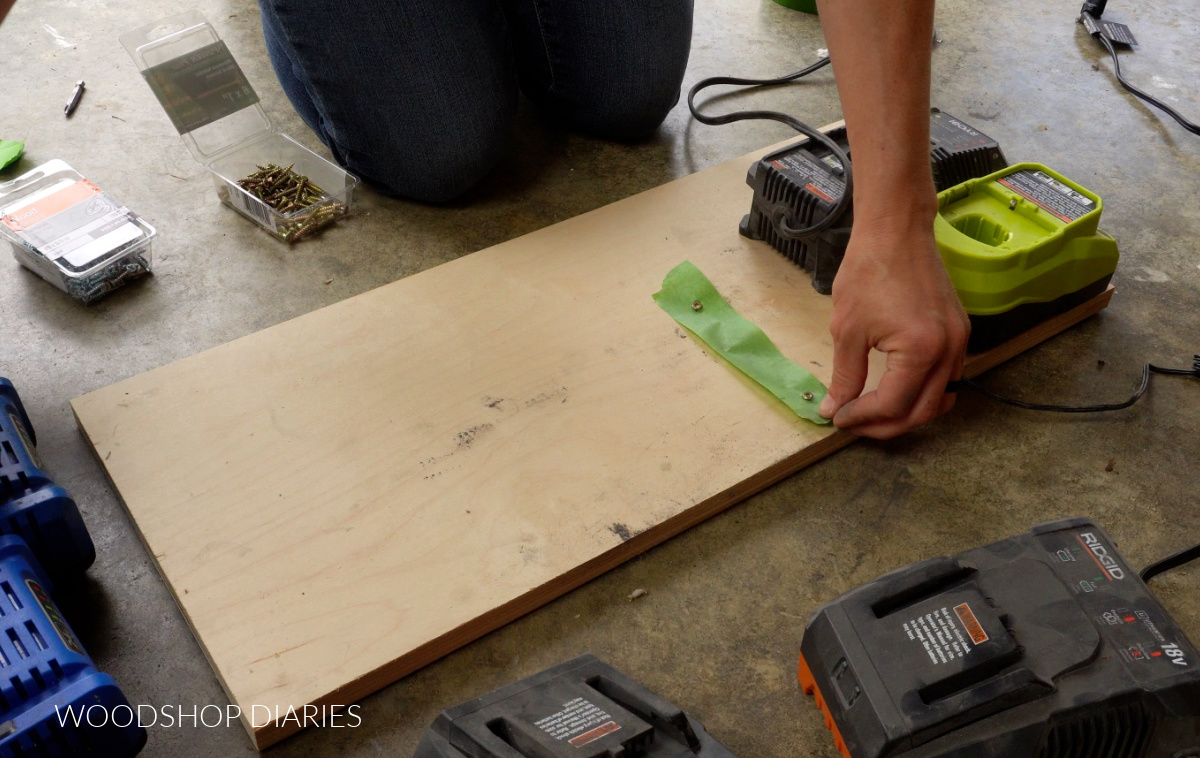
I placed the tape on the board and drove screws (make sure the screws you use fit into the slots on the charger) into these holes so that they stuck up about ¼″ out of the board.
Then, I could slide the charger(s) on. I mounted each one this way, and a power strip to plug them all in. I used a few zip ties to contain the cords and keep them semi-organized.
Installing the Garage Storage
Once all the pieces for the garage were assembled, we loaded them up and brought them over to my parents’ house to install.
First, I moved the pantry cabinet to the corner and placed the small paint cubby shelf next to it on the concrete blocks.
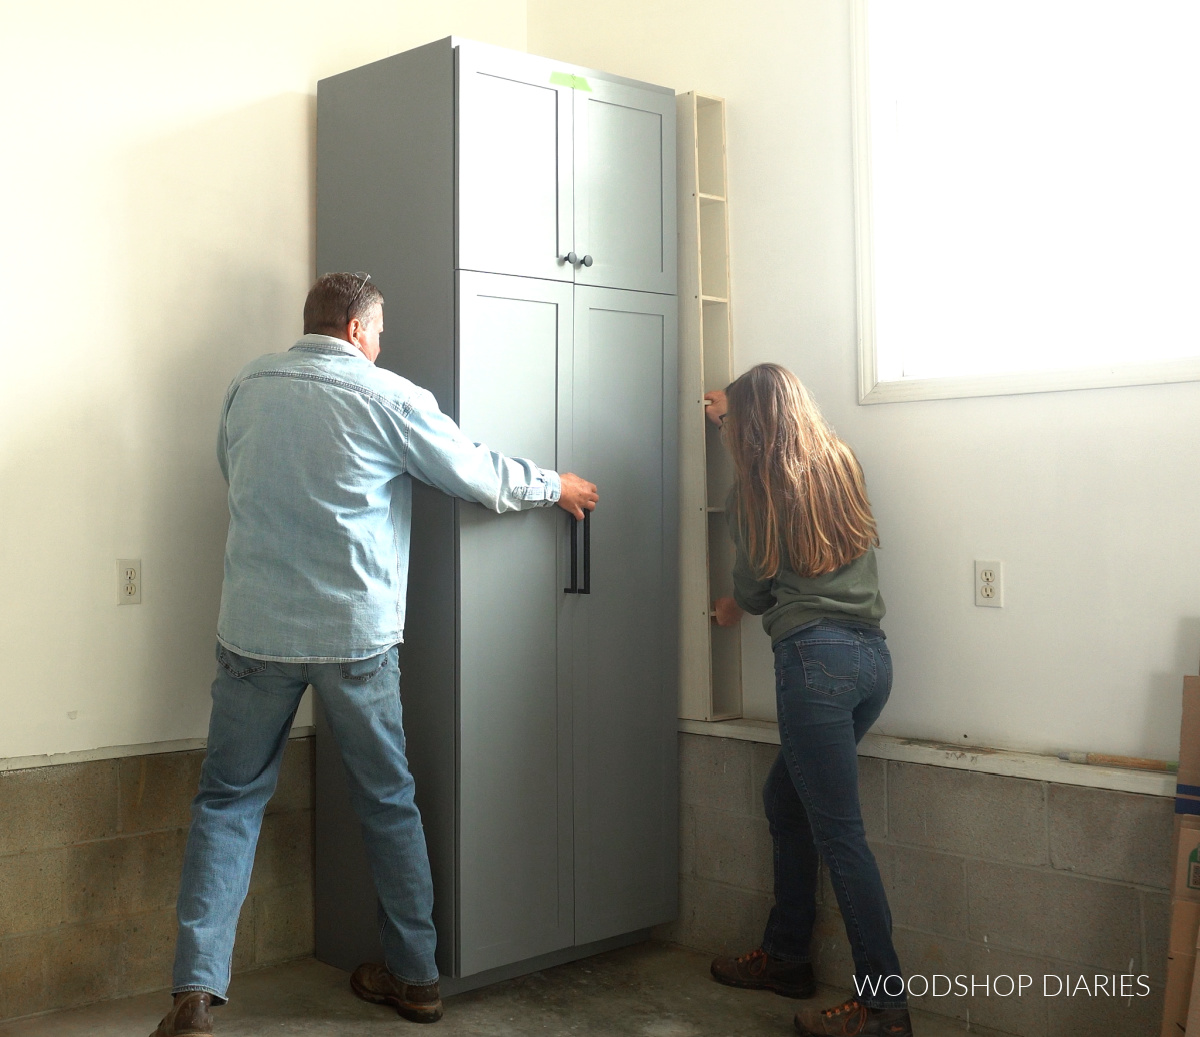
I used a couple screws through the side of the pantry cabinet into this shelf cubby to attach them together to keep the cubby from sliding around.
Then, I secured the pantry cabinet to the wall studs through the back supports of the cabinet. It’s important to secure this cabinet to the wall to prevent tip over!
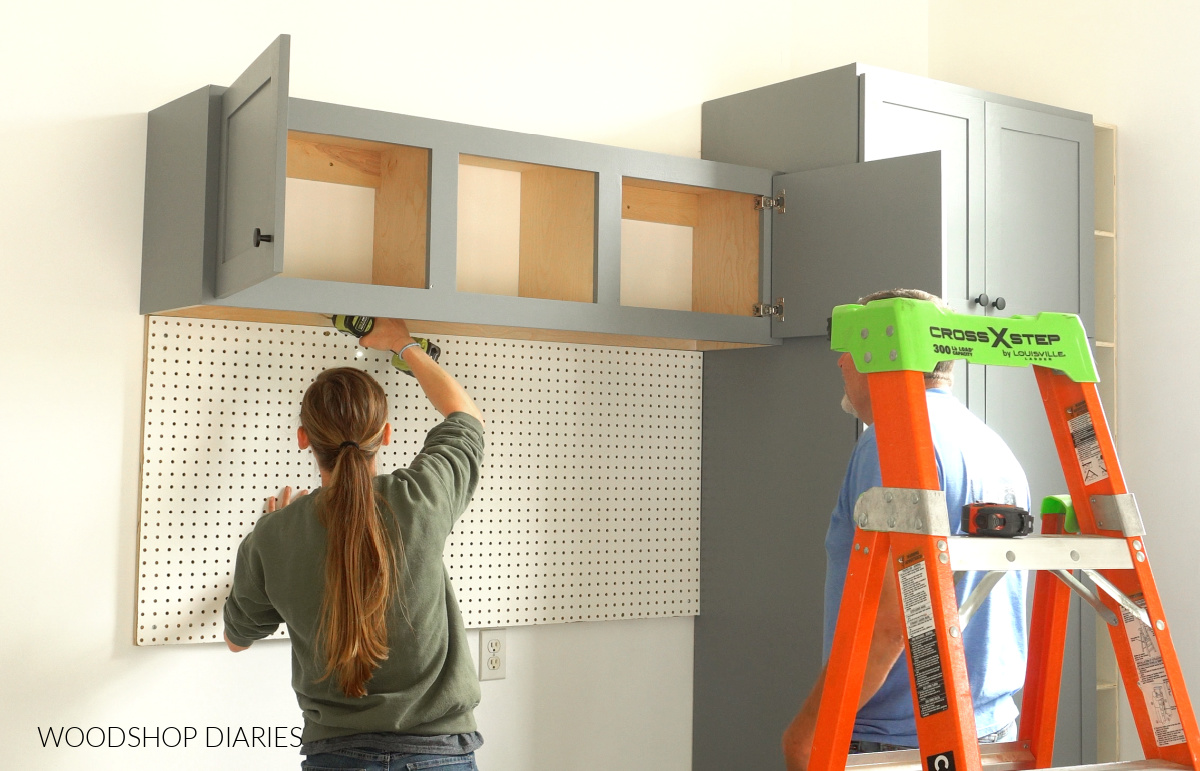
I hung the pegboard next to the pantry by driving screws through the frame and into the wall studs behind it.
Then, we installed the top cabinet above it using screws through the back supports and into the wall studs.
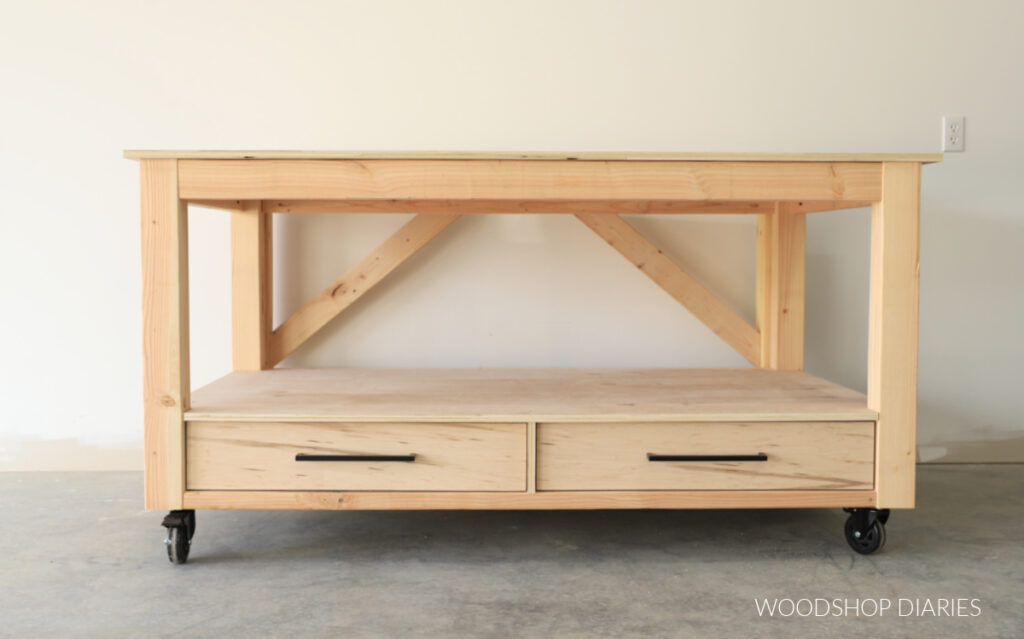
A that point, all that was left was rolling the tool cart into place. This tool cart/workbench has lockable casters, so after we rolled it in place, we locked the wheels so it’ll stay put until they need to move it again.
And finally, I screwed the battery charging station to the wall using a couple screws through the plywood board and into a wall stud close to an outlet.
Now Dad can plug in the power strip and turn it on to charge or turn it off when it’s not in use.
Oh, and there was still room for a simple little stand for Hank’s dog bowls next to the tool chest.
And with that everything–except filling it all back up–was finished. My parents reorganized all their things in the cabinets–paint cans on the pull out trays and all Dad’s car cleaning stuff on the shelves.
This simple update made a huge difference and added a ton of storage to grow into. It’s nice that Dad finally has a place for his tools and a convenient place to charge everything, too.
I hope this update gave you some ideas and inspiration for your own workshop or garage!
Looking for more garage and workshop organization ideas?
Here are a few more fun garage ideas you might enjoy browsing:
If you enjoyed this before and after and want to save it for later, don’t forget to pin it or share it to your favorite social channel!
Until next time, friends, happy building!