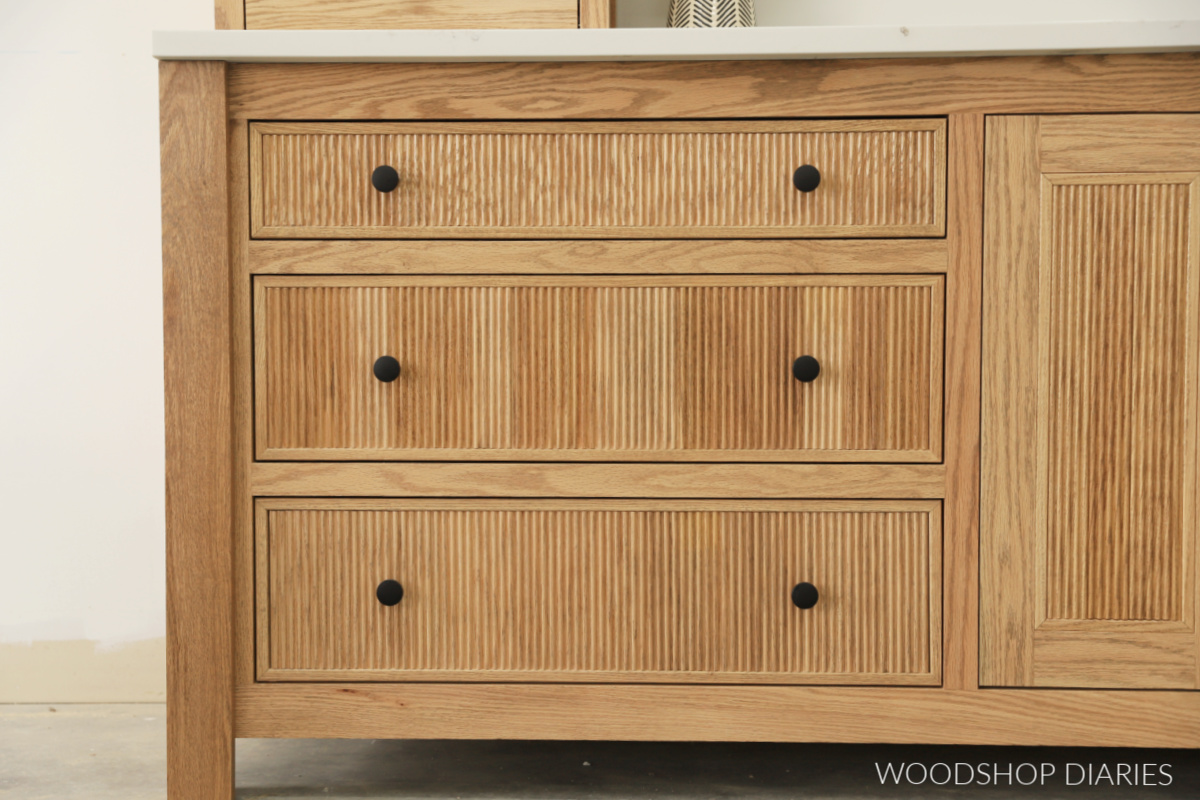
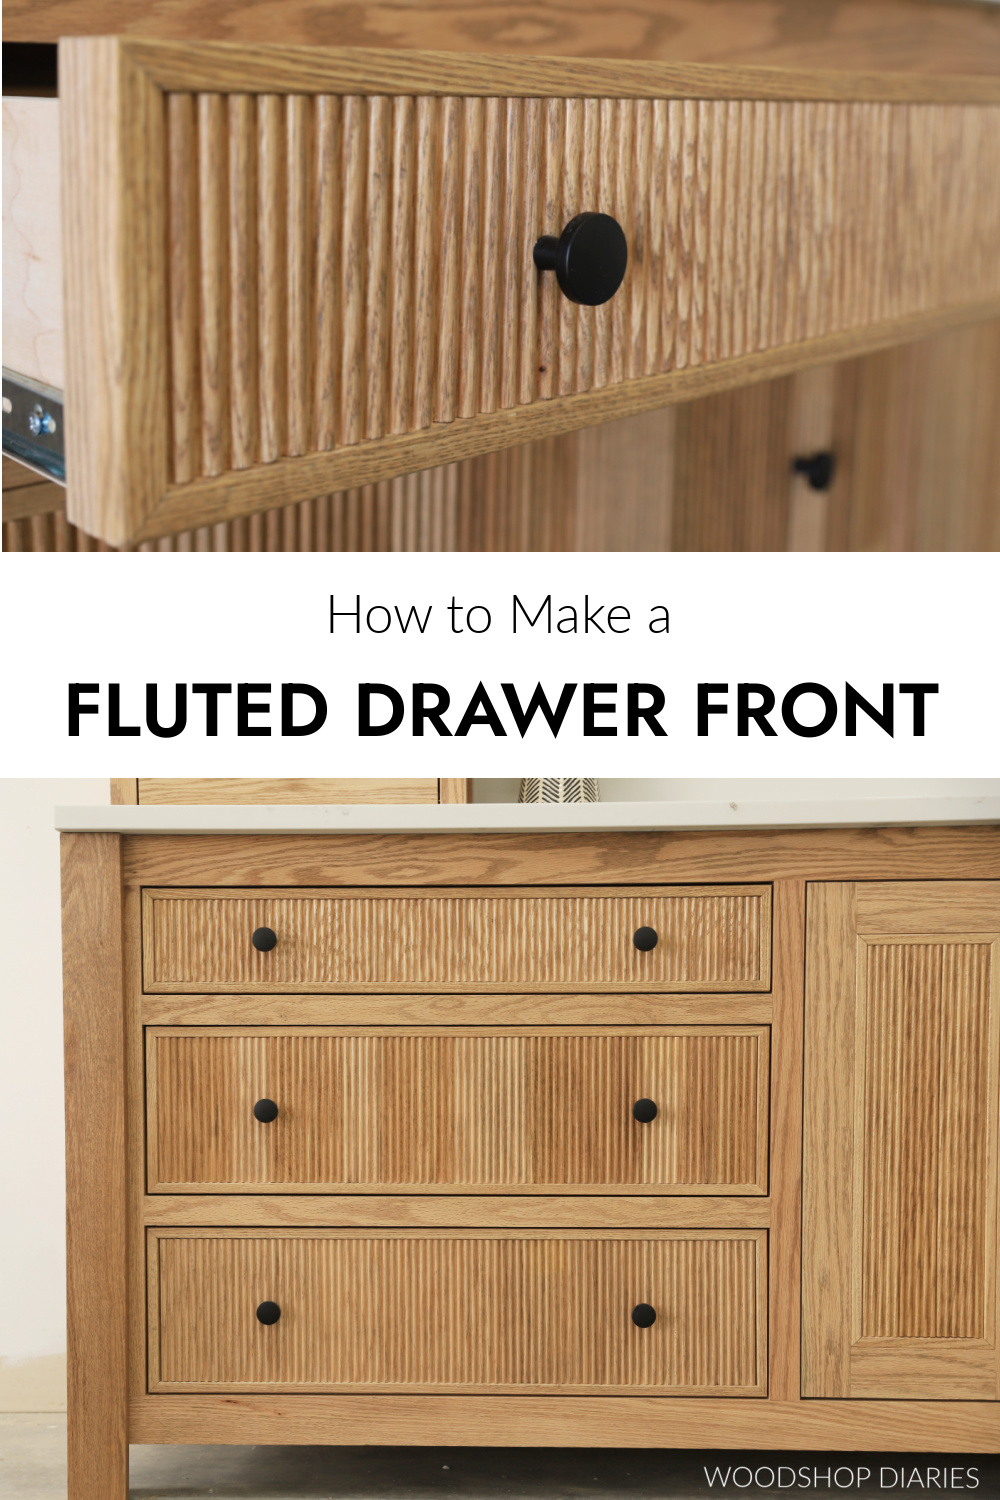
In this post, I’m sharing how to make a fluted drawer front to add detail and dimension to your DIY furniture projects!
Adding this extra dimension of trim to a drawer front or door is a simple and stunning way to take your DIY furniture project to the next level.
First of all–is it fluted or reeded? To be honest, I don’t really know and when I researched it, I got varying answers from various experts.
Some say that reeded patterns are more concave and hollowed out while fluted patterns are more convex and outward. And some say the complete opposite.
And some say that the terms fluted and reeded are completely interchangeable and that they’re the same thing. Seems everyone is confused ha!
So while I can’t tell you which term is correct, I can show you how to use it to create a beautiful drawer front to upgrade your project. If that’s what you’re looking for, let’s dive in.
*This post contains affiliate links. See website policies.
What to know before building
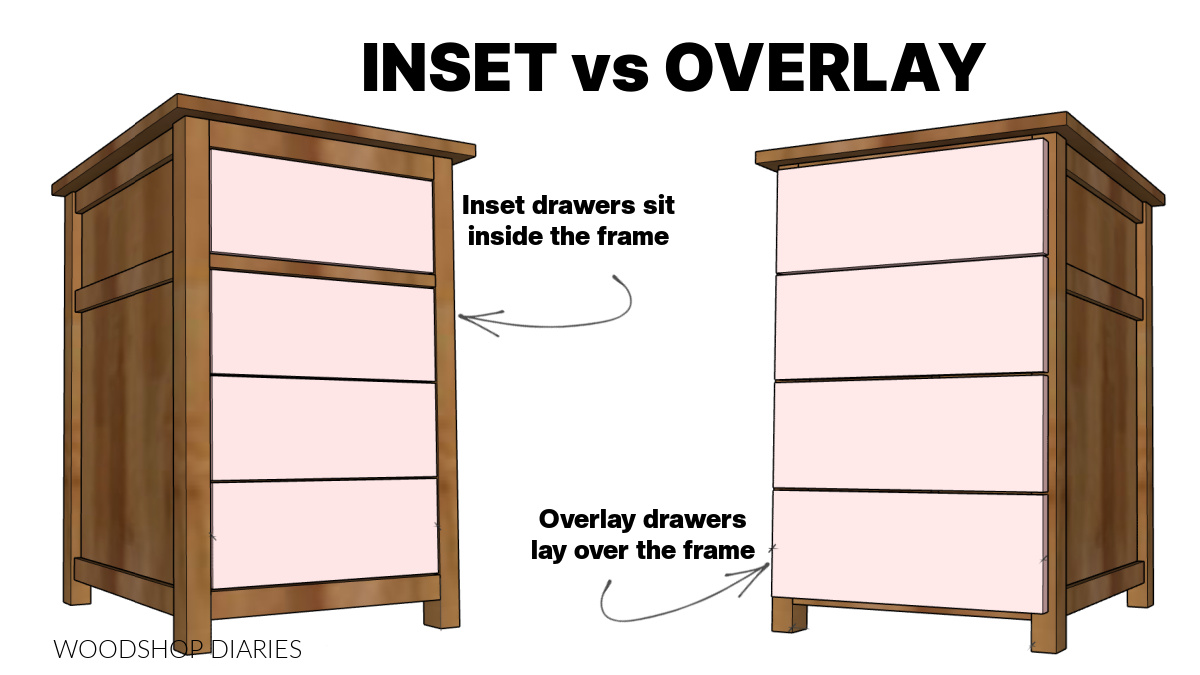
This style of drawer front can be made for EITHER inset or overlay drawer fronts. If you aren’t sure what that means, this post explains the difference in inset vs overlay.
Now, to be clear, there are many ways to make a reeded (or fluted…whichever this is) drawer front. I’m just sharing one way I’ve made them.
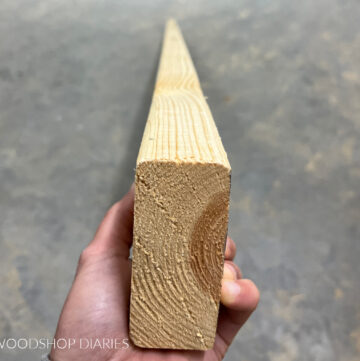
The ones I’m sharing here are how I made them for my recent bathroom vanity build and they were about 1 ¼″-1 ⅜″ thick.

Usually drawer fronts are closer to ¾″ thick, but there’s no “standard” thickness and they can vary depending on style.
So as you’re building, keep in mind they’re a little thicker than you might normally use. But they would still function just fine.
When building a drawer front, first you need to determine what size it needs to be. This post goes in depth to help you determine how to measure and size your drawer front for any project.
Are DIY projects your thing? Sign up for our newsletter for priority access to the latest projects and build plans!
How to make a Simple Fluted Drawer Front
I mentioned earlier in the post that there are many ways you can make a fluted drawer front using many different materials.
This is just one possible way and it involves using fluted trim casing. In this method, the casing is ripped into sections and one part is used to frame out the drawer front and the other part is used for the fluted center design.
If you prefer to watch, I show this process in this video on my YouTube channel at about the 8:46 mark

Love watching how-to videos? Subscribe to my YouTube channel for plenty more where that came from!
Tools & Materials
Tools:
- Table Saw
- Miter Saw
- Clamps
Materials:
- ½″ or ¾″ plywood (for drawer front backer)
- ⅝″ x 3 ¼″ fluted trim casing (amount depends on drawer front size)
- Wood Glue
- Edge banding (optional, but recommended)
NOTES ON MATERIALS: The type of plywood (oak, pine, maple, etc) isn’t critical as it will be covered with trim.
The fluted trim casing I linked above is red oak. I recommend looking for this fluted trim casing in the same wood type you’re using for the rest of your project so the wood types match.
You likely wouldn’t (for example) want to build your project with poplar and have red oak drawer fronts.
Step 1: Cut Plywood Backer
After I determined the height and width to make my drawer front, I cut a piece of ¾″ plywood to this size. (You could also use ½″ plywood. Either thickness would work fine.)
Not sure what size to make your drawer front? This guide explains how to figure your drawer front size.

The type of plywood you use here isn’t critical as it will be covered with trim in the next steps.
If desired, apply iron on edge banding to the edges of this piece. These edges will be seen in the finished drawer front, so edge banding helps hide the plies and makes it look cleaner.
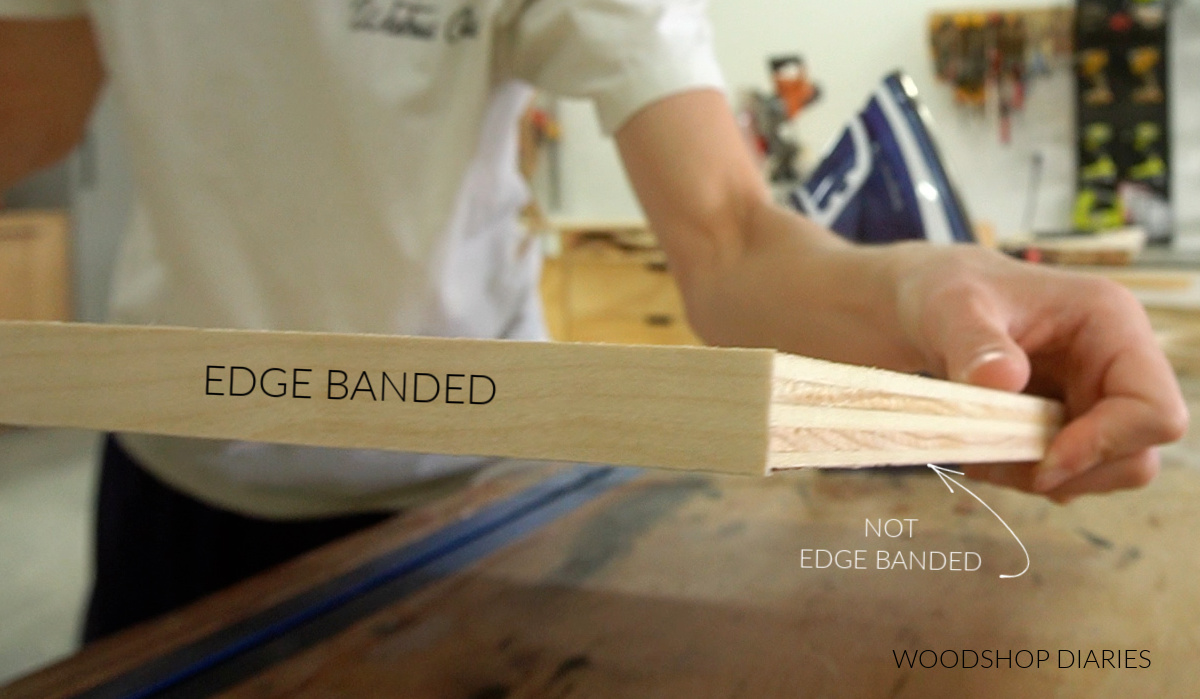
Learn how to apply iron on edge banding here.
TIP: Match the edge banding to the same wood type as the fluted trim you’re using. For example, if the trim is red oak, use red oak edge banding (it’s okay if the plywood isn’t red oak).
Step 2: Trim Fluted Boards
The trim boards I used here have a profile like shown below. Notice that the left and right edges are flat and the middle section is fluted/reeded.
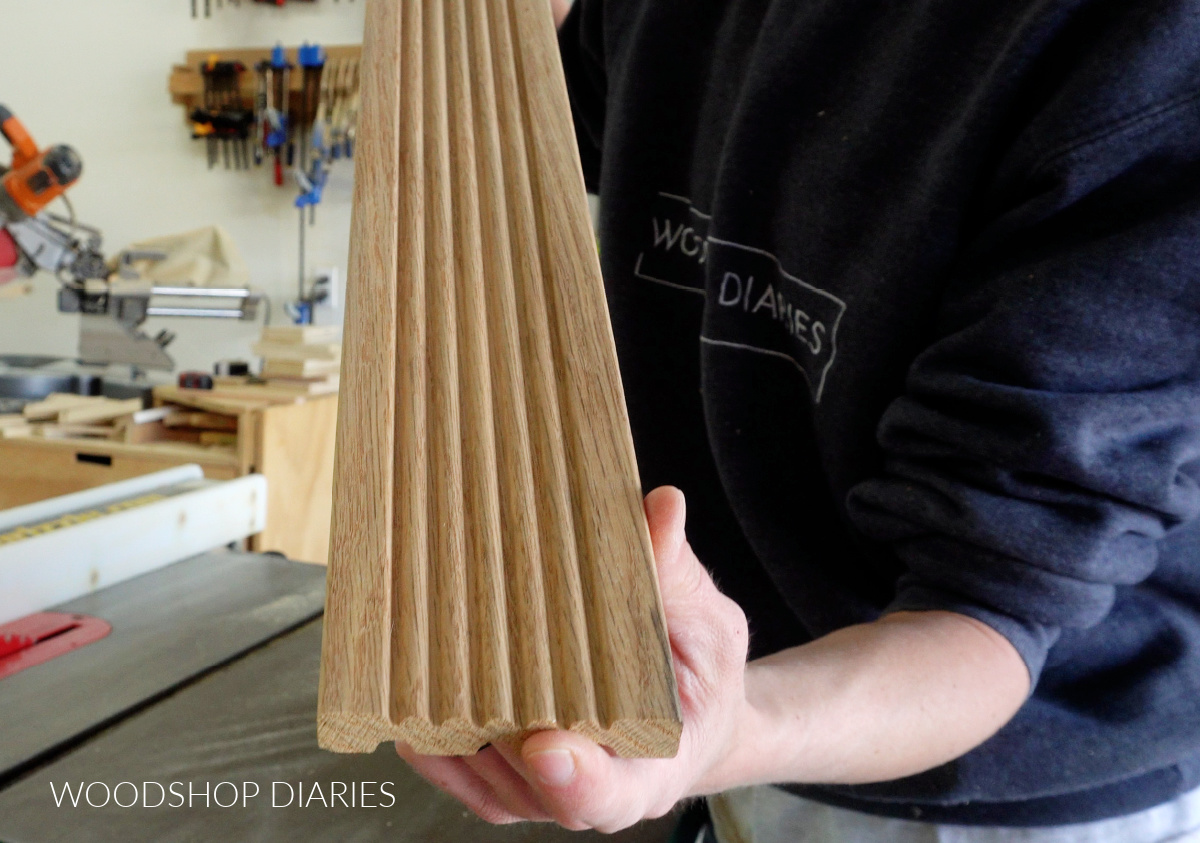
NOTE: These specific boards are about 3 ¼″ wide, but if you find a similar trim casing, it may vary in size and exact profile–that’s okay!
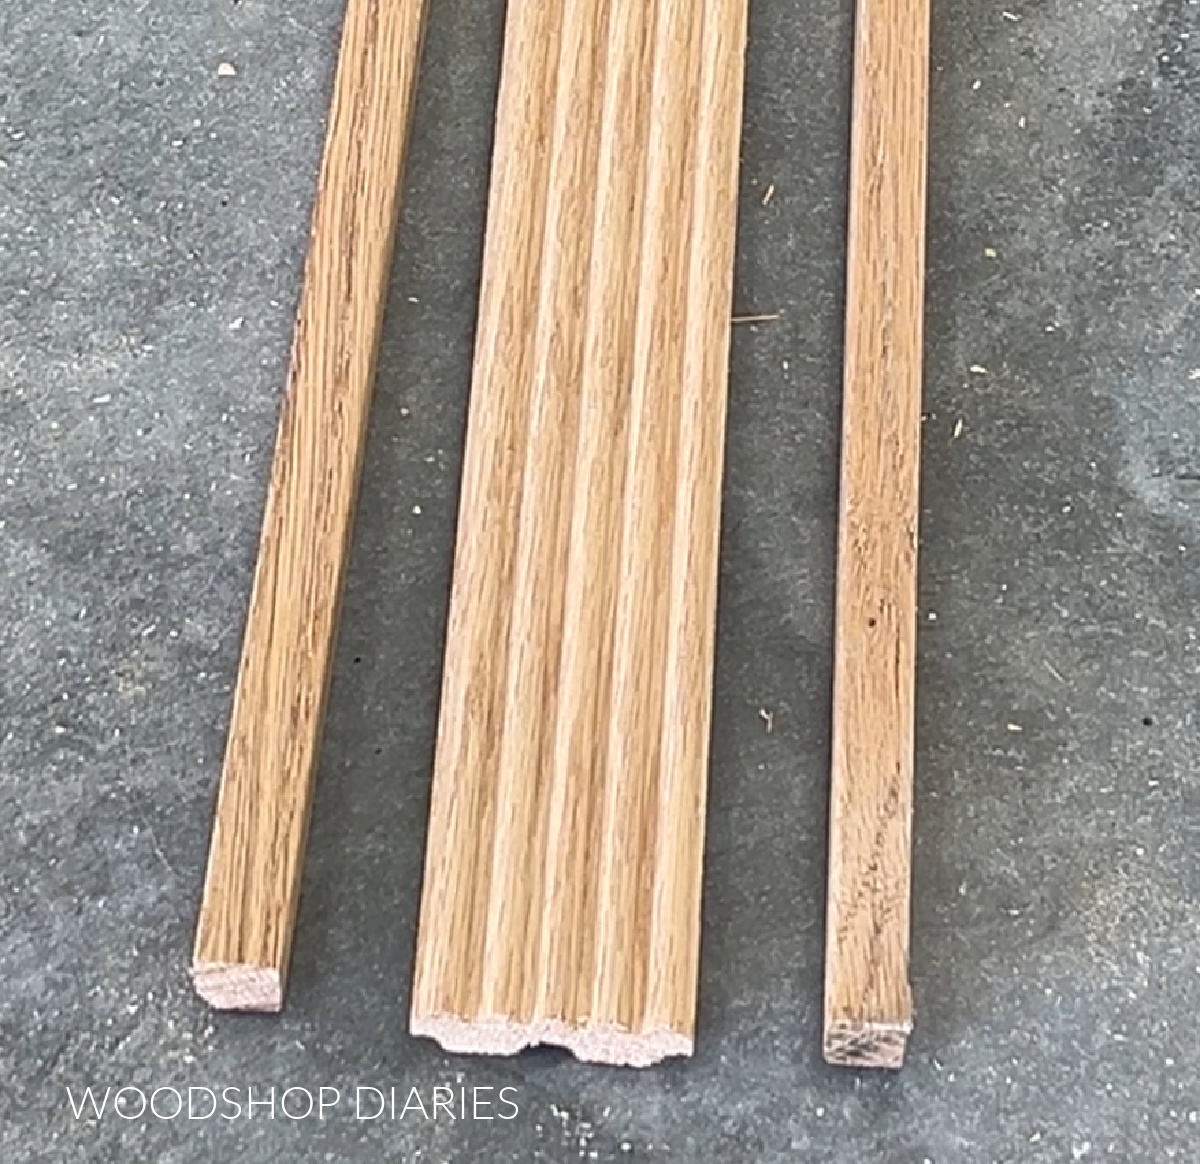
Using a table saw, I carefully ripped the two flat sides off the board. I did my best to cut these edges off so they were exactly the same width.
How much/many boards do you need to cut like this? That’s 100% dependent on the size of your drawer front.
To estimate, measure the width of the fluted middle section. Divide your drawer front width by this amount. That will give you how many pieces you will need to cover it.
Then, take the length of your trim board and divide by the height of your drawer front. That tells you about how many pieces you can get from one board.
Then you can figure out how many boards you need to cut down this way for your drawer front(s).
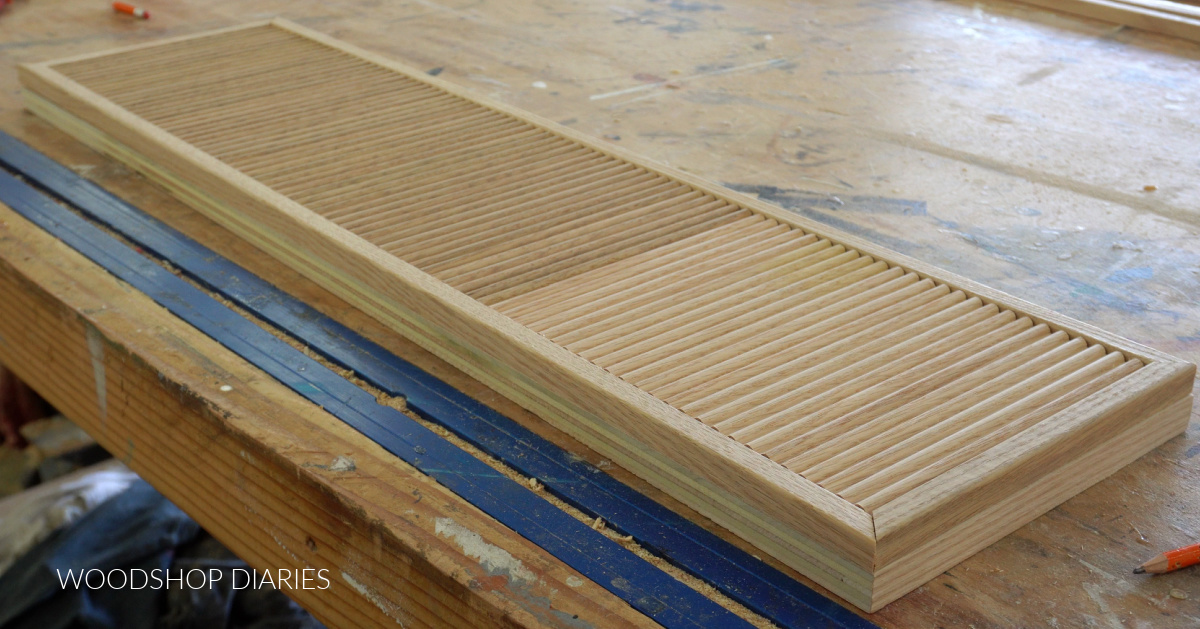
Step 3: Cut and Glue Trim Onto Front
I adjusted my miter saw’s angle to 45 degrees and cut four pieces from the “flat ends” I trimmed down in step 2 to fit around the front of the drawer front.
These pieces should meet at the corners at a 45 degree angle and should run flush to the edges on each side.
Once I had dry fit this frame around the edge, I measured the height of the inside opening and trimmed the middle fluted section of trim casing board into pieces this length.
TIP: I clamped a stop block on my miter saw so I could quickly cut consistent length pieces to fill the inside.
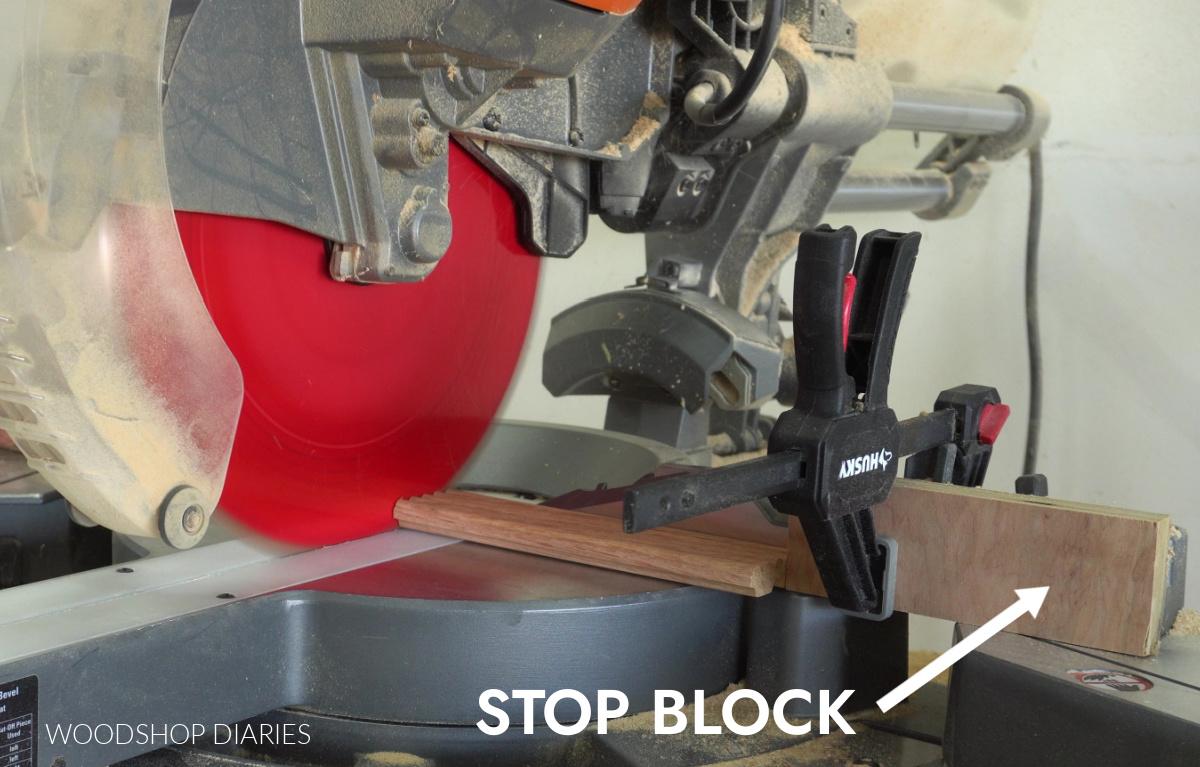
After I had trimmed enough pieces to completely fill the inside, I made sure everything lined up and fit well before gluing.
NOTE: When you get to the ends, you may have to trim the last fluted piece(s) narrower to fit. Be careful if/when trimming this as it’s already fairly small and may be difficult to trim on a table saw.
If available, a hand saw, band saw or scroll saw, etc may be an easier option to trim this with.
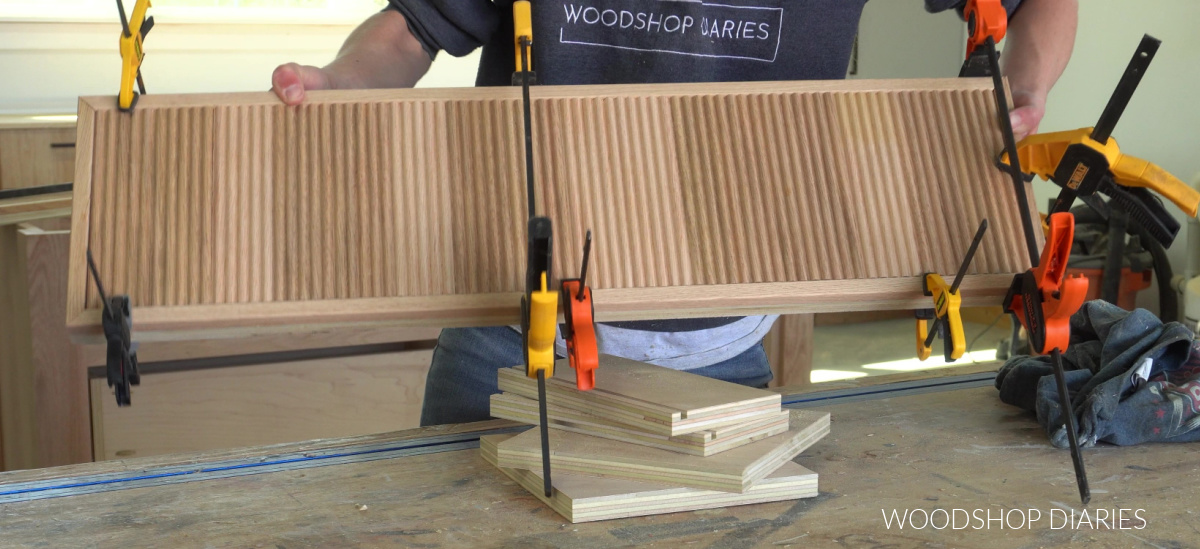
Once everything fit well, I removed the pieces from the drawer front and applied wood glue to the plywood and carefully pieced everything back in place, clamping the edges to hold them in place.
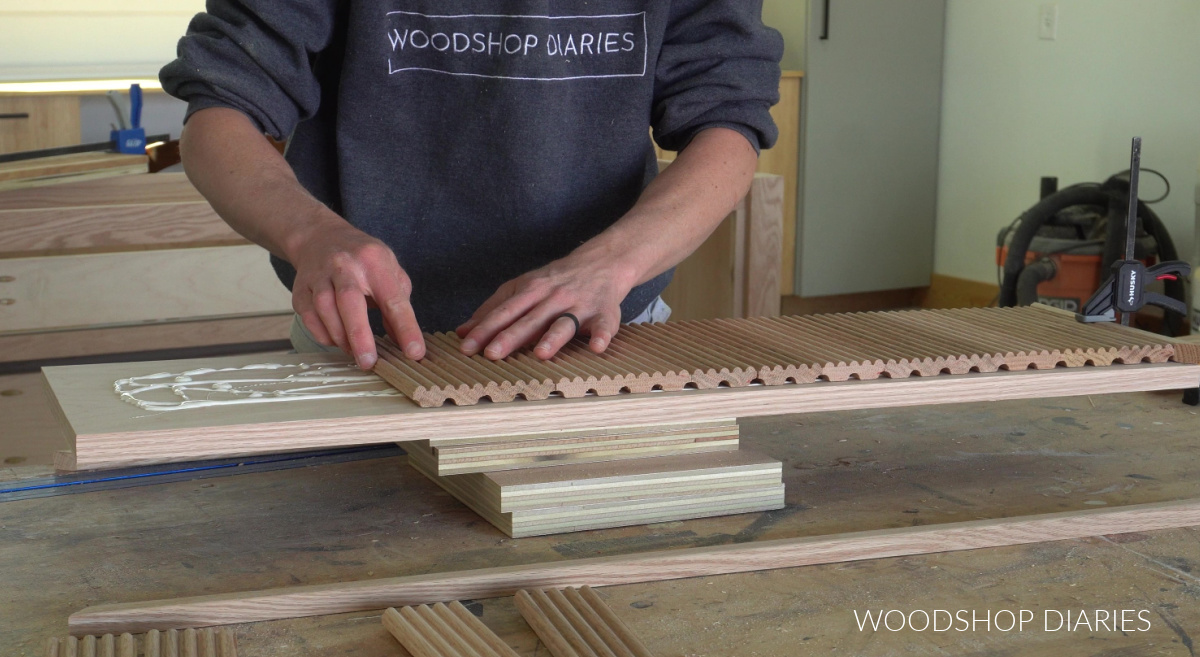
I allowed this to fully dry before moving on. Be sure to clamp the frame pieces so that they are flush to the plywood edges.
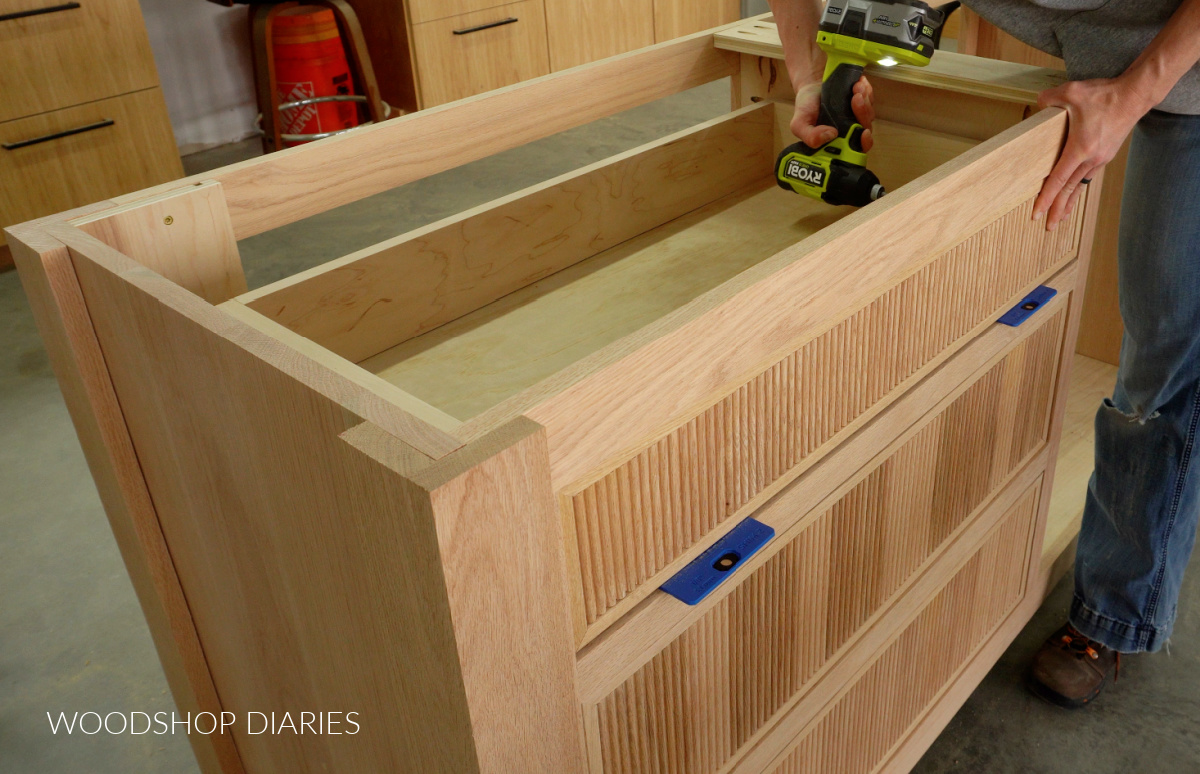
Step 4: Install Drawer Front
Once the glue was completely dry, I gave the edges and front a light sanding. RELATED: How to sand wood
Then, I installed it onto the drawer boxes using screws from the inside. Learn more about how to install drawer fronts here.
Then you can finish as desired. Due to the uneven texture of the trim, it may be challenging to apply a finish.
Be patient and use a foam or bristle brush to get into all the little grooves and make sure to wipe away any puddling in the grooves before it dries.
Learn more about how to stain wood furniture projects here.
Then, add handles or knobs as desired. Keep in mind that the handles and knobs may not sit completely flat due to the fluting, but that’s okay.

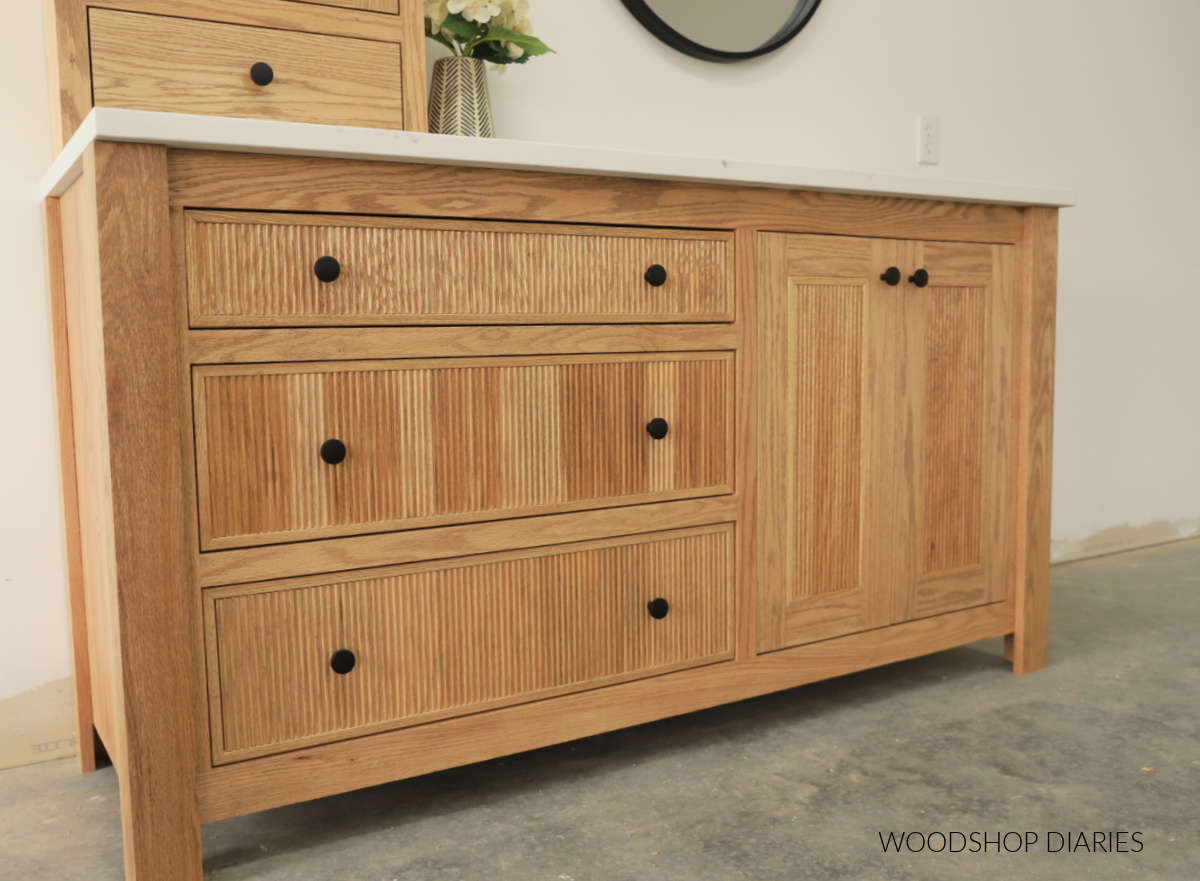
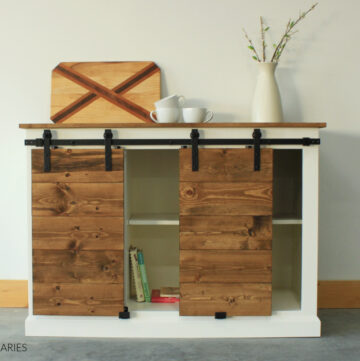
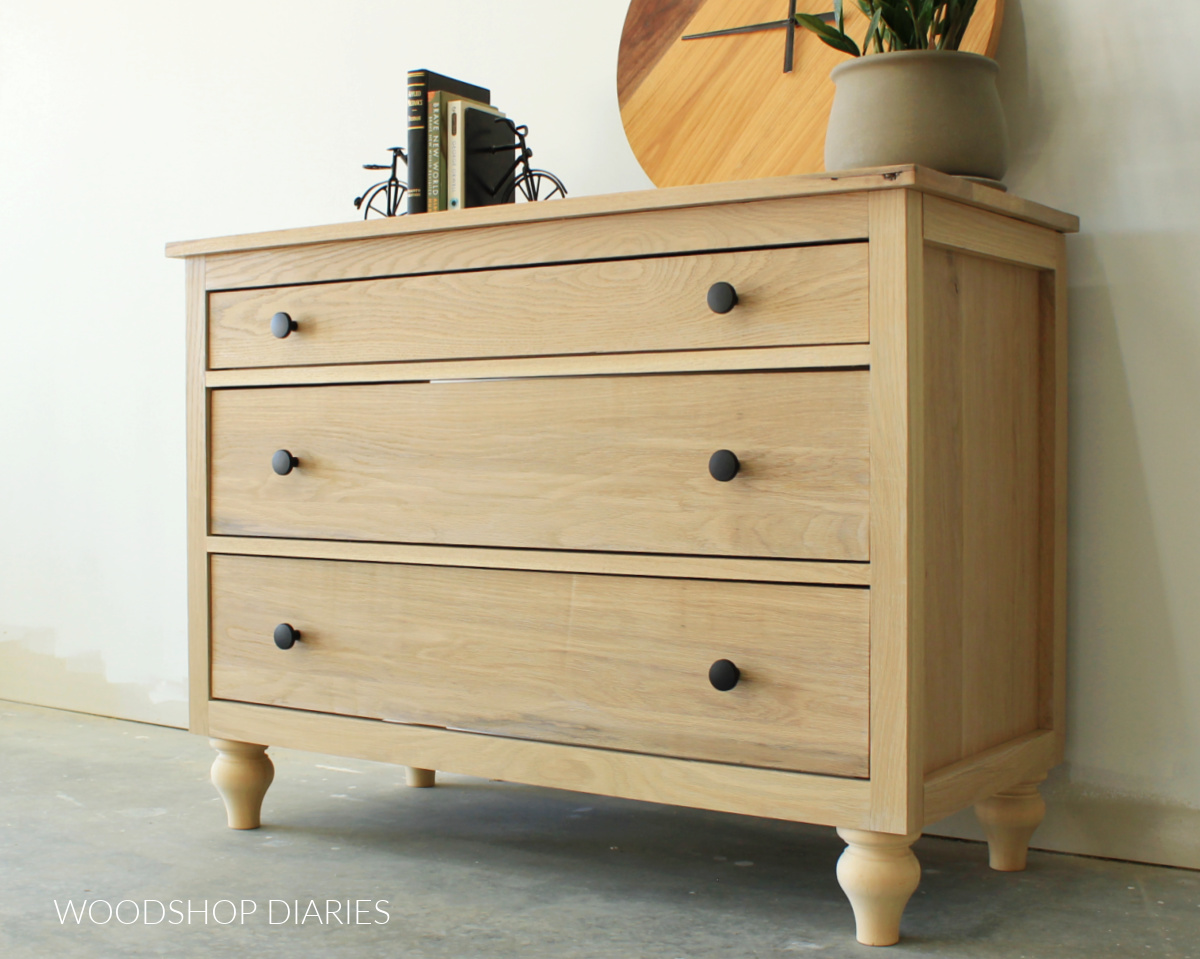
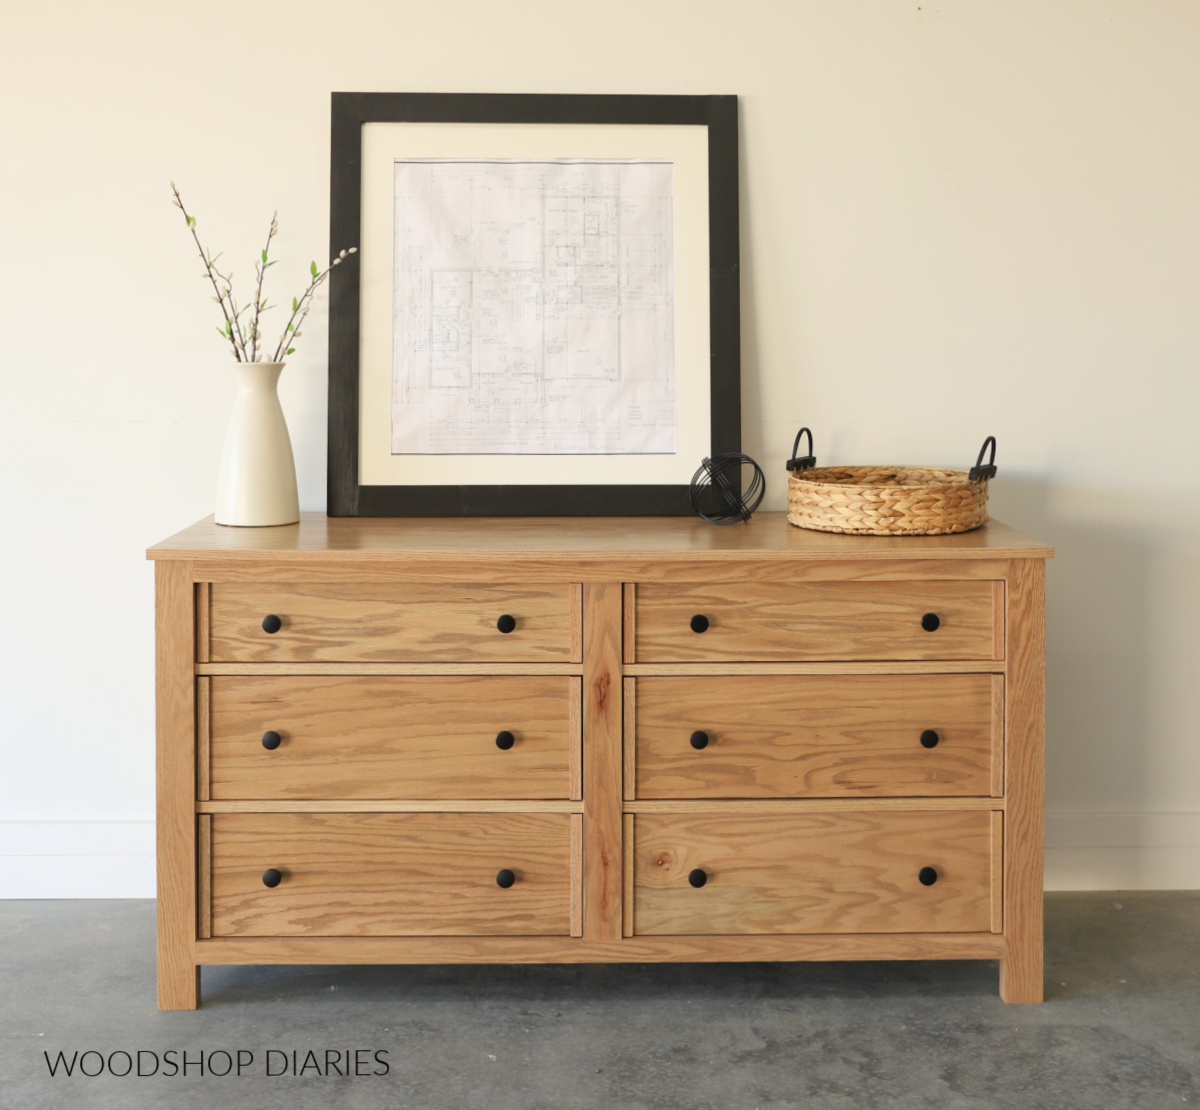
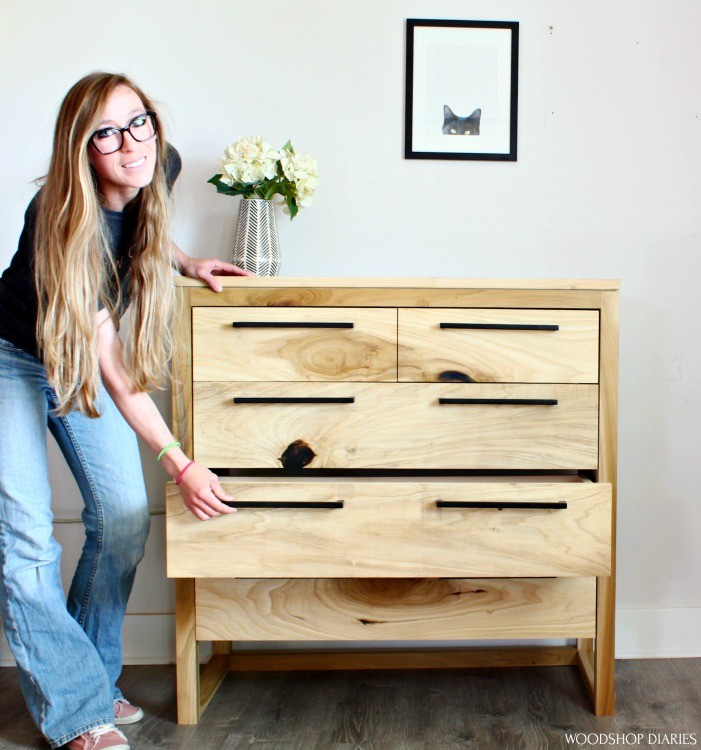
Projects to try fluted drawer fronts on
If you’re looking for some ideas to try fluted drawer fronts on, here are a few of my favorite projects with drawers. You can customize the drawer fronts with fluting or trim to give them some added detail:
If you enjoyed this project and want to save it for later, be sure to pin it or share to your favorite social channel!
Until next time, happy building!