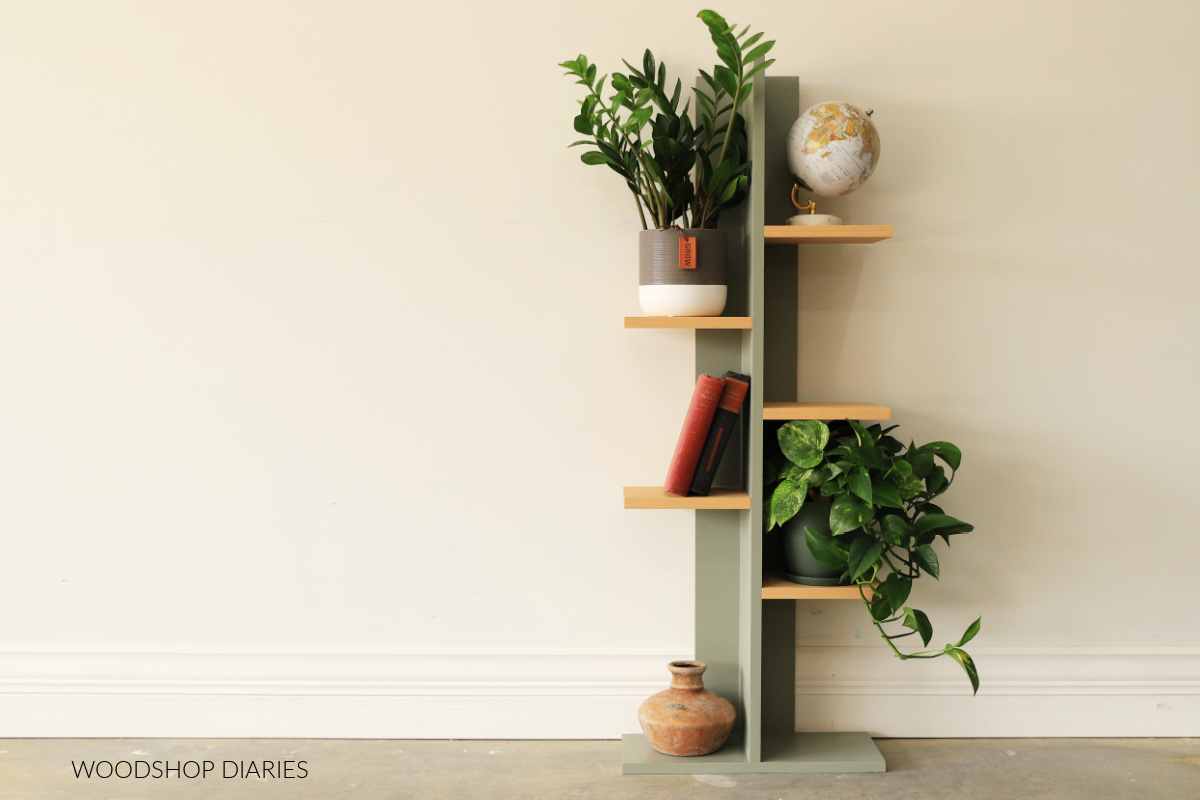
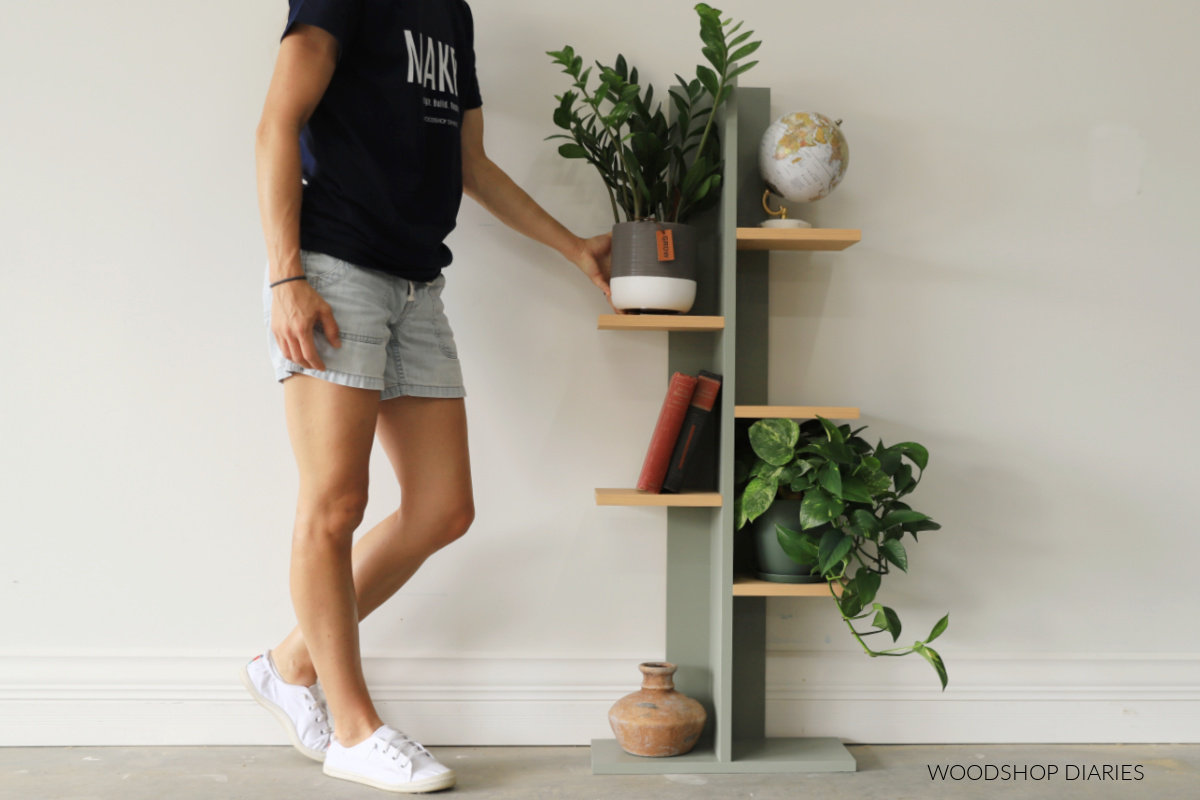
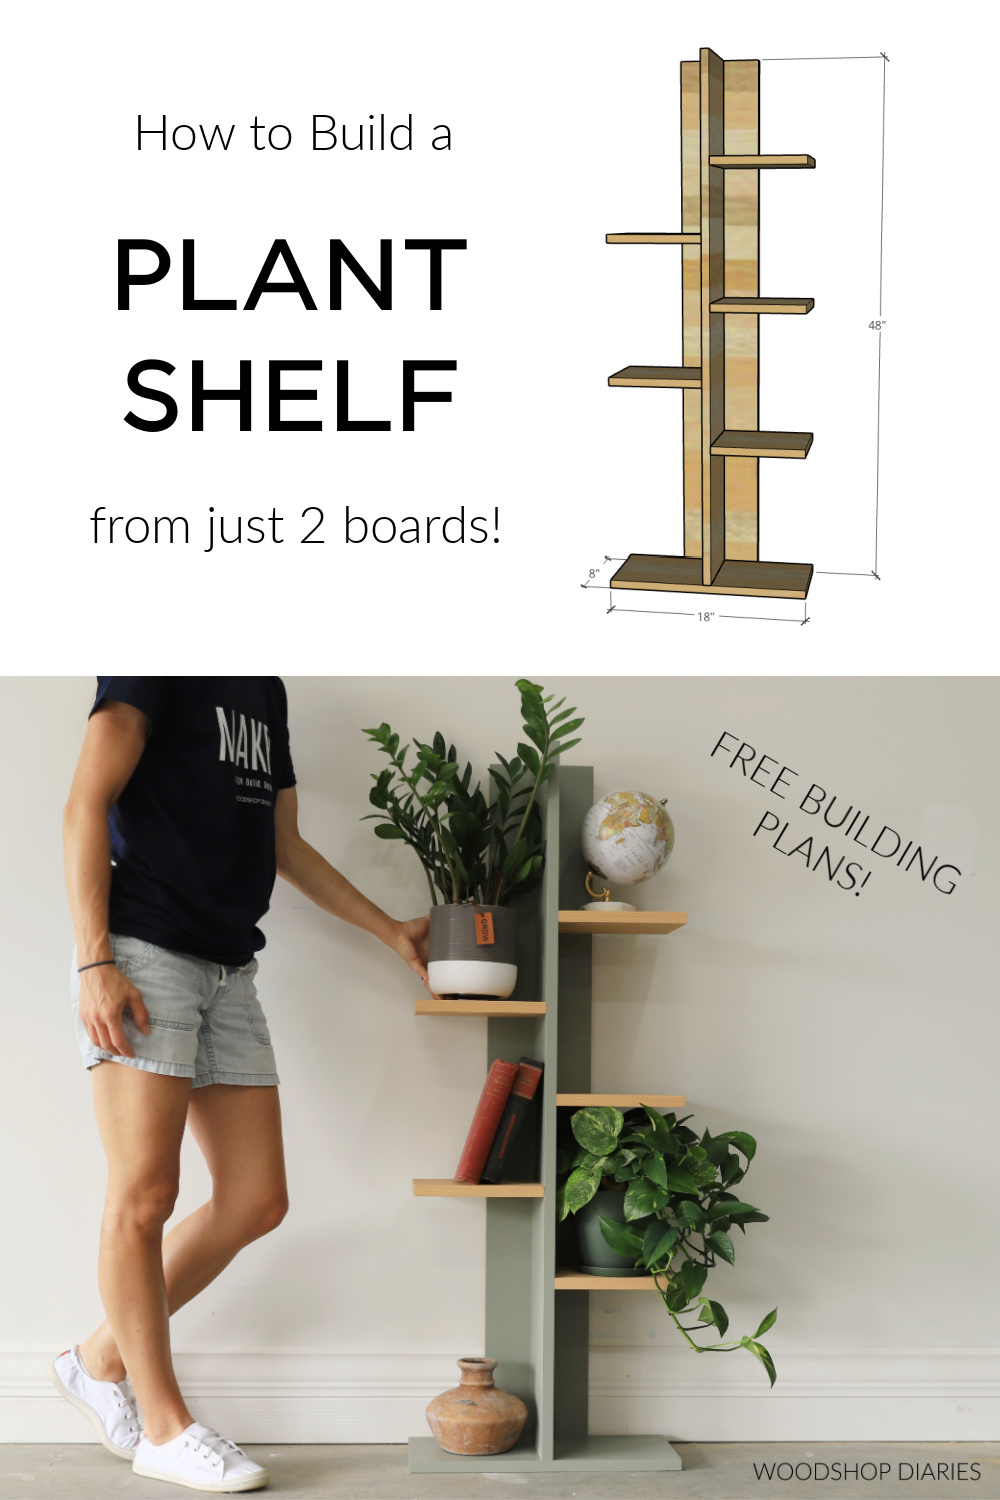
In this post, I’m sharing how to build this SUPER SIMPLE DIY plant shelf with just 2 boards!!
If you’ve got several small plants that you want to get off the ground or off your windowsill, this is the perfect little plant shelf for the job!
*This post is sponsored by my friends at Kreg Tool and contains affiliate links. See website policies.
Obviously, you can use it for plants, books, décor, even shoes! The size is easy to customize, as well as the number of shelves.
This is an excellent beginner woodworking project that’s easy on the budget and only requires a few basic tools.
So if you’re ready to get building, let’s dive in to the how-to!
What You’ll Need
Tools:
- Miter Saw (or any saw that can cut straight lines)
- Drill/Driver
- Kreg Pocket Hole Jig
- Kreg Quick Flip Drill Bit (or any countersinking drill bit)
Materials:
- (2) 1x8x8 boards
- 1 ¼″ pocket hole screws
- Wood Glue
What to know before building
This is an incredibly simple DIY project, but just in case you want to add your own touches, here are some tips to take note of before building.
This project is intended for smaller, lighter weight pots.
While it can structurally hold larger, heavier pots, this plant shelf is tall and skinny and adding large pots can cause it to be top heavy and easier to accidentally knock over.
Keep that in mind if you make modifications.
It’s easy to customize the sizing
I made this project from 1×8 boards, but if you’d like a deeper shelf, feel free to use 1x10s or 1x12s or even strips of plywood ripped to the depth you’d prefer.
And if you’d like to make it taller and add more shelves, you certainly can! Space them closer together or further apart. Feel free to get creative with your sizing.
Just keep in mind the taller the shelf, the more top heavy it can tend to be. So consider anchoring it to the wall if you plan to load it down or make it taller.
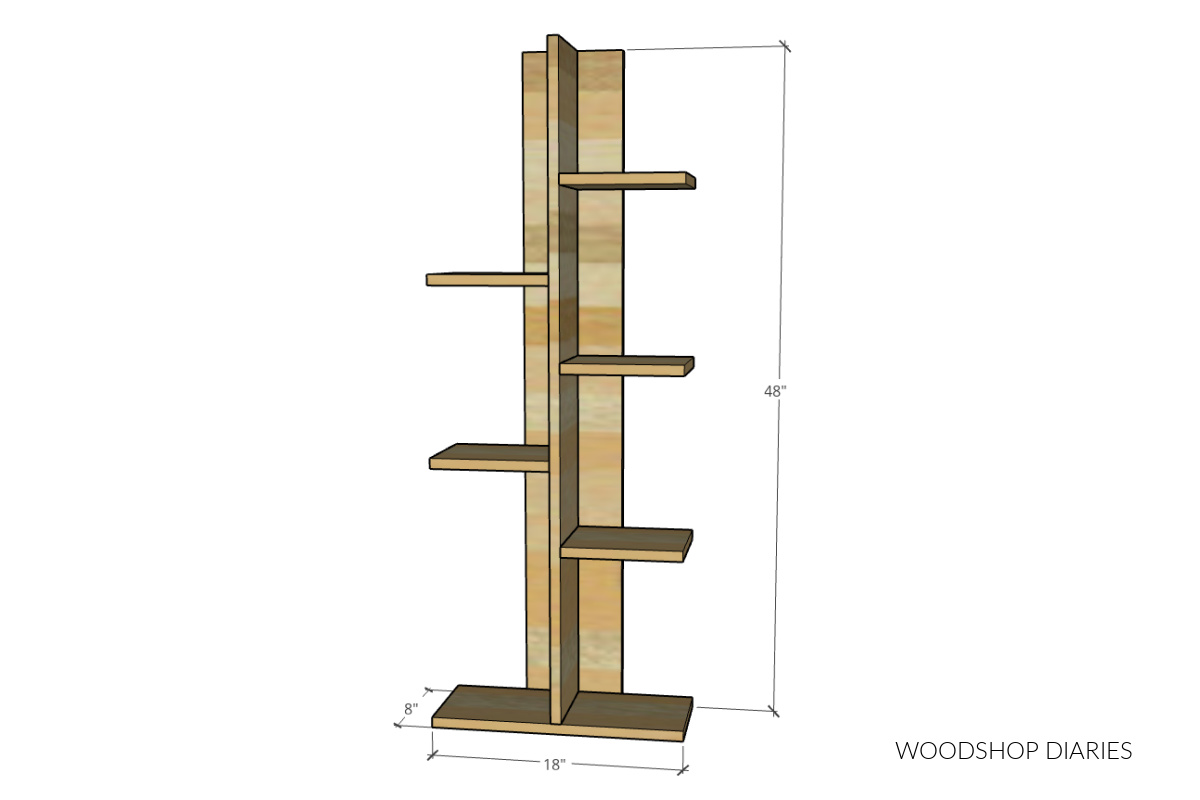
Overall Dimensions
The overall dimensions of this DIY plant shelf is 8″ deep x 18″ wide x 48″ tall.
How to Build a Simple Plant Shelf
This simple plant shelf can be built in under an hour with just two basic boards. The step by step tutorial with details and tips can be found below.
Or head to KregTool.com for the FREE building plans.
Love a good DIY project? Subscribe to our email list to be the first to know when new projects, plans, and woodworking tips are posted!
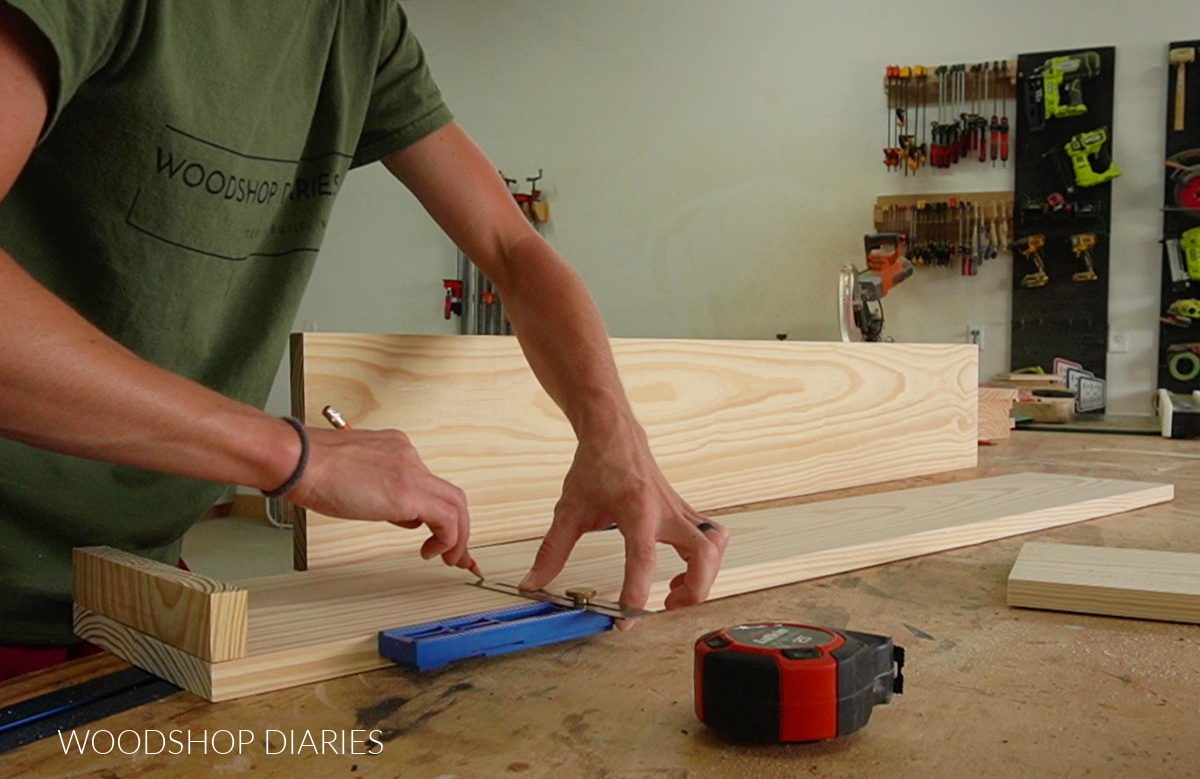
Step 1: Cut and Sand DIY Plant Shelf Pieces
For this shelf, I cut my two 1x8s into three pieces for the bottom and vertical frame. Then I cut 5 shelves from the remaining lumber.
1x8s
- (1) piece 18″ long for the bottom
- (1) piece 48″ long for the back
- (1) piece 47 ¼″ long for the middle divider
- (5) pieces 8 ½″ long for the shelves
I sanded all of these pieces well before assembling. It’s always good to sand individual pieces before assembling because getting in the corners after pieces are together is difficult.
If you’d like to finish these in different colors, consider staining or painting them now before moving on to putting them together. Just like with sanding, getting in all the corners after the pieces are together is challenging.
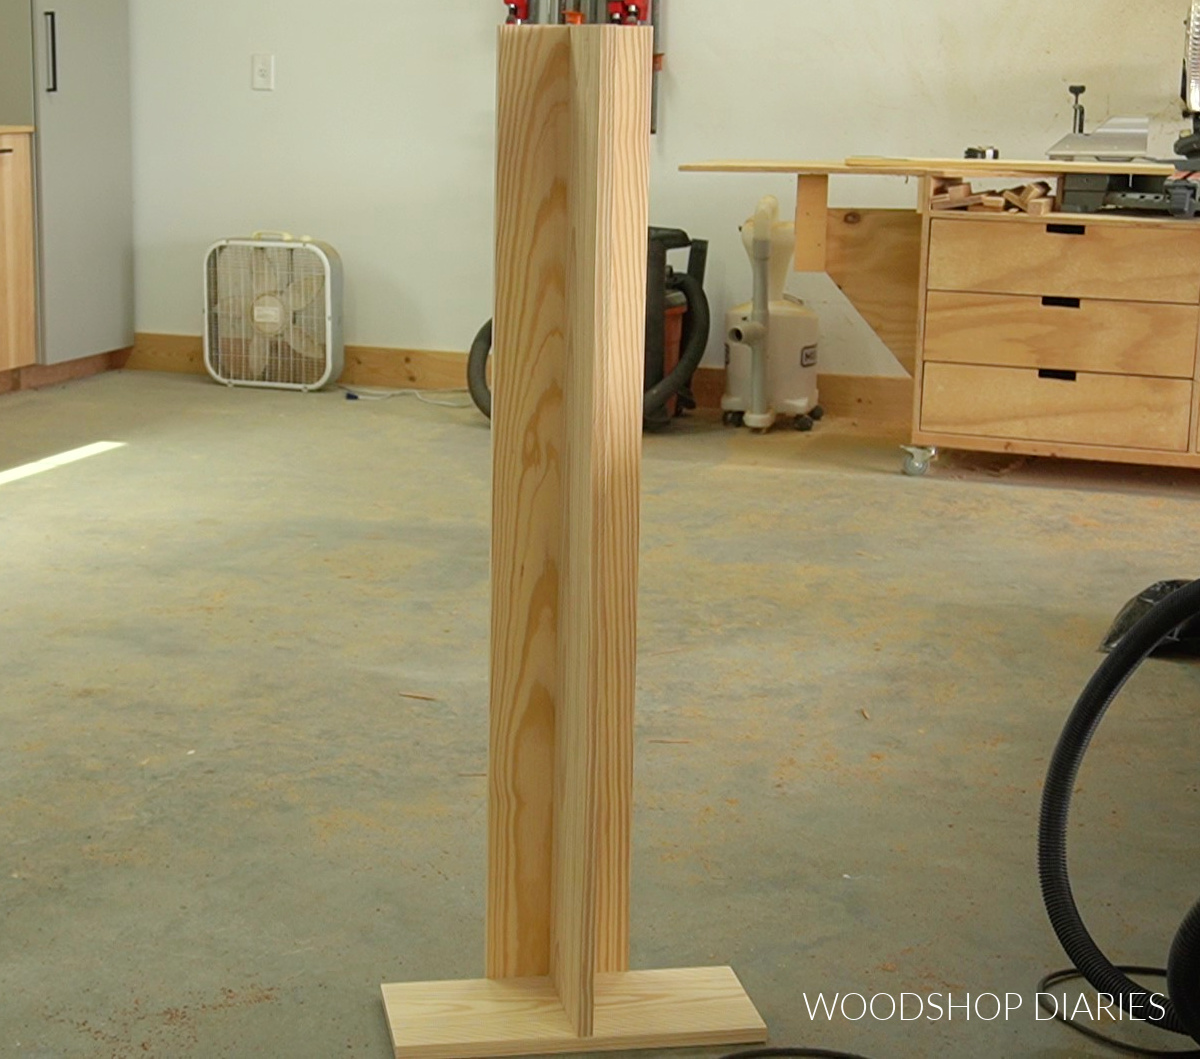
Step 2: Assemble Back and Middle Divider
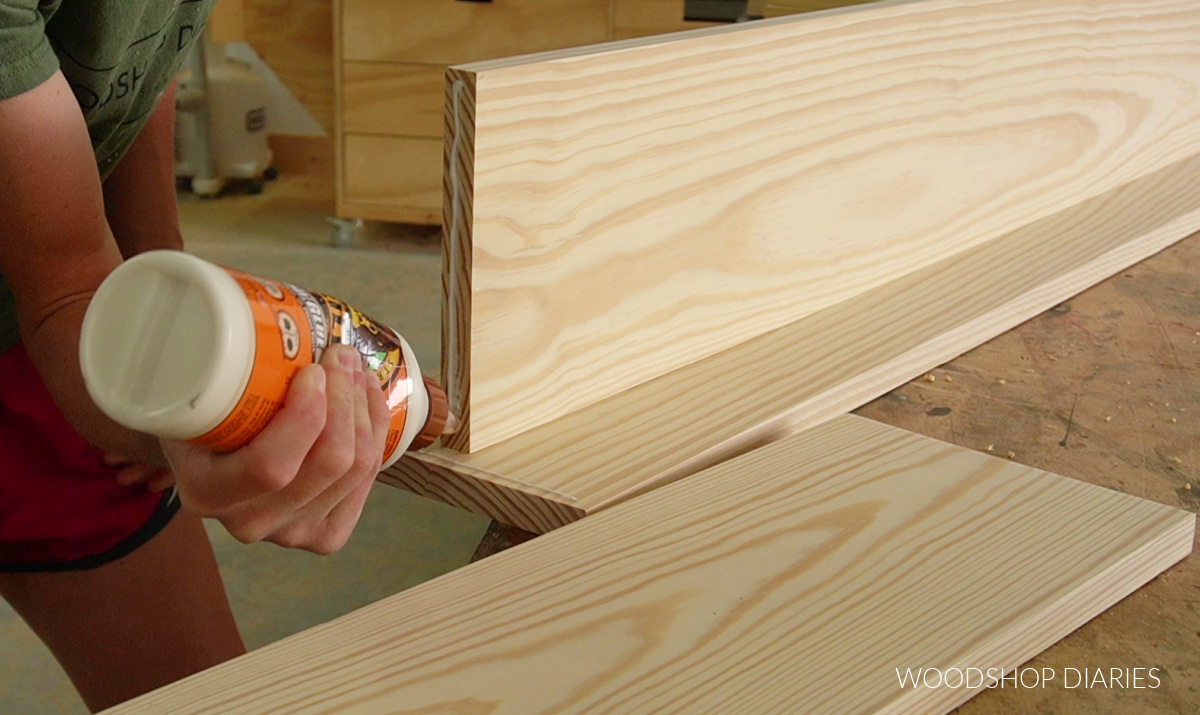
I laid the back panel flat on the workbench and marked the center line from top to bottom. I like using my Kreg Multimark for this, but a measuring tape and a straight edge would work as well.
Then I applied a bead of wood glue along this line and centered the middle divider on it. I lined up the top edges of the divider and back panel so they are flush along the top. panel.
NOTE: The middle divider is ¾″ shorter than the back. The top edges should be flush and the bottom of the back piece should overhang the divider by ¾″.
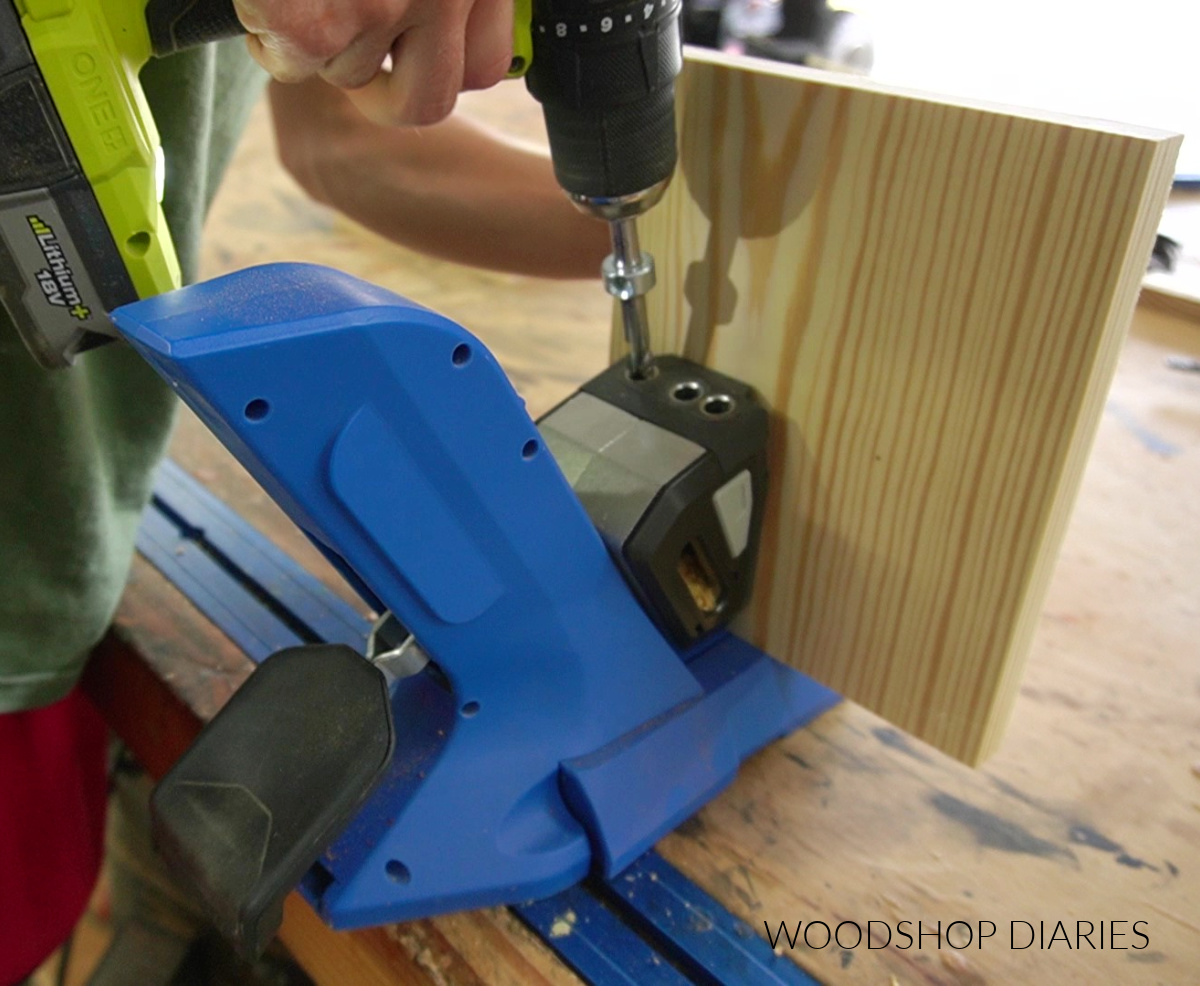
I clamped these together, then used a Kreg Quick Flip drill bit to predrill and countersink 5 holes along the back side of the back panel down the middle.
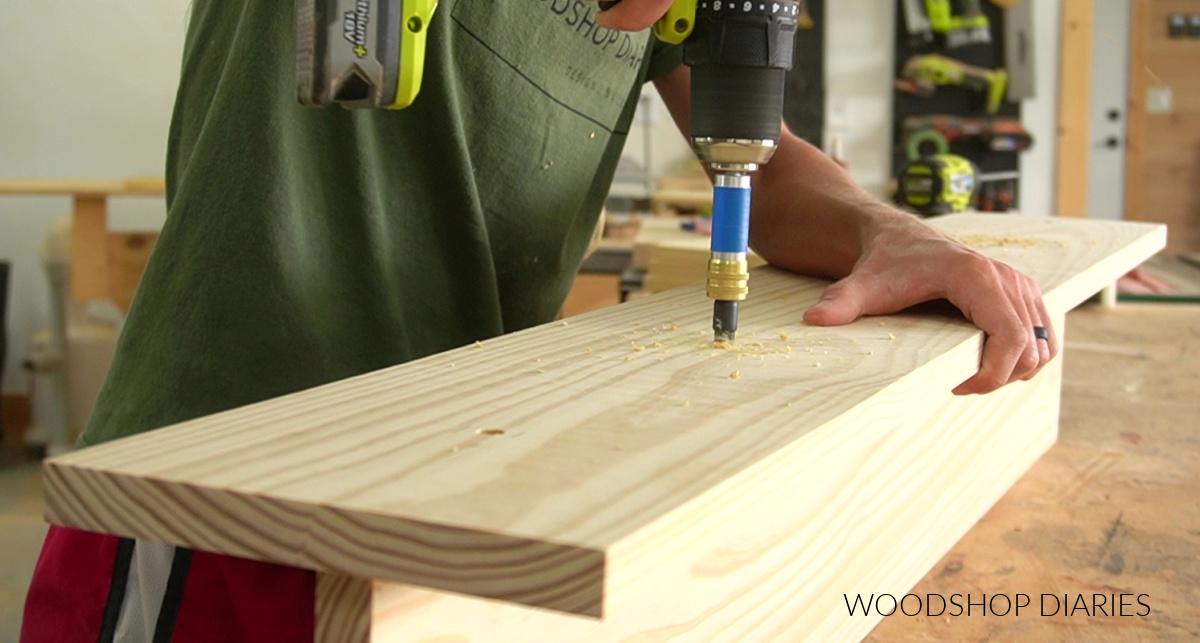
Then, I could drive 1 ¼″ pocket hole screws through these holes to attach the pieces together.

NOTE: The Kreg Quick Flip bit is a great little countersinking bit, but you can also use another type of countersinking bit or countersinking screws instead.
Step 3: Attach Bottom Panel to Shelf
The bottom panel will go under the middle divider and in front of the back piece–which is why the middle divider is ¾″ shorter than the back.
I applied a bead of wood glue along the back piece and middle divider and centered the bottom piece on them.
Just like for step 2, I used the Kreg Quick Flip to predrill and countersink two holes through the back and two holes through the bottom to attach this piece to each using 1 ¼″ pocket hole screws.
I wanted this main plant shelf assembly to be green, so first, I stained it green using Minwax Water Based Stain in Early Spring. So you’ll notice in the photos in the next step, it’s stained green.
However, after attaching the shelves, I changed my mind and went back and painted it in SW Evergreen Fog to tone it down a bit.
If you want this piece a different color from your shelves, I recommend finishing it now before adding the shelves in the next step.
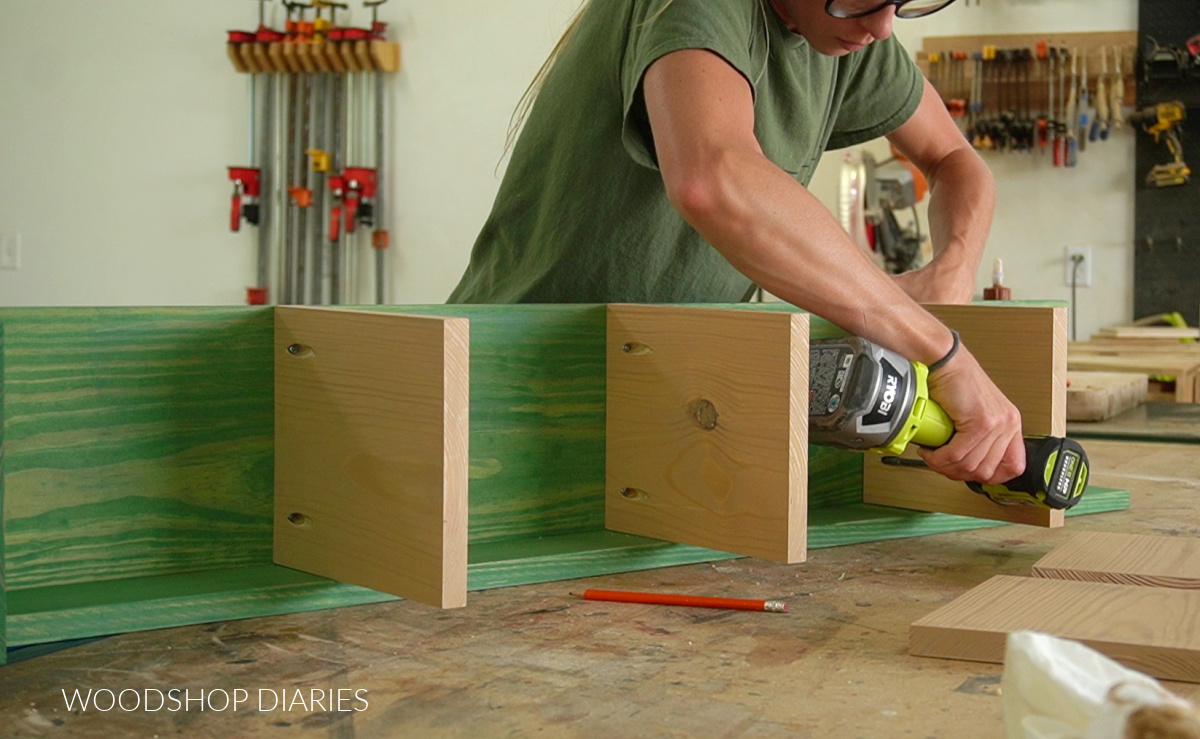
Step 4: Add Shelves
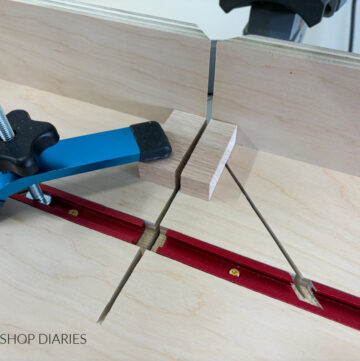
I drilled ¾″ pocket holes into ONE end of each shelf. Not sure how to drill pocket holes? Check out this post to learn how to use a pocket hole jig.
I started on the right side of the shelf and secured the bottom shelf to the middle divider 12″ up from the bottom panel using 1 ¼″ pocket hole screws.
Then, I installed another 12″ up from the bottom shelf, and a third 12″ up from the middle shelf.
Once the right side was finished, I installed the bottom left shelf 18″ up from the bottom panel.
And finally, I installed the top left shelf 12″ up from the one below it.
Of course, feel free to adjust your spacing, your layout and number of shelves as you’d like.
After these shelves were attached to the middle divider, I secured the back side of each shelf to the back panel by predrilling and countersinking holes (with the Kreg Quick Flip again), and driving 1 ¼″ pocket hole screws.
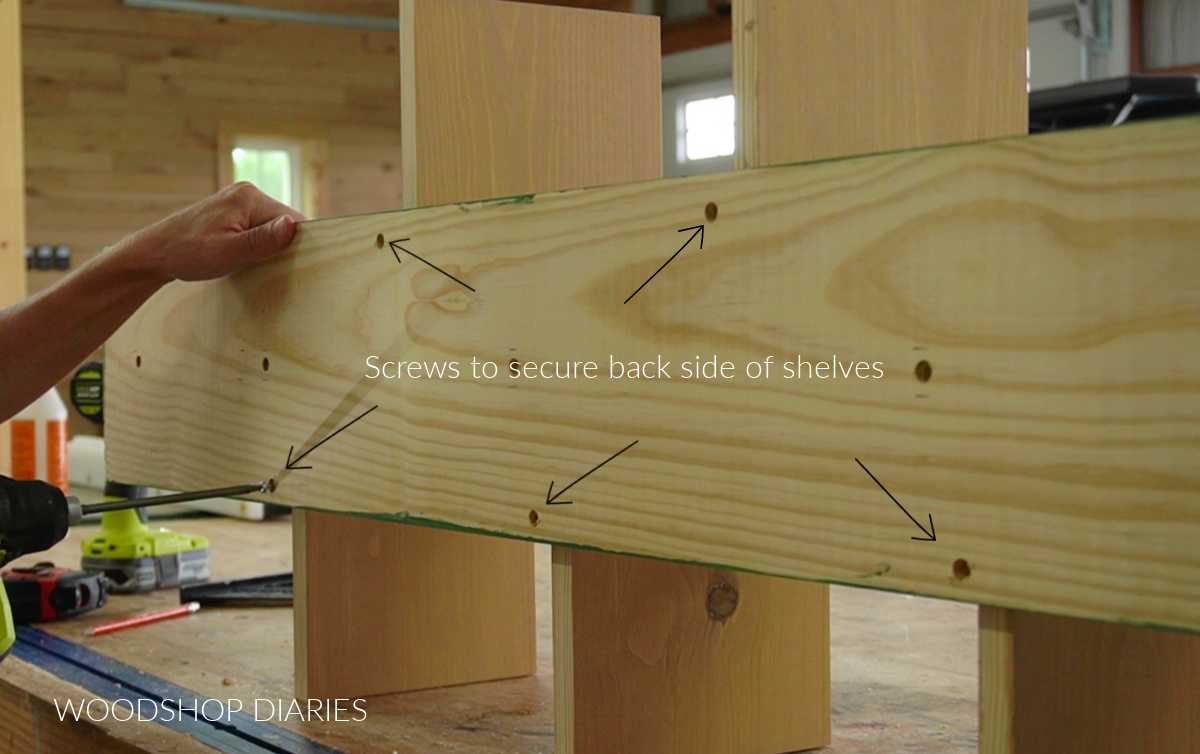
And at this point, the shelf is complete! If you plan to load this down with books, heavy plants, or décor, I recommend anchoring it to the wall to prevent tip over.
Stain/paint as desired if you haven’t already and once it’s dry, display your favorite things!
Don’t forget to grab the FREE building plans on KregTool.com!
Looking for more project inspiration?
Check out some of our favorite easy DIYs below or click here for a full list of simple, beginner DIY project ideas!
Save this DIY plant stand shelf project for later by pinning it or sharing to your favorite social channel!
Until next time, happy building!