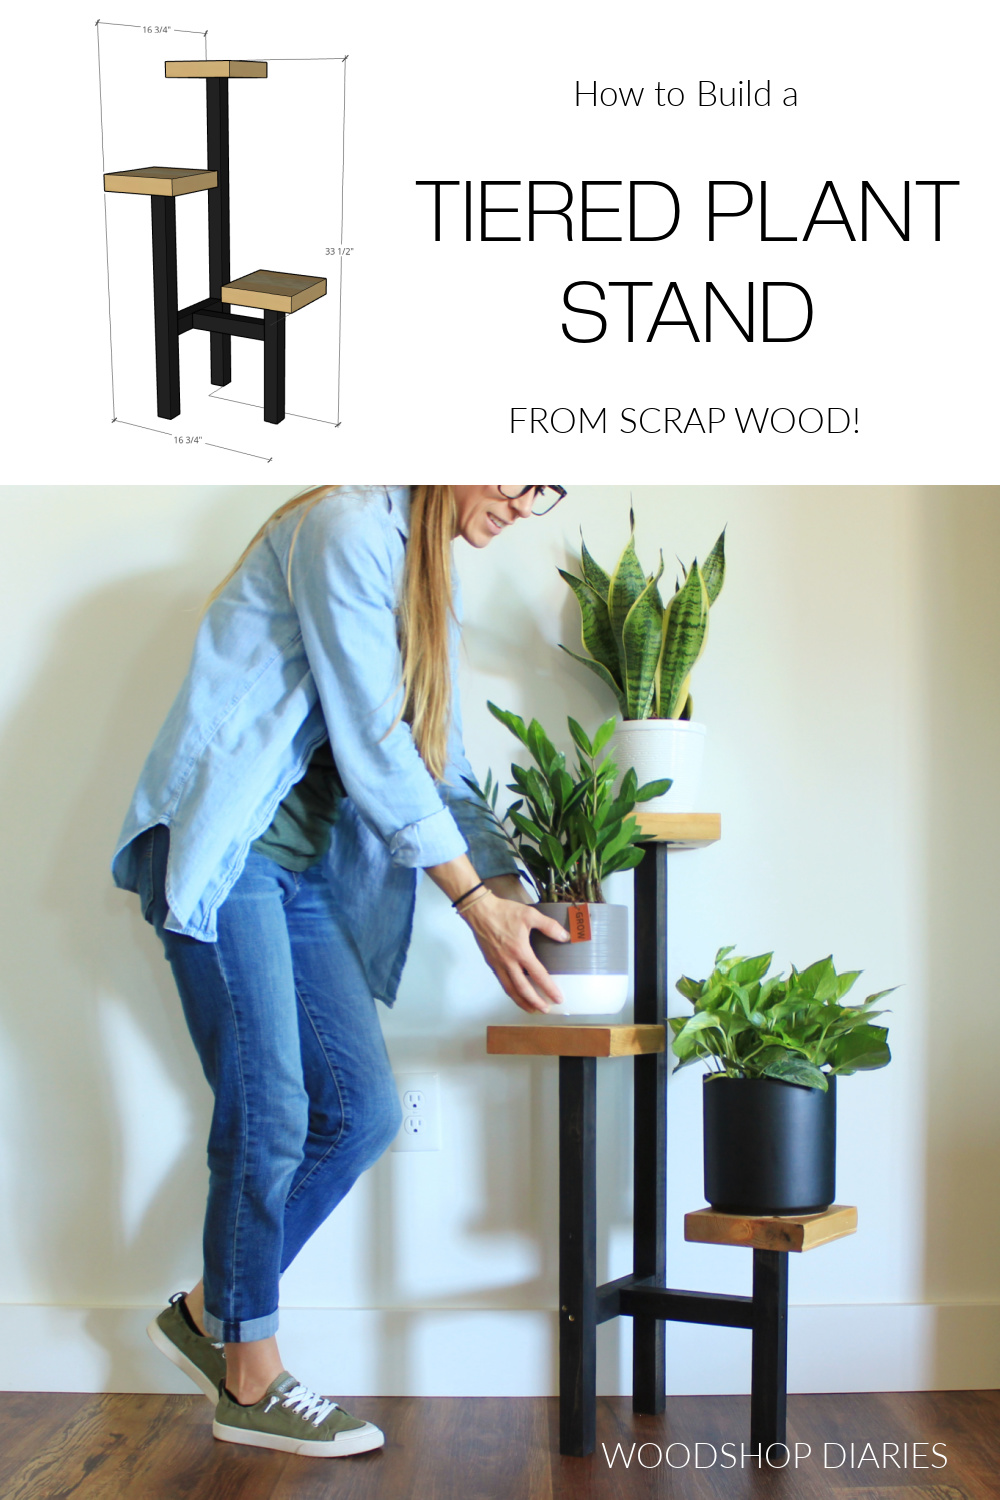
In this post, I’m sharing how to build an easy DIY tiered plant stand from scrap wood!
This tiered plant stand project is as practical as it is cute!
If your window sills are running out of room for all your indoor plants, this scrap wood plant stand is a great idea to display some of them on instead.
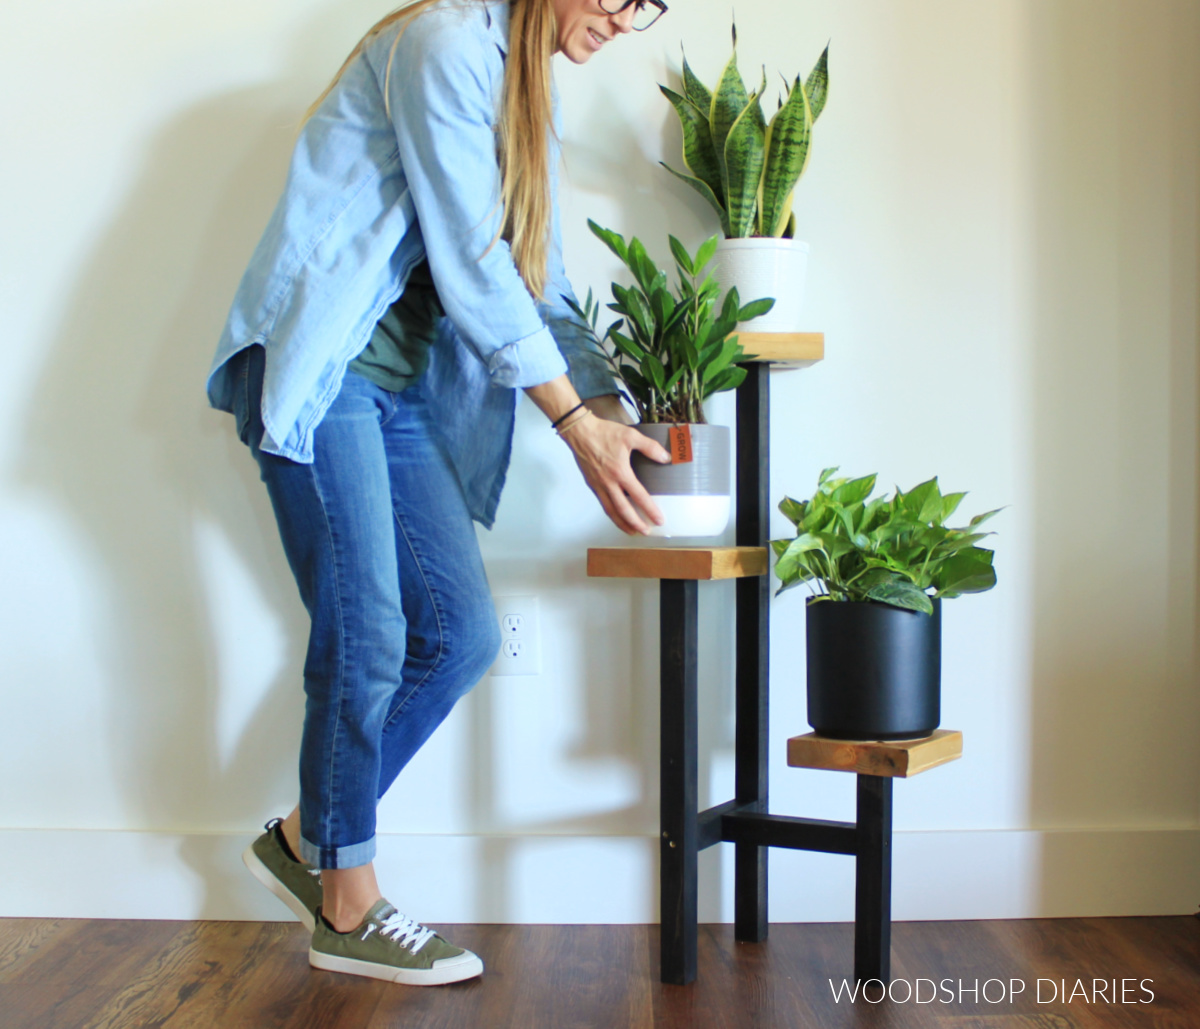
The tiered plant stand design takes up very little floor space and raises your plants off the floor to get better lighting and avoid drafts.
And, it only takes a few minutes to put together with pieces you probably already have in your scrap wood pile!
So let’s dive in and get building!
What You’ll Need:
*This post contains affiliate links. See policies page.
Tools:
- Miter Saw (or any saw that can cut straight lines)
- Drill/Driver
- Measuring Tape
- Clamp
Materials:
- Scrap 2x2s
- Scrap 2×8 pieces
- 2 ½″ wood screws
What to Know Before Building a Tiered Plant Stand
This is an incredibly simple DIY project, but just in case you want to add your own touches, here are some tips to take note of before building.
This project is intended for smaller, lighter weight pots.
While it can structurally hold larger, heavier pots, this stand is tall and skinny and adding large pots can cause it to be top heavy and easier to accidentally knock over.
Keep that in mind if you make modifications.
If 3 Tiers Aren’t Enough…
This plant stand obviously has three tiers. But, if you get creative, you can definitely add more tiers to it with a few more 2×2 pieces and tops.
You can simply “branch off” one of the tier posts and add another (or a few more) tier(s).
It’s Easy to Customize the Sizing
The exact measurements of these 2×2 pieces are completely customizable.
I’ll share what I used in the plans below, but these can be changed if you want the tiers taller, shorter, closer together, further apart, whatever.
I used scrap 2×8 pieces of wood cut into squares for the plant stand tops. But, you could also use ¾″ plywood pieces, or 2x6s or 2x10s, etc.
Again, the exact size of these tops isn’t critical, so use what you’ve got on hand and what fits your plant pot size.
Scrap wood projects are about making do with what you’ve got and seeing what you can make from it.
So use this as a starting point, and add your own customizations 🙂
Overall Size
The overall dimensions of this project as built from the plans below is 16 ¾″ deep x 16 ¾″ wide x 33 ½″ tall.

How to Build a DIY Tiered Plant Stand
If you prefer to watch, check out this quick tutorial video!
You can grab the measurements and project plans below in the step by step tutorial.
Prefer to print your plans? Grab the printable plans for this project here.
Step 1: Cut and Sand Plant Stand Parts
For this plant stand, I cut the following:
2x2s:
- (2) pieces 8″ long
- (1) piece 12″ long
- (1) piece 22″ long
- (1) piece 32″ long
2x8s:
- (3) pieces 7 ¼″ long

After these pieces were cut, I gave them all a good sanding before assembling.
It’s always good to sand individual pieces before assembling because getting in the corners after pieces are together is difficult.
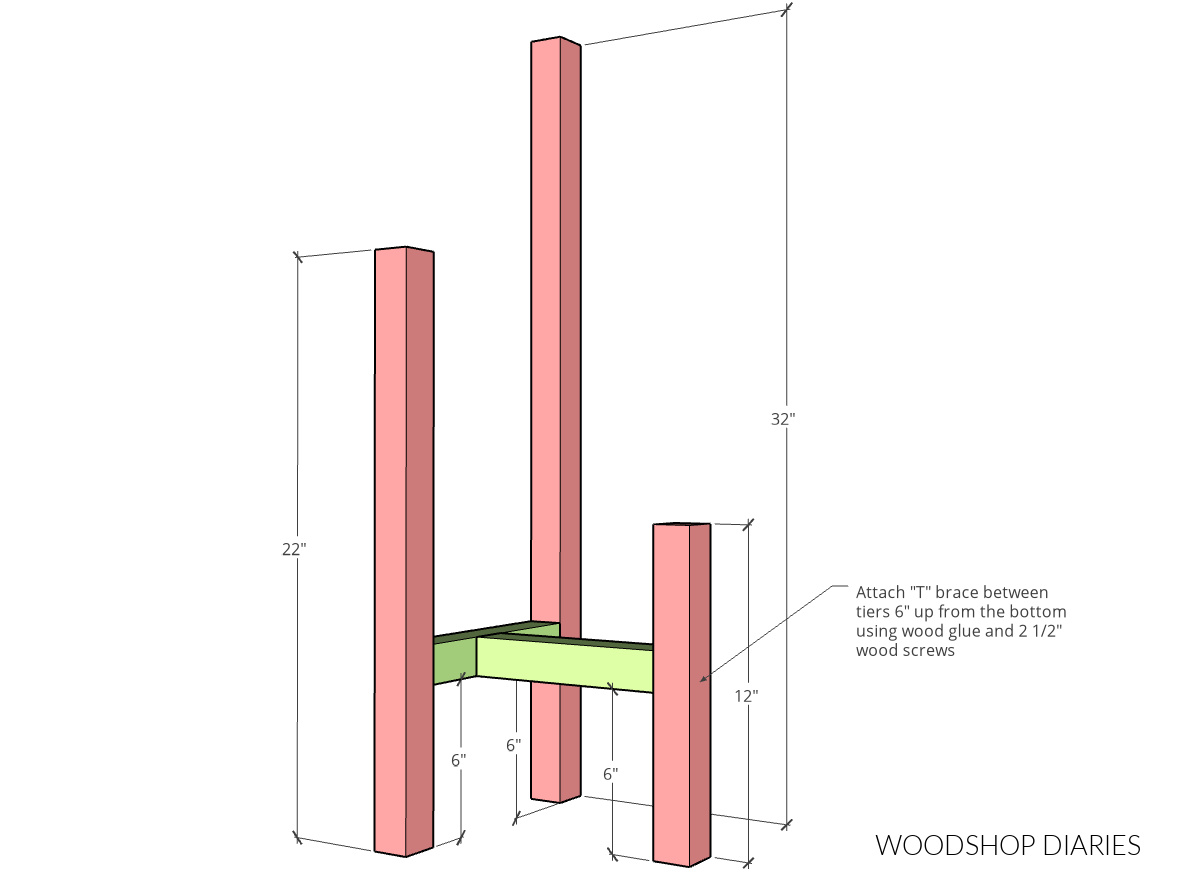
Step 2: Assemble “T” Brace
I took the two pieces of 8″ long 2×2 and assembled them together into a capital “T” shape.
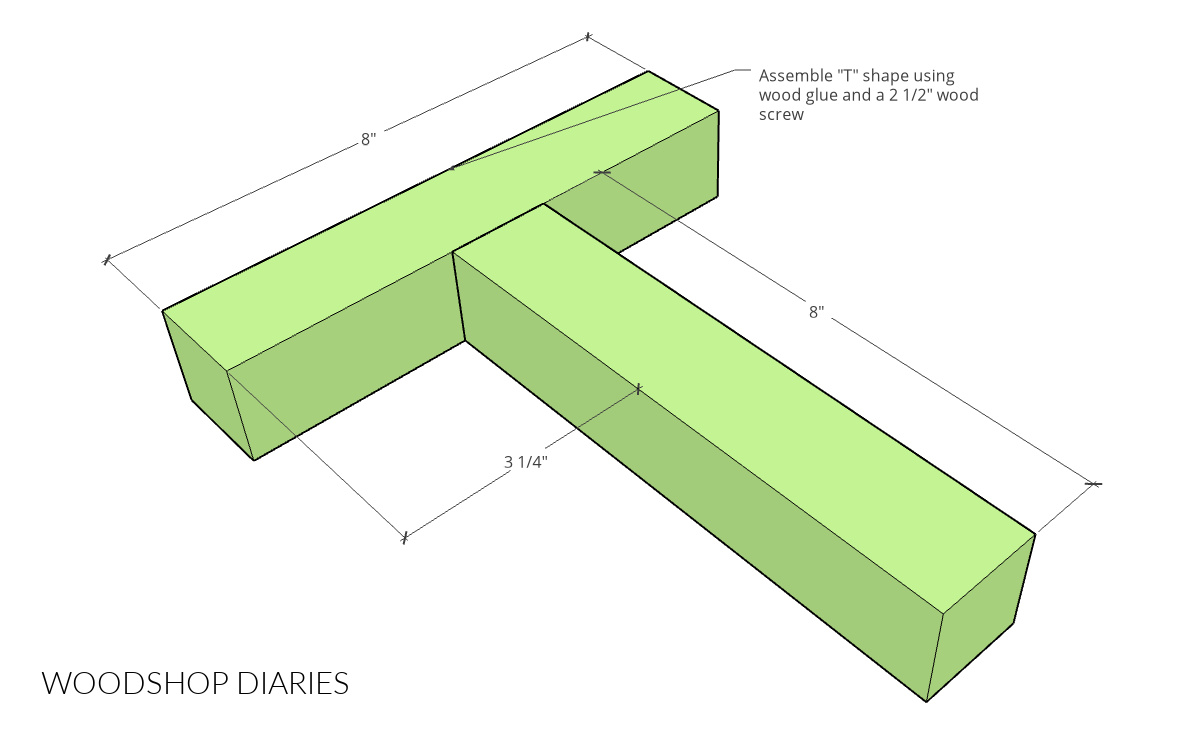
I used wood glue and a 2 ½″ wood screw to attach.
If you wanted, you could use pocket holes and screws for this instead.
RELATED: How to use a pocket hole jig
I was sure to predrill the hole first to help prevent the wood from splitting.

You can certainly use two screws per joint if you’d like to help prevent twisting, but I just used one screw.
Step 3: Attach Tiered Posts
After the “T” brace was together, I attached the rest of the 2x2s on each end.
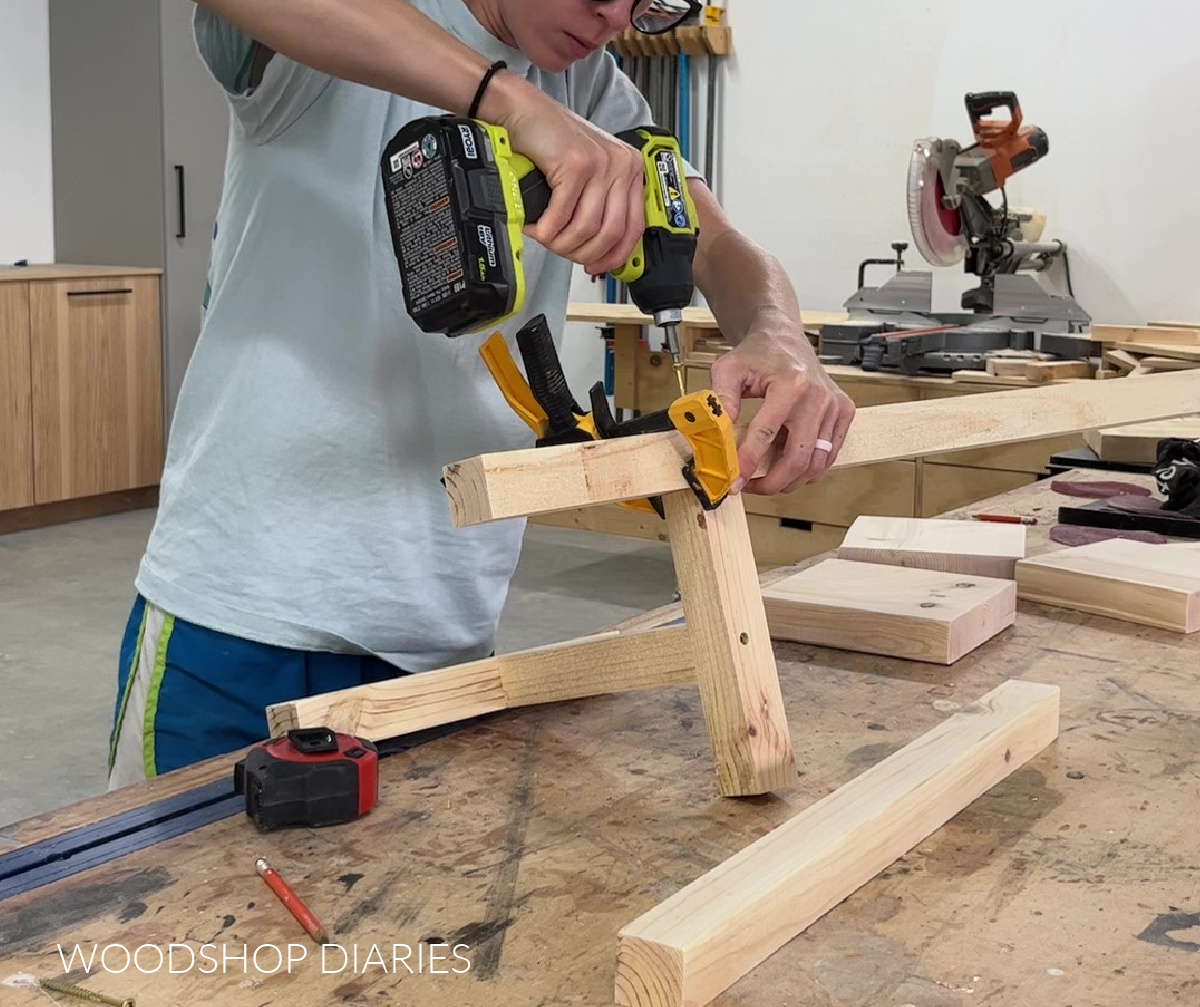
I made sure to attach the T brace 6″ up from the bottom of each post and used wood glue and 2 ½″ wood screws to secure.
Again, you could drill 1 ½″ pocket holes into the ends of the “T” brace and attach with 2 ½″ pocket hole screws instead of you prefer.
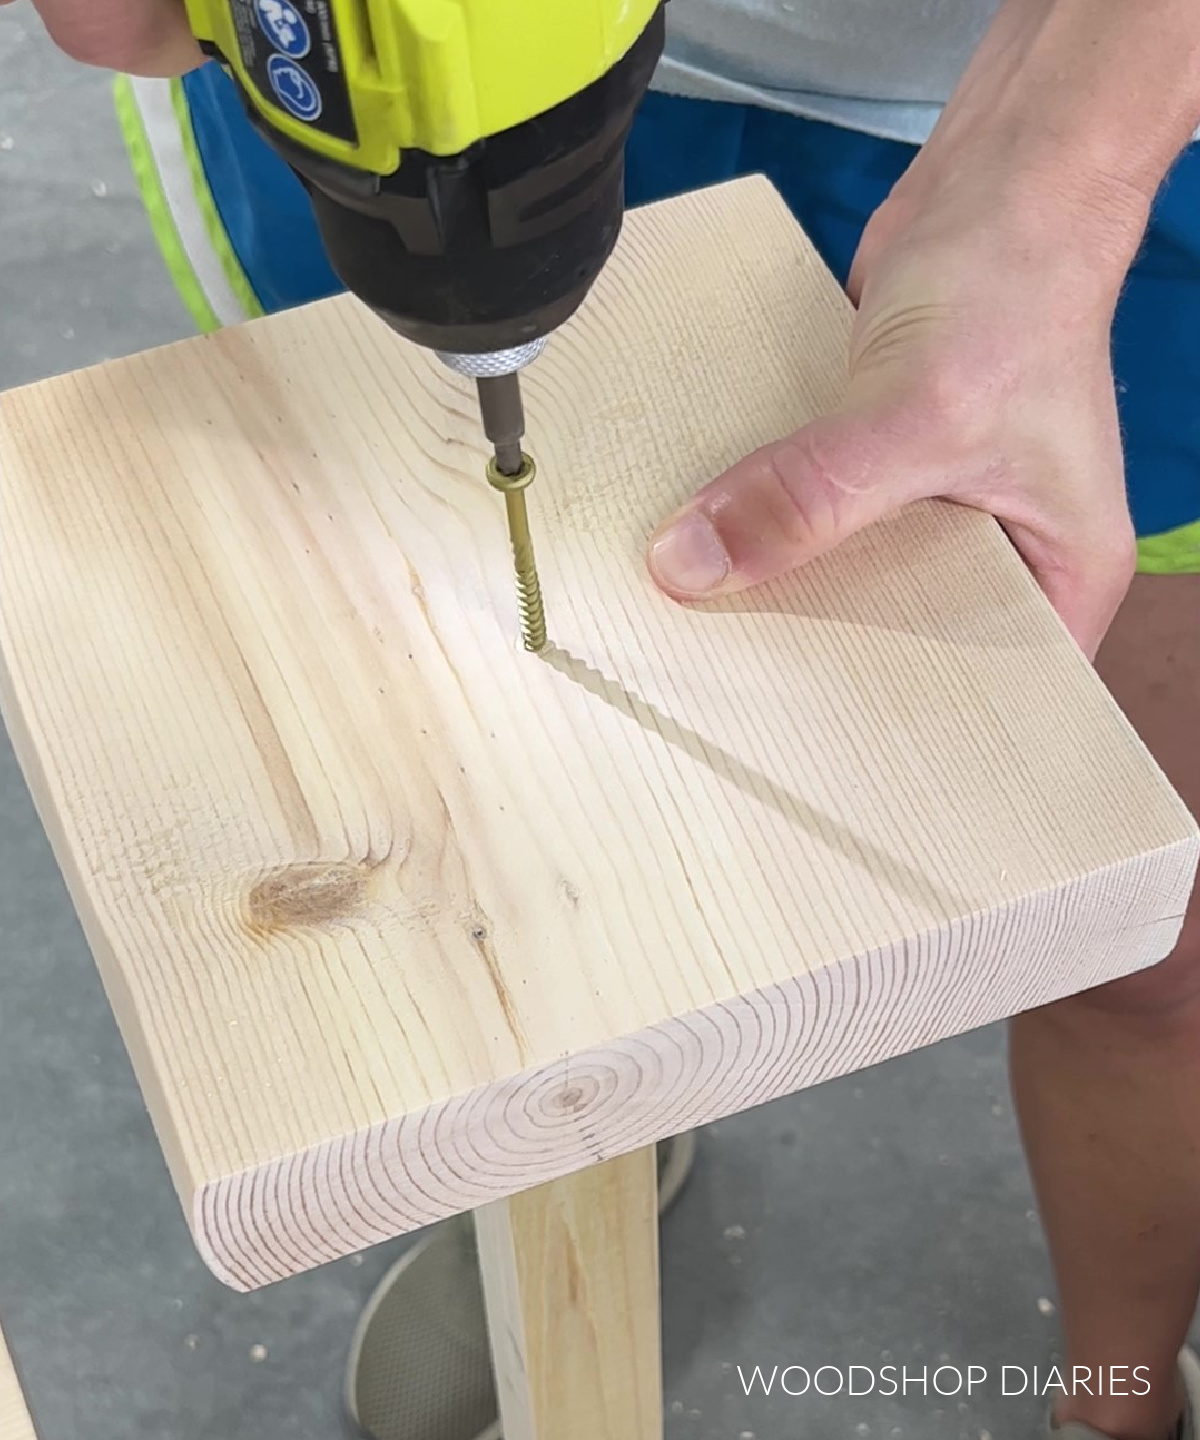
Step 4: Add Plant Stand Tops
Now the tiered frame is together, it’s time to add the tops–the part where the plants will sit on.

I used 2x8s, but as mentioned previously, you can also use other sizes of wood–whatever fits your plant pots.
I centered these on each tiered post and secured using wood glue and 2 ½″ wood screws through the center.
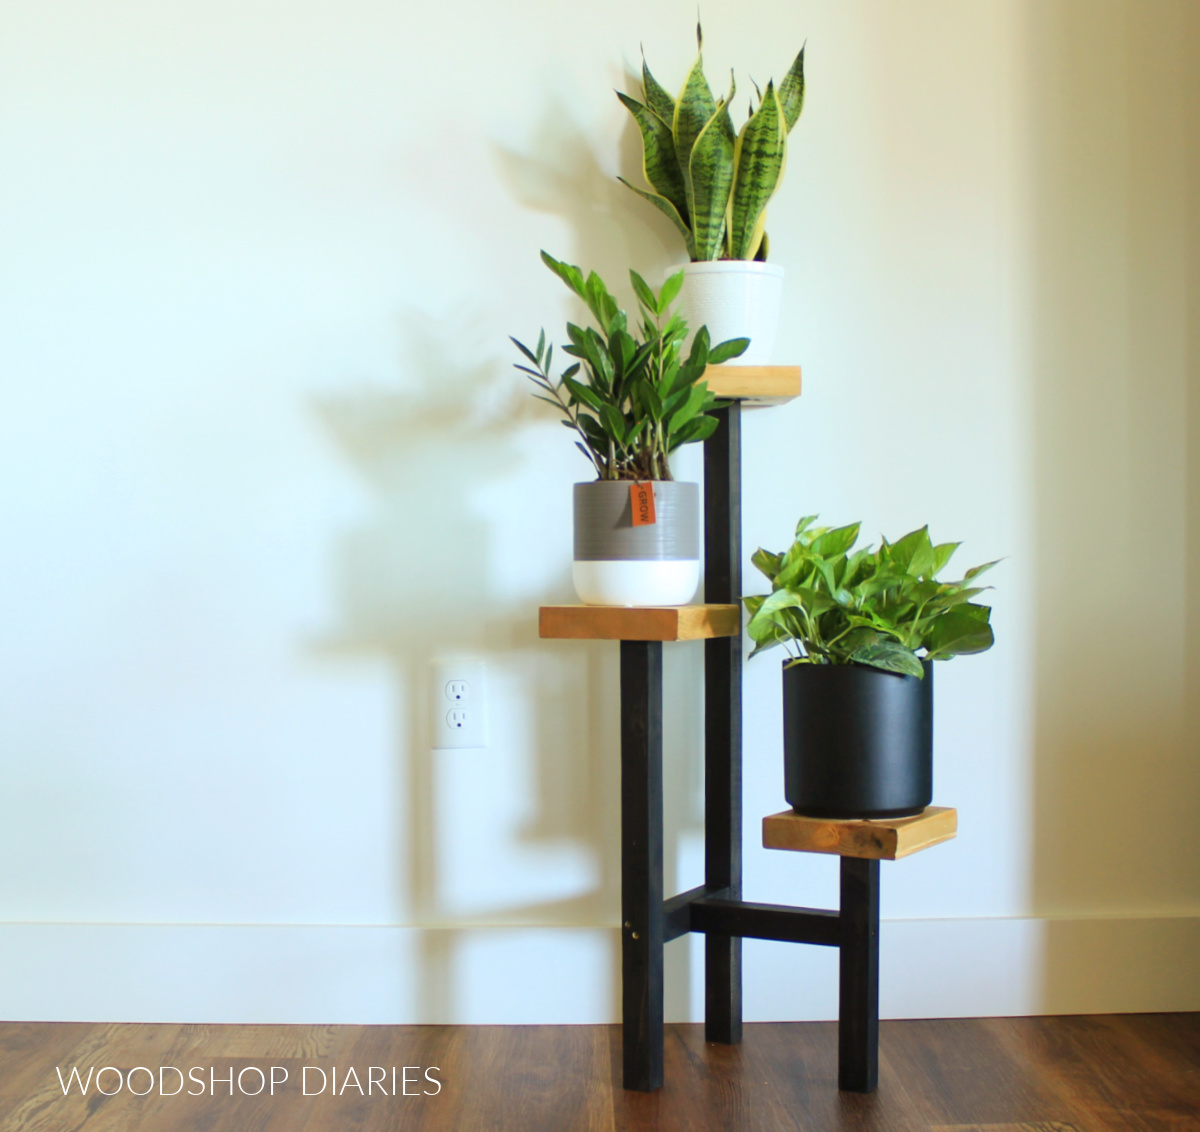
Step 5: Finish
At this point, all that’s left is to finish as desired!
Prefer to print your plans? Grab the printable plans for this project here:
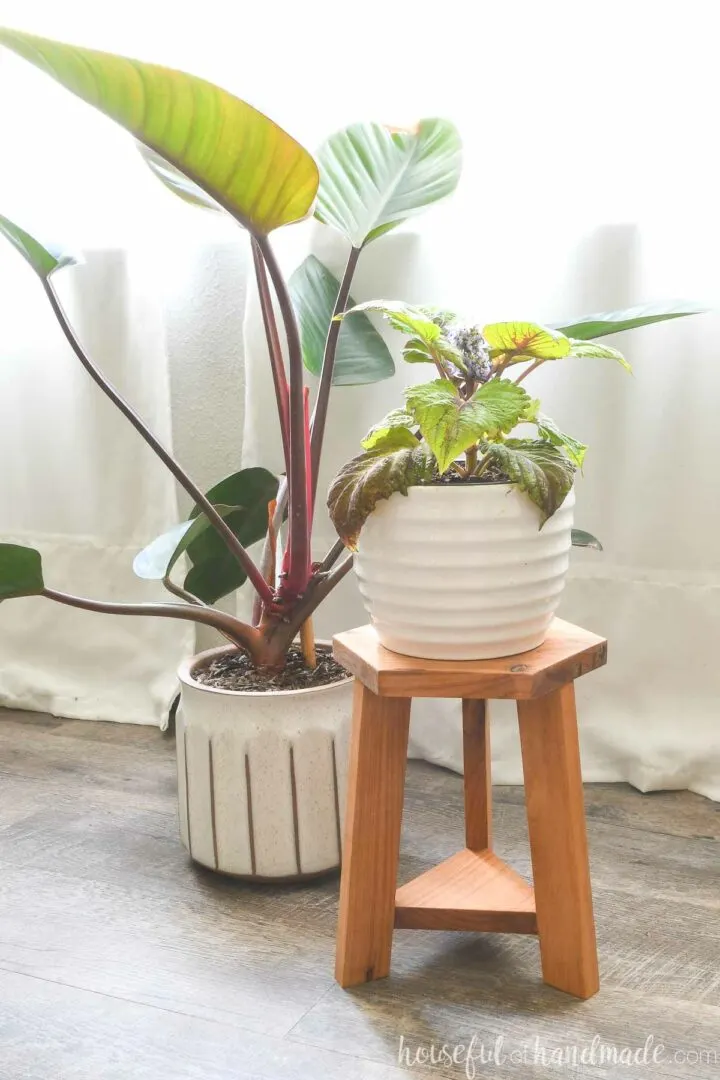
I stained the base with Varathane Ebony and the tops with Minwax Golden Oak.
And now it’s ready to display a few of my favorite indoor plants!
If you’re looking to start or add to your indoor garden collection, I grabbed these Vigoro indoor plants from The Home Depot and they have several varieties to pick from!

You can place this tiered plant stand by your favorite chair, next to your window, or tuck it away in a corner next to your desk or bookshelf.
More Fun with Scrap Wood
Can’t get enough scrap wood projects?? I teamed up with my friend, Kati, from Houseful of Handmade to share some “Scrap Wood Summer” Projects!
Check out all the projects in the scrap wood series below. Click on an image to learn how to make each one!


Subscribe to the newsletter below to be the first to know about new projects, plans, and woodworking tips on Woodshop Diaries!
If you enjoyed this project and want to save it for later, don’t forget to pin it or share it to your favorite social channel!
Until next time, friends, happy building!