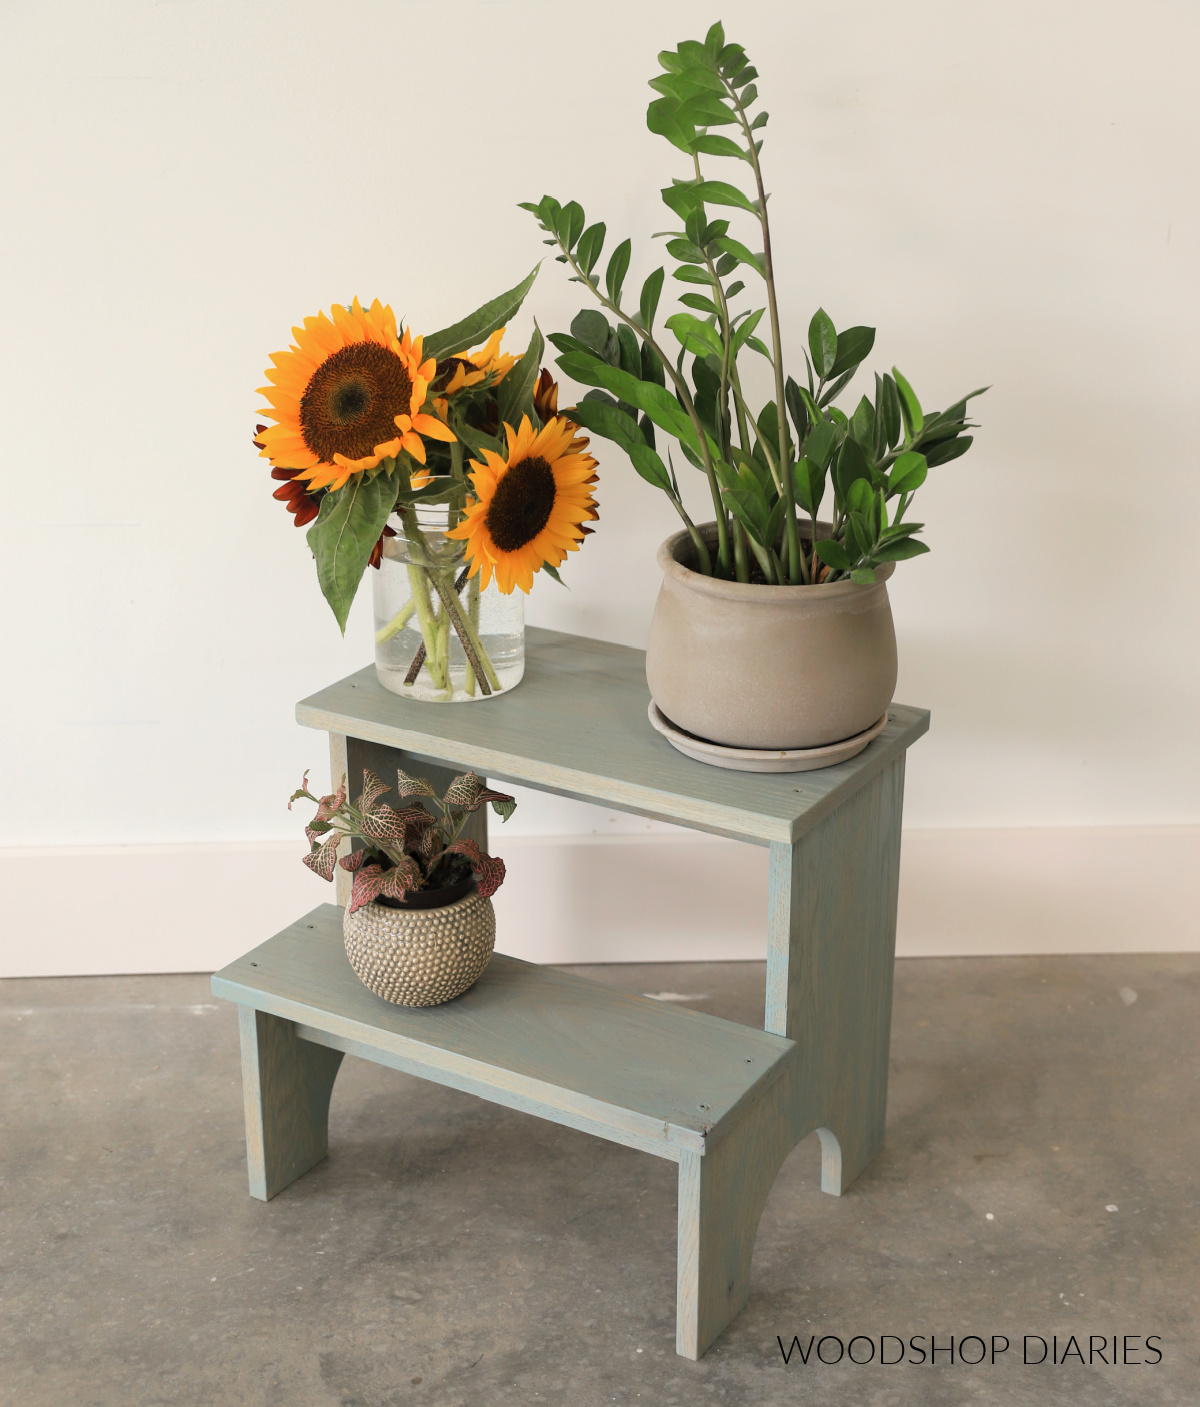
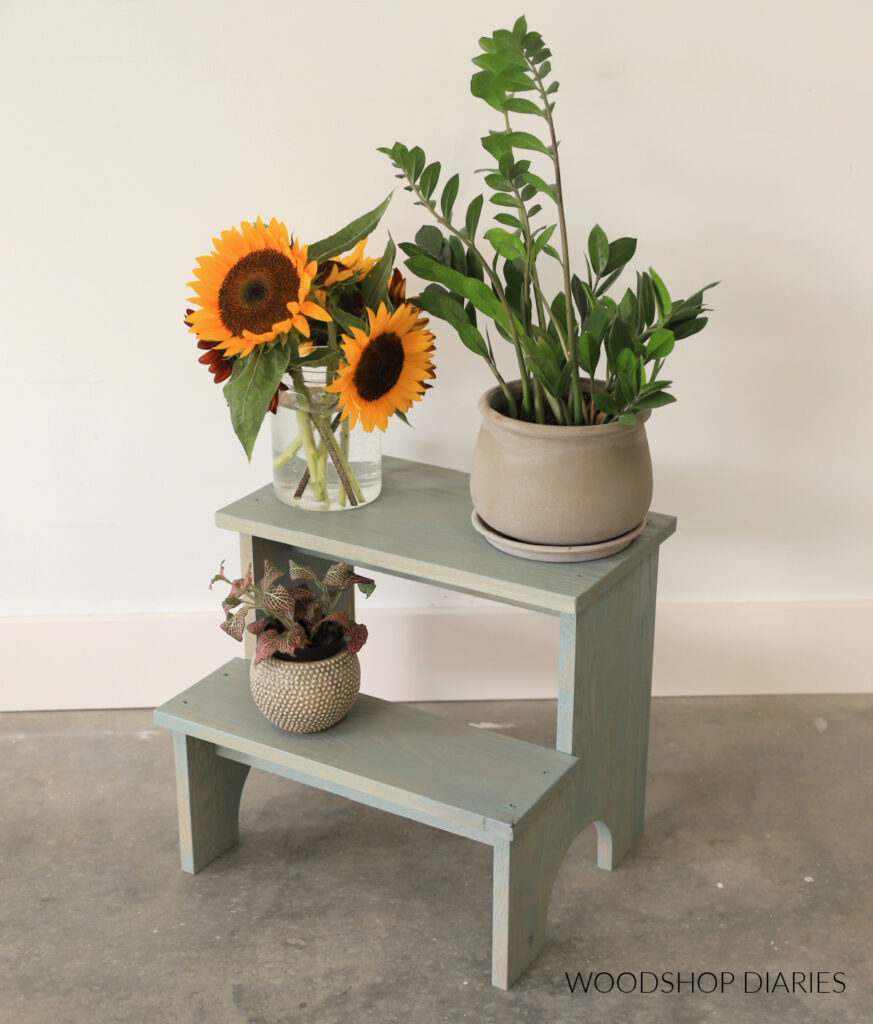
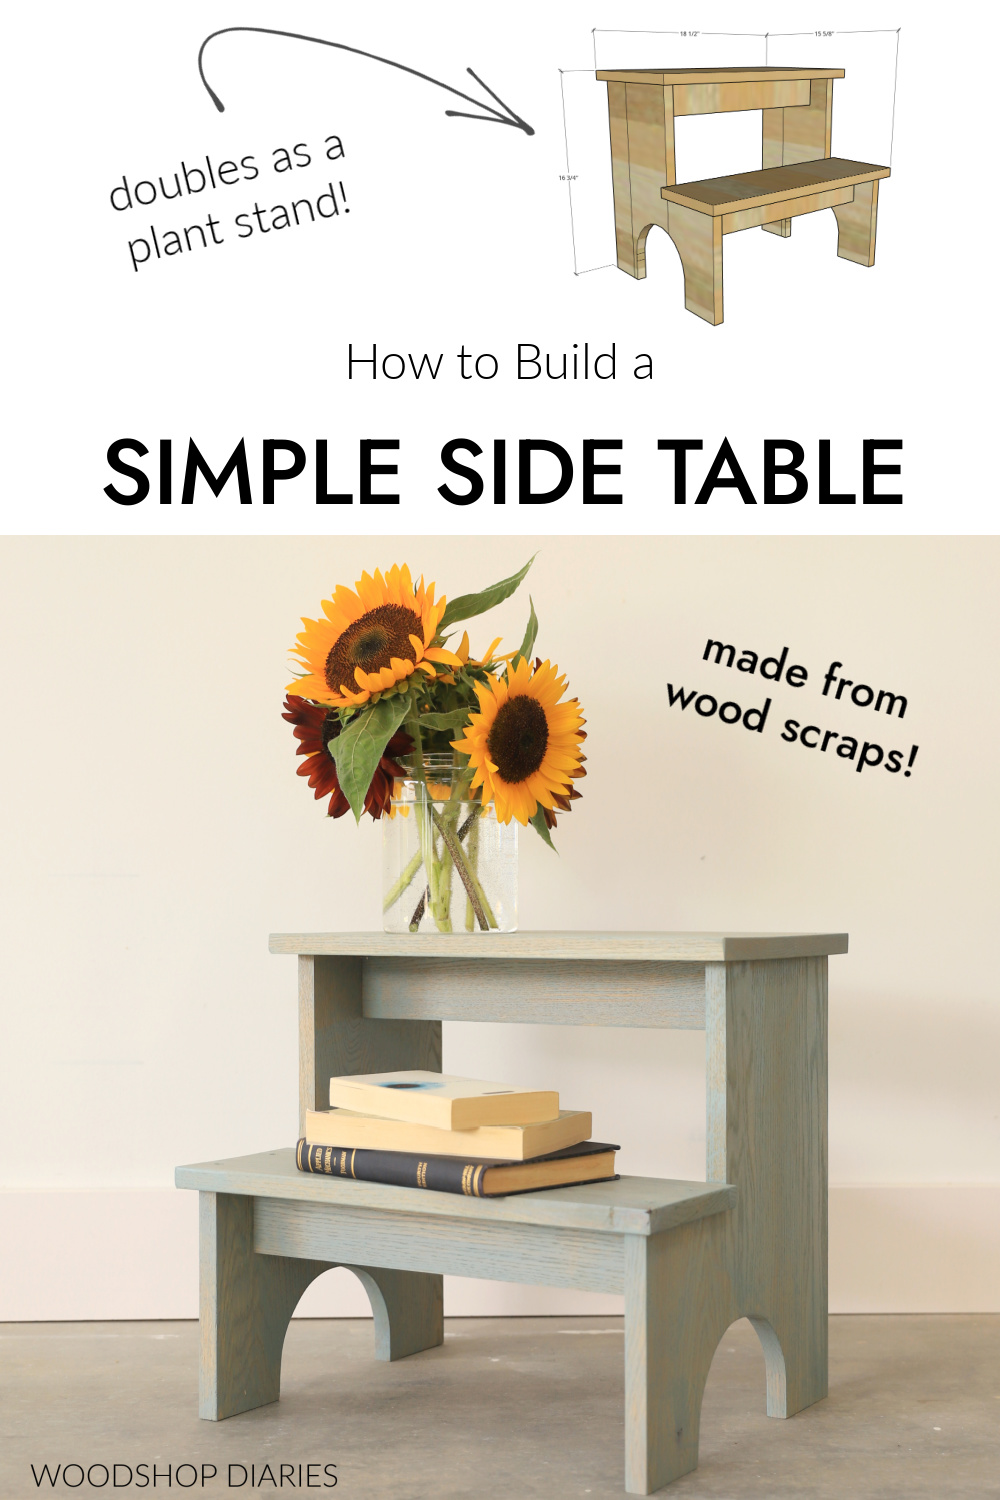
In this post, I’m sharing how to build a simple DIY side table that could also double as a plant stand!
This easy scrap wood project features two tiers for displaying or storage and can be customized to just about any size you’d need.

I’ve been loving arches lately, so I used a jig saw to add some cut outs to each for some added detail.
But you could customize tons of fun shapes in the sides to give it an antique or vintage look.
This would be perfect on the porch, next to the couch, or even as a decorative step stool! If you’re ready to build one of your own, I’m sharing the “how-to” below.
*This post contains affiliate links. See website policies.
A few notes before building
This simple side table is intended to be a scrap wood project made from 1×6 scraps. However, if you don’t have any 1×6 scraps to use for this, you can certainly purchase a 1×6 board (you’ll need approximately 12′ of board) to build this with.
Alternatively, you can also use ¾″ plywood scraps or any other 1x thick lumber scraps instead. Just note some of your dimensions may need to be adjusted from what’s shown below.
I used scrap red oak wood for this project, but any wood type you had available would work fine. You can even mix and match wood types for some extra character!
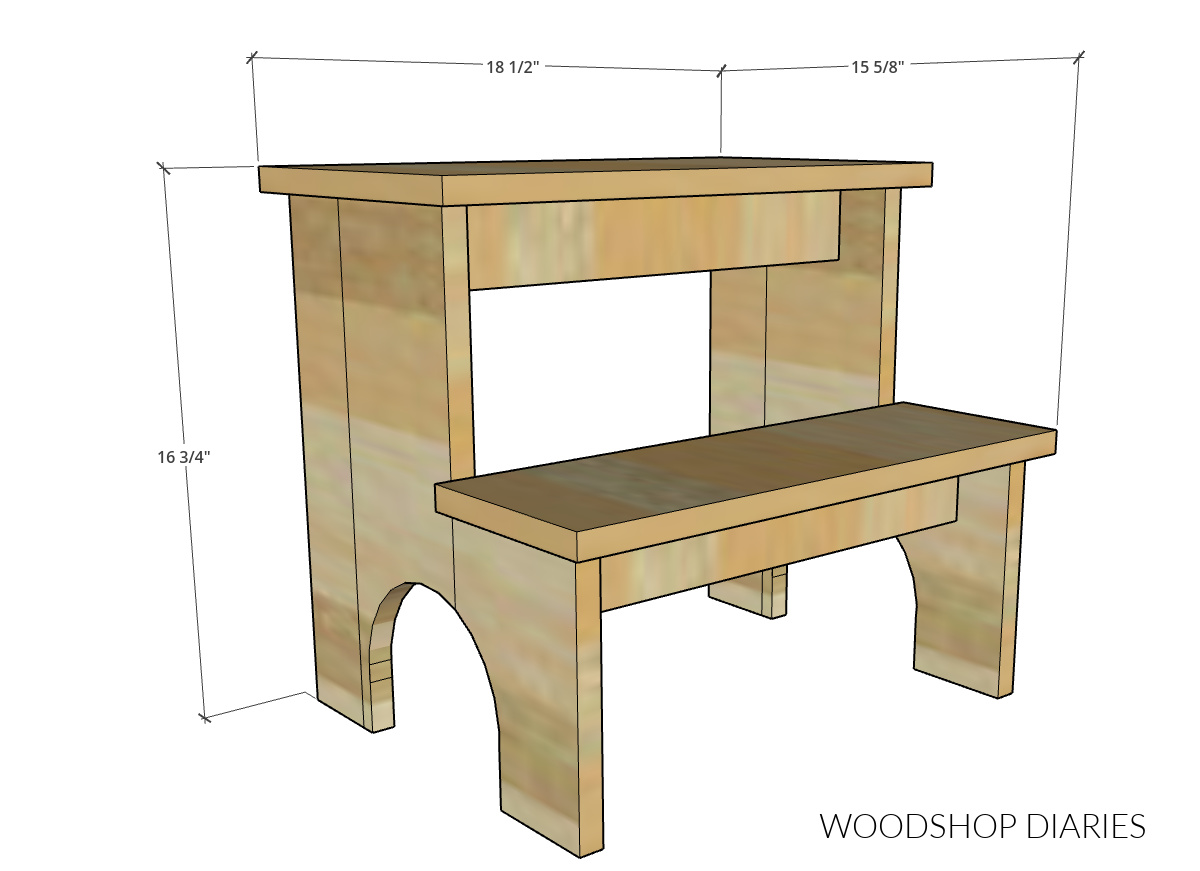
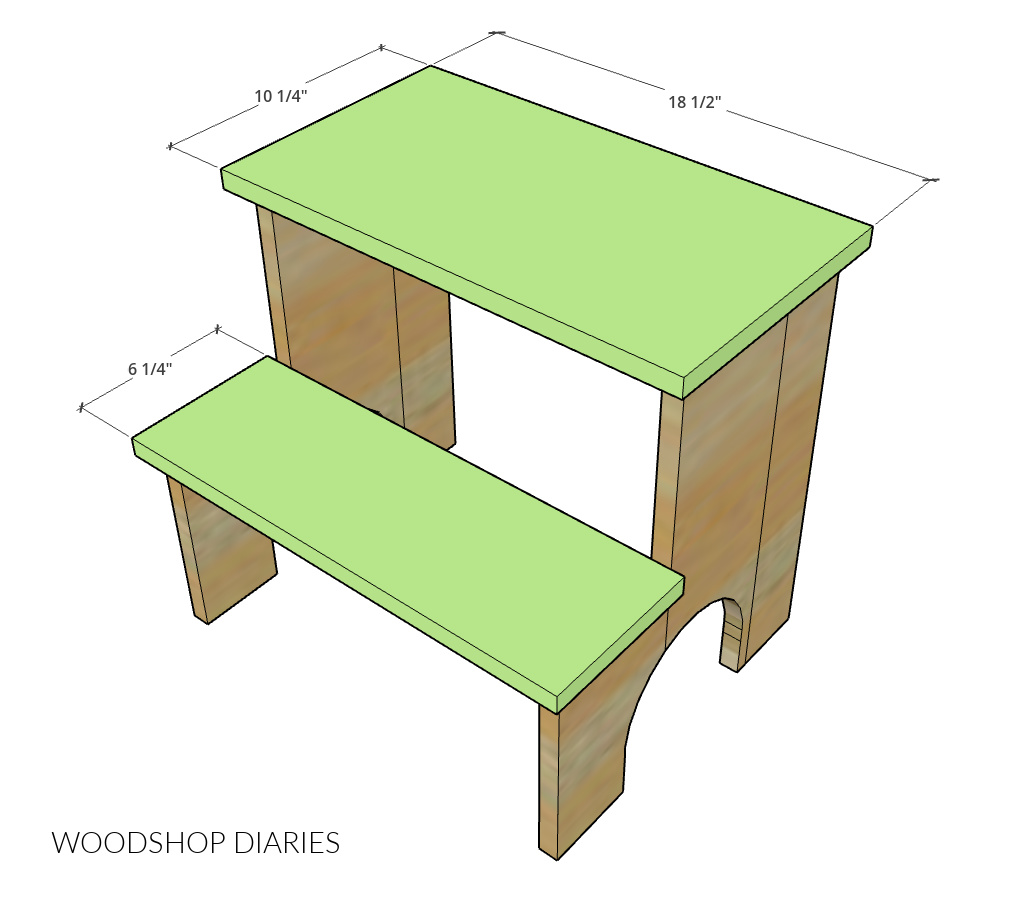
Overall dimensions
The overall dimensions of this simple side table plant stand are approximately 15 ⅝″ deep x 16 ¾″ tall x 18 ½″ wide.
Side tables and plant stands come in hundreds of sizes. Feel free to modify your table to fit your needs as there isn’t really a “standard” size.
The 16 ¾″ height may work great for some applications, but may be a little short for others. You can easily adjust the overall height by cutting the pieces in step 1 longer or shorter as desired.
Enjoy DIY projects and woodworking plans? Sign up for priority access for the latest posts on Woodshop Diaries!
How to Build a Plant Stand Side Table
This is a great beginner woodworking project that requires minimal tools. It’s simple, fun to build, and provides several options for customizations.
A miter and/or table saw are helpful for some of the straight cuts, but not necessary. You can make all the cuts shown here using only a jig saw if that’s all you have.
And if you don’t have large clamps to glue up your panels in step 1, you could also use pocket holes and screws to act as a temporary clamp. Once the glue is dry, remove the pocket hole screws to avoid cutting into one in the steps following.
Tools & Materials
Tools:
- Jig Saw
- Pocket Hole Jig
- Drill/Driver
- Clamps
Materials:
- 1×6 scraps
- Wood Glue
- 1 ¼″ wood screws
- 1 ¼″ pocket hole screws
Step 1: Glue up Wood Panels
This project was built entirely of 1×6 scraps that I glued together. If you don’t have 1x6s, any combination of 1x board widths (or even ¾″ plywood) would also work for this.
I created the two sides and the top panel by cutting the boards to length, then gluing them together.
For the two side panels, I cut:
- (4) 1×6 boards to 16″ long
- (2) 1×6 board to 8″ long
*each side consists of 2 long and 1 short board
For the top panel, I cut:
- (3) 1×6 boards to 18 ½″ long
Once the pieces were cut, I glued the edges and clamped them into the shapes shown below.
RELATED: How to glue up wood panels
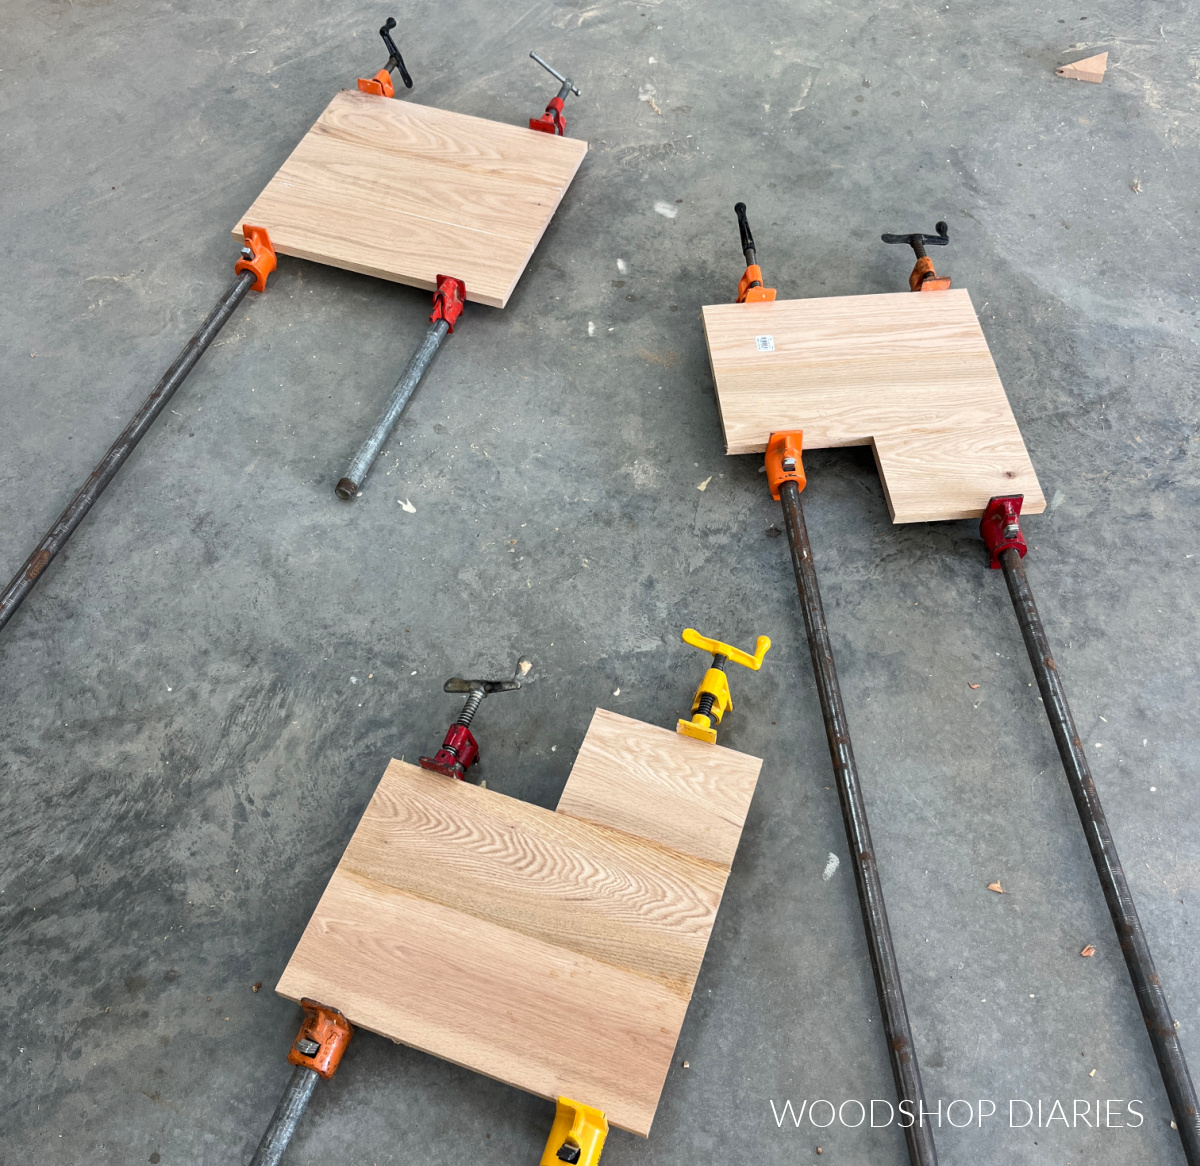
Notice that the two side panels consist of two 16″ and one 8″ long board. Allow panels to fully cure before removing from clamps.
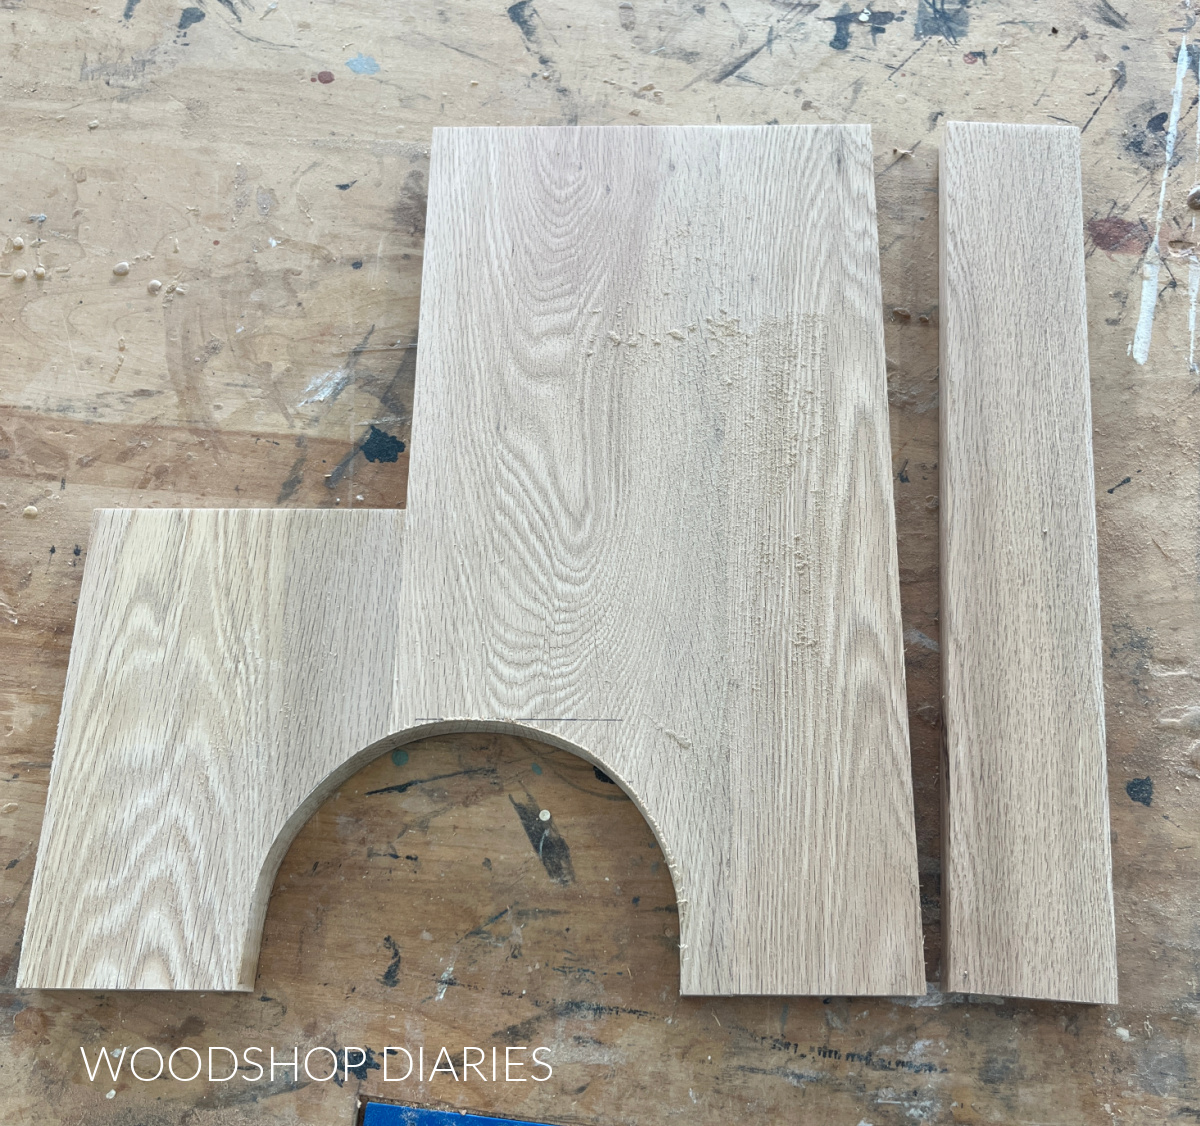
Step 2: Cut Out Side Table Pieces
After the glue had dried, I removed each panel from the clamps and sanded them smooth.
RELATED: How to sand wood
Then, I trimmed 2 ½″ off the back edge (the longer side) of each side panel. (Don’t trim the top panel just yet!)
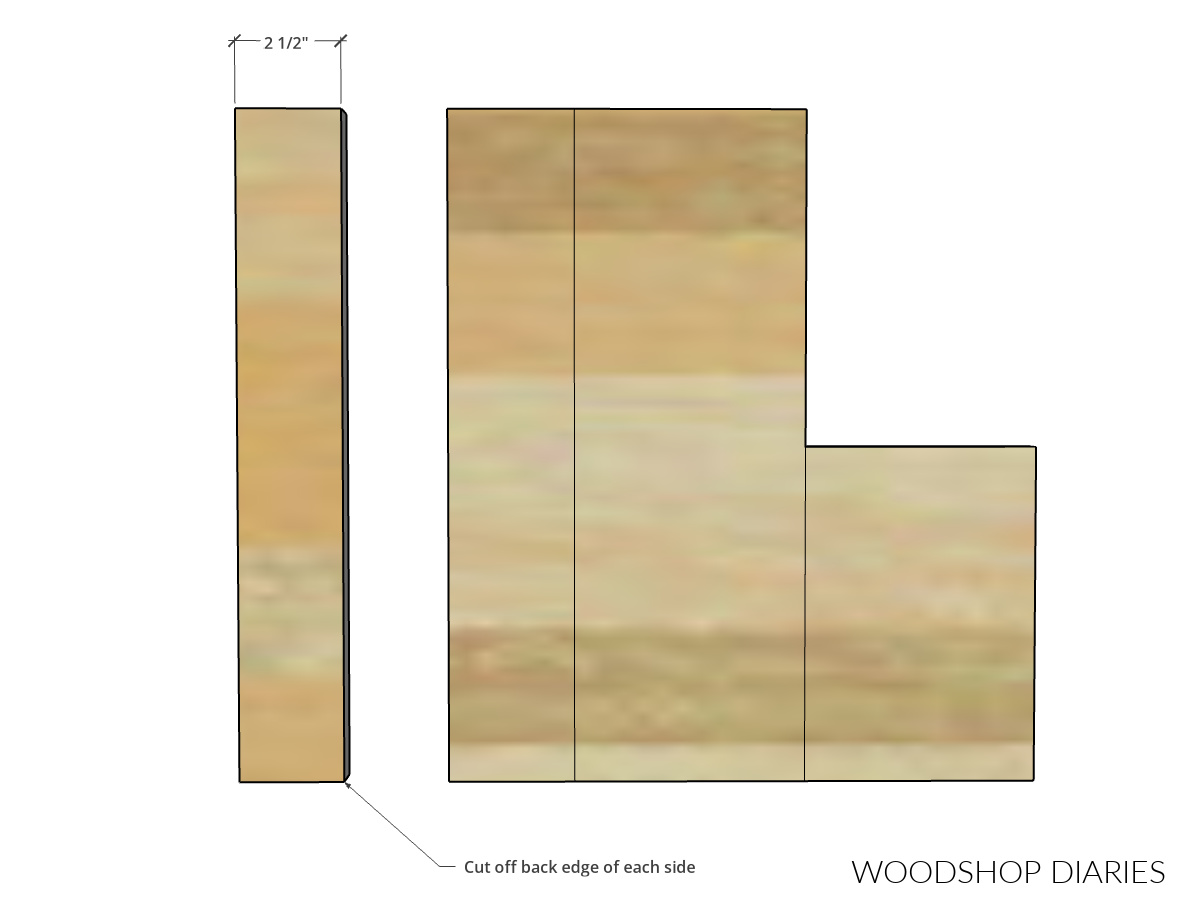
I set the two 2 ½″ x 16″ long strips to the side for now.
TIP: You can trim this with a jig saw, circular saw, table saw, or any saw that you prefer to cut a straight line.
Then, I used a gallon size stain can to trace an arch on the two sides along the bottom edge.
Feel free to get creative here if you’d like a different shape or size cut out. A diamond, heart, or V shape would work well, too.
I cut along the curved line with a jig saw, then hand sanded to smooth out around the cut. So those two side panels from step 1 should now look like this:
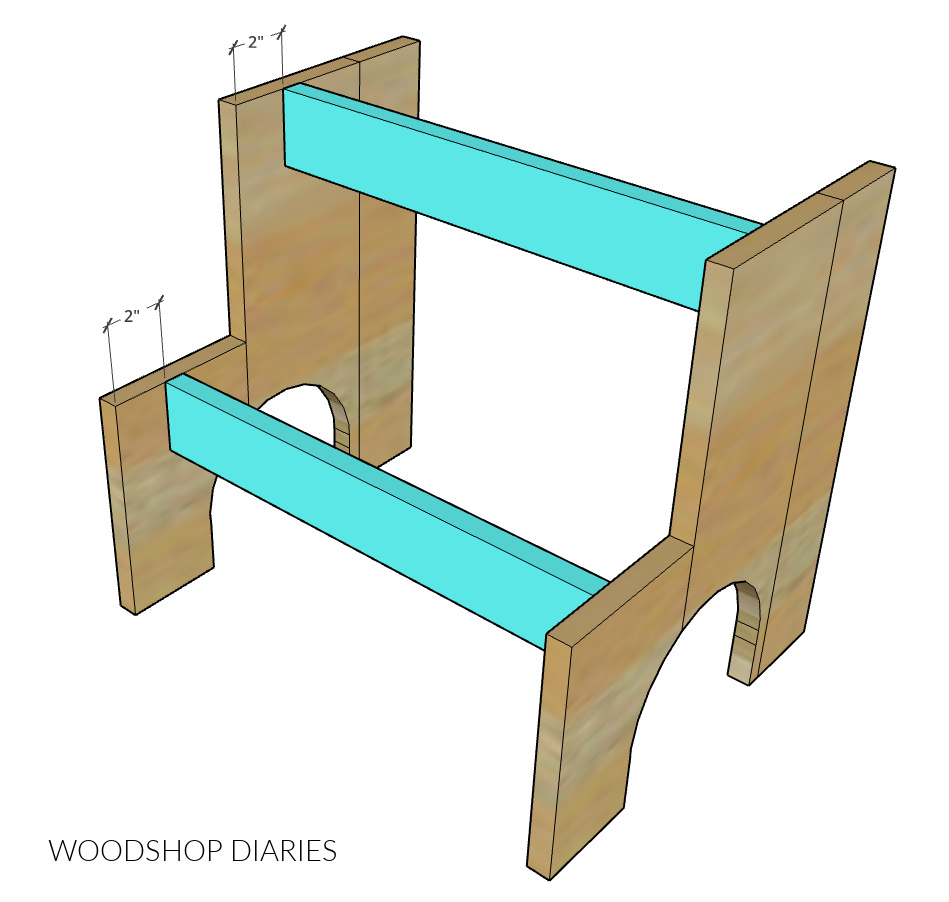
Step 3: Assemble Table Frame
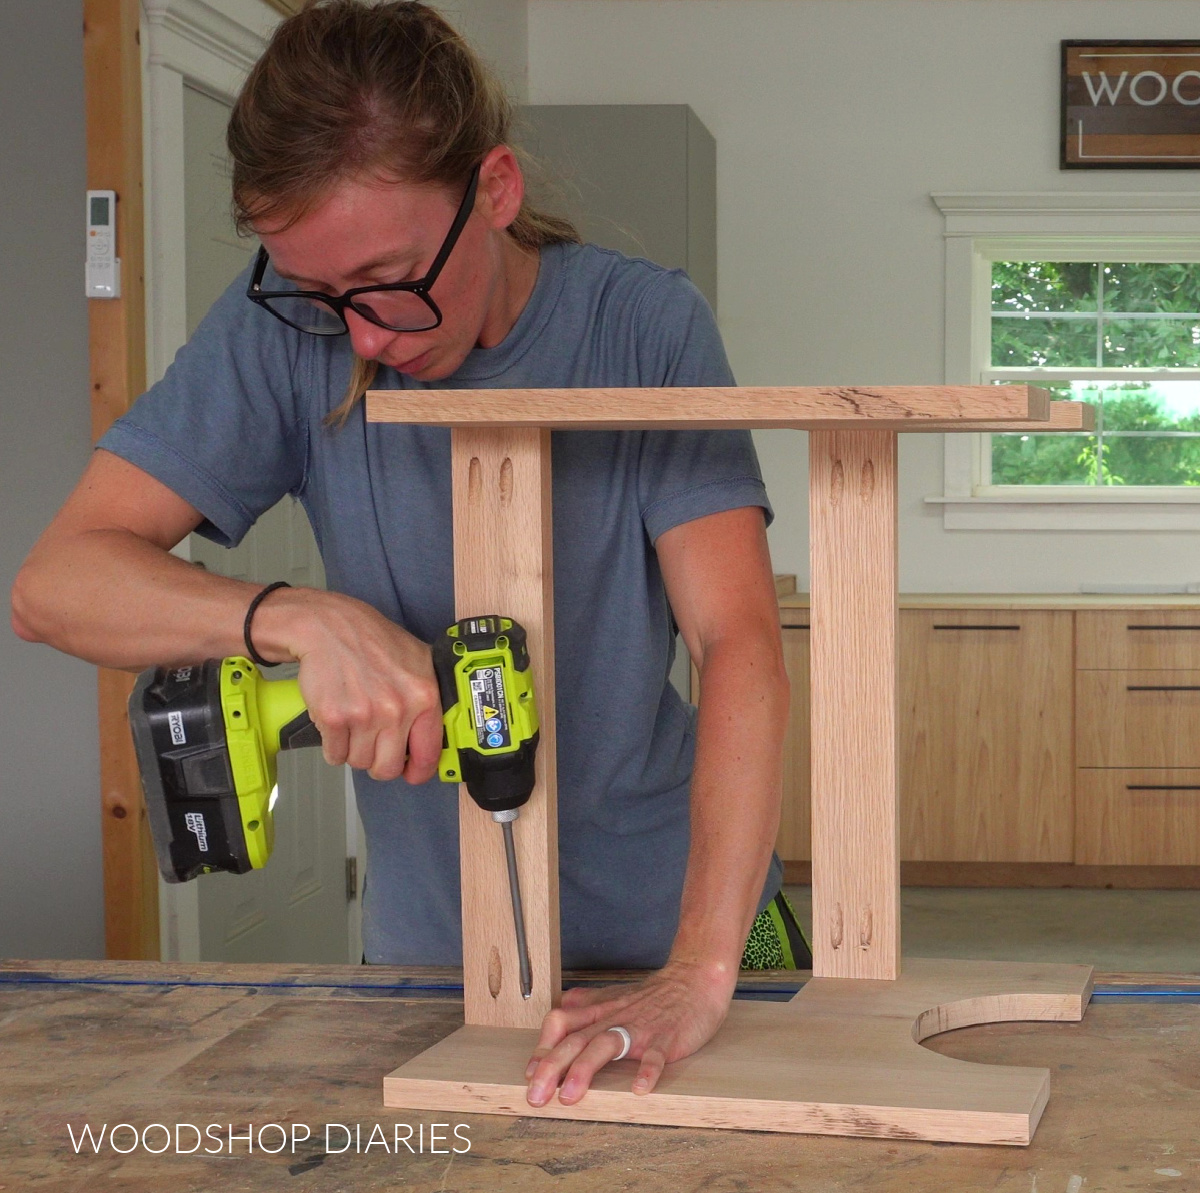
I drilled ¾″ pocket holes into the ends of the 2 ½″ wide strips I trimmed from the side panels in step 2.
RELATED: How to drill pocket holes
I attached these between the two side panels using 1 ¼″ pocket hole screws so that they were approximately 2″ inset from the front edge. Face the pocket holes toward the back.
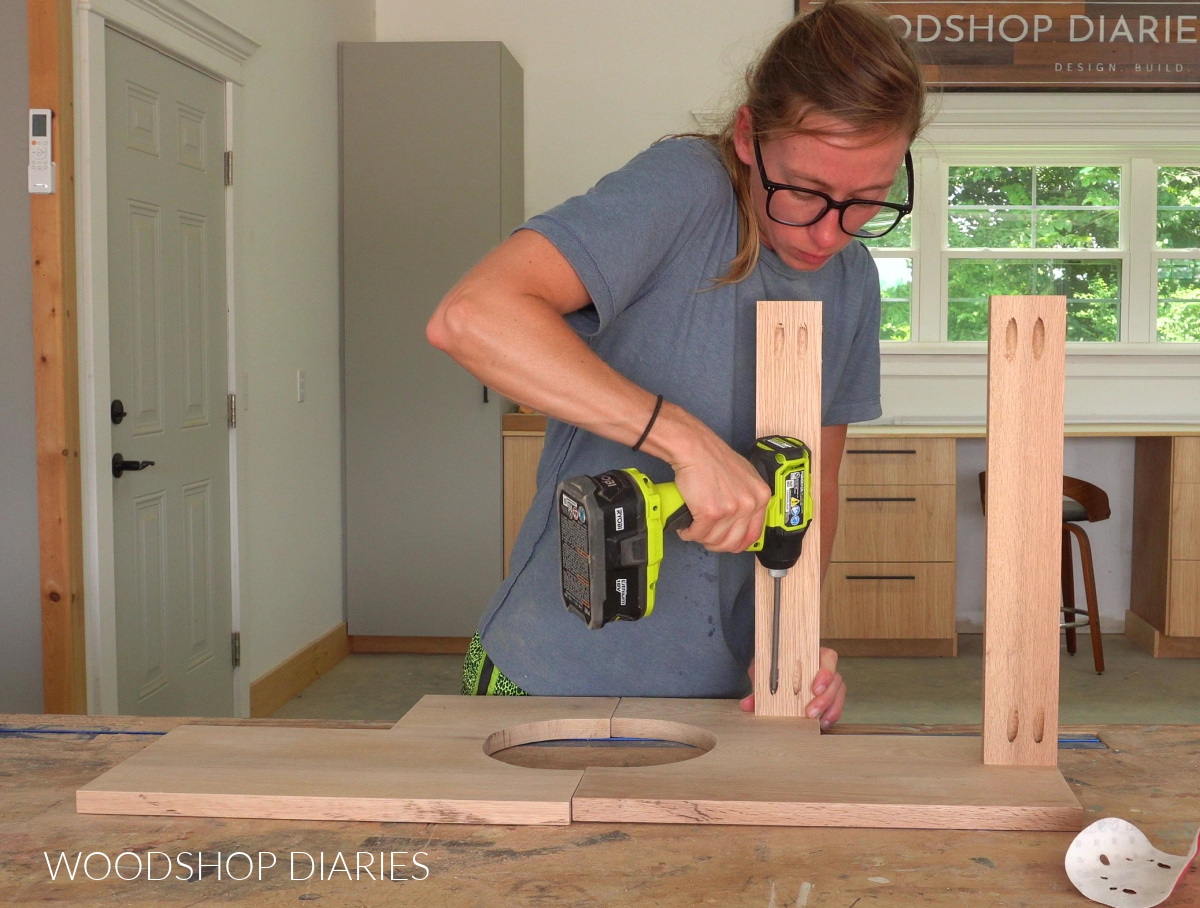
Exact placement here isn’t critical. Feel free to install these as close or as far away from the front as you want as long as they’re flush to the top of each tier.
Step 4: Add Tops
Once the “frame” of the table was together, all that’s left is adding the tops.
I trimmed the top glued up panel from step 1 down into two pieces–one was approximately 10 ¼″ wide and the other approximately 6 ¼″ wide.
Then I centered the smaller one on the front tier and the larger one on the back.
I secured these in place using 1 ¼″ wood screws from the top. Be sure to predrill pilot holes to prevent wood splits!
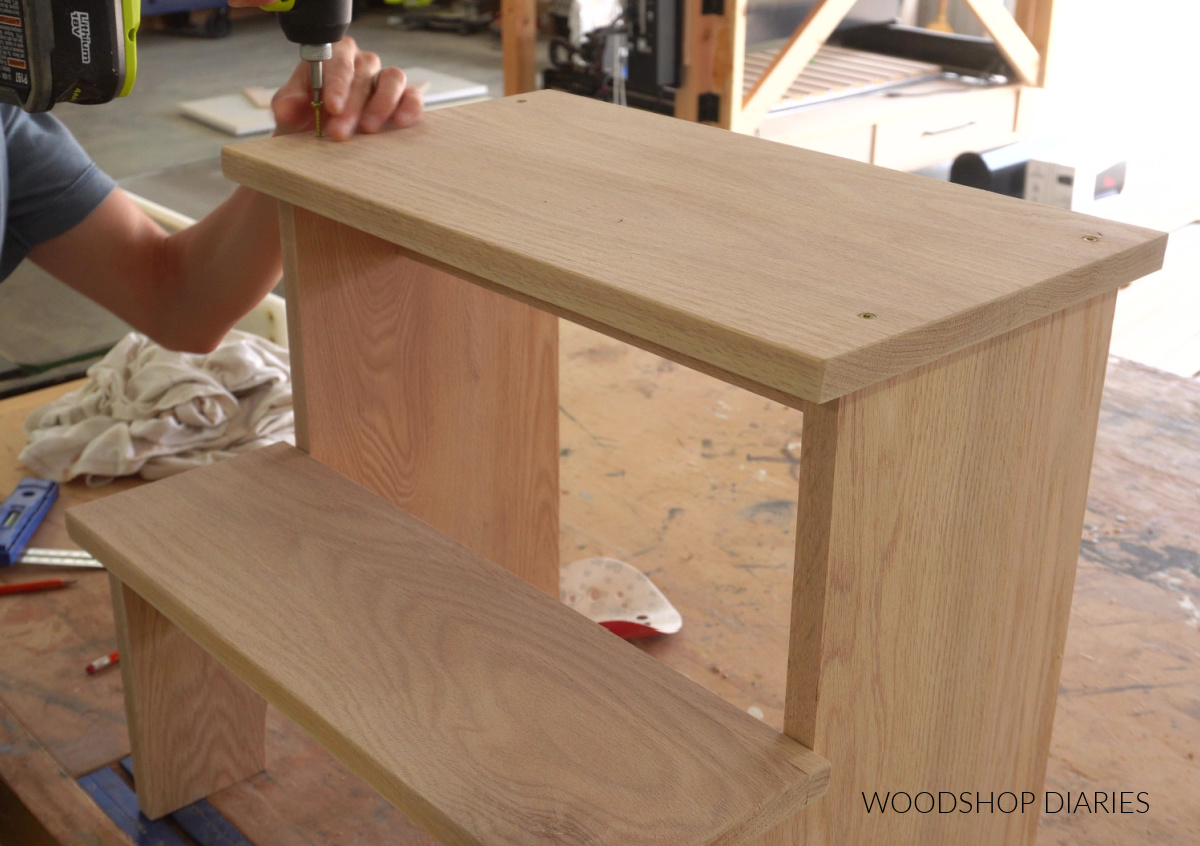
If you didn’t want to see the screw heads, you can certainly countersink your holes and add wood plugs. These were barely noticeable after adding finish, so I left them.
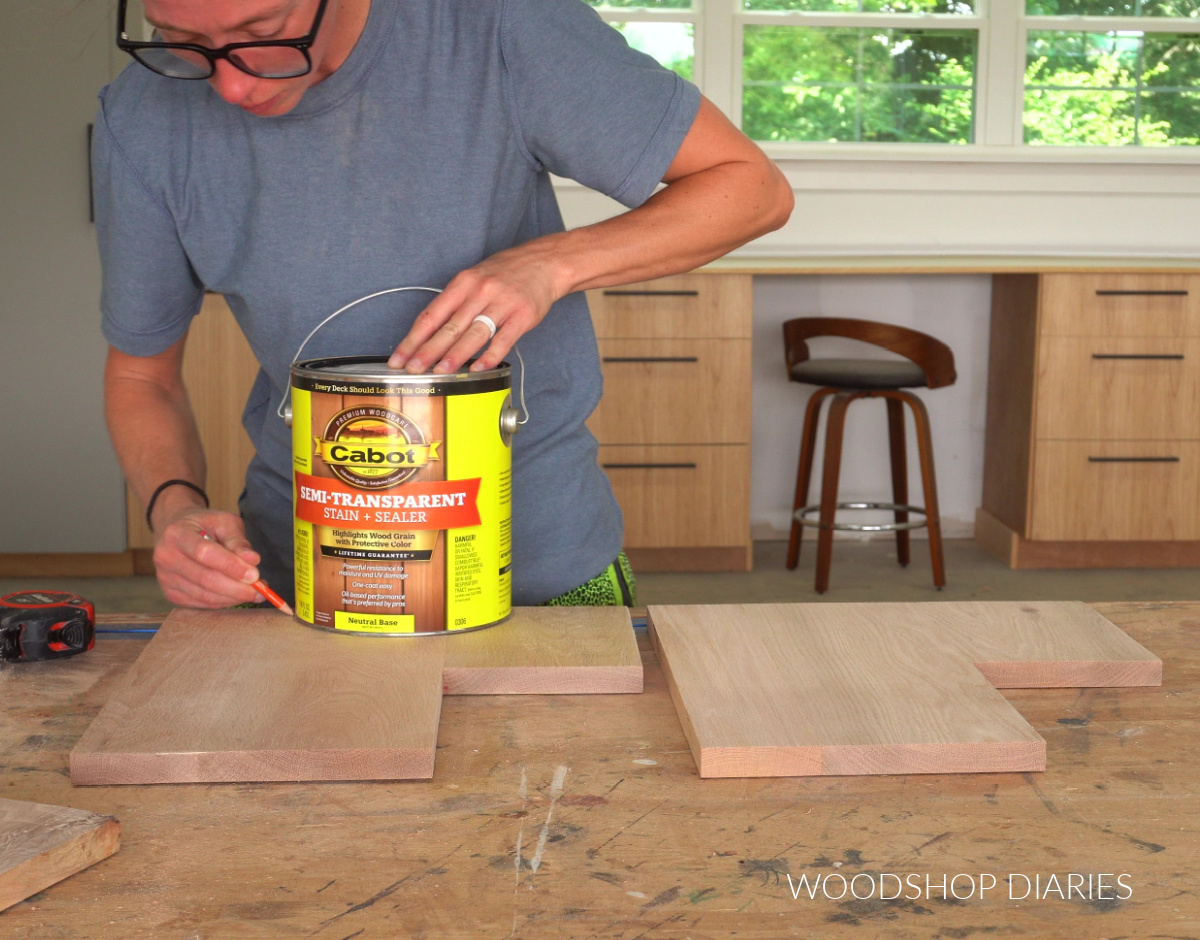
Step 5: Finish
Since I was planning to use this outdoors with my outdoor loveseat, I finished it with an outdoor stain and sealant. I used Cabot Semi Transparent in Arboretum.
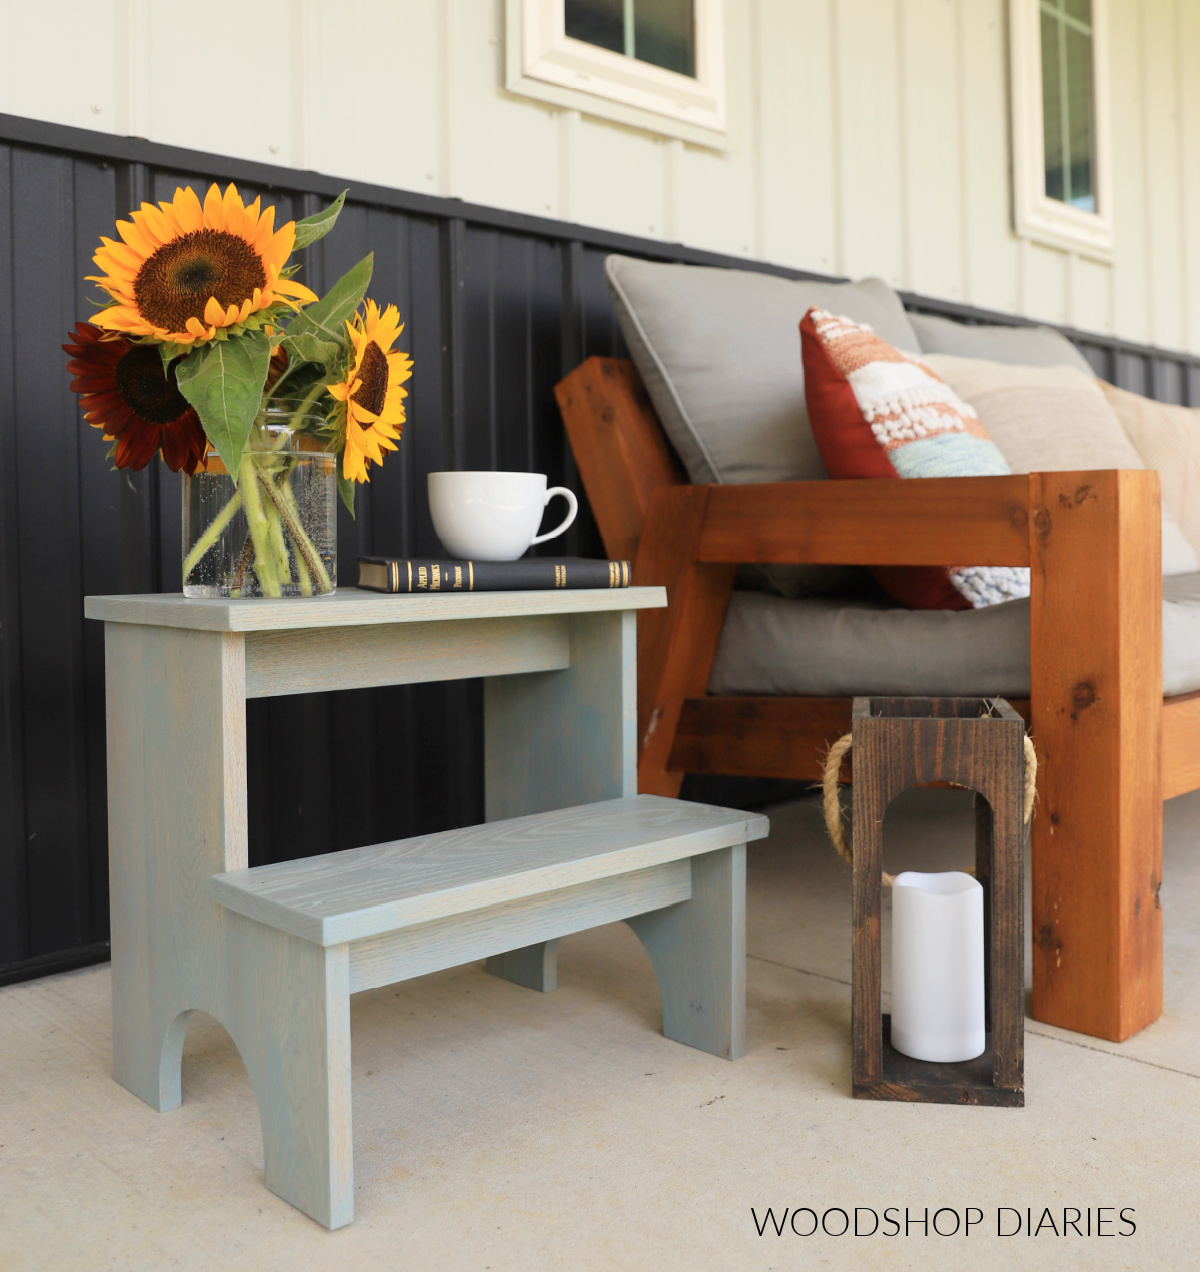
Of course, feel free to paint/stain yours however you’d like. This is where you can really let your creativity shine!
I think this would be adorable in different colors. If using indoors, I highly recommend checking out Minwax Water Based Stains as they come in TONS of fun colors.
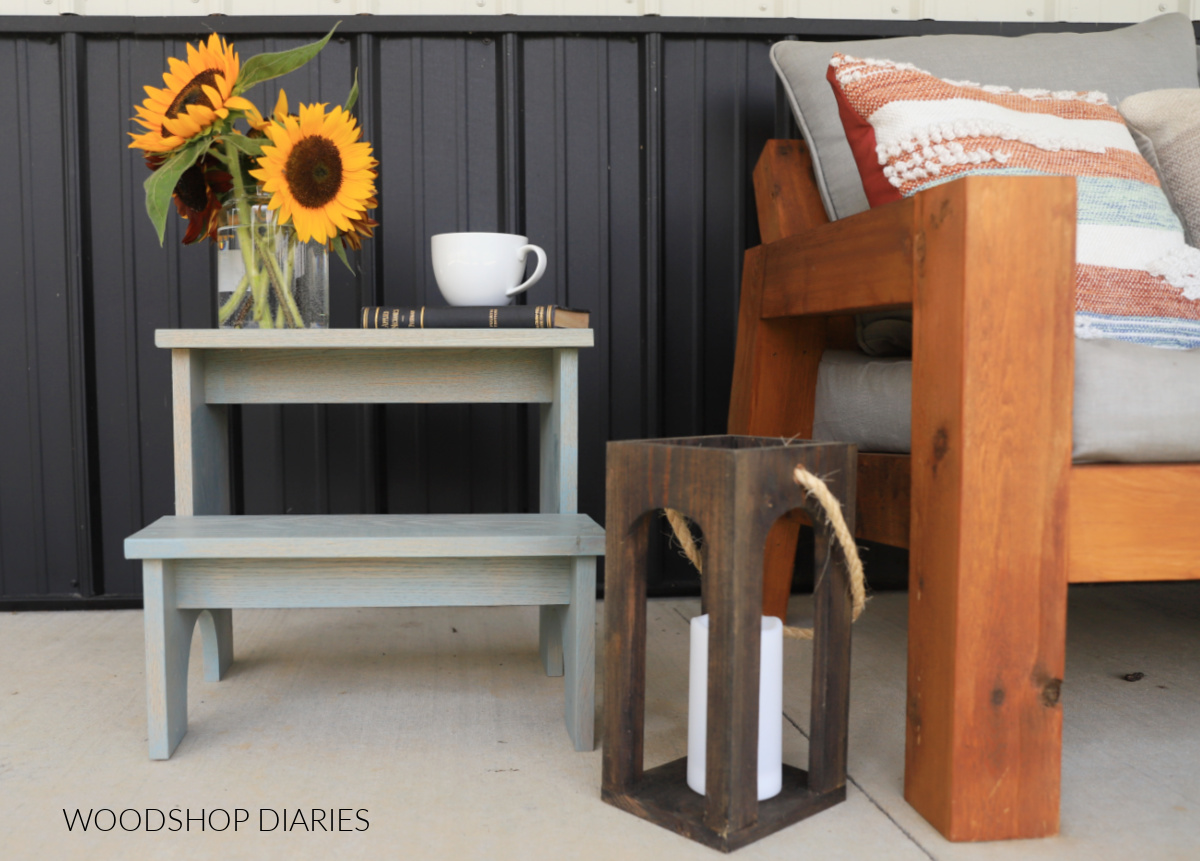
But with that, this simple side table/plant stand is ready for use! Stack, display, and show off your favorite trinkets, plants, books, and décor.
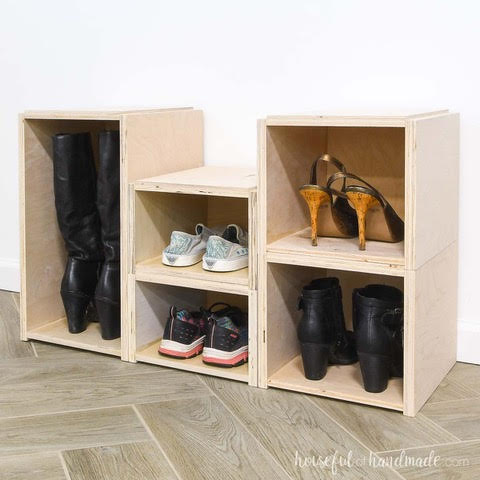
Looking for More Scrap Wood DIYs?
Can’t get enough scrap wood projects?? I’m teaming up with my friend, Kati, from Houseful of Handmade all month long for “Scrap Wood Summer!”
Check out all the projects in the series below. Click on the images to learn how to make each one!
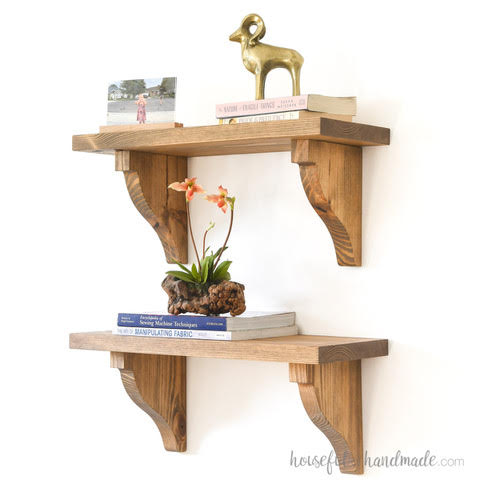
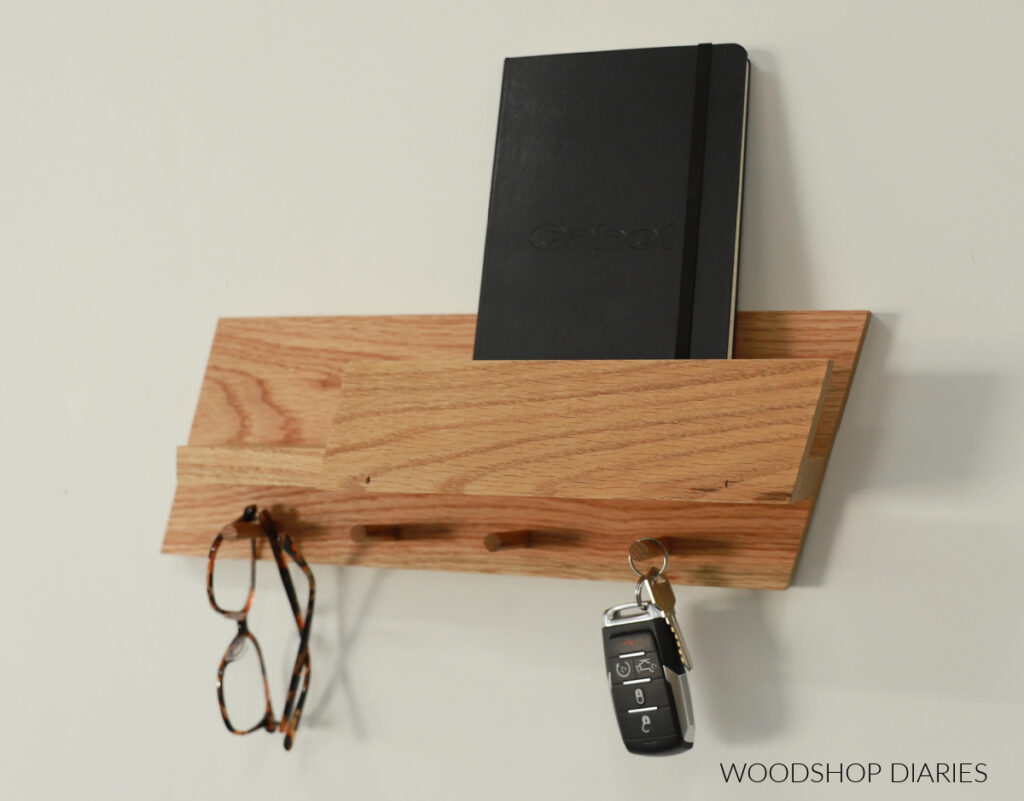
This is our third year hosting Scrap Wood Summer and I enjoy it a little more each time. But, if you’ve never heard of it before, that’s okay!
Essentially, we each share a new scrap wood project every Tuesday throughout the month of August (2024). So by the end of the month, you’ve got 8 new project ideas to try.
So stay tuned to see all the other fun ideas we are so excited to share with you!
Can’t wait? Check out previous Scrap Wood Summer projects plus other scrap wood ideas here.
If you’d like to save this simple side table for later, be sure to pin it or share to your favorite social channel!
Until next time, friends, happy building!