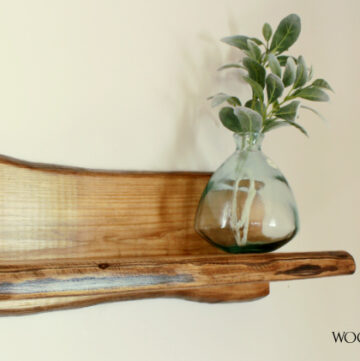
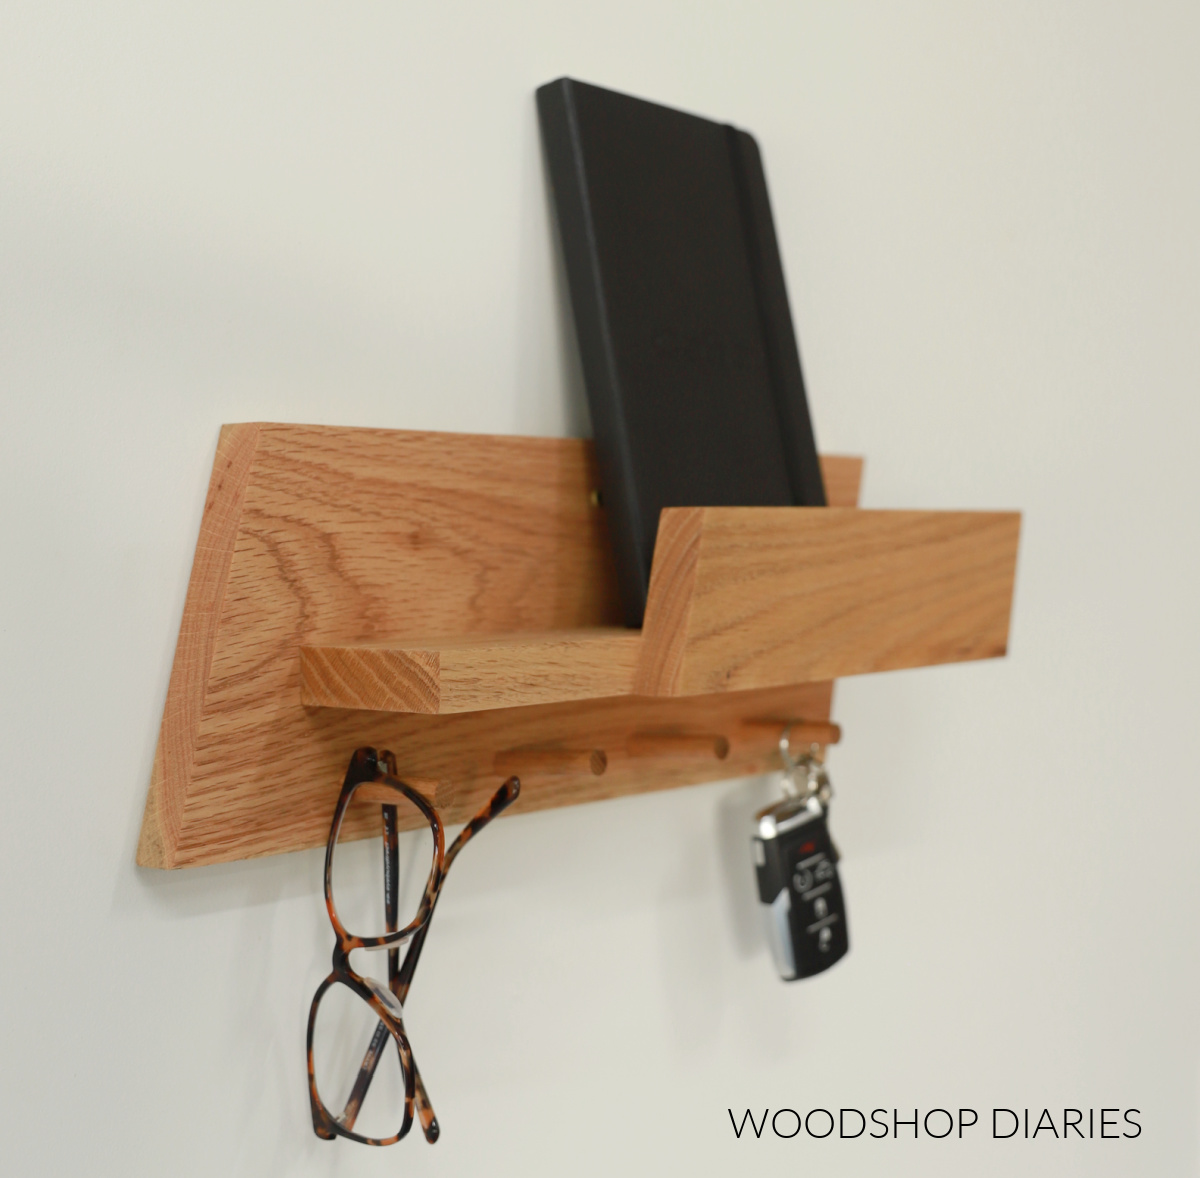
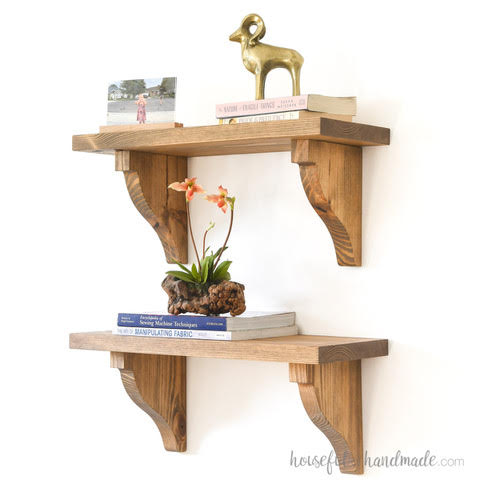
In this post, I’m sharing how to build a simple DIY entryway organizer and key holder shelf with a few pieces of wood scraps!
I don’t know about you, but I always have fun turning scraps into something useful.

Not only is it nice to get these pieces out of my shop (that ever growing scrap pile is starting to take over!), but it’s also nice to put them to work in a way that is beneficial.
This project did just that and is the perfect addition to the entryway to give us somewhere to keep the keys and the mail (besides on the kitchen table ha!).
If you could use a simple entryway organizer, I’m sharing all the details on how to make this one below.
*This post contains affiliate links. See website policies.
A few notes before building
This wall shelf is small–I was using the scraps that I had available and they were pretty small pieces. That said, if you need a bigger one, this project is SUPER easy to modify.
How to Modify the Size
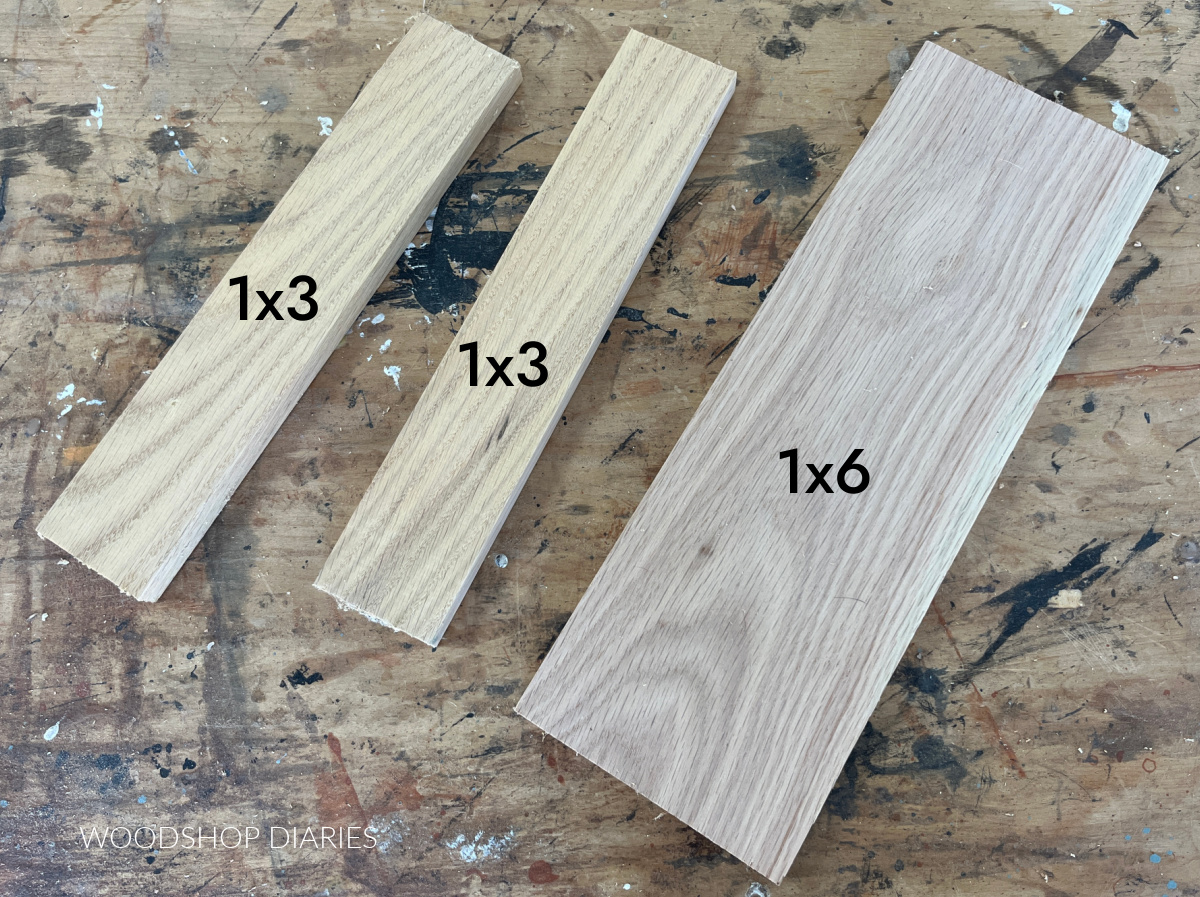
This project used a scrap 1×6 for the back piece and 1x3s for the shelf.
You can make it taller by simply using a wider board for the back or a scrap piece of plywood. And you can make it longer by simply cutting your back board longer.
Full transparency: I didn’t even measure the length of the pieces I used for this project until after I was finished so I could share them with you! So clearly, dimensions aren’t critical here.
For the key holder pegs, if you wanted hooks instead, you can simply swap those out. So use this post as a guide, but feel free to customize however you’d like.
What type of wood should you use for this project?
You can use any type of wood you’d like for this project. I used solid red oak, but if you wanted to use pine 1x boards or even ¾″ plywood instead, feel free. Those would both work great!

If you really want to get creative, use a different wood type (or stain color) for the back piece than you do for the shelf and wood pegs.
Enjoy DIY projects and woodworking plans? Sign up for priority access for the latest posts on Woodshop Diaries!
How to make Wall Shelf organizer
This project is a great beginner DIY and is easily built in under an hour. If you don’t need one yourself, this would also make an excellent inexpensive, handmade gift, especially for a housewarming!
Here’s what you need to build it:
Tools & Materials
Tools:
- Miter Saw
- Brad Nailer
- Drill
- ⅜″ Forstner Bit (optional–for adding key pegs)
- Clamps
Materials:
- Scrap 1×6 board
- Scrap 1×3 boards
- ⅜″ dowel pegs (can cut from ⅜″ scrap dowel rod)
- Wood Glue
- 1 ¼″ long brad nails
- 2 ½″ long wood screw (to hang shelf)
Step 1: Cut Pieces to Size
First, I cut my 1×6 and 1×3 boards to the size I wanted. The back will be the 1×6 and the shelf pieces are the 1x3s.
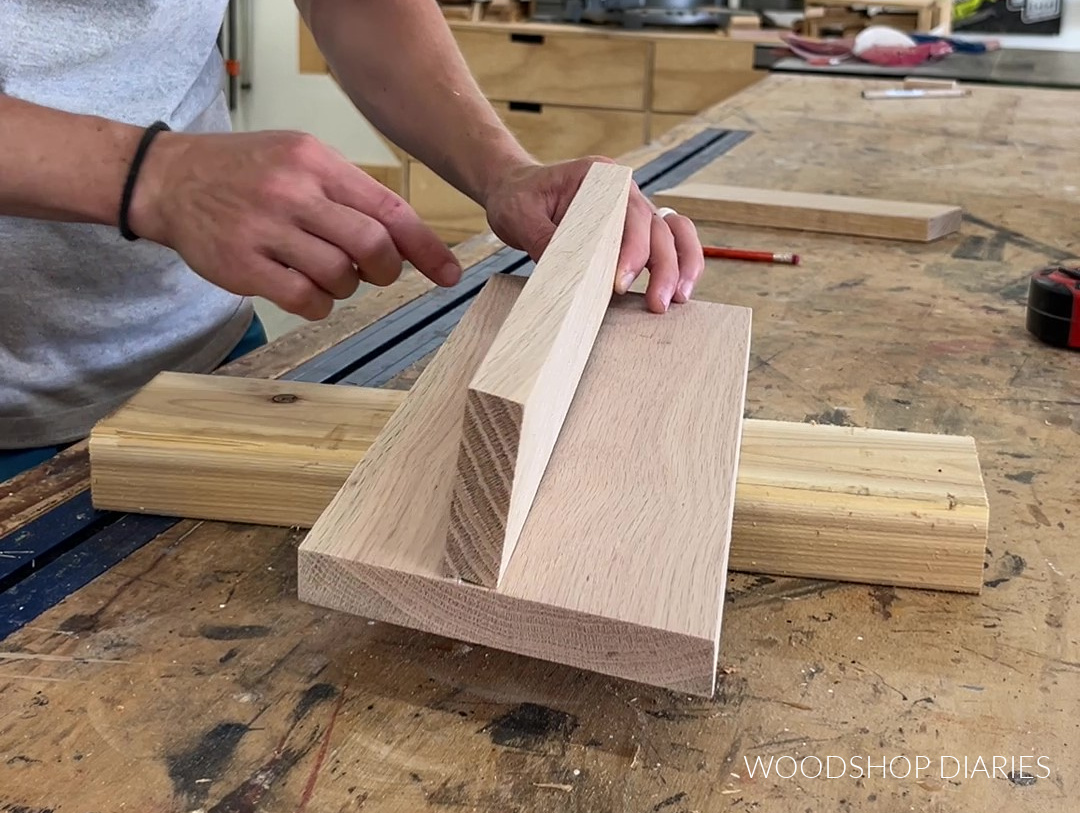
To give this project a little modern vibe, I mitered the ends of my back piece and the piece that goes along the front of the shelf 15 degrees off square.
RELATED: How to cut angles on a miter saw
Then, to match this angle, I beveled the right edge of my shelf 15 degrees.
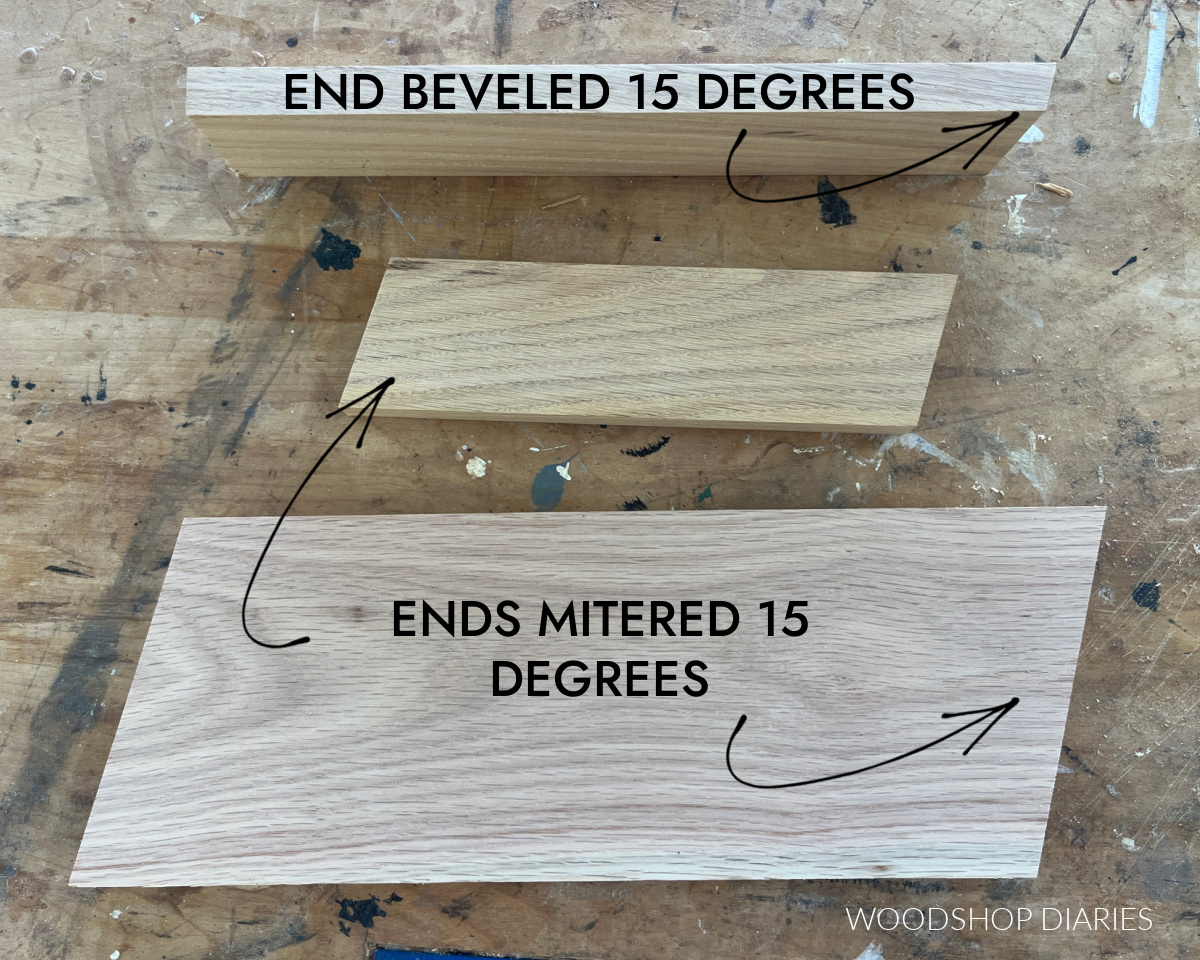
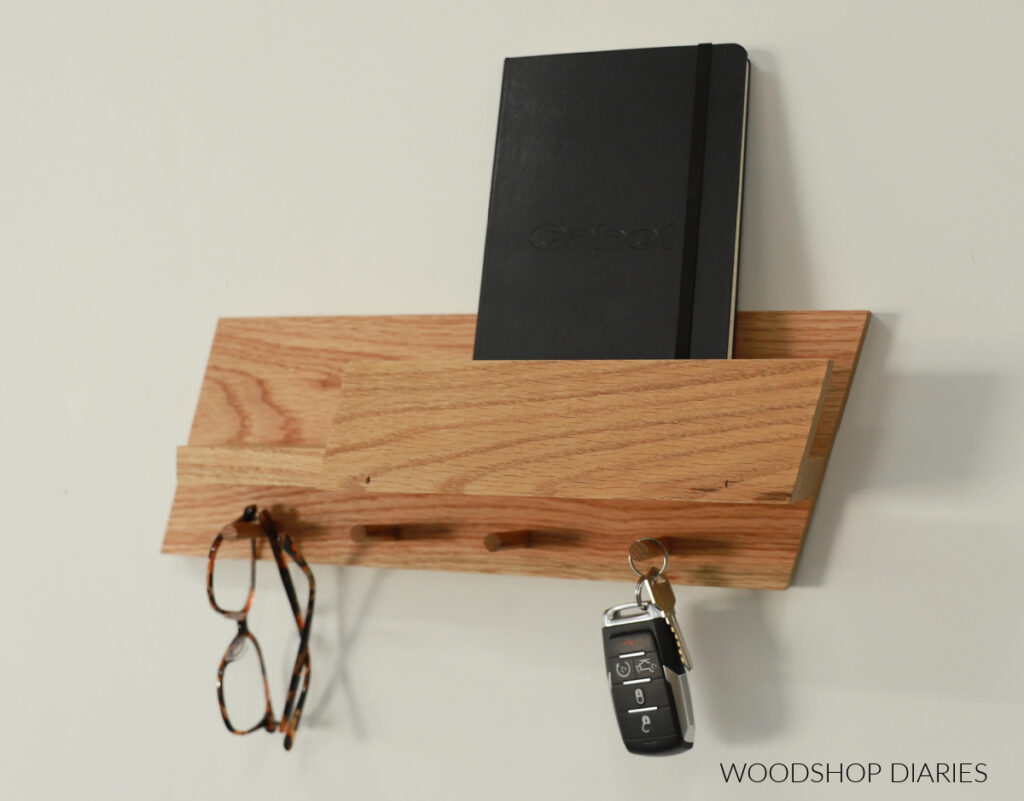
The back ended up being roughly 15″ long, the shelf piece roughly 13″ long and the front piece roughly 9″ long.
Step 2: Attach Shelf
After sanding, I marked a line about 2″ up from the bottom of the 1×6 and applied wood glue along the back edge of the 1×3 shelf piece.
I placed the shelf piece on the 1×6 back so that the bottom edge of it ran along this line I marked and the left edges were flush.
I used a brad nailer to drive a few nails through the back to hold this piece in place while the glue dries. If you don’t have a brad nailer, you could also drive a couple screws through the back instead.
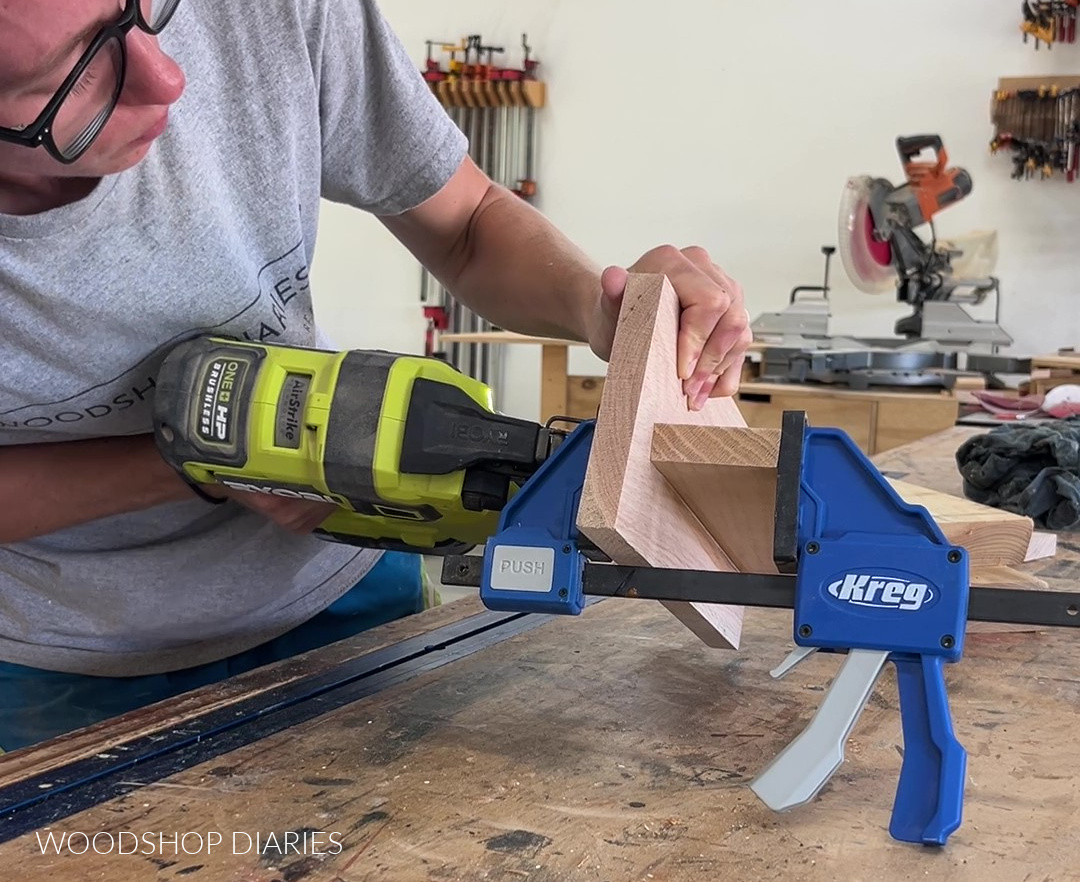
TIP: If you have some clamps, use them to hold the shelf piece in place while you drive fasteners through the back.
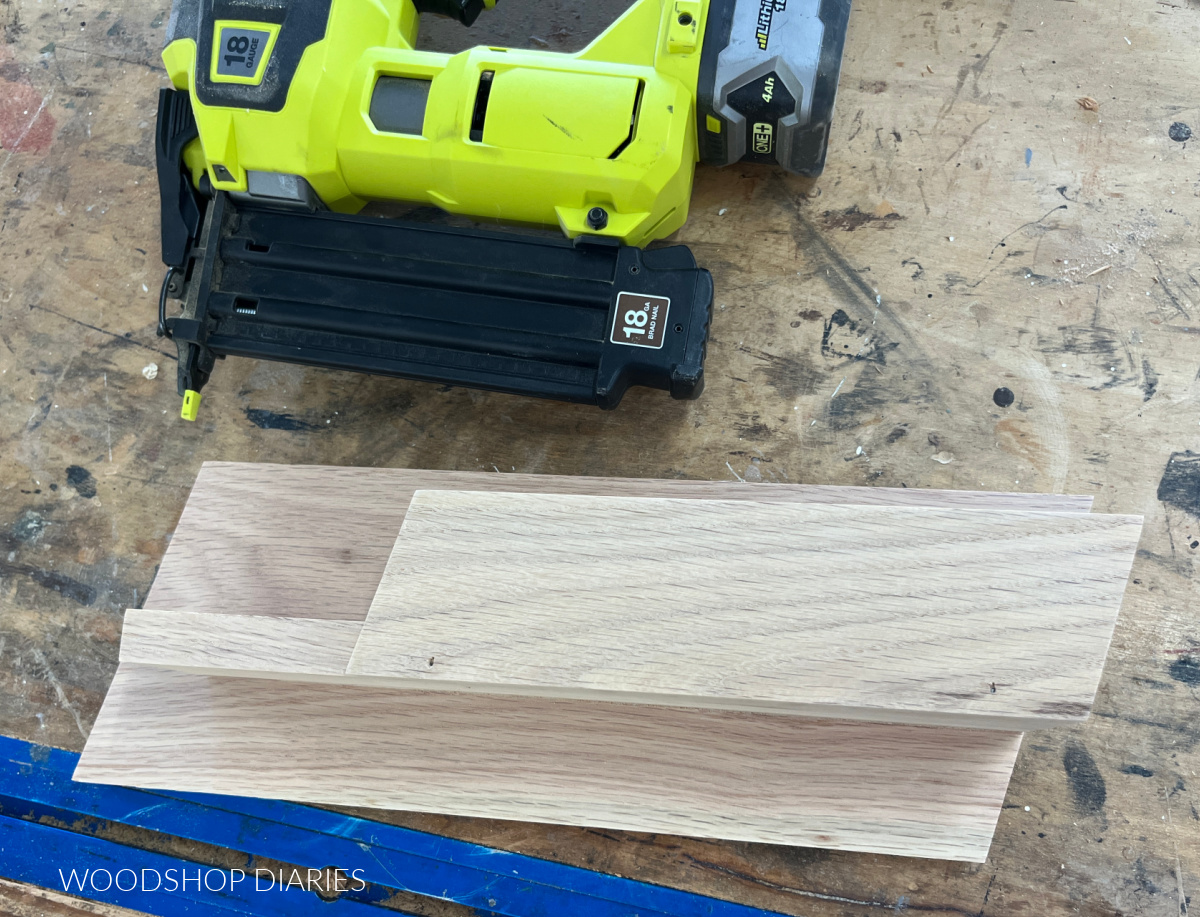
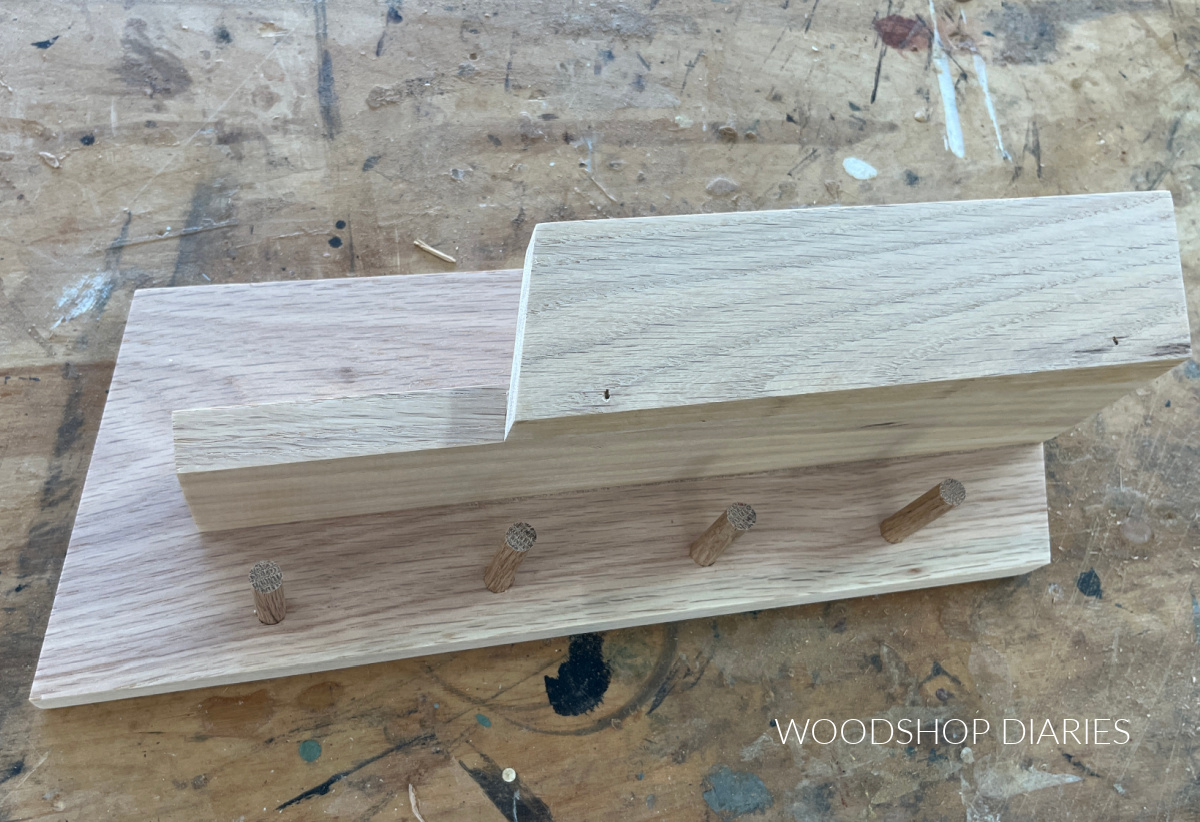
Then, I flipped this back over and glued and nailed the other 1×3 piece onto the front of the shelf.
Step 3: Add Key Pegs or Hooks
Here’s where you can add wooden pegs or your own hooks. I had some scrap ⅜″ dowel, so I cut four of these about 2″ long.
If you had another size dowel, that would work, too–it doesn’t have to be ⅜″.
I marked ¾″ from the bottom edge of the 1×6 piece and evenly spaced out my dowels how I thought they looked right. They ended up being about 3″ apart.
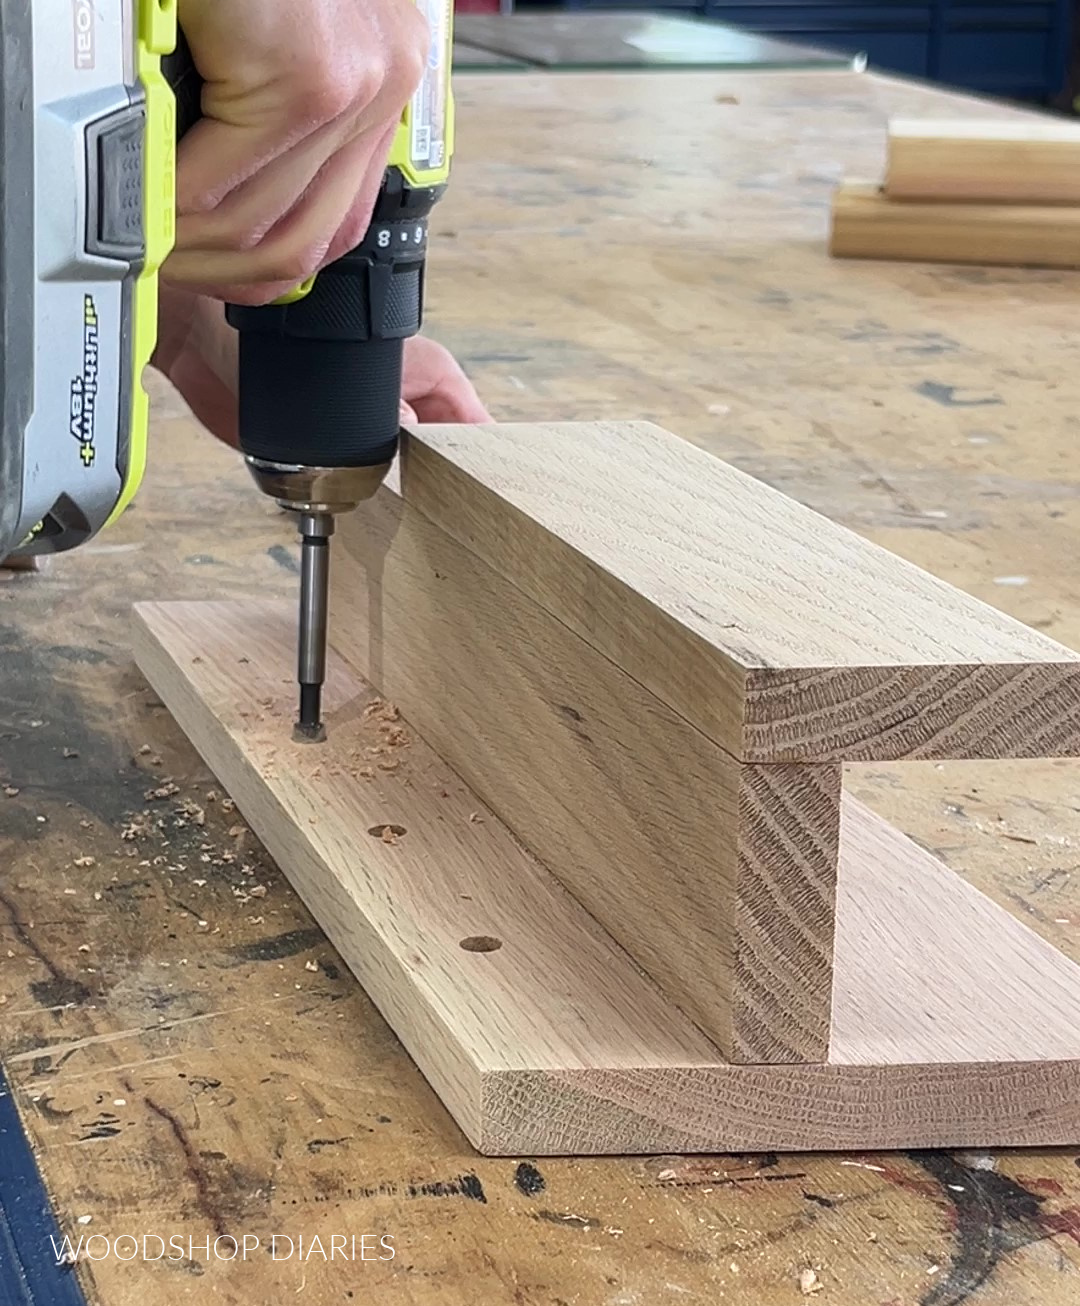
Then I drilled ⅜″ holes at these locations using a ⅜″ forstener bit. I drilled about ⅜″ deep (this was about the depth of the head of the bit).
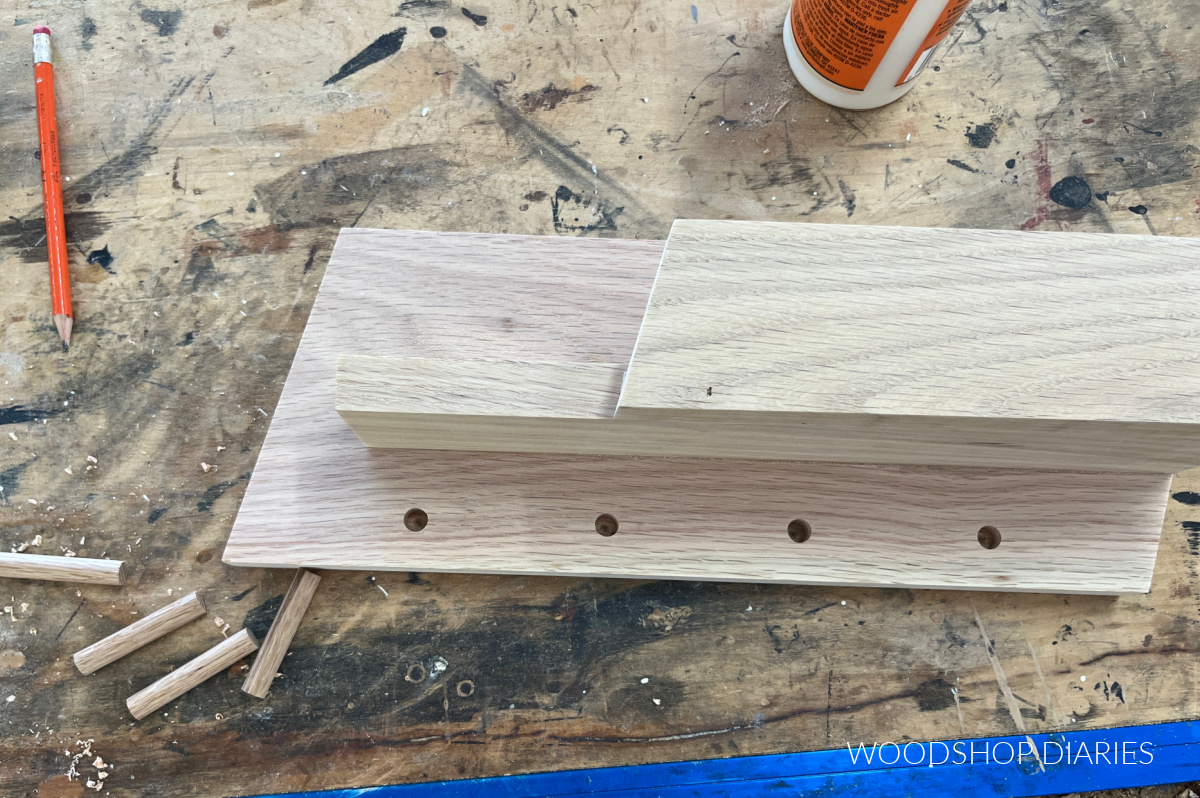
I added a little glue into each hole and tapped the dowels in with a rubber mallet.
If you wanted to add hooks, you can screw those onto the back in place of the pegs.
Step 4: Finish and Hang
Once the glue was dry, I stained this piece in Minwax Weathered Oak, but feel free to paint or stain any color you’d like.
RELATED: How to stain wood
After the stain was dry, I screwed this DIY wall organizer to the wall using a 2 ½″ long wood screw through the 1×6 and into a wall stud.
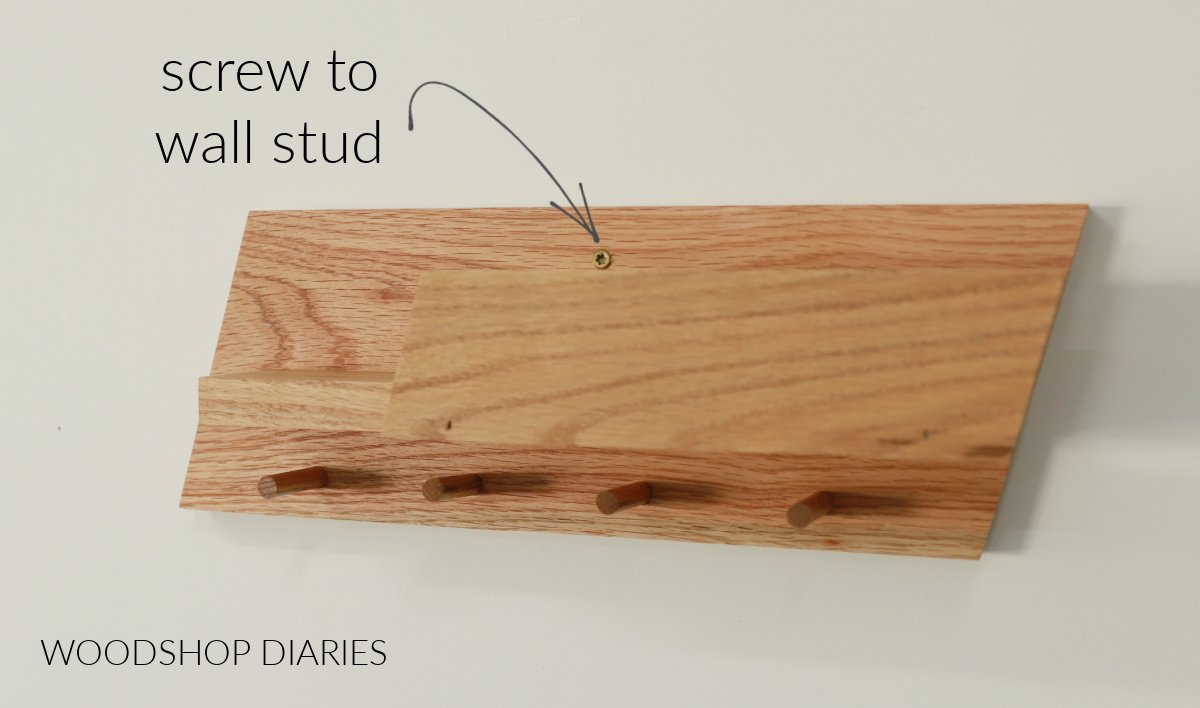
You could also hang this using sawtooth hangers if you wanted. Those would work fine, but with sawtooth hangers, a slight bump could accidentally knock it off the hangers, so I usually prefer screws.
I only used one screw for this little shelf–this should hold fine, but it will still be able to twist if its pulled on. (You have to be pulling pretty hard, though.)
If you are concerned about that or if you made yours larger and need additional holding power, add a screw at the top and at the bottom (both into studs!) to prevent it from twisting.
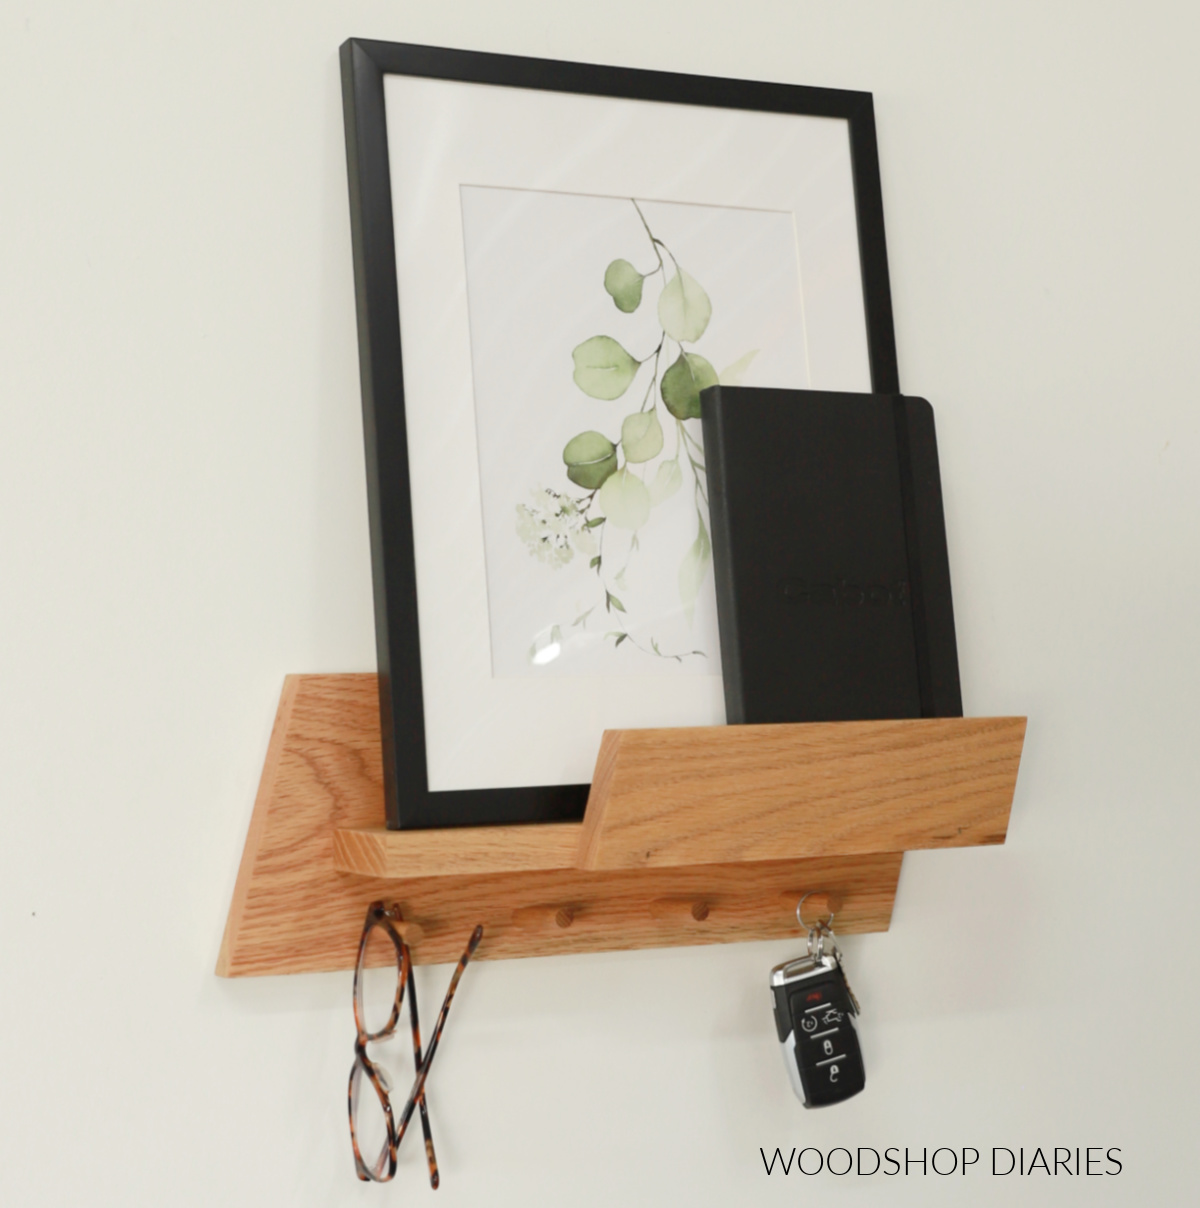
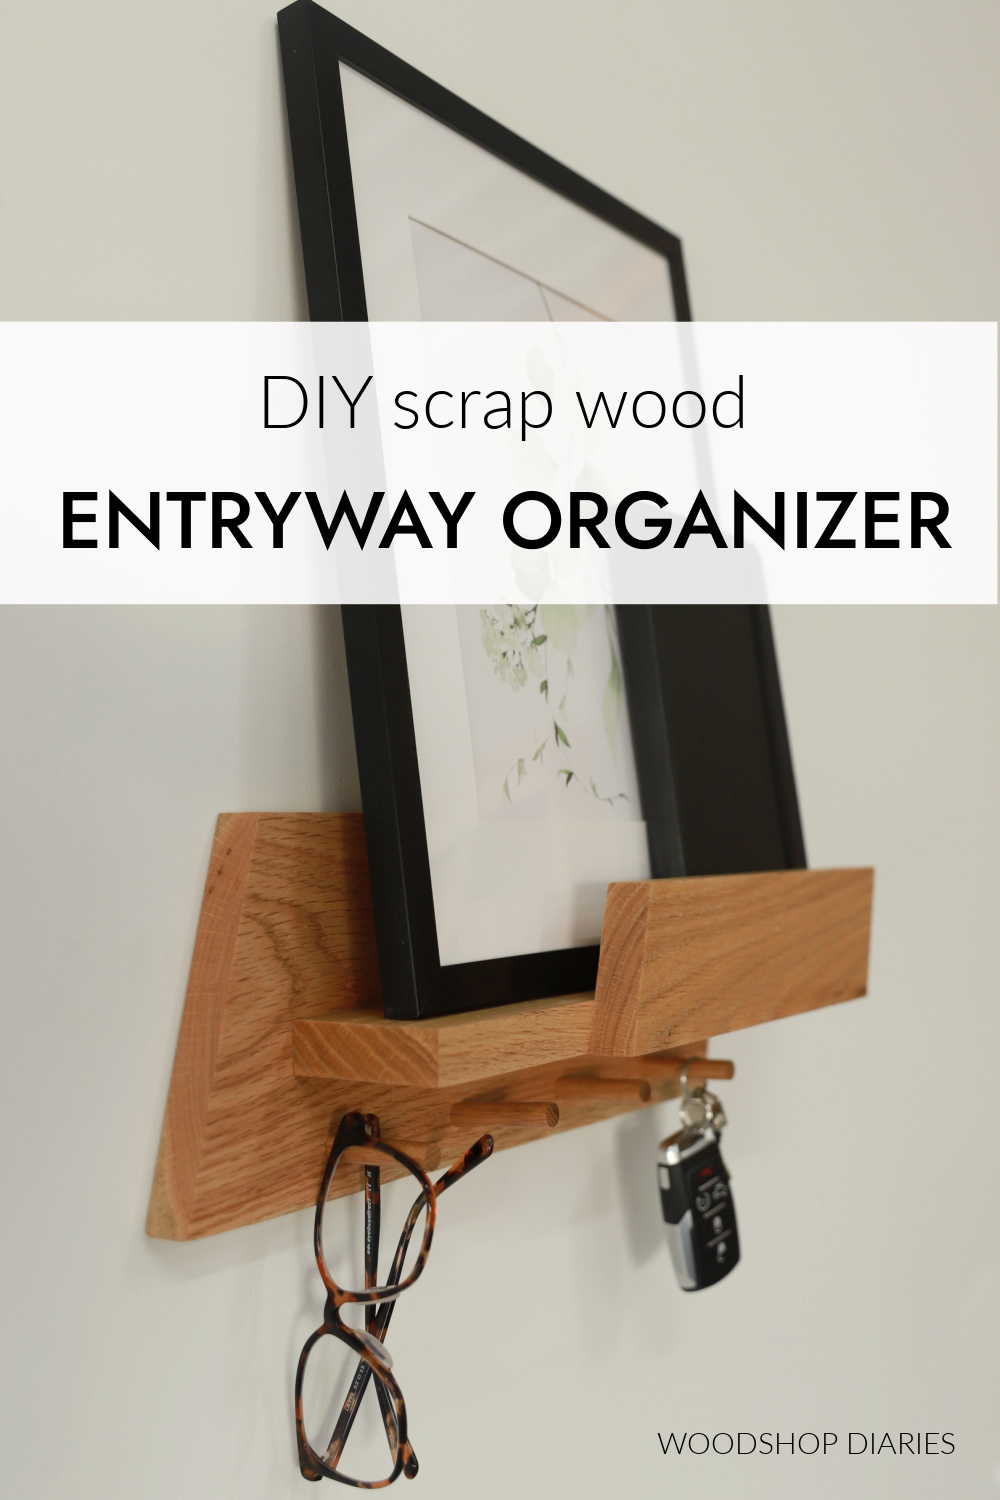
And now you’ve got a cool place to hang your keys, glasses, lanyard, hat, etc. The shelf is a great place for your favorite photo, a notebook, your mail, whatever you need to keep by the door so you don’t forget it when you leave the house ha!
Looking for More Scrap Wood DIYs?
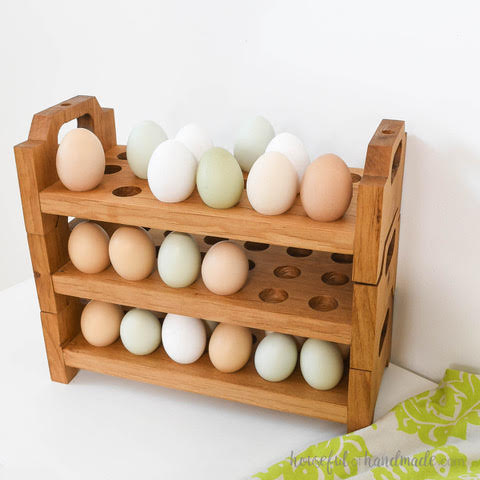
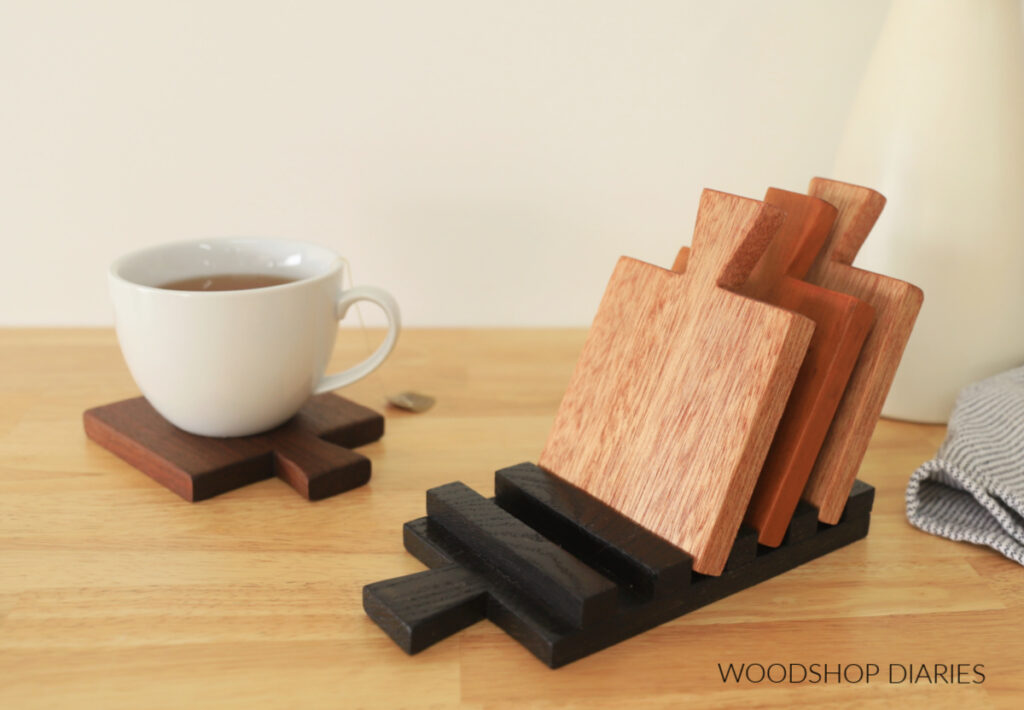
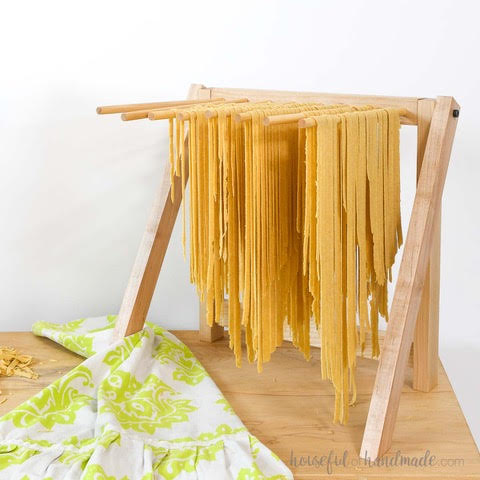
Can’t get enough scrap wood projects?? I’m teaming up with my friend, Kati, from Houseful of Handmade all month long for “Scrap Wood Summer!”
Check out all the projects in the series below. Click on the images to learn how to make each one!
This is our third year hosting Scrap Wood Summer and I enjoy it a little more each time. But, if you’ve never heard of it before, that’s okay!
Essentially, we each shared a new scrap wood project every Tuesday throughout the month of August (2024). So by the end of the month, you’ve got 8 new project ideas to try.
Check out previous Scrap Wood Summer projects plus other scrap wood ideas here.
If you’d like to save this DIY key holder shelf project for later, be sure to pin it or share to your favorite social channel!
Until next time, happy building!