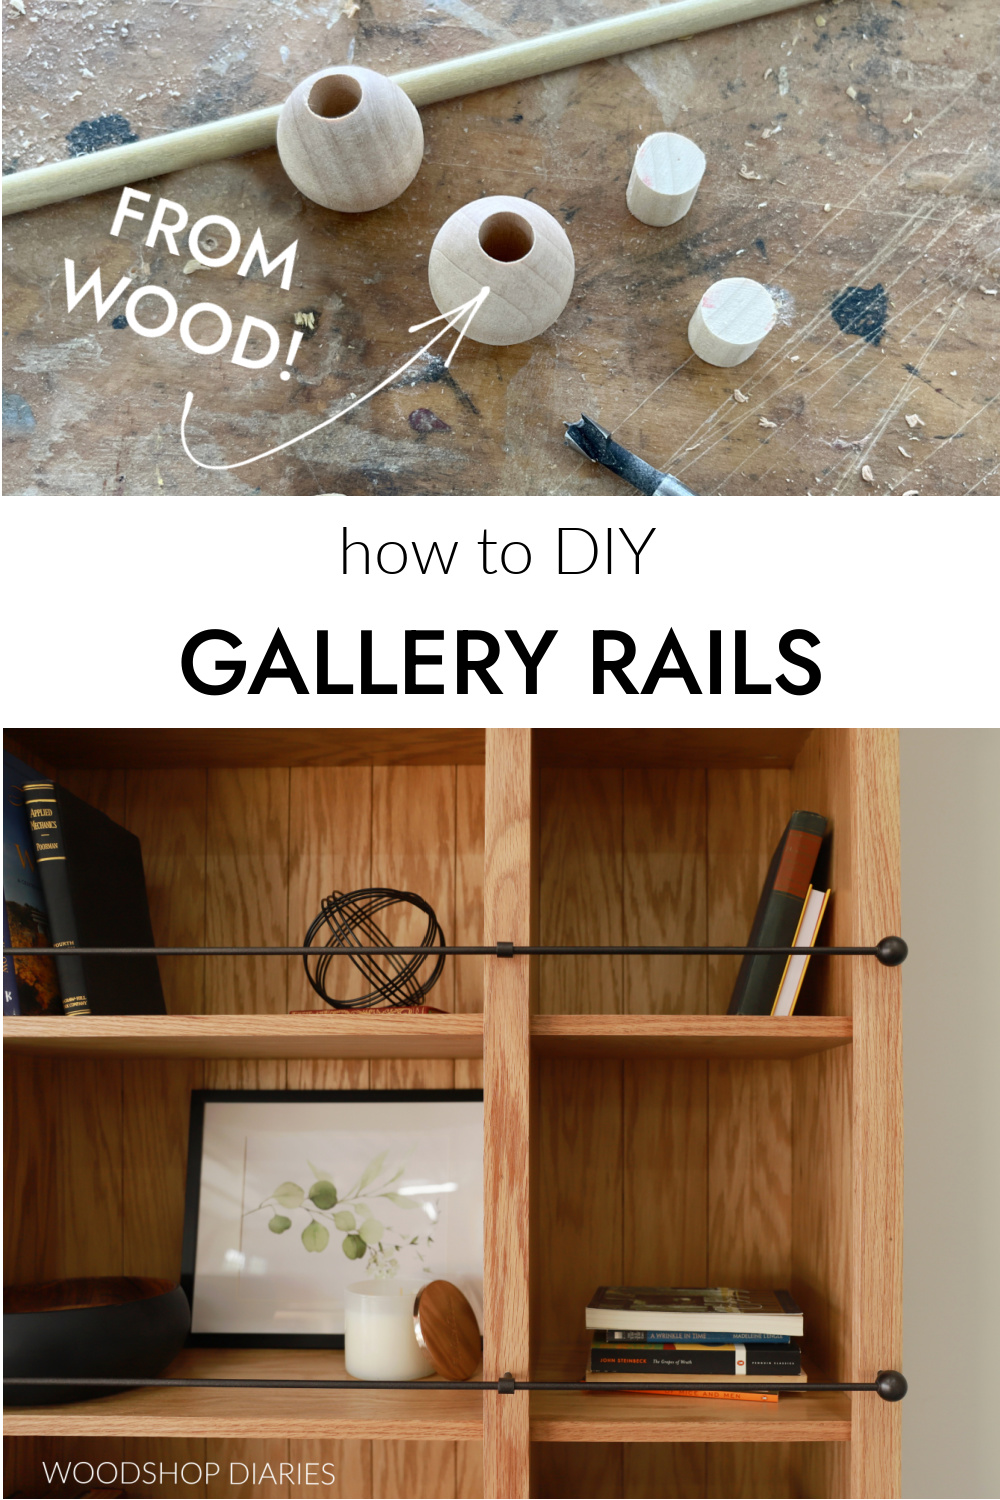
In this post, I’m sharing how I saved hundreds of dollars by making my own DIY gallery rail for my bookshelf!
Have you seen those shelves with the railings on the front? They are sometimes called gallery rails, shelf rails, tipping rails–they have several names.
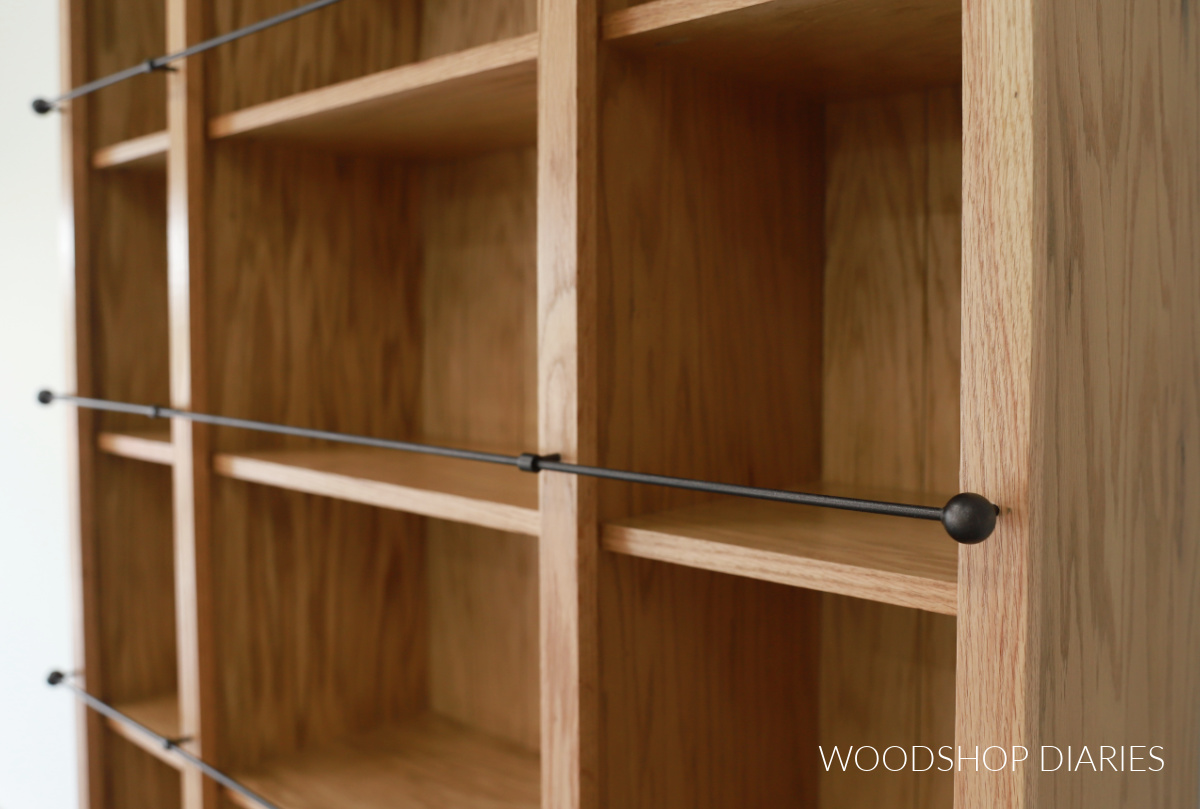
Normally, they’re used on smaller shelves to prevent things from sliding off (like drink glasses, for example).
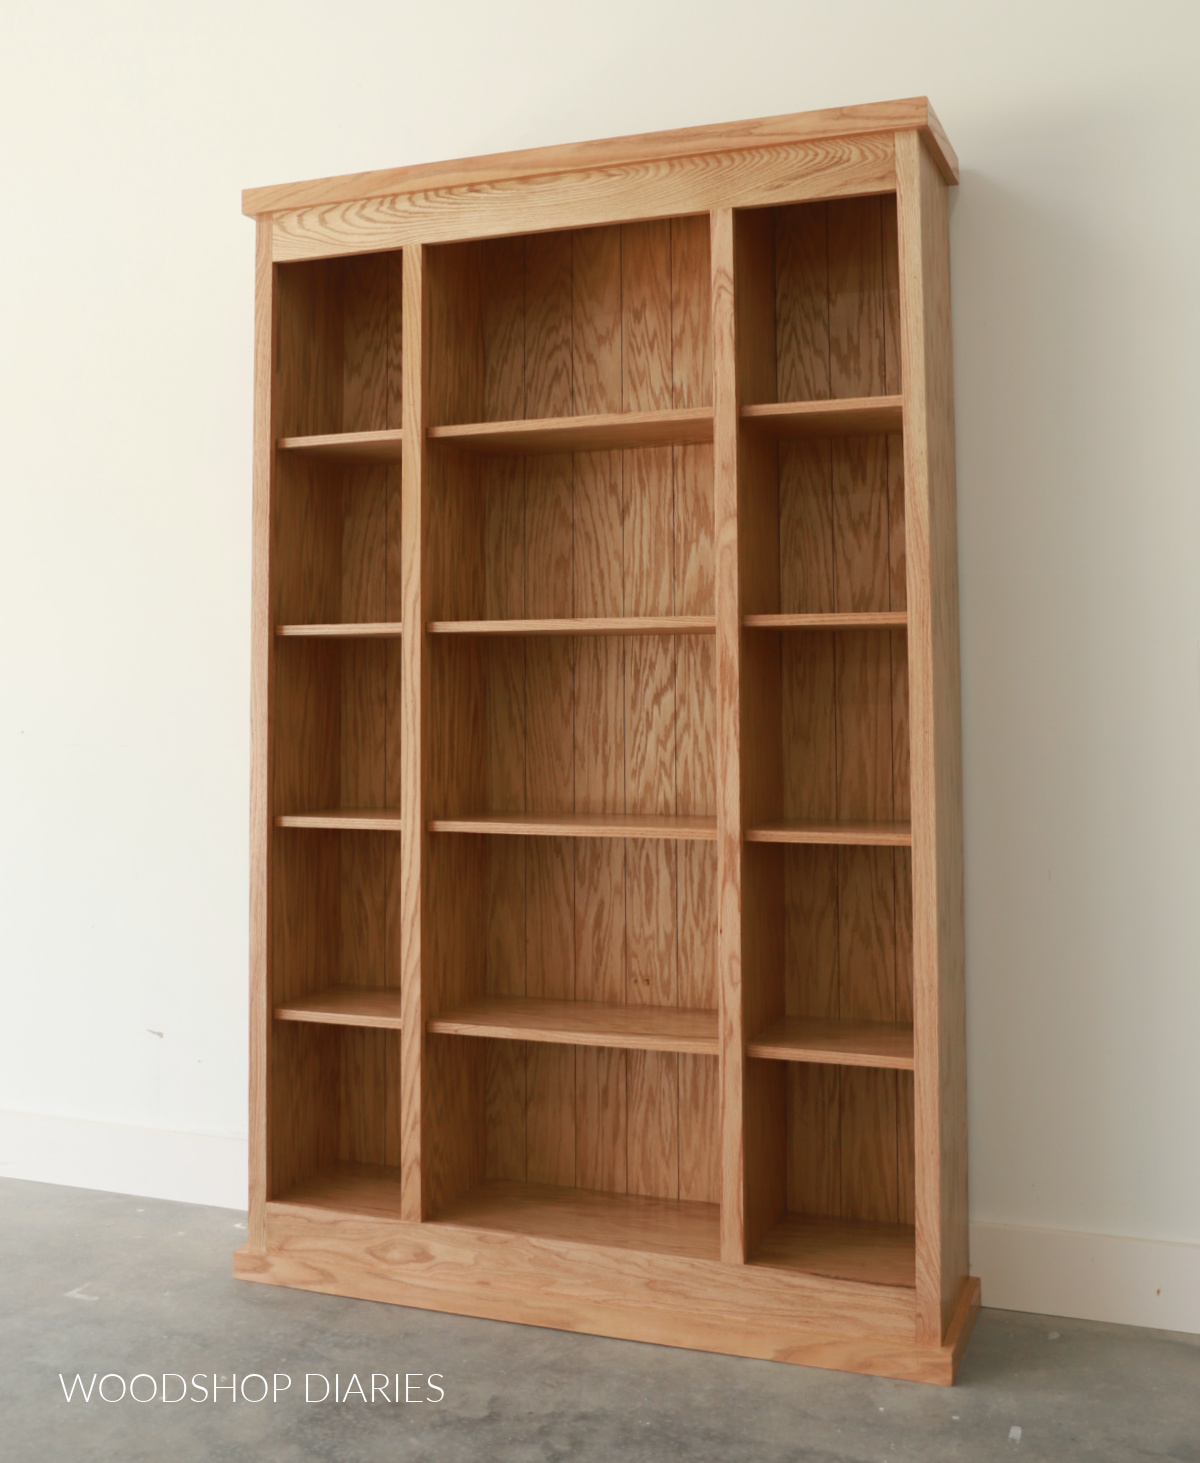
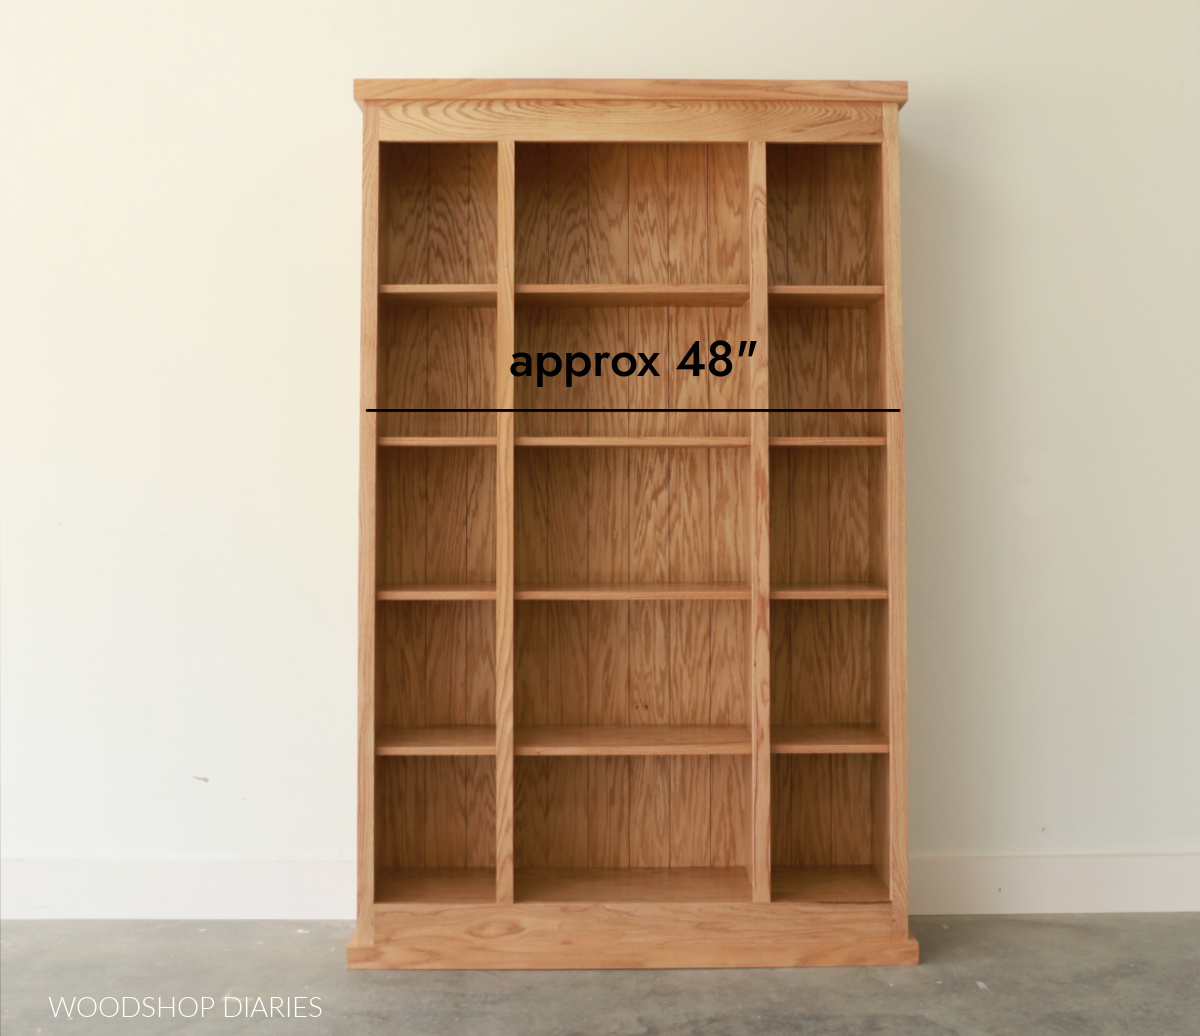
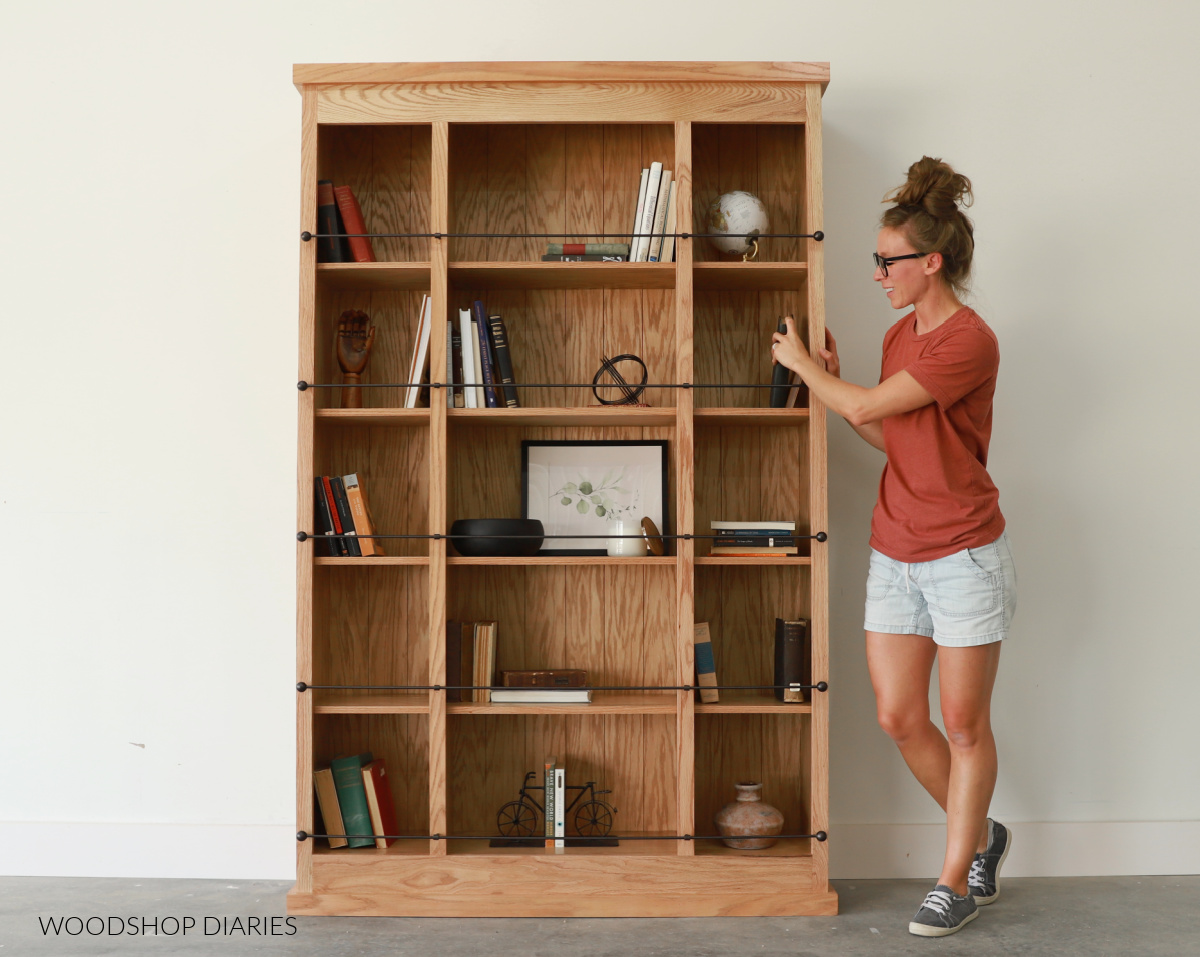
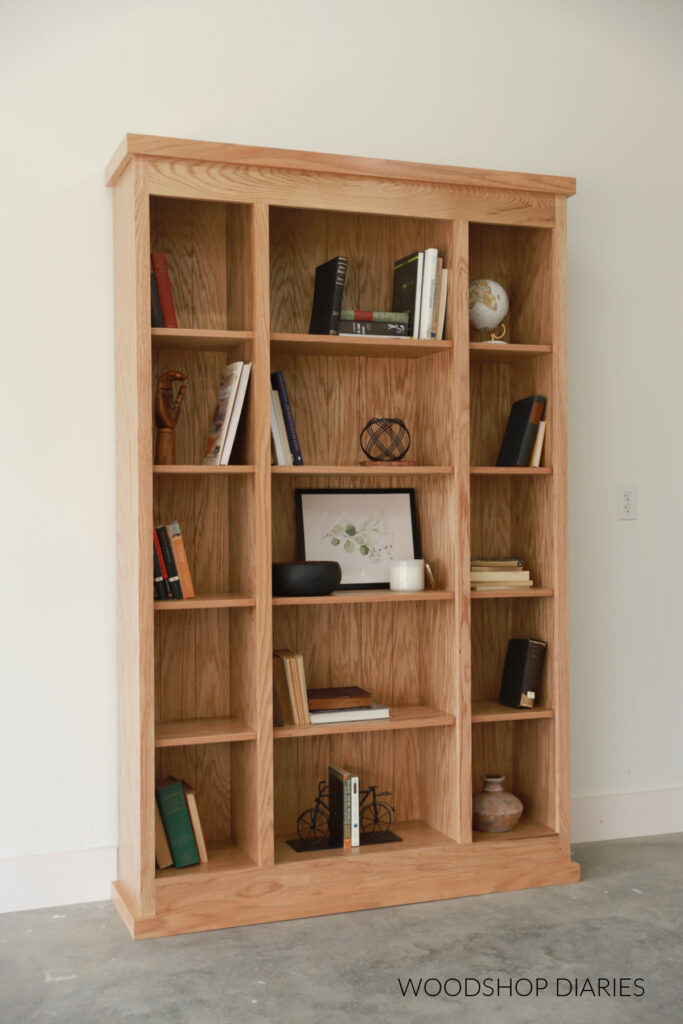
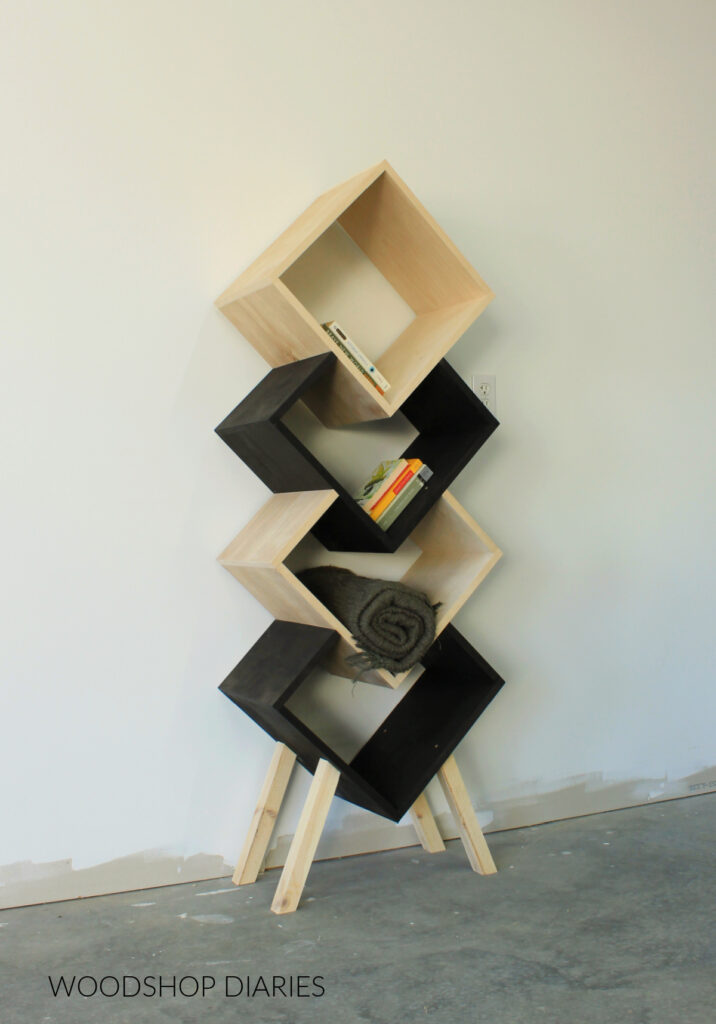
But often, they’re just for decoration and provide a cute accent. That’s the case with my bookshelf. Check out how to build this classic bookcase here.
This simple DIY bookcase would have been completely fine without shelf railing–stuff slipping off isn’t a likely possibility.
But I had seen a similar one online with rails across each shelf that I LOVED. I wanted to replicate that idea on my own bookcase, but the problem was that when I looked into buying them, the railings were pushing $1000. (No wonder that bookcase was so pricey!)
That was not in my budget. Not even close. So I made my own for about $30. And I’m excited to show you how below.
*This post contains affiliate links. See website policies.
What to know before starting
This is a simple project that you can customize however you need. Here are a few tips to consider before starting.
Drill Bits
First and foremost, you will need a forstner bit to drill your holes. Don’t attempt this with a regular drill bit or a spade bit. You will rip, split, or shred your pieces and likely your fingers, too.
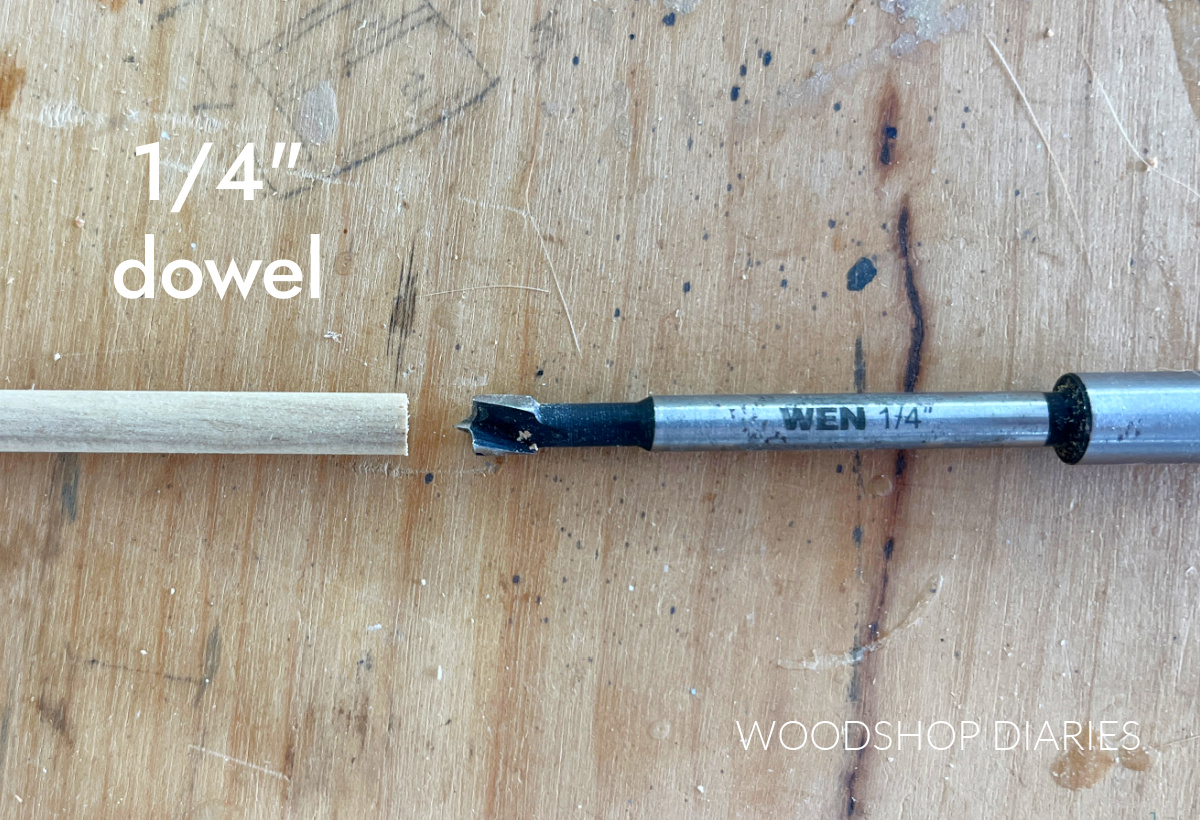
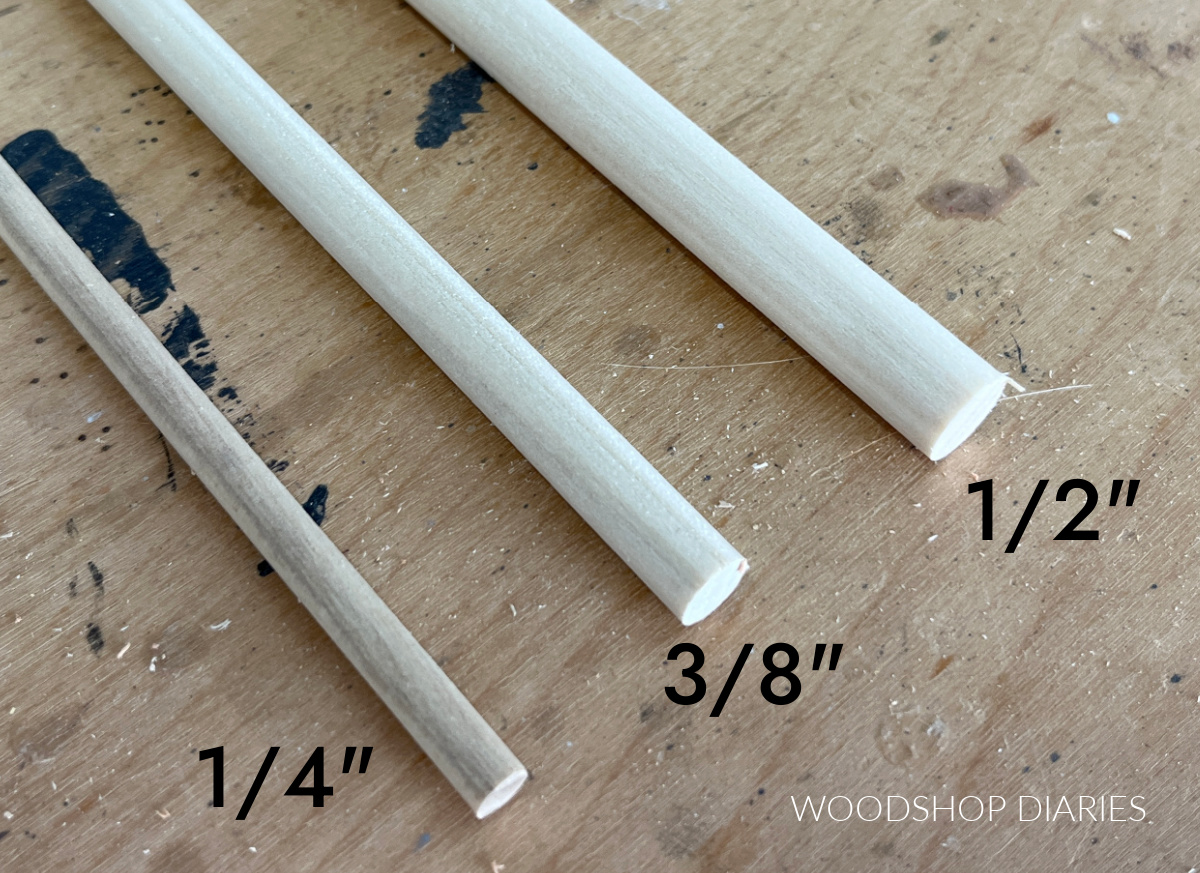
The size forstner bit you need will be based on the size dowel you use for your railing. I used ¼″ diameter dowel for my railing. It worked great, but if you wanted chunkier rails, you could also use ⅜″ or ½″ dowel rods instead.
Here’s a visual of them all side by side to get an idea of the difference.
You’ll need a forstner bit the same size as the diameter of the dowel you want to use for your railing. Since I used ¼″ railing, I used a ¼″ forsner bit.
Cutting Small Pieces
This project required cutting some small, delicate wood pieces. This can sometimes be a little tricky.
You can use a hand saw if you feel more comfortable with that, but a band saw, scroll saw, or miter saw would also work if you’re careful.
I used a miter saw to cut my small pieces, but I highly recommend clamping some scrap blocks to the saw’s fence on each side to prevent the blade from flinging the pieces backwards.
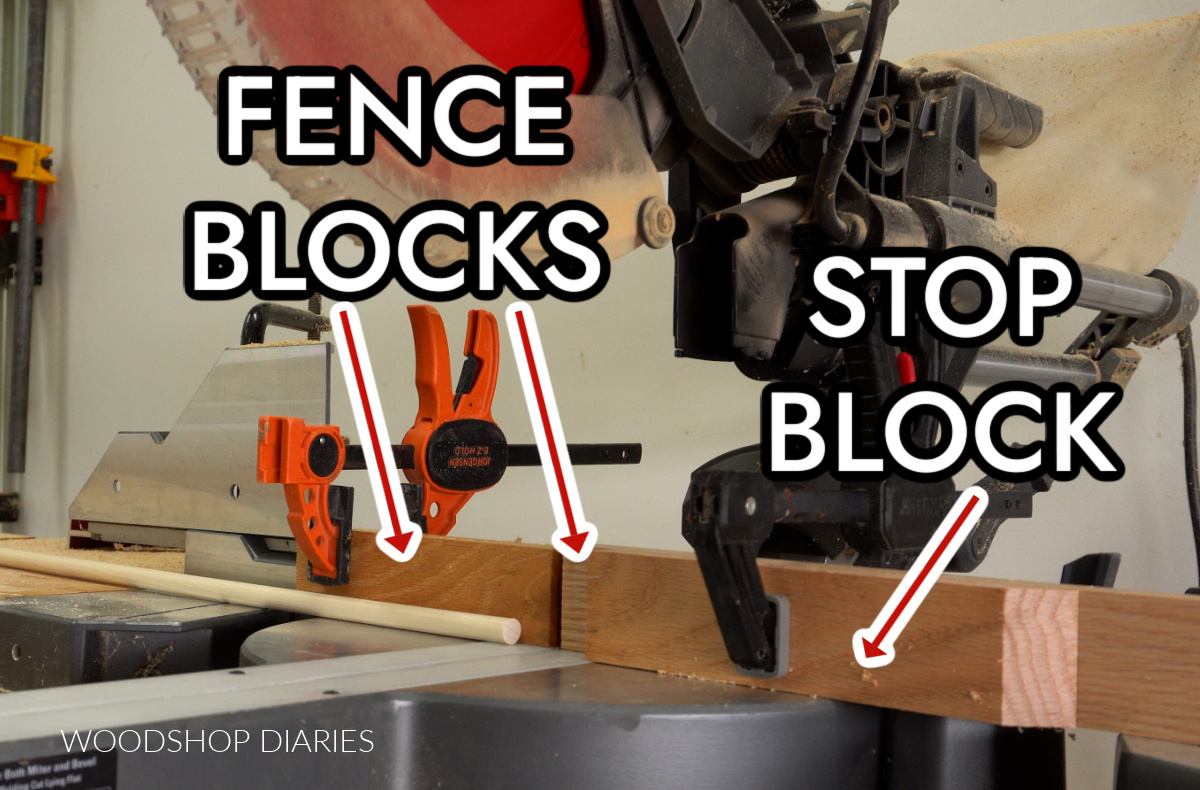
Or, if you have a miter saw sled, that would be great to use here. I also recommend clamping a stop block in place to help you cut consistent lengths for these short pieces.
Enjoy DIY projects and woodworking plans? Sign up for priority access for the latest posts on Woodshop Diaries!
How to make DIY gallery rails for Bookcase
If you prefer to watch, I detailed this entire process at the end of the bookshelf build video on my YouTube Channel here.
Love watching how-to videos? Subscribe to my YouTube channel for plenty more where that came from!
Tools & Materials
Tools:
- Drill
- ¼″ forstner bit
- Measuring tape
- Saw (see notes above)
- Rubber mallet (optional)
Materials: (amounts depend on the number and length of railings)
- Wooden Balls (1″ diameter used here)
- ¼″ diameter dowel rod (or other size as desired)
- ½″ diameter dowel rod
- Wood Glue
- Metallic Spray Paint
TIP: You can buy dowel rods online, but I recommend swinging by your local Home Depot or Lowes and picking up a few. They’re much cheaper there than I’ve found online.
Step 1: Cut Gallery Rail Pieces
First, I gathered and cut my pieces for each railing. My bookcase was approximately 4′ wide, so I used a 4′ long ¼″ diameter dowel rod for each rail.
(I made five rails total–one for each shelf of my bookcase.)
If your shelf is a different size, you can trim your dowel or buy a longer one to fit. And if you prefer a chunkier rail, ⅜″ or ½″ diameter rod could work instead.
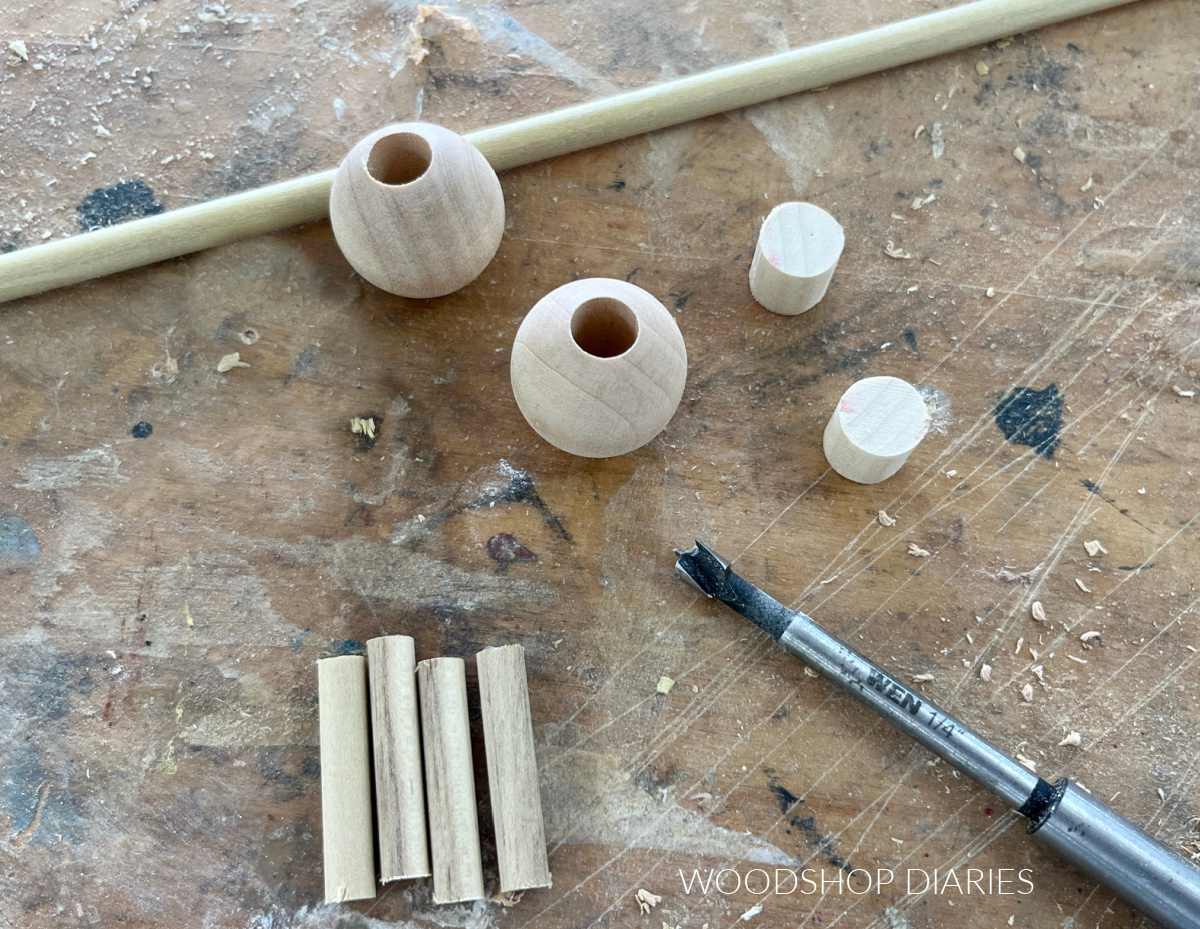
For each rail, I gathered/cut:
- (1) ¼″ diameter x 4′ long dowel rod
- (2) 1″ diameter wooden balls (with a pre drilled ¼″ diameter hole–not all the way through)
- (2) ½″ diameter dowel rod ½″ long
- (4) ¼″ dowel rods cut 1″ long
Step 2: Drill Out Center Supports
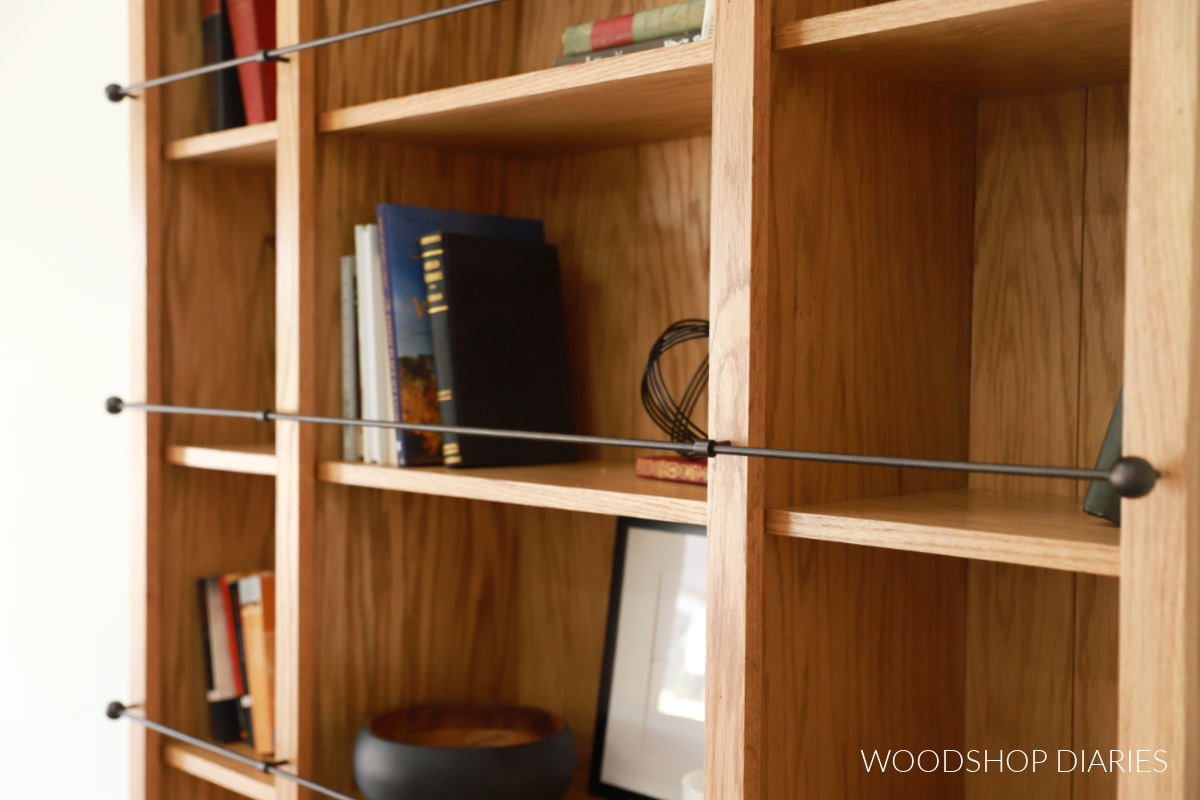
This railing will attach to the bookshelf in four places–at each end and at both dividers.
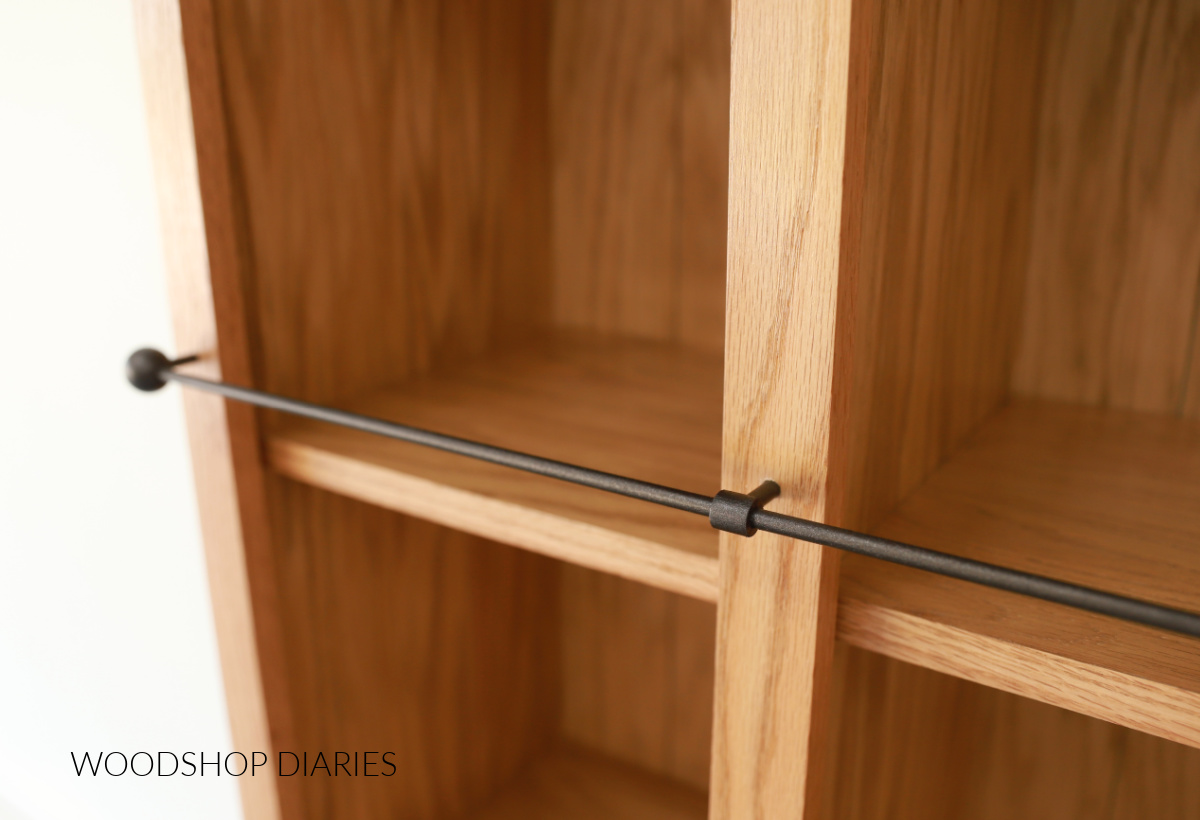
The wooden balls will serve as the “end caps” of the rail, but for the pieces that go on the dividers, I used ½″ diameter dowels.
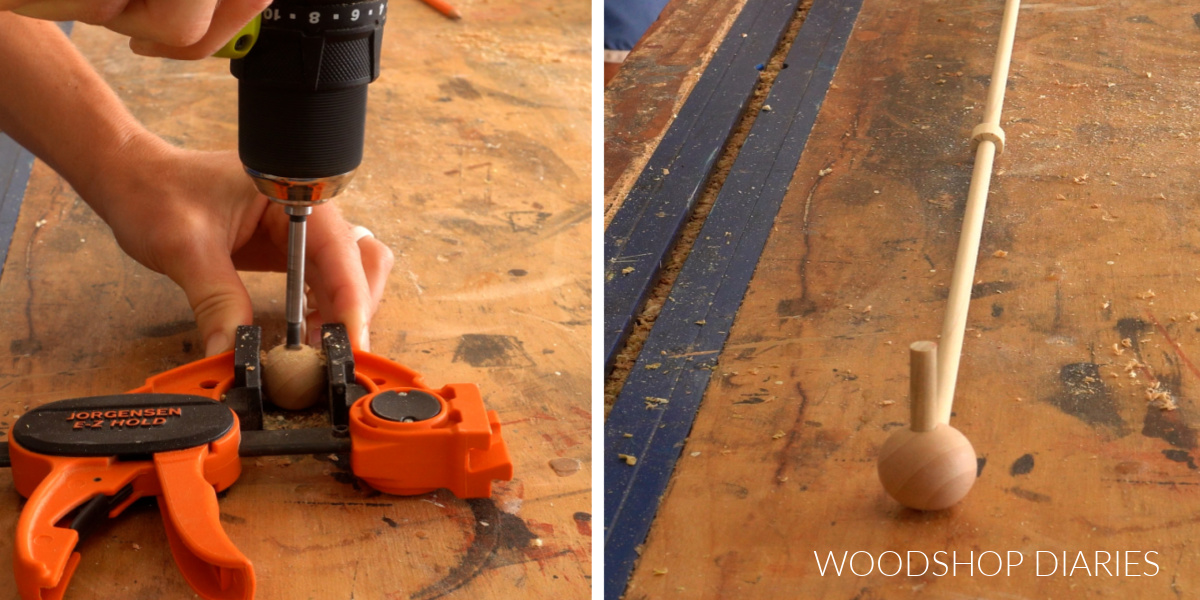
I cut these to ½″ long and carefully marked the center of each one.
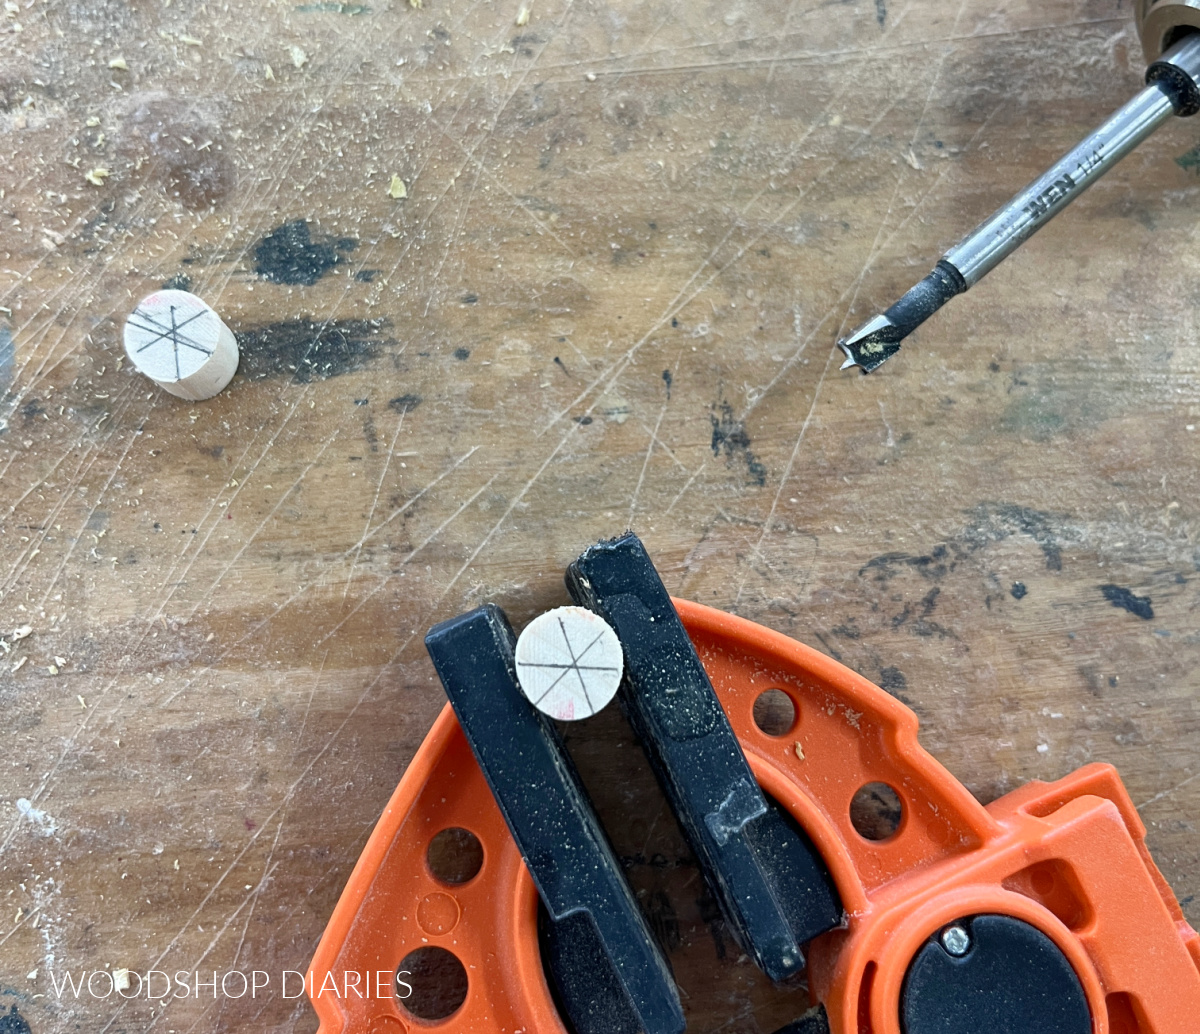
I used a ¼″ forstner bit to drill a hole through the center of the dowel. Here’s a tip–I held the dowel in a clamp to get my hole started. But I found that if I tried to drill all the way through with it clamped, the pressure would break it.
So instead, once I got my hole started, I removed it from the clamps.
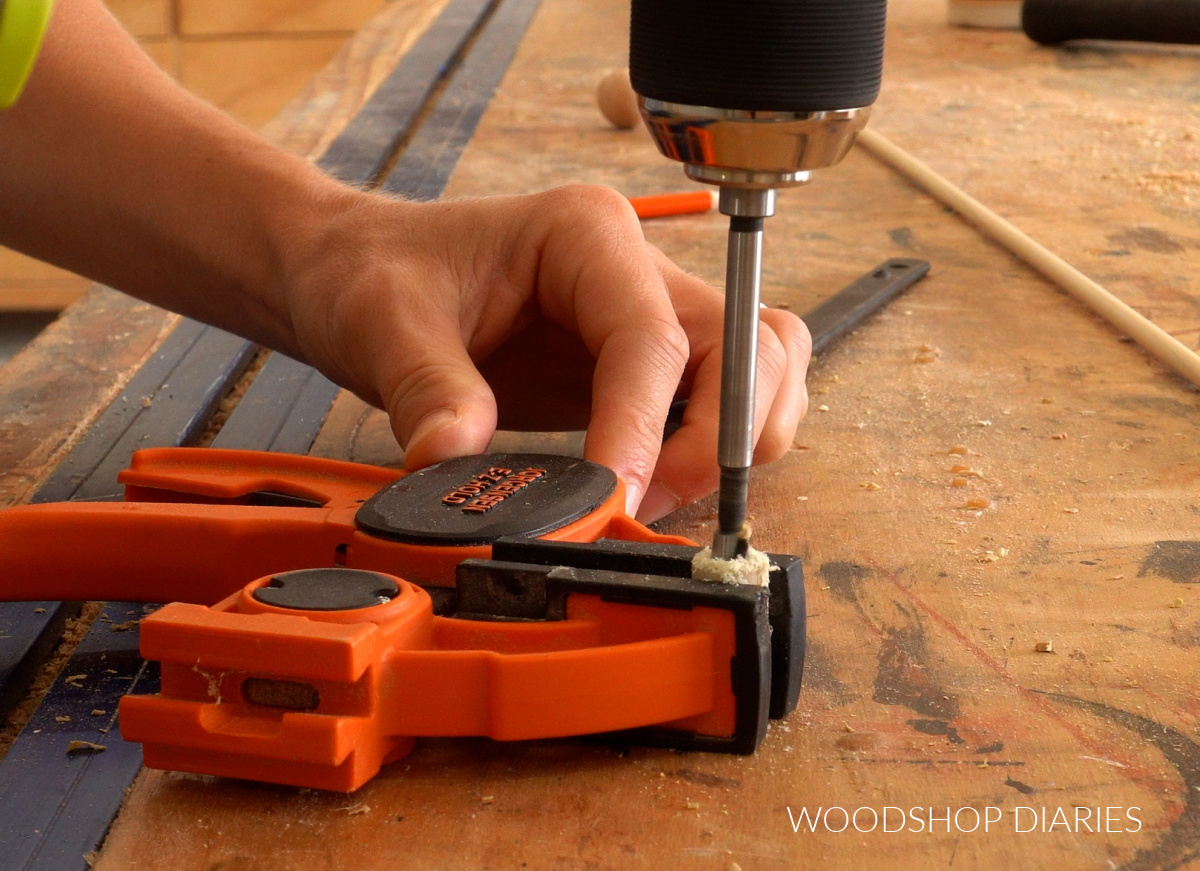
At that point, I CAREFULLY held it between my fingers to drill the rest of the hole. Drill SLOWLY. Do not attempt this with a regular drill bit or a spade bit.
If you didn’t want to use your fingers, a pair of pliers could work, but use some tape between the pliers and the wood so it doesn’t scratch it up–and don’t squeeze too hard!
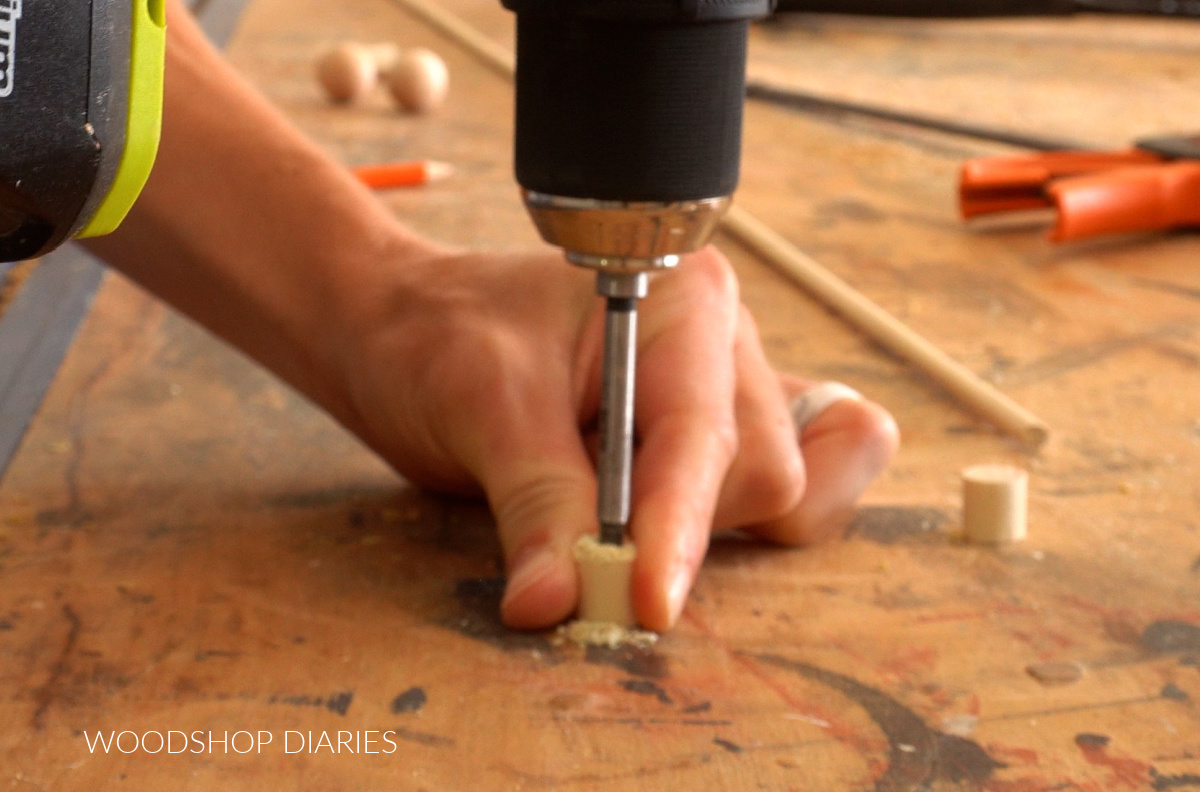
It’s important to try your best to drill straight so you can keep the hole centered through the dowel. But if it’s a little off, that’s okay. It doesn’t have to be PERFECT–just close.
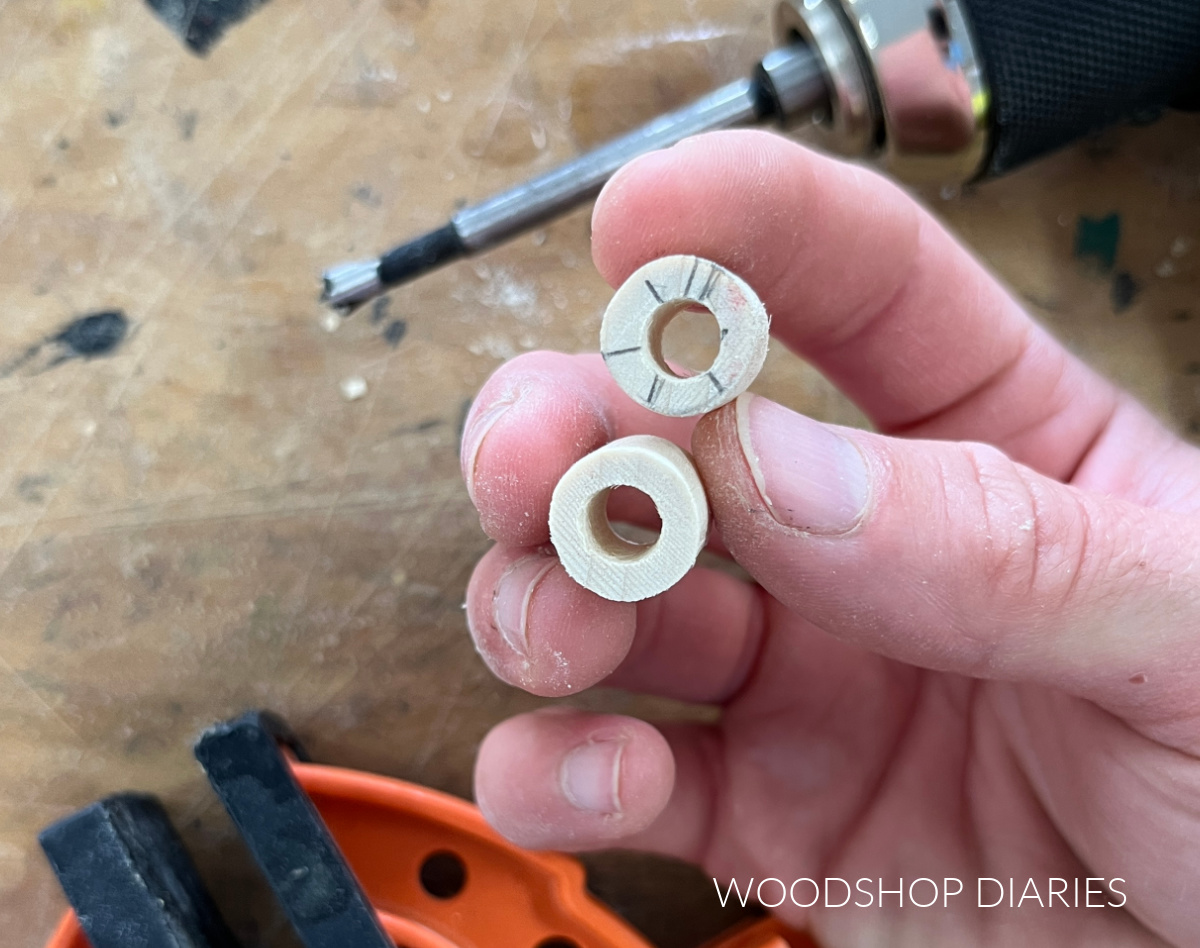
Sand these pieces lightly with 220 grit sandpaper by hand before moving to step 3.
Step 3: Install Pegs on Back
Next, I slipped the ½″ dowels onto the ¼″ dowel rod I was using for the railings and slipped the wooden balls onto each end. Don’t glue anything in place yet.
I recommend taking this rail to your bookshelf and sliding the ½″ dowels and the balls on the rail so that they’re centered on the bookcase framing–or in whatever position you’d like them to be for your project.
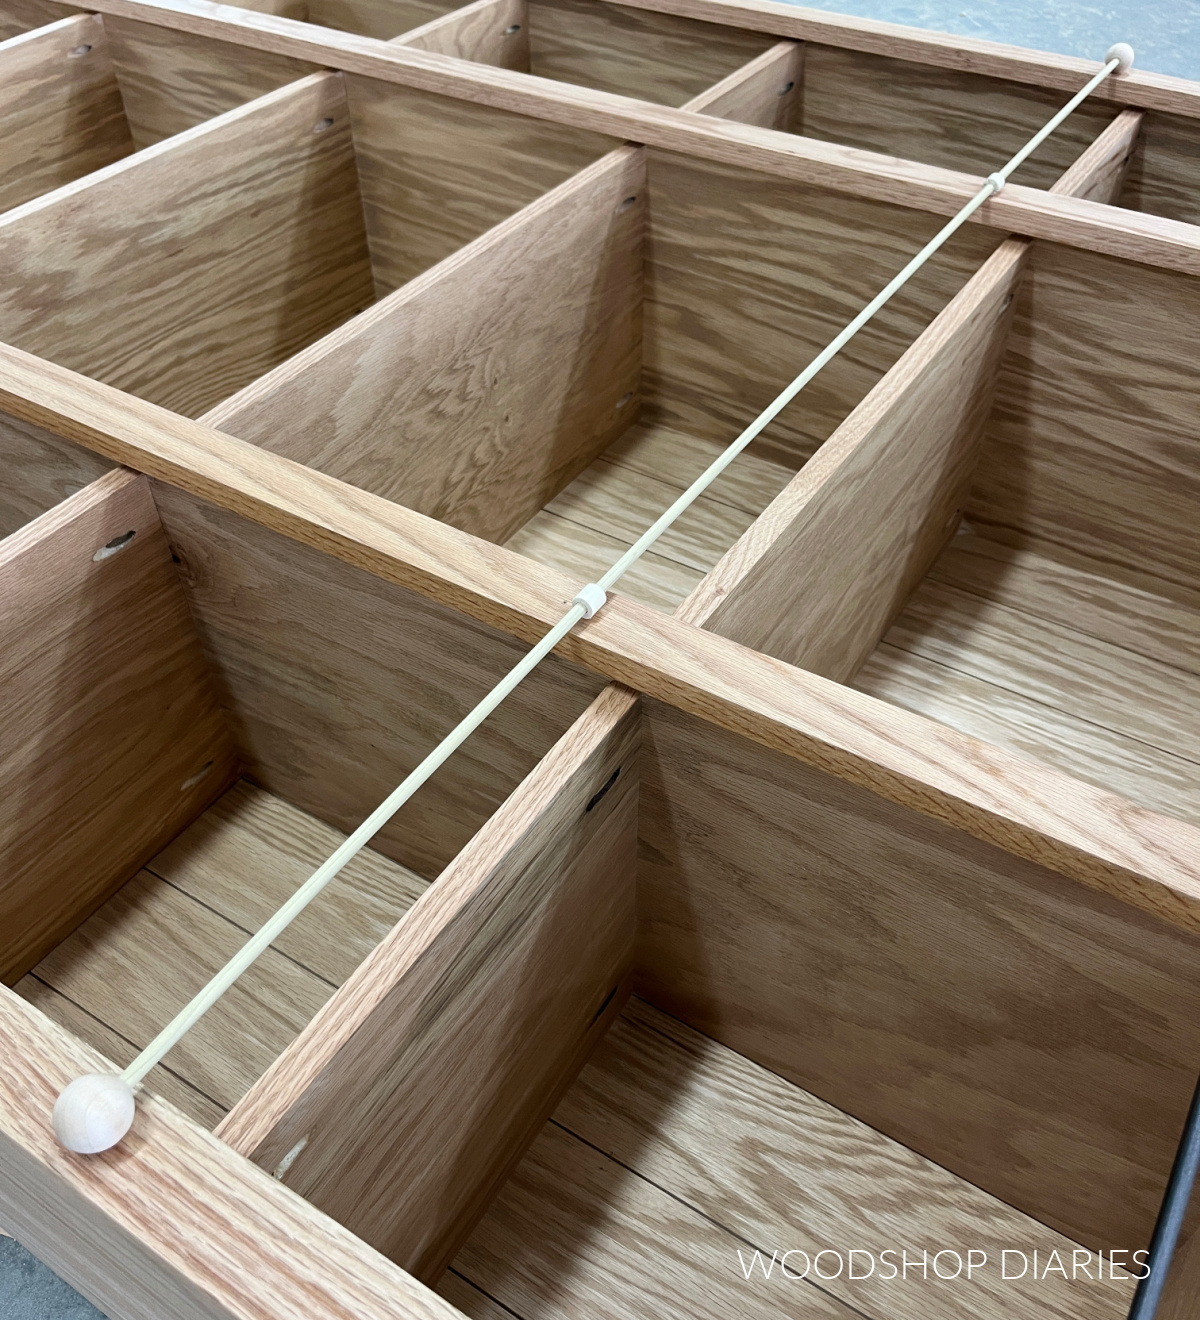
Without sliding the pieces on the rail, bring the rail back to the workbench to install the pegs on the back.
I clamped the wood balls to hold them still and carefully drilled a hole about ¼″ deep straight into the back of each one. Then I slipped in a 1″ long ¼″ dowel (don’t glue these!).
Then, I did the same thing on the back of each ½″ dowel piece. Carefully drill just deep enough that a ¼″ dowel will go into the hole.
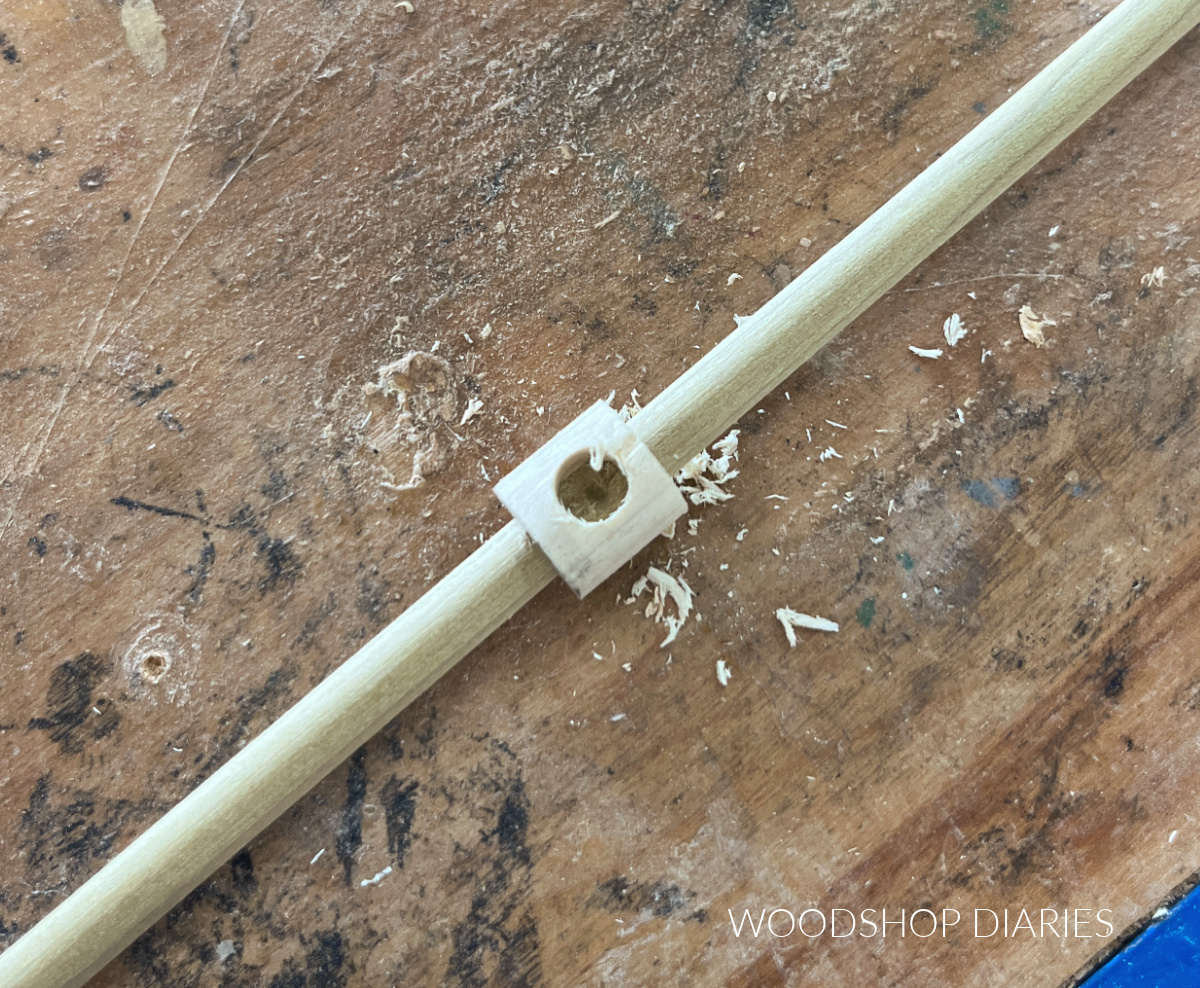
I glued the 1″ long ¼″ dowels into these pieces and before allowing to dry, I made sure they looked straight and square.
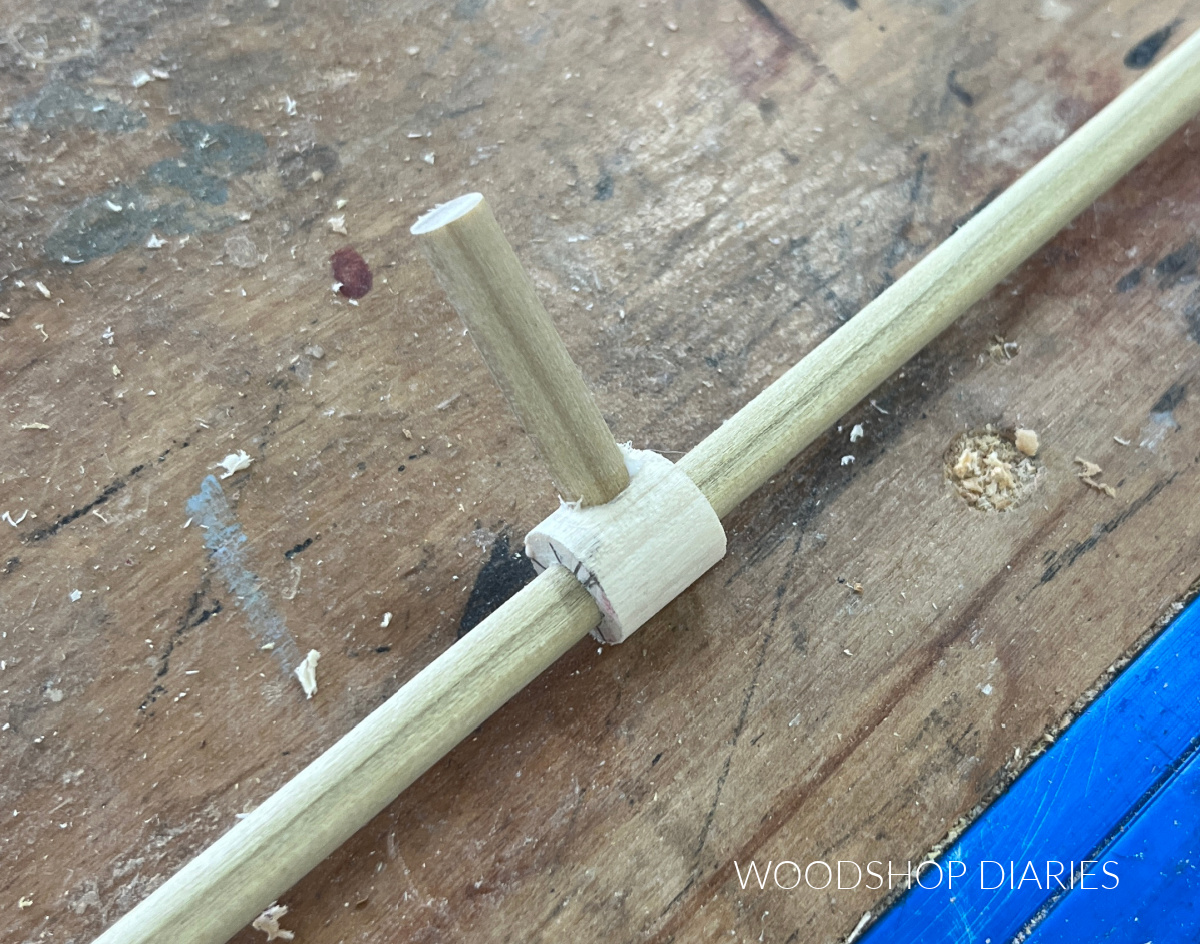
The balls on the end aren’t glued, so they can be moved/adjusted for alignment as needed (this is intentional). But since these middle pieces are glued, it’s important to make sure they’re aligned before letting them dry.
Eyeball down the rail to see if they line up with each other and adjust if needed.
Step 4: Paint Rails
Once the glue had dried on the pegs, I took these out to spray paint them with metallic spray paint. Make sure to cover them well.
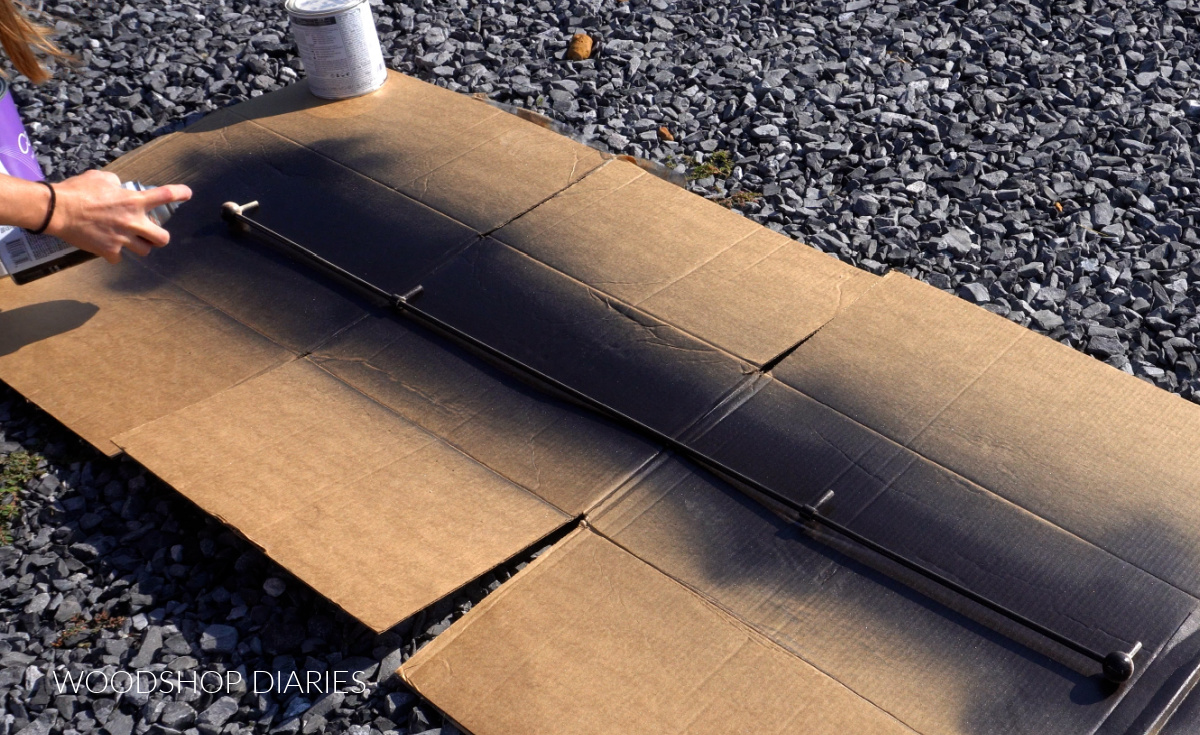
Feel free to choose a color that compliments your project–rose gold, brass, oil rubbed bronze. There are a lot of metallic paint options, so get creative!
Step 5: Install Gallery Rails to Shelf
Once the paint had dried, all that’s left is installing them to the actual bookcase!
I recommend laying the bookcase on it’s back for this part to make things easier to measure and lay out.
I measured out where I wanted the railings to go. Really, this was just a matter of deciding how far above the shelves I wanted them to be. I settled on about 2″ above each shelf.
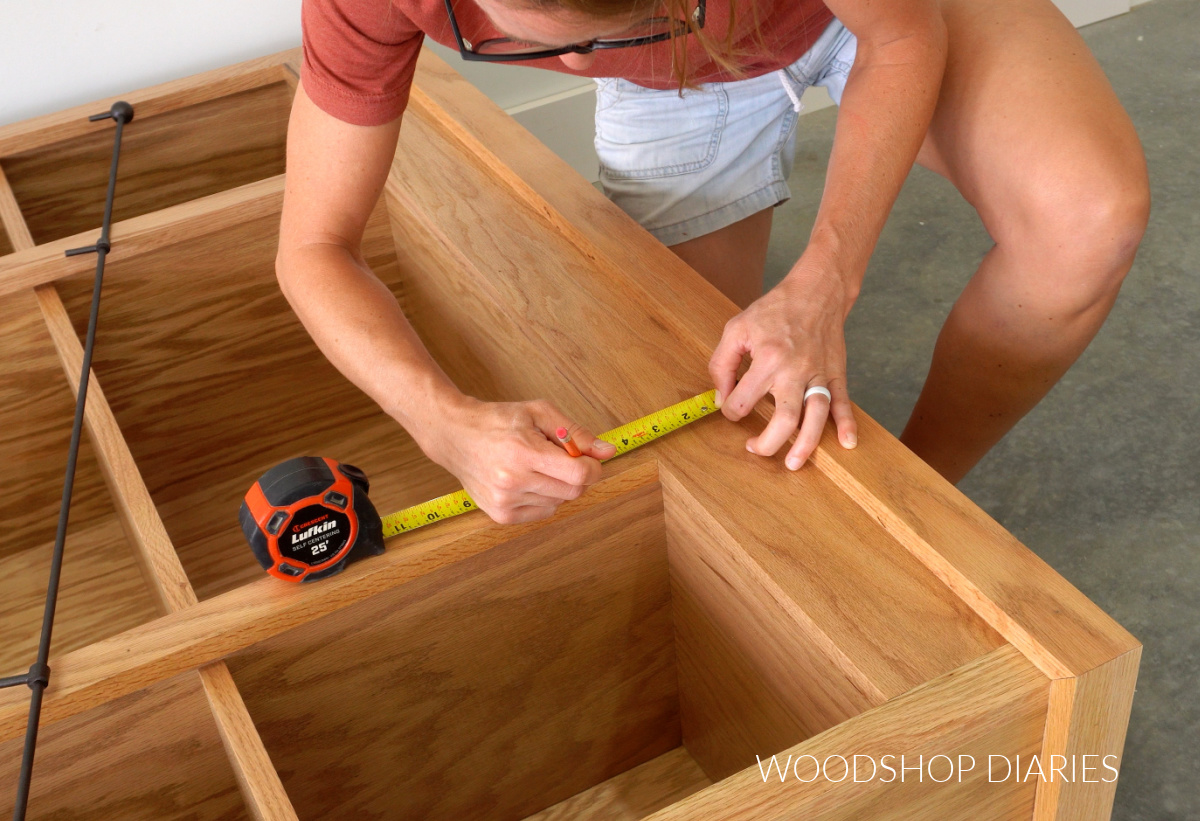
So I measured from the bottom of the bookcase and marked where 2″ above each shelf would be on the center of each vertical face frame piece.
After I made my marks, I placed the railing across them to make sure the pegs did in fact line up with the marks.
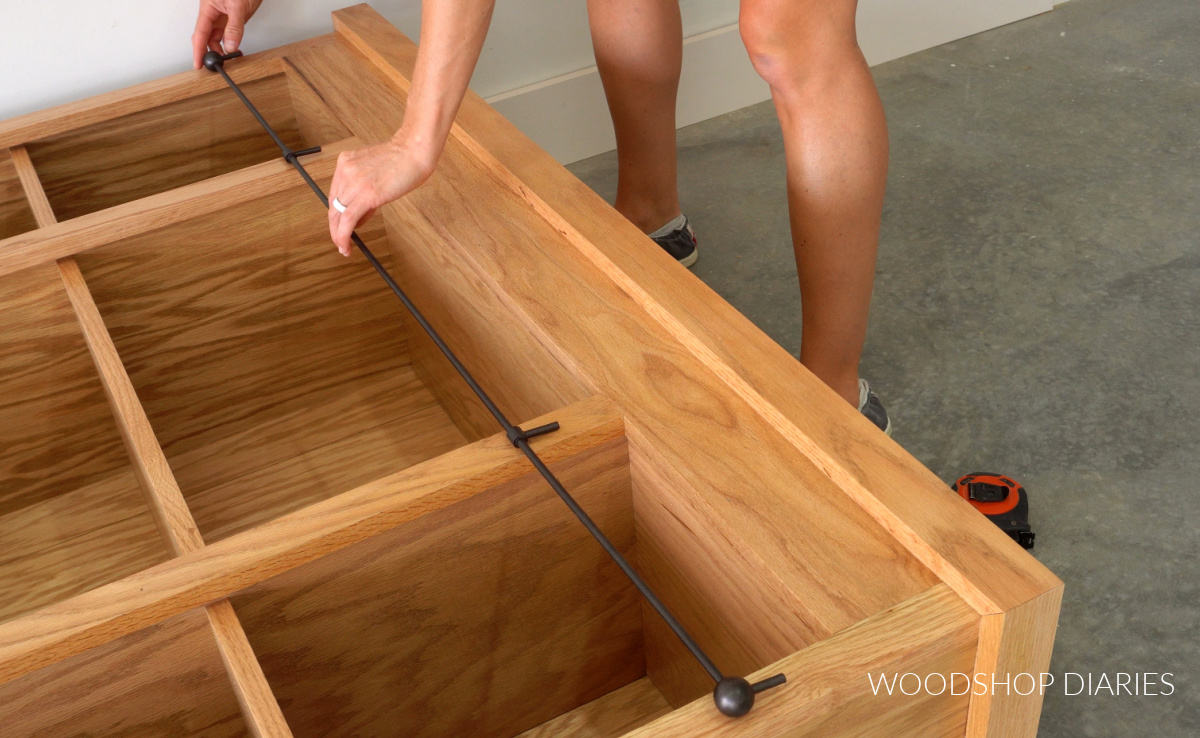
Once I made sure everything lined up, I drilled holes (again with my ¼″ forstner bit) about ¼″ deep at each mark.
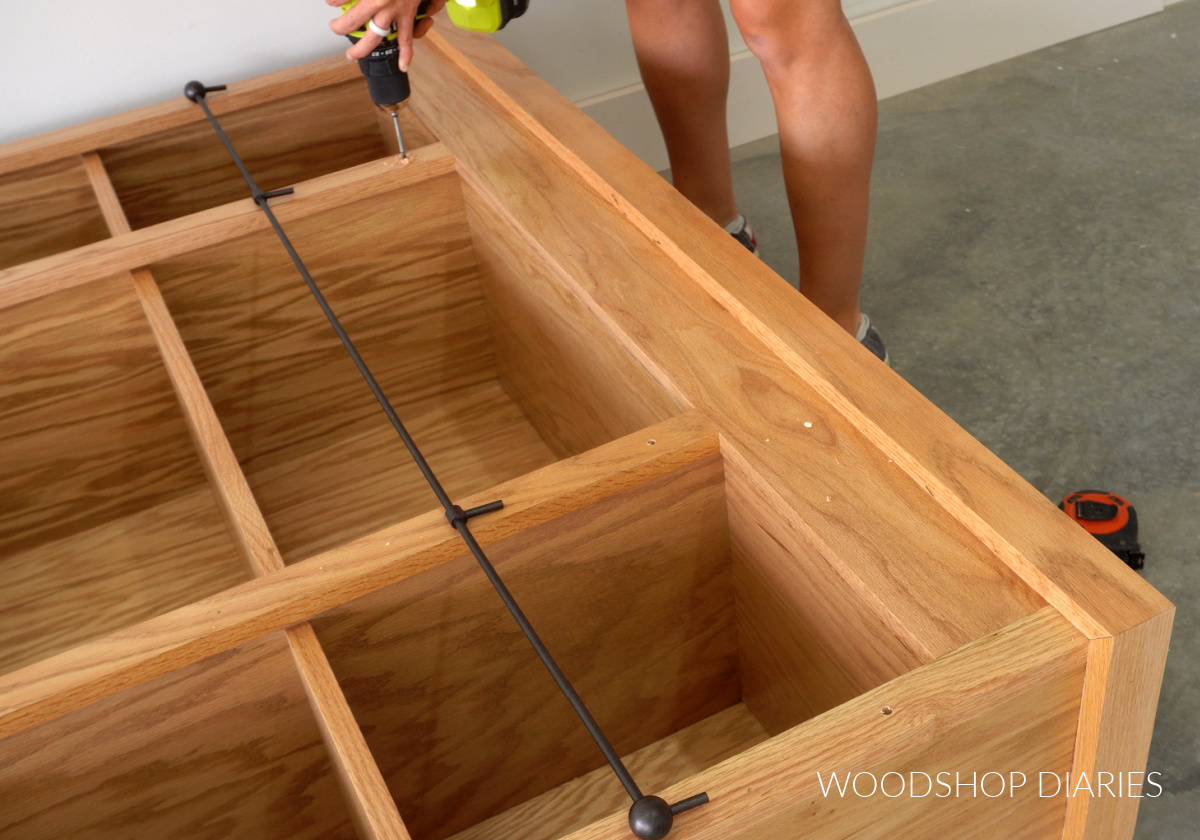
Then I used a rubber mallet to carefully tap the back pegs into the holes. I didn’t use wood glue here. It’s a pretty snug fit, so I don’t think it’s needed.
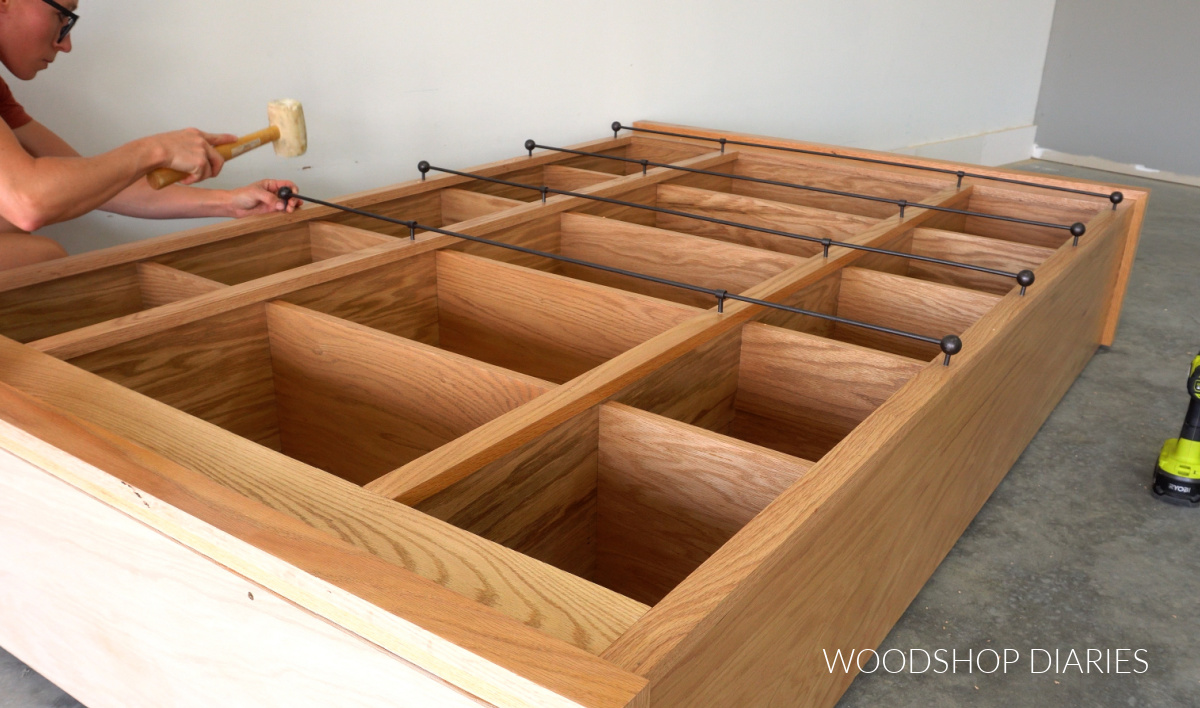
Not gluing allows me to to be able to remove them later if needed to repair/replace if one gets broken, if I change my mind and don’t want them anymore, or if I decide to spray paint them a different color.
Once the last rail was in place, I flipped it back up and was impressed to see how realistic it looked!
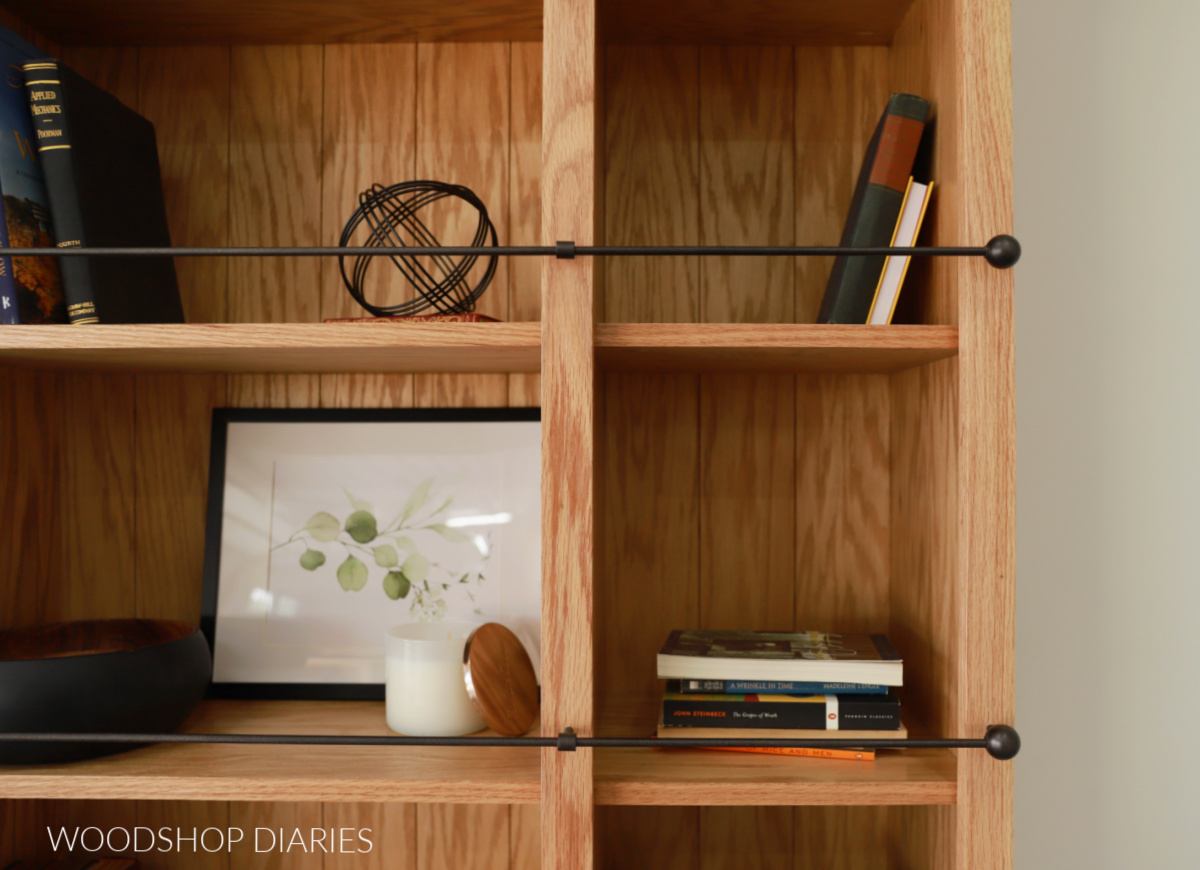
So many people have told me they can’t believe it’s wood–it looks just like the fancy, expensive metal railings you see online. But it cost SO much less!
While this was installed on a bookcase, it would work well on wall shelves, too! You can turn the pegs down and install them in the top of a wall shelf, or add them to a bookshelf that way instead of across the front.
I hope this gives you some ideas and inspiration to try on your next shelving project!

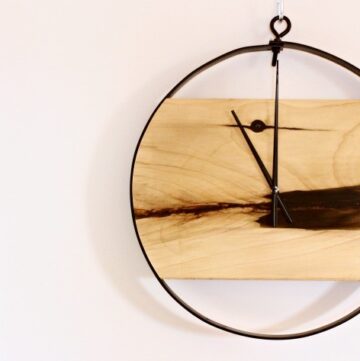
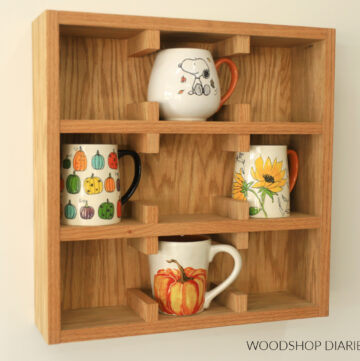
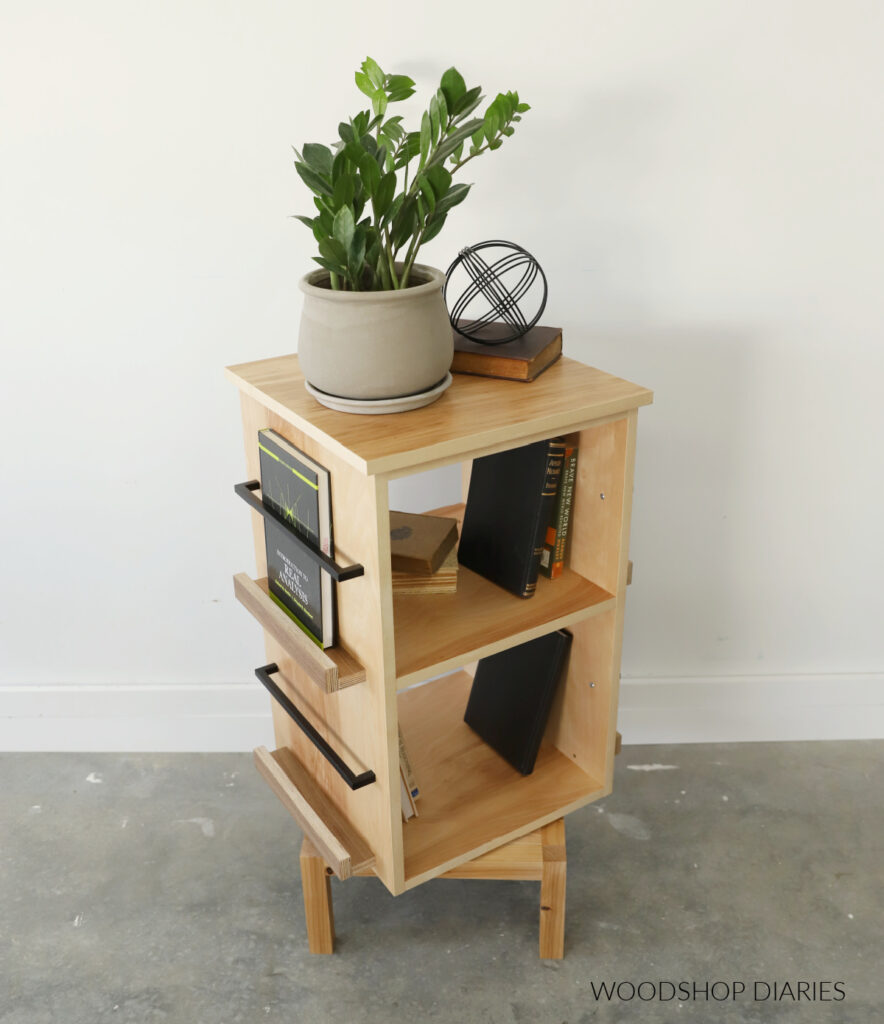
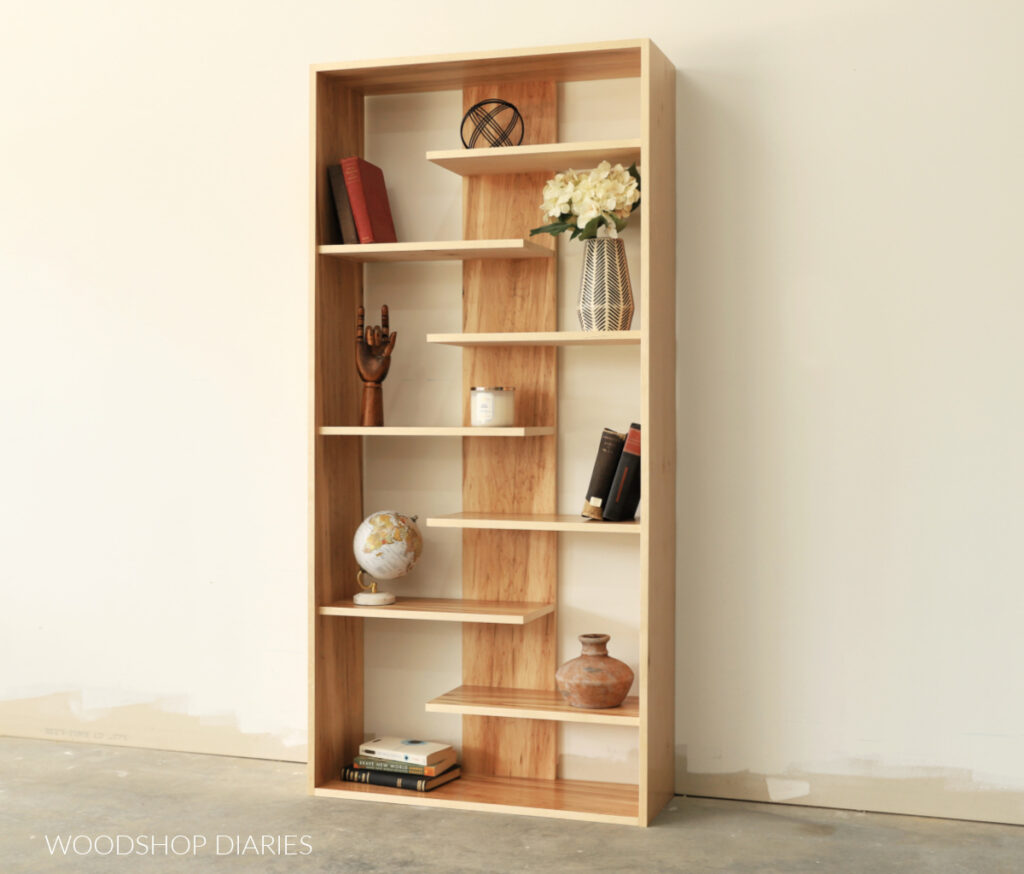
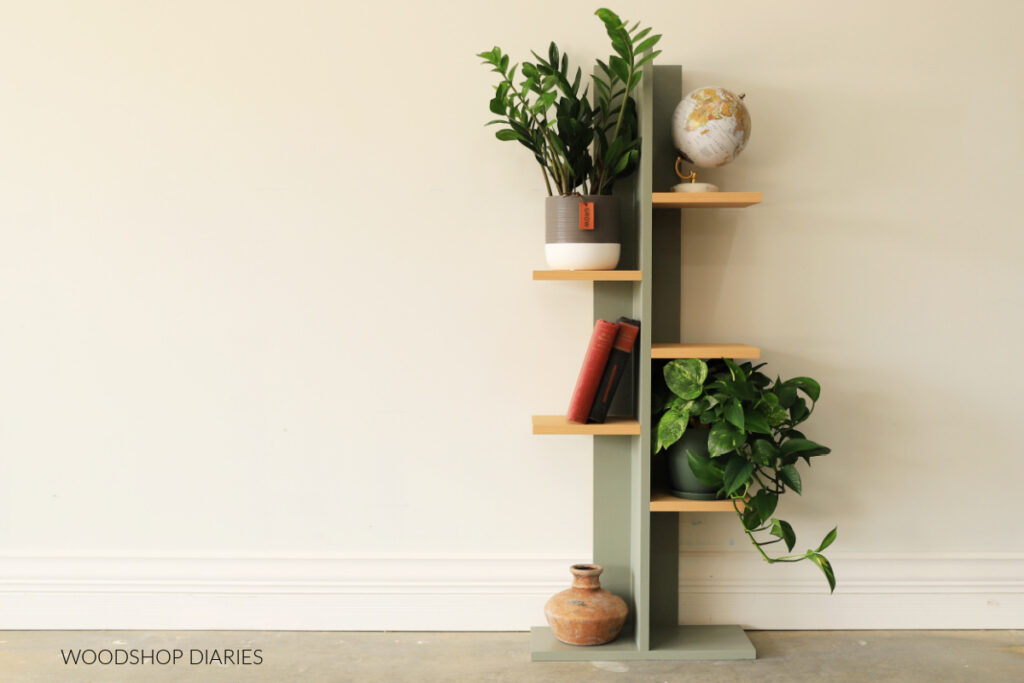
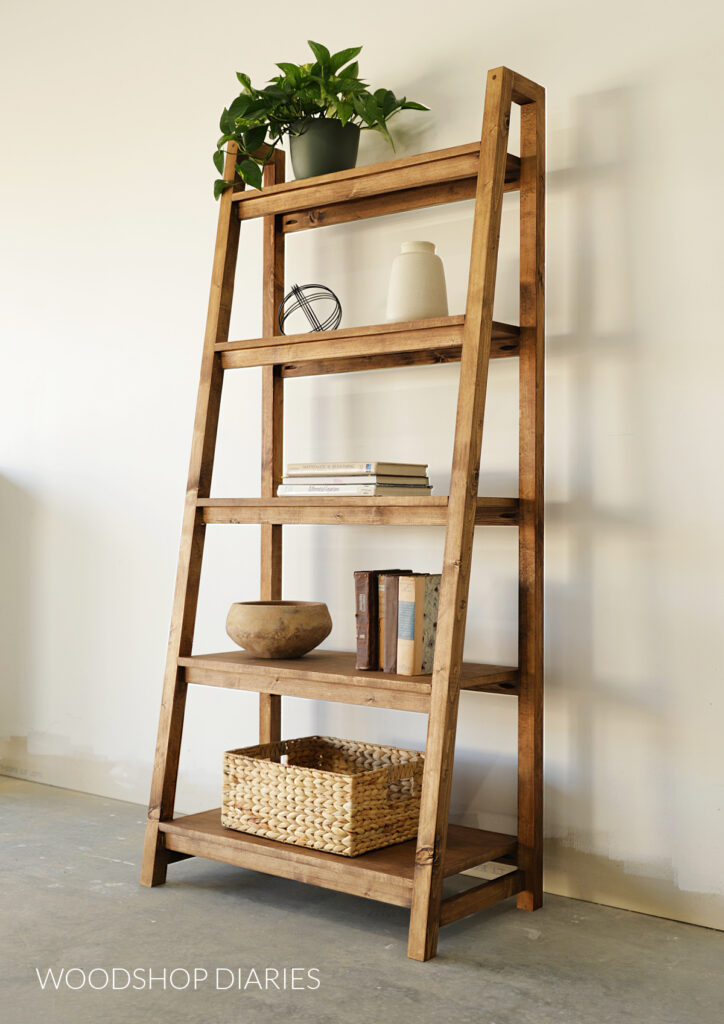
Looking for more DIY shelving projects?
Looking for some unique shelving ideas? Each of these projects are unique in their own way and are easy to build. Click on the images below to see how to build each one.
Enjoyed this DIY gallery rail hack and want to save it for later? Be sure to pin it or share it to your favorite social channel!
Until next time, friend, happy building!