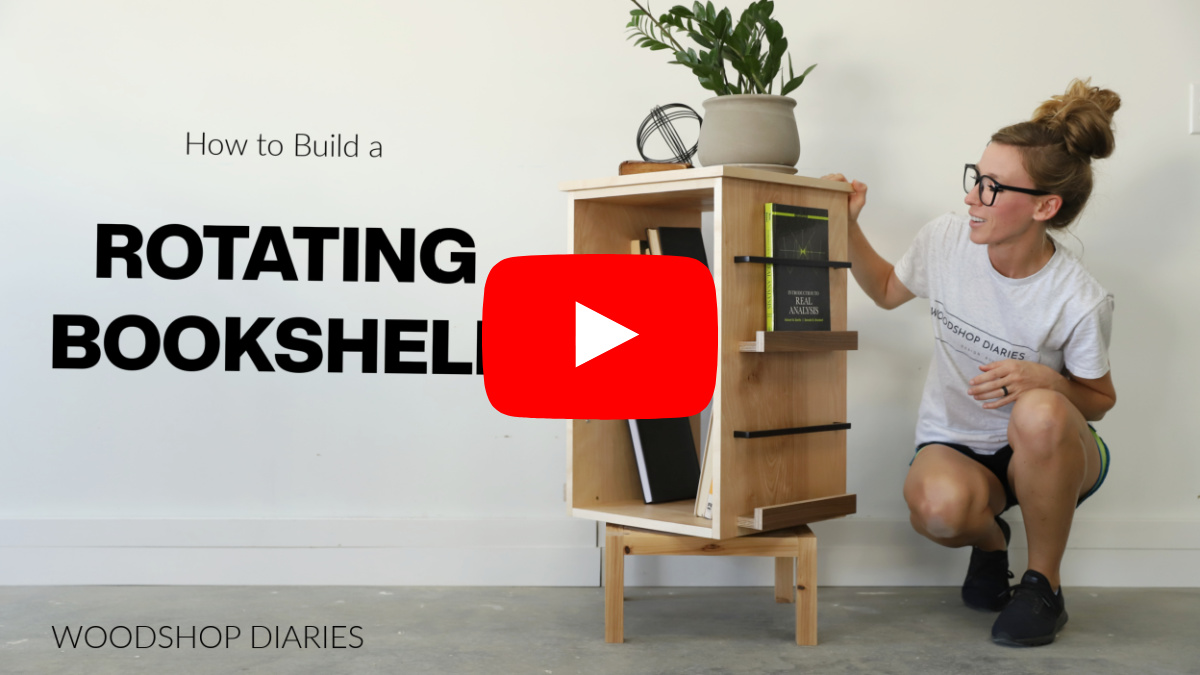
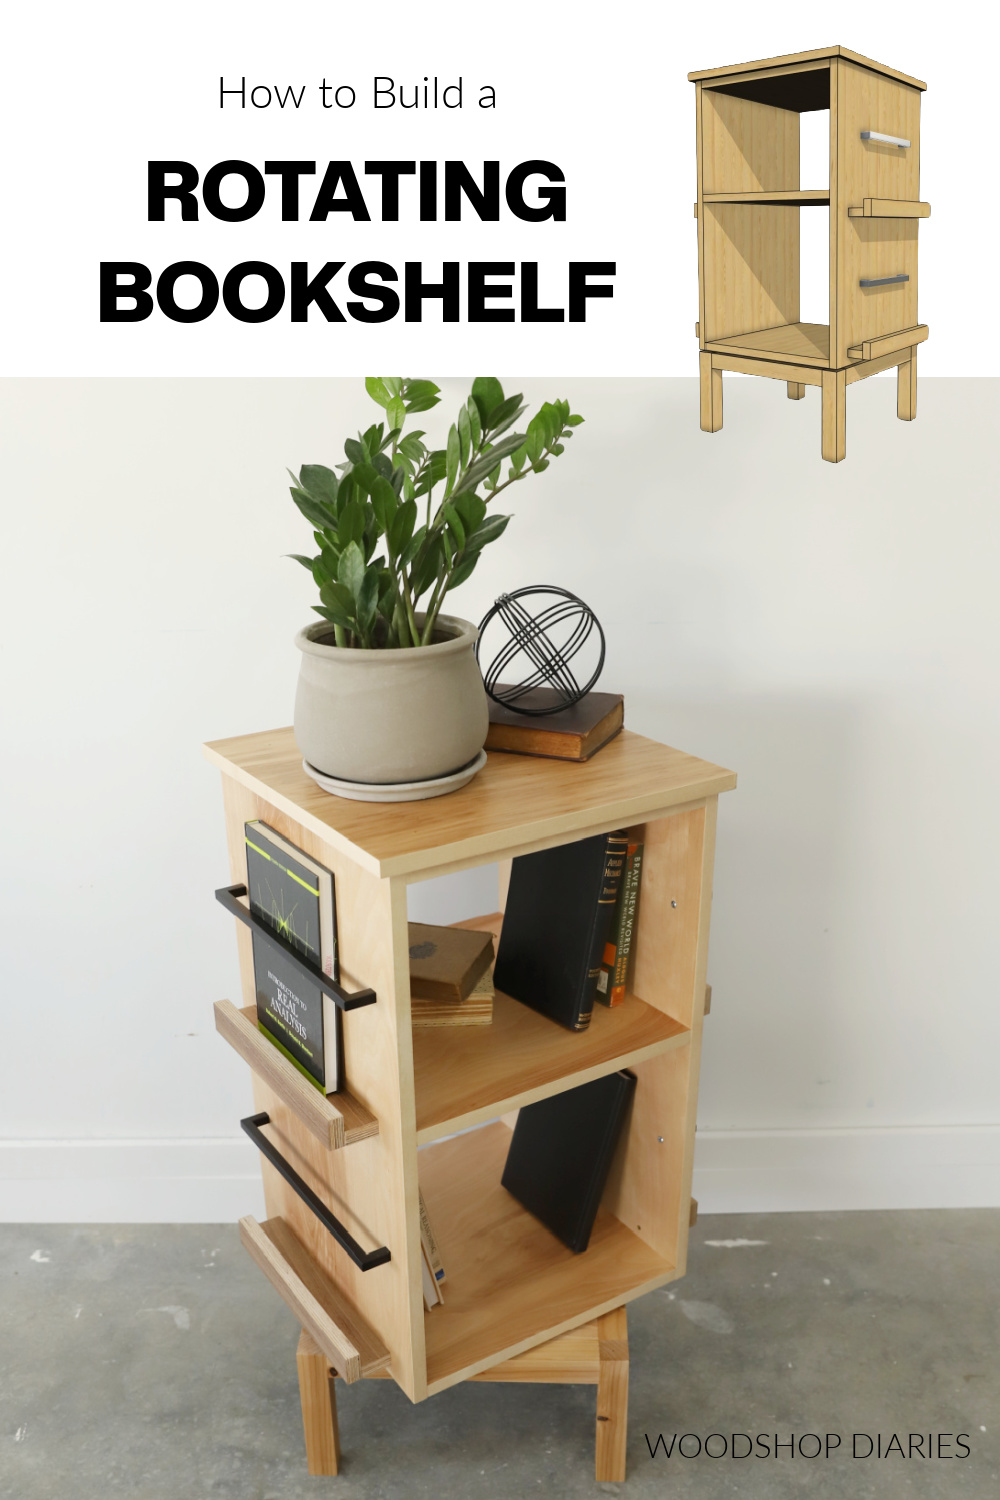
In this post, I’m showing you how to build this simple DIY rotating bookshelf using basic tools and materials!
Built on Lazy Susan hardware, this shelf spins either direction for easy access to all sides. What a unique way to store your favorite books and magazines!
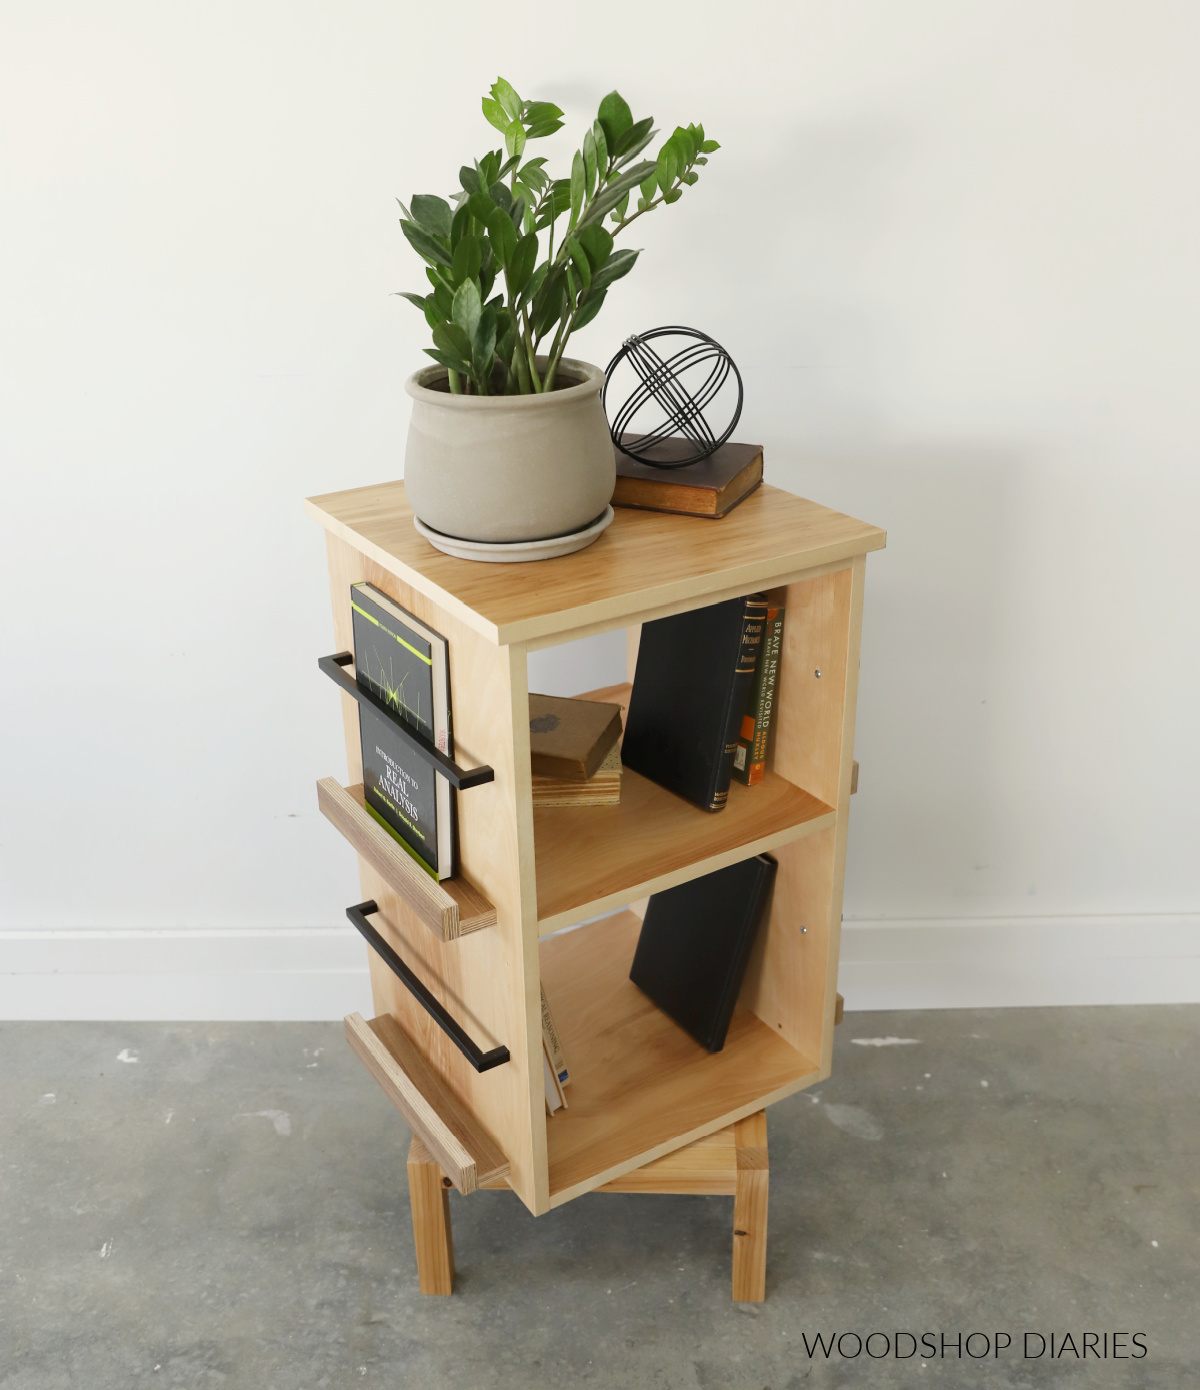
What a fun an unique way to store and display your favorite books, records, DVDs or even board games!
This rotating shelf is a fun addition to any room of the house with plenty of storage inside and out.
I’m excited to share how to build your own, so if you’re ready, let’s dive in!
*This post contains affiliate links. See policies.
What to know before building
This DIY rotating bookshelf is a great beginner to intermediate build. It uses basic tools and techniques and is a great project to learn more about installing Lazy Susan hardware.
I built this project using birch plywood for the main body, pine/fir 2x2s for the base, and walnut plywood scraps for the ledges on the sides.
Check out this post to learn how to choose the correct plywood for your projects.
However, this can be built from whatever species of wood you prefer. I highly recommend checking your scrap piles as you may have almost everything you need already there. The pieces of this project are all fairly small.
If you didn’t want this to rotate, you can totally skip the Lazy Susan hardware and simply screw the base to the bottom of the bookshelf instead.
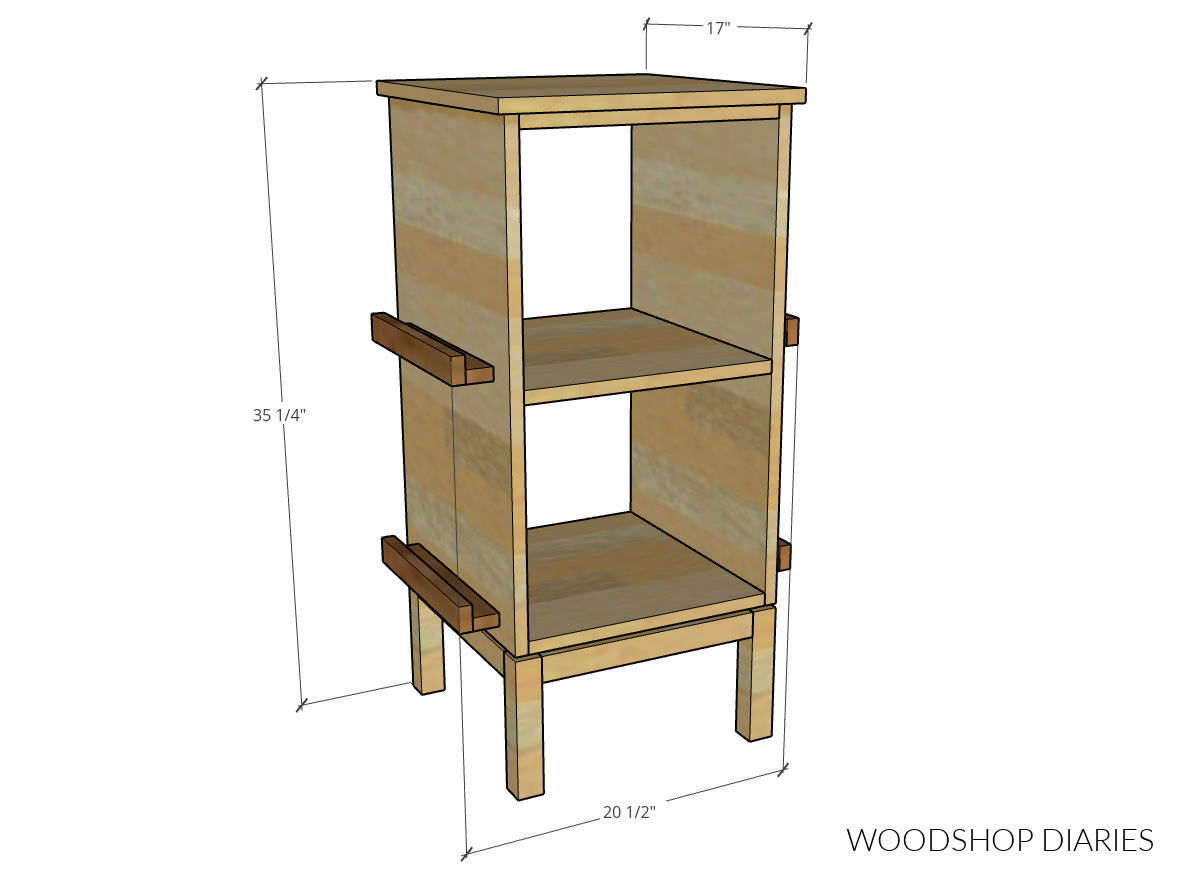
Overall dimensions
The overall dimensions of this project are approximately 17″ x 20 ½″ x 35 ¼″.
How to Build a Rotating Bookshelf
I’m sharing the step by step below, but if you prefer watching, I’ve also got a video tutorial on my YouTube channel with tons of tips and helpful resources.
Love watching how-to videos? Subscribe to my YouTube channel for plenty more where that came from!
Are DIY projects your thing? Sign up for our newsletter for priority access to the latest projects and build plans!
You may find these guides helpful throughout this build:
Tools & Materials
Tools:
- Miter Saw
- Circular Saw
- Cutting Guides (Kreg Rip Cut & AccuCut)
- Drill/Driver
- Pocket Hole Jig
- 1″ diameter Forstner drill bit
Materials:
- (1) 2x2x8 board
- (1) 4×8 sheet ¾” plywood
- Iron on edge banding
- (4) 12” drawer pulls
- 12″ Lazy Susan
- ⅝″, 1 ¼” and 2” wood screws
- 1 ¼” pocket hole screws
- Wood Glue
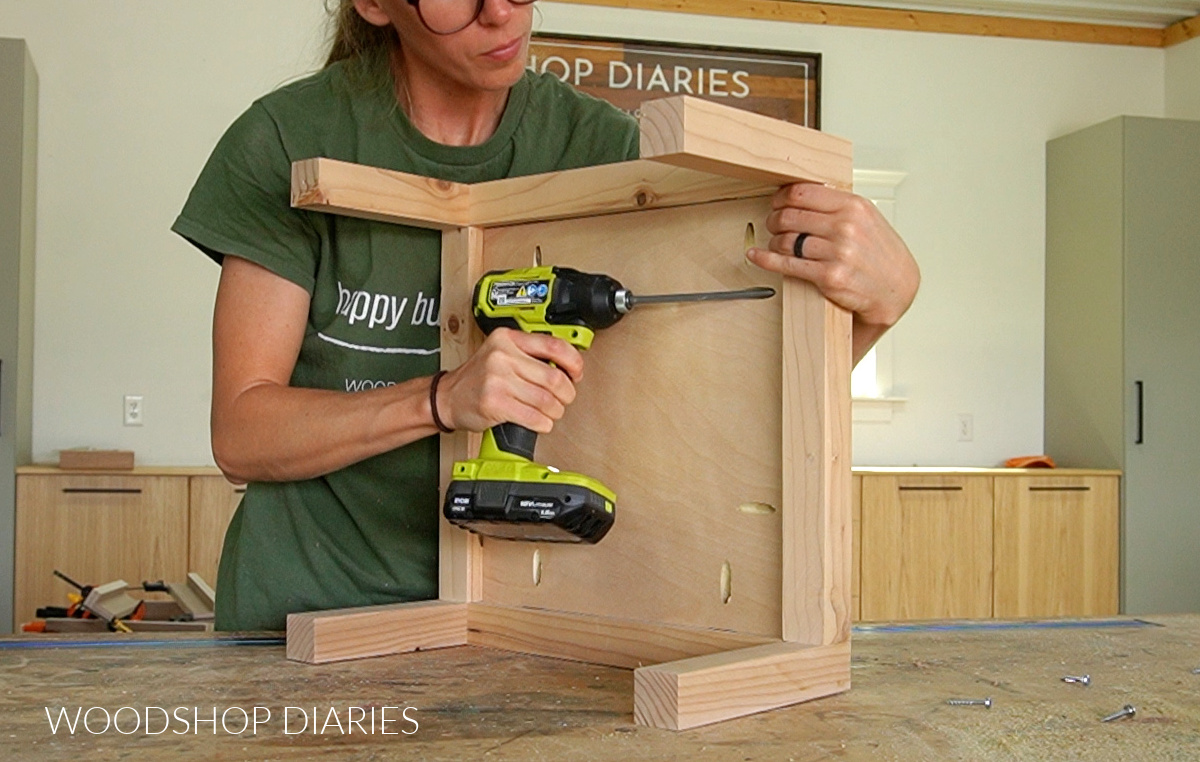
Step 1: Assemble Bookshelf Box
First, I ripped my ¾″ birch plywood sheet into a 16″ wide strip. Check out this post to see how I cut my plywood down.
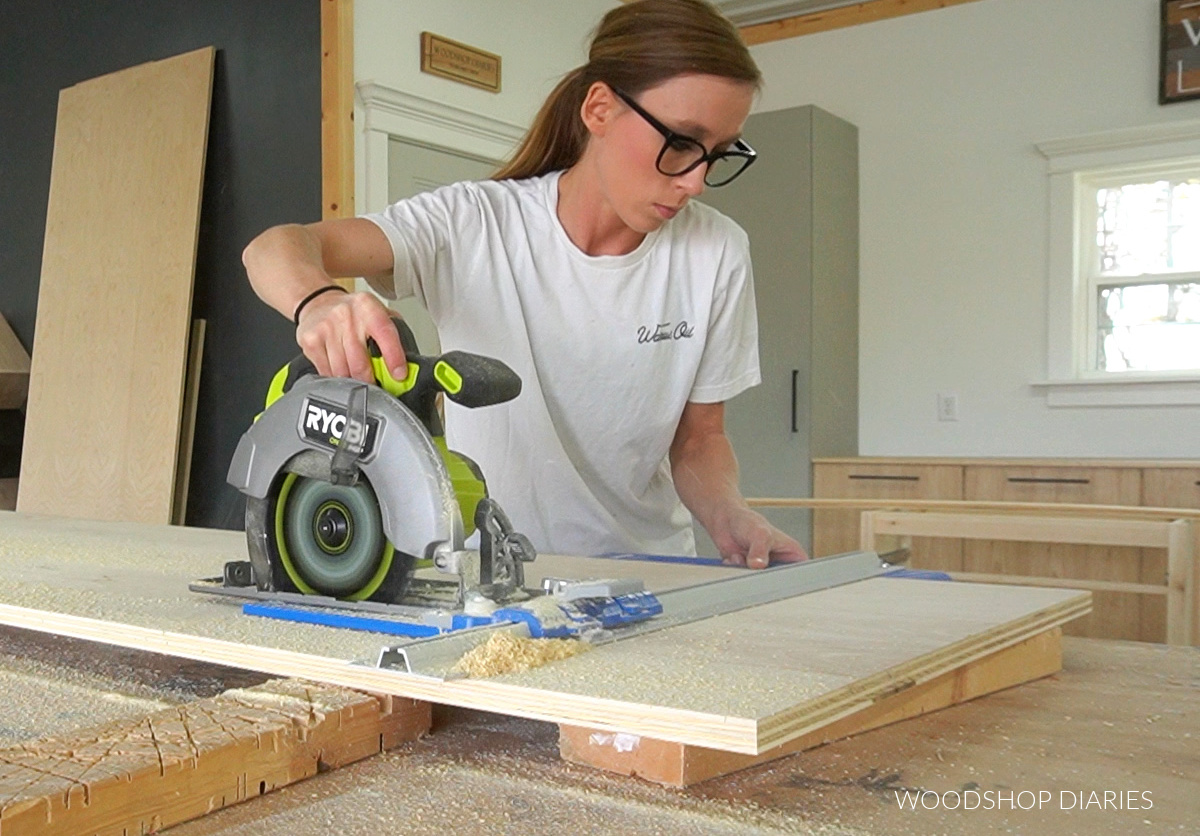
From this strip, I cut two pieces 26″ long for the bookshelf sides and three pieces 14 ½″ long–one for the top, one for the bottom, and one for the middle shelf.
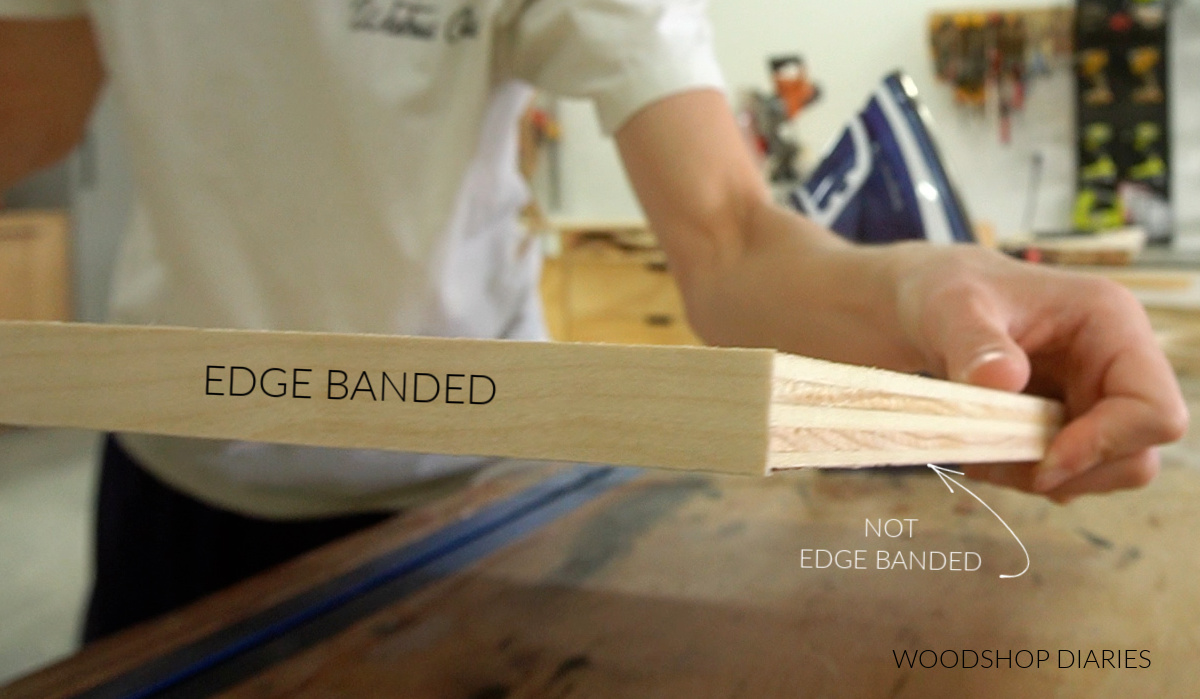
I applied iron on edge banding to the front and back edges of each of these pieces (the 26″ long sides and 14 ½″ long sides). Iron on edge banding is optional, but it’s easy to apply and makes your plywood edges look nice and clean.
Learn how to apply iron on edge banding here.
Then, I drilled ¾″ pocket holes into the 16″ long ends of the top, bottom, and middle pieces using my Kreg Pocket Hole Jig. Learn how to use a pocket hole jig here.
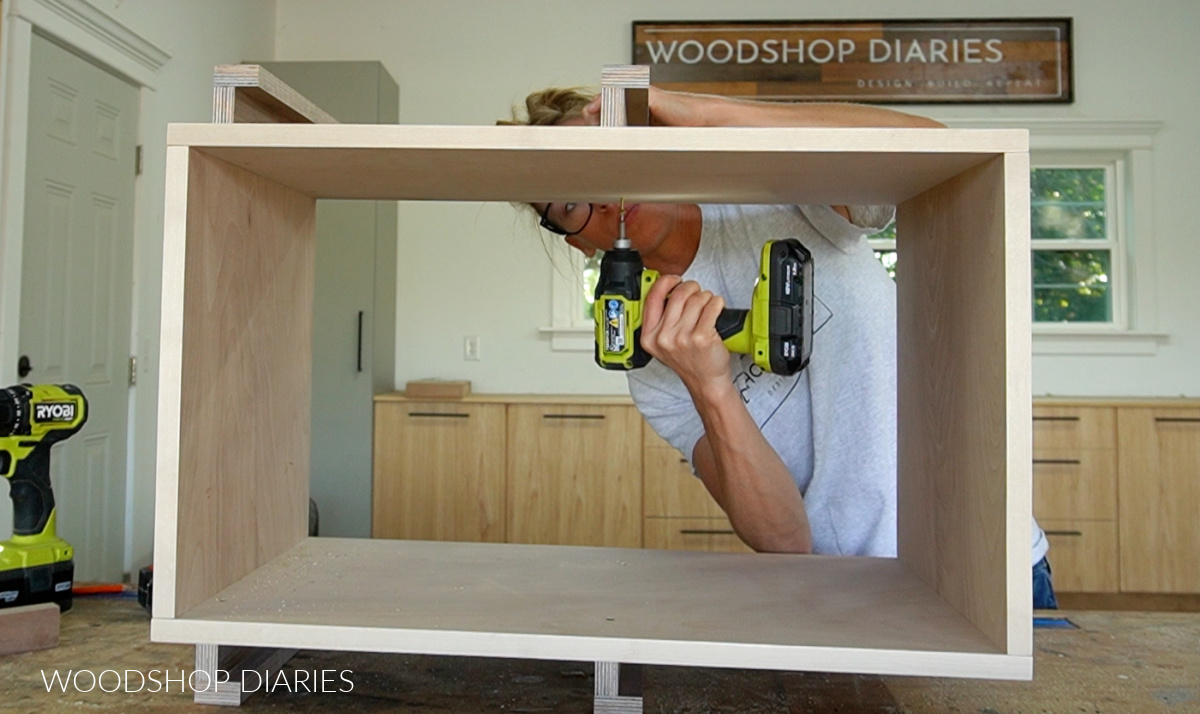
I assembled the sides, top and bottom into a basic box using 1 ¼″ pocket hole screws.
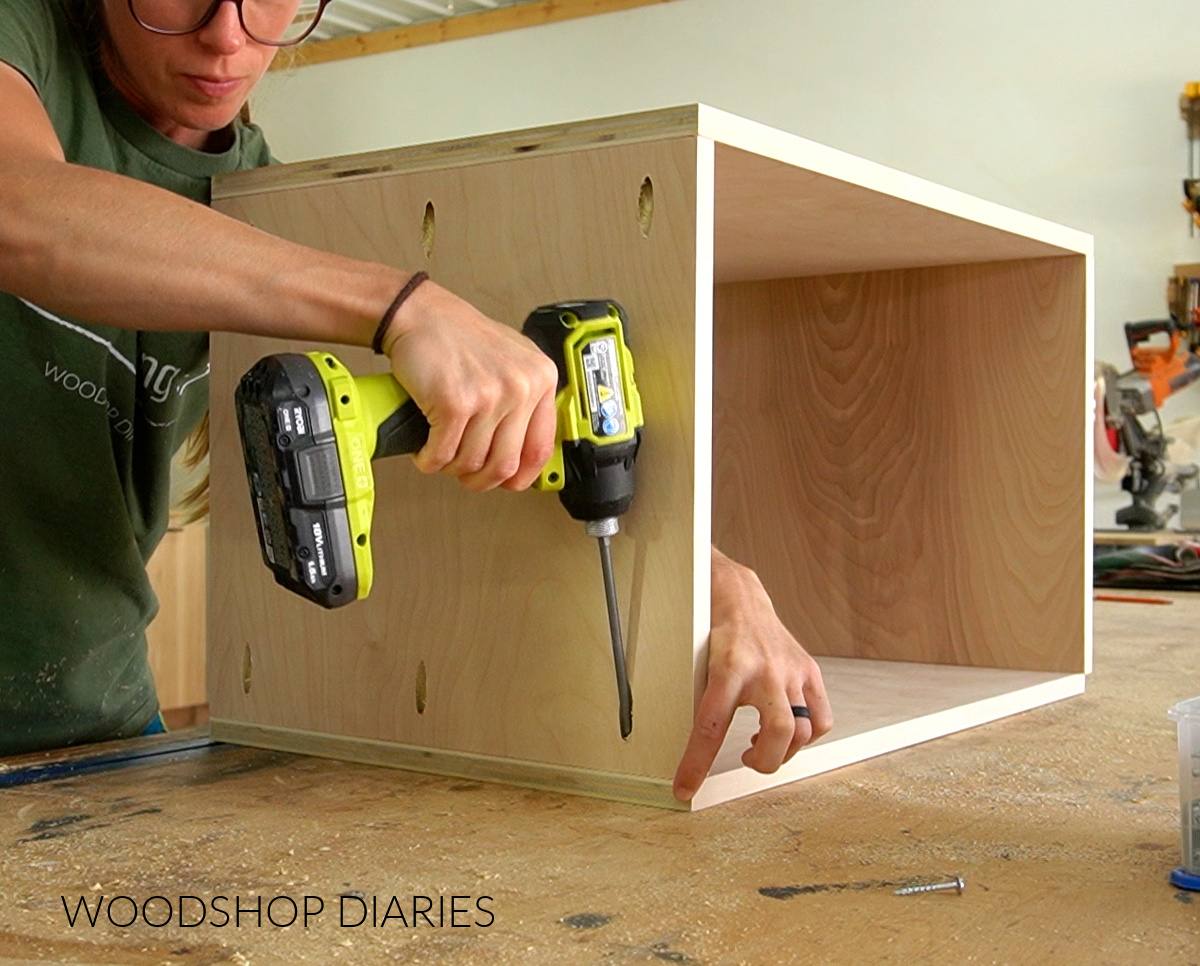
This will be the main body of the top section of the rotating bookshelf.
Step 2: Attach Book Ledges
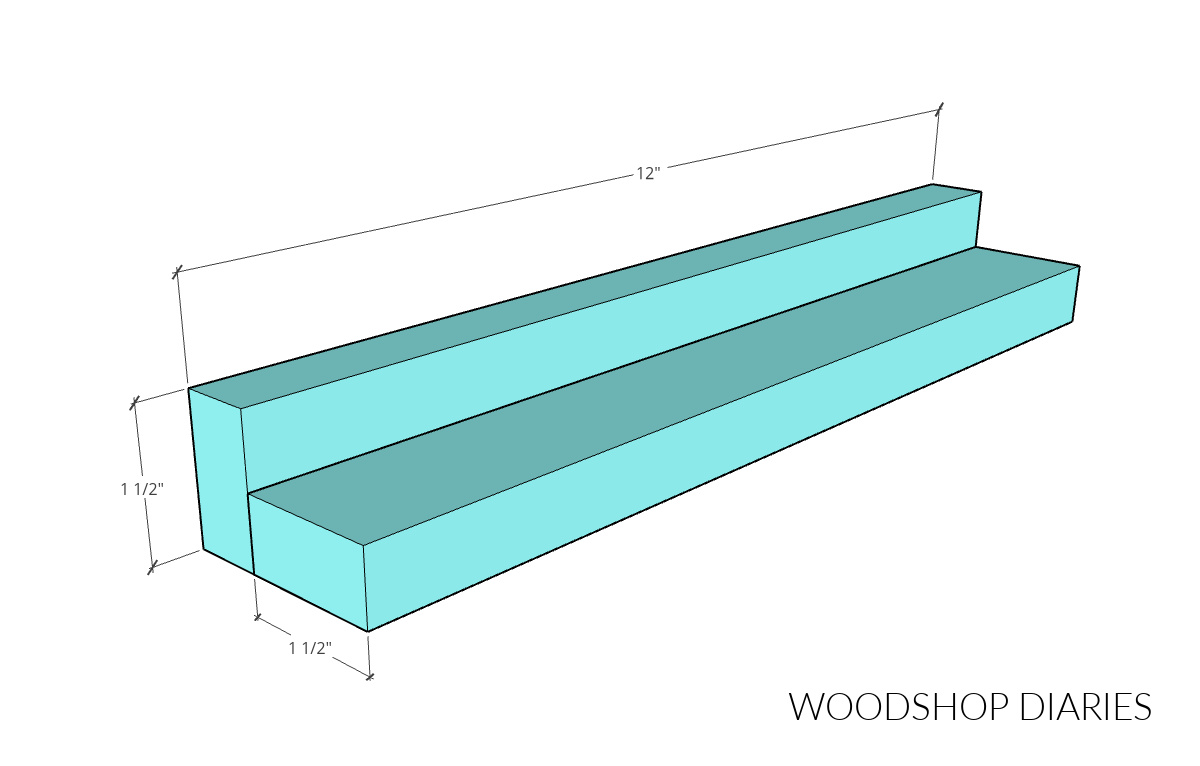
I added some narrow bookshelf ledges on the sides of this box to store thin books or magazines. To make the ledges, I ripped some walnut plywood scraps I had leftover from this console project into 1 ½″ wide strips.
From these strips, I cut 8 pieces about 12″ long and glued them into pairs to make four simple ledges.
Once the glue was dry, I placed them on the sides of the main bookshelf box from step 1 (two ledges will go on each side). I used 2″ wood screws through the bookshelf sides to install the bottom ledge about ¾″ up from the bottom of the box.
Then, I measured up from it 12″ and installed another one there. Make sure to predrill before driving the screws to prevent splitting the wood.
Once I had two on one side, I flipped the box over and installed two the same way on the other side.
Step 3: Add Middle Shelf & Top
There should be one 14 ½″ x 16″ piece left from step 1 that wasn’t installed yet. That is the middle shelf.
Once the ledges were in place, I installed this panel into the box about 13″ up from the bottom with 1 ¼″ pocket hole screws.
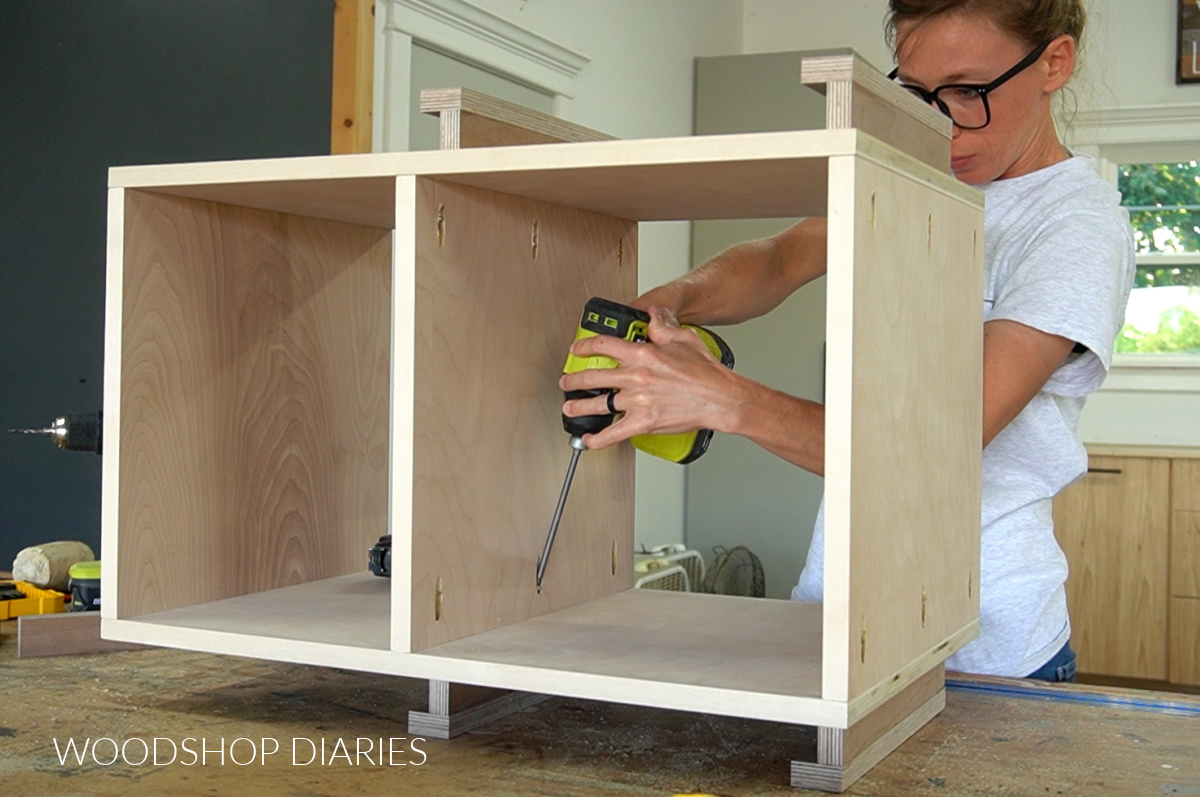
This panel should cover the screw heads from installing the top ledges in step 2.
For the top panel, I cut a piece of ¾″ plywood to 17″ x 17″ and applied iron on edge banding to all sides (of course, that’s totally optional!).
I centered this on the top of the bookshelf box and clamped it in place while I secured from the bottom side using 1 ¼″ wood screws.
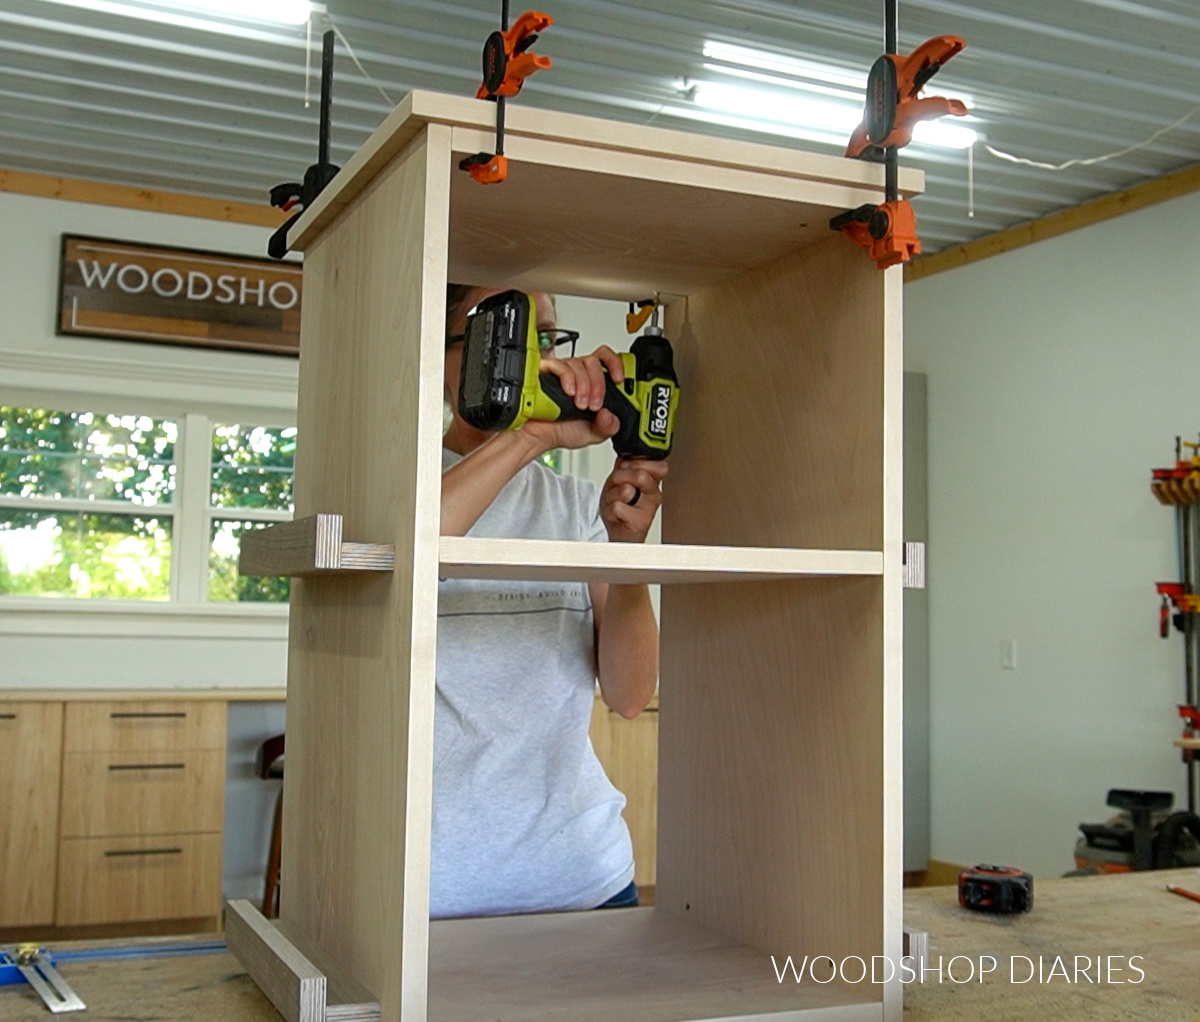
At this point, the top section of the bookshelf is complete, so I set it aside to work on the base.
Step 4: Assemble Bookshelf Base
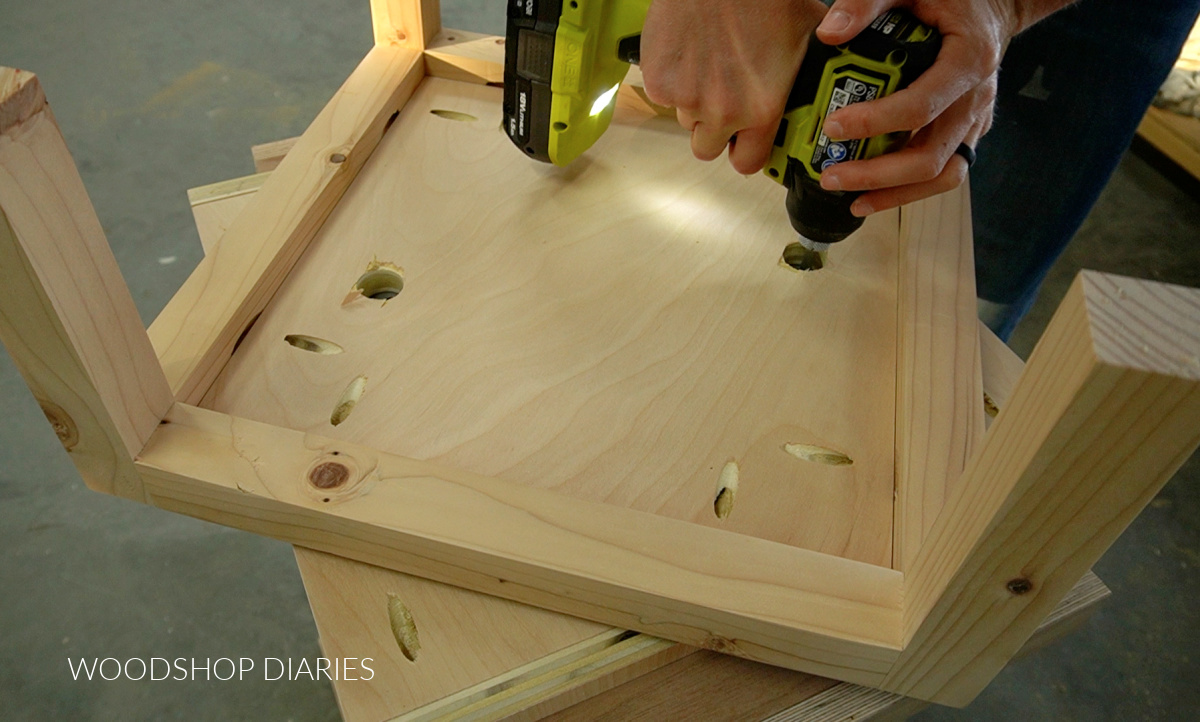
The bookshelf base is made with 2x2s for the frame and a piece of plywood in the center. So first, I cut four pieces of 2×2 to 8″ long for the legs and four more pieces 13″ long for the sides.
I drilled 1 ½″ pocket holes into the ends of the 13″ long pieces and assembled a simple frame between the legs using wood glue and 2 ½″ pocket hole screws.
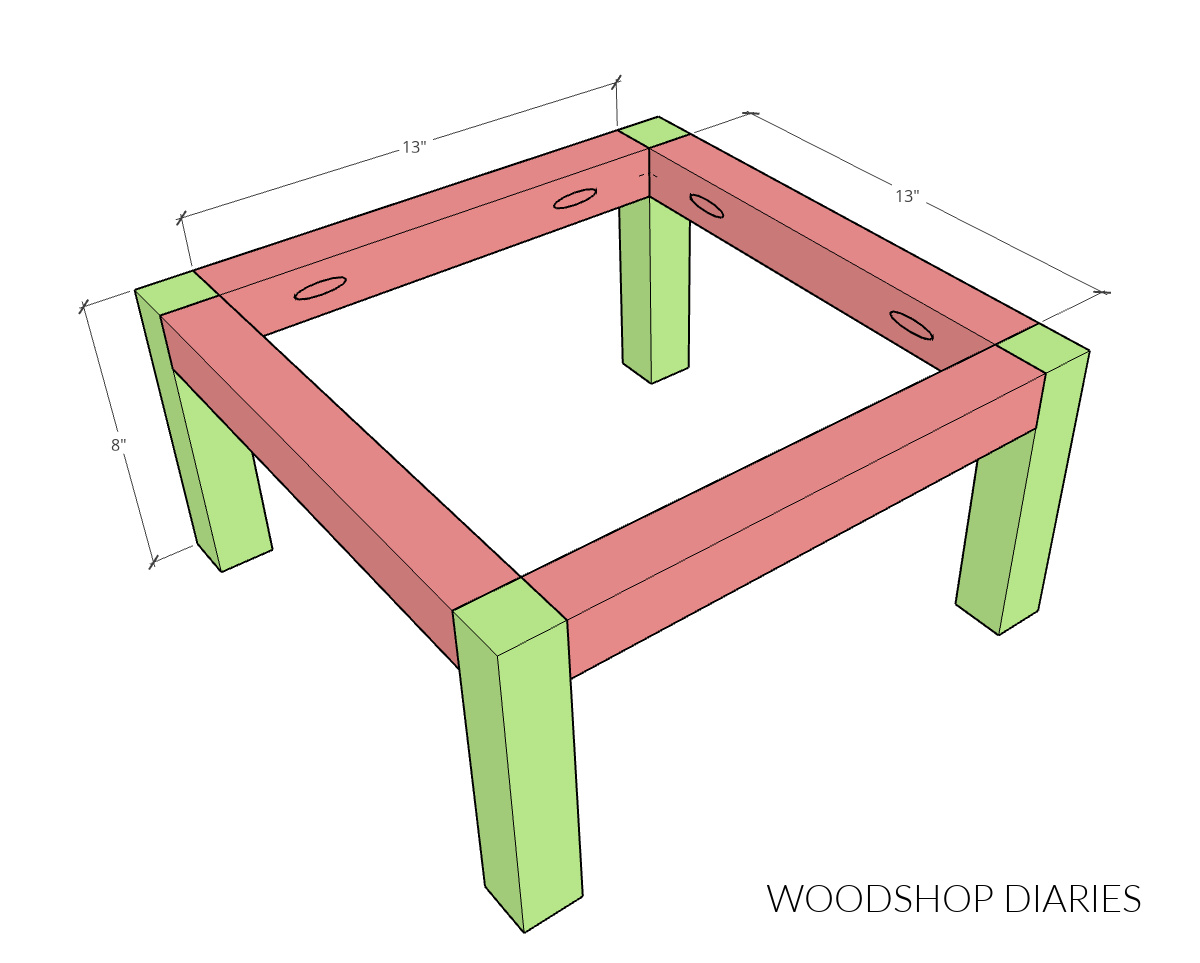
NOTE: I’ve personally found that using 2 pocket hole screws in 2x2s are much more likely to split. So I like to use wood glue and 1 pocket hole screw in 2x2s instead. Either method works fine here.
Once the frame was assembled, I cut a piece of ¾″ plywood to 13″ square to install inside of it. I drilled ¾″ pocket holes on all four sides and installed it into the frame with 1 ¼″ pocket hole screws so that it was flush across the top.
At this point, if you want to paint or stain, I recommend going ahead and finishing the top and base separately before attaching. I gave these pieces a couple coats of Minwax Polycrylic to seal them.
Step 5: Install Lazy Susan Hardware
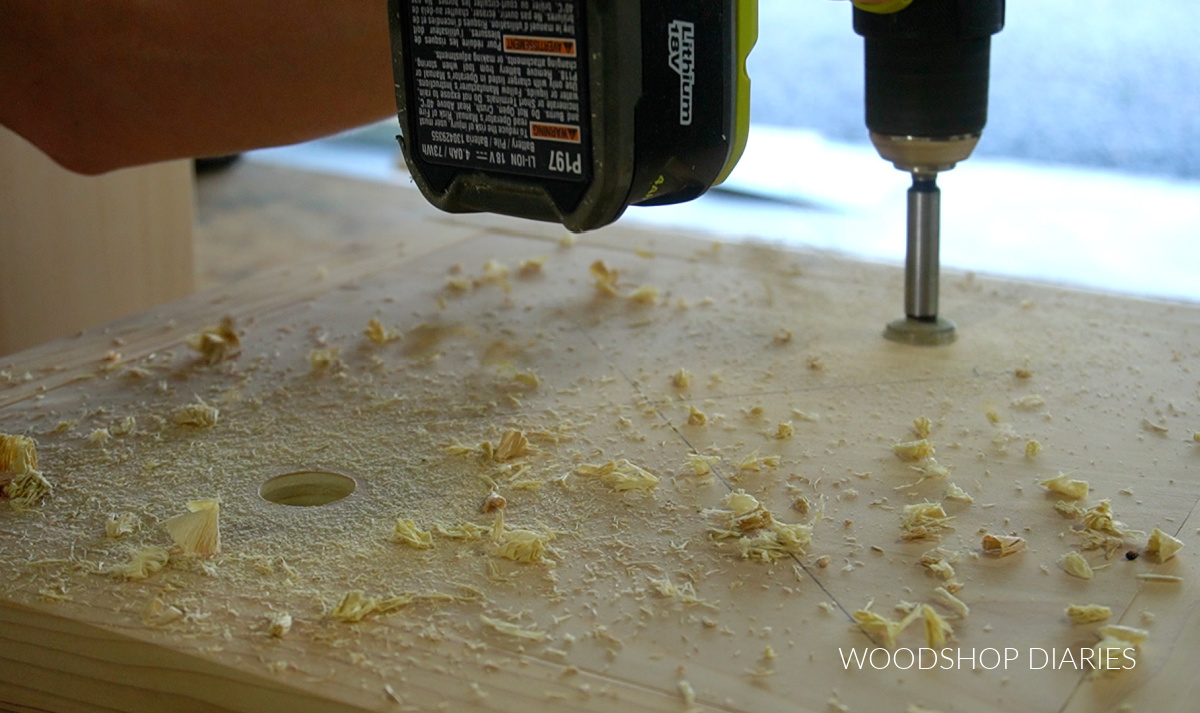
I used a 12″ Lazy Susan to connect the bookshelf to the base. First, I used a straight edge to draw a diagonal line from corner to corner. This makes a large X in the center of the base.
I centered the Lazy Susan hardware on the base and found the two oversized holes in the ring–these should be on the bottom side. I used a pencil to mark them.
Then I removed the hardware and used a 1″ diameter Forstner bit to drill through the base at these marks.
Then, I centered the hardware back on the top of the base making sure to line up the oversized holes in the hardware with the holes I just drilled.
I secured the Lazy Susan to the top of the bookshelf base using ⅝″ long screws through the small holes in the ring. I used at least 4 screws.

Once the hardware was attached to the base, I flipped the bookshelf box upside down and flipped the base upside down on top of it. I made sure to line up the edges on all sides.
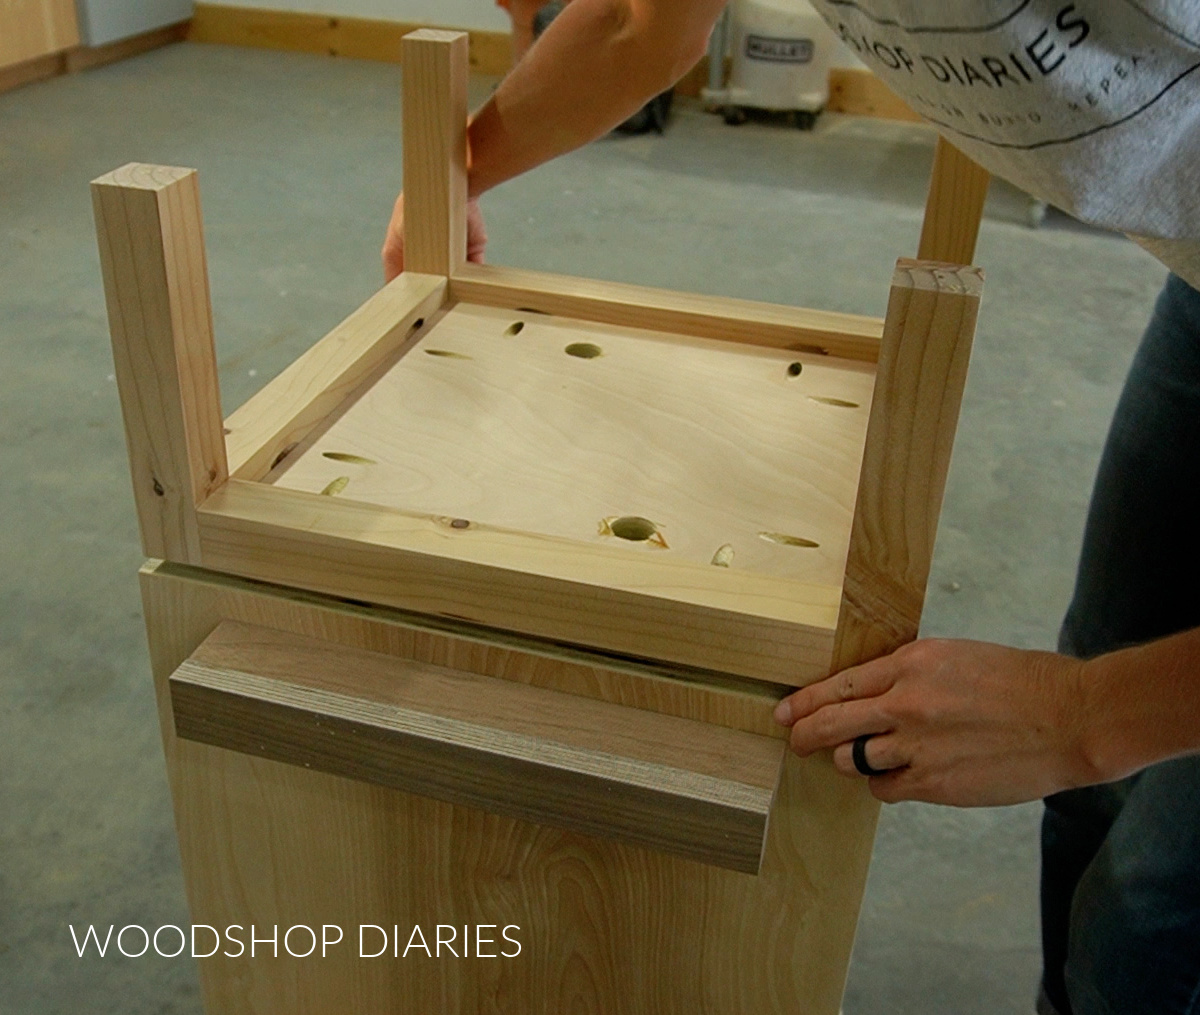
Without MOVING the base left or right, I carefully ROTATED it on the Lazy Susan while looking through the access holes to locate screw holes on the hardware. (Please ignore my nasty plywood tear out.)
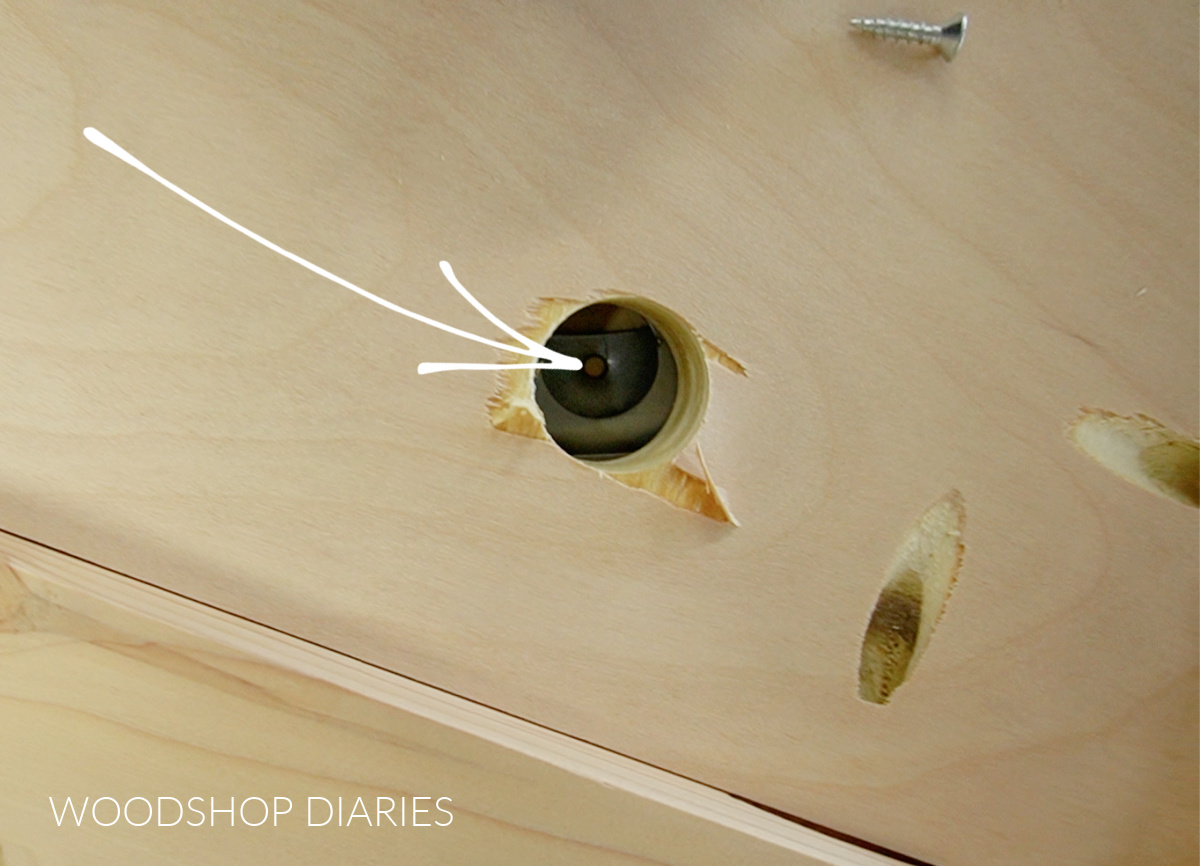
Once I located the screw holes, I used ⅝″ long wood screws to secure the Lazy Susan to the bottom of the bookshelf.
NOTE: If you locate a screw hole through one of the access holes, there will also be on in the other access hole–the screw holes are directly opposite each other.
I made sure to get at least four screws through the hardware and into the bookshelf. There are various size screw holes in the hardware. It doesn’t matter which you use as long as the holes aren’t larger than your screw head.
Then, I flipped the rotating bookshelf back over and added a few finishing touches. To prevent the books from tipping over on the ledges, I added 12″ long drawer pulls about 6″ up from each edge.
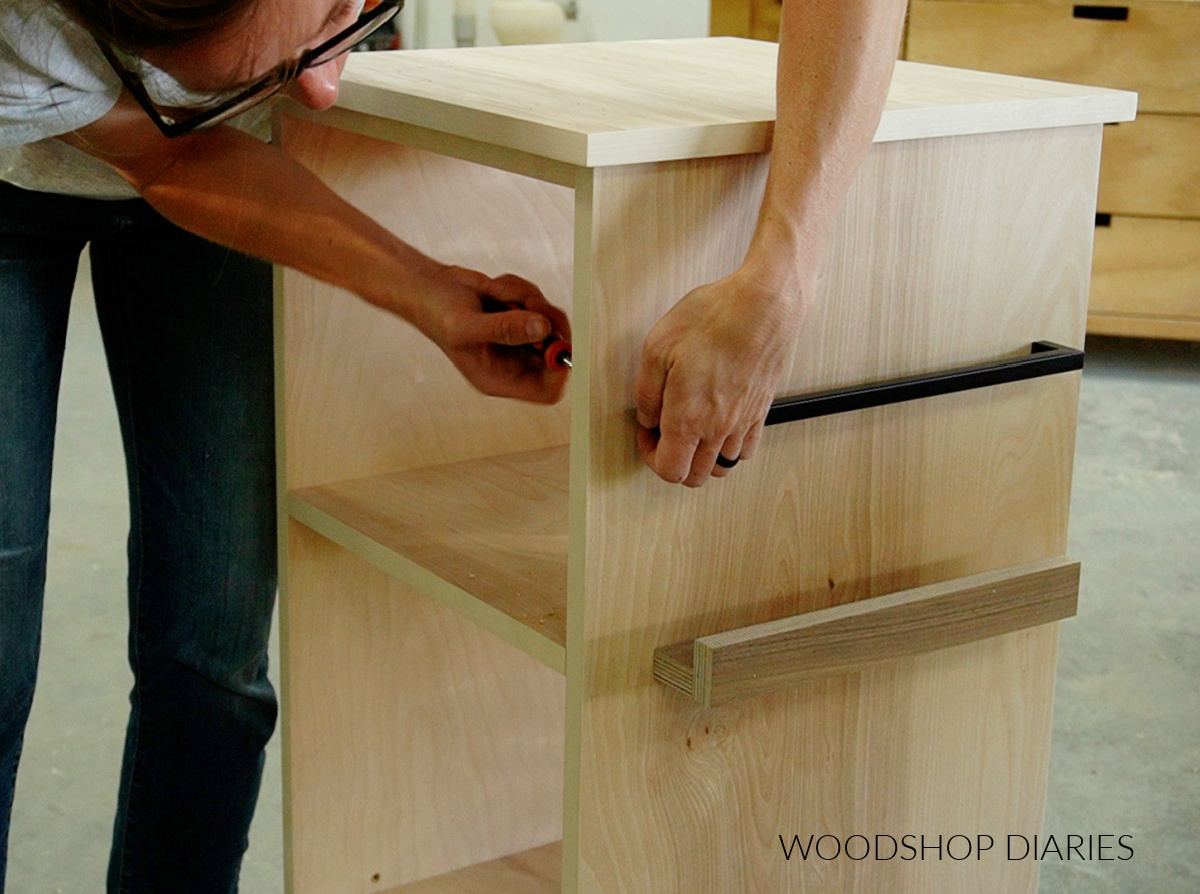
These are actually not as deep as I would have liked, BUT it would work perfect for thin notebooks and magazines.
And with that, this project is complete and ready to use! This would be the perfect addition to an office, a game room (store games instead of books!), or a living room. You could even add it in the kitchen for cookbooks!
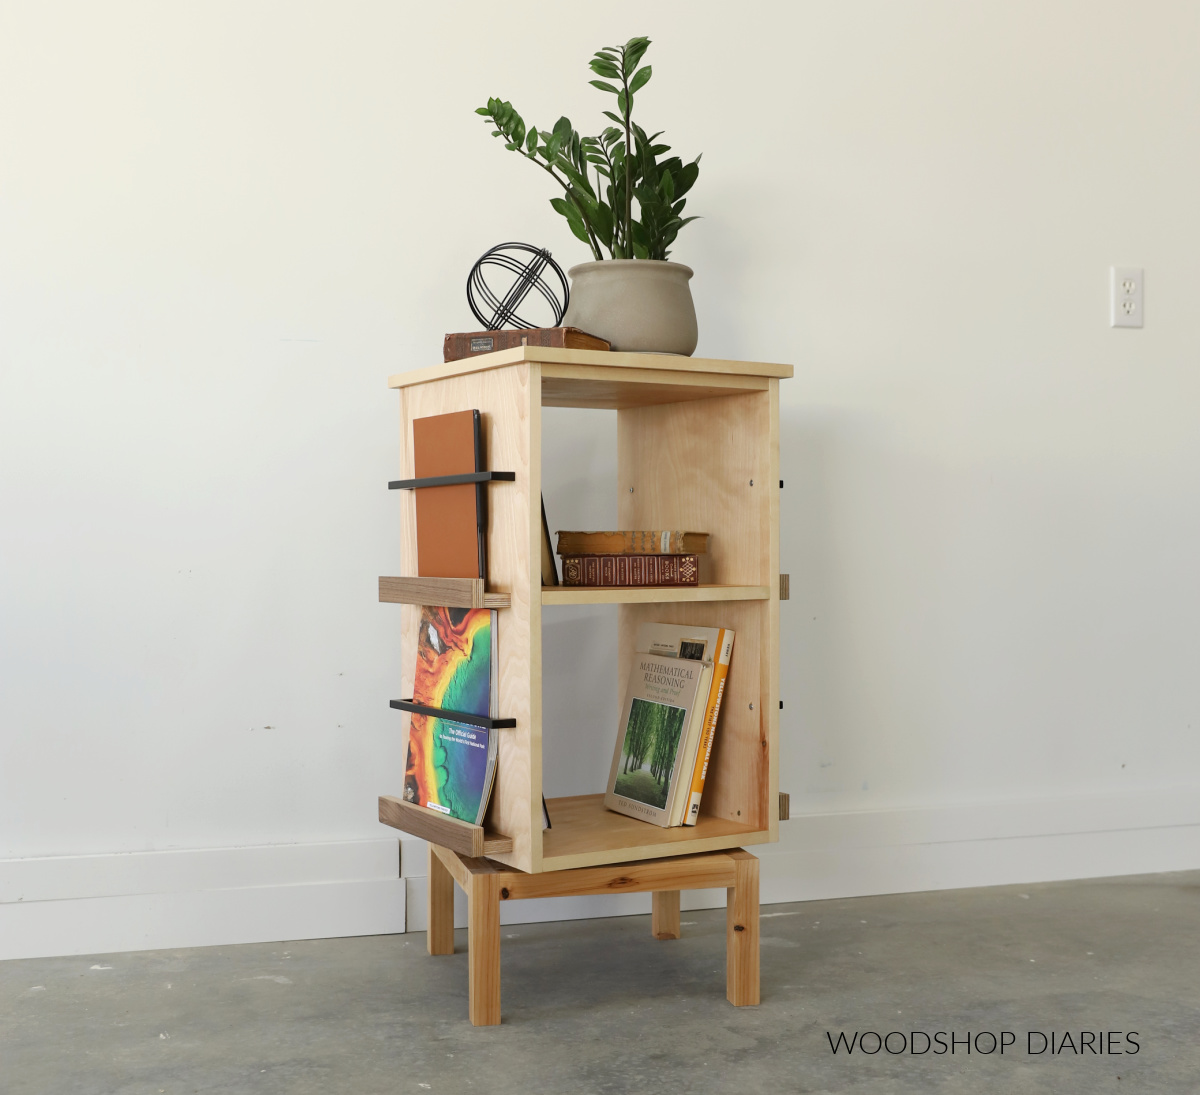
It’s such a fun way to store and display your favorite books, games, records, or DVDs!
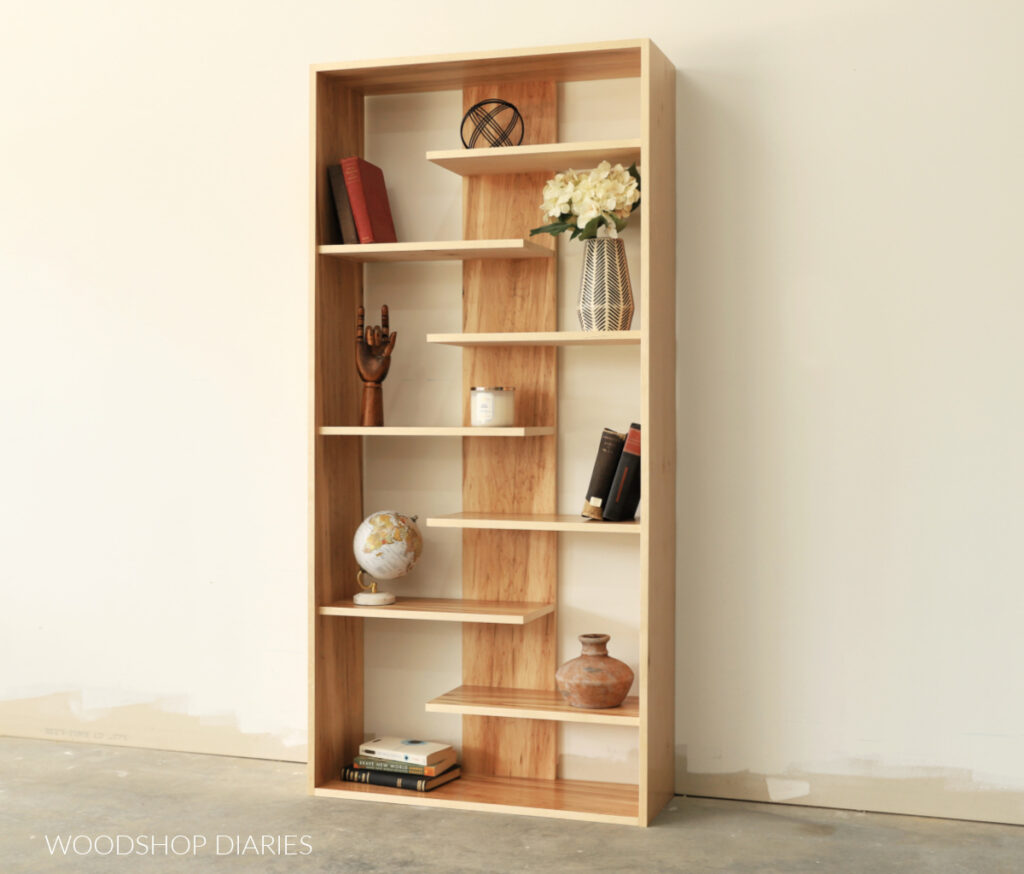
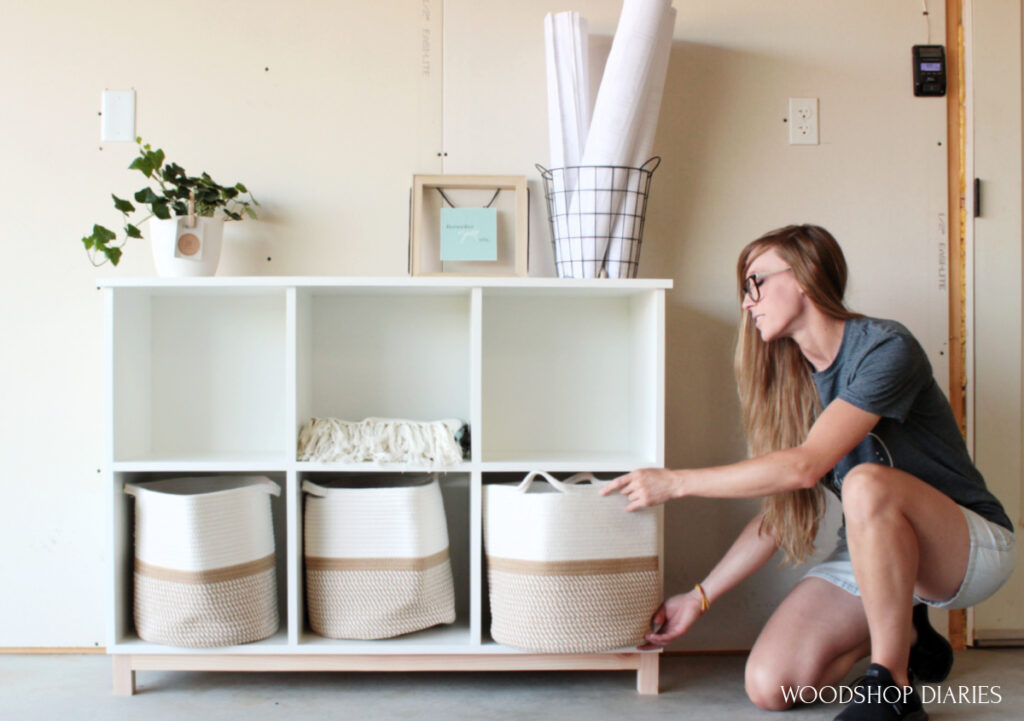
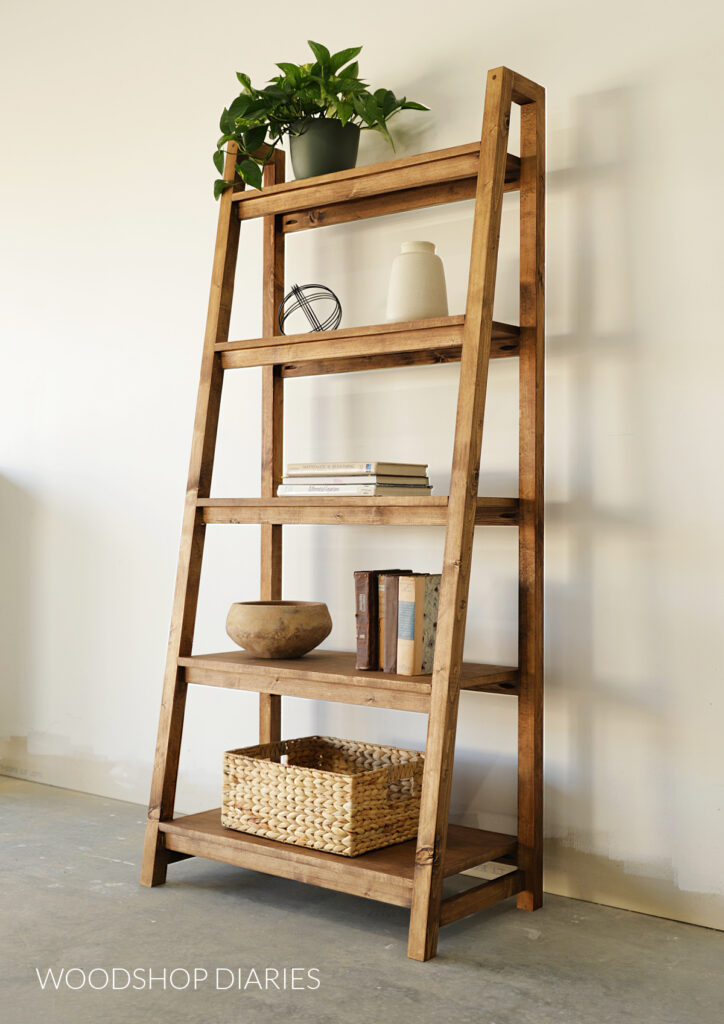
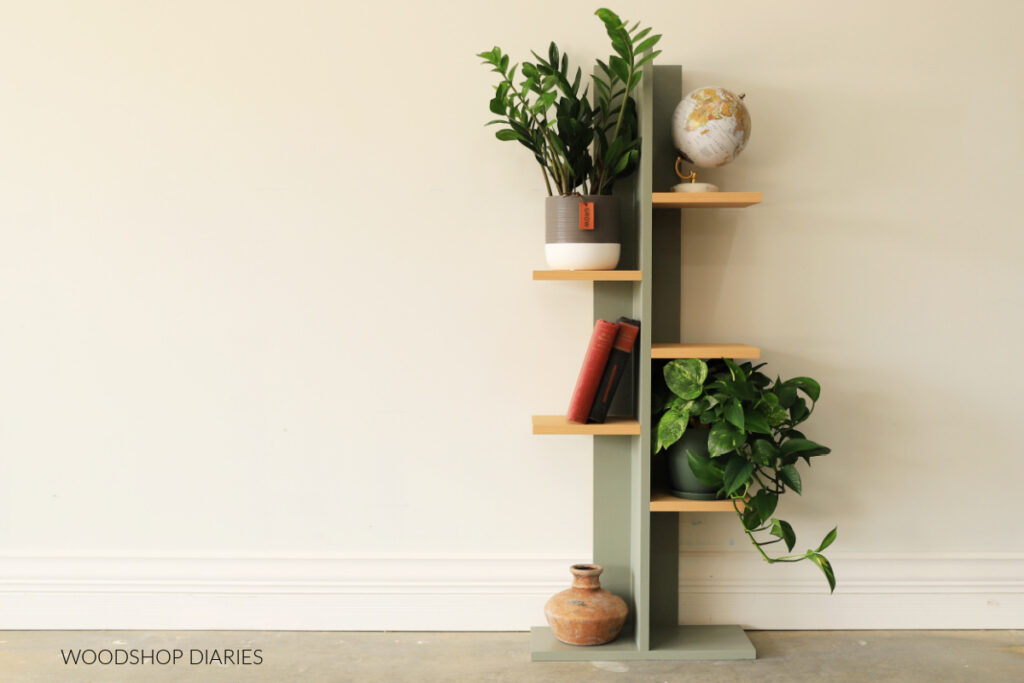
Looking for more simple bookshelf ideas?
Enjoyed this project and looking for more ideas? Here are a few of our favorite simple DIY bookshelf designs. Click on an image to see how to build each one!

If you enjoyed this project, don’t forget to save it by pinning or sharing to your favorite social channel!
Until next time, friends, happy building!