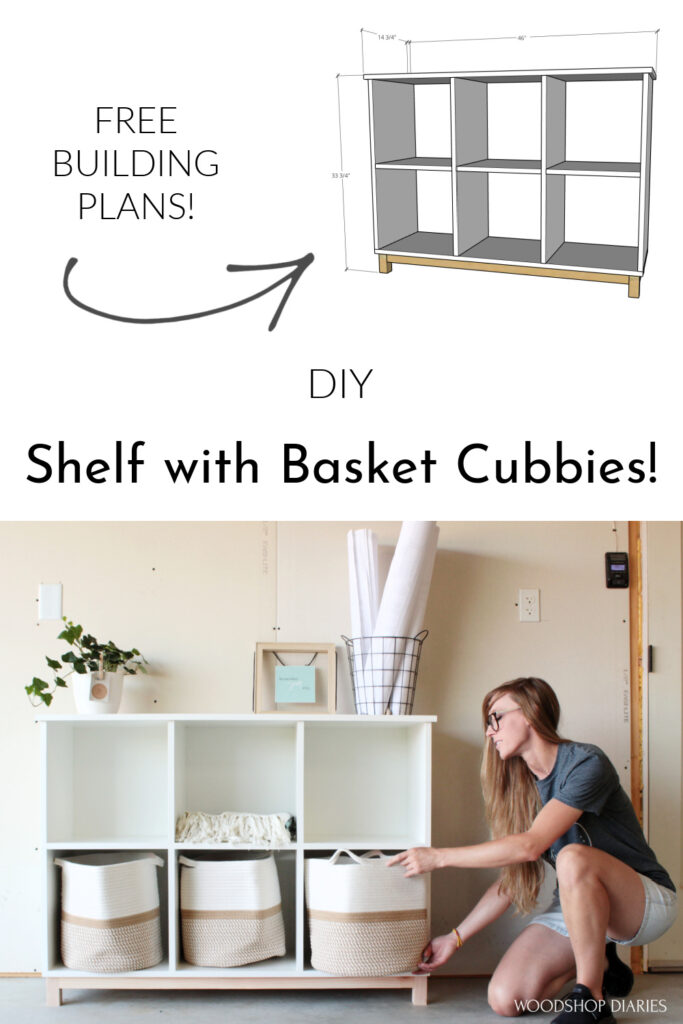
This post will show you how to build an easy DIY shelf with basket cubbies using basic tools and lumber! I’m sharing FREE building plans below 🙂
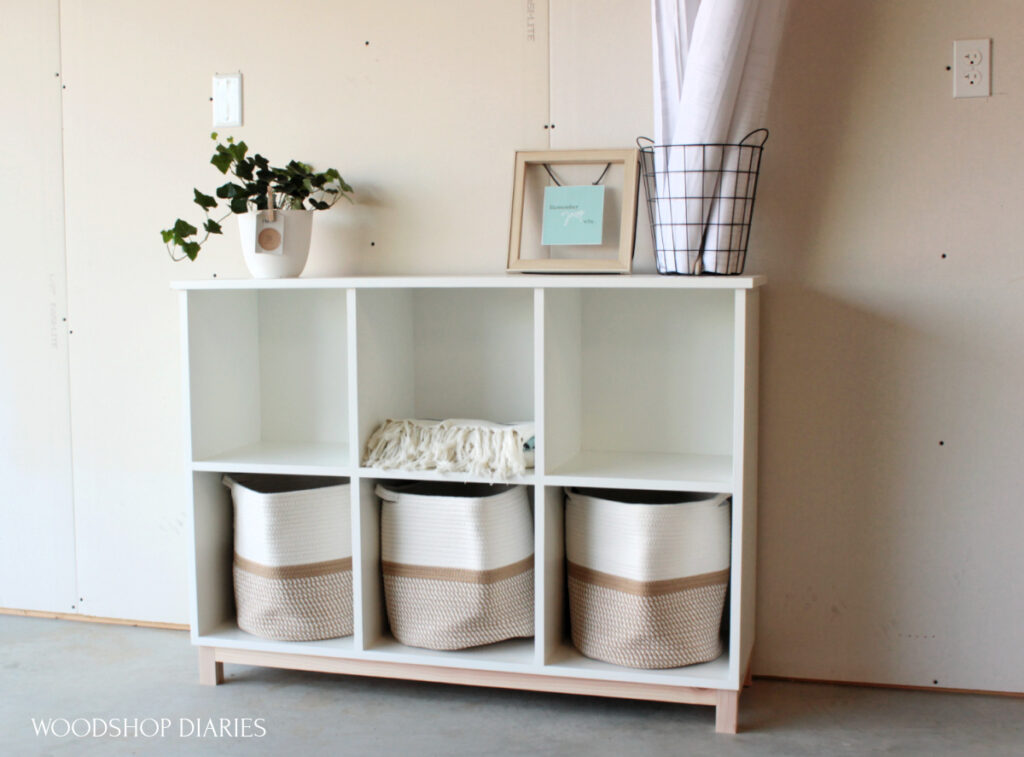
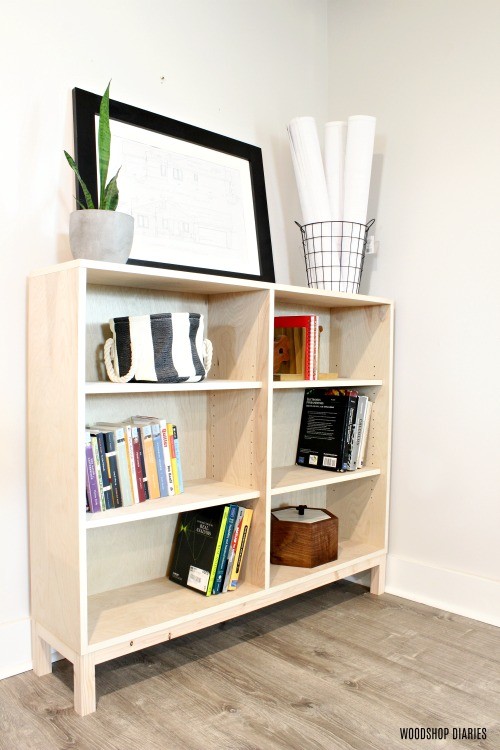
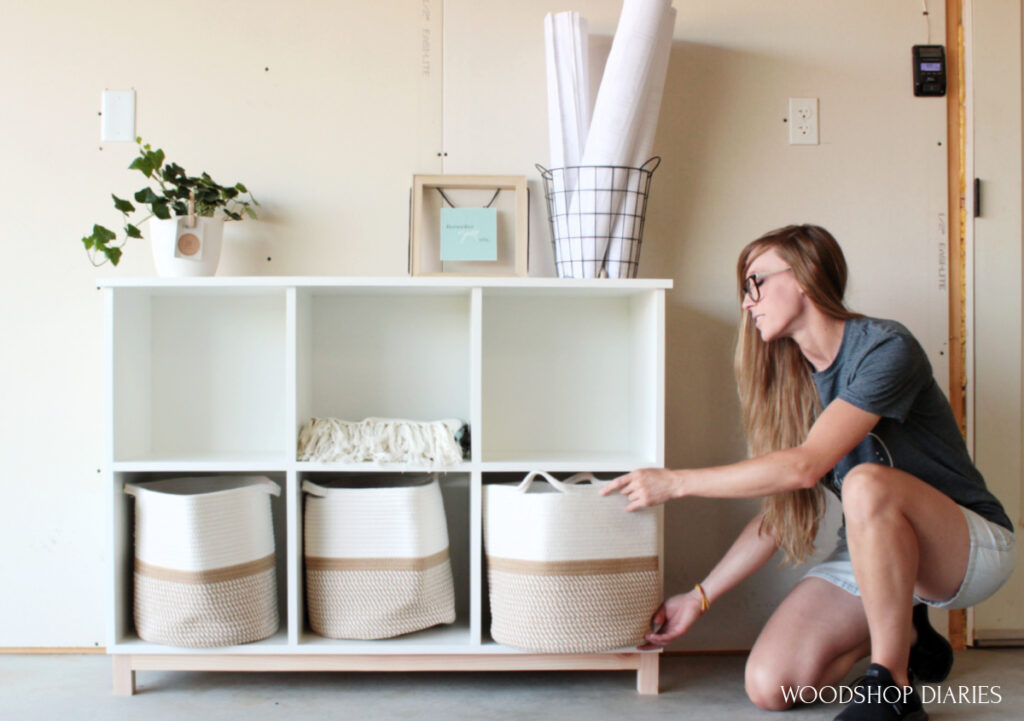
I recently built this basic shelf project for a friend who wanted cubbies for six identical storage baskets to help contain her kid’s toys. (I borrowed the three above to take some photos haha!)
.
This was a simple project, but the key was building it to fit the specific baskets she wanted to use. Of course, if you aren’t using baskets, this design is the perfect little bookshelf, folding table, or console to store or display whatever it is you need a place for!
.
In this video, I’ll show you exactly how I figured out the measurements and walk you through the building process. But, I’ve also provided the written step by step plans below in this post 🙂
This post contains affiliate links. See policies.
Tools and Materials:
Tools:
- Circular saw (saw guides optional–Check out how to cut down plywood in this post)
- Miter saw (or any saw that can cut straight lines)
- Drill/Driver
- Pocket Hole Jig
Materials:
- 1 sheet ¾″ plywood (I used birch plywood)
- ½ sheet ¼″ plywood
- (2) 2x2x8 boards
- 1 ¼″ pocket hole screws
- 1 ¼″ & 2″ wood screws
- Wood Glue
- Edge Banding
- Wood Putty
- Storage Baskets (optional)
A Few Notes About the Build:
I decided to keep this project VERY simple and use ¾″ plywood for the shelf and 2x2s for the base.
.
The overall dimensions were 14 ¾″ deep, 33 ¾″ tall and 46″ wide.
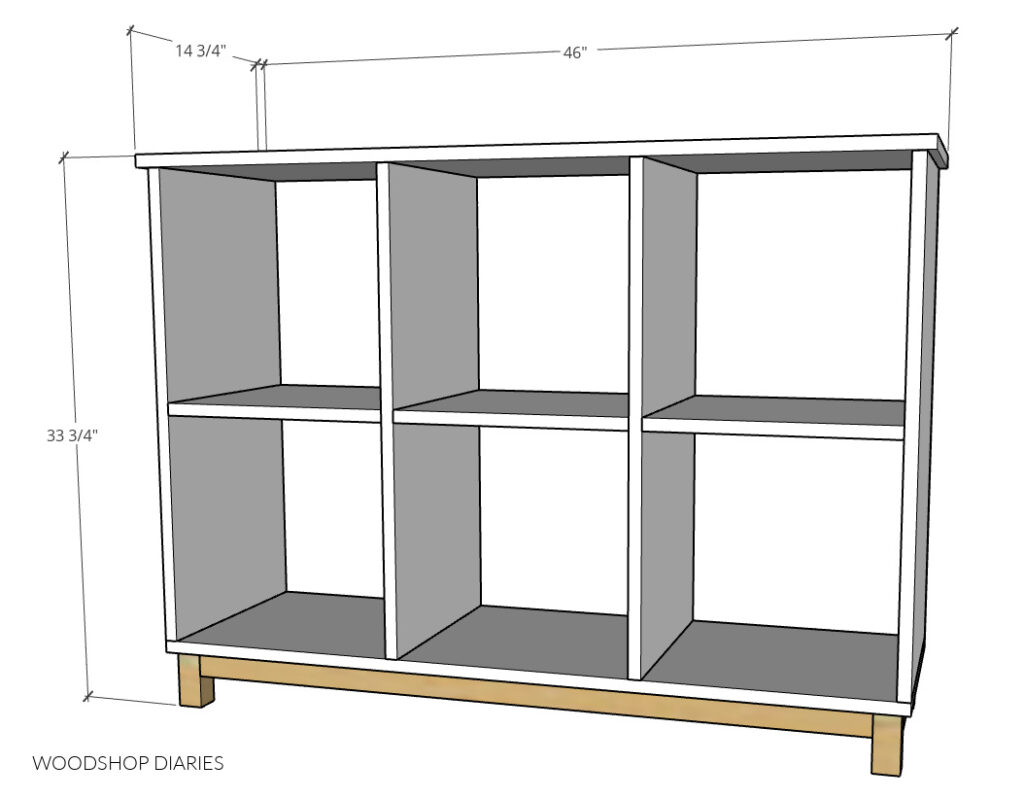
The cubbies fit these specific baskets perfectly.
.
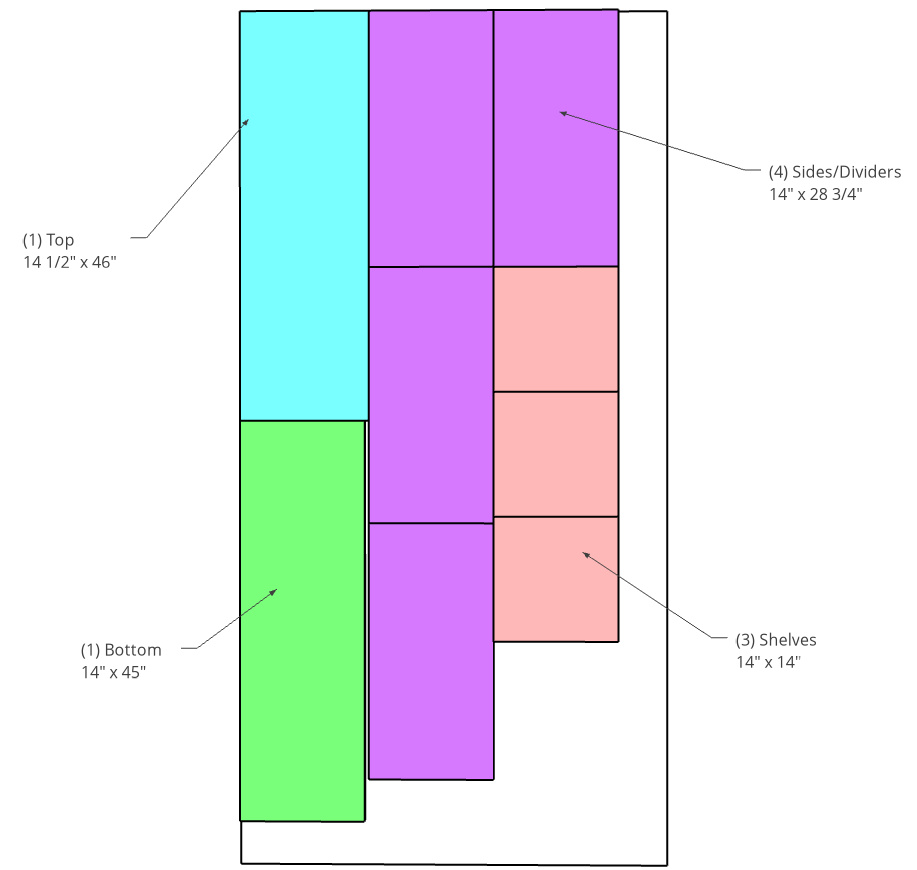
For easier cutting, I’ve provided a plywood cut diagram for the ¾″ plywood here:
Some posts you might find helpful before or during the build:
- How to cut plywood
- How to use a pocket hole jig
- How to apply edge banding
- How to make your own 2x2s
- How to finish raw wood furniture without a sprayer
.
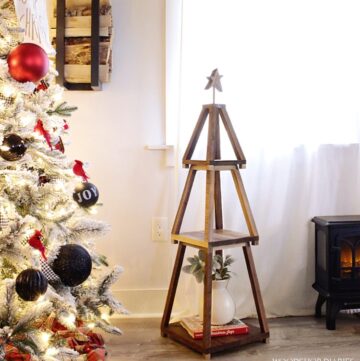
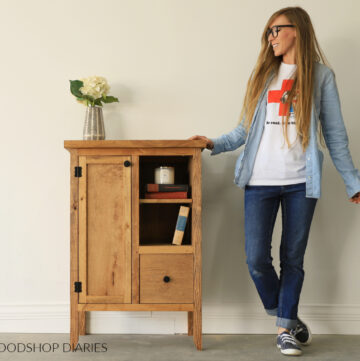
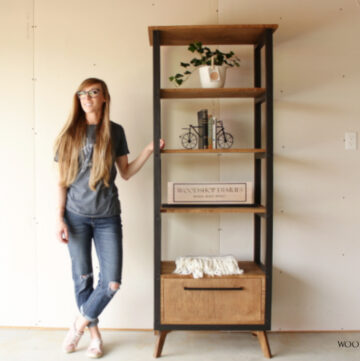
For more DIY Shelf Projects, check out this list!

Industrial Open Bookshelf 
Mid Century Bookcase 
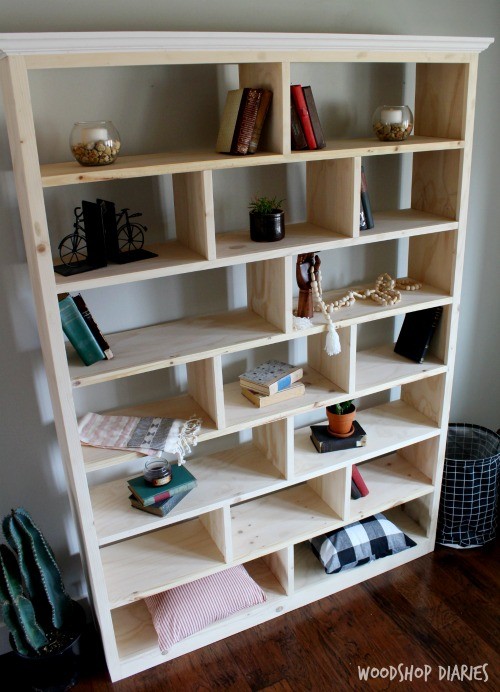
One Sheet Plywood Bookshelf 
Modern Bookshelf 
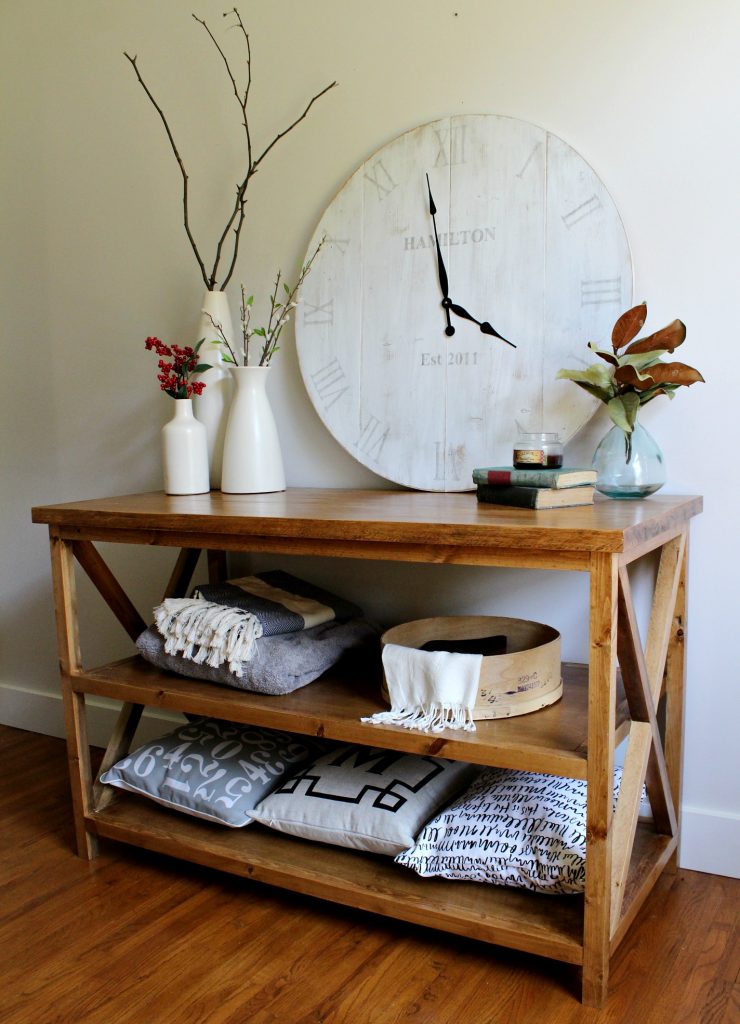
X Base Console Shelf
Step 1: Assemble DIY Shelf Sides and Bottom
First thing was first–I cut down my plywood pieces. Now, normally, I don’t recommend cutting all your pieces at once. Cutting to fit as you go is usually the best method.
.
However, in this case, since it is so simple and so few pieces, It’s not a bad plan to cut all the ¾″ plywood pieces first. Just make sure the 14″ pieces are 14″! If they get off, the rest of the pieces will, too.
.
Once the pieces were cut, I applied iron on edge banding to the edges that will be exposed.
RELATED: How to Apply Iron On Edge Banding
.
Then, I used wood glue and 1 ¼″ wood screws (don’t forget to predrill to prevent splitting!) to attach the side panels at each end of the plywood bottom.
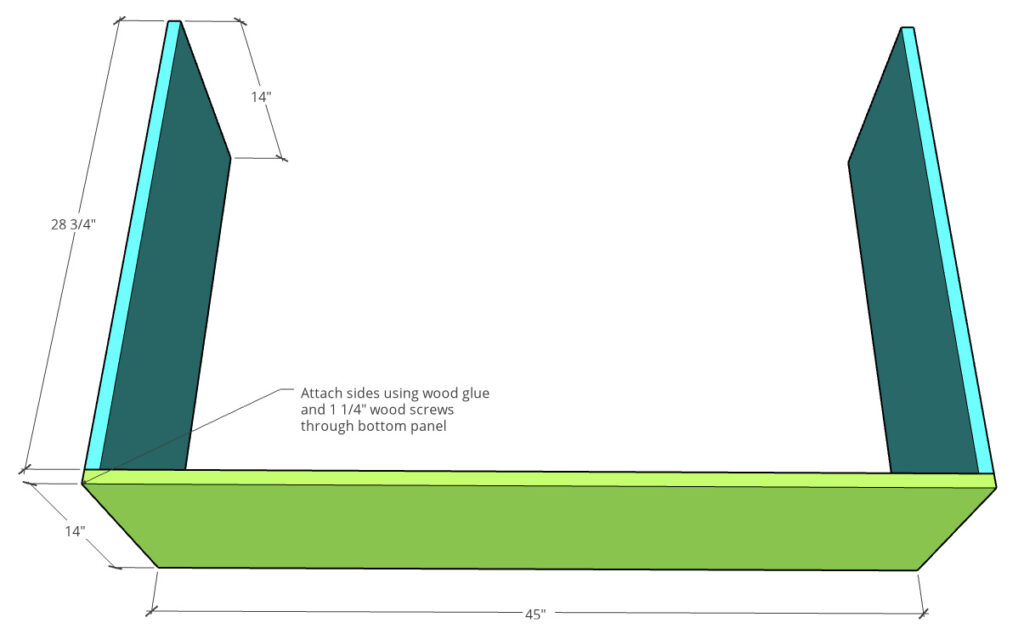
Note that I used screws THROUGH THE BOTTOM and into the sides. This will hide the screws from view as they will be on the bottom.
Step 2: Add Divider Panels
Since the shelves are 14″ square, I found it helpful to use them to help properly space the middle dividers. You can see this in the video above.
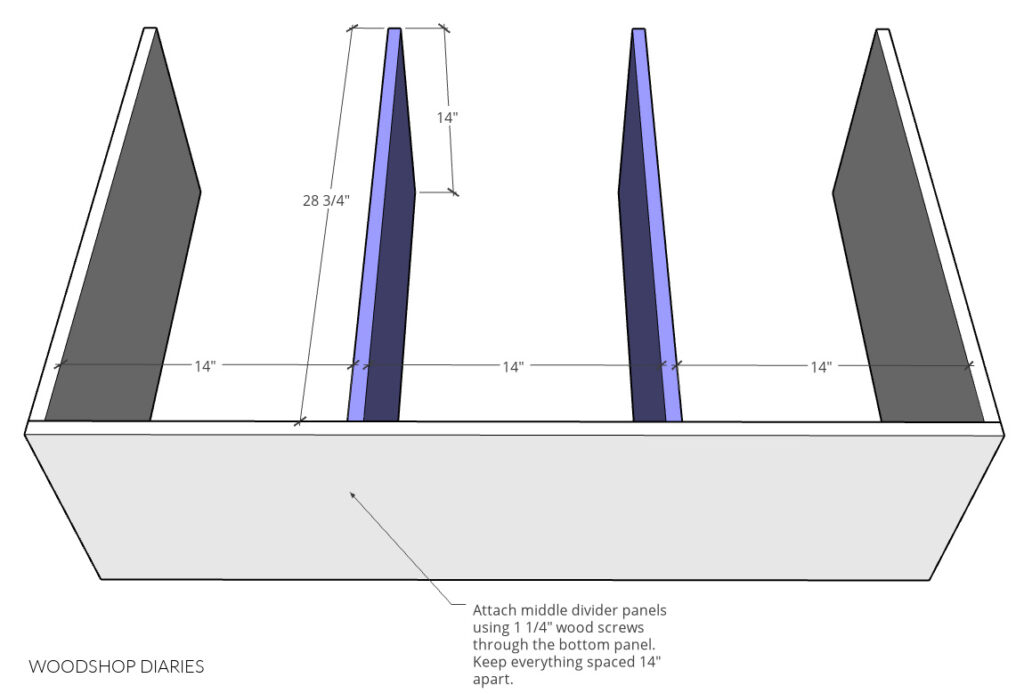
I attached the two divider panels using 1 ¼″ wood screws through the bottom so that the panels were all 14″ apart.
Step 3: Install Middle Shelves
I installed the middle shelf here using 1 ¼″ wood screws through the two middle dividers and into the shelf. This just saved a little time–check out the video to see.
.
Then, I installed the left and right shelves using ¾″ pocket holes and 1 ¼″ pocket hole screws.
RELATED: How to Use a Pocket Hole Jig
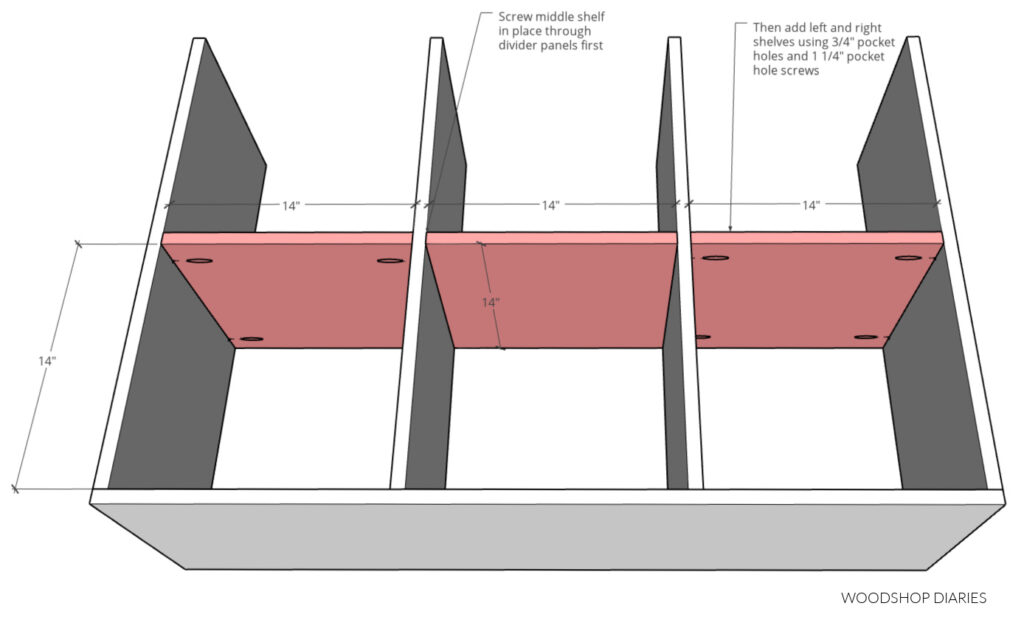
You can use pocket holes for all three shelves if you’d rather.
Step 4: Attach Top of Shelf Box
Once the shelves were in, I installed the top using wood glue and 1 ¼″ screws from the top side. Since I was painting this piece, it would be easy to simply putty and paint over these screws.
.
However, if you planned to stain and don’t want to see the putty or screw heads, you may want to opt for pocket holes on the side panels or use some braces along the top to screw through. Check out the video for more details.
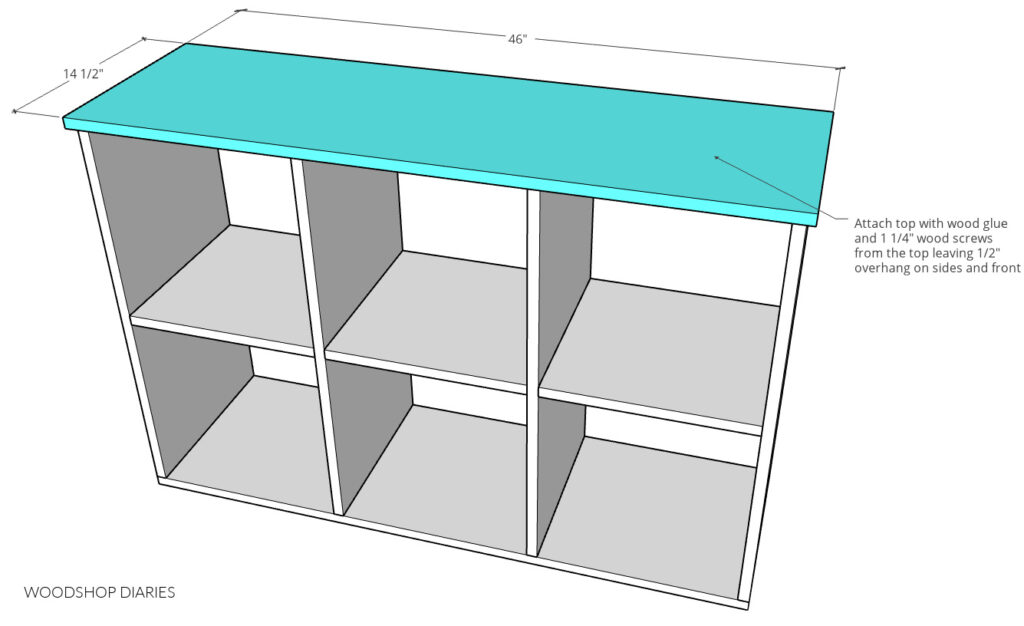
Once the top is installed, putty over any joints or screw heads you want to smooth out.
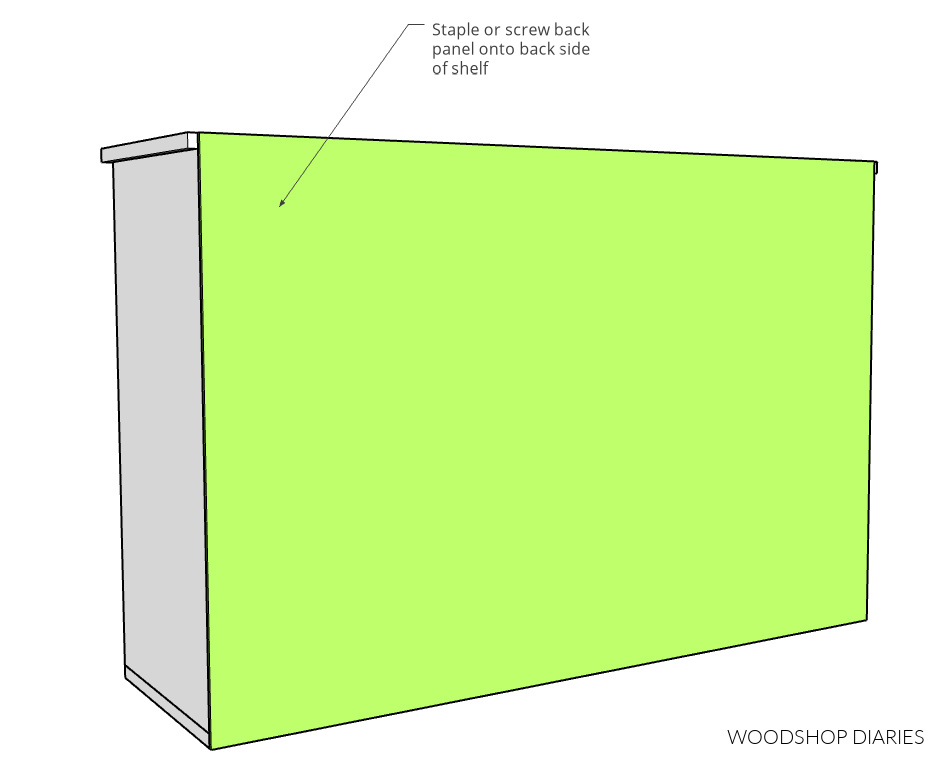
Step 5: Paint & Attach Back Panel
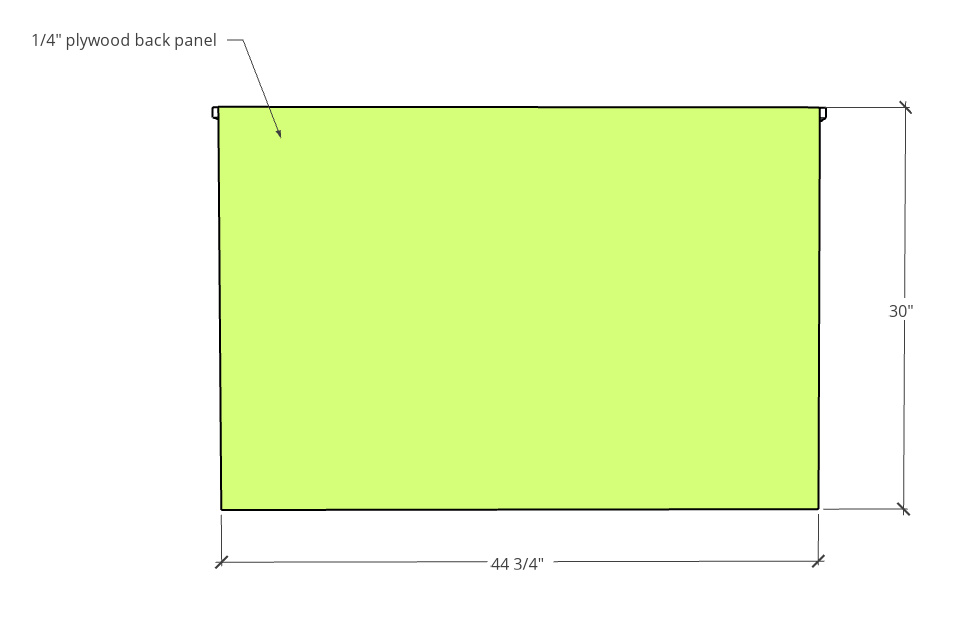
While the putty dried, I cut a piece of ¼” plywood panel to fit over the back side of the shelf. Note: These dimensions are ¼″ smaller than the overall size to allow for a little wiggle room on each side.
Once the putty was dry, I sanded the shelf and the back panel well and used a roller and a brush to apply two coats each of primer and paint (SW Alabaster was the color) to both the shelf and the back panel.
RELATED: How to finish raw wood furniture
.
Once the paint was dry, I stapled the back panel onto the back side of the shelf. If you don’t have a staple gun, you can also use wood screws instead.
Step 6: Build DIY Shelf Base Frame
I ripped down a 2×4 into 2x2s to begin making the base. You can purchase precut 2x2s at the store, but I prefer to make mine from 2x4s to give me straighter boards with squared corners.
RELATED: How to make your own 2x2s
.
I cut four legs and 4 pieces to complete the base frame. I ended up making this about 13 ½” x 44” so that the cabinet overhung the base ½” on each side and the front—kind of like the top.
.
I assembled the frame using wood glue and 1 ½″ pocket holes with 2 ½″ pocket hole screws.
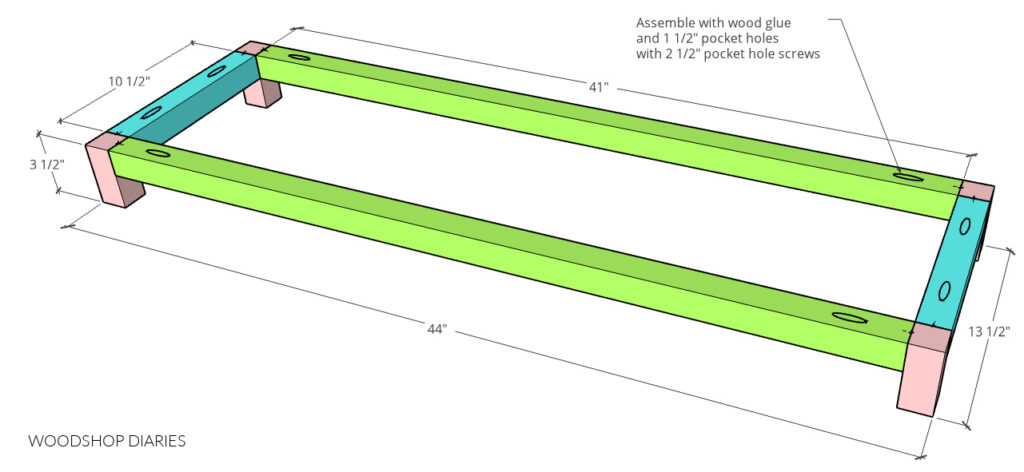
By the way, when I’m using 2x2s, I’ve found wood glue and one screw tends to do better than two screws. Whenever I use two screws, they are much more likely to split.
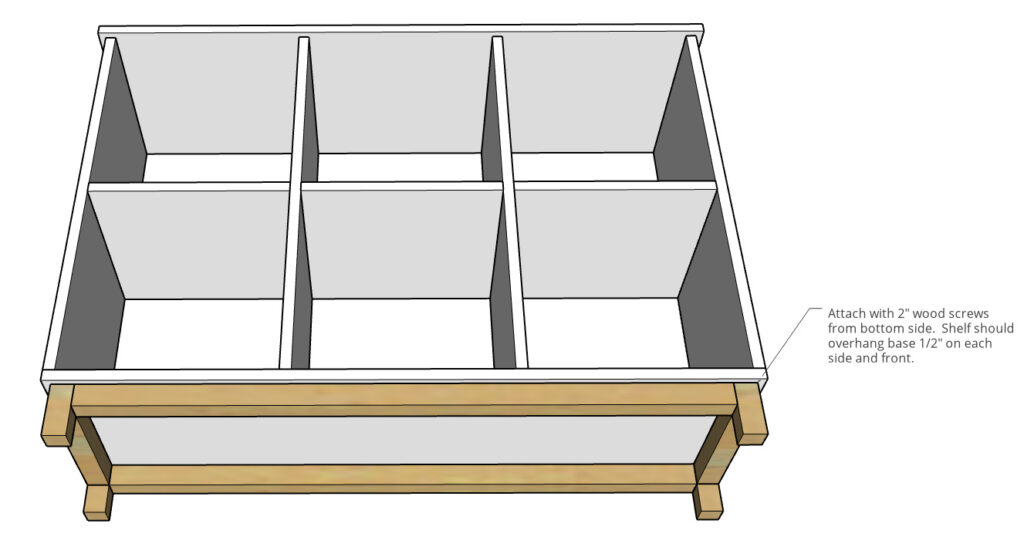
Step 7: Attach Base to DIY Shelf Box
I flipped the shelf on its back to attach the base.
.
I made sure to predrill first, and used 2” wood screws to attach the base to the shelf.
And once that was installed, I flipped it back over and it was complete. All that was left was filling the shelf cubbies with baskets!
This was a really simple project and I hope you enjoyed watching it come together. If you’d like to build your own DIY shelf with basket cubbies, be sure to check out the video above for additional tips.
.
And if you’d like to stay up to date on all the latest projects and DIYs, I’d love if you’d subscribe to my newsletter here:
And if you’d like to save this for later, don’t forget to pin this or share it to your favorite social channel!
Until next time, friends, happy building! 🙂