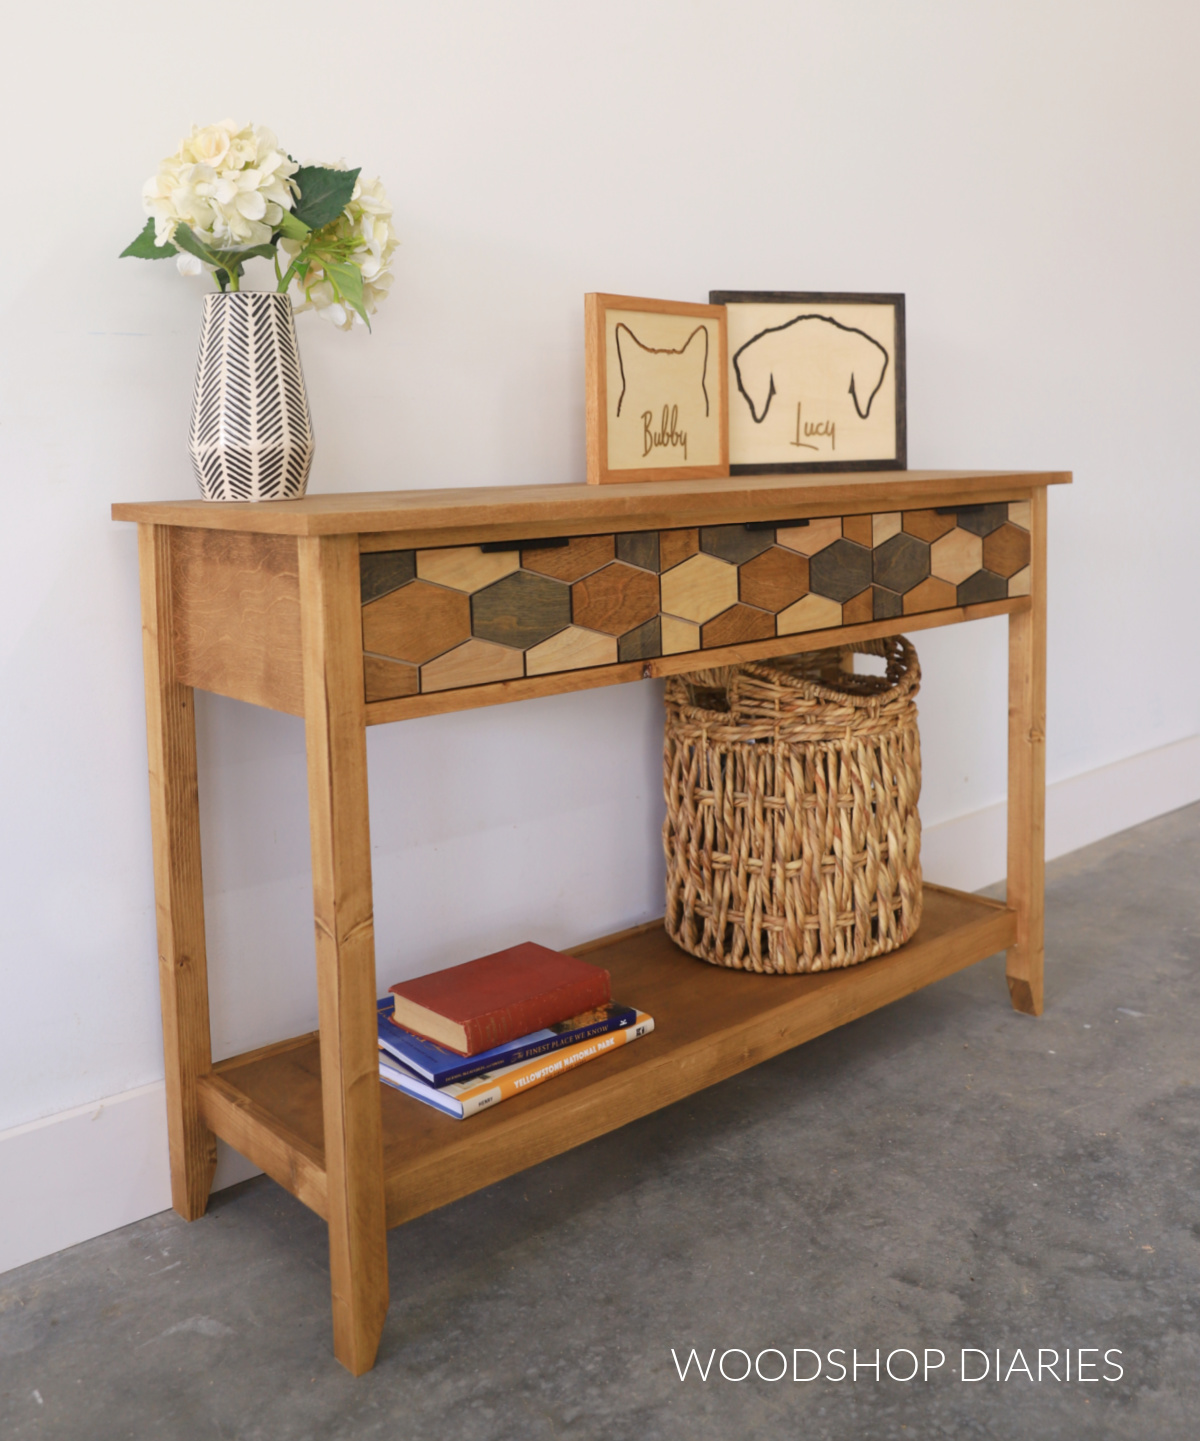
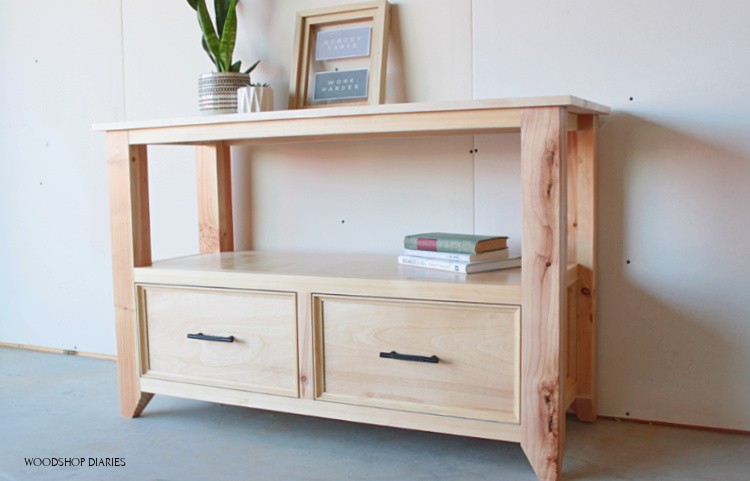
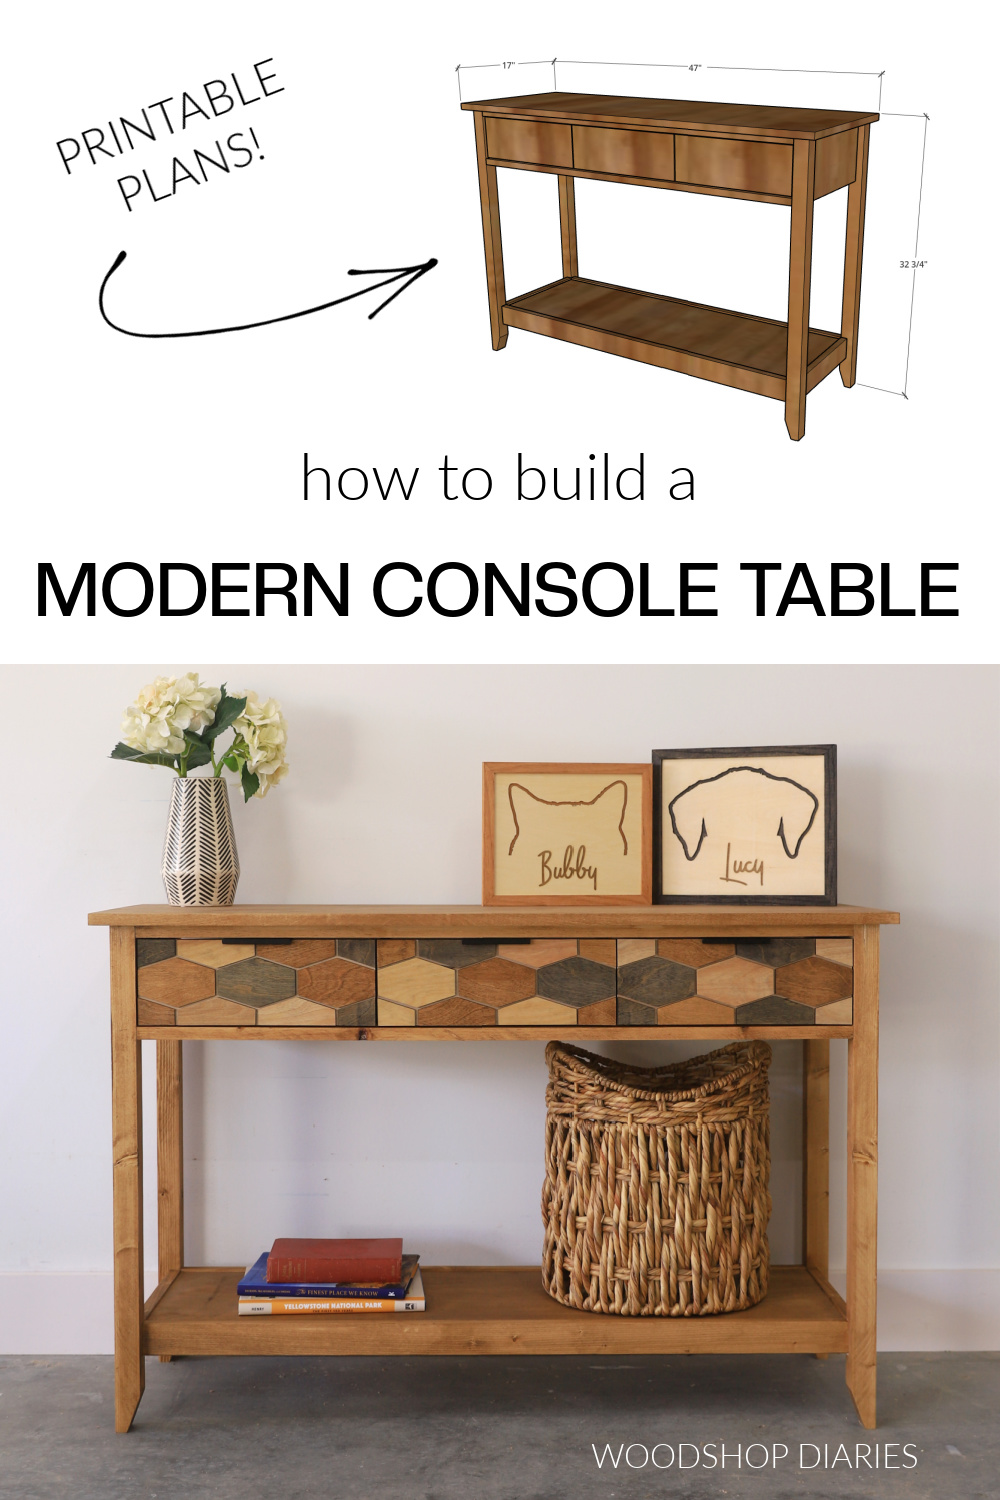
In this post, I’m sharing how to build a DIY console table with drawers at the top and a shelf underneath.
This design is a classic style for entryways or behind the sofa to provide some extra storage and a place to drop things like keys and accessories.
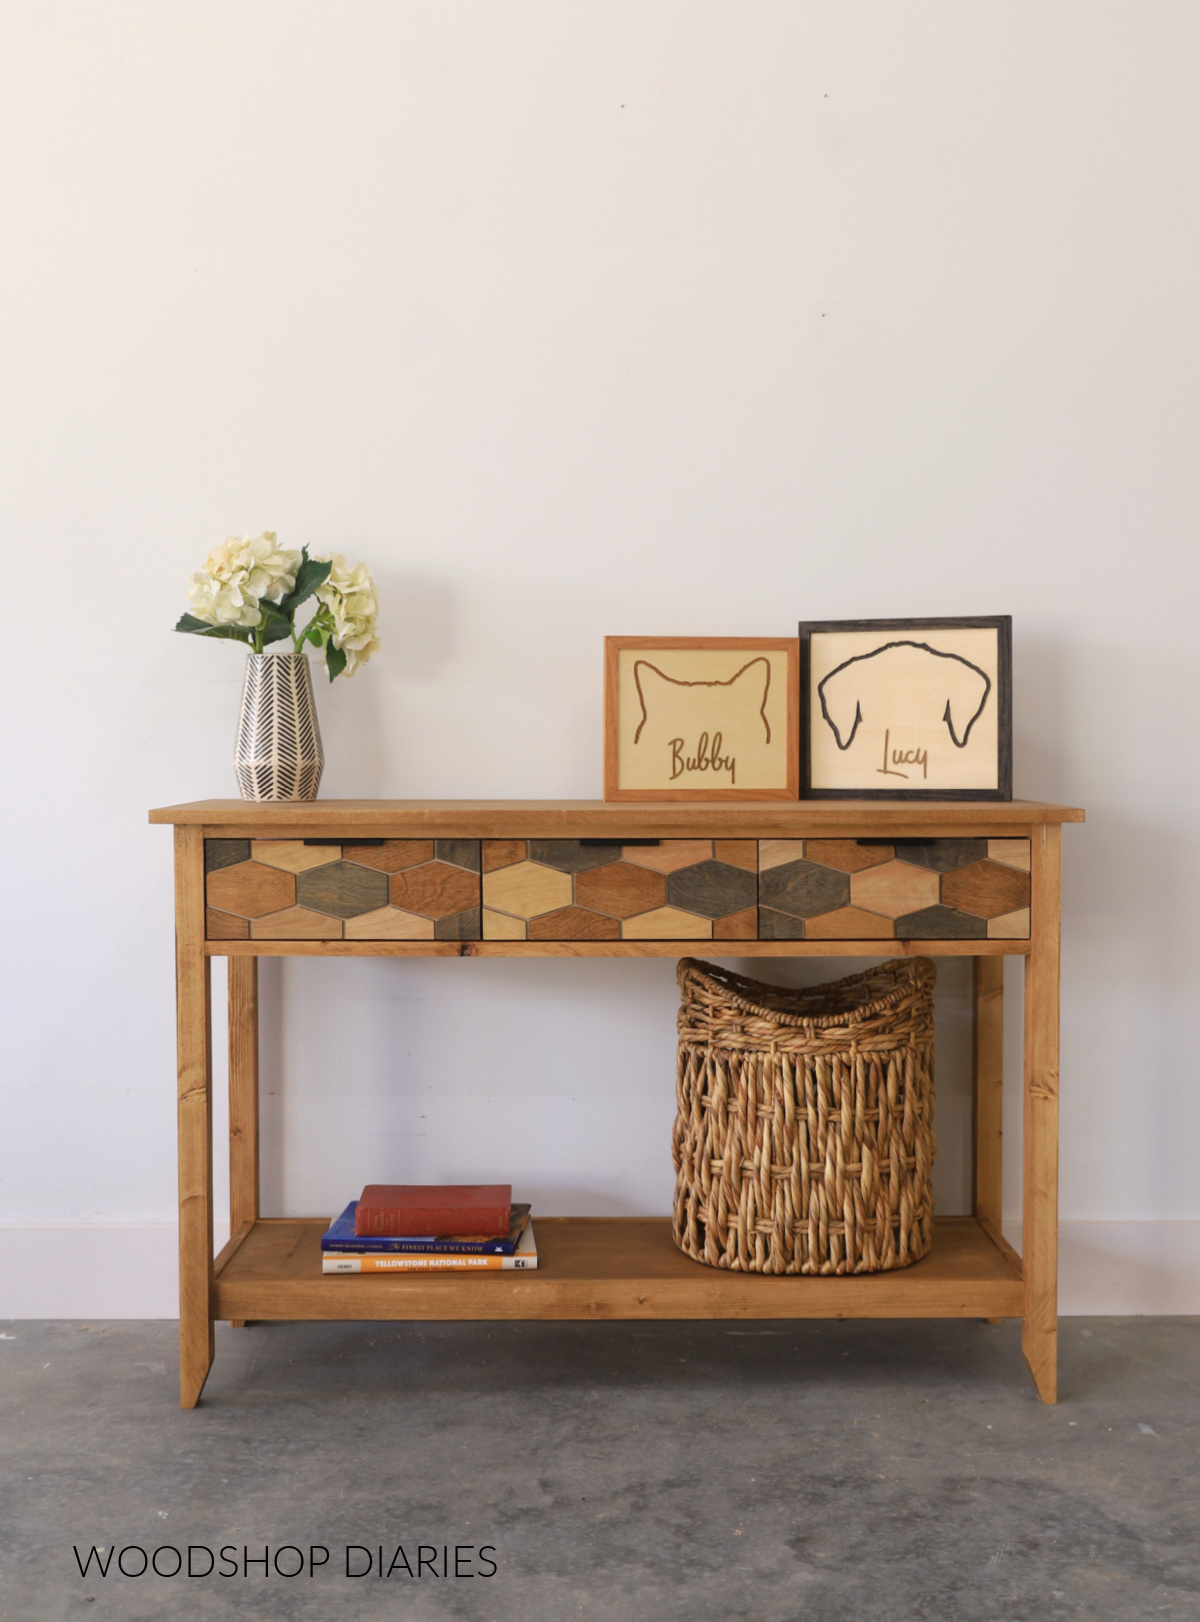
But to give this piece some extra character, I added a modern (and multicolor) overlay to the drawer fronts.
If you’re ready build your own console table with drawers, I’m sharing the step by step below.
*This post contains affiliate links. See website policies.
What to know before building
This console table is a quick build that you can complete in a day or over a weekend. The assembly is pretty simple (pocket hole joinery) and it’s made of common materials.
Material Choices
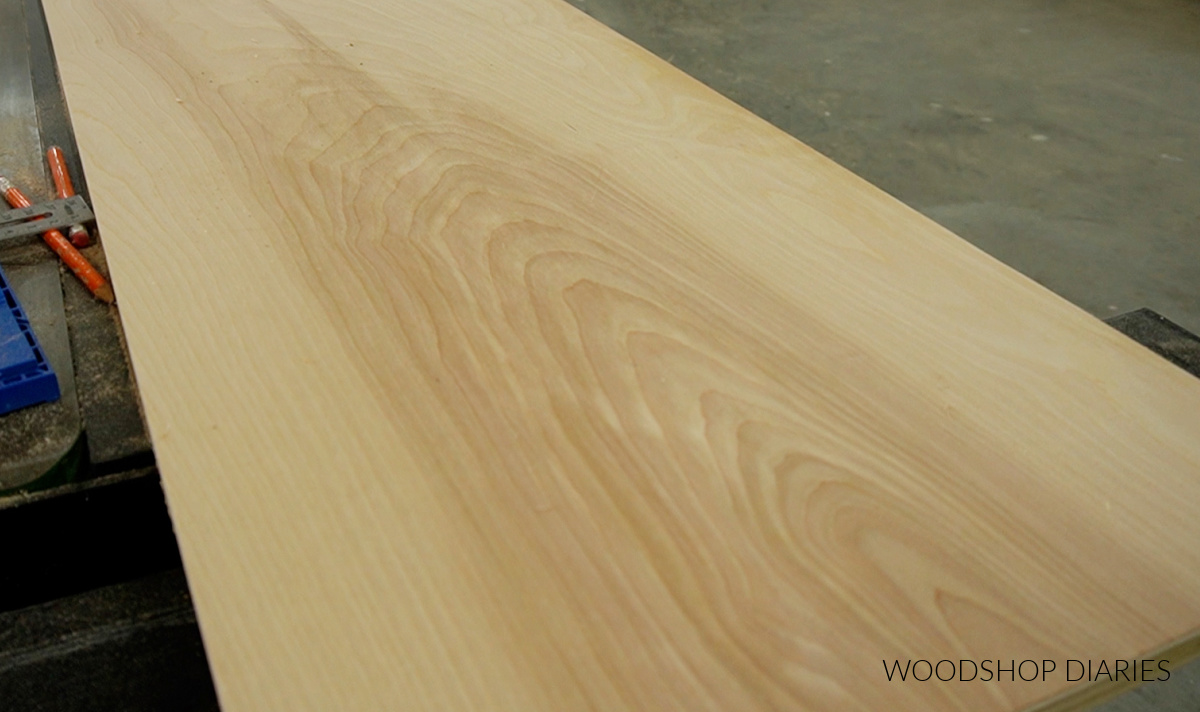
Any wood type you’d like to use would work fine. Construction lumber (like pine, fir, spruce) and birch plywood are great budget friendly options, so that’s what I used here.
When building furniture pieces, I highly recommend using cabinet grade hardwood plywood (like maple, birch, oak, etc). It’s a little pricier than other plywood options you may see at the store, but it’s smooth, super durable, and finishes really nice.
You can learn more about choosing the right plywood for your project here.
I used 2x2s for the legs of this console table. It’s often challenging to find good, straight 2x2s precut at the store. They sometimes look more like bananas than wood!
So I personally prefer to cut my own 2x2s from 2x4s. If you’d like to learn how to do that, check out this guide to cutting your own 2x2s.
Adding a Back Panel
You can see in the video (linked below) and in this post that I did not add a back panel to the console that I built. I typically don’t like to add backs onto pieces with drawers (it’s just a personal preference).
However, I have included instructions for adding a back panel in the printable plans in case you’d like to add one to yours. The back panel is optional.
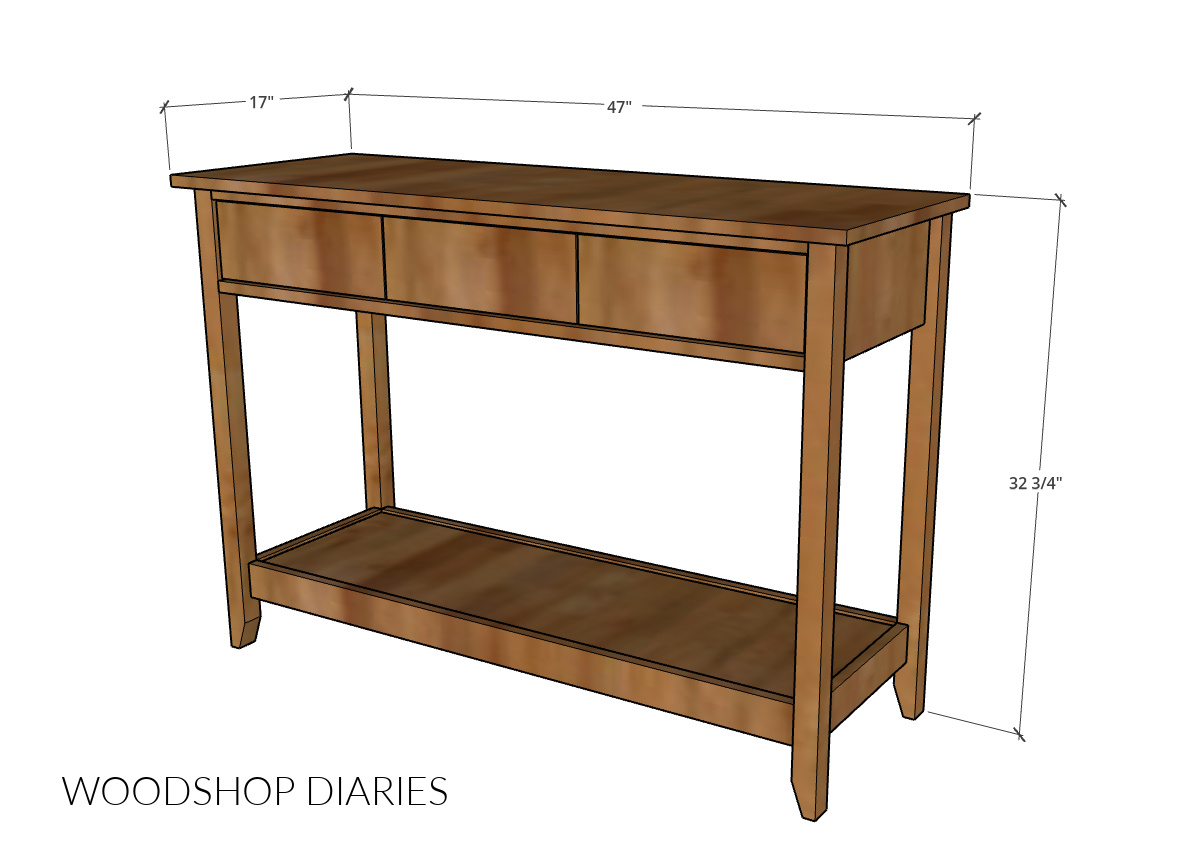
Console Table Dimensions
The overall dimensions of this project are approximately 17″ deep x 32 ¾″ tall x 47″ wide.
Drawer Front Overlay Design
I highly encourage you to check out this video for additional tips, and details on adding the drawer front overlay design. The drawer fronts shown in the plans are cut from ¾″ plywood. No additional trim or overlay is required–slab fronts will work fine.
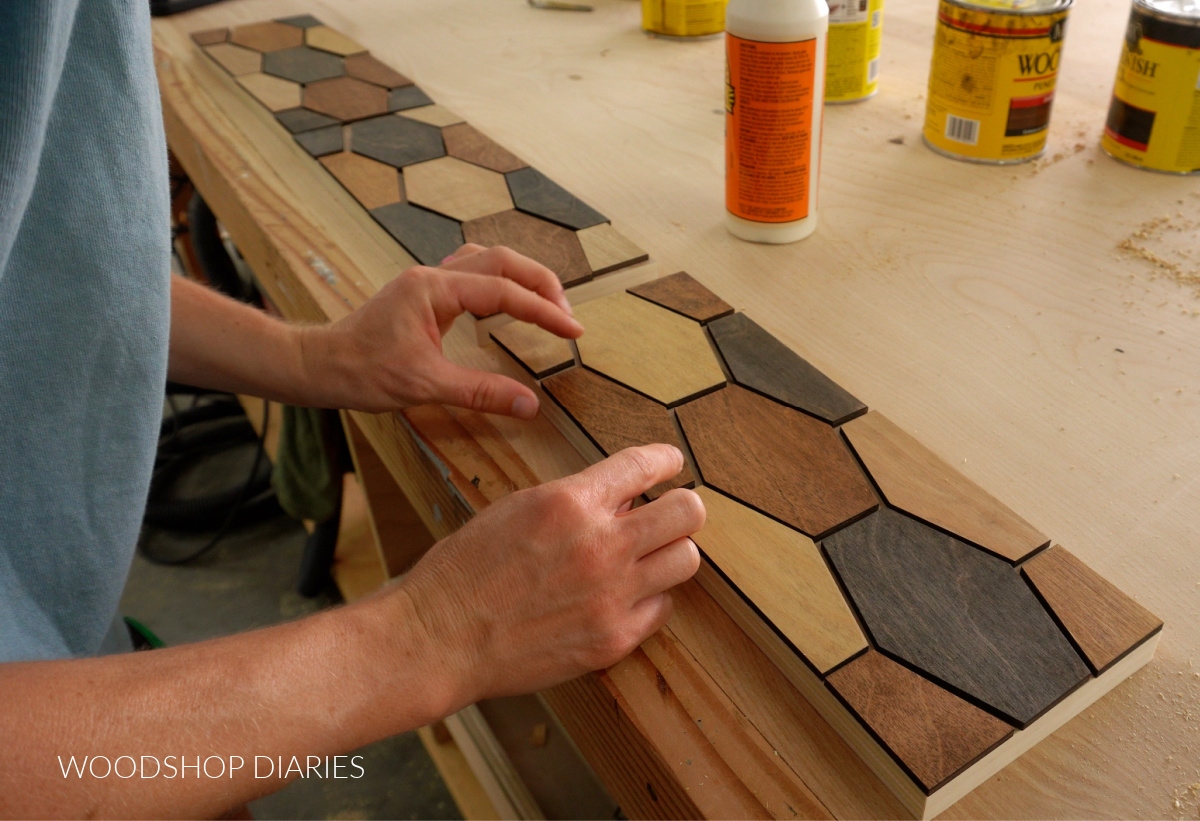
But if you’d like to dress them up a little like I did, you can use ¼″ plywood scraps to create a design to glue onto the plywood drawer fronts.
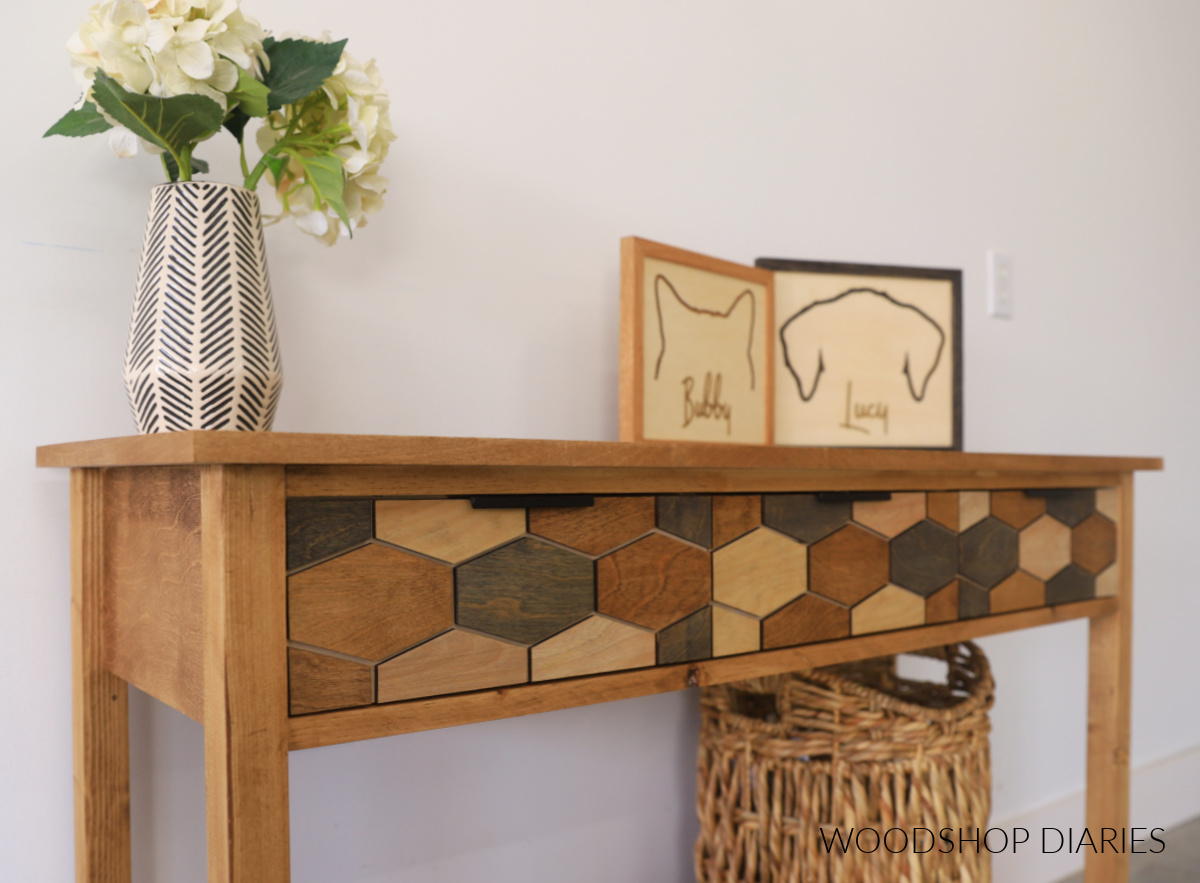
If you watch the video, you’ll see that I cut some hexagon shapes using a laser cutter and stained them different colors before gluing.
If you don’t have a laser cutter, you can use a jig saw to cut an overlay design instead. OR, you could even use painters tape to tape off your design and stain it directly on the ¾″ plywood drawer fronts.
Feel free to customize your drawer fronts however you’d like–OR leave them plain.
You may find these resources helpful throughout the build:
Are DIY projects your thing? Sign up for our newsletter for priority access to the latest projects and build plans!
How to Build a Console Table with Drawers
If you prefer to watch, I’ve shared the full build video with tons of tips, behind the scenes, and additional details on my YouTube Channel here.
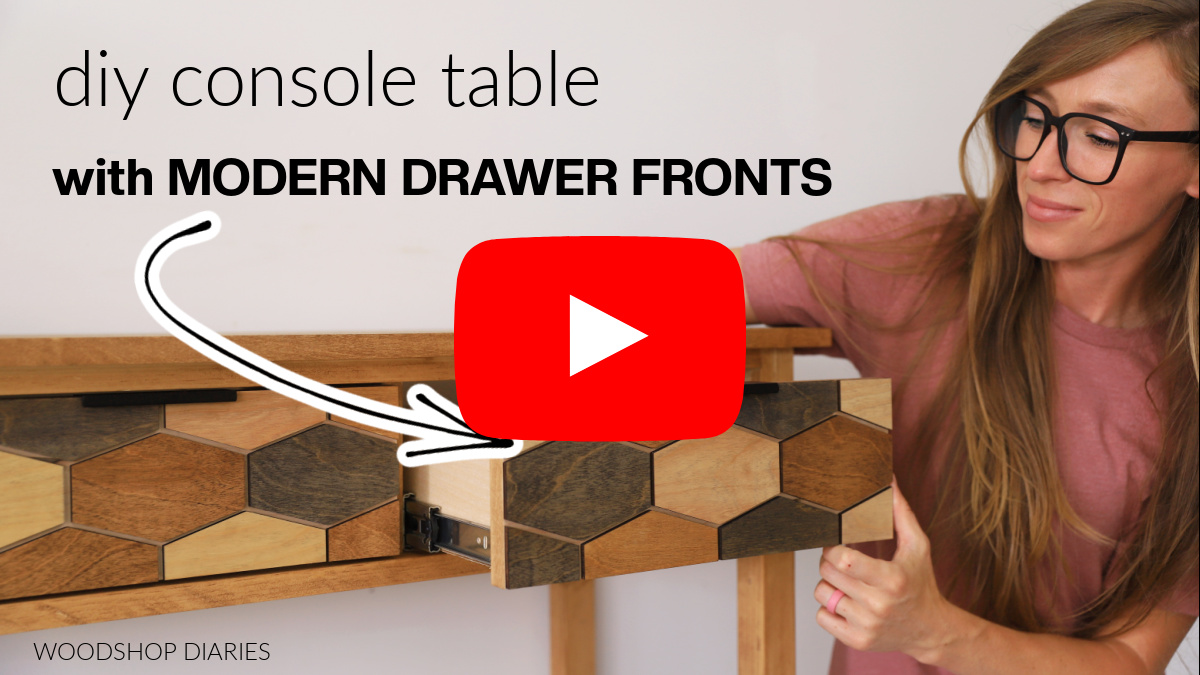
Love watching how-to videos? Subscribe to my YouTube channel for plenty more where that came from!
Prefer to print? Grab the printable console table building plans here:
Tools & Materials
Tools:
- Circular Saw
- Miter Saw
- Cutting Guides (Kreg Rip Cut and AccuCut)–optional
- Pocket Hole Jig
- Drill/Driver
- Crown Stapler OR Brad Nailer
Materials:
- (1) 4’x8′ sheet ¾″ plywood
- (1) 2’x4′ sheet ¼″ plywood
- (2) 2x6x6 boards
- (4) 1x3x8 boards
- (1) 100 count box 1 ¼″ pocket hole screws
- (1) 1 lb box 1 ¼″ wood screws
- (3) pair of 14″ drawer slides
- Wood Glue
- Edge banding (optional)
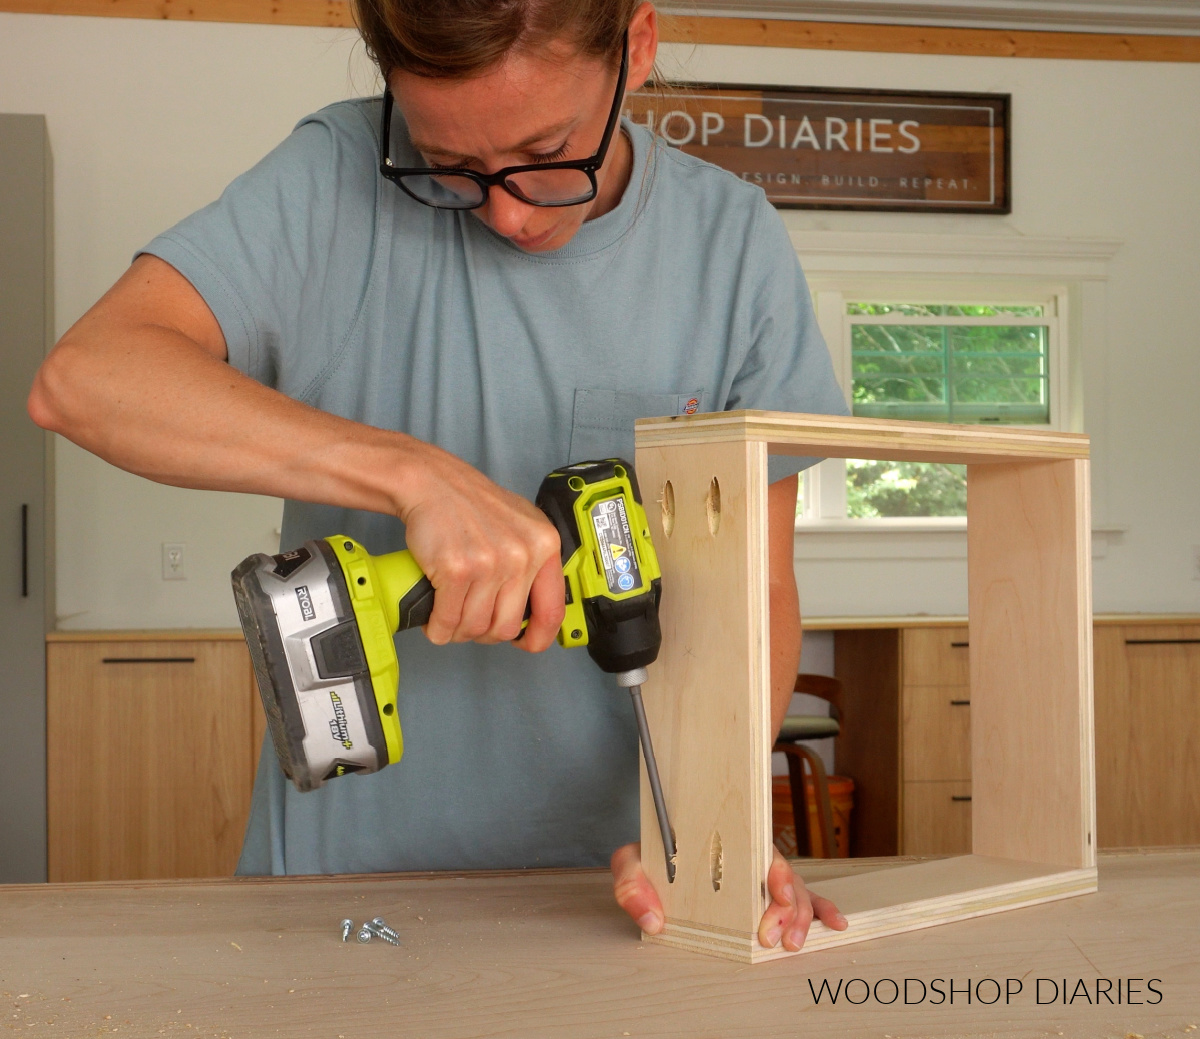
Step 1: Assemble Console Table Frame
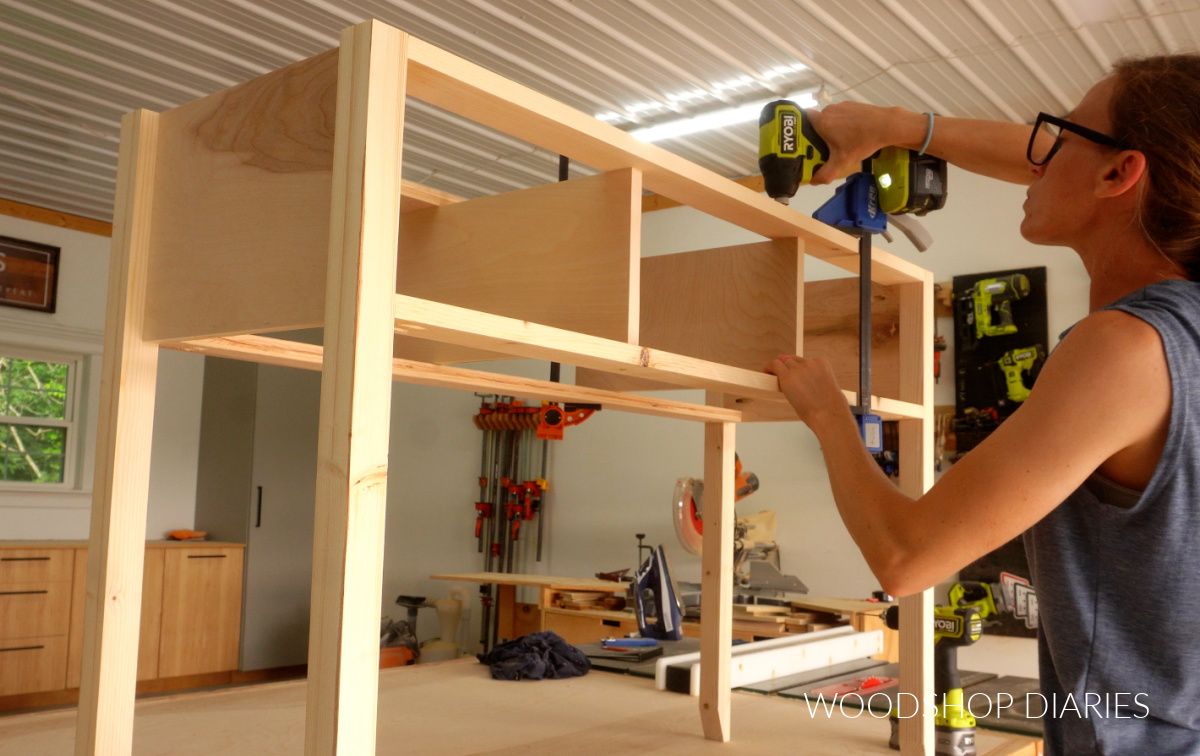
First, I assembled the sides of the console.
I cut four console table legs from 2x2s and tapered the bottom inside corners of each leg on the miter saw. The taper is purely for decorative purposes, so you can skip it if you’d like. I find a little taper adds a nice subtle detail.
By the way, if you struggle to find good 2x2s precut from the store, I highly recommend making your own 2x2s like this.
Then, I attached a ¾″ plywood side panel between each pair of legs using pocket holes and screws. Learn how to use pocket holes here.
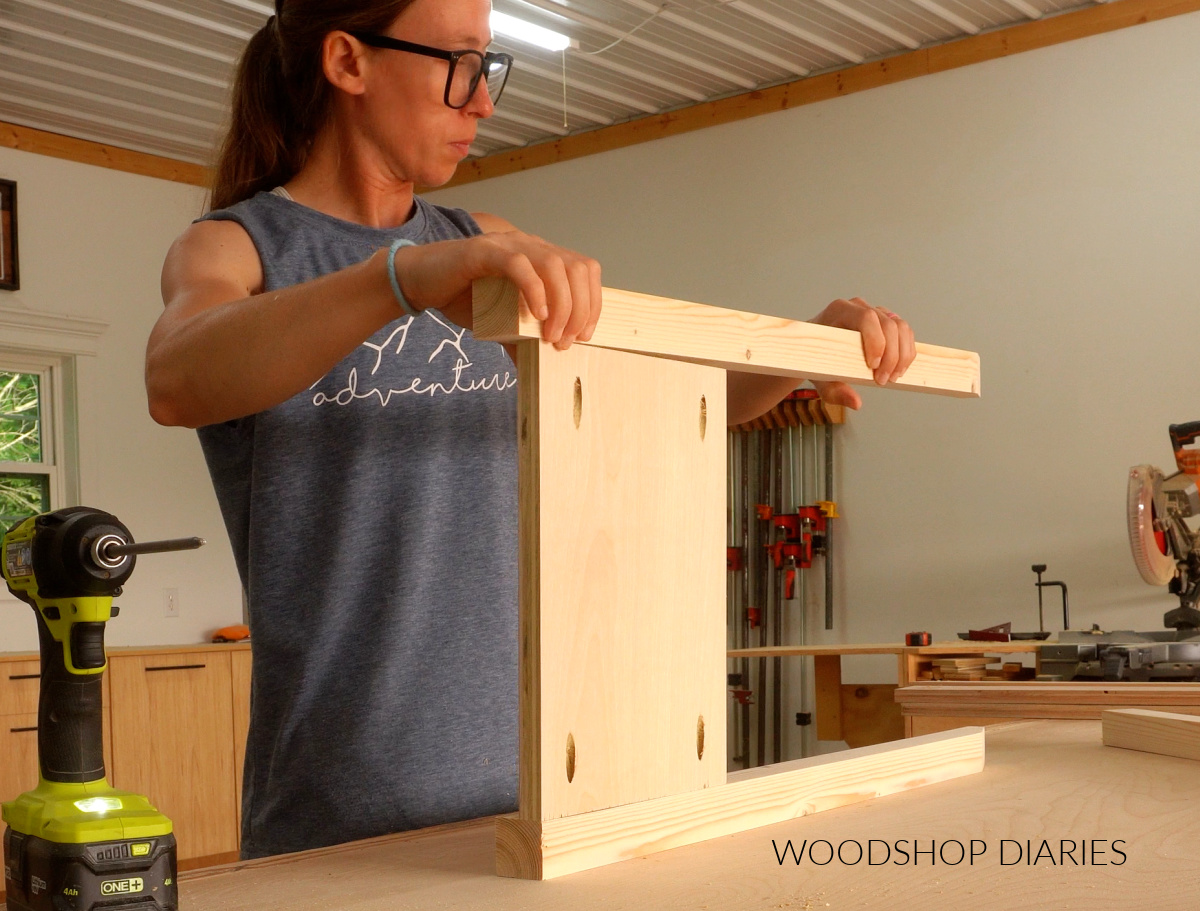
Once I had two identical side panels like shown above, I cut four pieces of 1×3 to attach between them–two at the front and two at the back.
I installed these, again, using pocket holes and screws. The two top 1x3s should be flush to the top and the two bottom 1x3s should be even with the bottom edge of the side panels.
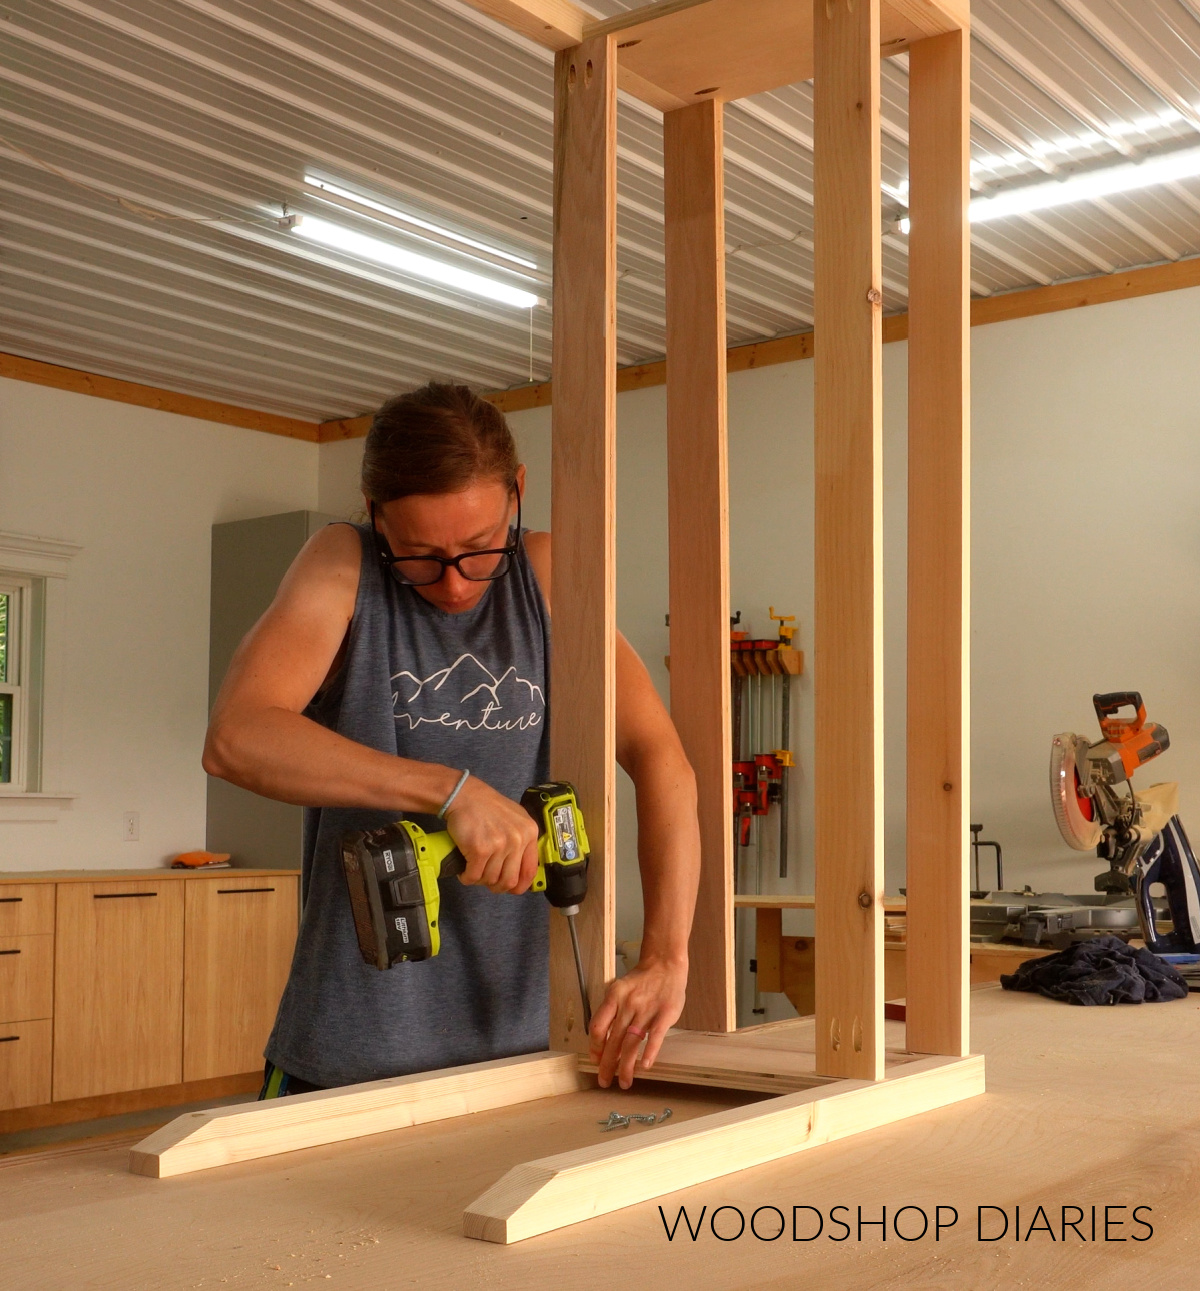
I planned to add three drawers into this console, so I cut two pieces of ¾″ plywood to use as the drawer dividers.
I’ll be adding overlay fronts in a later step, so I made these pieces 1″ narrower than the overall depth of my frame. That way, these will be inset the front edge (like you see below) when installed.
The drawer fronts will cover these pieces when installed. I made sure the openings were all equal, then screwed these dividers in place using screws through the top and bottom supports at both the front and the back.
Prefer to print? Grab the printable console table building plans here.
Step 2: Install Shelf
Next, I added the shelf that goes into the bottom of this frame.
I could have (maybe should have) added this in step 1, but I didn’t decide that I wanted one until later in the project. Luckily, it’s pretty easy to add at any point, so you can change your mind anytime ha!
For the shelf, I cut 1×3 boards to attach between the legs on the sides, front, and back. I drilled pocket holes into the ends of each board and installed them vertically, flush to the INSIDE of each leg toward the bottom using pocket hole screws.

Then, I cut a piece of ¾″ plywood to fit into the opening in this frame. I made sure it fit (trust me–make sure it will fit first!), then drilled pocket holes around all the edges and secured it to the 1x3s using pocket hole screws from the bottom side.
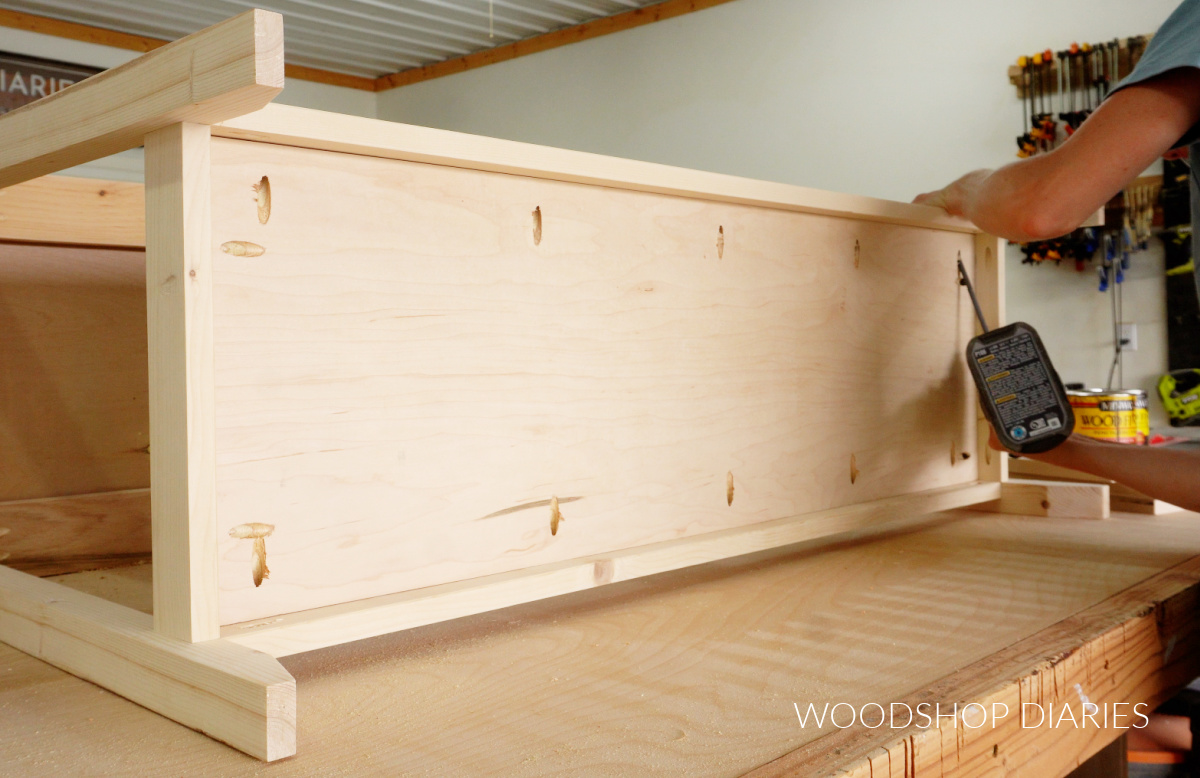
You can absolutely install this so that it’s flush to the very top edges of these 1x3s, but I actually installed it about ¼″ down from the top edge so that there’s a little “lip” around the shelf.
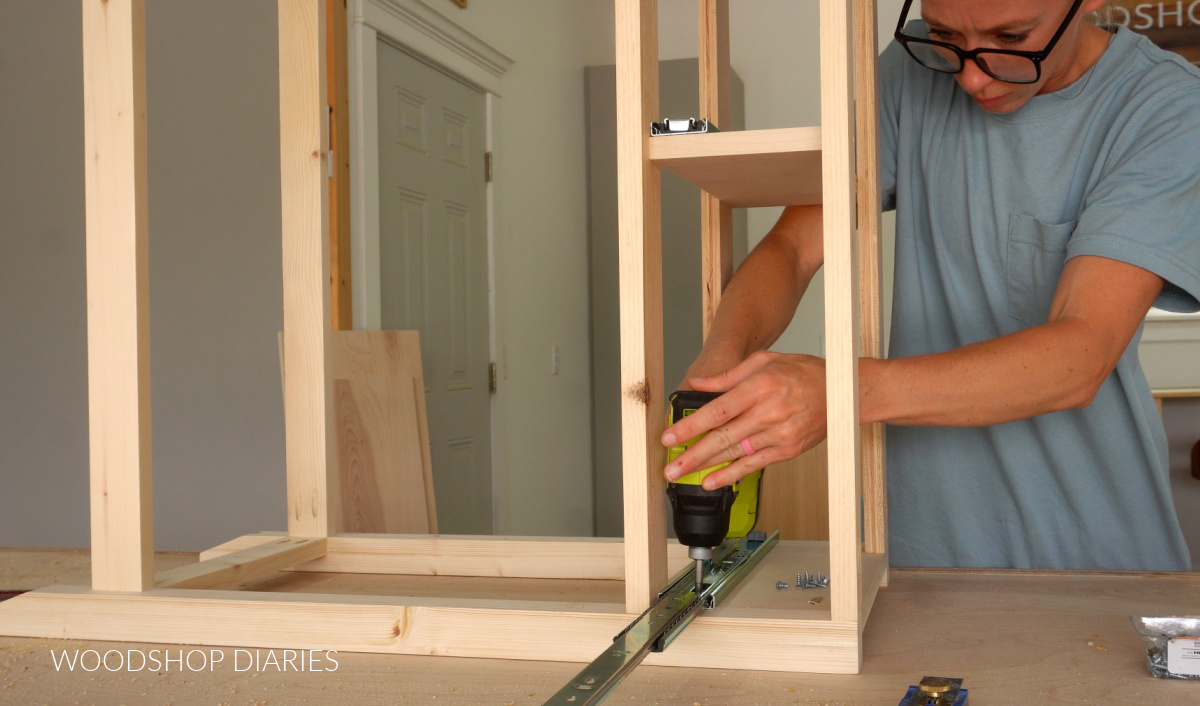
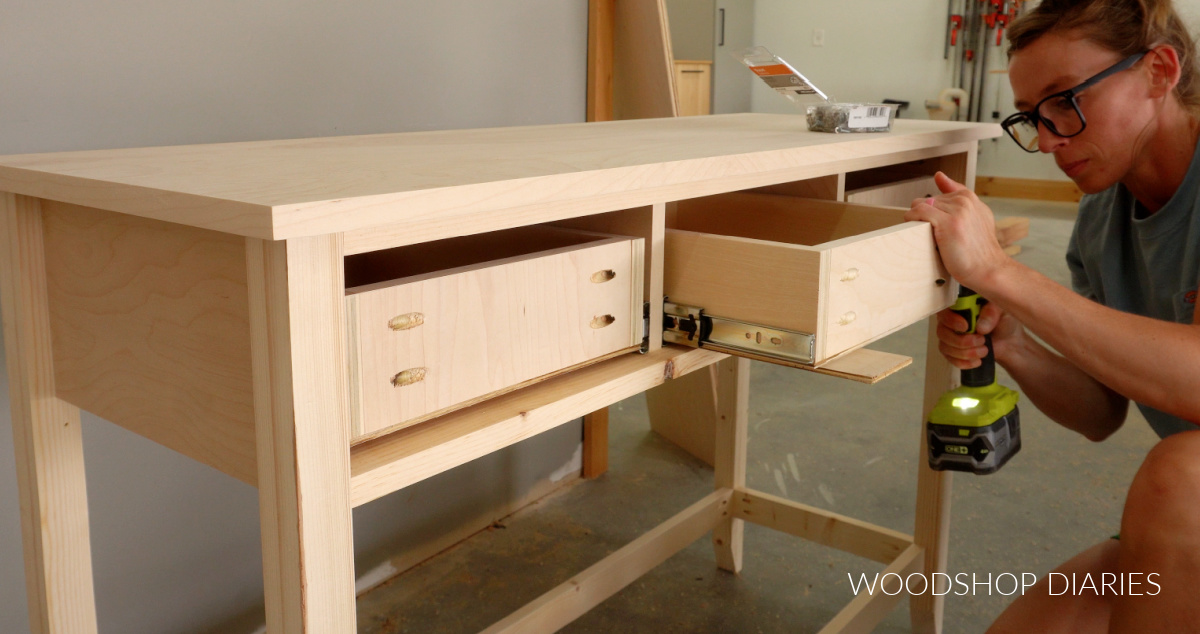
Step 3: Add Drawer Slides
Next, I added the drawer slides into the console openings at the top. I installed 3 pair of 14″ ball bearing drawer slides so that they were 1″ inset from the front of the console table frame.
RELATED: How to install side mount drawer slides
Prefer to print? Grab the printable console table with drawers building plans here.
Step 4: Attach Top
Next, I cut a piece of ¾″ plywood that was about 2″ longer than the width of my table base and 1″ wider than the depth.
I applied iron on edge banding to the sides and front of this piece to cover the plywood edges. This is totally optional, but just looks nice and clean.
Learn how to apply iron on edge banding here.
Then, I placed this piece on my console table frame so that it overhung both sides 1″ and the front 1″ and secured using screws through the top supports.
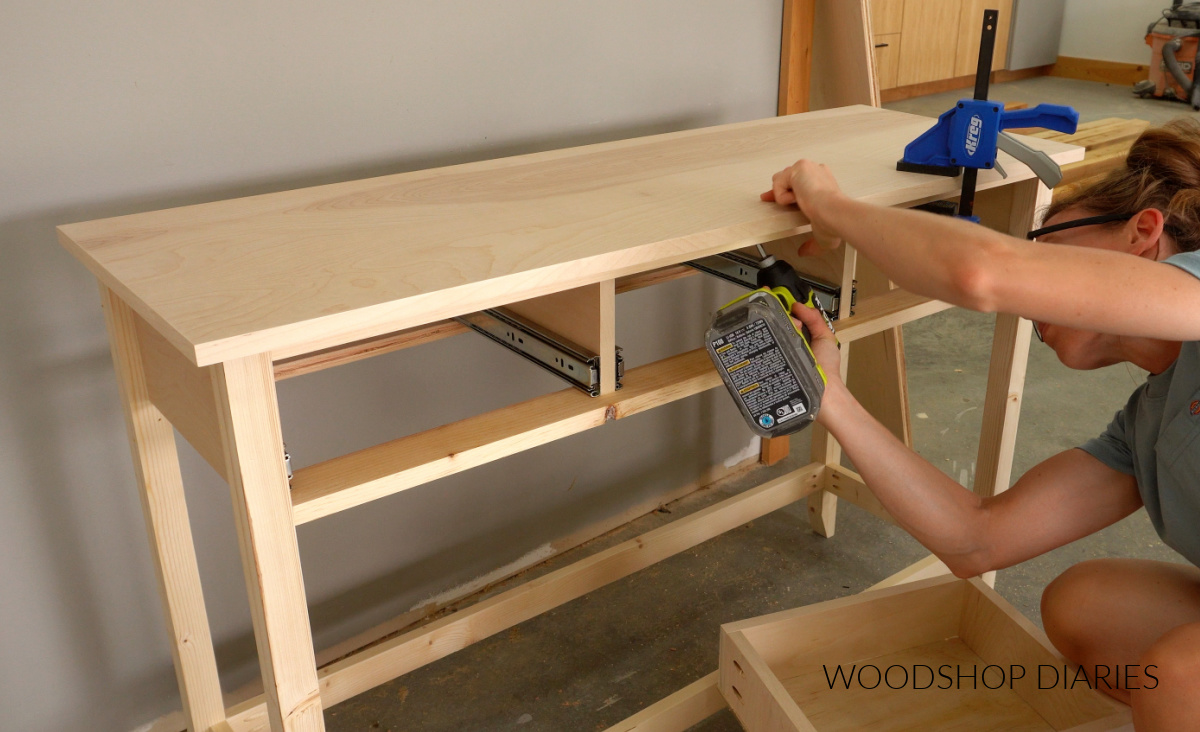
TIP: Much of this build can be done in random order–all the pieces don’t have to be assembled in a specific step. However, whatever order you assemble in, I do recommend installing the top before installing the drawer boxes.
Step 5: Build and Install Console Table Drawers
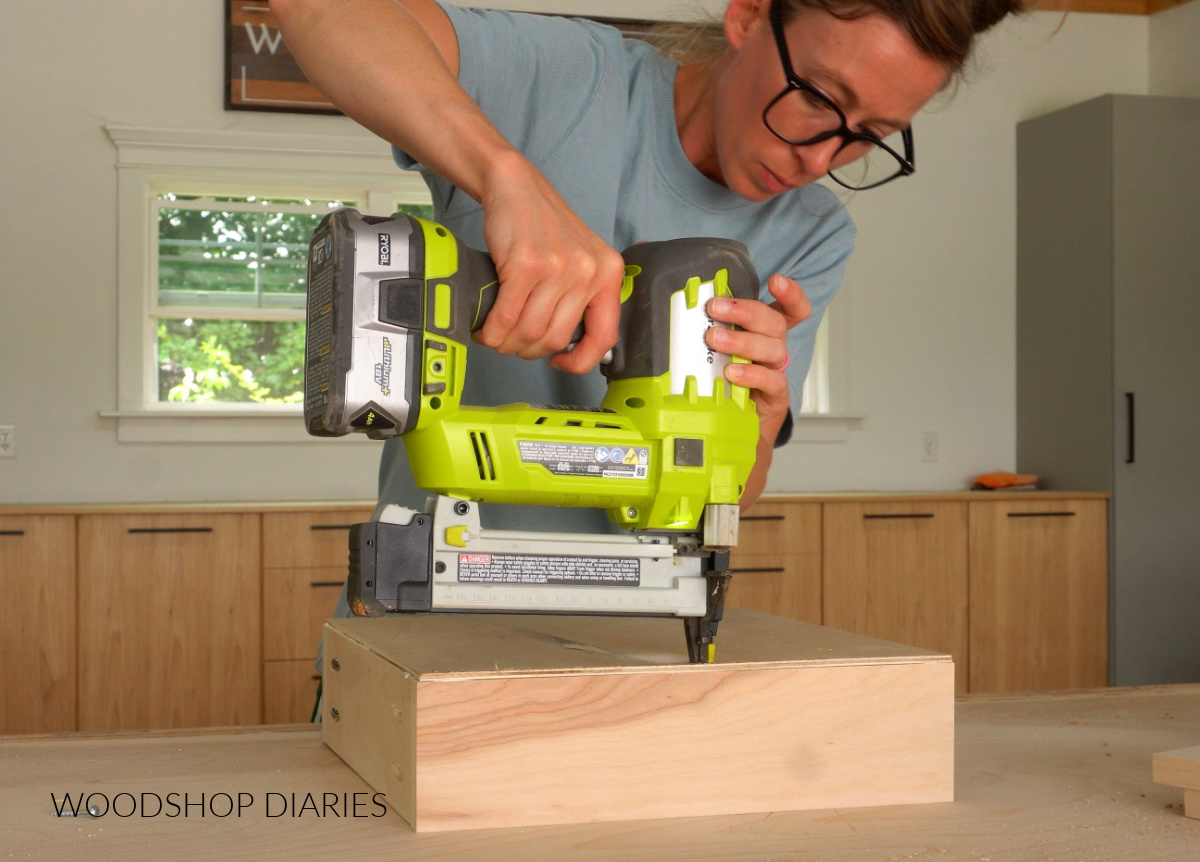
Now all that’s left is adding the drawers! I assembled three small drawer boxes to fit into the openings in the top of the console.
I built my drawer boxes using ¾″ plywood scraps for the four sides. I assembled them using pocket holes like you see below.
Then, I cut ¼″ plywood panels to fit over the bottom of each box. I glued and stapled these onto the bottom.
Now, if you have seen me build drawers in the past, you know that typically, I like to cut dadoes and install my ¼″ plywood drawer bottoms into those.
But since these drawer boxes are so shallow, gluing the bottom on gives me just a little extra space inside for storage. Cutting dadoes takes away some of the drawer depth.
After all three boxes were together, I installed them into the console onto the slides. Again…even though I’ve mentioned it already several times, these needed to be 1″ inset from the front edge.
The drawer fronts in the next step will go on the front and be inset the frame.
Step 6: Customize and Attach Drawer Fronts
I cut three drawer fronts from ¾″ plywood–one for each drawer box. I mentioned earlier that these plain fronts would work totally fine on the console.
But, I wanted to add a fun design to give it a little more character. To do this, I used a laser cutter. I know not everyone has a laser cutter handy, so if you don’t have one, you can cut a design using a jig saw OR you can also just use a stencil or painters tape to stain a design directly onto the plywood.
There are TONS of options to dress up a drawer front, so feel free to get creative.
For the laser cutter, I go into more detail in the video here, but essentially, in the design software, I drew a rectangle the same size as my drawer fronts, then added hexagon shapes inside of it.
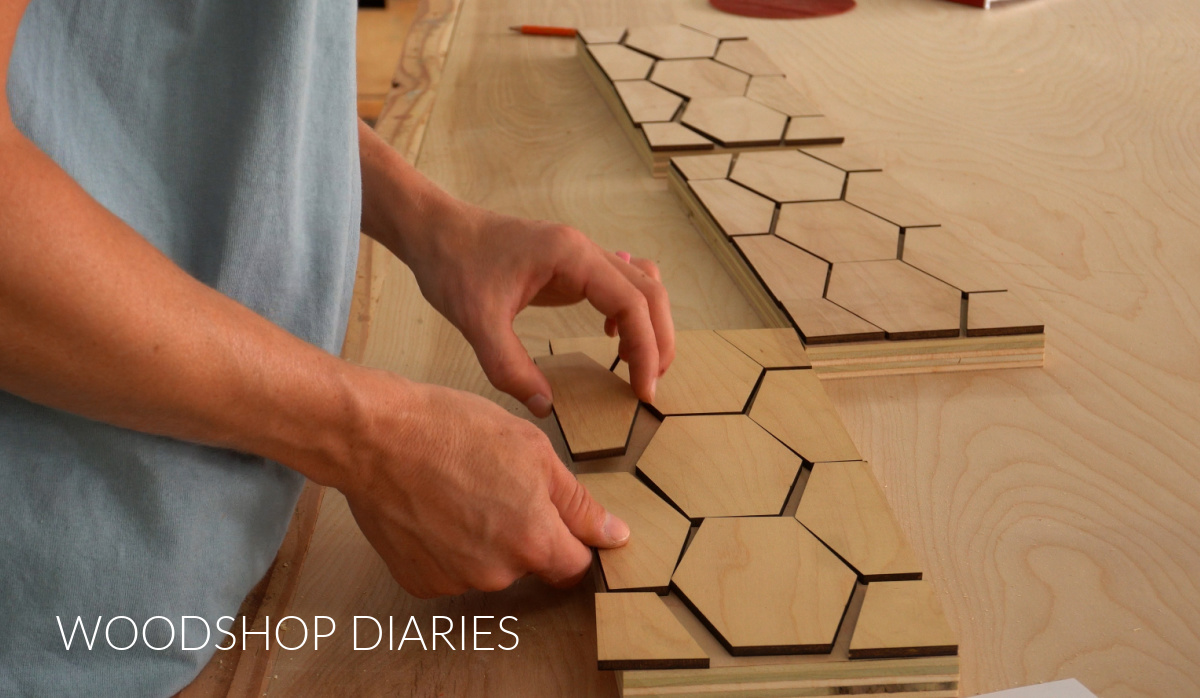
I cut this out on ¼″ plywood. Once it was cut, these pieces would fit perfectly over my drawer front–almost like a puzzle. I stained them randomly in three different colors–Minwax Weathered Oak, Early American, and True Black–before gluing them onto each front.
While I was staining, I went ahead and stained the console table Minwax Early American as well. After the stain had dried, I attached the drawer fronts to the drawer boxes using a couple screws from the inside.
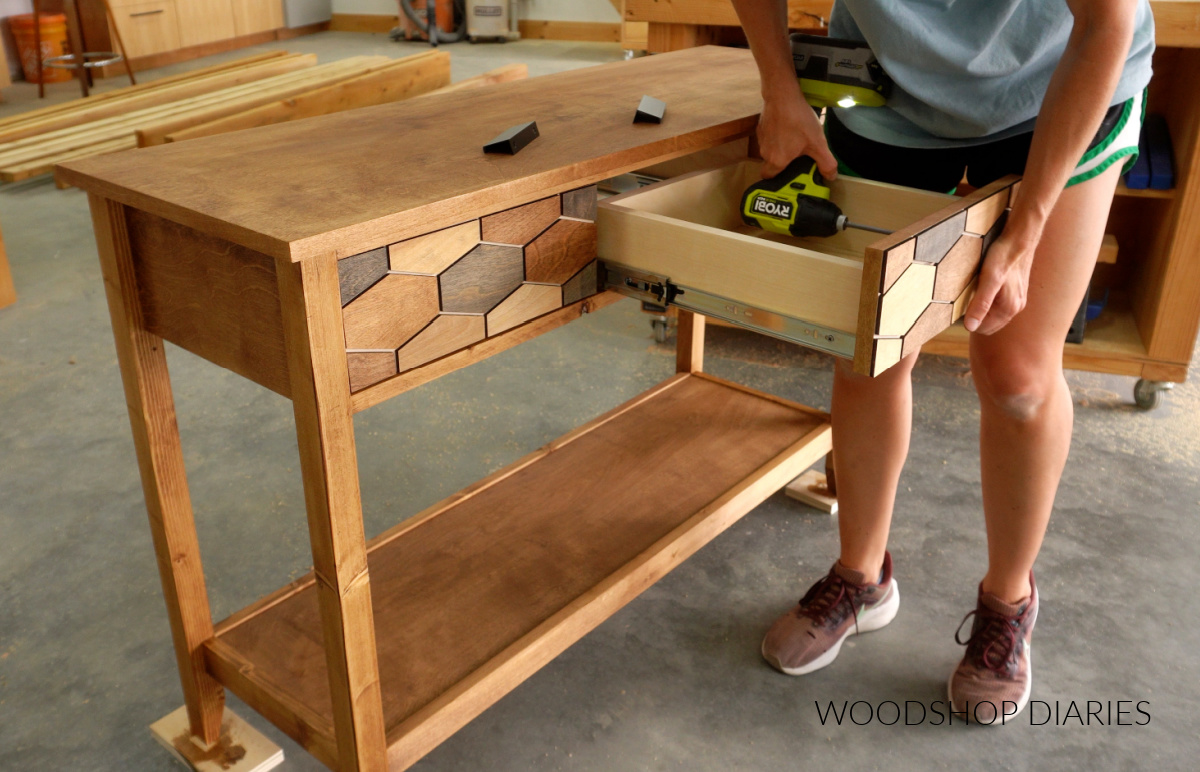
Then, I added these simple drawer pulls. Now, I will say that because of the additional ¼″ plywood overlay, these don’t overhang the drawer front very much, so there’s not much to grab to pull it out. So these may not be the BEST option, but they do work.
But, I just really didn’t want to drill holes to add knobs, so I’m going to live with this for a while and I can always change my mind later and add a different knob or pull if needed.
So with that, this console table is complete and I’m loving the modern vibe. It’s such a simple piece, but so practical.
If you’d like to build your own, don’t forget to grab the printable console table plans here.
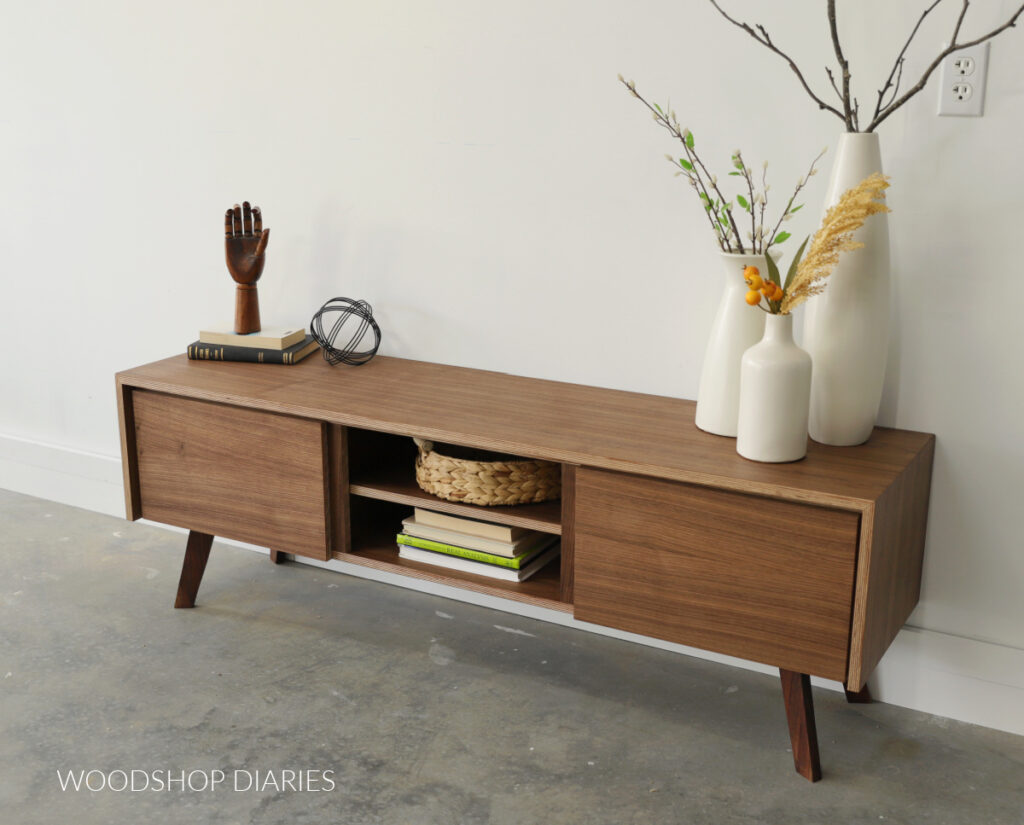
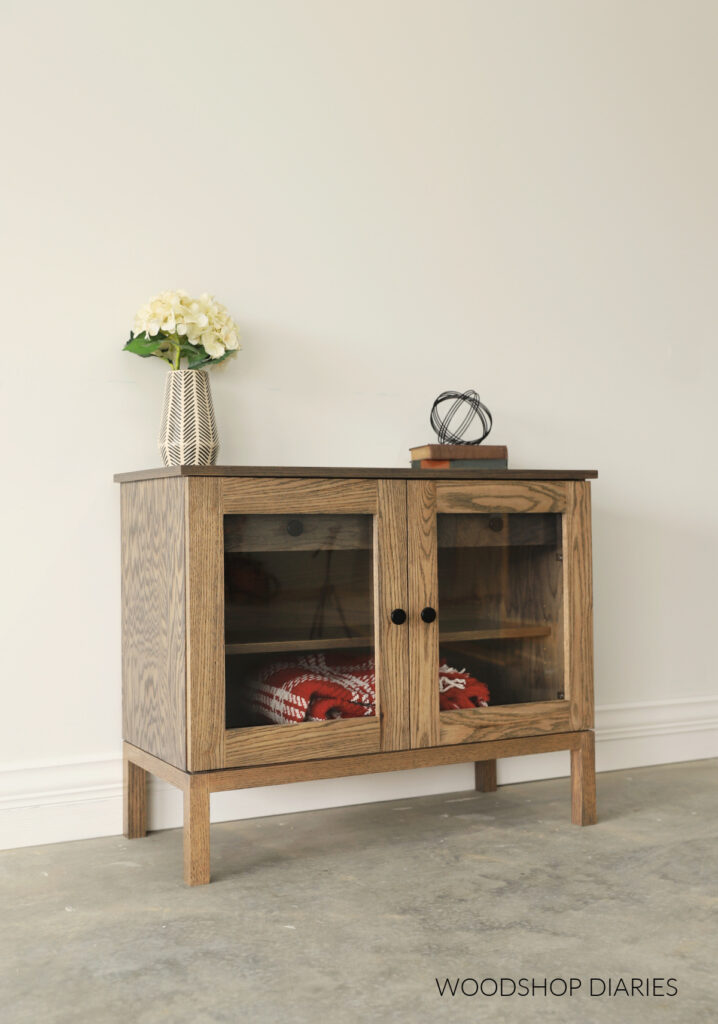
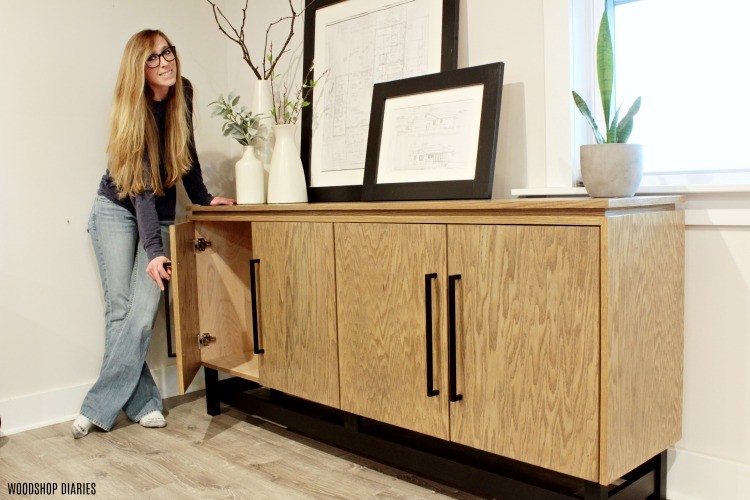
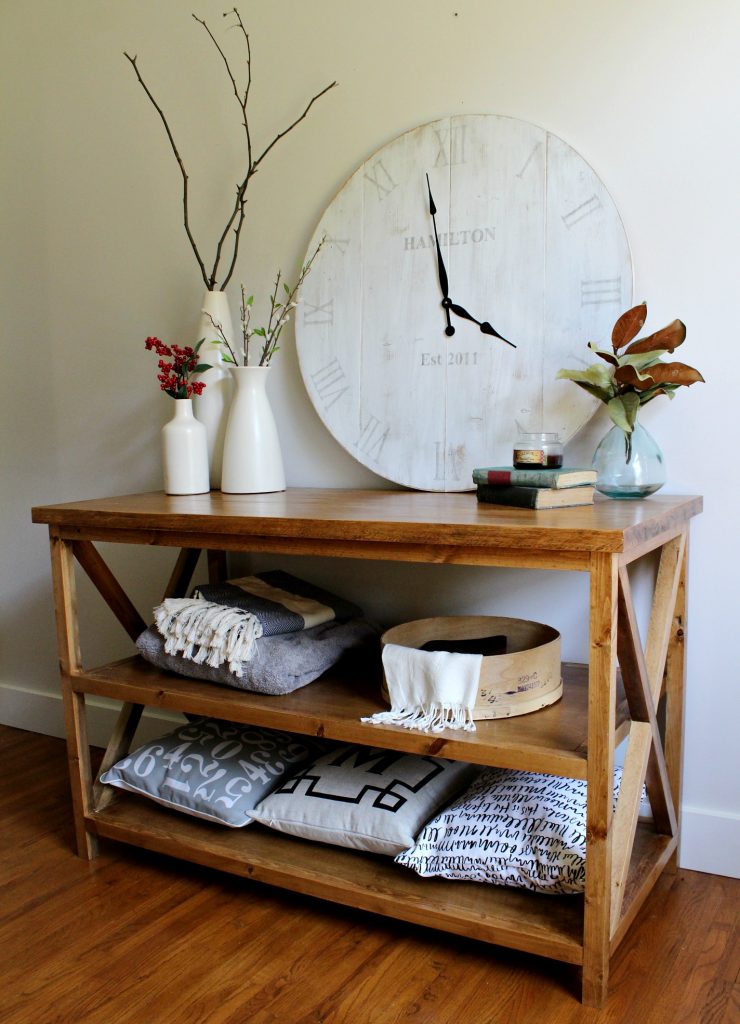
Looking for more console table designs?
Enjoyed this build, but looking for more fun ideas? Here are a few favorites you’ll enjoy browsing! Click on the image(s) below to take you to the how to for each project:

If you enjoyed this project and want to save it for later, don’t forget to pin it or share to your favorite social channel!
Until next time, friend, happy building!