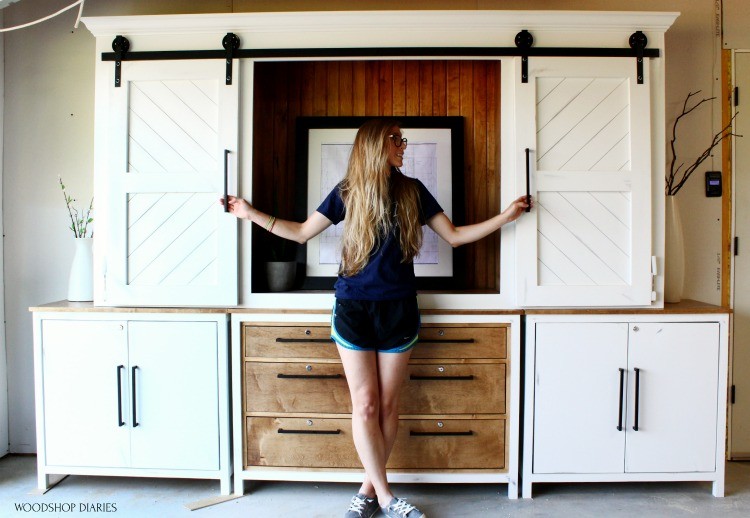
This DIY Pocket Door Cabinet looks simple from the outside. But when you open it up…
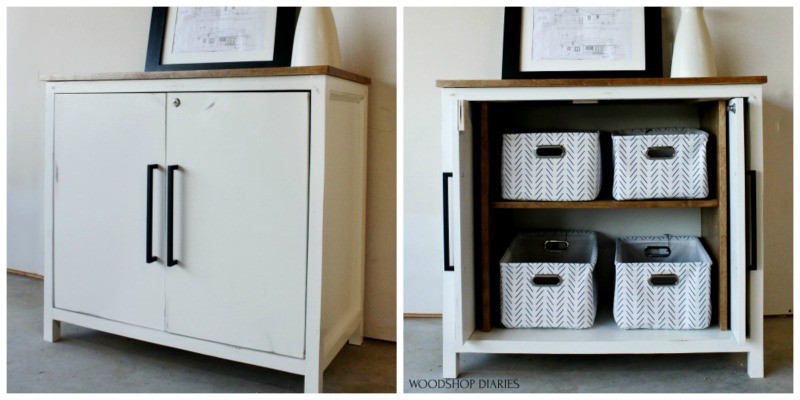
The doors slide back into the cabinet and out of the way! How cool!
.
If you saw my last post, I shared how I built this 6 drawer dresser as kind of the “base” of this large entertainment piece.
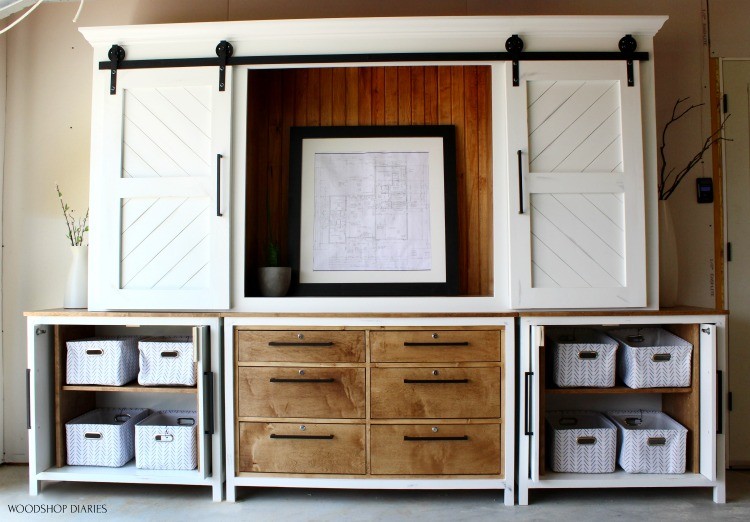
But today I want to show you how I built these two pocket door cabinets that go on each side. They work great as simple stand alone cabinets (I’m imagining this as the perfect coffee station cabinet), too!
.
And the final piece of the puzzle that goes on top is in this post here on how to build a sliding door cabinet.
.
If you’re ready to get building, I’ve got the plans below and I’ll show you how it came together in this video.
This post contains affiliate links. See policies.
For this Pocket Door Cabinet, You Will Need:
- (4) 2x2x8 boards
- (1) 4×8 sheet ¾″ plywood PLUS ¼ sheet for the top
- (1) 4×4 sheet ¼″ plywood
- (1) 1x2x8 board and cove molding (optional trim)
- (2) pair pocket door hardware
- (2) pair inset concealed hinges
- (2) door pulls
- Shelf pins
- 1 ¼″ pocket hole screws
- 2 ½″ pocket hole screws
- ⅜″ dowels (optional)
- 2″ wood screws
- Circular Saw (for cutting down plywood)
- Miter Saw
- Drill
- Nail gun and/or stapler
- Pocket Hole Jig
- Dowel Jig (optional)
- Concealed hinge jig
- Shelf Pin Jig
- Edge Banding
Printable plans for the entire entertainment center series (which includes this pocket door cabinet) are here:
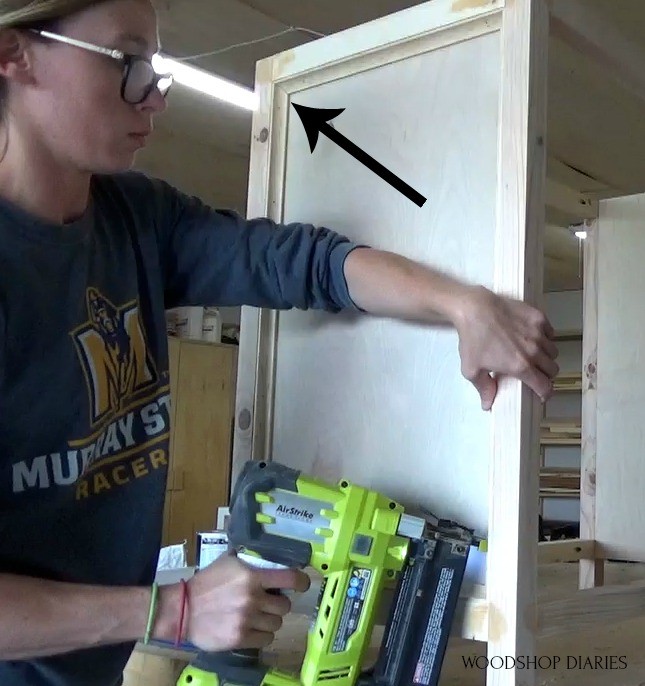
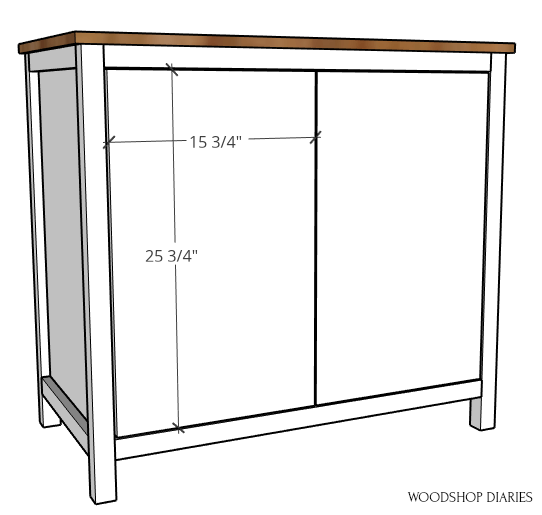
Step 1: Assemble Pocket Door Cabinet Side Panels
You’ll notice that the first part of this project looks very similar to the dresser build. I built these so that they would match so the measurements are the same for the side panels of both projects.
.
I used 2x2s for the frame and ¾” plywood for the inside panels.
RELATED: How to Cut Your Own 2x2s
ALSO RELATED: How to Easily Cut Down Plywood Sheets
.
Once I had my 2×2 legs and plywood cut down to size, I assembled the two side panels like shown.
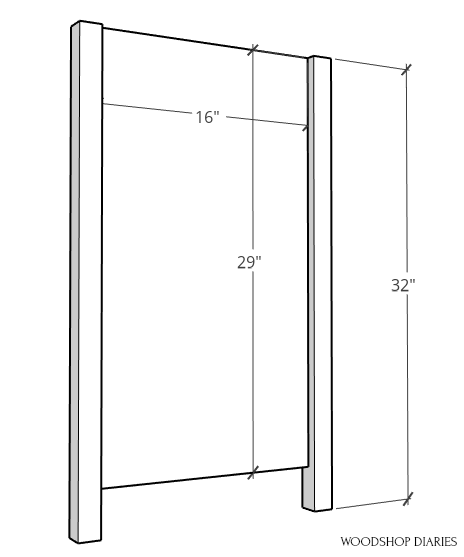
In the dresser build, I used ¾″ pocket holes and 1 ¼″ pocket hole screws for this since they would be covered. But with this project, I used ⅜″ dowels instead so you wouldn’t see the joinery when you opened the doors.
.
If you wanted, you could still use pocket holes here and just plug them. Or even get fancier with another joinery method. There are plenty of ways to join them.
.
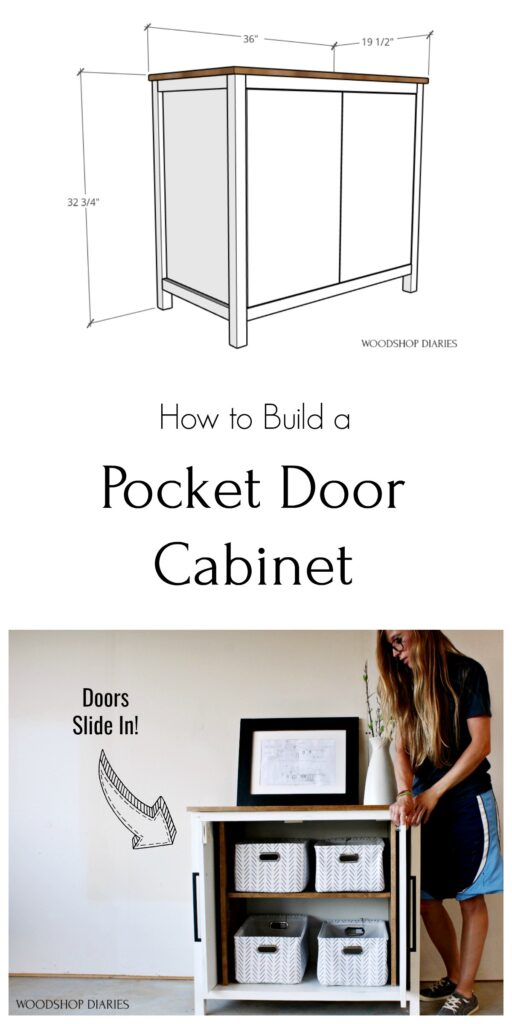
As long as you end up with two side panels with the measurements shown above, you’ll be fine 🙂
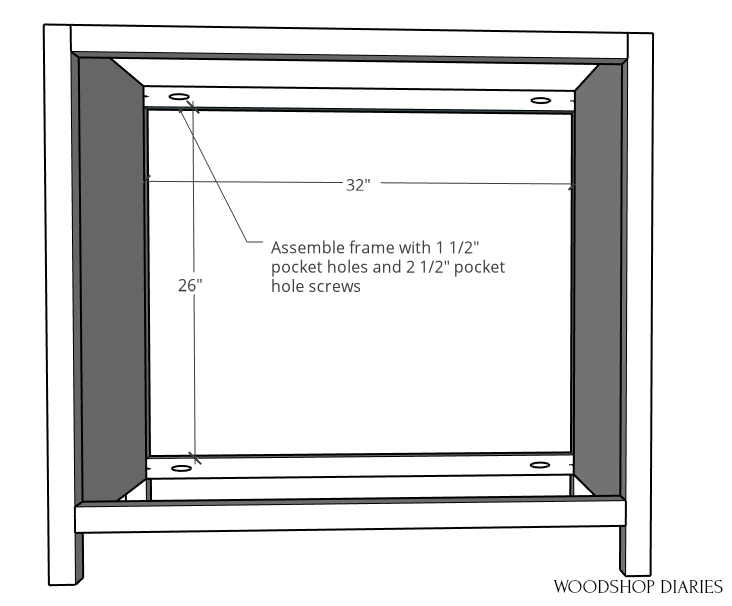
Step 2: Assemble Pocket Door Cabinet Frame
Once the glue was dry on these sides, I assembled the remainder of the cabinet frame using 2x2s. Just like with the dresser, I assembled this with wood glue, 1 ½″ pocket holes and 2 ½″ pocket hole screws.
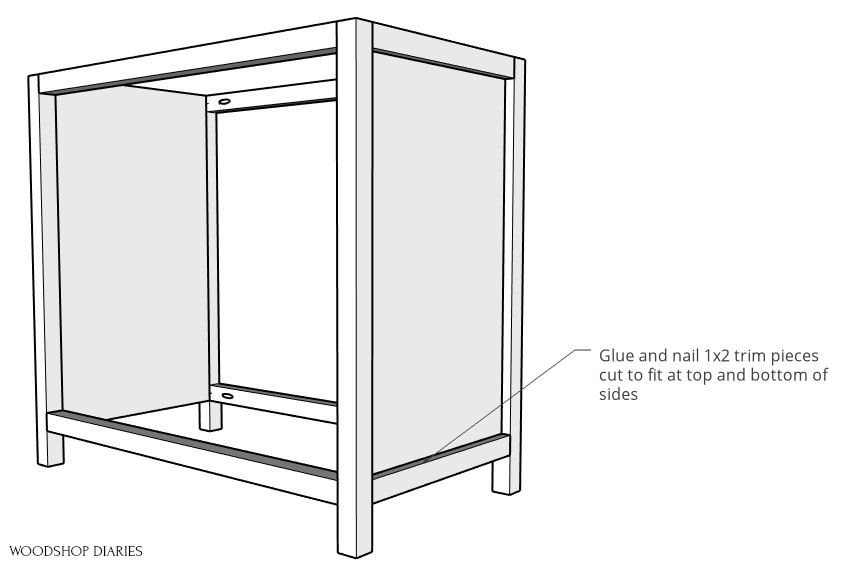
Step 3: Add Trim to Side Panels (Optional)
And again, just like the dresser, I glued and nailed on 1×2 trim pieces and cove molding along the sides. That’s optional, I just thought it looked a little nicer with the trim added.
Step 4: Attach Back Panel to Cabinet
Now, finally things start to look a little different than the dresser build from the last post. This piece gets a back panel.
.
I could have just stapled the back directly onto the 2×2 frame and it would have been fine.
.
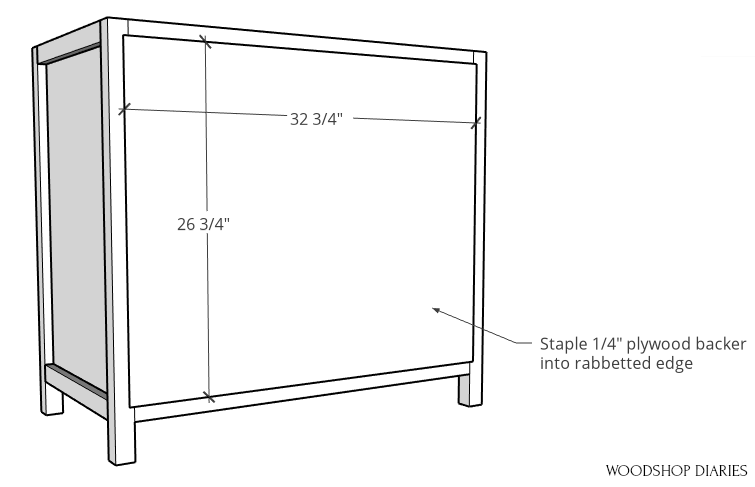
But I got a little fancy and I used a ⅜” rabbeting bit with my router to route out a groove to place the ¼” plywood backer down into so it would be flush across the back.
Once I had routed the groove, I used a chisel to clean up the corners and make them square.
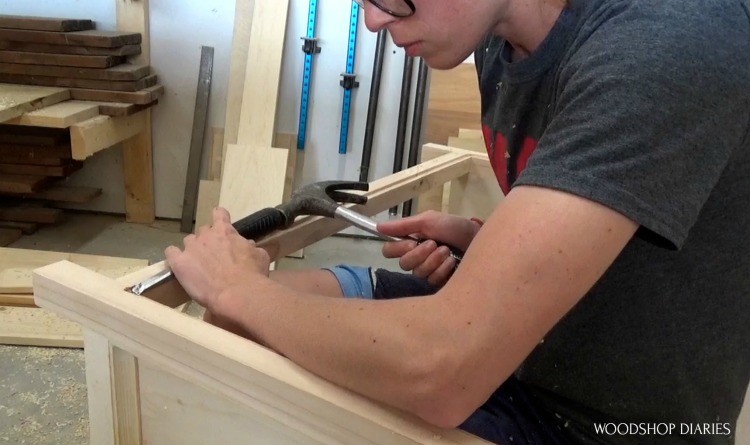
Then I cut to fit a ¼” piece of plywood and stapled it into this groove.
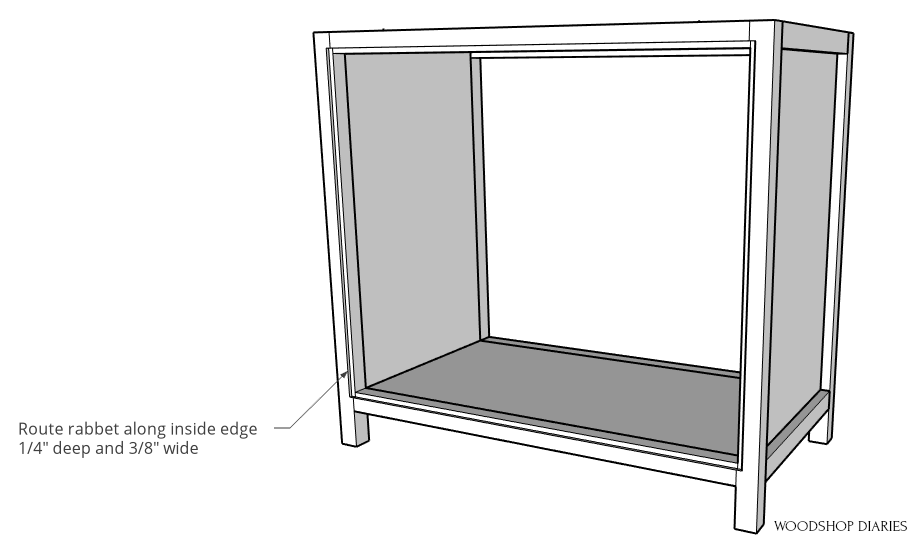
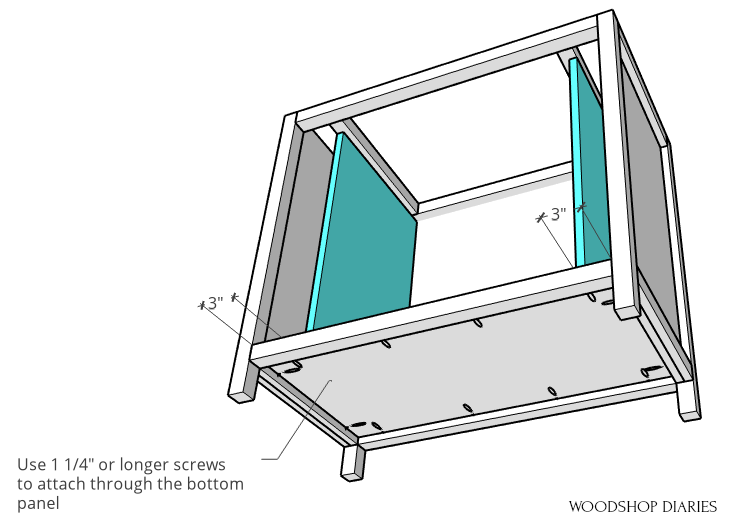
Step 5: Install Pocket Door Cabinet Bottom Panel
Next, it was time to add a bottom into this cabinet.
.
I cut a piece of ¾” plywood to fit inside the bottom frame and drilled ¾″ pocket holes along the edges. Then, I screwed this in place with 1 ¼″ pocket hole screws so that it was flush with the top of the frame pieces.
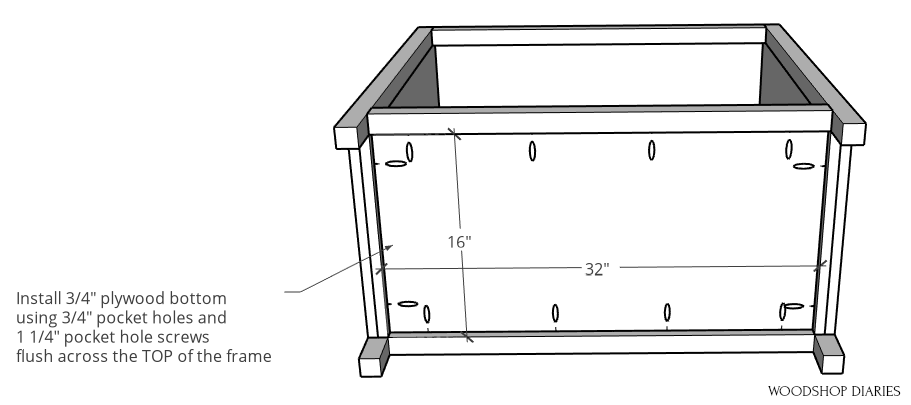
At this point, it’s best to go ahead and finish the inside however you wish. So I went ahead and painted everything white to match the dresser frame from the last post.
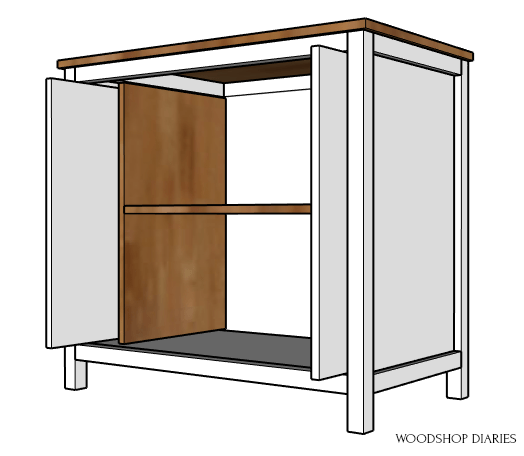
Step 6: Install the Pocket Doors
Once the paint was dry, it was time to start adding everything that will go INSIDE the cabinet.
.
First was the doors.
.
You could use my tutorial to build a paneled door for this project to dress it up a little, but I simply cut my doors from ¾″ plywood for a solid panel style door. I edge banded them before finishing.
I installed these doors using pocket door hardware so they would open up and slide back into the cabinet. This was a nice touch, but there was a bit of a learning curve.
.
This is a link to the exact slides I used. The instructions that come with them were very well written and easy to follow. You have two sides per door—one is installed at the bottom and one at the top of the cabinet.
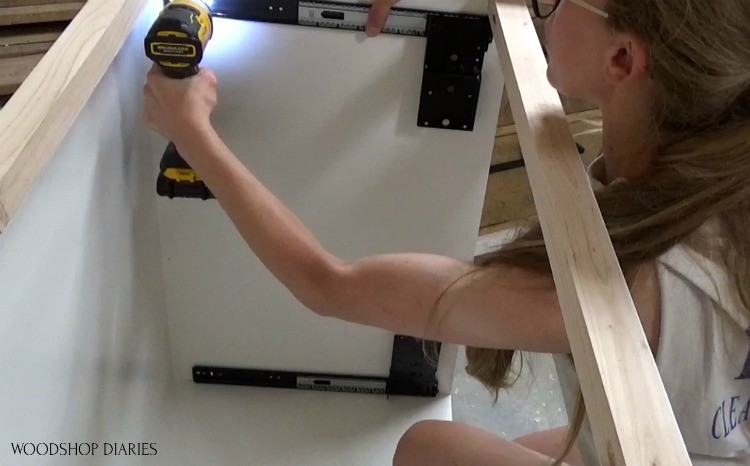
The instructions tell you where to place the slides based on the thickness of your door and whether it’s inset or overlay. In my case, my doors were ¾” thick and were inset, so the slides were placed 1” inset from the front edge.
.
Once the slides were installed into the cabinet, I cut a scrap piece of 1×4 to screw between the slides like shown. (All of this is in the instructions that come with the slides.)

Now, I had to drill the concealed hinge holes in my doors and install them onto the slides. This is where I had some issues.
.
I realized after the fact that they make specific hinges for this type of slide. The hinges I used, were just generic inset hinges.
.
So I’m guessing maybe this isn’t an issue if you use the correct type of hinge, but according to the instructions, I should have drilled my hinge cup holes 5 mm from the door edge.
.
I did this on a few test pieces first, and that ended up leaving about ¼” between the cabinet frame and the door.
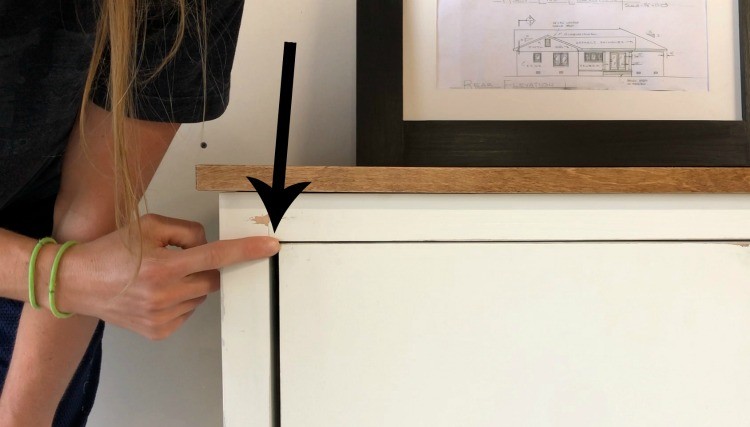
Typical gaps should have been about ⅛”. I tried to move my hinge cup hole further in to narrow the gap, but my concealed hinge jig only goes to 5mm.
.
I ended up removing part of my jig and drilling them 6mm in, but it didn’t make much difference. Check out the YouTube Video for more details.

Long story short, these hinges may be a better option to use with these slides.
.
Anyway, once the hinges were attached to the door, I used the included screws to attach the hinges onto the slides.
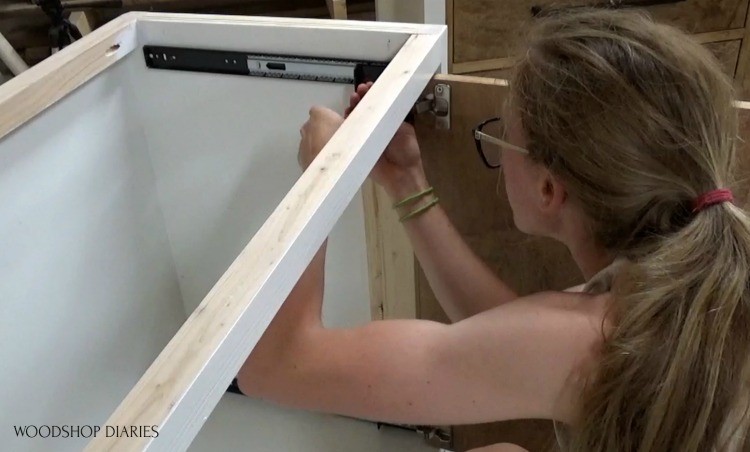
Besides the gap issue (which was my own fault), these were really easy to install and work really well. I highly recommend them, but they are a little pricey. Hardware always is, I suppose.
.
NOTE: You’ll see I stained the doors above. I changed my mind and removed them later and painted them white to match the cabinet.
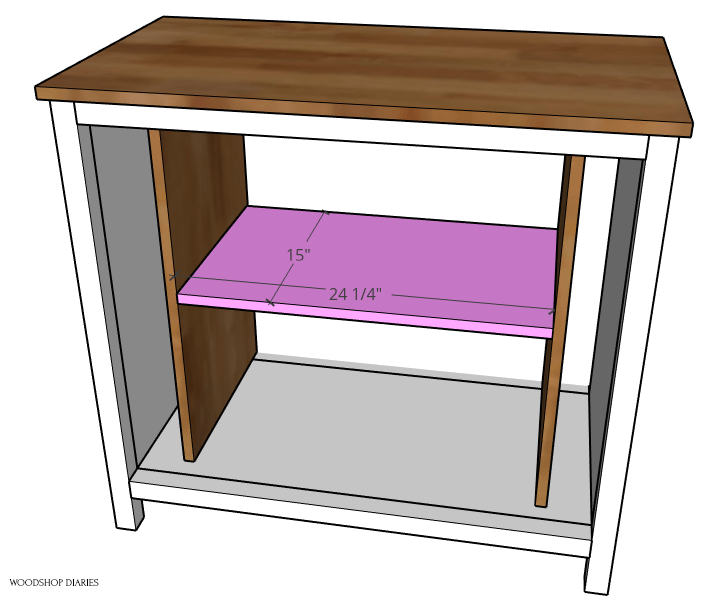
Step 7: Install the Inner Shelf Panels
Once the doors were installed, it was time to add what I like to call the “guts” of the cabinet—the shelves inside.
.
Typically, I would just use shelf pins and drill holes for adjustable shelves, but since these doors slide into the cabinet, I basically had to build a cabinet inside the cabinet.
.
First, I used some scraps at the top here. I used 2x4s in my project, but I could have used 2x2s, but I was lazy and didn’t want to cut them in half haha. I’m showing this using 2x2s here.

I simply pocket hole screwed them between the frame at the top leaving about 3” open on the sides. These blocks are only here to secure this next piece I added here.
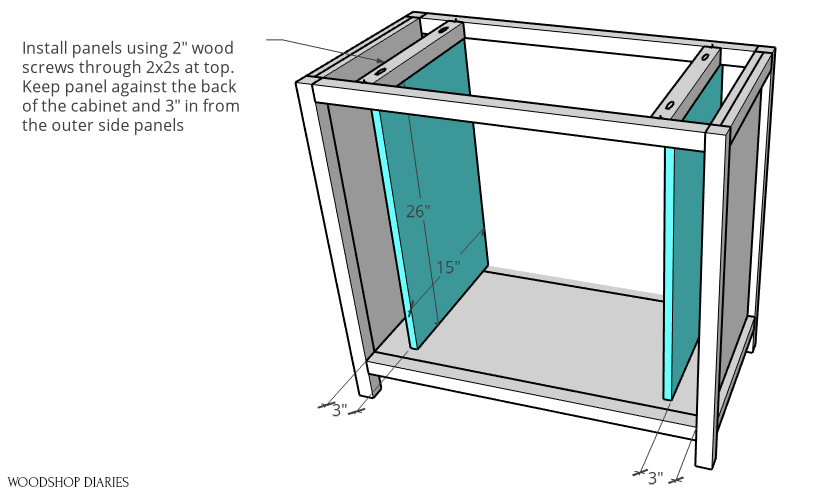
I installed ¾” plywood panels between the bottom cabinet panel and these 2×2 blocks using wood screws. I edge banded the front edge and stained them before installing because it would have been difficult to do so after the fact.
I kept double checking throughout the process that the doors had enough room to open and slide inside. Leaving about 3” between the inside and outside panels seemed to work well.
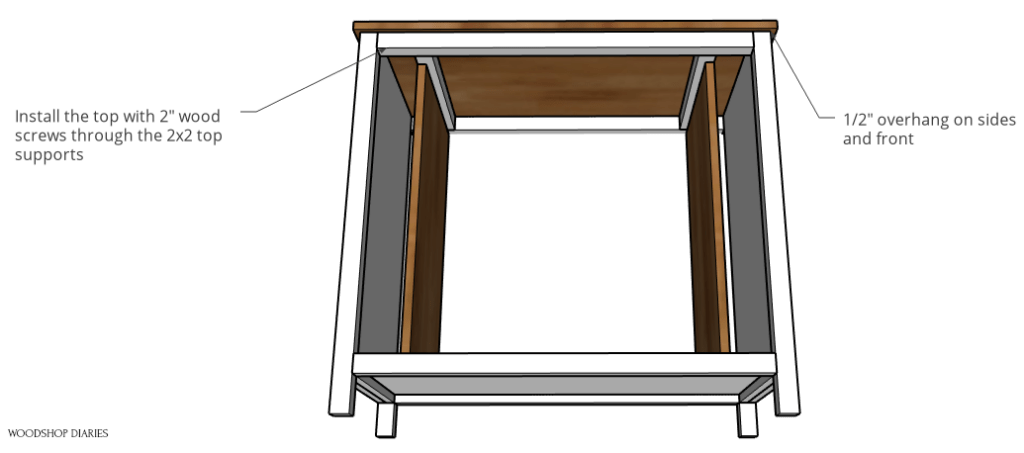
Step 8: Install Top Onto Pocket Door Cabinet
Just like with the last dresser build, I cut a ¾” plywood top for this, edge banded, and stained it, then installed it onto the cabinet using 2” wood screws through the top frame pieces.
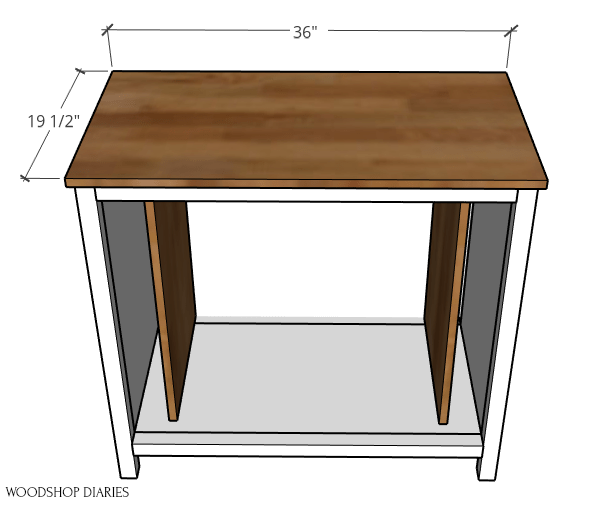
Step 9: Add Shelves and Finish
Then I could add the last piece…the shelf. I drilled shelf pin holes into the sides to place an adjustable shelf without interfering with the doors.
.
RELATED: Check out the shelf pin jig and other helpful tools for cabinet building in this post.
And again, just like the dresser, the library requested these doors to lock as well. Check out the YouTube Video to see how I installed the lock if you’re interested in adding those onto your project.
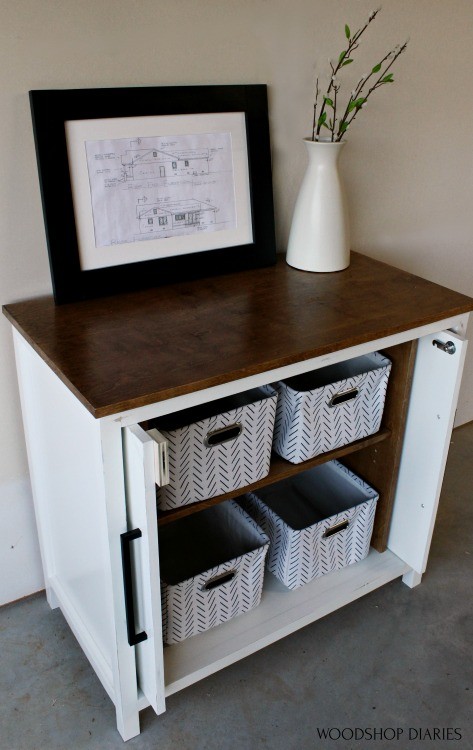
After a little distressing and some clear coat poly, the cabinets were done. I added some little storage baskets I found at Walmart to help them keep things organized.
.
These make great little stand alone storage cabinets, but also look nice as the end sections of this larger piece.
And if you’re wanting to build the entire entertainment center, be sure to check it out here:
DIY Sliding Door Entertainment Center
Until next time, happy building 😊