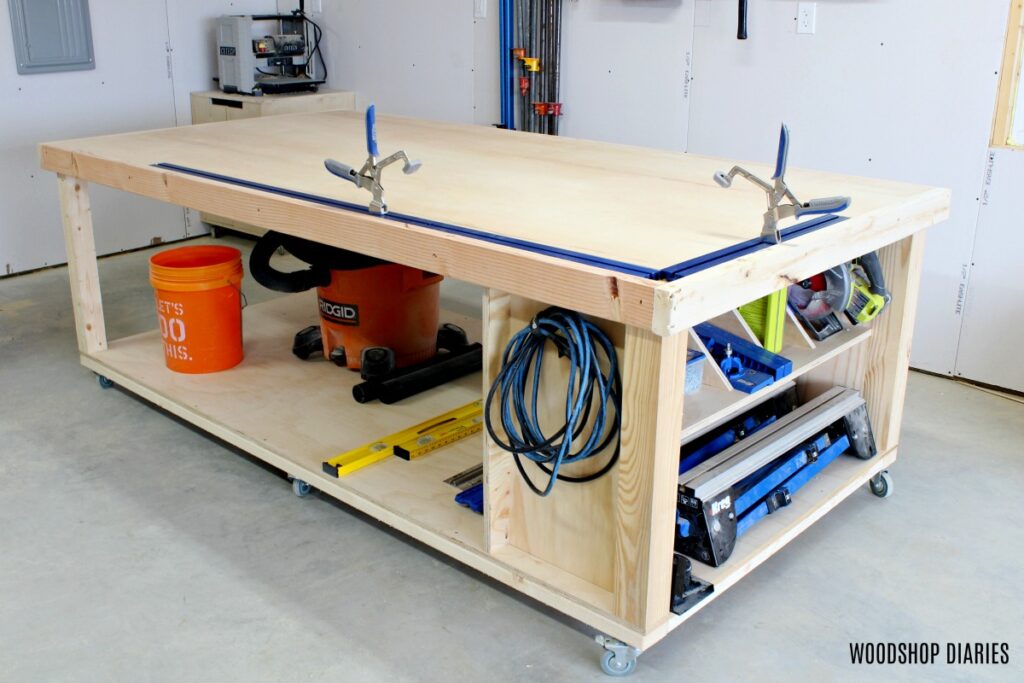
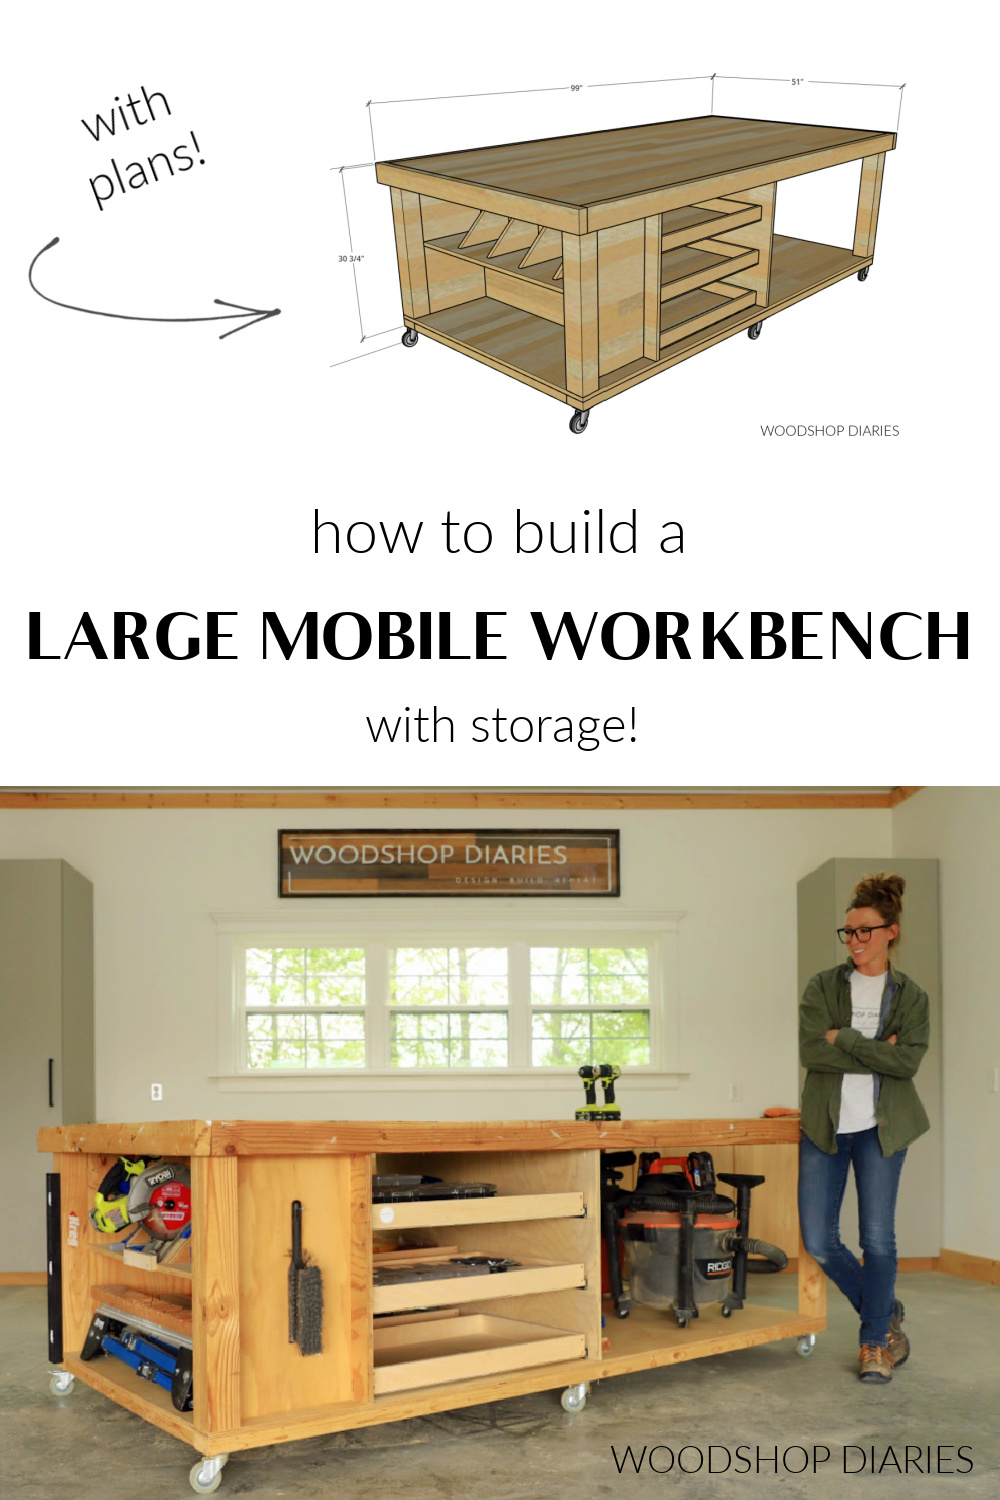
In this post, I’ll show you how to build a large mobile workbench with tons of storage for your workshop or garage!
If you’ve got the space for it, a large workbench is a valuable asset to a workshop. The large worksurface gives you room to assemble, plan, and place your tools.
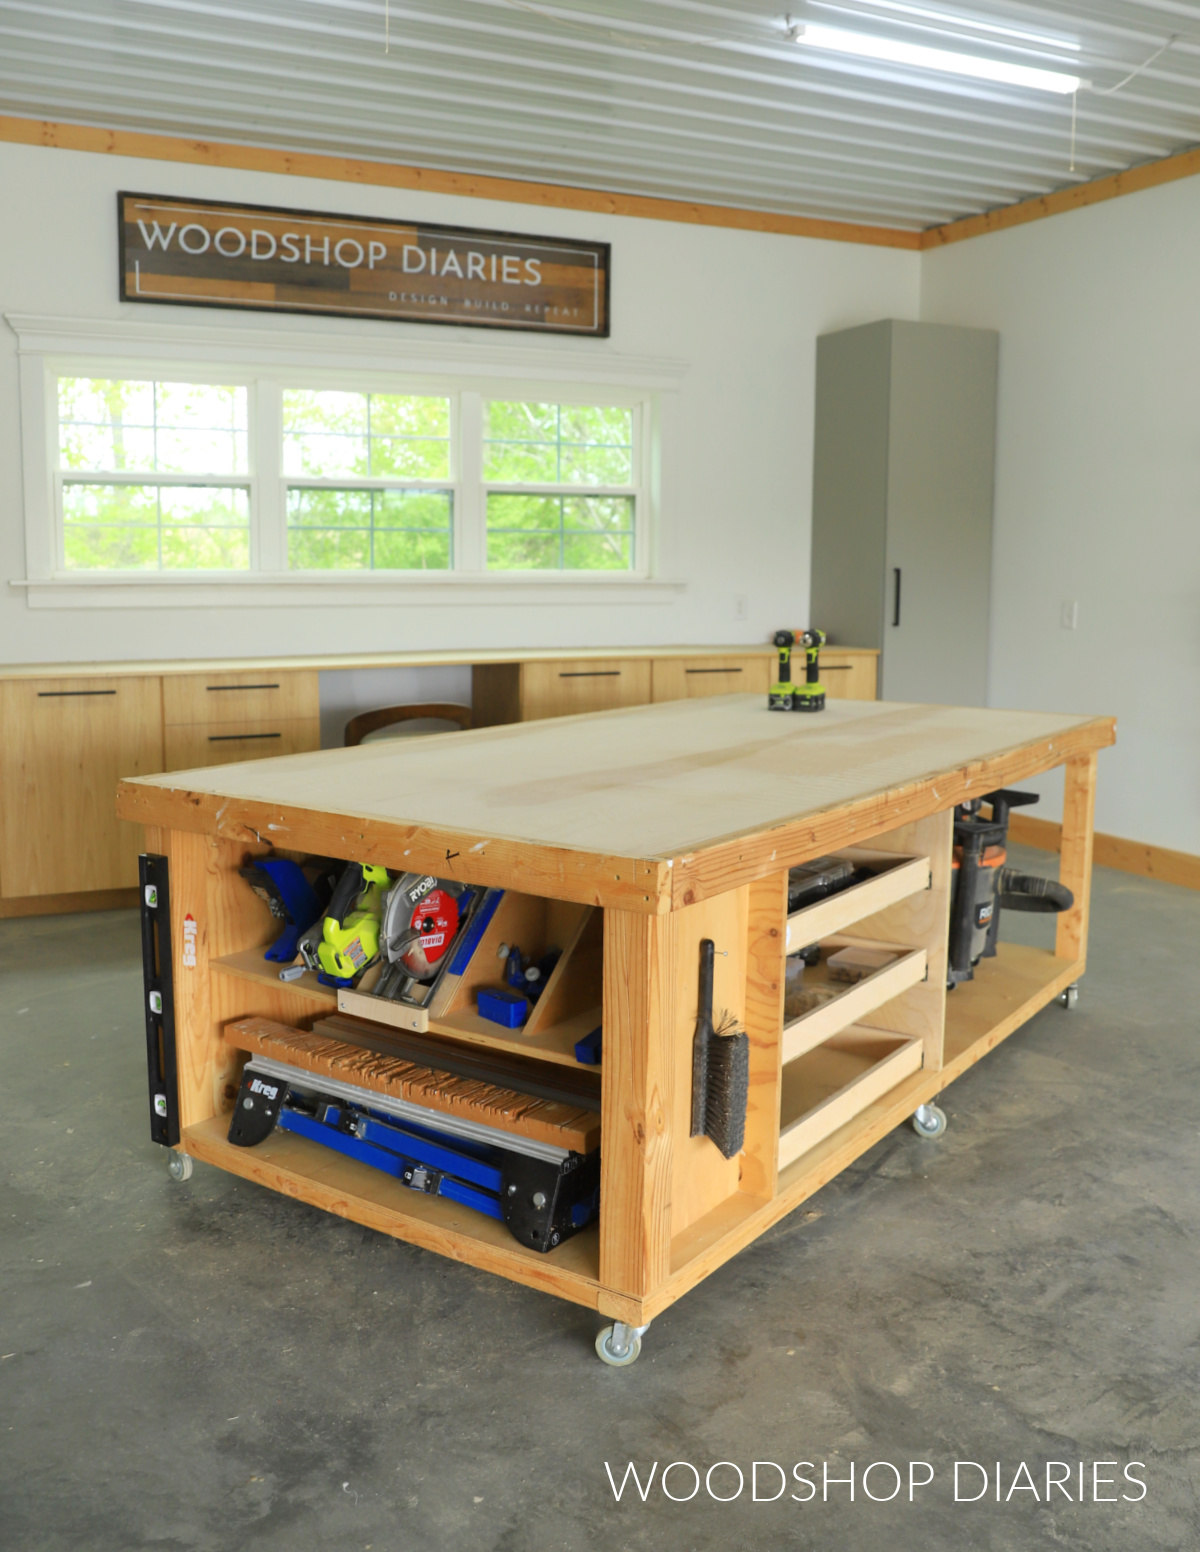
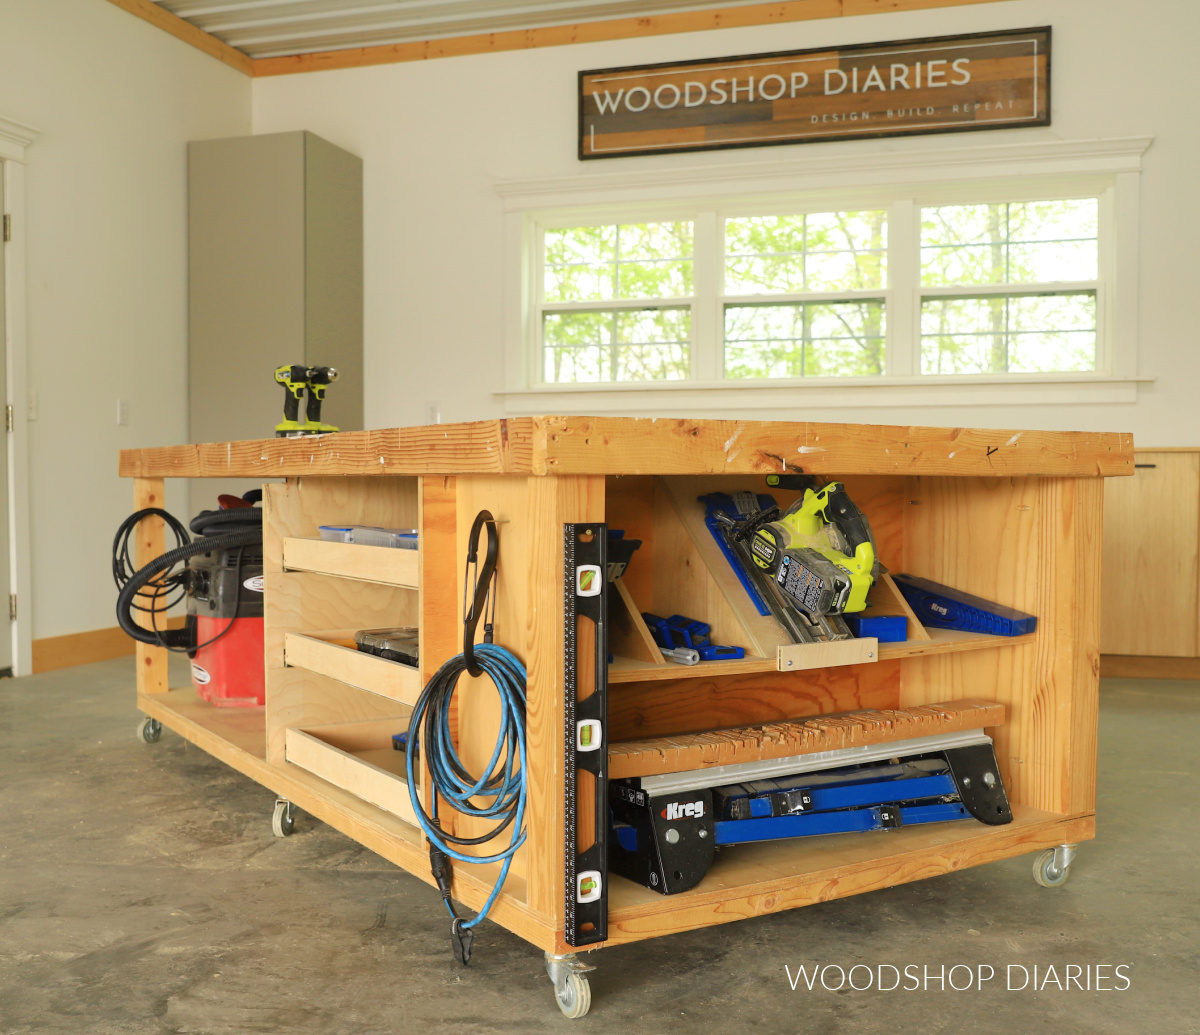
But the best part about a large workbench is having so much space underneath to store your stuff!
This design utilizes shelves, cubbies, and drawers so there’s plenty of room to store and organize your big bulky items (like vacuums) and your small parts (like screws).
I even built this mobile workbench to be the exact same height as my table saw so it serves as the perfect outfeed table, too.
If you’re ready to add some storage AND function to your workshop, I’m sharing how to build and customize your own large workbench below.
*This post contains affiliate links. See website policies.
What to know before building a workbench
If you’re thinking this workbench looks familiar, it’s because I’ve actually had it for 6+ years! You can see the original version of it here.
After 6 years of heavy use, the top was pretty dirty and it was about time to replace it. And also after those 6 years, I had some ideas on how to make it better, so I decided to change things up a bit while rebuilding it.
While this “new” workbench is very similar to the original, it includes additional storage with drawers on each side to better utilize the open space underneath.
Mobile Workbench Size
The overall dimensions of this large mobile workbench are 51″ x 99″ x 34 ½″.
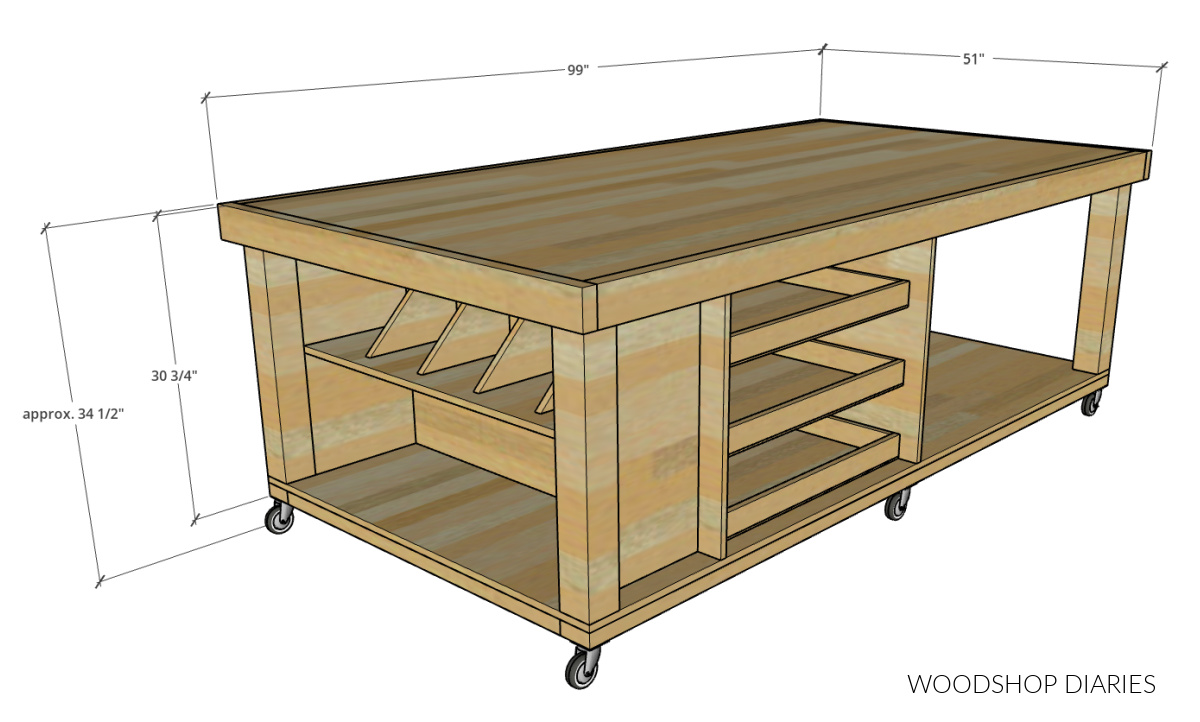
A comfortable workbench height is between 34″ – 36″. This specific workbench design is 34 ½″ tall because that’s the height of the top of my table saw. So this works out perfect for an outfeed table.
If your table saw isn’t 34 ½″ tall like mine or you don’t care to use it as an outfeed table and want it taller or shorter, simply adjust the height of your legs in the plans.
NOTE: Double check the actual overall height of your caster wheels before assembling. Caster wheel designs will vary and they come in various sizes. Without the wheels, the workbench frame is 30 ¾″ tall.
What kind of wood should you build a workbench with?
If aren’t on a budget, hardwood is a great option for a workbench. However, in most cases, since workbenches will get beat up and be well used, you probably don’t want to splurge on materials.
So in that case, construction lumber is a great option as it’s budget friendly, readily available, strong (they literally build houses out of it!), and comes in various sizes.
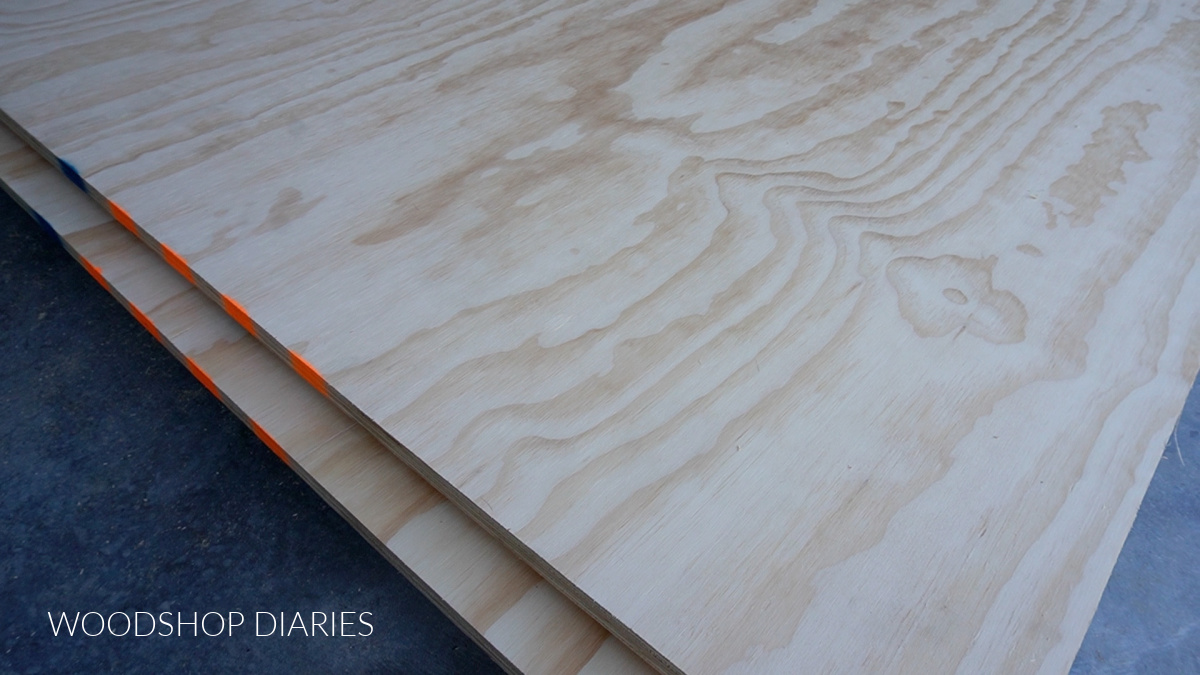
I used basic pine/spruce construction lumber for all my workbench framing and I used sanded pine plywood (shown above) for everything EXCEPT the top.
Since my workbench top will be subject to more wear and tear, I opted for a hardwood birch plywood for it since it’s a little more durable.
*I used birch plywood on my original workbench top and it still worked great after 6 ½ years of heavy use. If I had just been more careful not to spill stain and paint all over it all the time, it would have lasted even longer ha!
Other Workbench Options
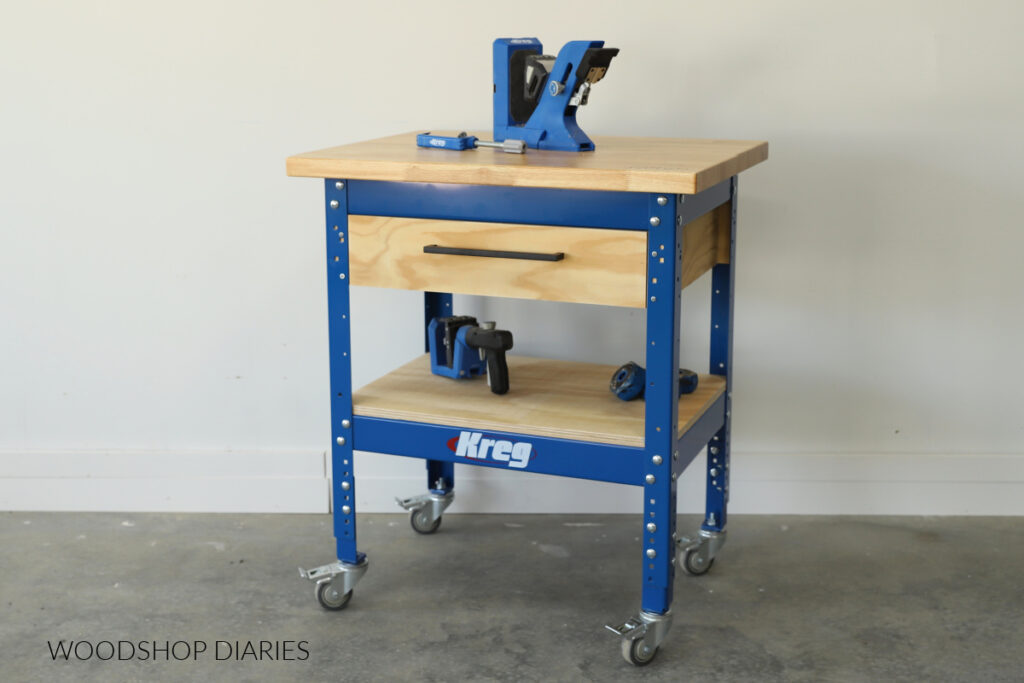
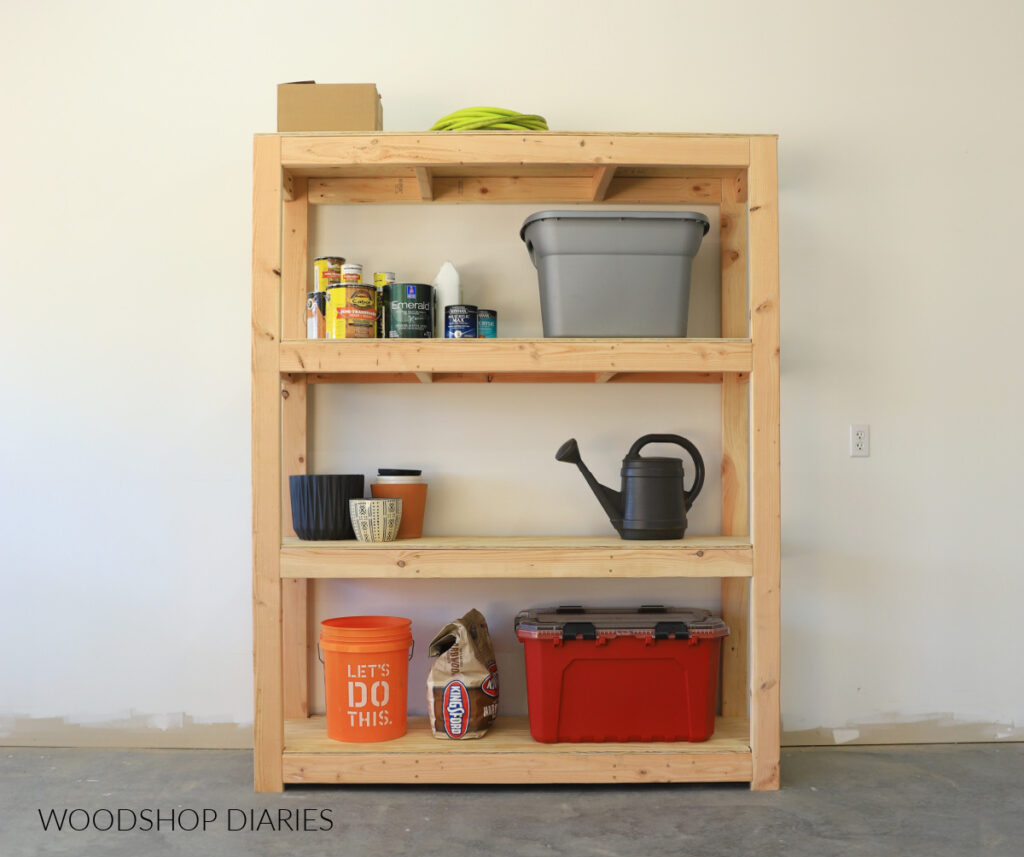
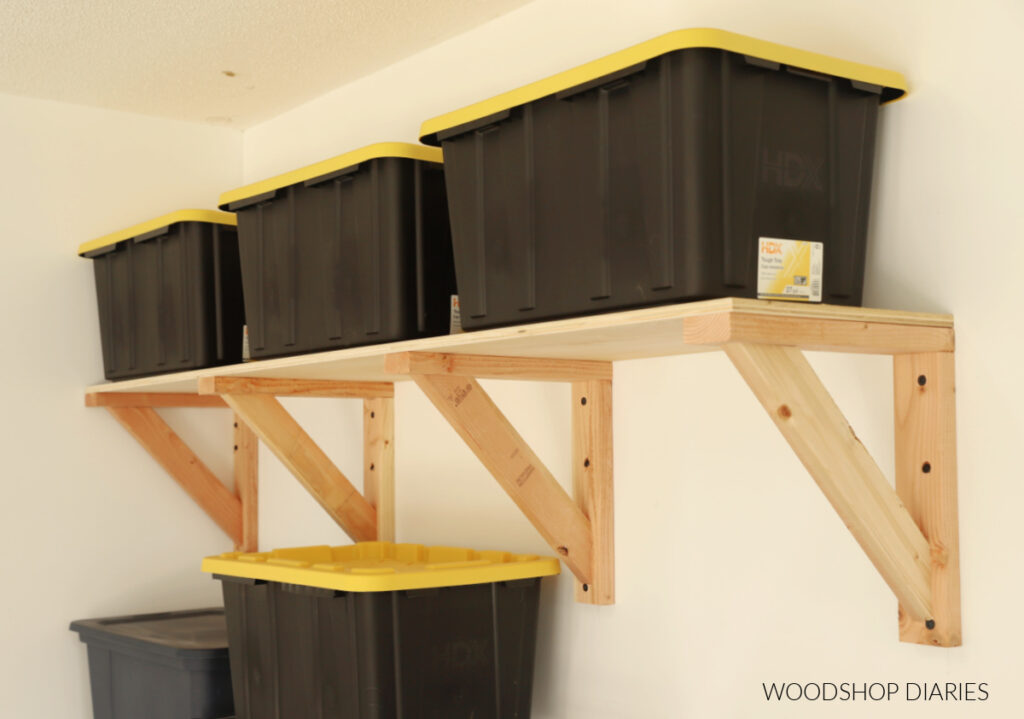
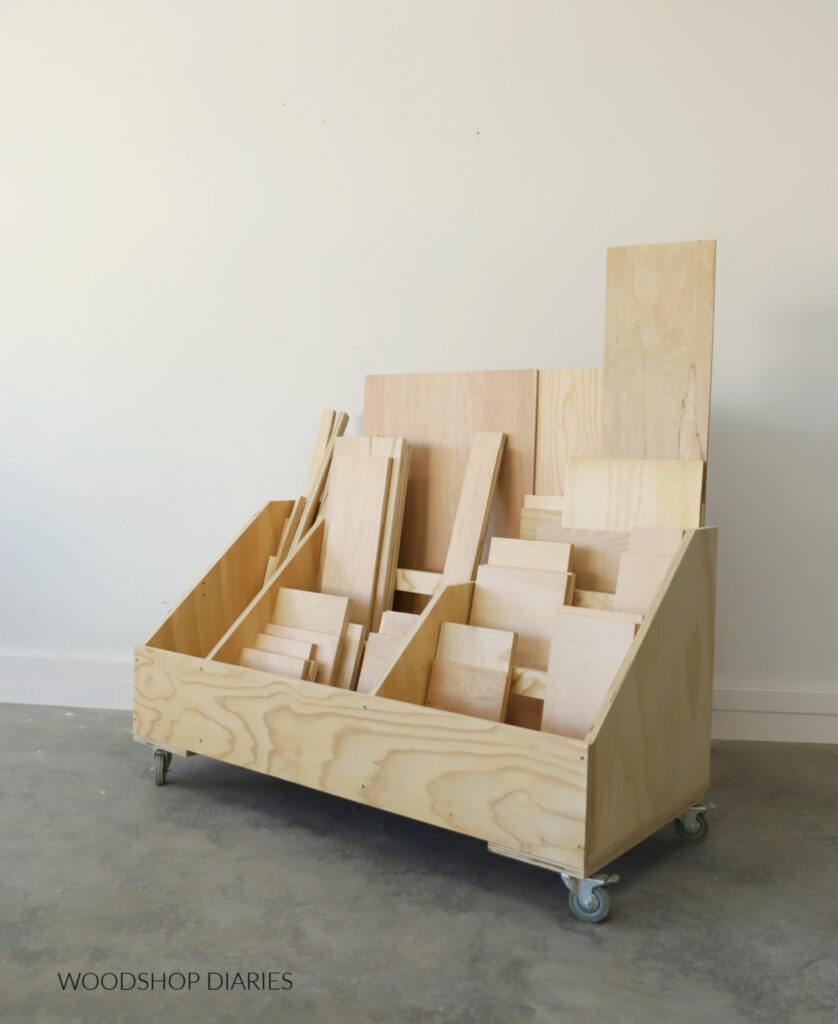
If this workbench isn’t quite what you’re looking for, or you need something smaller, here are some other great mobile workbench options you might enjoy browsing:
You might find these resources helpful throughout the build:
Are DIY projects your thing? Sign up for our newsletter for priority access to the latest projects and build plans!
How to build a large mobile workbench with storage
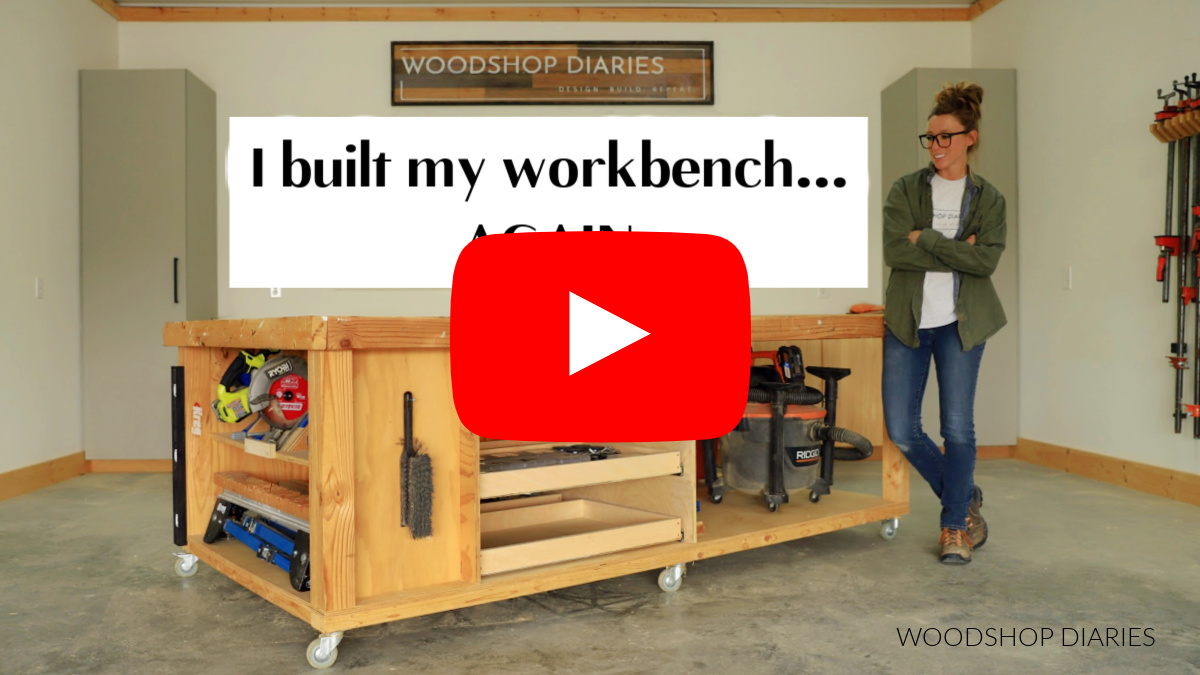
If you prefer to watch, I’ve shared the full build video with tons of tips, behind the scenes, and additional details on my YouTube Channel here.
Love watching how-to videos? Subscribe to my YouTube channel for plenty more where that came from!
Prefer to print? Grab the printable large mobile workbench building plans here:
Tools & Materials
Tools:
- Circular Saw
- Miter Saw
- Cutting Guides (Kreg Rip Cut and AccuCut)–optional
- Pocket Hole Jig
- Drill/Driver
Materials:
- (10) 2x4x8 boards
- (2) 4x4x8 posts
- (3) 4’x8′ sheets ¾″ plywood
- (1) 4’x8′ sheet ¼″ plywood
- (6) 1x3x10 boards (or use scrap ¾″ plywood strips)
- (1) 50 count box 2 ½″ pocket hole screws
- (1) 50 count box 1 ¼″ pocket hole screws
- (1) 1 lb box each 1 ¼″, 2″, 2 ½″ & 3″ wood screws
- (6) 3″ caster wheels
- (6) pair of 20″ drawer slides
Step 1: Assemble Mobile Workbench Frame
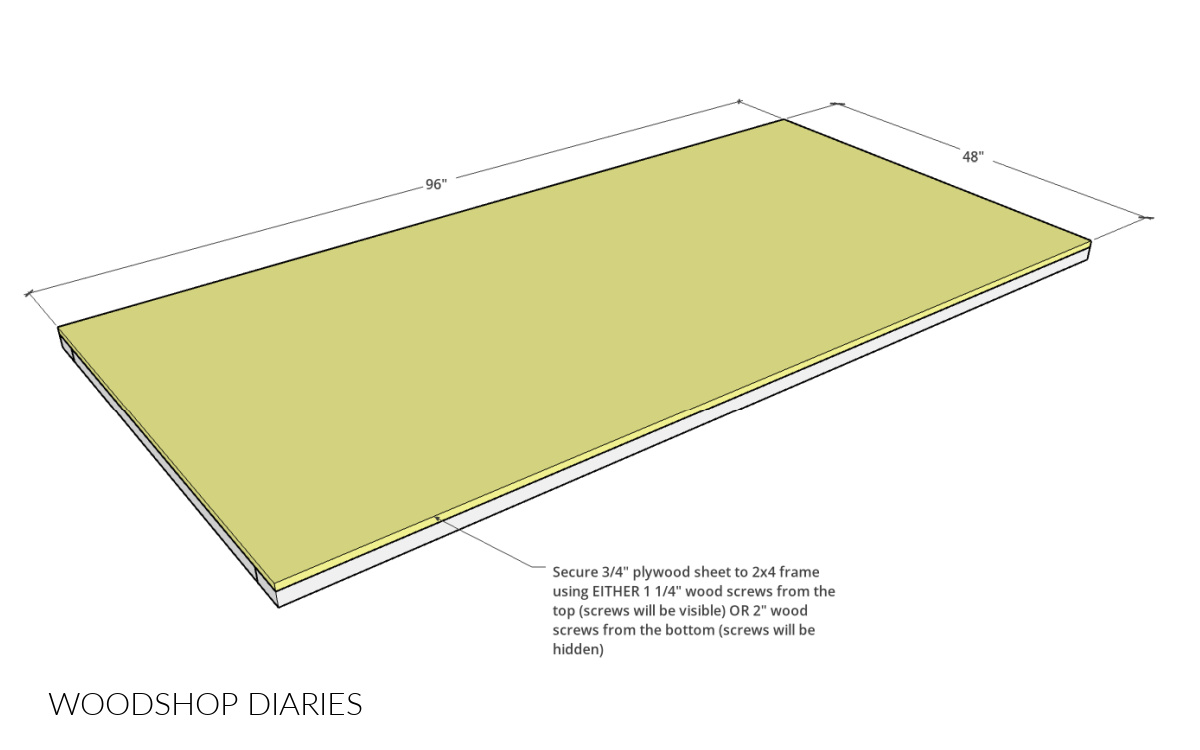
First, I assembled two frames from 2x4s that were 4′ wide x 8′ long so that they were the same size as a full sheet of plywood.
I assembled these using 1 ½″ pocket holes and 2 ½″ pocket hole screws. One will be used for the top and one will be used for the bottom.
RELATED: How to use a pocket hole jig in woodworking projects

TIP: If you wanted your workbench smaller, simply modify the overall size of the frame in this step.
Then, I screwed one of my plywood sheets (I used sanded pine plywood for this bottom panel) onto one of the frames using 1 ¼″ wood screws from the top side. (If you didn’t want to see the screw heads, you could use 2″ screws from the bottom side instead.)
Obviously, if you made your frames smaller, you will need to trim your plywood sheet to fit it. For tips on cutting plywood sheets, check out this guide to cutting down plywood sheets using a circular saw!
Next, I cut four corner posts/legs from 4x4s. If you didn’t want to use 4x4s, you could also just glue and screw 2x4s together to make your own 4×4 posts.
NOTE: 4×4 posts are 3 ½″ x 3 ½″. If you screw 2x4s together to make your own, this will give you 3″ x 3 ½″. So you may need to adjust some other measurements in the plans.
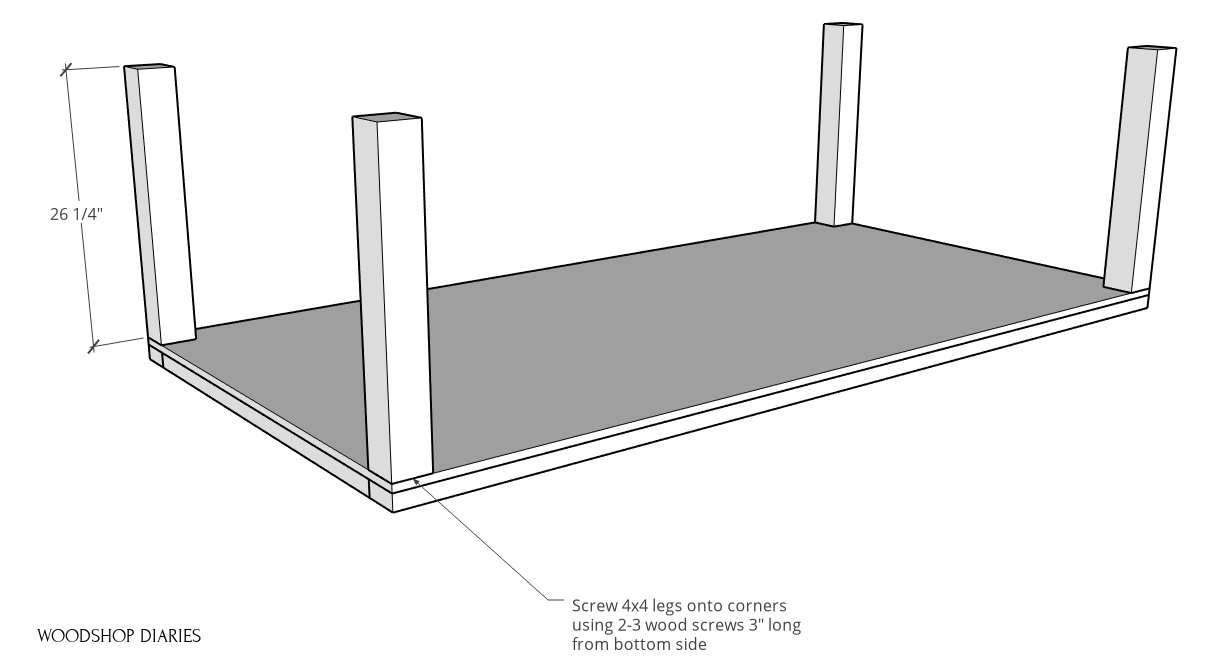
If the legs are cut to 26 ¼″ long, this workbench is 30 ¾″ tall without the casters. So consider the height of your caster wheels and adjust the length of the legs, if desired.
I used wood glue and 3″ long wood screws to attach these posts from the bottom side of the 2×4 frame at each corner.
TIP: I found it easiest to set this bottom frame up on some saw horses, sturdy boxes, or a table to access the bottom side to attach the legs.
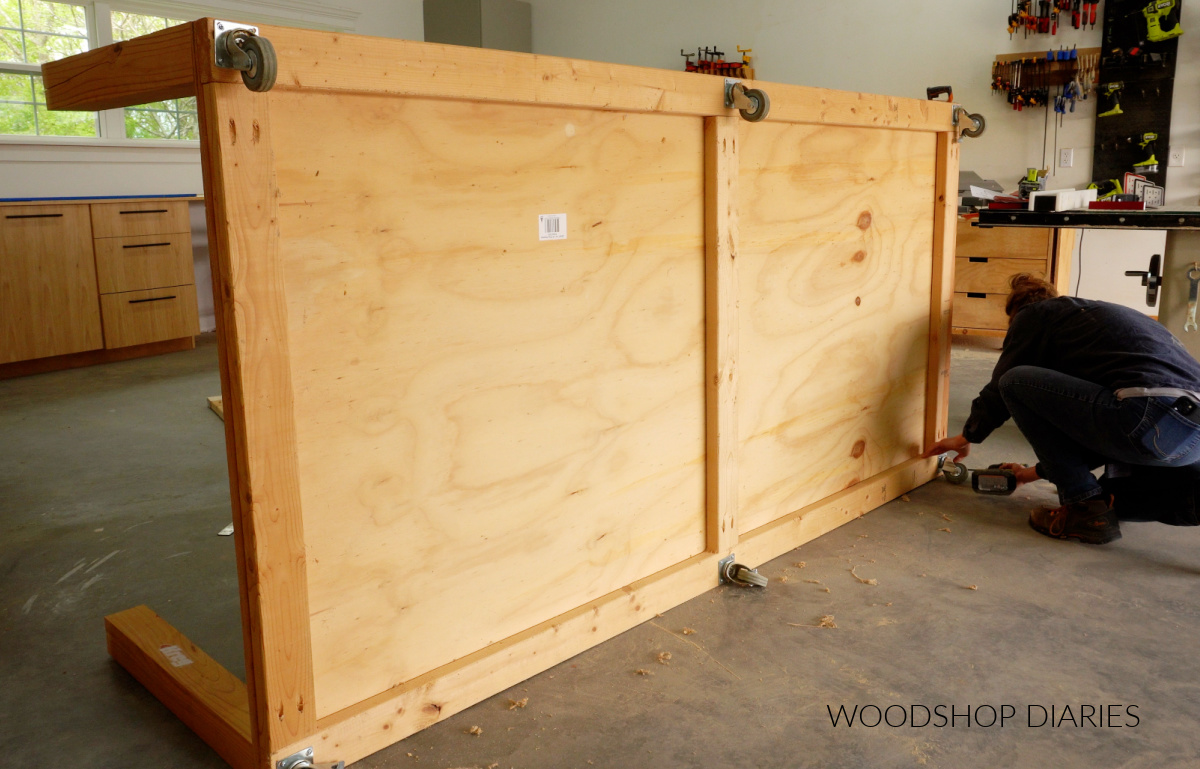
Next, I attached caster wheels at each corner and added two in the middle along the long sides to help prevent sagging.
You can use just about any size and style of caster wheel you’d like (I used 3″ caster wheels), but make sure they are heavy duty since this workbench (and what you put on top of it) will be pretty heavy.
Then, I brought out the second 2×4 frame and secured it to the top corners of the legs using 2 ½″ wood screws.
Prefer to print? Grab the printable building plans for this project here.
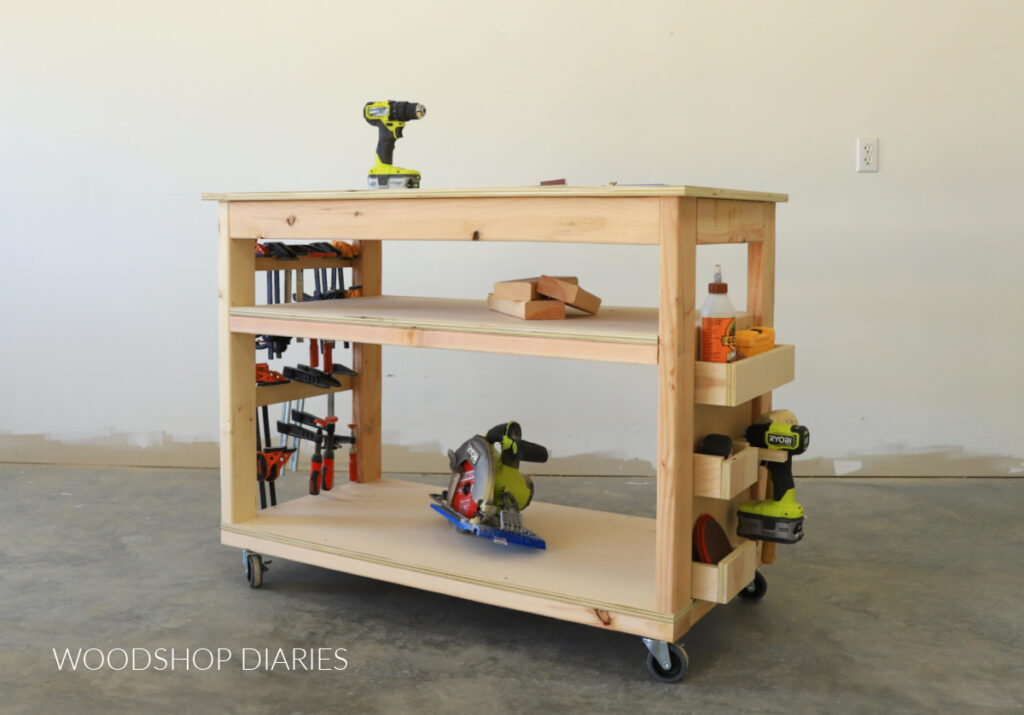
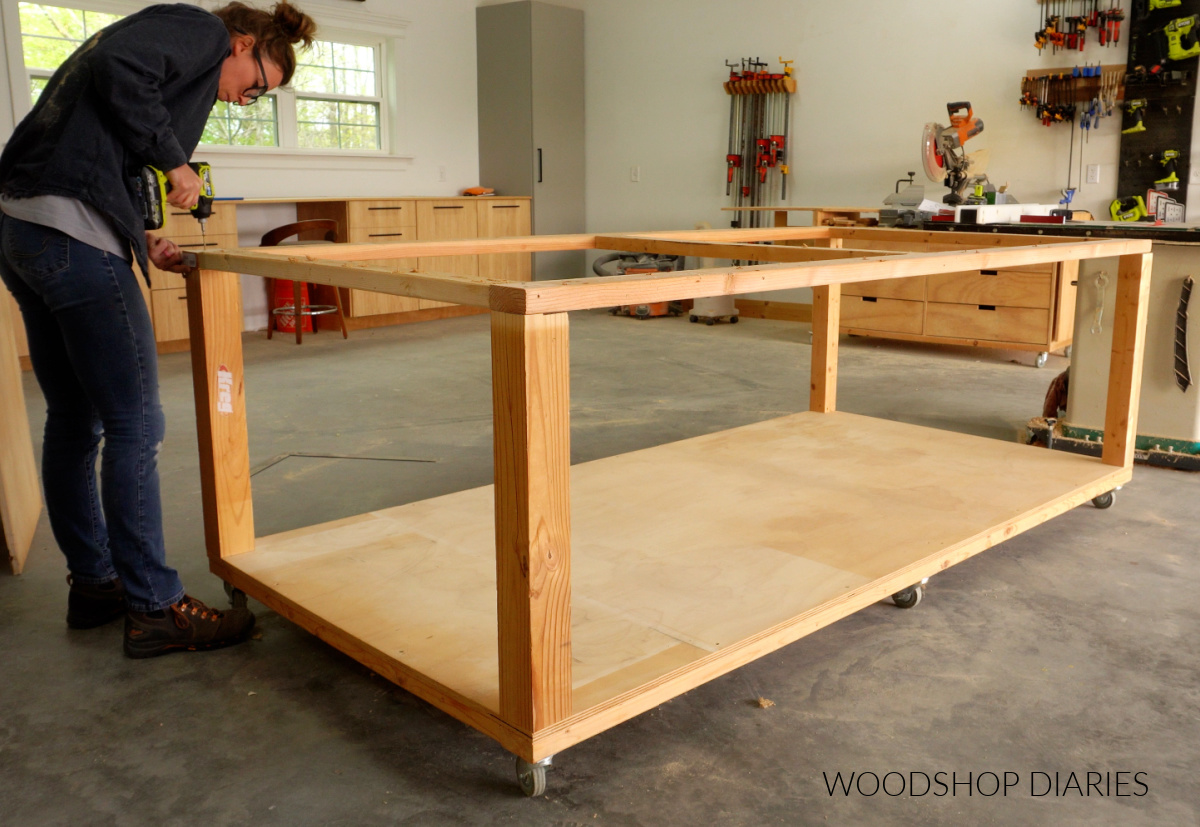
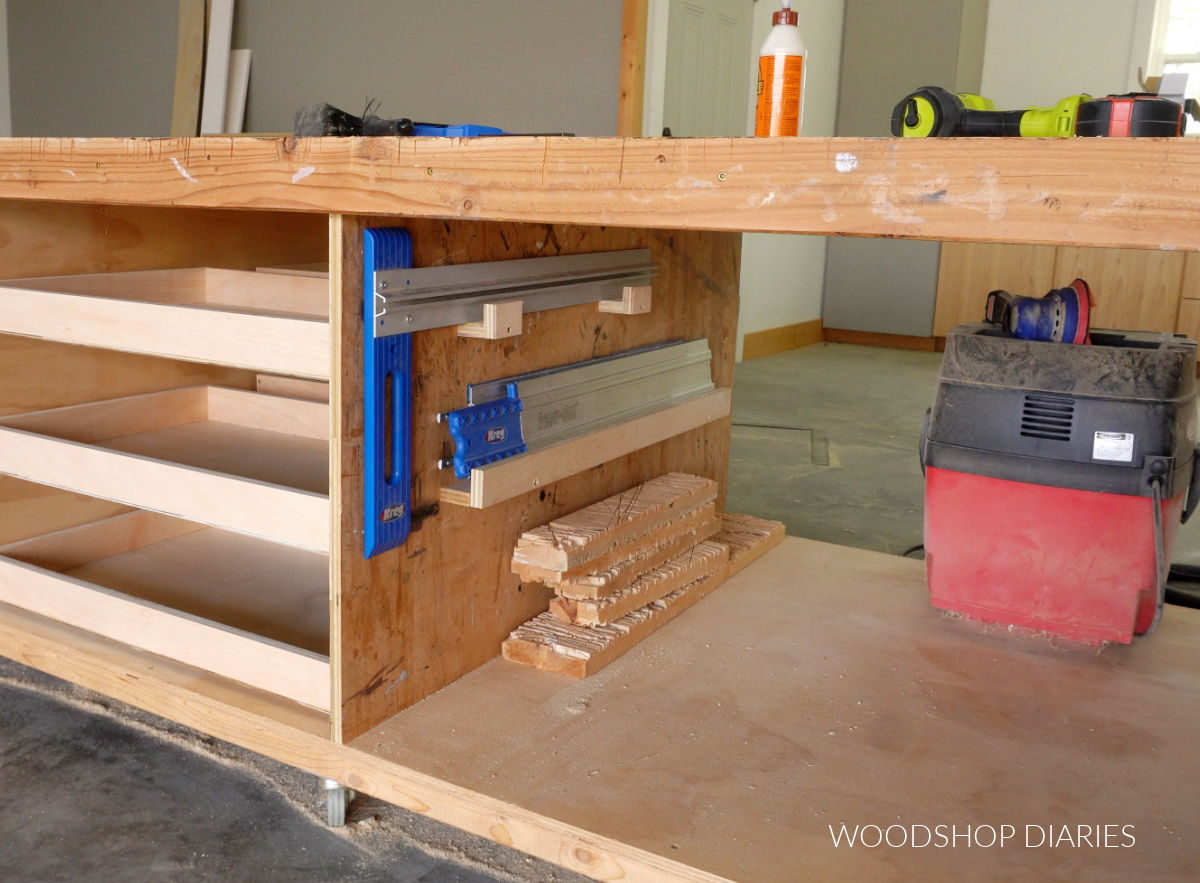
Step 2: Install Workbench Dividers
Now the main frame is together and it’s time to start adding the storage into the bottom.
I cut a piece of ¾″ plywood to fit into the workbench like shown below to serve as a divider. I drilled pocket holes along the top and bottom edges to secure it to the frame with pocket hole screws.

Then, I cut and installed two small side panels–one on each side of the workbench. I used pocket holes and screws to secure this to the framing and the legs.
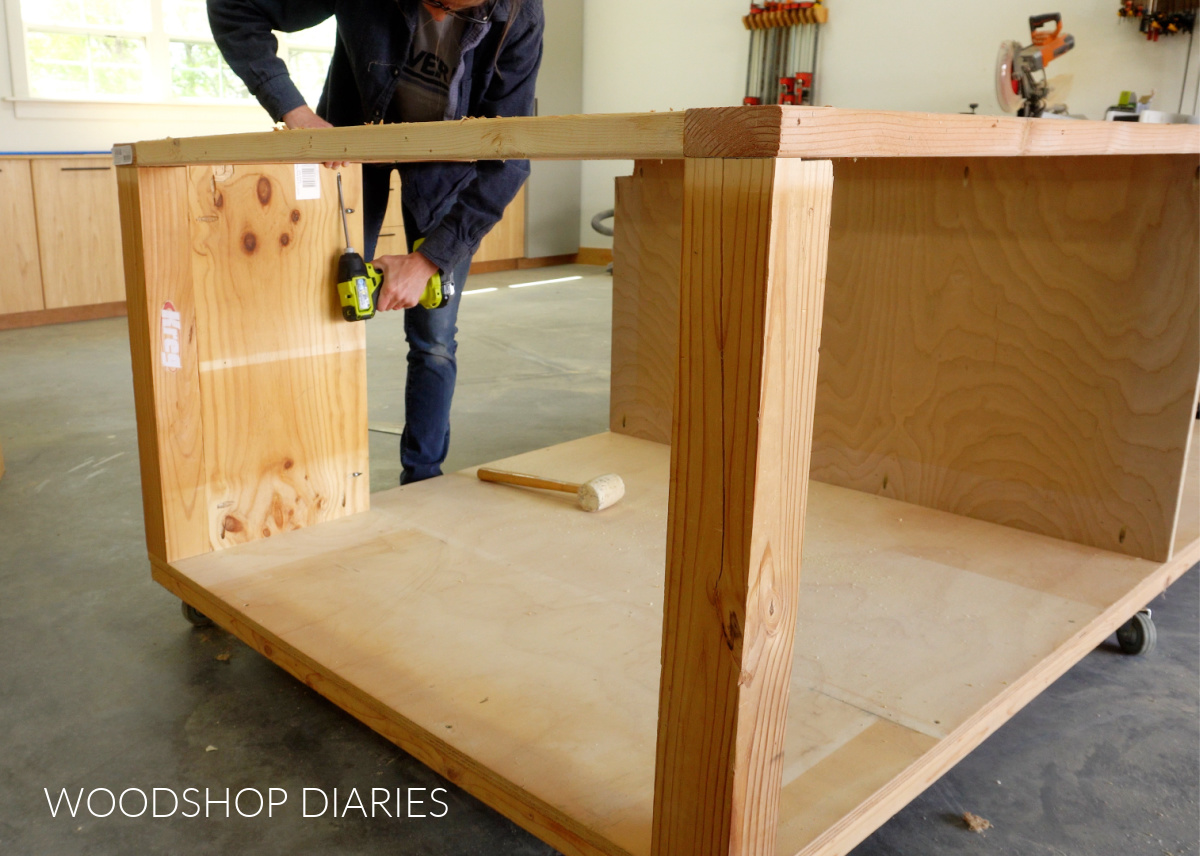
Then I added another divider panel (just like the first one) right behind these side panels.
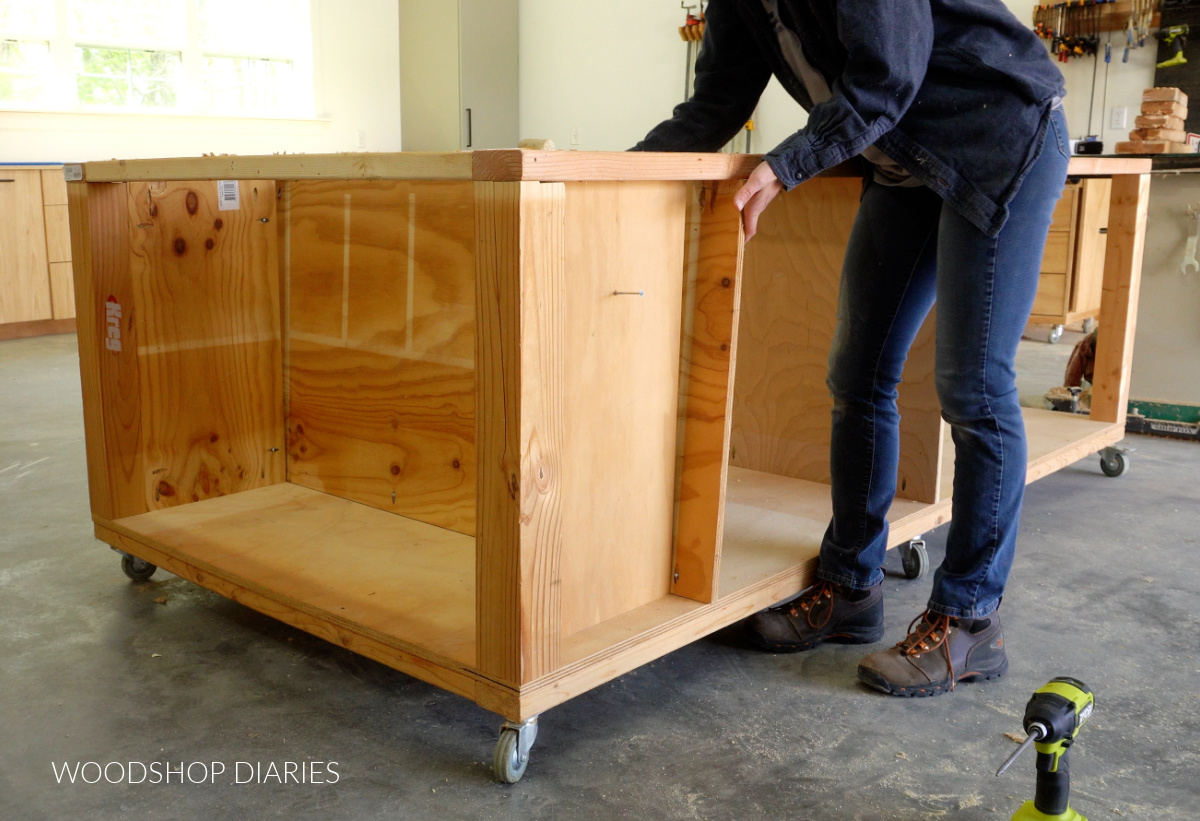
Of course, you can customize the spacing and sizing here to fit your needs and what you plan to store here, but it’s important to make sure the two large divider panels stay parallel to each other (equal distance apart at the top and bottom).
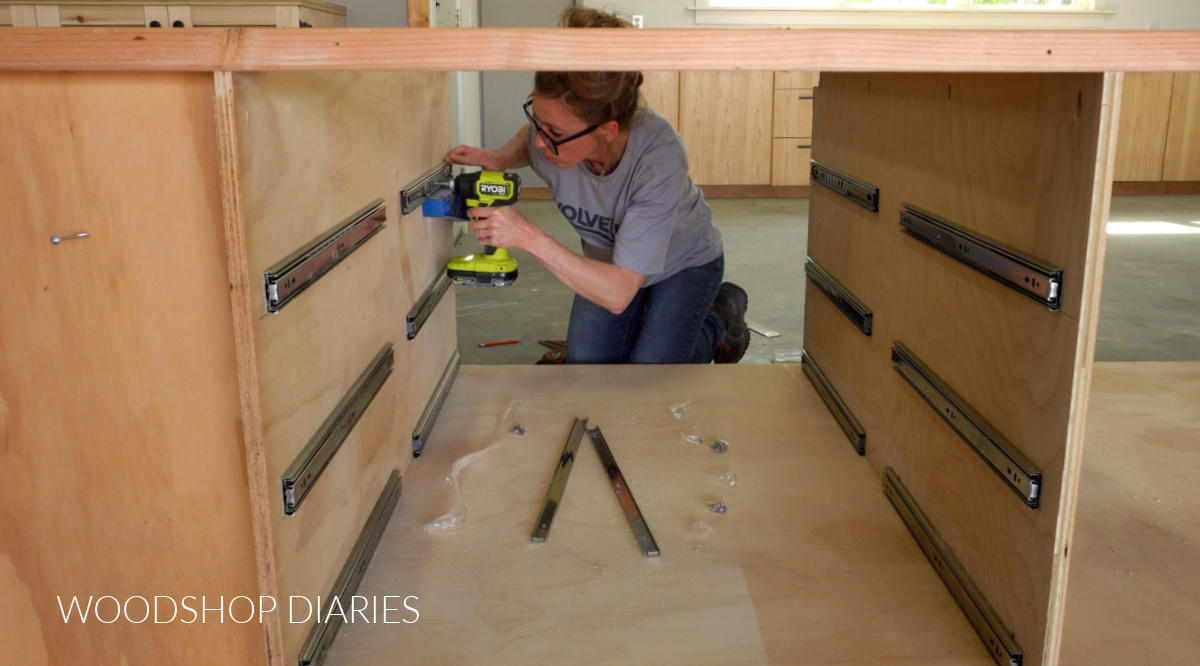
Step 3: Install Drawer Slides and Shelf
Next, I added 6 pair of 20″ ball bearing side mount drawer slides onto the dividers. This will give me three drawers on each side of the workbench. If you wanted more drawers, you can absolutely add more slides.
RELATED: How to install drawer slides
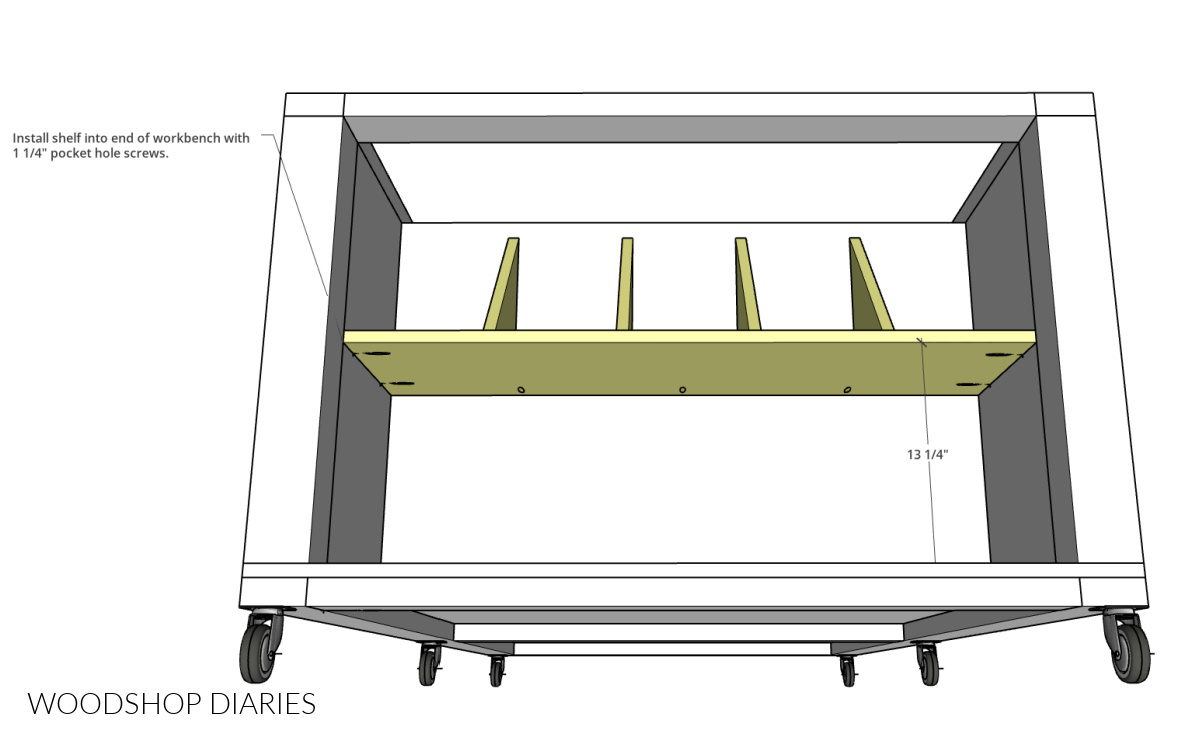
Next, I added a shelf into the end section between the side panels. In my original workbench, I cut my shelf from ¾″ plywood and screwed some ¾″ plywood triangles through the bottom to divide the shelf into “cubbies” for easier organization.
That has worked well over the years, so I just kept that same shelf and put it back in just like it was. But in step 6, I’ll show you how I customized one part of it.
Prefer to print? Grab the printable building plans for this project here.
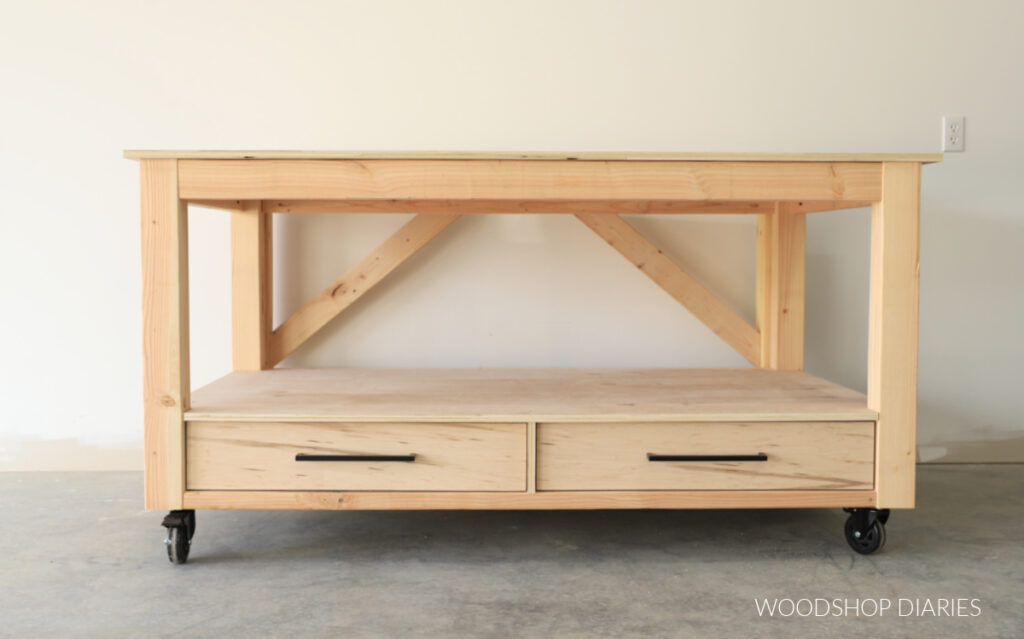
Step 4: Attach Workbench Top
Next, I placed my birch plywood sheet on the top frame and secured it from the underside using 2″ wood screws around all sides.
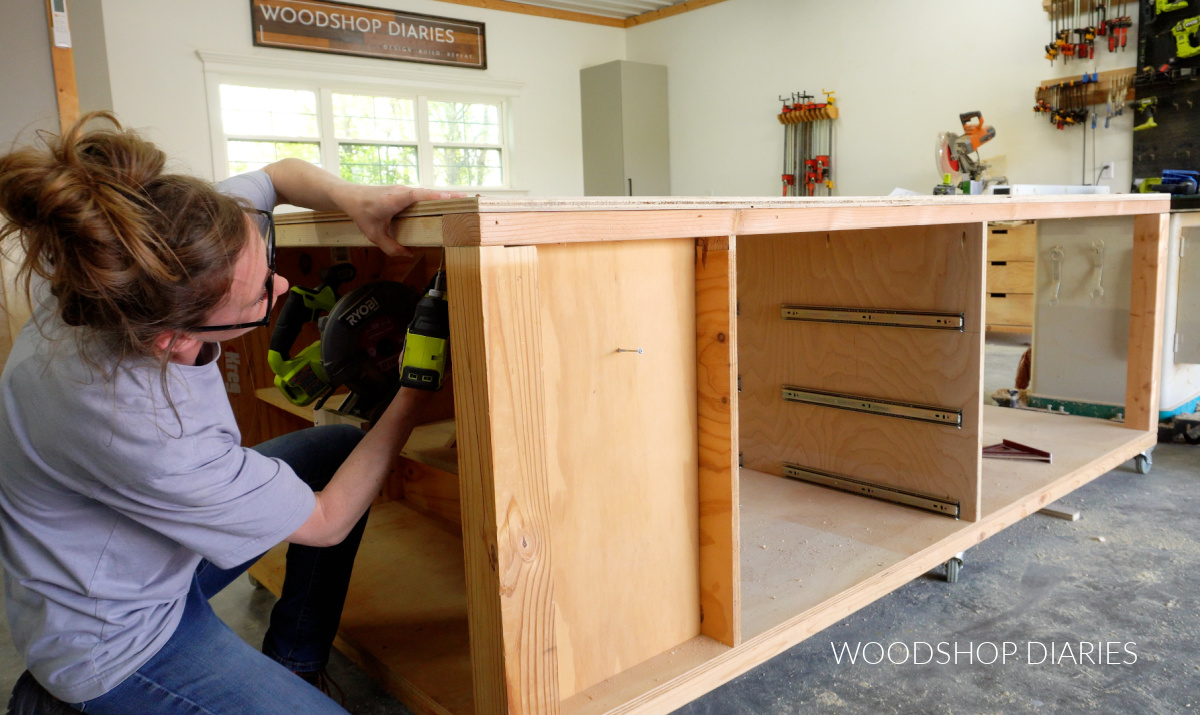
This is optional, but to add some strength and protect the edges of the plywood top from dents and dings, I attached some 2x4s around the top.
Because 2x4s usually have rounded corners, I ran these through the table saw to square off the top edge before attaching. This isn’t necessary, but it makes the top nice and smooth without a divot where the plywood joins the 2×4.
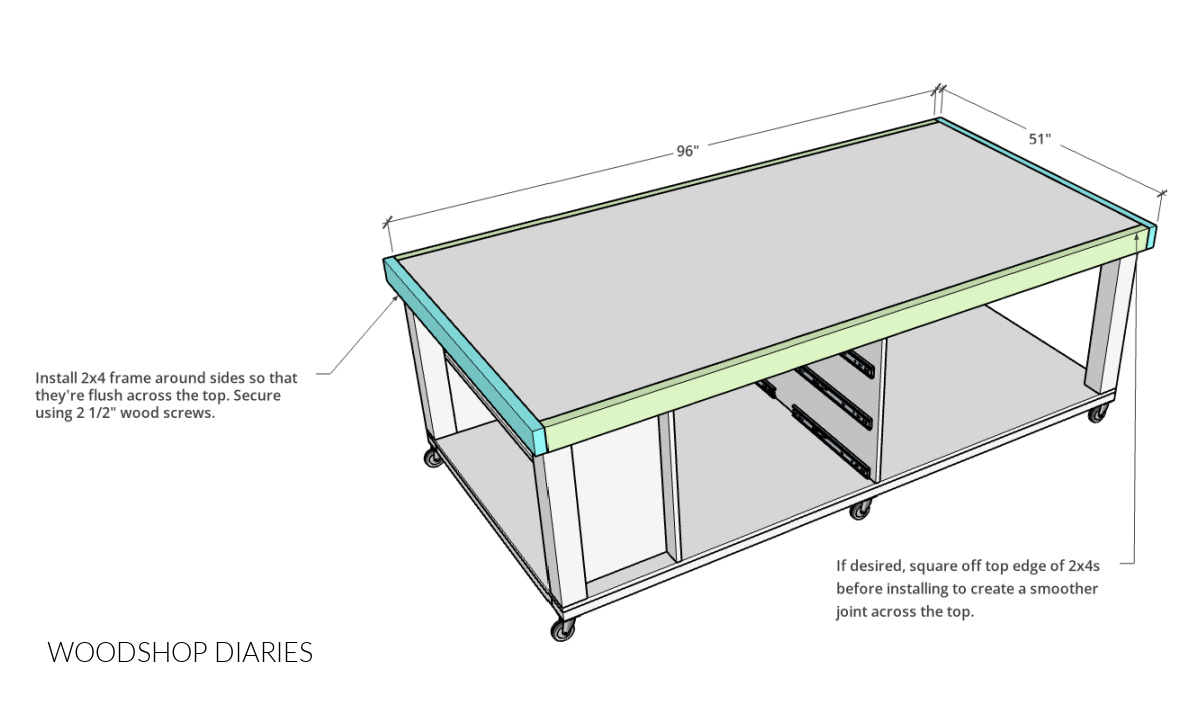
I screwed these 2x4s into the top frame (NOT THE PLYWOOD) using 2 ½″ wood screws around all sides, keeping the top edge of the 2x4s flush to the top of the plywood.
Step 5: Build and Install Drawers
You can assemble the drawer boxes from 1x3s OR ¾″ plywood ripped into 2 ½″ wide strips. I cut four sides for each drawer box and simply screwed them together at the corners with wood screws.
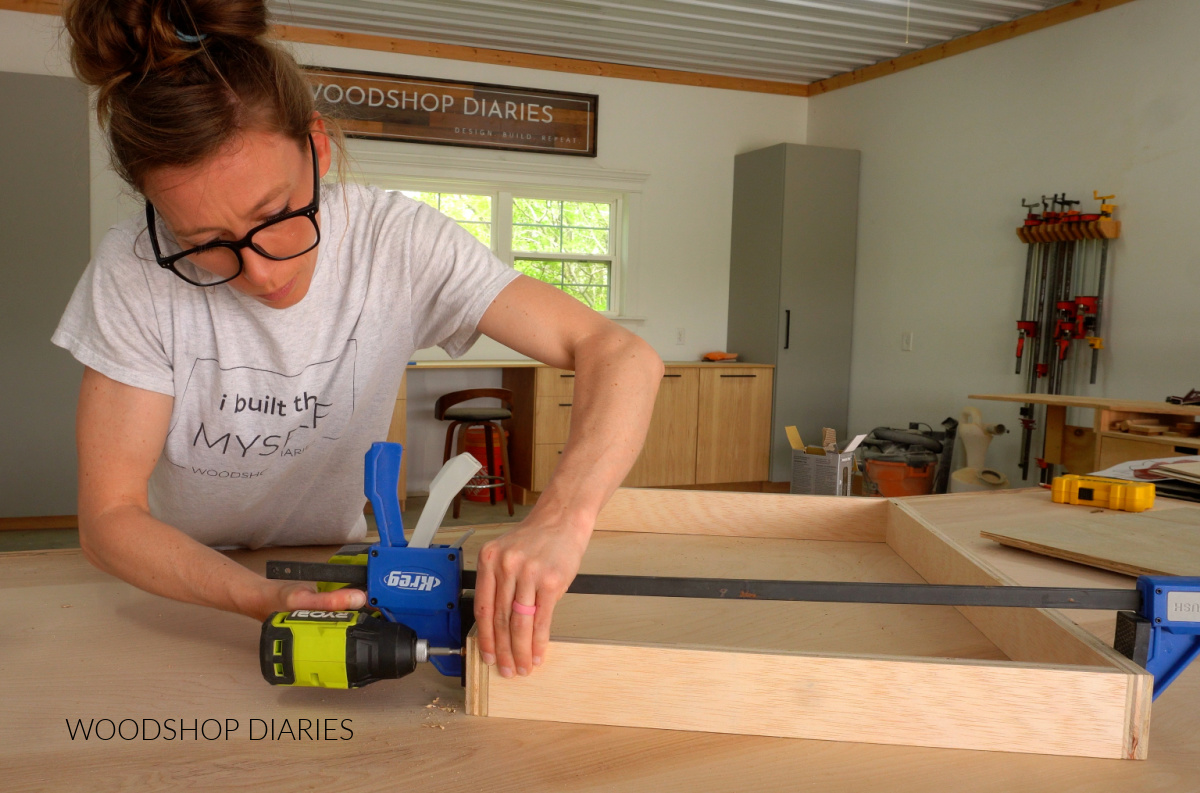
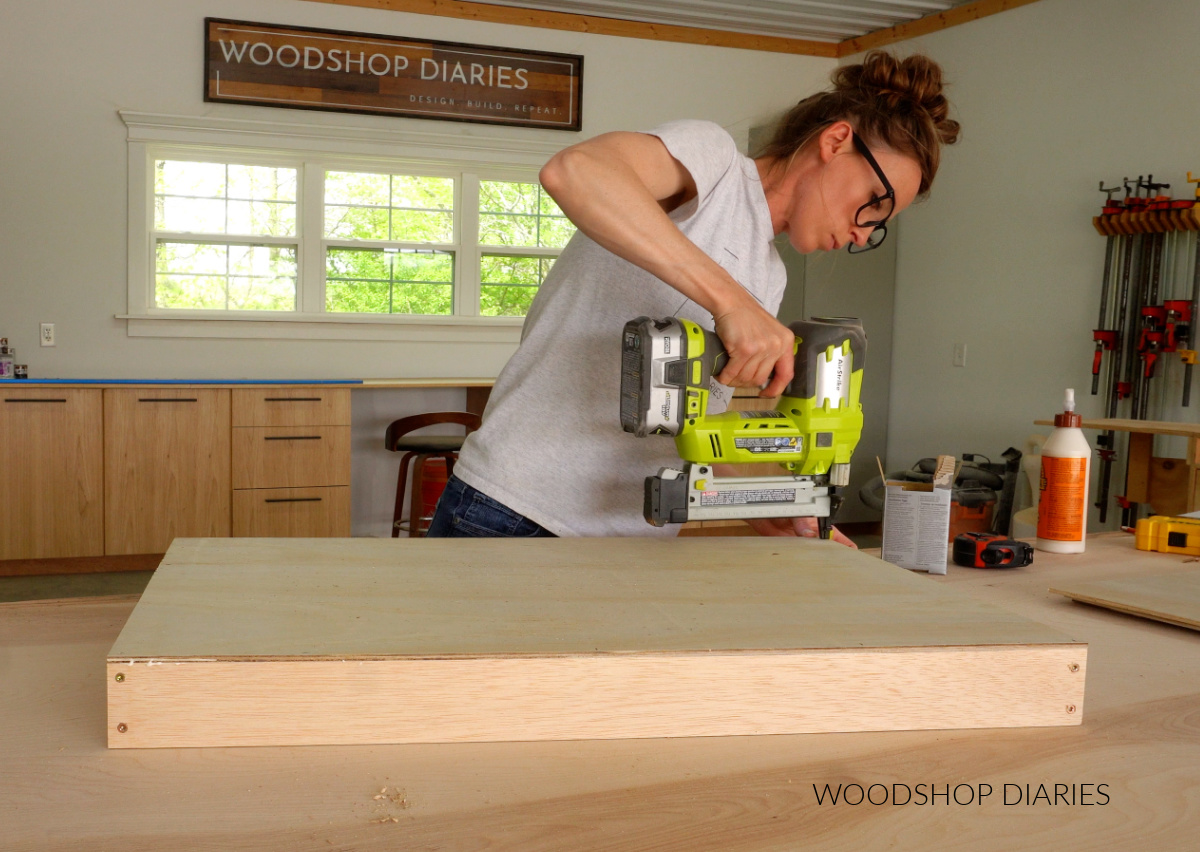
Then, I glued and stapled (you can staple, screw, or nail) ¼″ plywood bottoms onto each box.
After all size identical boxes were together, I installed them into the workbench. I found it easiest to remove the part of the slide that mounts to the drawer box using the little tabs on the sides.
Then, I secured these flush to the bottom and front of each side of each box.
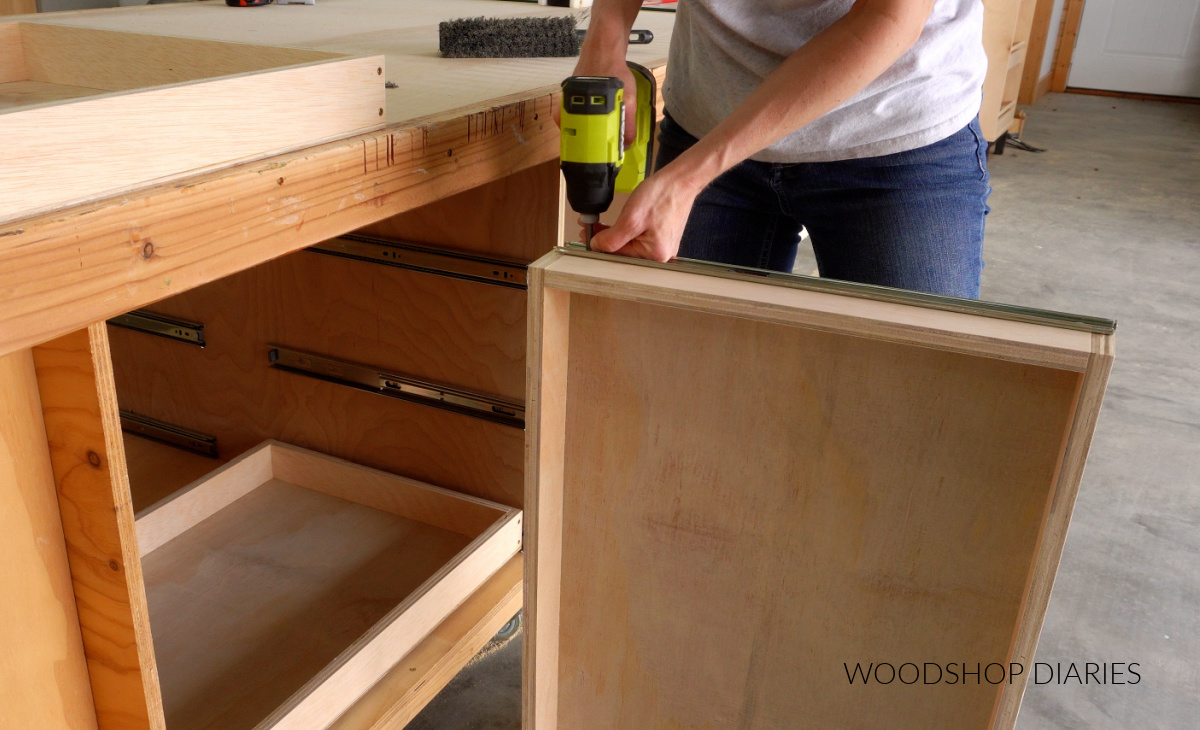
Then I could slide them right into the workbench. Check out this post for more details on installing drawer slides.

Step 6: Customize
At this point, the workbench is complete, but it’s time for the fun part–customizing it for YOUR workshop.
I added some screws (but hooks would work, too) into my side panels to hang my workbench broom, my level, and my extension cord on.
But I also made some brackets/shelves using scrap plywood to hang my cutting guides on as well. I use my Kreg Rip Cut and Accu-Cut guides ALL THE TIME, so I thought it would be nice to give them somewhere to hang up out of the way.
One other thing I added to my workbench was a dedicated spot for my circular saw. On the shelf in step 3, I cut a piece of scrap ¾″ plywood to run up two of the triangle dividers.
I placed my circular saw on this piece and marked where the blade rested and cut this out.
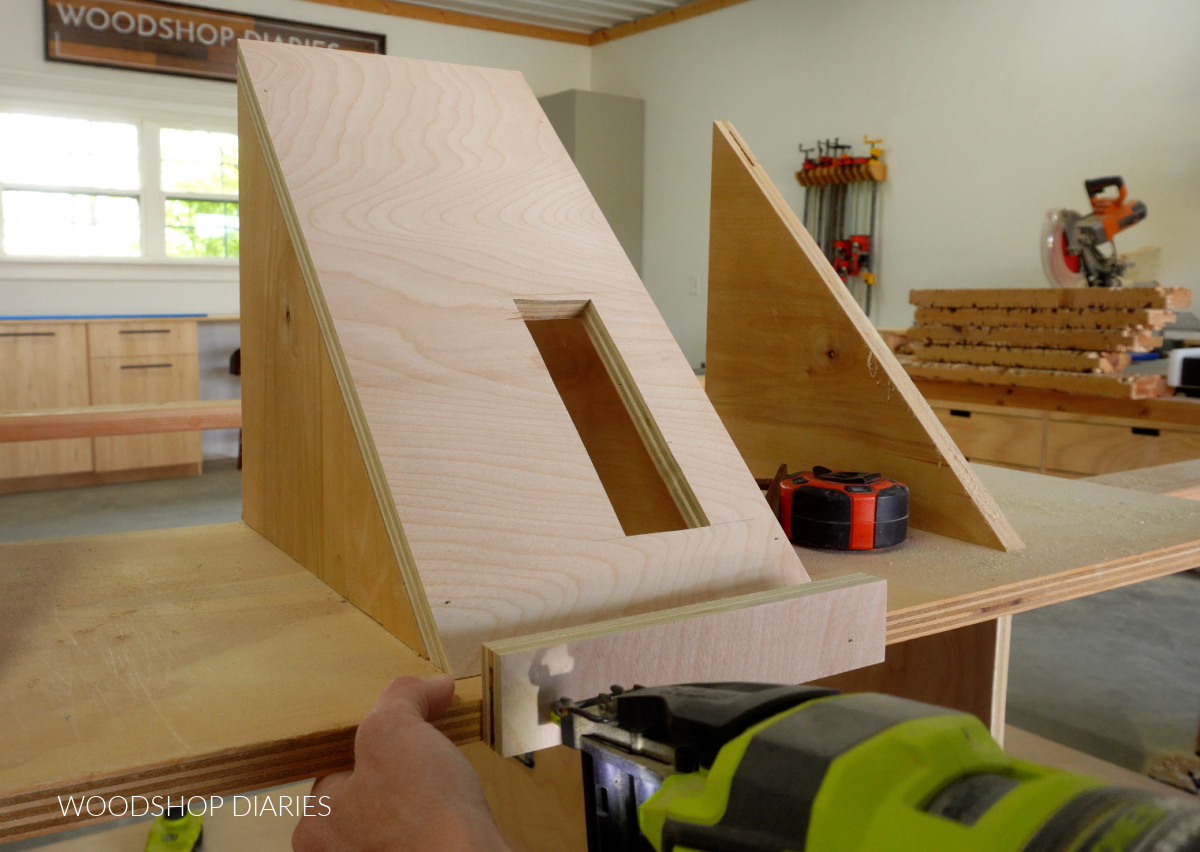
That gave me a dedicated spot to rest my circular saw so that the blade can rest safely inside the notch and the saw can set flat.
Of course, these customizations may not make sense for your work flow, so I highly encourage you to customize your workbench with brackets, hooks, etc to best fit your own needs.
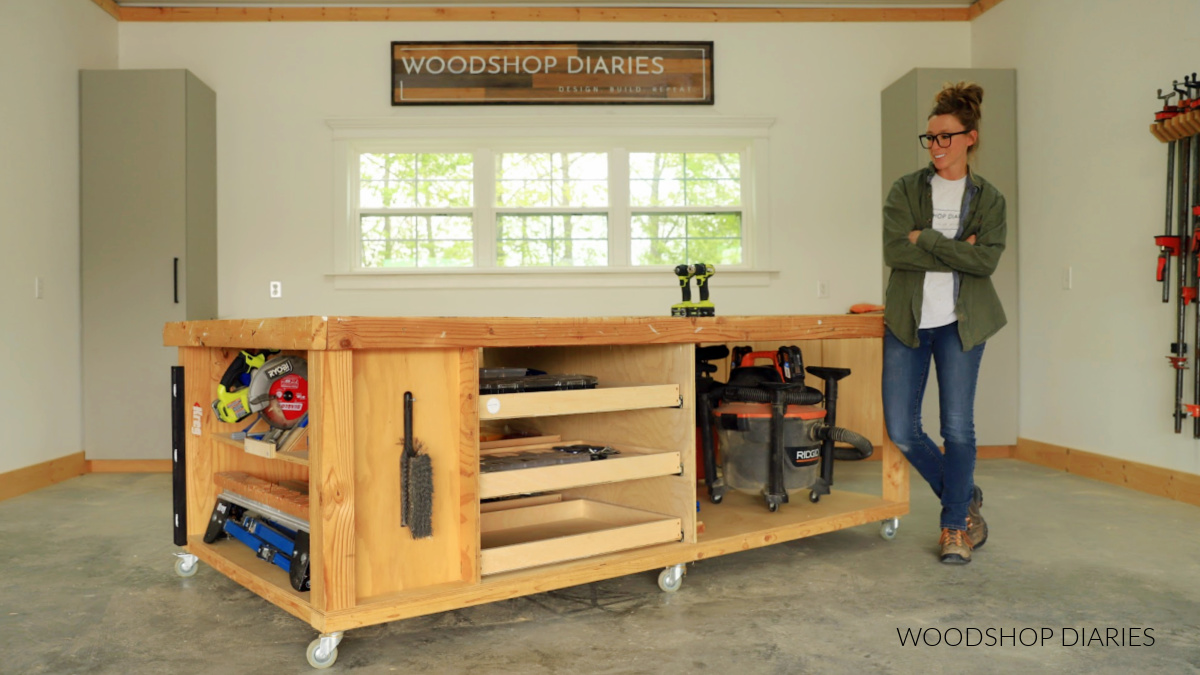
And with that, this workhorse of a workbench is ready for all the projects on your to do list! Although I’ve had this workbench as the centerpiece of my shop for years, these upgrades have made a world of difference already.
If you’d like to build your own, grab the printable building plans here!
Looking for more DIY workshop projects?
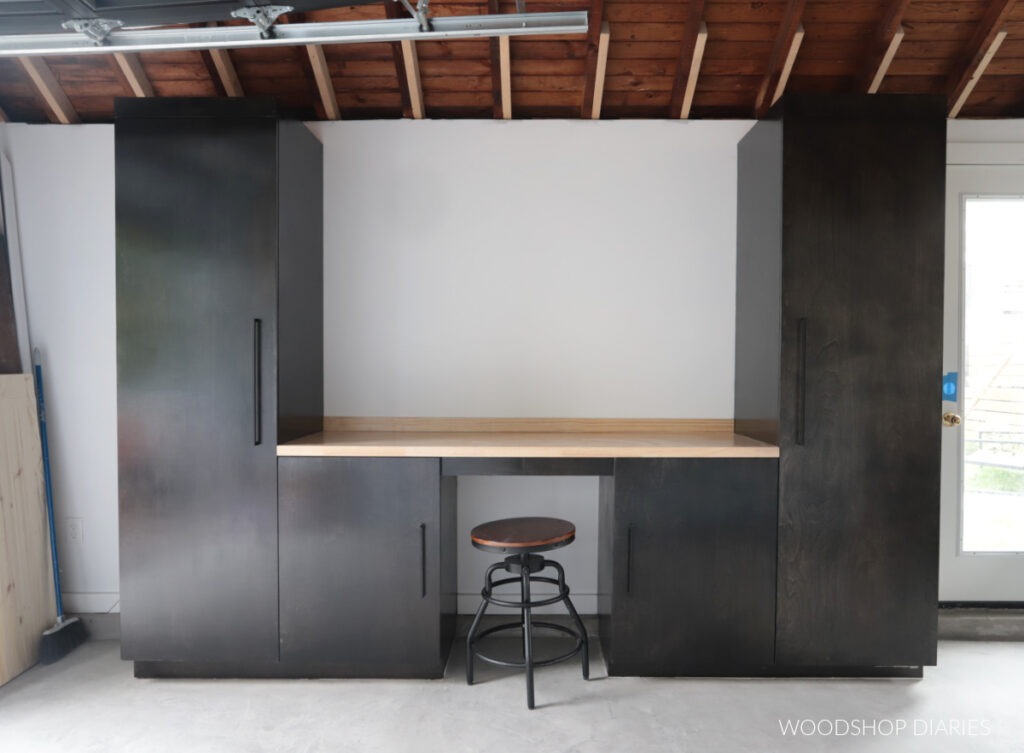
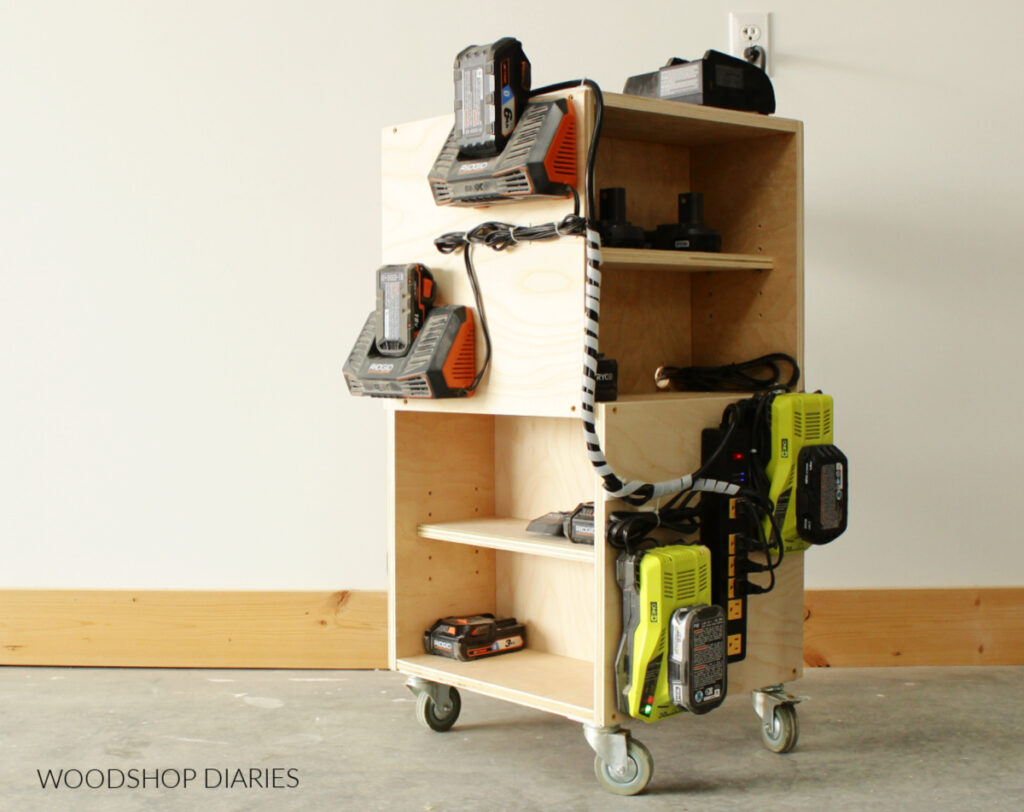
If you enjoyed this project and want to see more workshop and garage organization and storage projects, here are a few favorites!
If you enjoyed this project and want to save it for later, be sure to pin it or share to your favorite social channel!
Until next time, friends, happy building!