
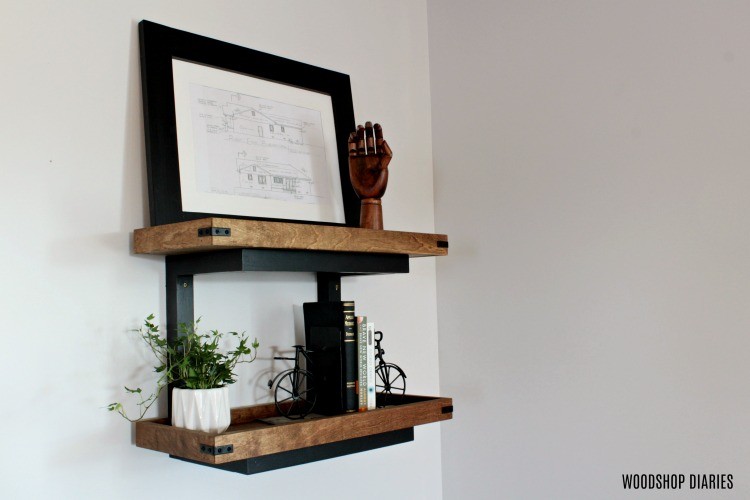
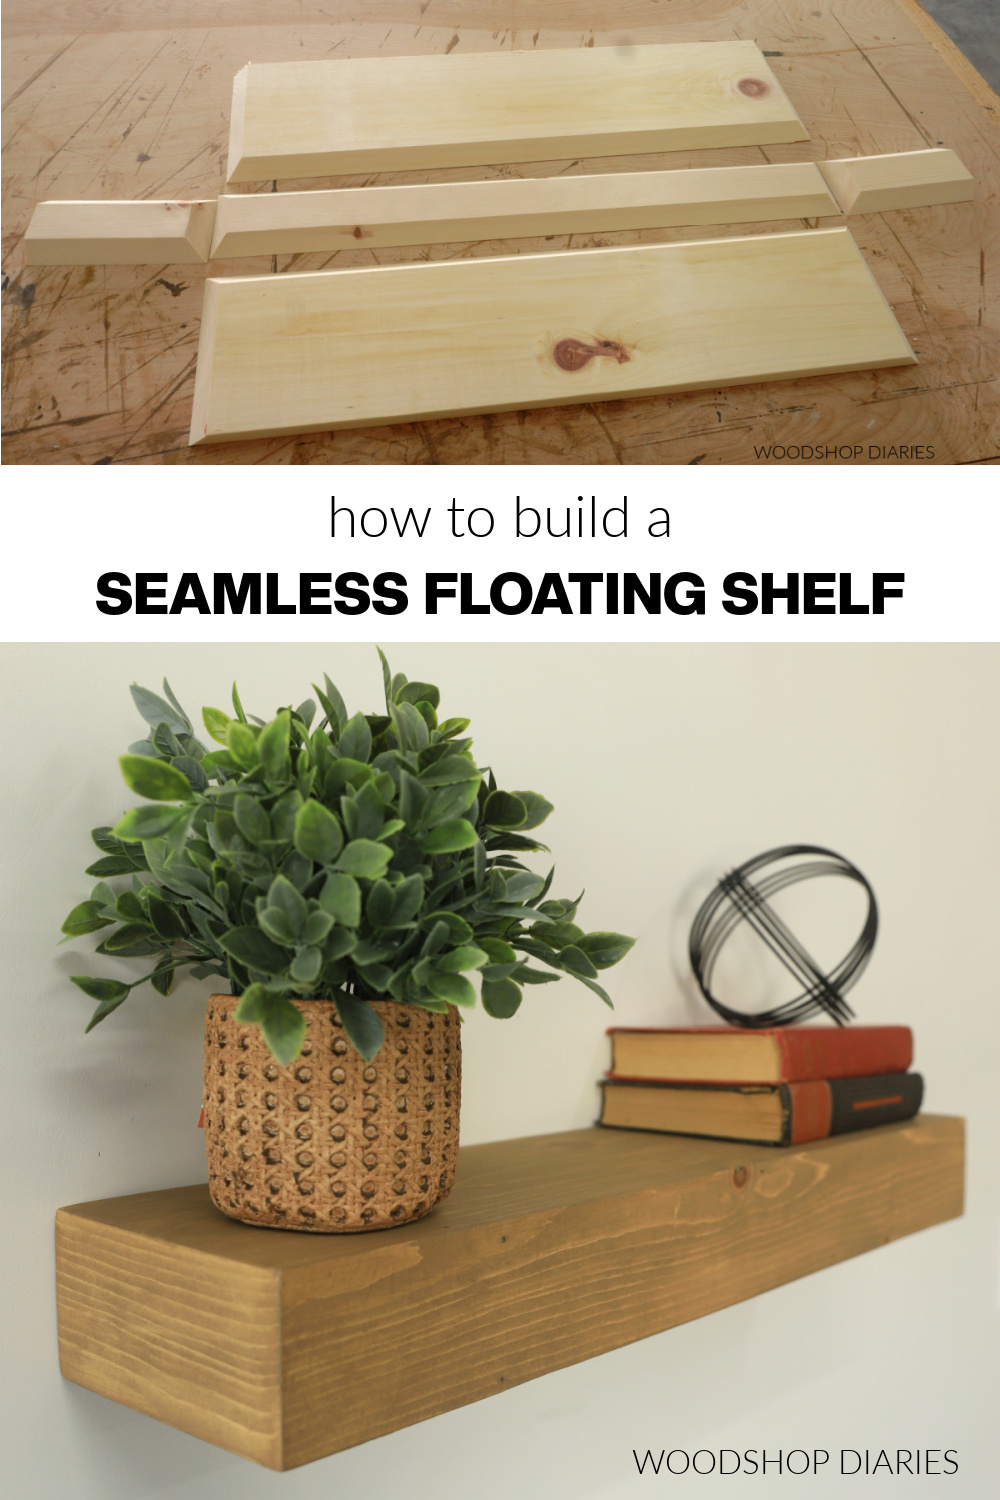
In this post, I’m sharing how to build chunky style “seamless” floating shelves.
What do I mean by seamless? This shelf doesn’t have any visible seams except at the corners.
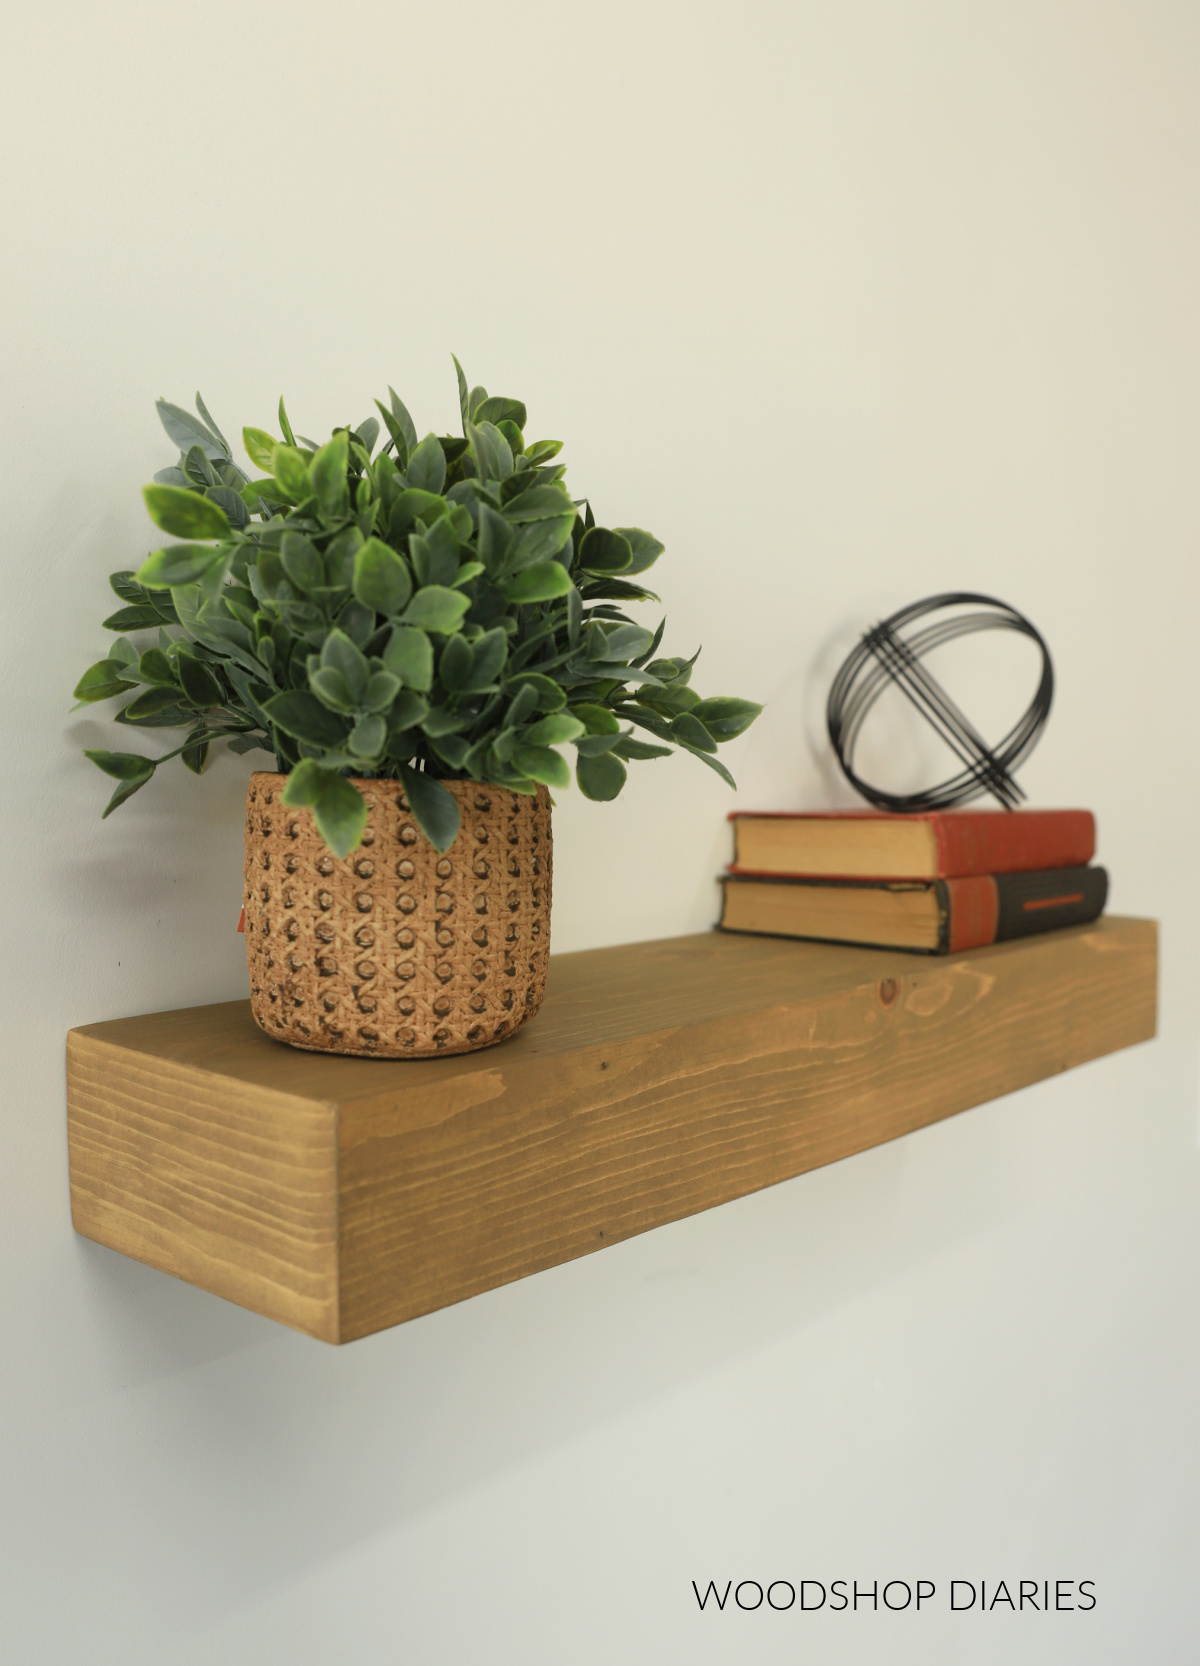
So it looks more like a solid chunk of wood vs something that was pieced together. See what I mean at those corners?
But, despite the fact that it LOOKS like a solid chunk, it’s actually a simple hollow box, so it’s much lighter weight and easier to install.
This is a great way to build some high end looking shelves, so if you could use a few for your blank wall, let’s build some below.
*This post contains affiliate links. Please see website policies for details.
RELATED: Looking for corner floating shelves? Check out this creative way to make them!
What to consider before building Floating shelves
This is a common method and popular choice for DIY floating shelves, but I will warn you. It’s not the easiest way of building them.
The way these end up being “seamless” is because all the corners are beveled and mitered 45 degrees. Getting these to fit together well requires a bit of patience and some precision.
But, it’s definitely doable. And don’t worry…wood filler and sanding helps a lot 🙂
You can use just about any wood type you’d like for this shelf, but I used basic pine lumber from the box box store.
If you’re looking for a simpler way, this easy floating shelf tutorial is a great alternative!
Overall Dimensions
This style of floating shelf is easy to customize in size and works great for both shallow or deeper shelves….within reason. I recommend keeping it 12″ or under.
As is, this shelf is 3 ¼″ thick x 6 ¾″ deep x 30″ long.
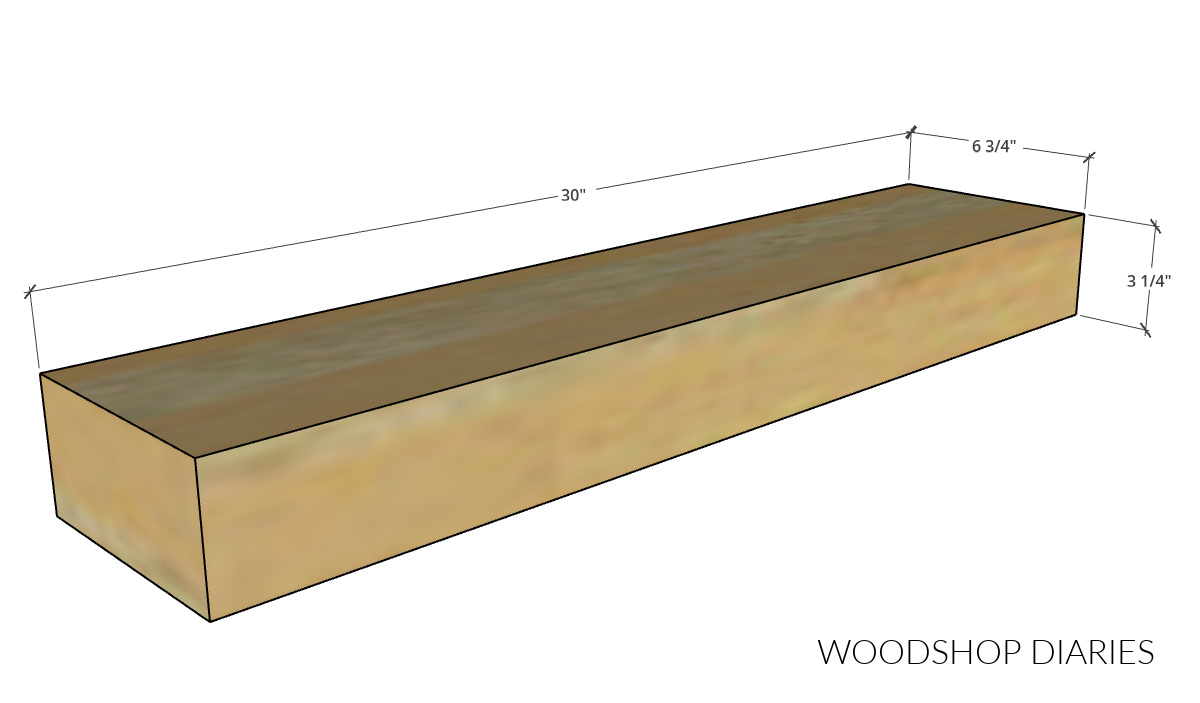
You can certainly make it longer or shorter, but it needs to be long enough to cross at least two wall studs.
So if your wall studs are 16″ on center (which is pretty typical), your shelf should be at least 17″ long or so. And if your studs are 24″ on center, your shelf should be at least 25″ long or so.
Enjoy DIY projects and woodworking plans? Sign up for priority access for the latest posts on Woodshop Diaries!
How to build a seamless floating shelf
If you prefer to watch, I’ve shared the full build video with tons of tips, behind the scenes, and additional details on my YouTube Channel here.

Love watching how-to videos? Subscribe to my YouTube channel for plenty more where that came from!
Prefer to print? Grab the printable floating shelf building plans available here:
Tools & Materials
Tools:
- Drill/Driver
- Miter Saw
- Table Saw
- Brad Nailer
- Clamps (optional, but helpful)
- Pocket Hole Jig
- Stud Finder
- Level
- Sander
Materials:
- 1×8 board (need about 6′)
- 1×4 board (need about 4′)
- 2×2 boards (need about 4′)
- Wood Glue
- 1 ¼″ Brad nails
- 2 ½″ pocket hole screws
- Wood Filler (optional)
NOTE: You can swap the 1x boards for ¾″ plywood or ½″ plywood if you’d like. But I prefer to use solid wood for these types of shelves. Once assembled, you’ll need to sand the edges well to smooth them out and it’s too easy to sand through the plywood veneer.
Step 1: Cut Top and Bottom of Shelf Box
Since this is essentially building a hollow box, first I needed to cut the top and bottom pieces of the box. For this, I used a 1×8 board.
NOTE: If you wanted a deeper shelf, use a wider board. If you wanted a shallower shelf, use a narrower board.
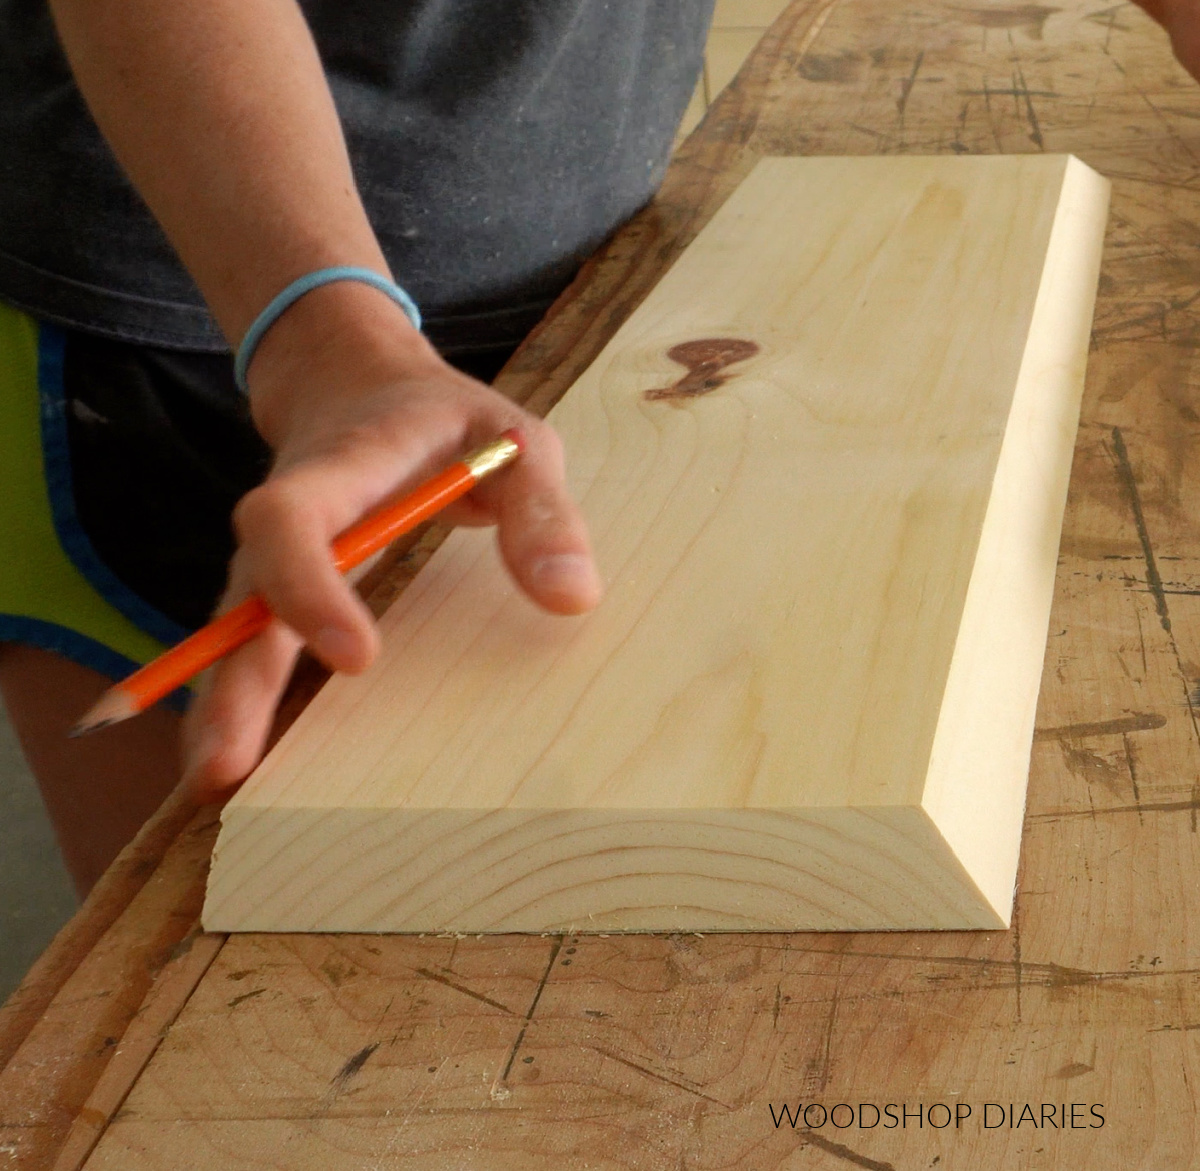
I adjusted my table saw bevel angle to 45 degrees and ripped one edge off this 1×8. The other edge I left square.
Then, I adjusted the bevel angle on my miter saw to 45 degrees and cut two pieces with beveled ends from this board the length I wanted my shelf (30″ long).
All the bevels should be slanting inward. This will make more sense once it starts coming together.
RELATED: How to cut angles on a miter saw
Step 2: Cut Sides and Front of Floating Shelf
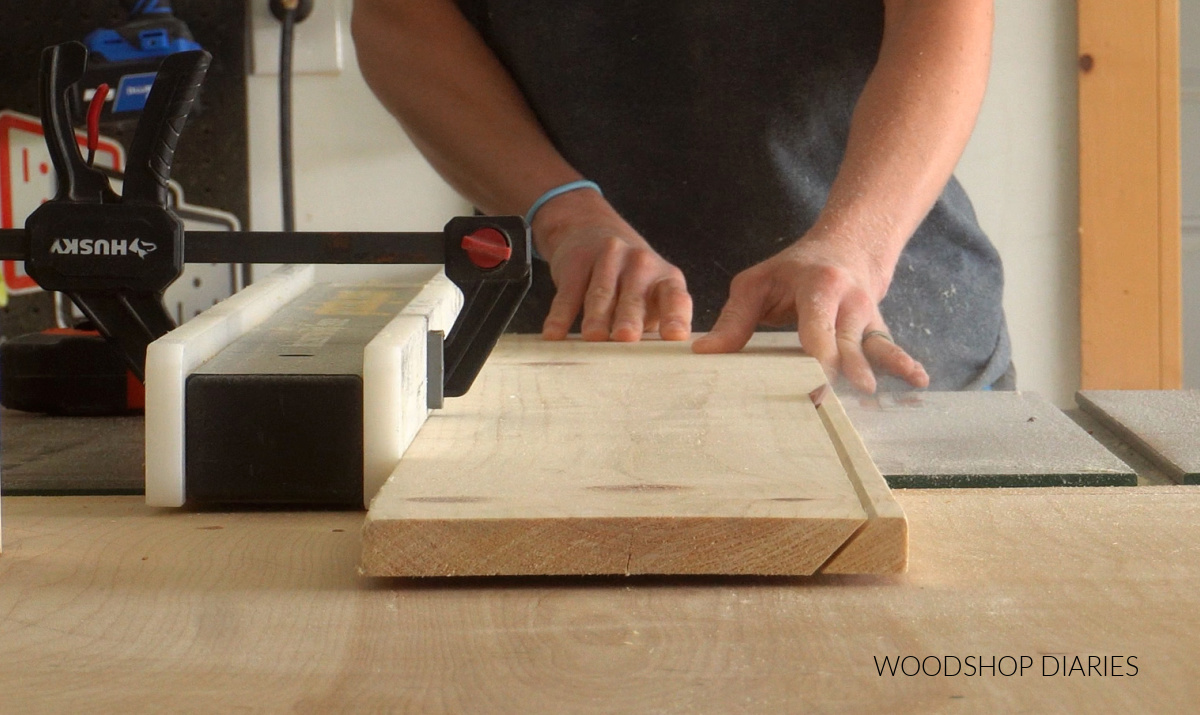
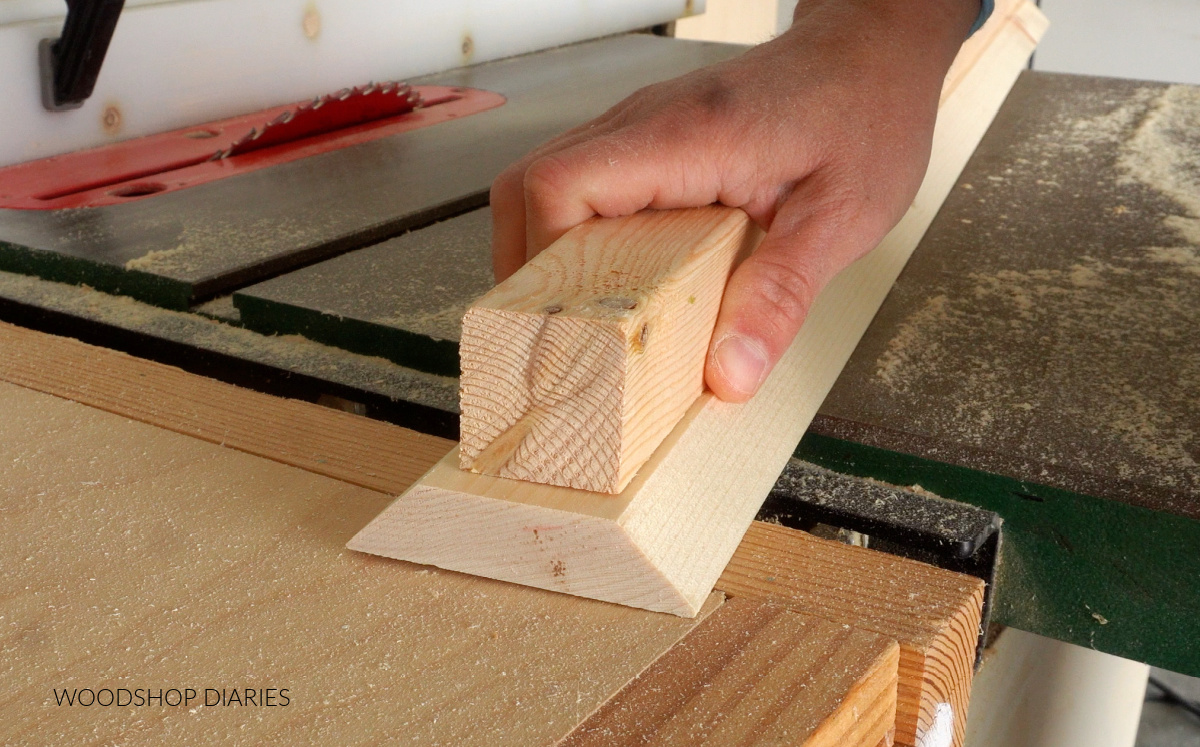
After the top and bottom shelf pieces were cut, I beveled BOTH edges of my 1×4 board on the table saw 45 degrees.
I trimmed these off both sides so they ran opposite directions and the widest part was about 3 ¼″ wide.
The narrow part needs to be just slightly wider than the width of a 2×2 like you see below.
This strip will become the sides and front of the shelf box, so I carefully cut it into three pieces to fit around the sides and front of the top and bottom pieces from step 1.
NOTE: The back edges of the sides are square, but the rest of the board ends are beveled 45 degrees.
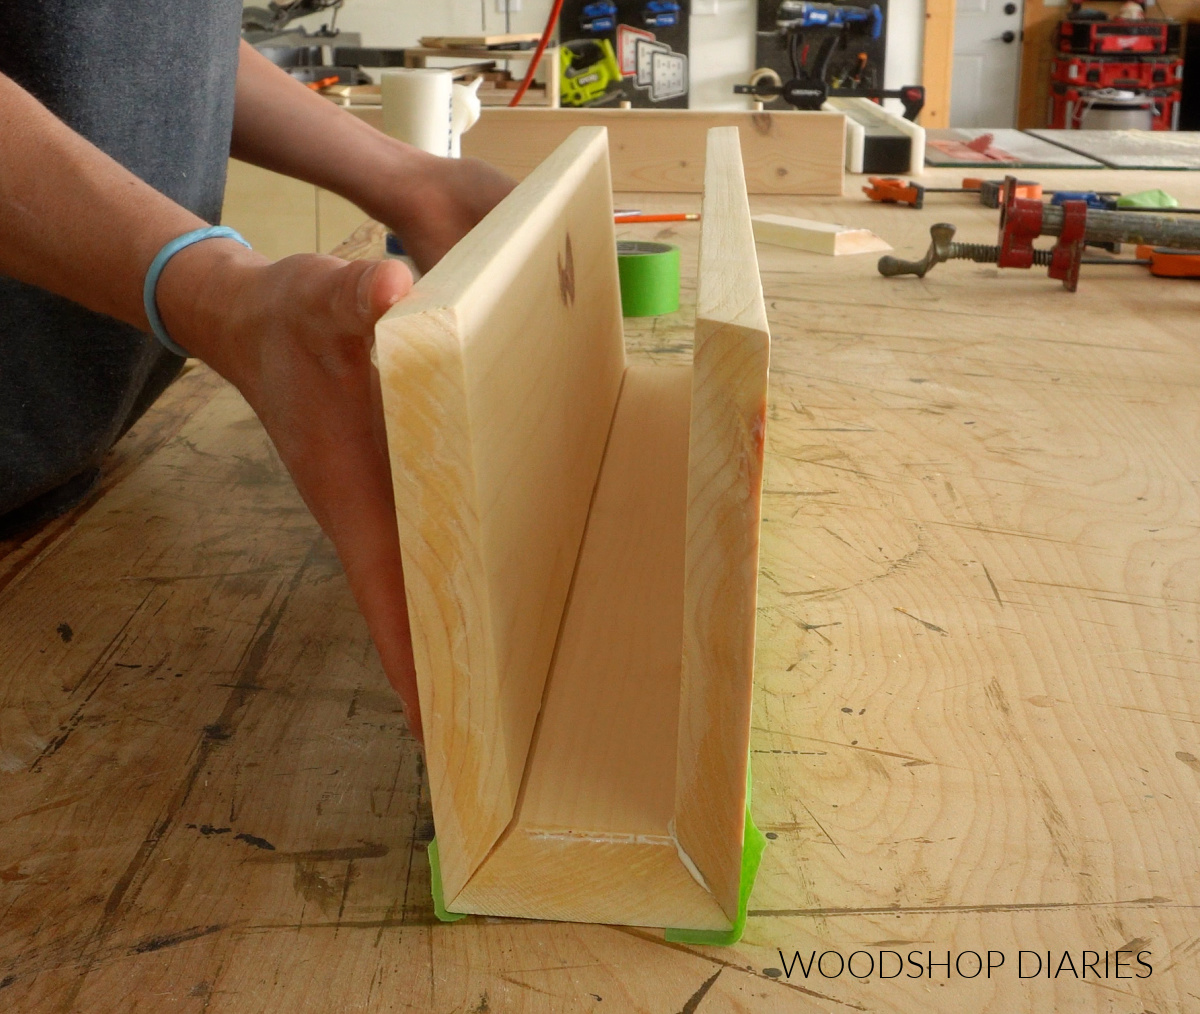
Below you can see the two larger top and bottom pieces and the narrow strips in the middle are the sides and front of the box.
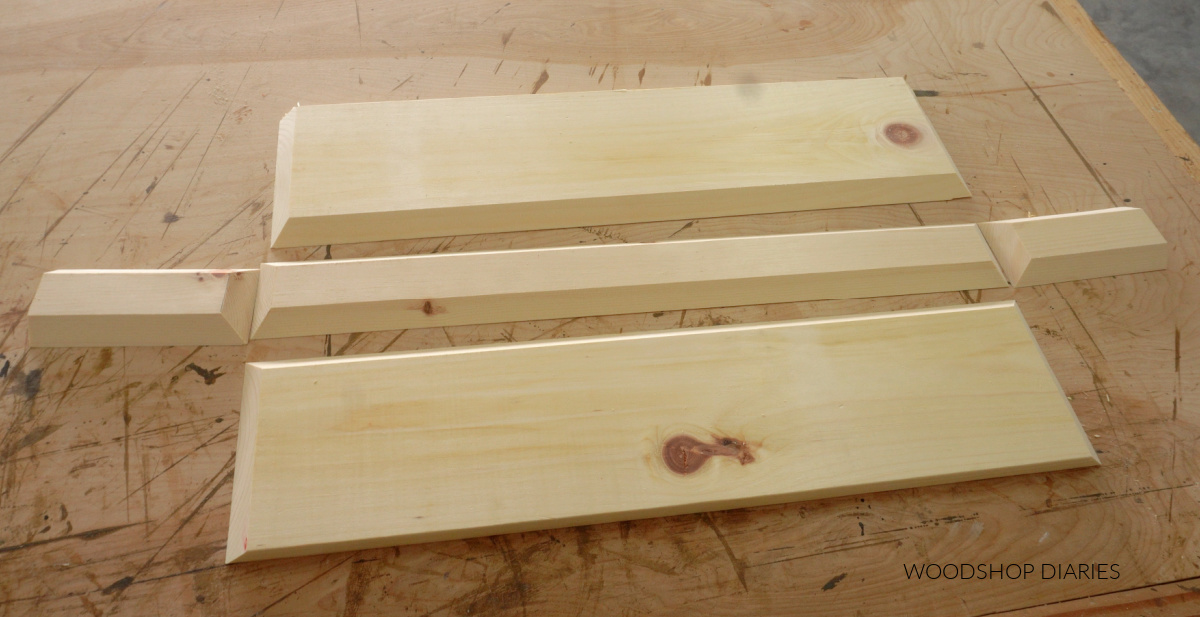
If you fold all these pieces up together, you will get a hollow box…which is what we will do in the next step.
But first, I recommend “dry fitting” the pieces together without glue first to make sure everything fits okay.
It’s challenging to get these to fit together PERFECT, so if it’s not quite there, that’s okay. But it needs to be close so that the corners all line up without huge gaps.
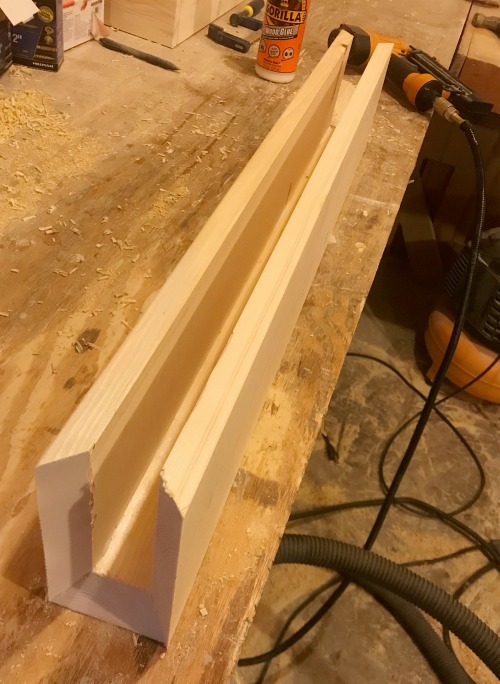
Step 3: Assemble Floating Shelf Box
Painter’s tape is a huge help in gluing this up, so first, I aligned my top, front, and bottom pieces so that the edges touched and applied tape along the joints.
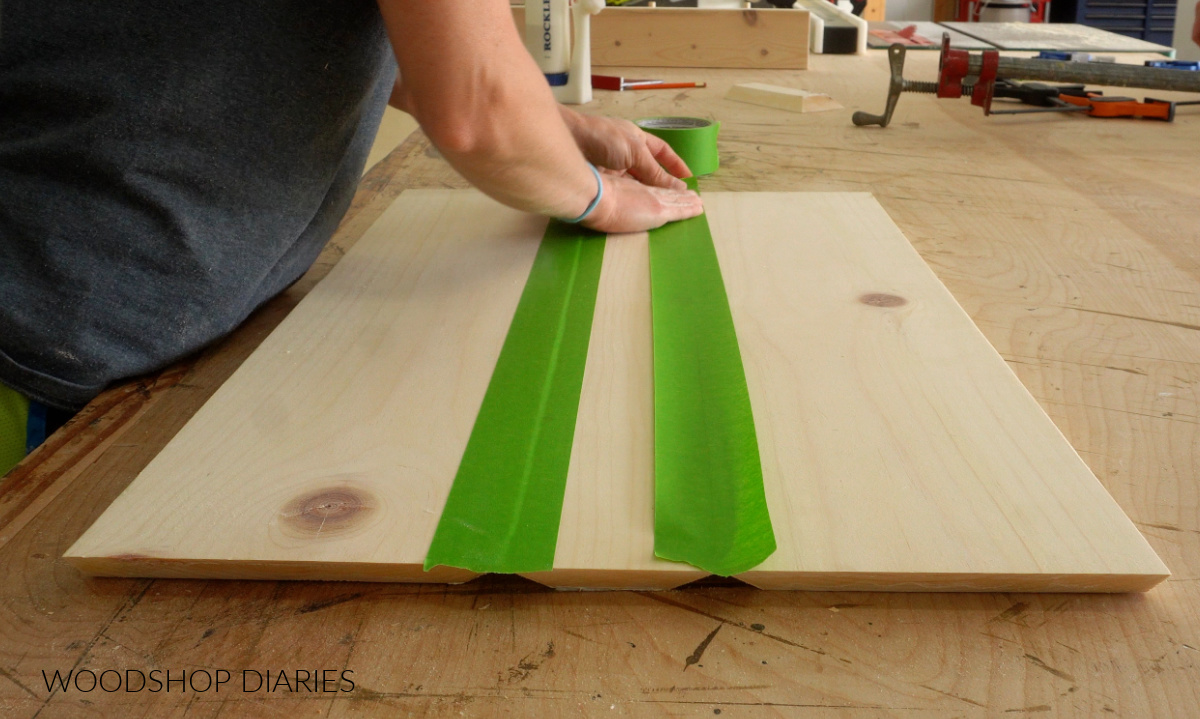
Then I could flip this over, apply some wood glue along the beveled edges, and fold them together.
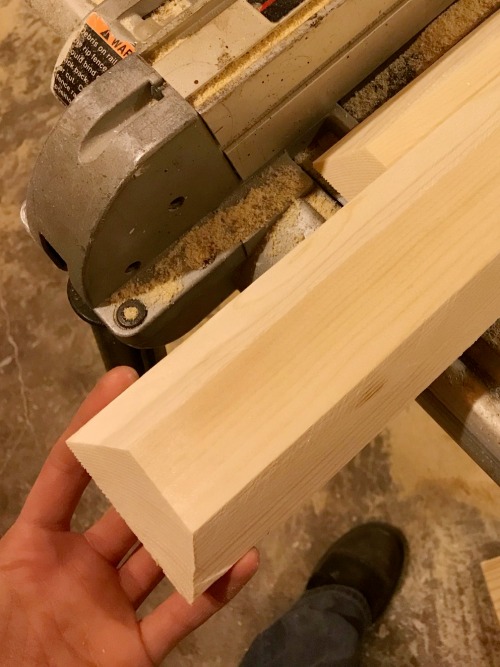
Then a used a brad nailer to help tack the pieces together at the corners. If you didn’t want to use painters tape, you don’t have to.
When I used to make these years ago (see photo below), I just held them tight and shot a few nails without the tape. Either way works fine!
Once these three pieces are together, I glued the two small sides and brad nailed them on as well.
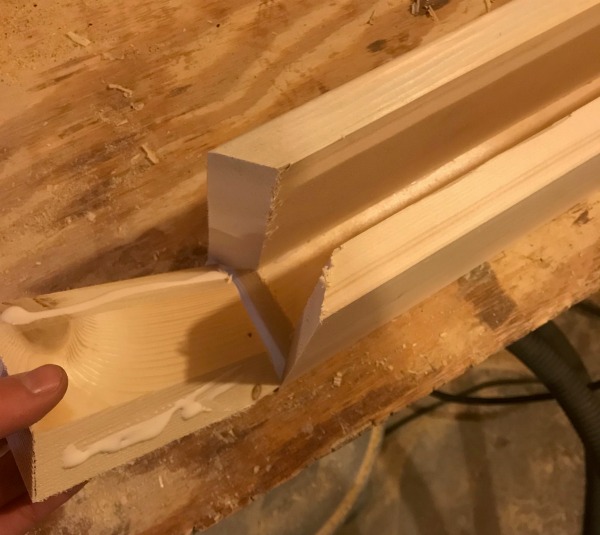
You can use clamps to make any adjustments or pull any pieces tight as needed. If there are some gaps, don’t panic!
After the glue dried, I sanded the joints to smooth things out. I applied some wood glue into any gaps and while it was still a little tacky, sanded it. The sawdust mixes with the wet glue to form somewhat of a paste.
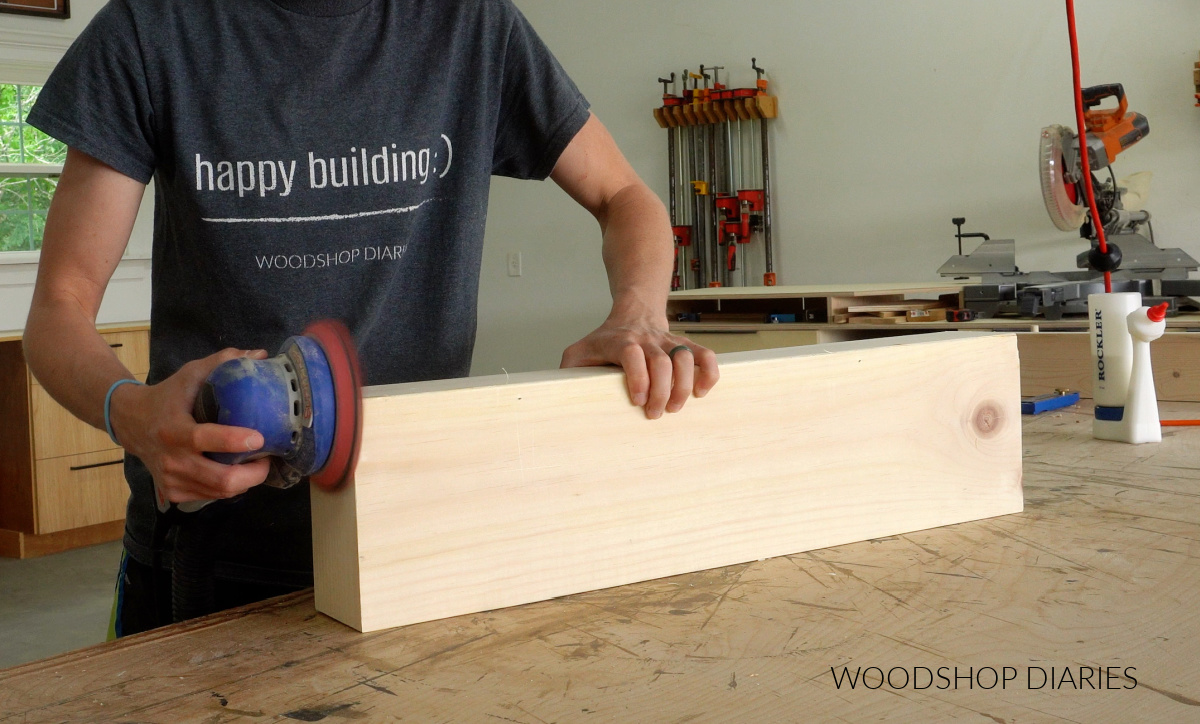
OR, you could absolutely use regular wood filler as well.
TIP: I’ve found that sanding and staining wood filler while it’s still a little wet makes the stain take better.
Once the box was sanded and I was happy with the joints, I stained it in Minwax Driftwood.
Step 4: Build Floating Shelf Support Hangers
While the stain dried, I assembled the frame that will actually hold this shelf box on the wall.
I built the frame using 2x2s, and it is basically an E shaped frame. So I cut one long piece for the back (it should be slightly under the inside opening of the box). Then I cut a few shorter pieces to use for the supports.
RELATED: Check out how to make your own 2x2s in this post!
I installed the shorter blocks into the back piece using pocket holes and screws.
RELATED: How to use pocket holes
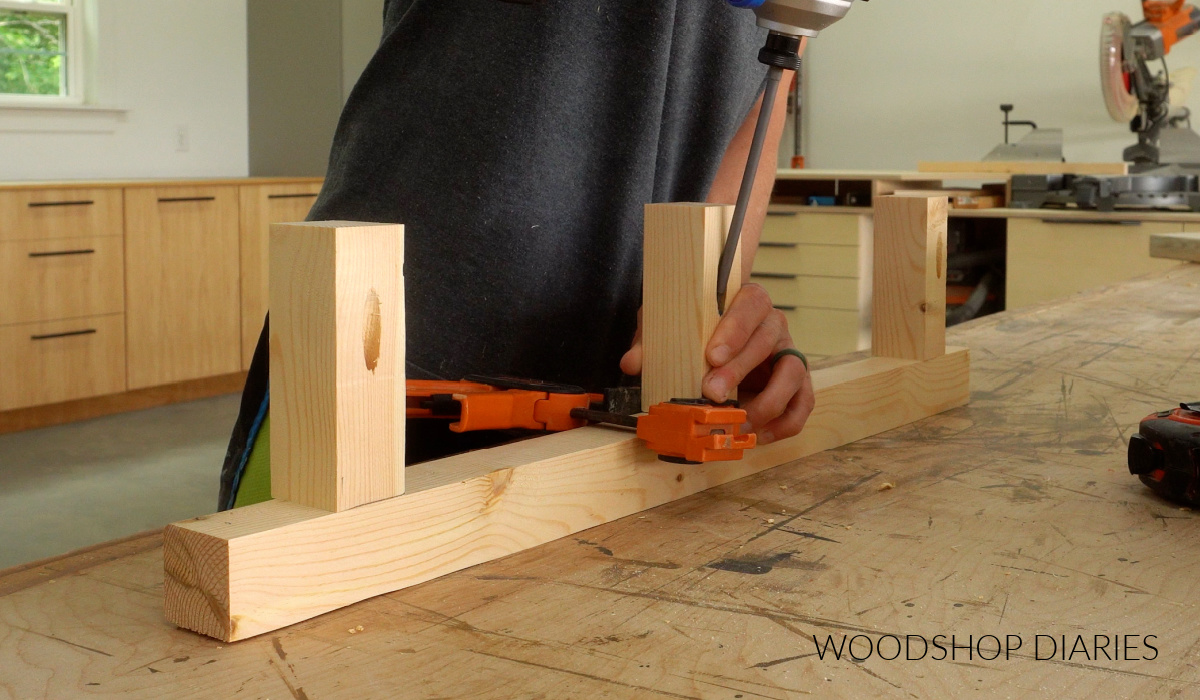
It’s important that this frame fit fully into the shelf box. It’s also important to consider where you plan to hang the shelf and make sure not to place a support on the back piece where a stud will be.
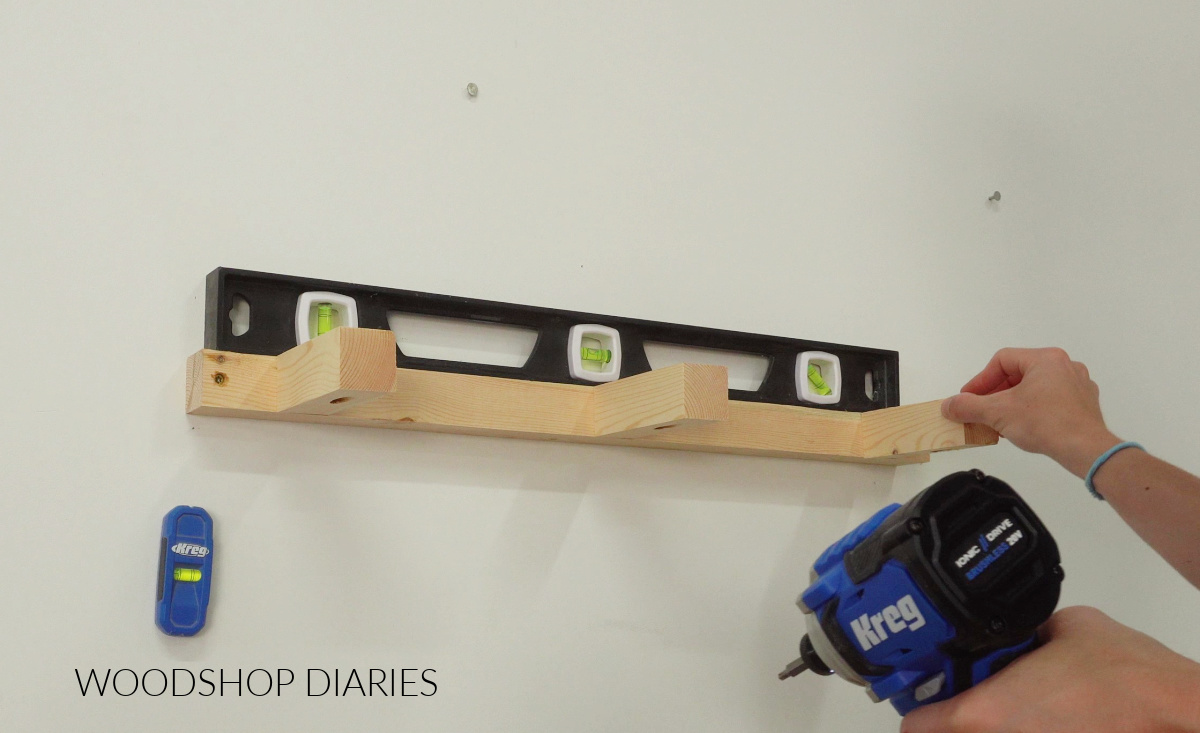
Step 5: Hang Floating Shelf
Now, all that’s left is to hang it up. I located the wall studs and secured this frame to them with 3″ wood screws.
The frame should cross AT LEAST two studs. Make sure it’s installed level!
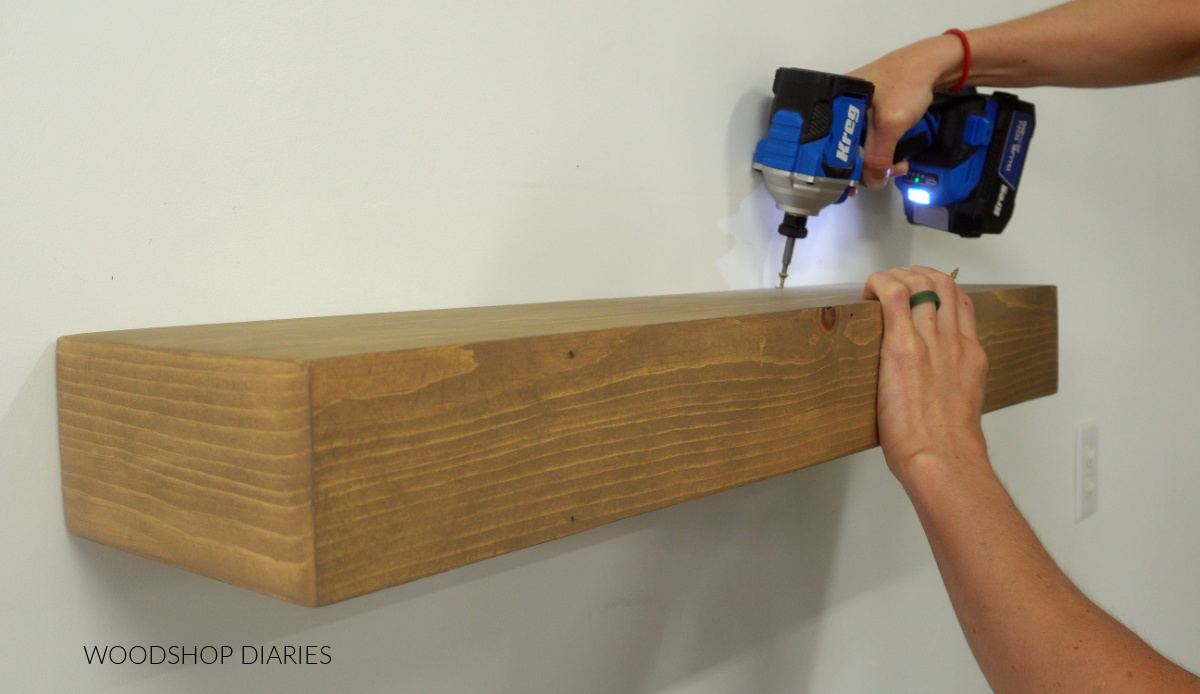
The shelf box simply slides onto, over, and around the frame and butts against the wall.
To prevent the shelf from sliding off the frame, I used a couple screws in the back through the top to secure it.
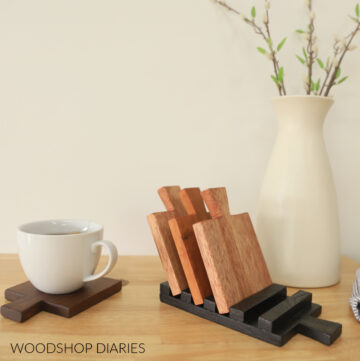
And now this simple floating shelf is ready for decor, photos, books, whatever you want to use it for!
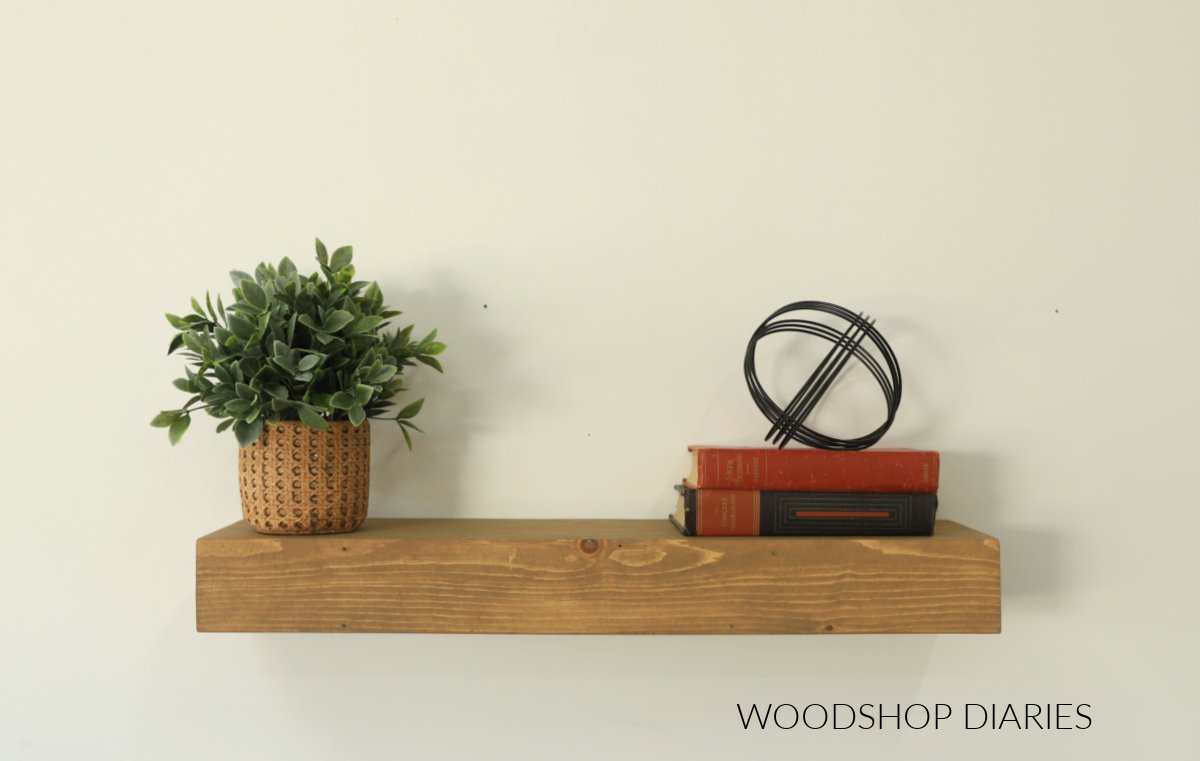
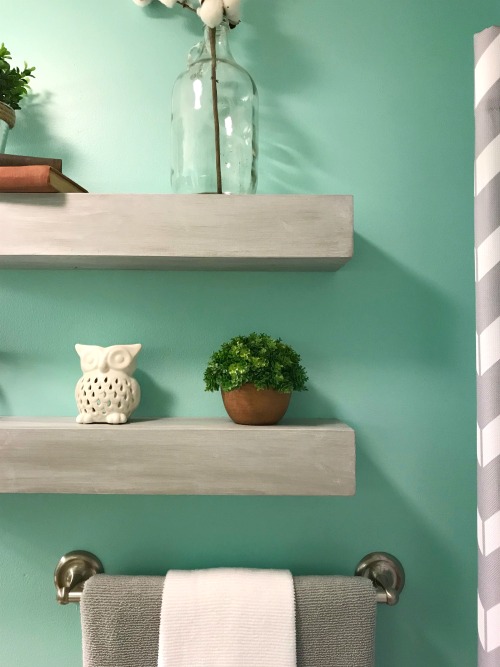
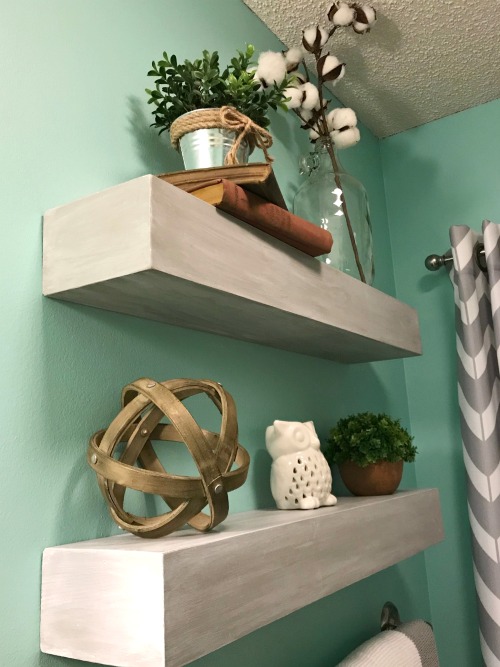
I’ve been making floating shelves like this for years and the chunky style really adds some character to a blank wall.
Here’s a peek at some that I built for a friend’s bathroom several years back.
These style floating shelves will take a little more time and require a little more effort to build than some I’ve seen, but I really think the little extra is totally worth it.
Looking for more DIY shelving ideas?
Enjoyed this project, but looking for more shelving DIYs? I’ve got you covered with plenty more!
Click on the image(s) below to see how to build each one:

If you enjoyed this post, be sure to save it for later by pinning or sharing to your favorite social channel!
Until next time, happy building!!


Rich says
Cool looking shelves, what paint or stain did you use to give them that gray finish?
Shara, Woodshop Diaries says
Thank you! Unfortunately, my friend finished these…I just made them for her. I believe she used a whitewash technique where you stain, then mix water and white paint and brush on to give that grey look.
Ivory says
Perfect, perfect, and perfect. Do I need to say more? Ok, perfect!
Shara, Woodshop Diaries says
Thank you! 🙂