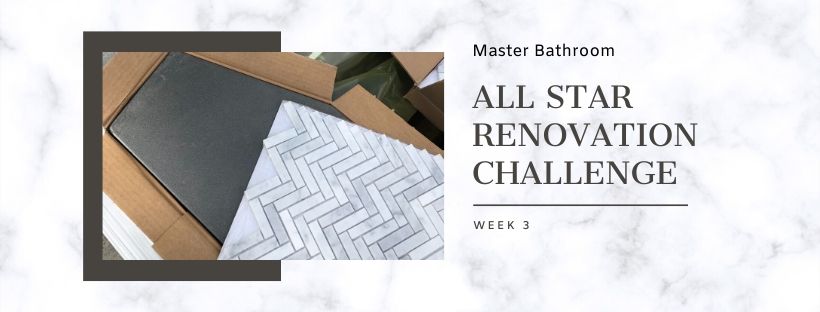
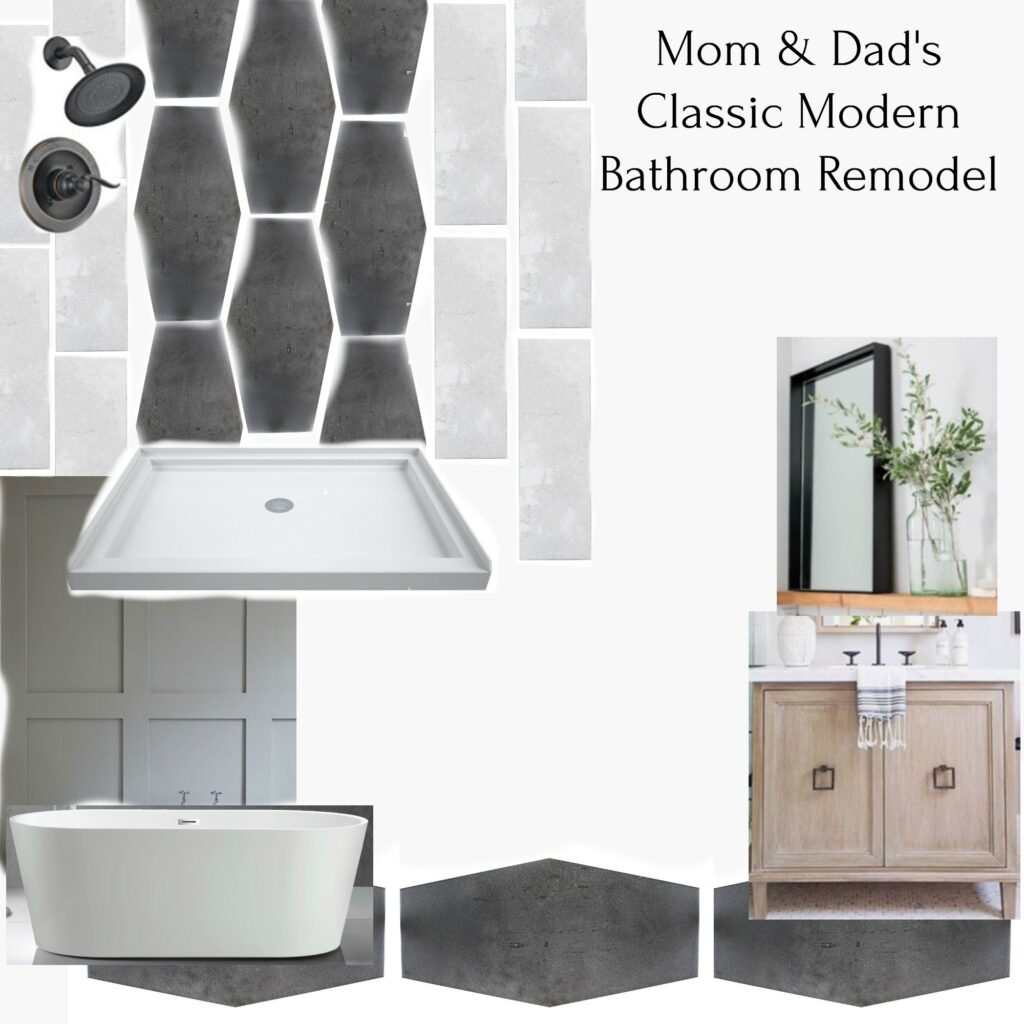
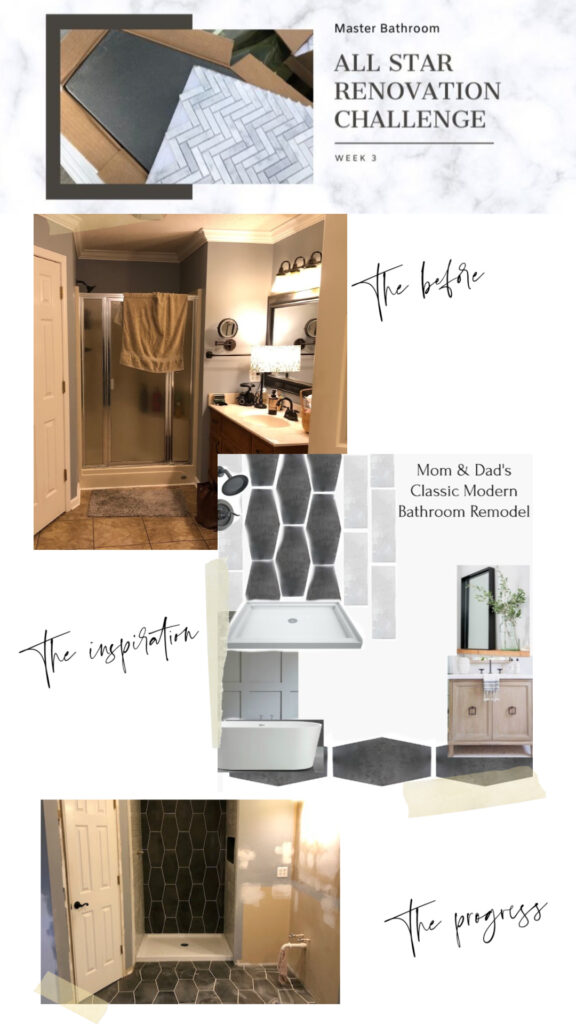
Hey friends! Welcome to Week 3 of the All-Star Renovation Challenge with Jeffrey Court, FrogTape, and Behr Paint! We are talking master bathroom renovation again, and I’m updating you on week THREE of our progress. This post contains affiliate links. See policies.
If you remember from last week, these three brands challenged eight bloggers from past renovation challenges (remember my kitchen renovation???) to take on another renovation challenge as the “All-Stars.” I’m so excited to be included in this group and to share with you the journey as we transform my parents’ master bathroom! Check out all the designers and their spaces here.
This week begins fan voting…the winner of the challenge takes home the grand prize of $5,000 and, of course, bragging rights that they won the ALL STAR Challenge. The winner this time around will be determined solely by fan votes, so I’d be forever grateful if you’d click on over and cast your vote!

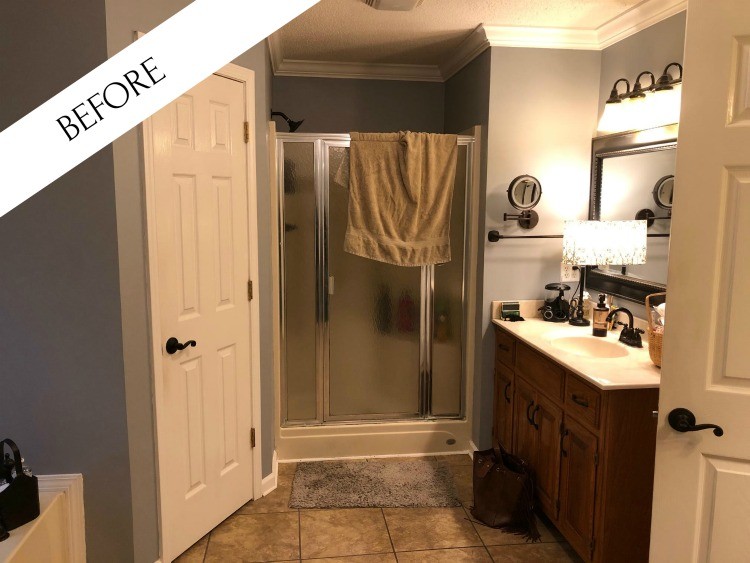
Now let’s see some progress…So if you missed last weeks update, head over and check that out first. But I’ll give you a quick recap of where we started this week. Here’s the original “before” photo of the space:
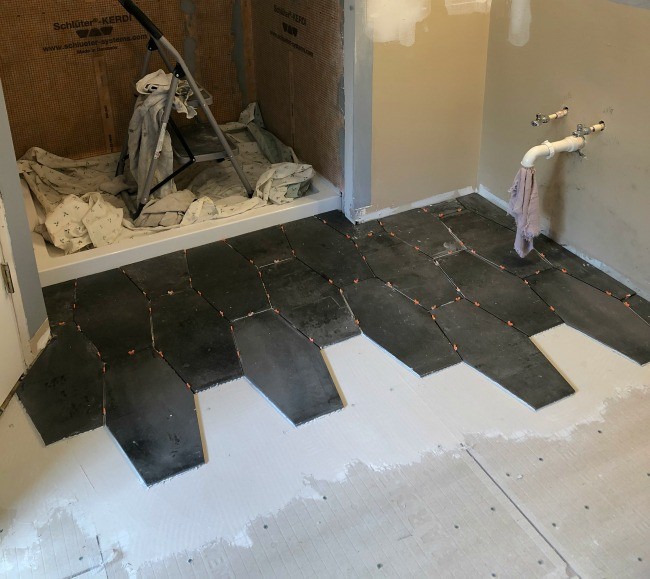
At the end of week two, we had removed everything to the subfloor and taken out the garden tub and the shower stall. We replumbed the shower water supplies and the shower drain and set the shower pan in place. I also prepped the floor and shower for tile, laid the floor tile, and one wall of the shower.
It doesn’t sound like a lot, but trust me…it was a busy first two weeks! There was also some drywall patching in there somewhere, too, but you get the idea 🙂
So let’s talk about Master Bathroom Renovation Progress–Week 3
Shower Walls:
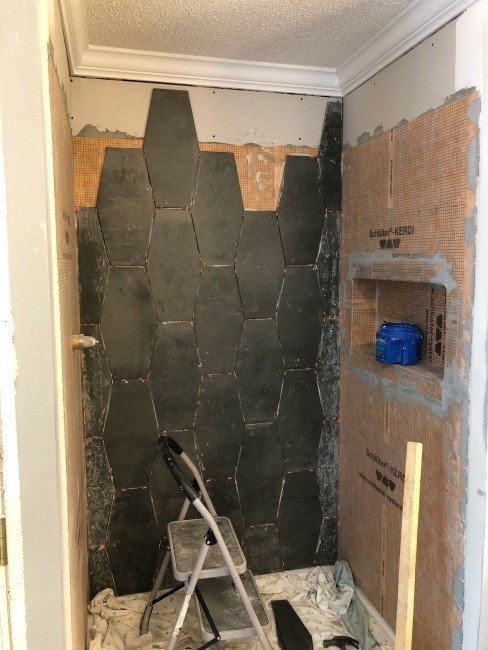
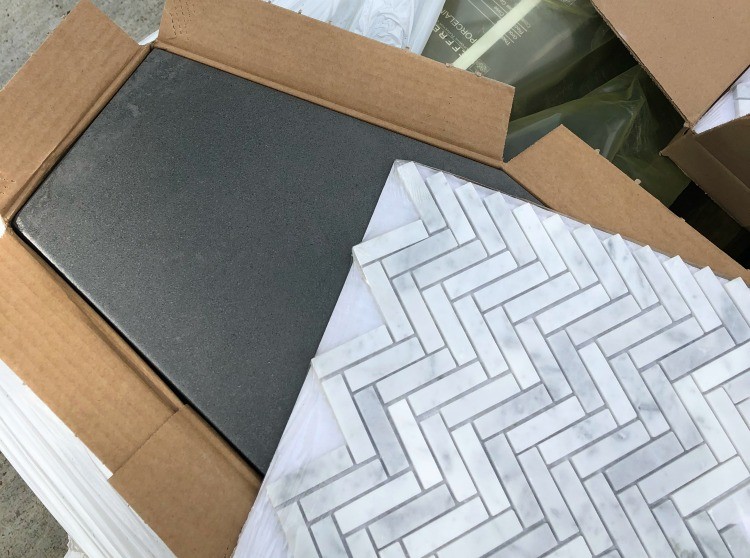
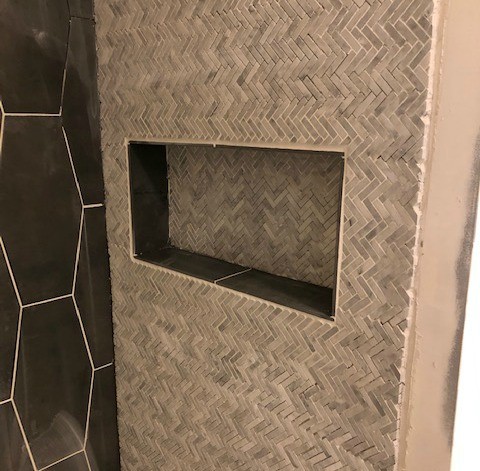
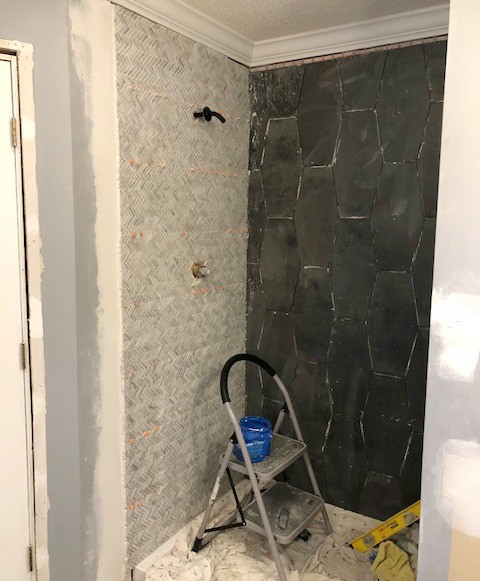
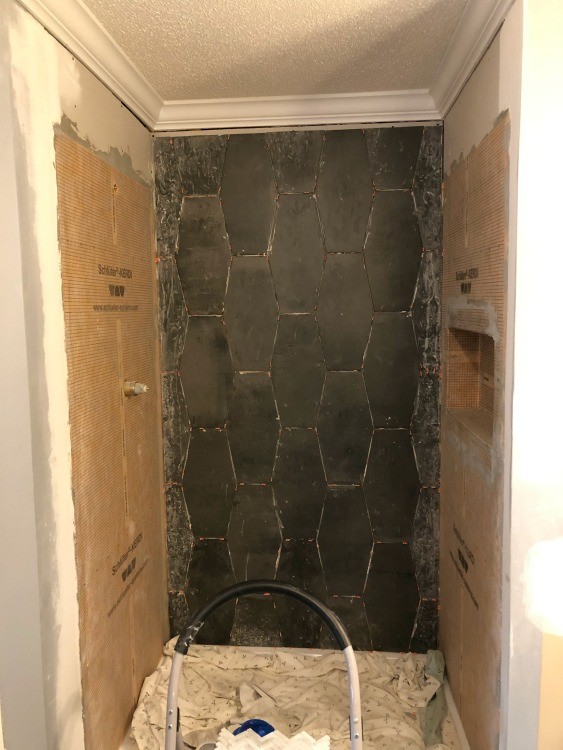
I installed the Jeffrey Court Castlerock tile along the back wall of the shower as sort of a continuation of the flooring. But I had planned to put something a little lighter on the other two sides.
This Jeffrey Court Jetstream tile was SO pretty online, so I thought I’d order some and see how it worked with this darker tile. As pretty as it is online, it definitely did not disappoint when I saw it in person. I love the lighter color, but also the herringbone pattern.
To make things difficult try something different, I decided to lay this tile on its side vs. the traditional way. In hindsight, I wish I hadn’t tried to “be cool” because it was really difficult to get the lines straight. And it was really difficult to cut straight.
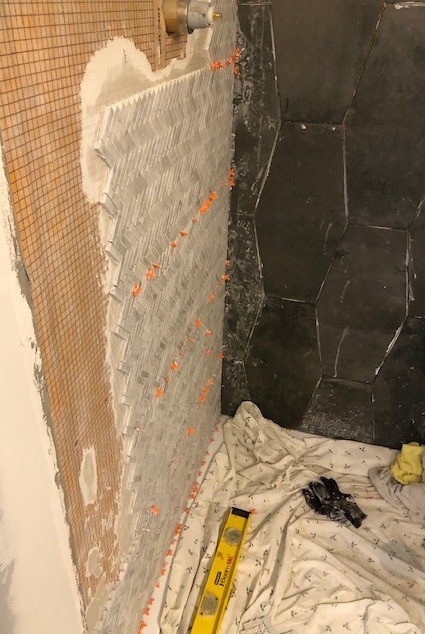
I got frustrated the first day of tiling these side walls and quit for the day about half way up both walls.
So the next day, I focused on cutting straight and keeping things level. It was easier once the tiles below were set in the mortar and weren’t moving anymore. Again, I think this would have been MUCH easier to install the traditional way, but…live and learn 🙂
.
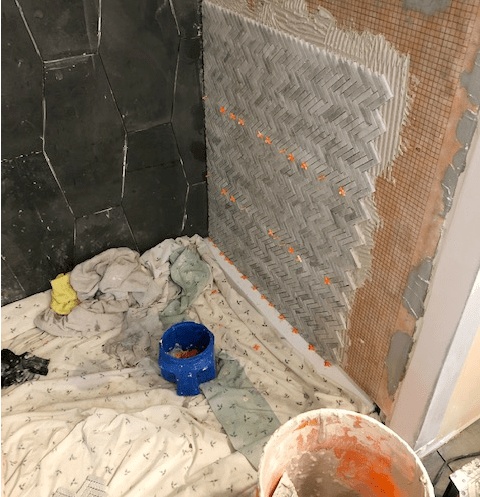
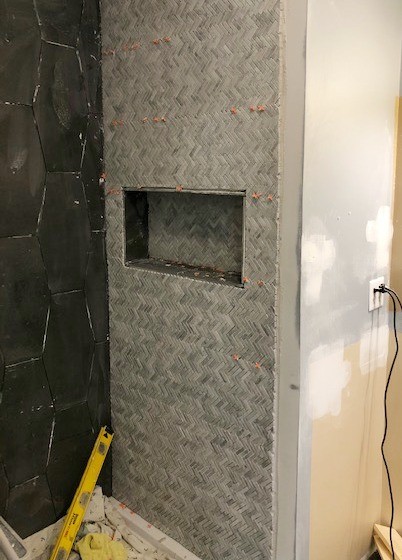
When we got to the shelf/niche, my dad wanted the inside framed out in the darker tile. So we cut some pieces of the Castlerock tile we had leftover from the floor and placed them inside. Then I laid the Jet Stream tile the traditional way inside the shelf. I really loved how it looked, but the outside edge just looked…unfinished.
I grouted everything the next day to see if the shelf edges looked any better. NOPE.
So I brainstormed some options to frame it out to cover up some of these uneven cuts (again…all because I wanted to “be cool” and lay this side ways…) and pulled out some of my Tundra Grey tiles that I used from the kitchen renovation and in my laundry nook remodel.
After I had grouted the shower walls, I cut some of these Tundra Grey tiles down and stuck them in place. I wasn’t 100% sure how was best to stick them at this point.
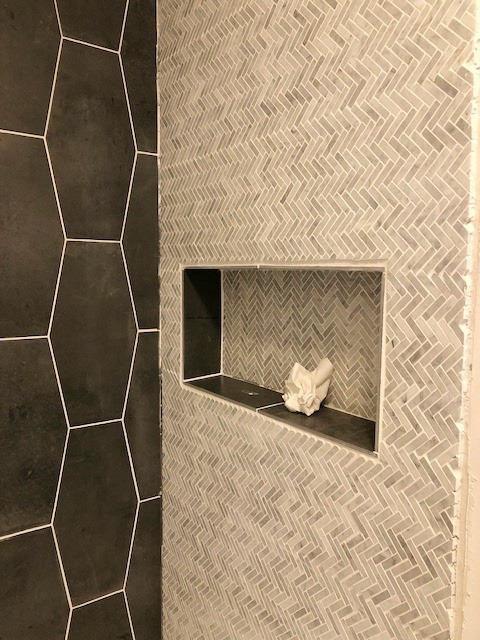
And this may not be the best option, but I used some silicone and plumber’s epoxy to attach them to the existing tile. I applied the silicone and epoxy and used FrogTape to “clamp it” in place until it was cured.
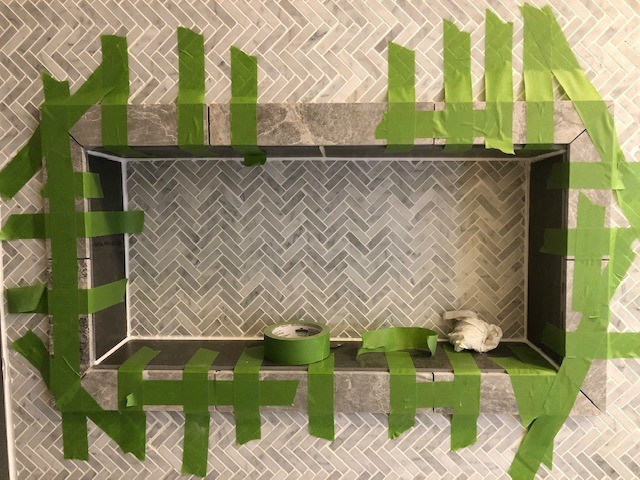
I am hopeful they’ll hold up well over time, but it’s just a trim piece, so if it falls off someday, we can figure out another way to attach it. It’s not vital…but I do really like how it looks with these tiles framing it out.
.
Once the grout was dry and these trim pieces were up, I caulked everything and moved onto trimming out the rest of the room.
Bathroom Tile Grout:
I waited to grout everything in one day…so once the shower tile was installed, I grouted the shower walls and the floor all in the same day. You can see in the images above where I had grouted the shower tile.
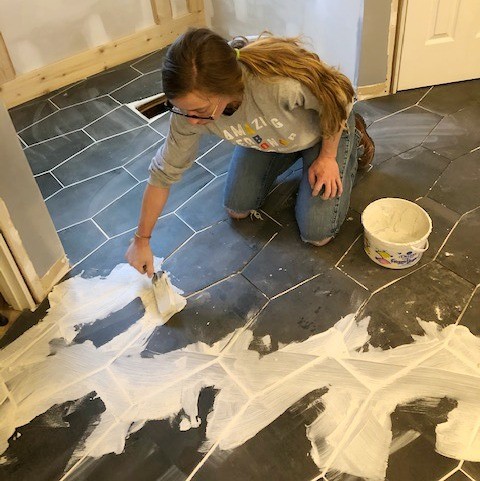
I know I already mentioned grouting the shower walls, above, but all the things were happening at once, so it’s hard to keep things in order haha.
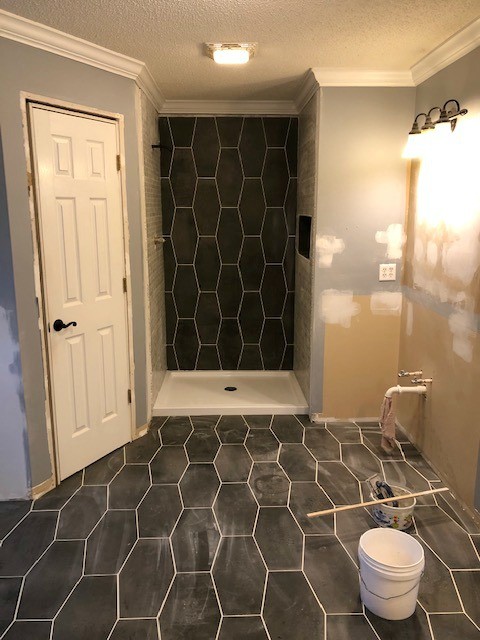
I LOVE LOVE LOVE this large grey Castlerock tile with this white grout. It really makes the floor pop.
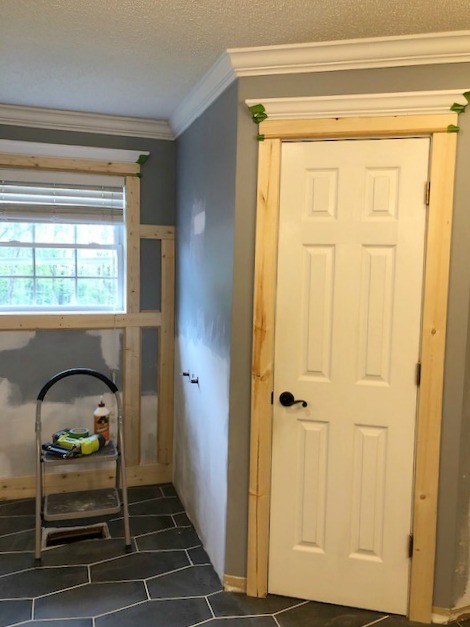
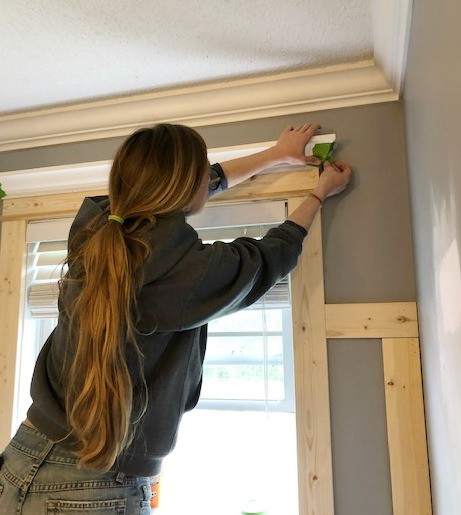
Bathroom Door, Window, Wall, Baseboard Trim:
I mentioned in the last post that I was doing a “feature wall” behind the tub. It’s nothing fancy, but I had planned to put some trim detail here behind where the tub will go. So I started working on that wall, installing the matching door trim, and the baseboards.
Also, just like I used the FrogTape to “clamp” the tile trim, I also use it A LOT in my trim work to hold glued pieces together until the glue dries…helpful hint *wink wink*
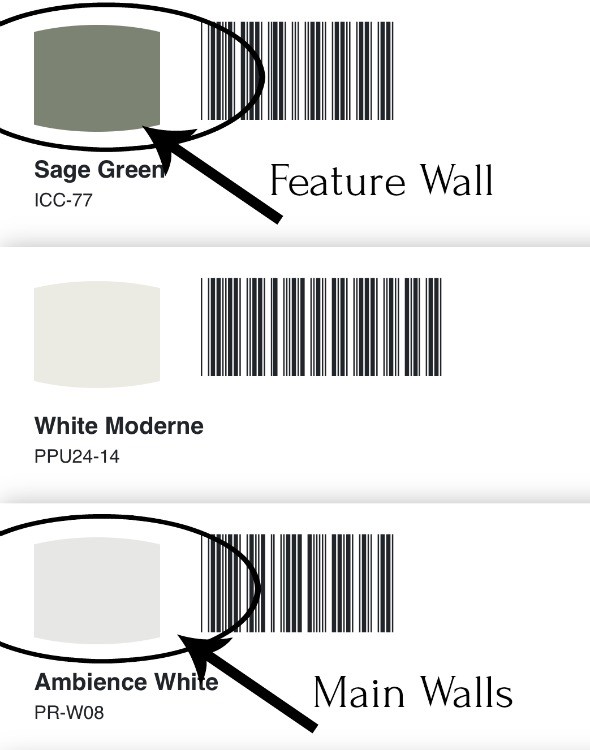
So if you remember from last week’s bathroom renovation post, I’m painting the main walls in here Behr Ambience White and this feature wall Behr Sage Green. Stay tuned for next week to see how it works together!
I got all the trim sanded, caulked, puttied, and wiped clean ready for paint. And with the two shower walls, and this trimming and caulking, that was basically a full weeks worth of work. Caulking and sanding and puttying is time consuming work!
Shower Edge Trim:
One last detail about the trim. I mentioned that the tile was difficult to cut straight on its side. So our shower edges ended up looking…well…not even close to my standards (again…not a good idea to lay these sideways). So I had to find a way to be able to trim out these edges that would cover up the uneven lines.
This isn’t ideal, but it worked really well and will look pretty seamless once its painted. But I used a couple of 1x3s and cut a rabbet in one edge that can “lip” over the tile edge and I can nail into the wall as a trim piece.
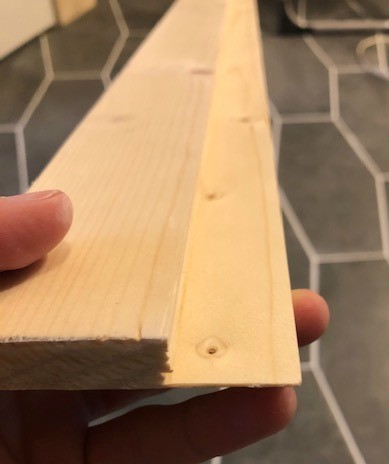
I used a router to cut a little cove detail in the top so it will meet the crown molding at the ceiling at the same depth. This will be painted to match the trim, so I think it will look like it was intentional…but we will know the secret *wink wink*

It makes the tile edges look SO much cleaner, too. It’s on the outside of where the shower curtain will be, so it shouldn’t get wet, plus the paint should seal it from damage from occasional splashes as well. It’s not an IDEAL solution, but it’s a creative solution that worked in our situation.
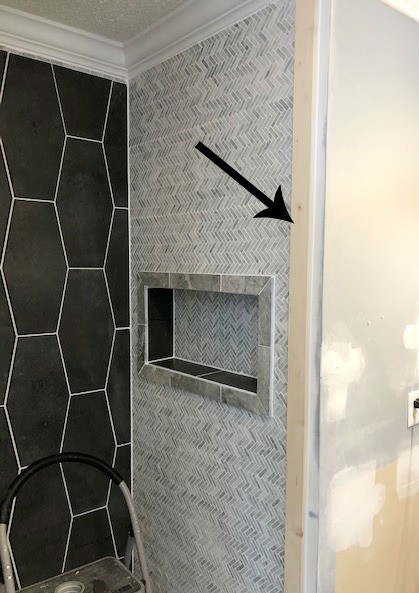
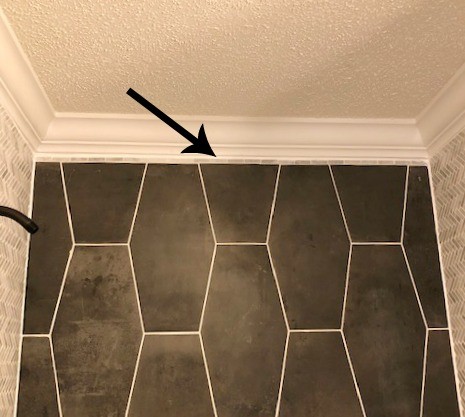
Also, one more detail to note…see the top of the tile along that back wall in the image above? When I ran the back wall tile up, I left a small gap between the last tile and the existing crown molding.
It worked out best that way for how I was cutting the tiles. But, now I had this weird gap. So, to fill the gap, I used some little leftover pieces of the Jet Stream herringbone tile. I think it turned out pretty cool like that. It’s just a subtle detail I thought I’d point out 🙂
Okay, so that was week 3 of this bathroom renovation. Stay tuned because a few more details are left to finish up and I can finally gift this to my parents, pack up my tools, and get back in the workshop! I think we will all be glad when that happens haha.
.
It’s really coming together quickly. I’ll update you again next week! Be sure to subscribe to the newsletter below so you don’t miss out on updates!
Until then, happy bathroom renovating! 🙂