I’m tackling another master bathroom renovation you don’t want to miss!! As much as I love building furniture, occasionally, I do like to tackle a renovation project just to change things up a little and keep my (limited) skills sharp. This post contains affiliate links. See policies.
.
Jeffrey Court is partnering with FrogTape and Behr Paint to present an All Star Renovation Challenge project this summer. They asked participants from past renovation challenges to give it another go this summer. No pressure or anything *wink wink*. You can check out all the participants and their projects and progress here.

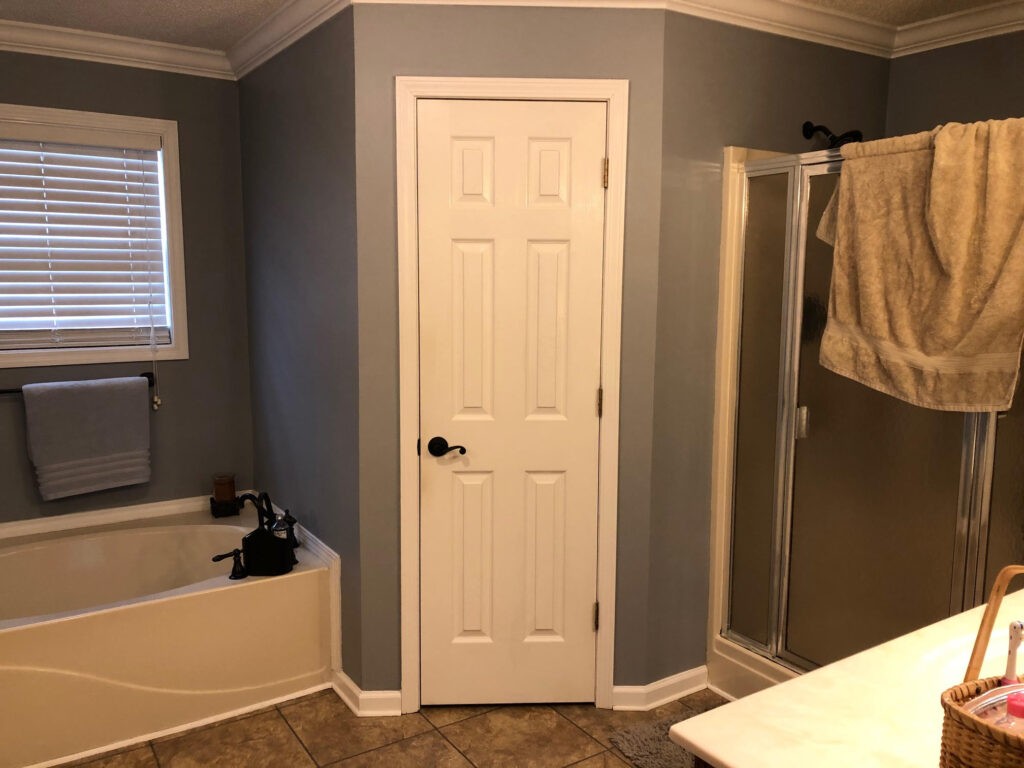
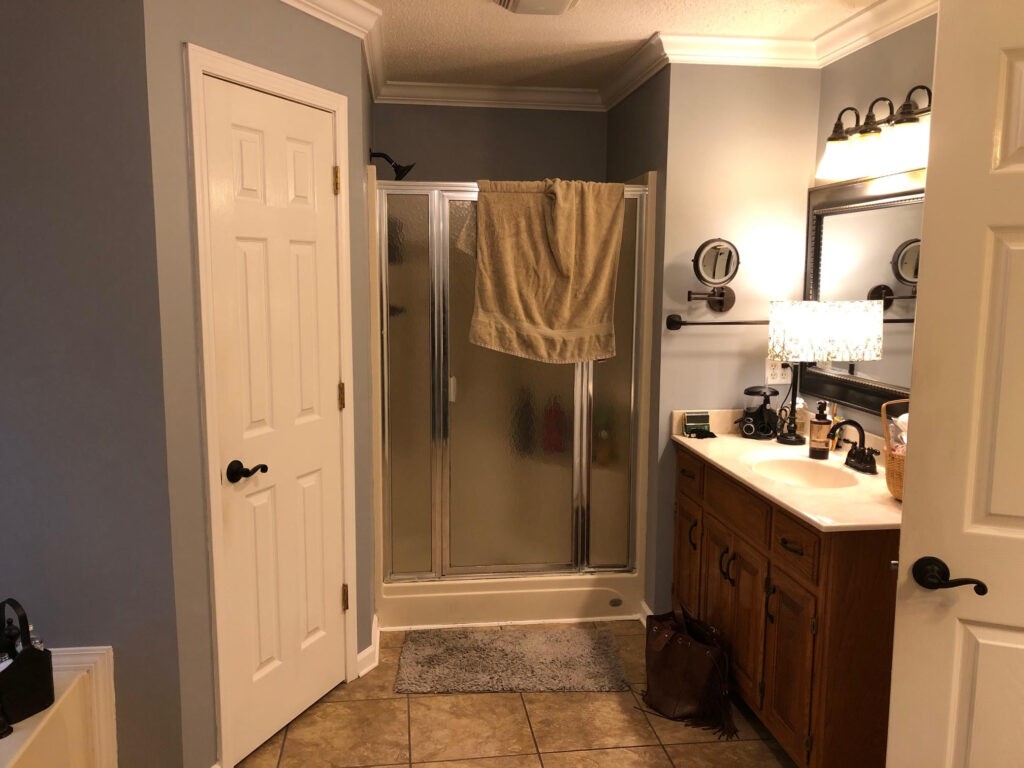
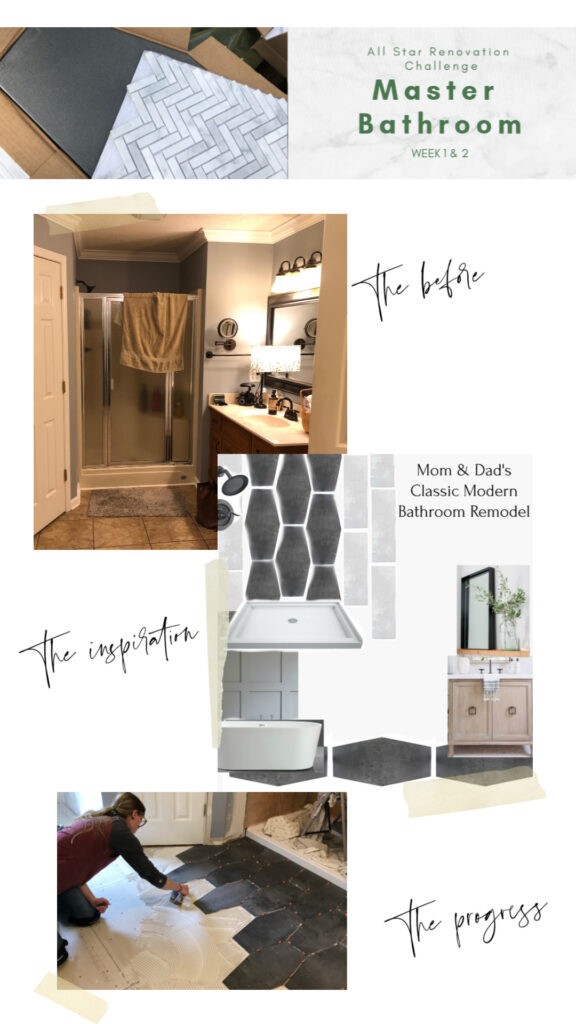
Since building our garage apartment a while back, we don’t really have anything to update in our own home. But my parents have been wanting a some updates to their master bathroom for a few months now. So I decided to start another (this isn’t my first master bathroom renovation—check out my other one here) DIY master bathroom renovation in their house. Here’s their before:
If you remember from my garage apartment build, we used our kitchen as part of the Fall 2019 renovation challenge and we actually WON! I’m still in shock about that.
This time, the winner will be picked solely on fan votes, so I’ll be asking for your help again in supporting the project and casting your votes! But…not yet. First, we have to lay out the back story here. So let’s talk about the before and how far we’ve gotten in the first two weeks–A LOT happened in that time!
.
Each week I’ll post an update and the fifth one will be the final reveal. So be sure to tune in for updates (subscribe to our newsletter at the end of this post to get updates!).
The Before:
My parents built their house almost 20 years ago (I was in 3rd grade). At the time, they didn’t want to spend a lot of money on the things they could change later—like flooring, paint, etc. So they went with basic linoleum flooring, a built in shower stall, and a built in garden tub. Standard contractor grade stuff. The entire house also had tan walls. I HATE TAN…but that’s neither here nor there.
.
Over the years, they painted (multiple times), added some crown molding, and installed some glue on vinyl floor tiles. All was fine, but ultimately, not really what they wanted.
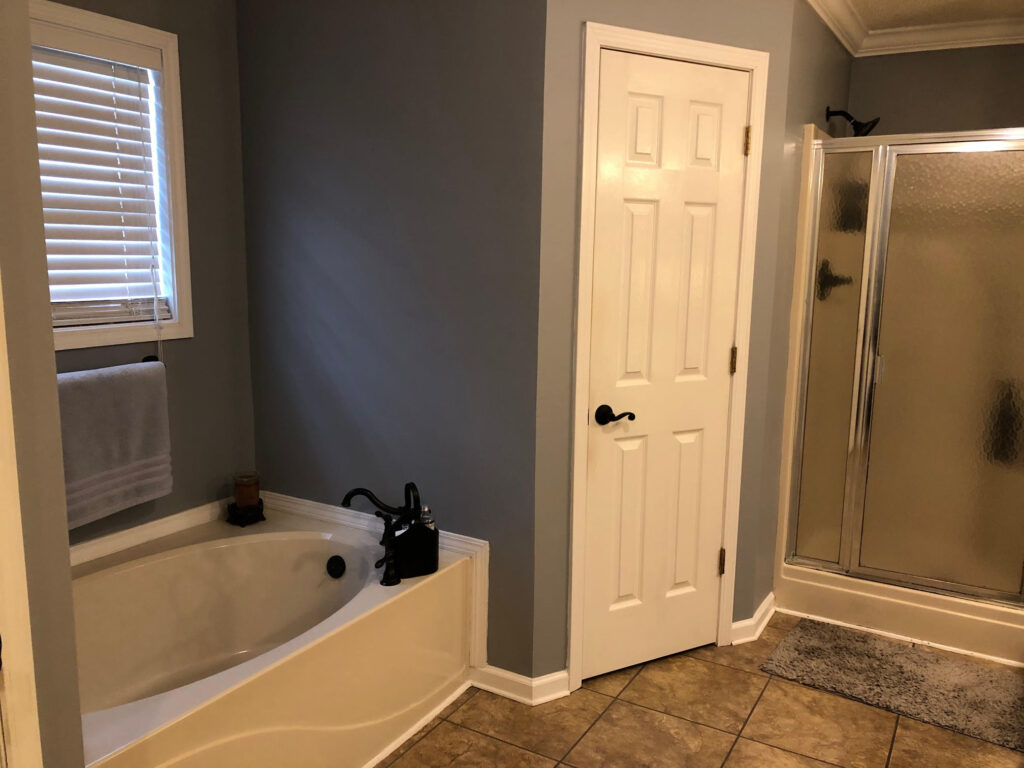
The bathroom is a good size with double closets on each side of the tub, a 3×4 shower, two single vanities, and a toilet behind a privacy wall in the back corner (which is always nice to have in the bathroom haha).
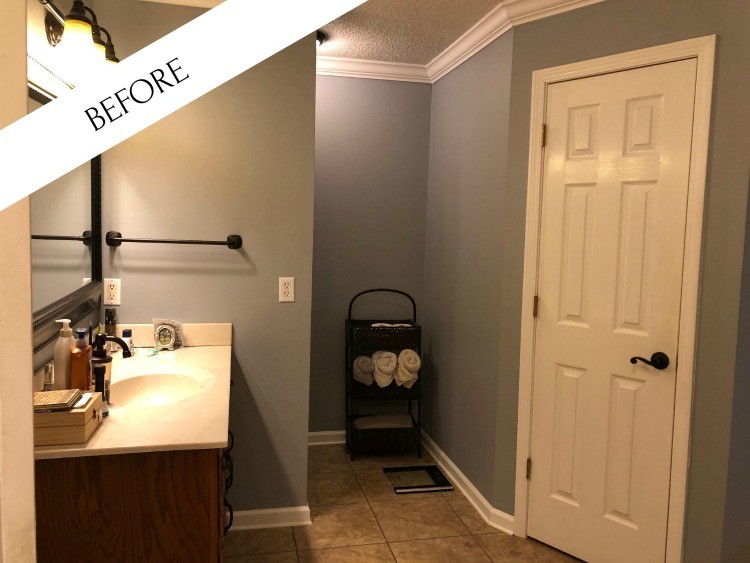
But Dad has always dreamed of a tile shower and mom is ready for an update to the overall look. So that’s where I came in.
The Master Bathroom Renovation Plan:
In a nutshell, the plan for this bathroom was to remove and replace the shower, tub, flooring, vanities, mirrors, lighting, and paint. Of course, it’s a lot easier said than done, but that’s the basics.
.
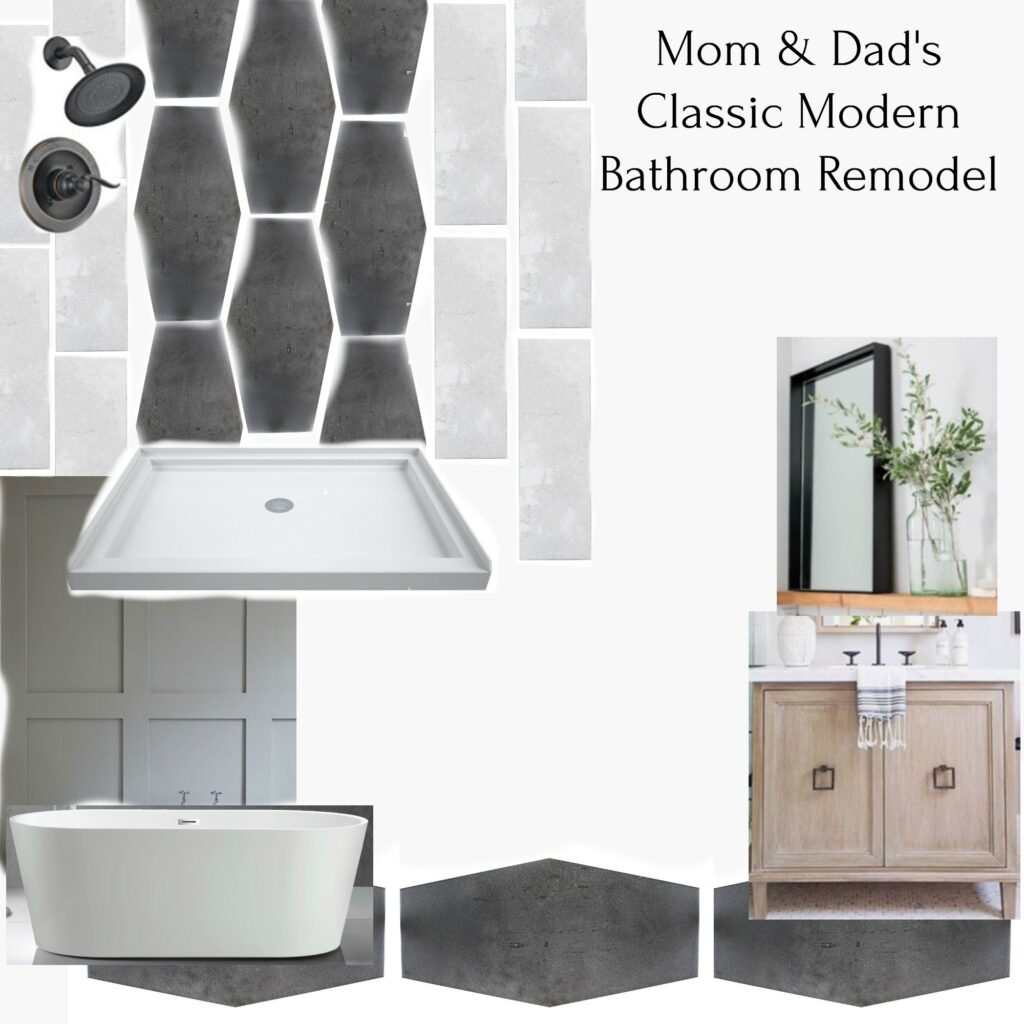
The overall design included using Jeffrey Court Castlerock Hex tile along the floor and going up the back side of the shower wall. The shower sides would be this lighter tile Jet Stream herringbone option. We are replacing the existing garden tub with a modern freestanding tub, and those old oak vanities will be replaced with the console dressers I built recently to use in here. I’m not very good at “mood boards” but here’s the gist.
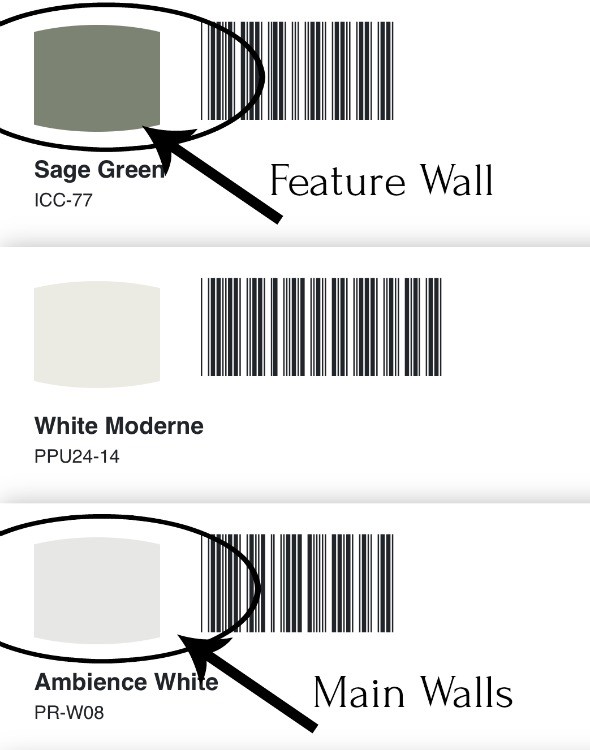
I’m also doing a feature wall behind the tub and using Behr Ambience White on the main walls and Sage Green on the feature.
So that’s the master bathroom renovation PLAN. Let’s talk about the PROGRESS 😊
The Progress:
Bathroom Renovation Week 1:
Demo:
The renovation challenge has a six week time allotment. I’m an overachiever and I was hoping to get this done in about three-four weeks so that my parents can have their master bathroom back and so that I can get my own work done at my home (someone has to pay the bills and my dog isn’t contributing much haha). So we worked quickly.
.
Demo is almost always easy…putting things back together is the hard part. So, I tore out the vanities first. I unhooked the faucet supply lines and the sink drain and removed the countertop. Then, I pulled out the cabinets.
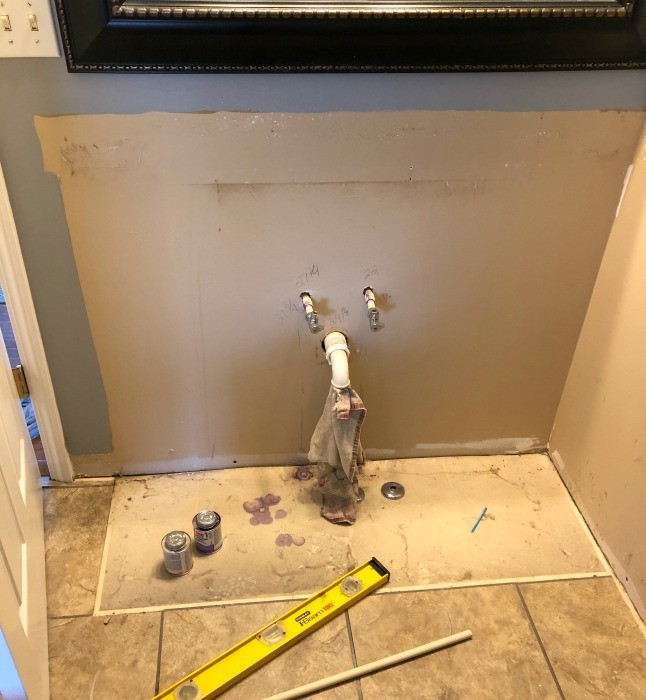
The cut off valves on the water supply lines were old and one was leaking, so I cut them off and replaced them before moving on.
.
Then, we removed the shower and the tub. Because these were installed BEFORE the drywall when the house was built, they wouldn’t fit to come out in one piece now. So we cut them in pieces using a reciprocating saw. It was a total mess. But it worked, so….
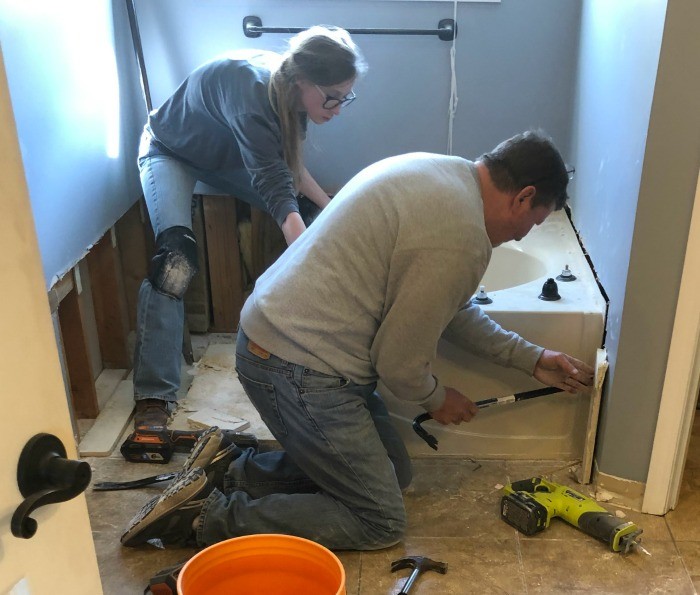
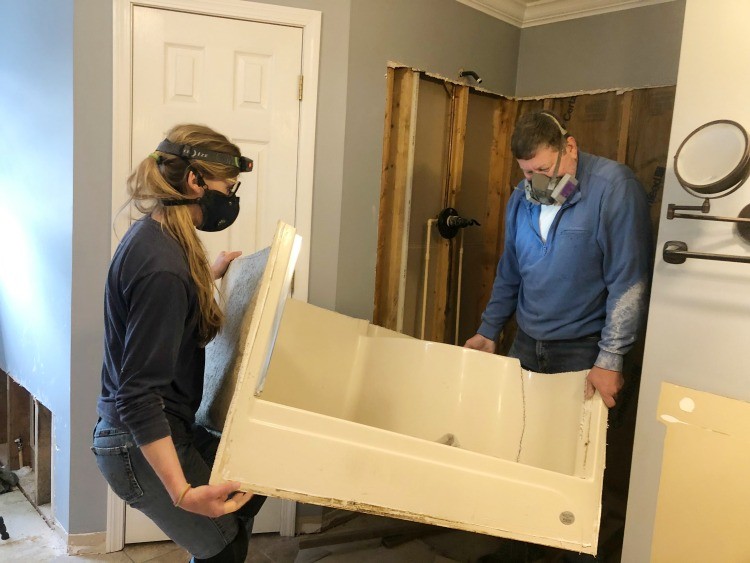
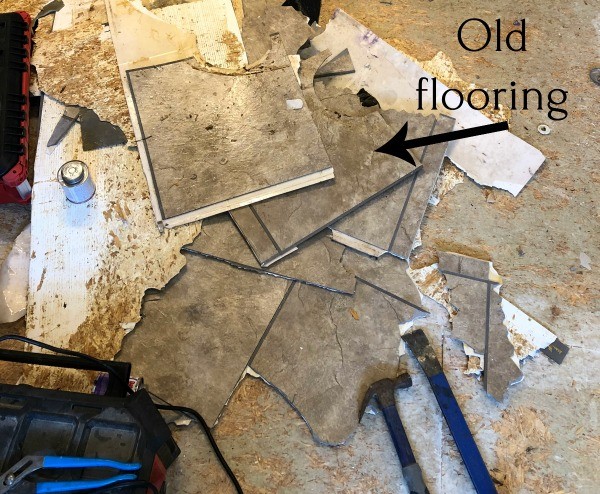
Lastly, we removed the flooring…which was a PAIN. I was planning on removing just the peel and stick vinyl and leaving the linoleum, but it all started peeling up together, so I just took it all the way down to the OSB subfloor. I used a prybar, a hammer, and a utility knife. It was slow going with a few painful blisters. But it eventually all came up.
The Shower Pan:
Once the floor, shower and tub were removed we could have a look at any damage and drain locations to see what we needed to do to prepare for the new stuff.
.
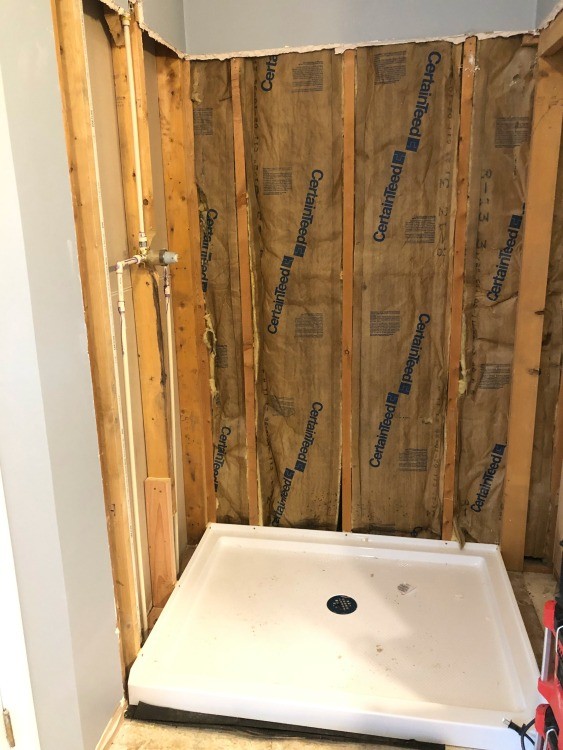
I worked on the shower first. I didn’t want to chance screwing up tiling a shower floor. So I purchased a pan for the floor and just tiled the walls for this remodel. But, in order for the pan to fit, the drain had to be moved back three inches and the supply lines needed to be run through the WALL, not the floor.
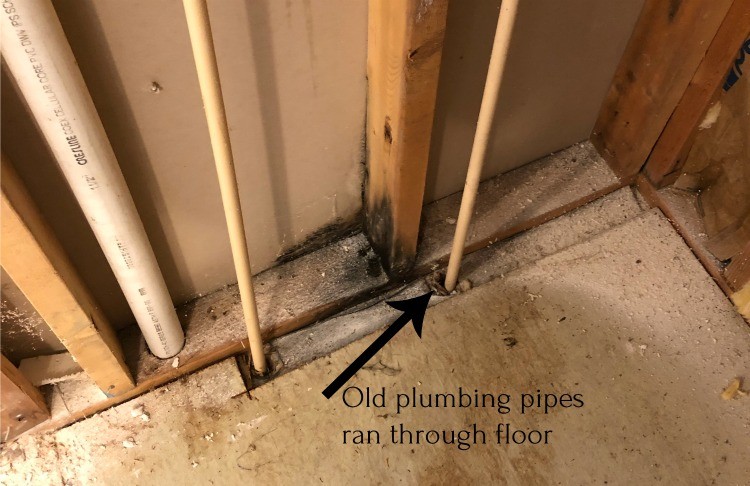
I also noticed some water damage to this section of wood under the shower valve. So I cut it out, replaced it with new framing (note: this was NOT a load bearing wall, so it wasn’t a big deal), reran the supply lines, replaced the shower valve and moved the drain.
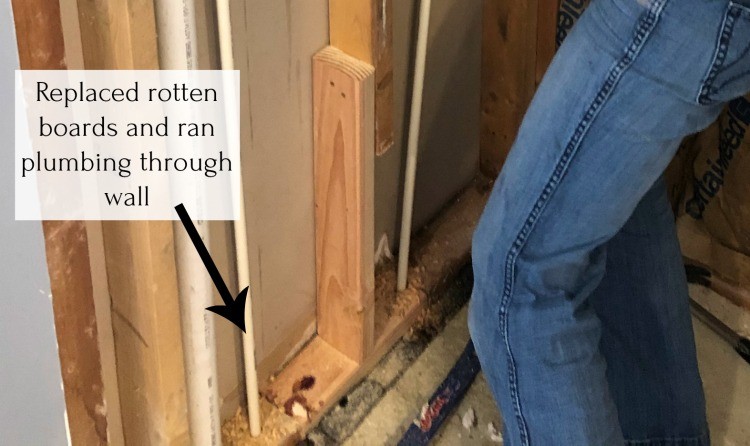
I know that sounds short and sweet, but it took an entire day and there was lots of crawling under the house to replumb things. Guess who got to do that part??
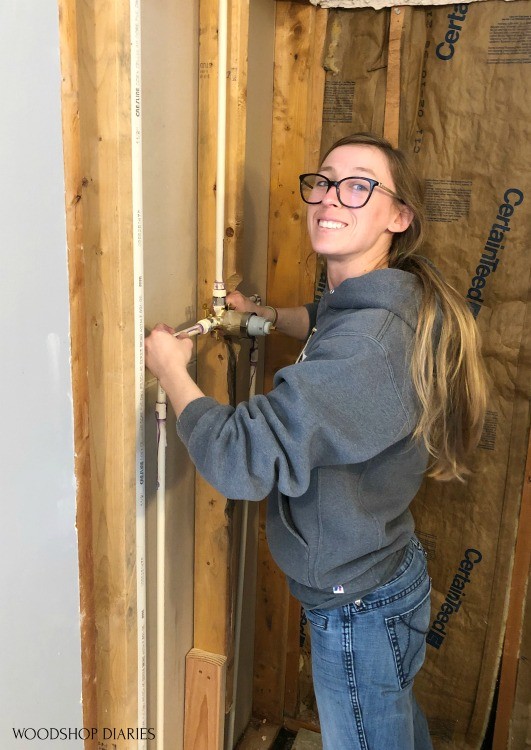
But eventually, we got the pan to fit in place and secured it to the studs.
Drywall patching:
After removing the tub, I had to patch the drywall behind it.
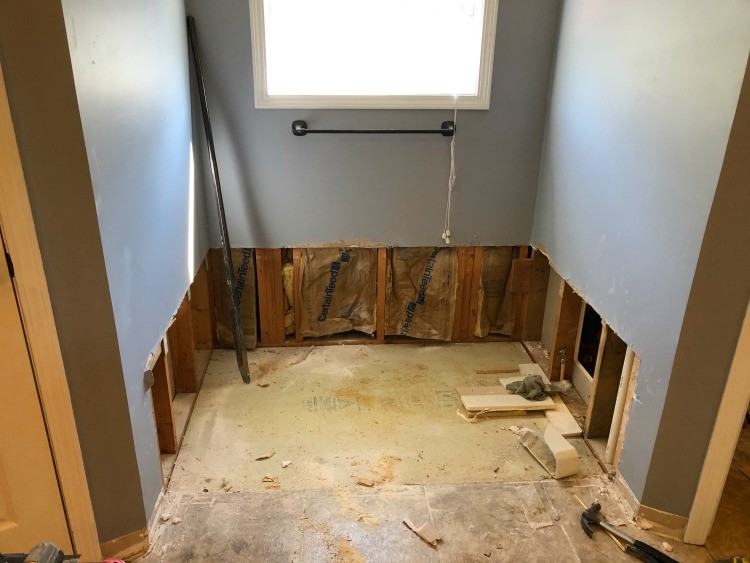
It’s not the most exciting part of the project, but is worth mentioning that there is no longer a huge hole in the wall where the tub used to be haha.
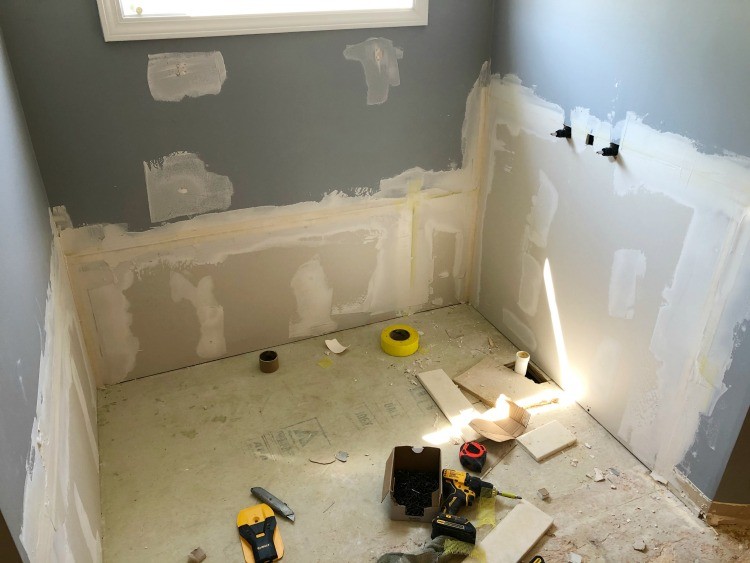
I installed a wall mounted faucet on the right side for the tub, here as well. I puttied and sanded this in between other tasks I’ve been typing about.
Shower Wall Prep:
Mom and Dad have a built in bookshelf on the other side of their right shower wall. So I guess whenever the framers built this out, they didn’t bother framing this side of the shower since the old stall didn’t require it and the bookcase hid it.
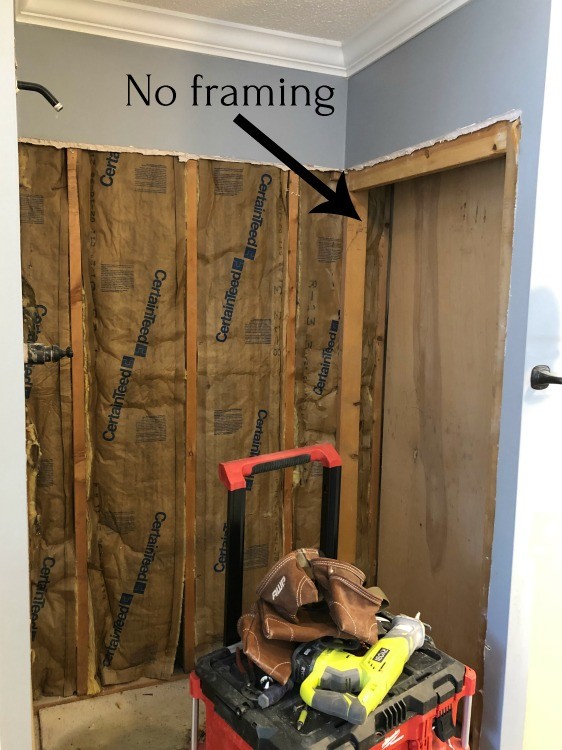
But, in order to tile this, I had to install cement board on this wall, so I needed some framing to screw into. While I was framing it out, I also decided to add a niche in this space to give them somewhere to store their shampoo and stuff in their new tiled shower.
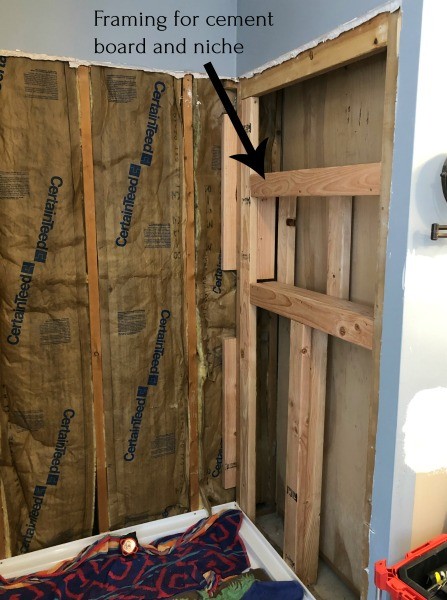
I cut and installed ½” cement board inside the shower area, and had hoped to be able to leave the existing drywall.
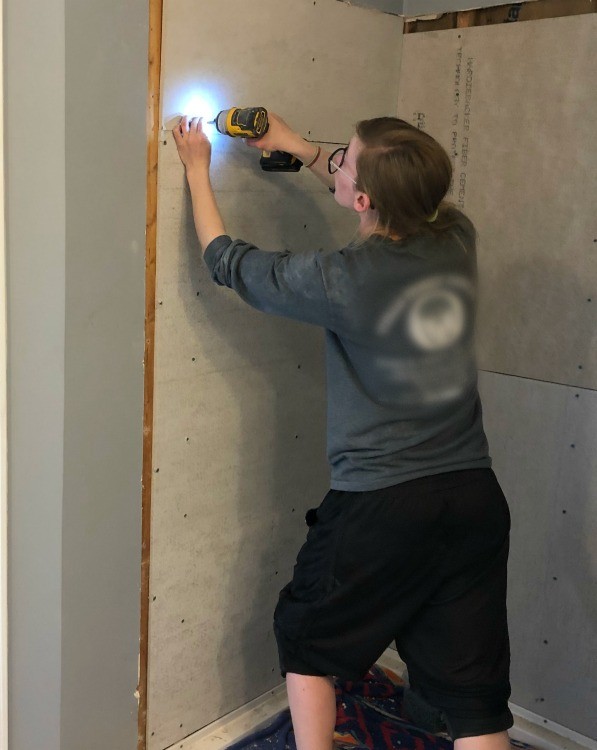
However, I was really unhappy with the unevenness of the walls once I got the cement board in place. When you install shower stalls, you shim out the drywall to fit over the lip of the stall. So when we removed the stall, the drywall was shimmed (pushed out). But the cement board I installed wasn’t. So there was a lump where the drywall met the cement board.
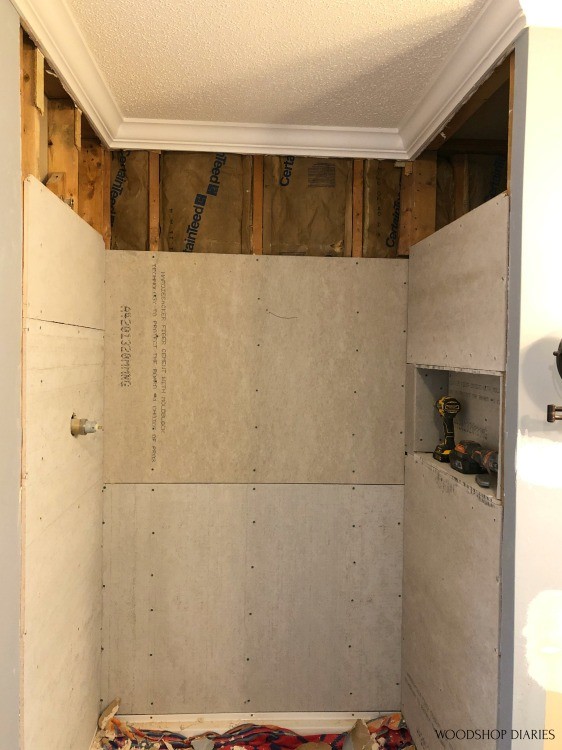
I thought long and hard about just leaving it, but decided to do the right thing and ended up cutting out the drywall around the shower (see above), removing the shims, and installing new drywall.
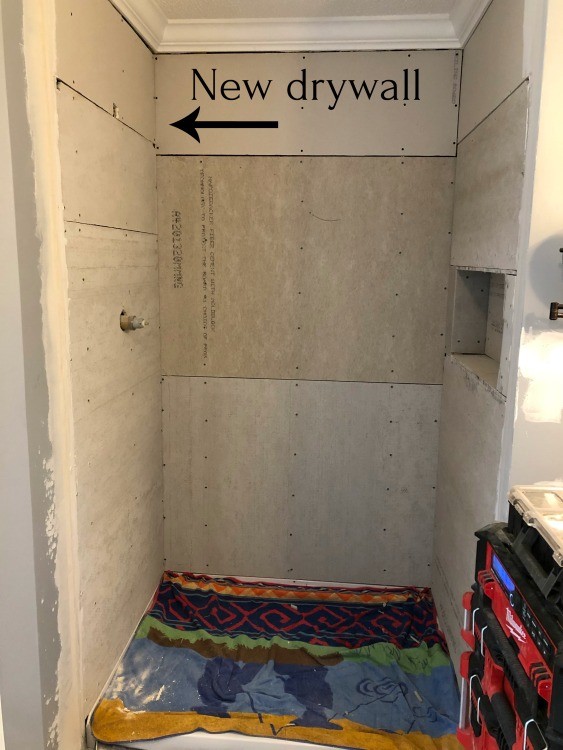
It was a time suck, but I feel better knowing I did it the right way. Kind of haha.
Waterproofing the Shower:
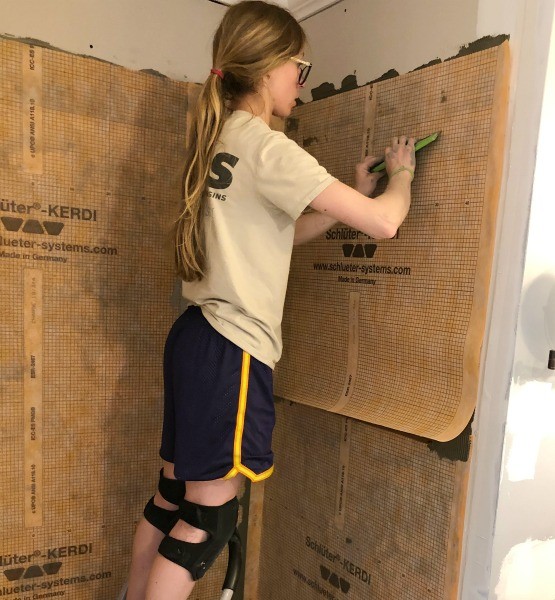
Once that ordeal was finished, it was time to waterproof the shower so I could get ready to tile. In our last bathroom remodel, we used Schluter Kerdi to line the shower walls as a waterproofing barrier. As far as we could tell, it worked well. So I did it again here. You can read all about this stuff on their website, but in a nut shell, I applied mortar to the walls, and smoothed this waterproof membrane over it overlapping the joints.
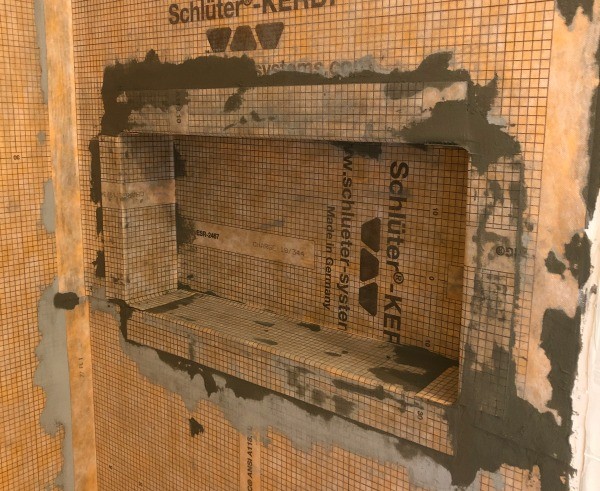
They make premade niche inserts which probably would have been better to use here, but I wanted to be difficult and I just lined it with this stuff. It seemed to work okay, but was quite a bit of work to get the corners nice and tight. Live and learn.
Floor Prep:
I let the Kerdi cure on the walls for a few days while I moved on to working on the floor. The floor was two layers of ¾” OSB, so I was able to lay ¼” cement board directly on top of it to prepare it for the tiles.
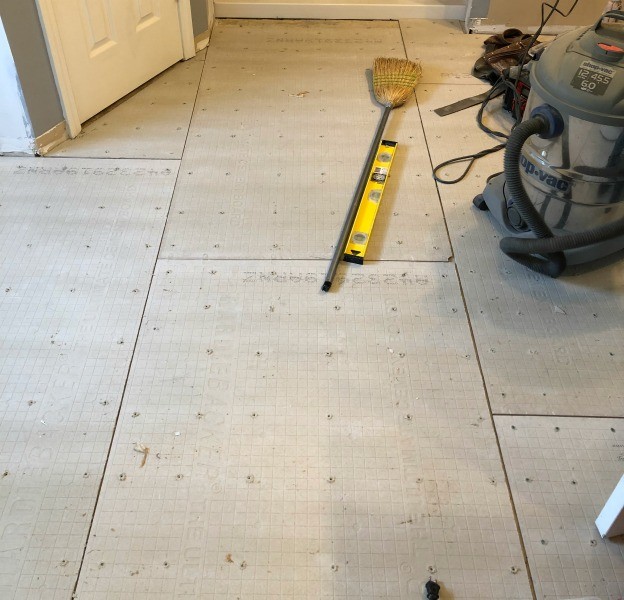
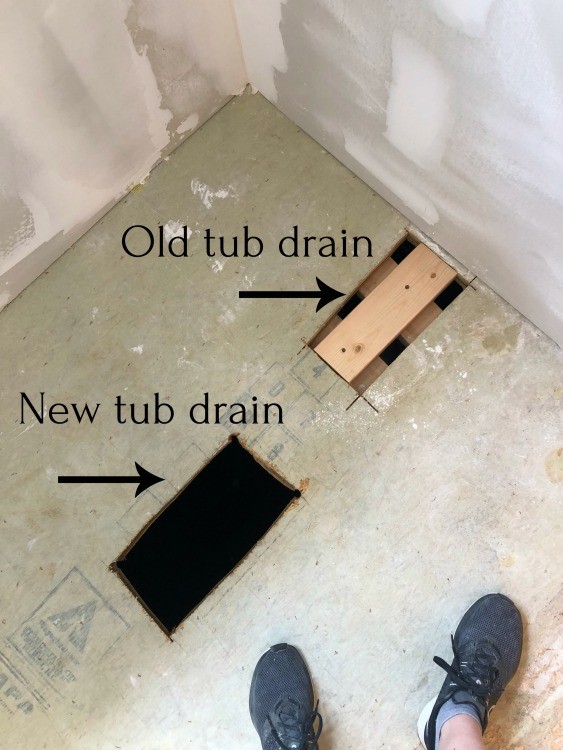
This, again, was a tedious job, but not too difficult. Once I got over by the tub, I had to determine where the new tub drain would be. We unpacked the freestanding tub we bought for this space and saw that the drain was in the center, not on the right like the existing tub. So I cut a new hole for the drain, and blocked up the old one to lay flooring over.
Bathroom Renovation Week 2:
Floor Tile:
Once all the cement board was in place, I taped the seams with mesh tape and mixed up the mortar. It was go time (I was a little nervous haha).
.
My design idea was to run the floor tiles long ways down the floor, then straight up the back wall of the shower. So I centered the tiles on the shower pan, so that when they go up the wall, the sides are equal and it doesn’t look offset. So that’s where I started the floor tiles and worked my way out from there.
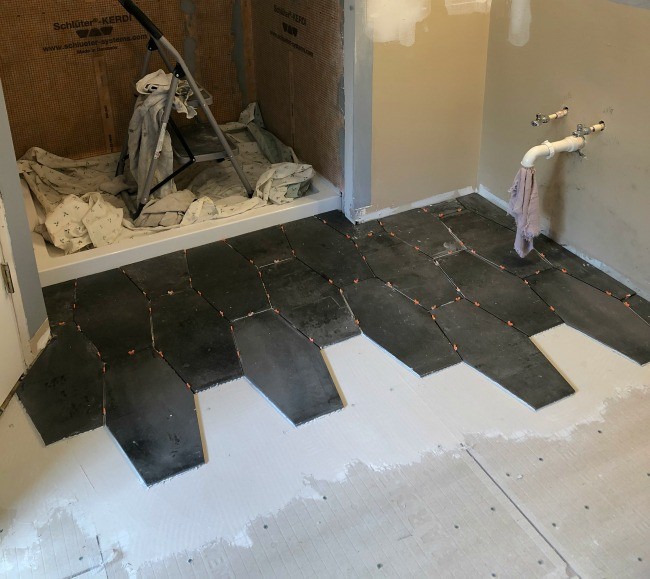
We decided not to take the tile into the closets during this project for various reasons. If we had unlimited money and time, we would have gone into the closets, but for now, it’s just a closet, so we will add floor transitions here later.
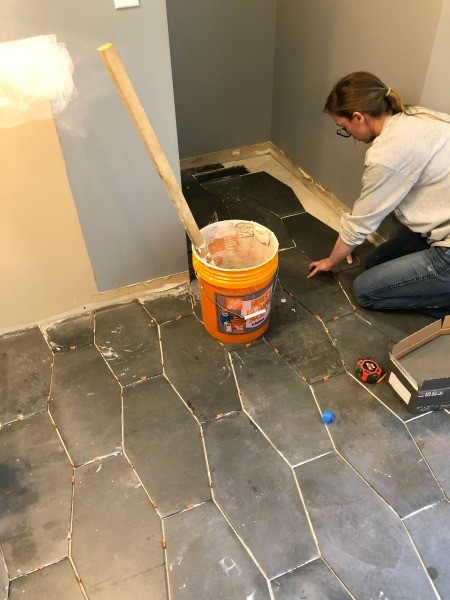
I tiled the majority of the floor in one day. I kind of tiled myself into a corner and decided to quit for the day because the tiles needed to set up before I could walk across them back and forth to cut them as needed. I returned the next day and finished up the remaining floor and the area around the toilet.
Shower Wall Tiling:
Once all the flooring tile was laid, I worked on the back shower wall. It went pretty smooth with these large tiles. I followed the same flooring pattern up the back wall only.
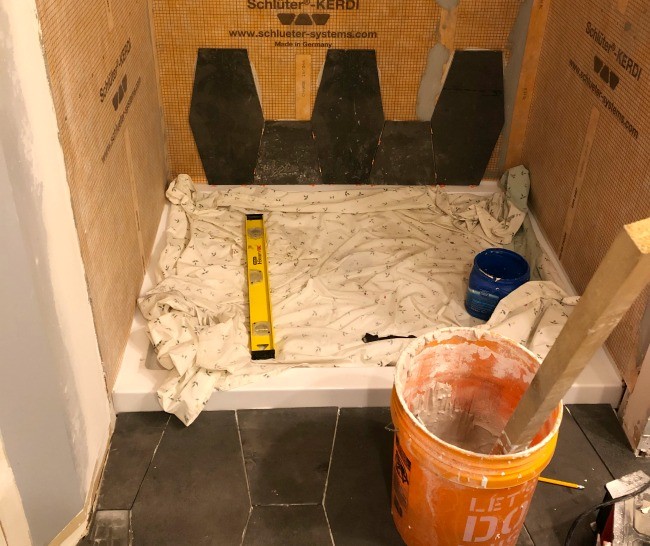
I used a tile saw to trim pieces as needed for both the floor and the back shower wall. This tile was really easy to install and cut and I love dark grey color. I finished up the entire back shower wall and called it a week. (Actually a SECOND week haha)
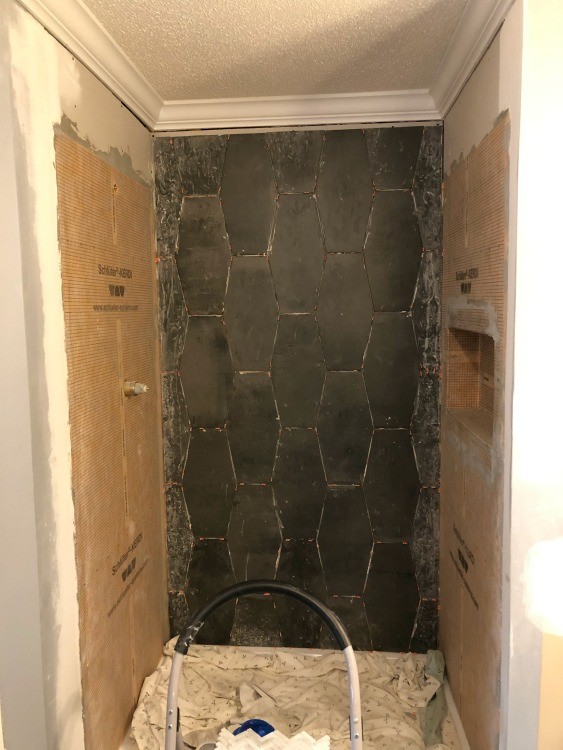
And that wrapped up master bathroom renovation week two. I’m still hopeful we can get this knocked out well before the six weeks is up! I can’t believe how much I got done in just two weeks so far. Crossing my fingers things keep going smoothly!
.
Next up on the to do list is tile the remainder of the shower, grout, install the feature wall, trim, paint, and install the tub, vanities and toilet. I THINK things should go smoothly for the rest of the renovation. I THINK haha.
.
Stay tuned for another master bathroom renovation update next week!
Until next time, happy renovating! 😊


It’s looking fabulous like all your projects Shara! I think you got an amazing amount of work done since starting!! Keep going, be safe, have fun. By the way, you are a wonderful daughter and your folks are blessed to have you girl!
Thanks so much!!! We’ve been working really hard…both so they can have their bathroom back and so I can get out of their house again haha. I’m excited to share the updates as we go!
Can’t wait to see the end results! You are amazing to tackle such big jobs. Love the modern bathroom tiles
Thanks so much!! I’m so excited to share the design as it takes shape. I think the shower tiles are really going to look good together!
Wonderful!
Thank you so much!