In this post, I’m sharing all the details on my DIY hallway makeover project!
Our home has this hallway that’s like an “off shoot” from the main hallway with all the bedrooms.
.
This hallway seems kind of random, but it’s the only way to have an access door to the side of the wrap around porch, so I guess that’s why they added it.
.
The storage closets here are nice to have, but the little nook between them wasn’t being used to it’s full potential. The gray and white felt kind of boring. And there was so much blank wall space, it was just kind of…blah.
.
All in all, I thought this hallway could use an update, so I’m sharing how I gave it a modern makeover with you here!
.
I’m detailing the entire before and after here in this video, and sharing the before and after photos below!
*This post contains affiliate links. See website policies.
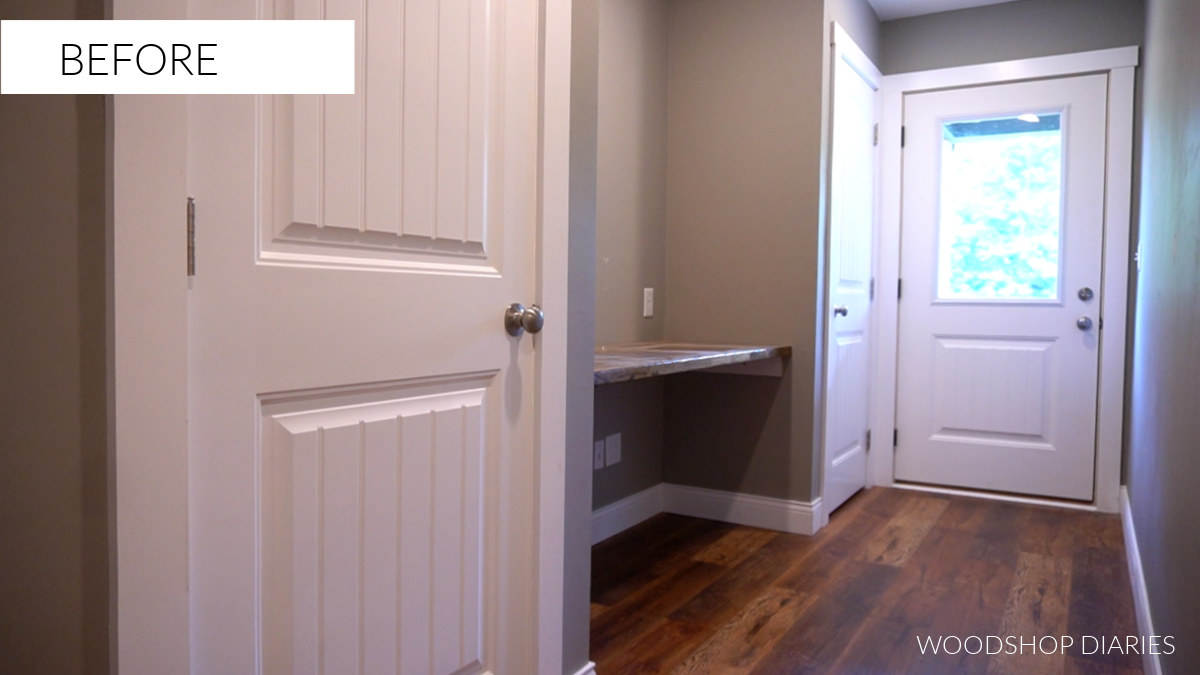
The Hallway Before:
This hallway in our home had a few things going on—It had two small closets and an exterior door that goes out to the porch.
.
I’m not usually too fond of closets and doors, (remember how I transformed this closet into open shelves??) but I kind of wanted to keep these particular closets.
.
It’s where I keep my vacuum, files, and a bunch of my crafting and sewing supplies—which are nice to be able to hide behind a door haha.
However, I did want to dress them up and give them a little more visual interest.
.
The previous homeowners had set this nook between the closets up as a desk area with just a desk top, but we didn’t use it, so it felt like a waste of space. So I also wanted to rework it into something a bit more functional for us.
The DIY Hallway Makeover Plan:
Paint:
One of the biggest changes I wanted to make here was painting it a bright white. A fresh coat of white paint would definitely brighten things up and allow the natural light from the exterior door to reflect more.
.
To give the space some contrast, I also wanted to paint the doors a rich black color. Black doors with white walls is my favorite combination!
Trim:
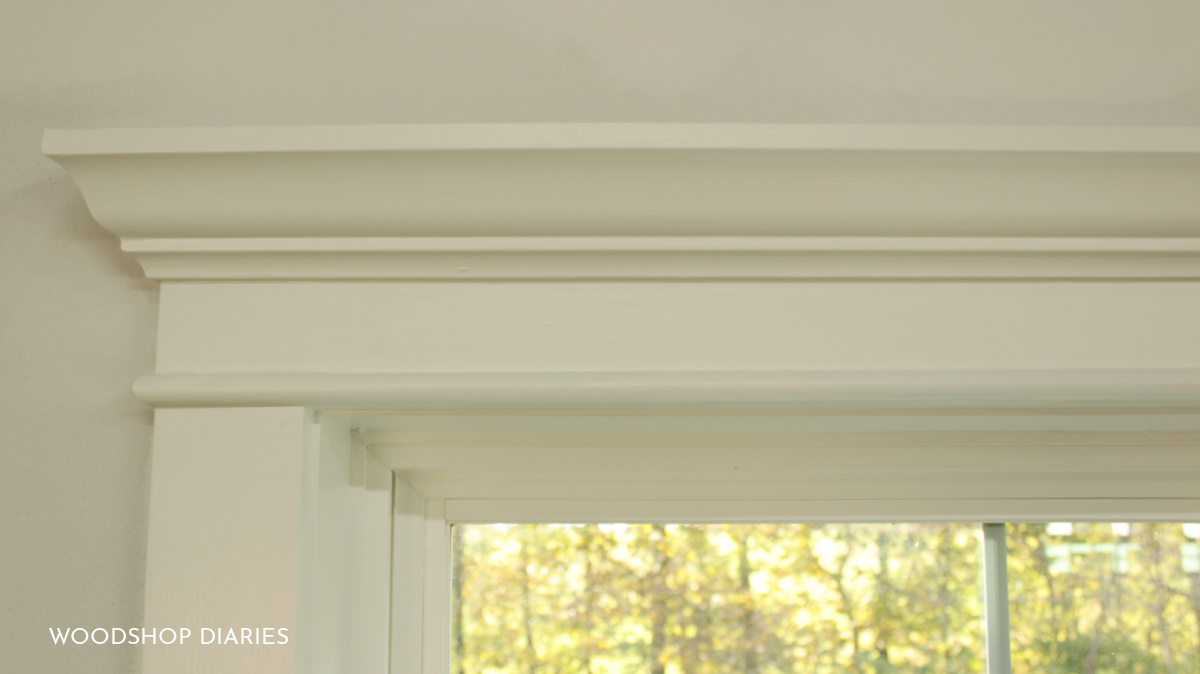
In addition to paint, I planned to remove and redo the existing door trim with a more “custom” version of trim that I like to use when I trim out my doors and windows.
You can check out my step by step guide for trimming windows and doors here.
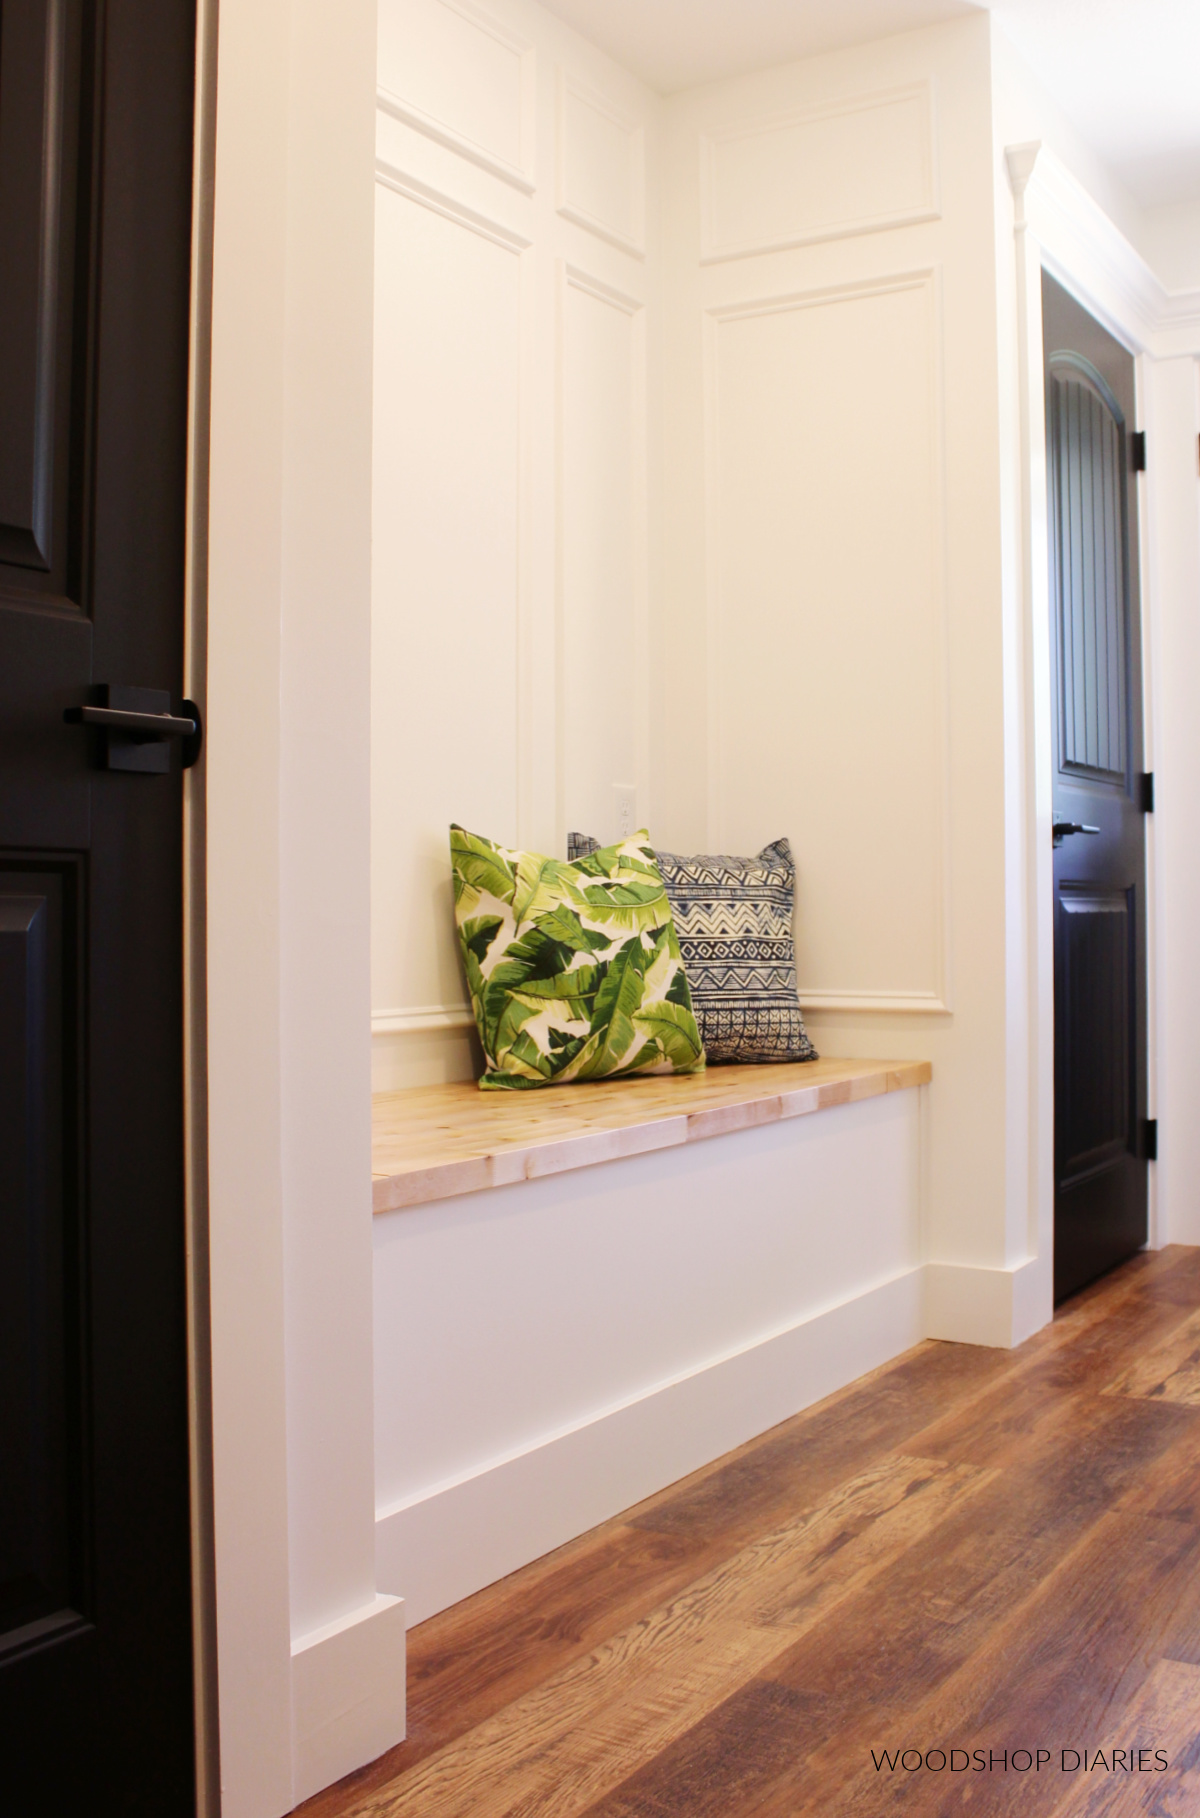
Bench/Storage:
And since we didn’t use the nook space as a desk, I thought it would be a more practical idea to make this a storage bench. We may not actually use the bench seat very often, but a little extra storage is always nice to have 🙂
Accent Wall(s):
The nook space seemed like the perfect place to create an accent wall that adds a little “custom character” without being too much.
.
So after the bench was in, I wanted to create a picture frame molding accent on these three walls to give it a high end look without being too busy.
DIY Hallway Makeover Process:
Demo:
First thing was first, I began removing everything from the space. The desk top was one of those prefab hardwood butcher blocks, so while the color was a little too dark for me, I saved it to sand it down and use it for the bench top later.
.
I removed all the baseboards and door trim and salvaged some of the door trim pieces to use later. But they definitely needed some sanding first.
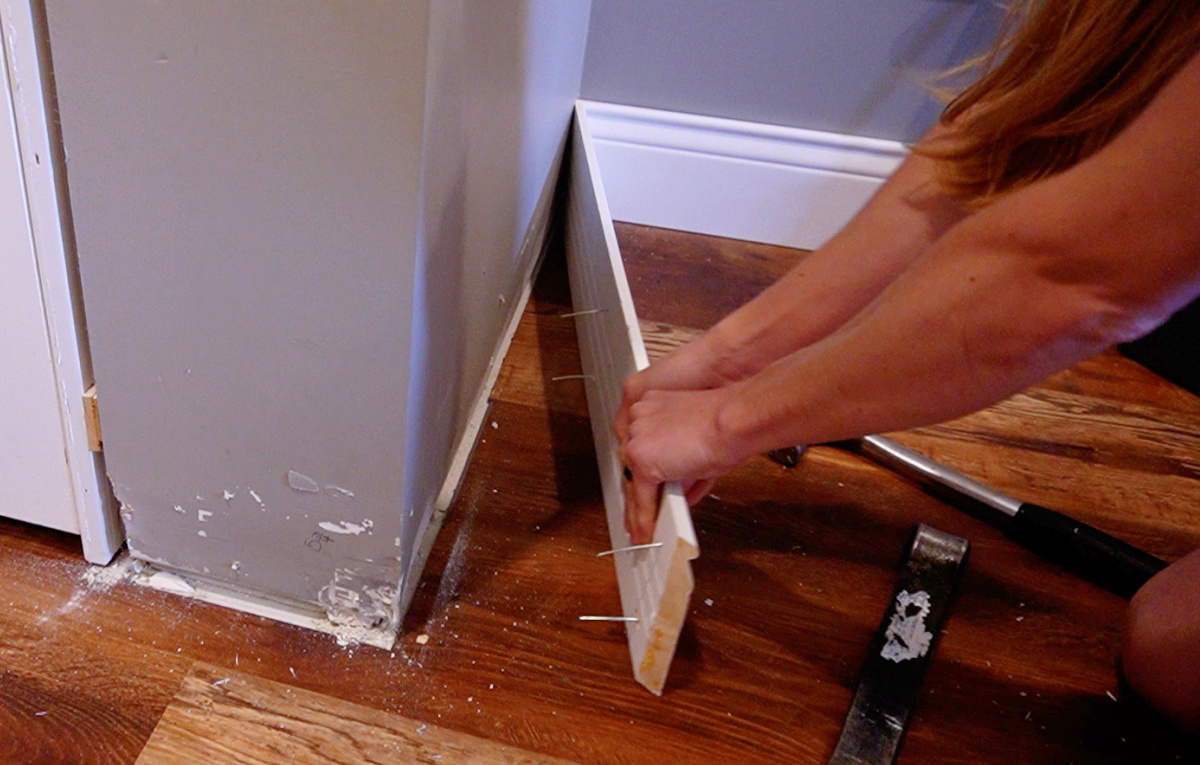
And then, I patched several holes and uneven spots in the drywall to get it ready for paint.
Trim and Paint:
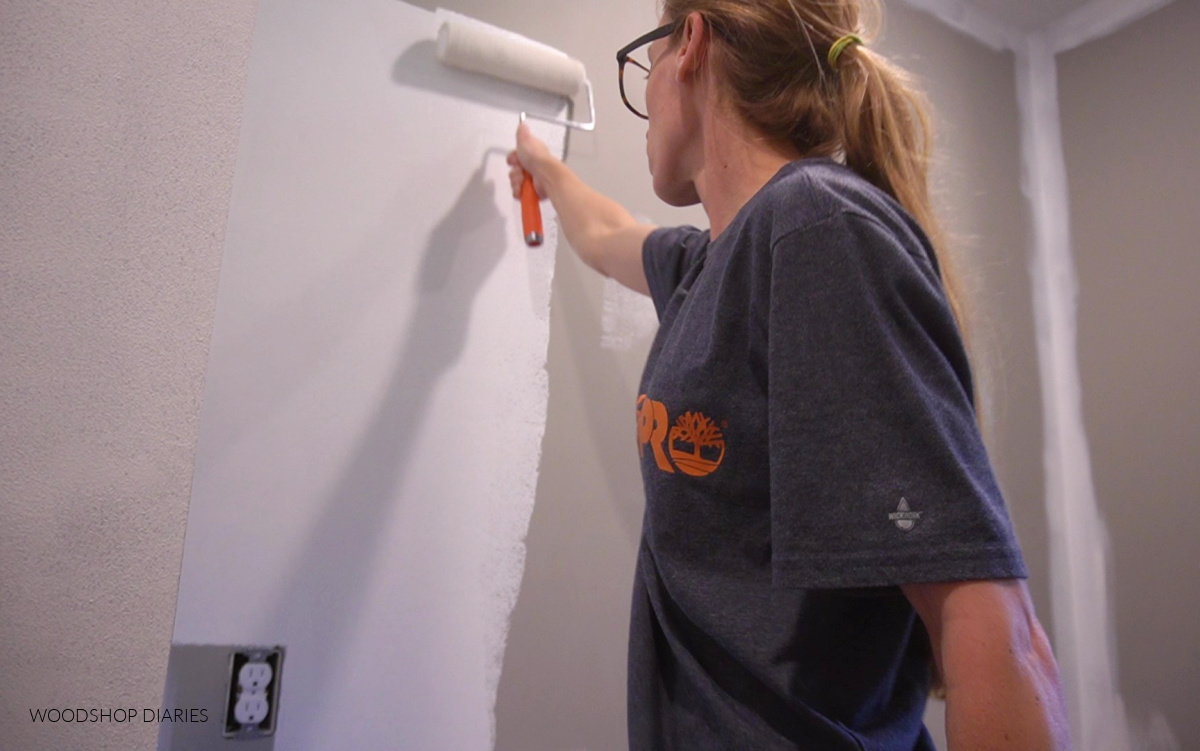
With everything out of the way and the walls sanded nice and smooth, I painted the walls a bright white (color: SW Pure White). I also removed the doors and primed and painted them PPG Onyx Black.
Between coats of door paint (because waiting for coats to dry between priming and painting both sides took a while!), I moved on to replacing the trim on the doors.
.
I’ve covered in detail how to trim out windows and doors in this post, so I won’t go into detail here, but I basically used 1x4s for the sides and top, then added some crown molding around the tops and some half round to cover the seams where the sides meet the top.
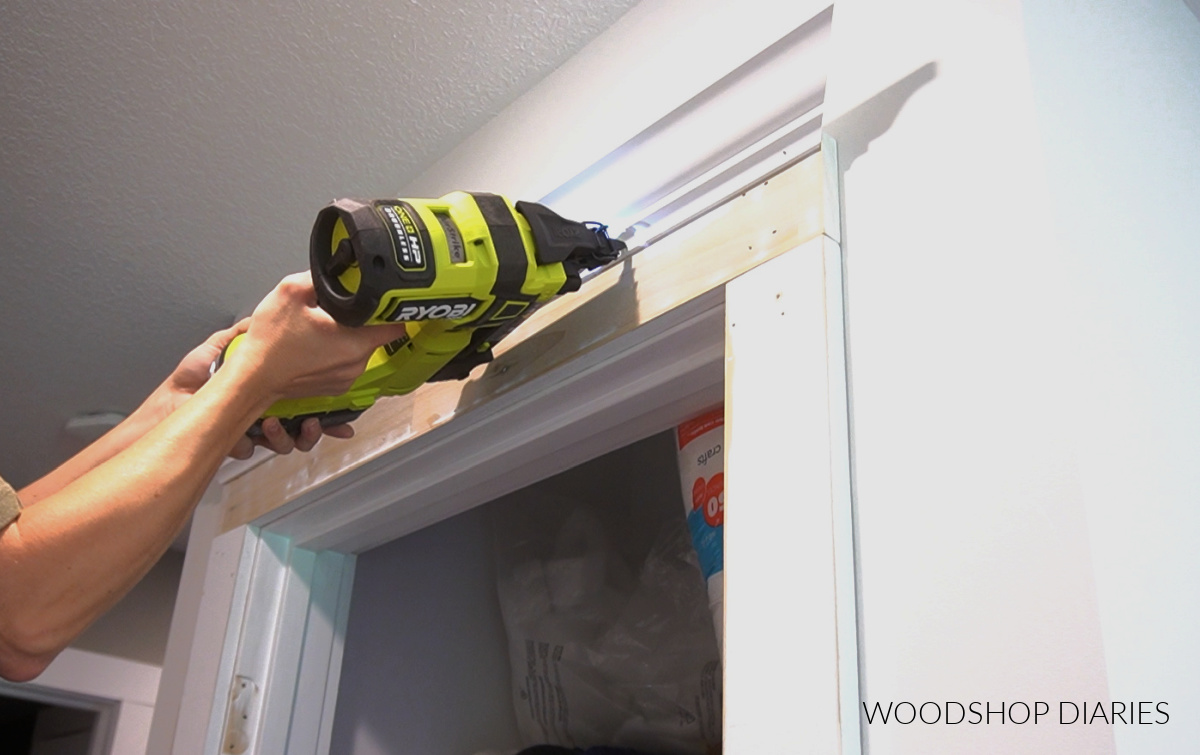
I LOVE how classy and high end this trim style looks and it’s really an easy way to customize your home by updating the trim.
.
After the bench was installed, I also went around and added simple 1×6 boards for the baseboard and painted all the trim the same color as the walls–SW Pure White–except I painted the trim semi gloss and the walls satin.
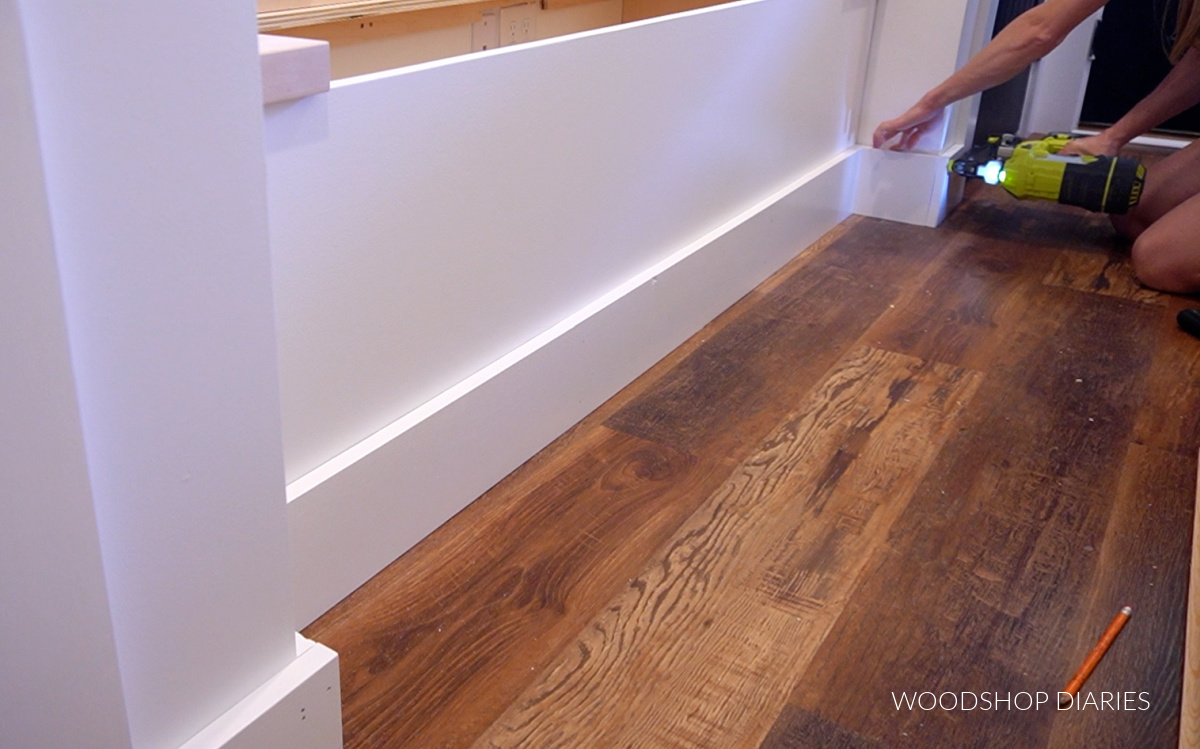
I love using 1x6s for baseboards–it’s inexpensive, but they’re clean lined and thick so they look really nice and fit any style.
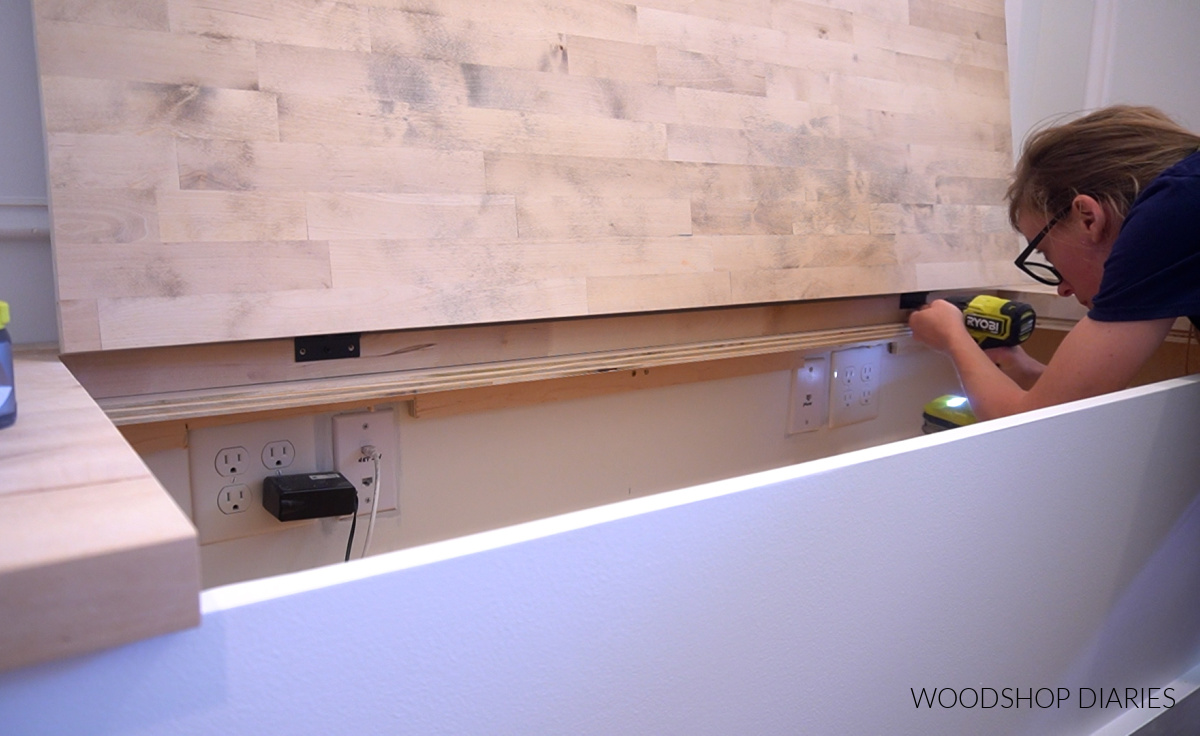
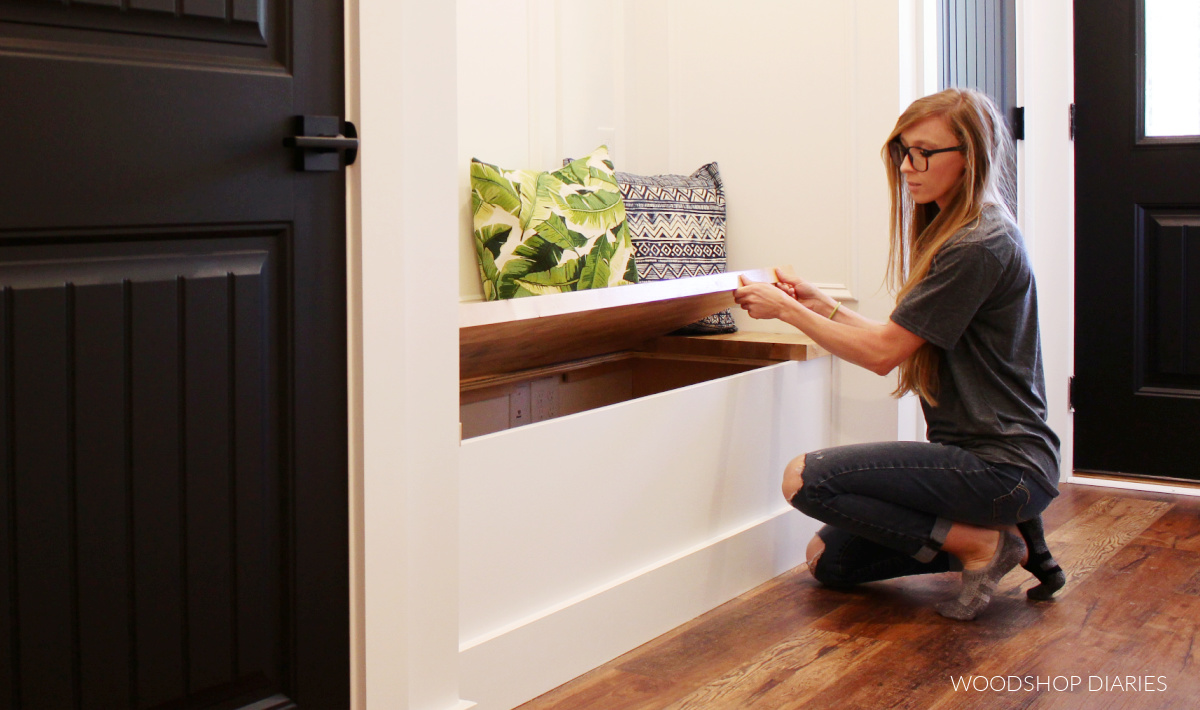
Built In Storage Bench:
I’ve detailed the storage bench plans and how to modify them for your own space in this post here.
.
However, basically, I was able to reuse the desk top that was here previously, sand it down, and set it on top of a large plywood box that I built to fit into this nook.
I made this a flip top style bench so I can flip it open and store things (mostly fabric, batting, and bulky stuffing I use in my sewing projects haha) inside easily to put this space to some kind of good use.
.
I painted it white to blend into the walls but left the seat top a natural color. I love the warmth and contrast that gives without being too dark.
You’ll notice, I wrapped the baseboards around this box to make it look all built in and seamless.
.
Once that was in place, I added the final touch above it–the accent wall trim!
Picture Frame Molding Accent Wall:
I’ve been wanting to try picture frame molding on my walls for a while, but wanted to start small because I’m really indecisive and wanted to make sure I loved it before doing a large wall or a whole room.
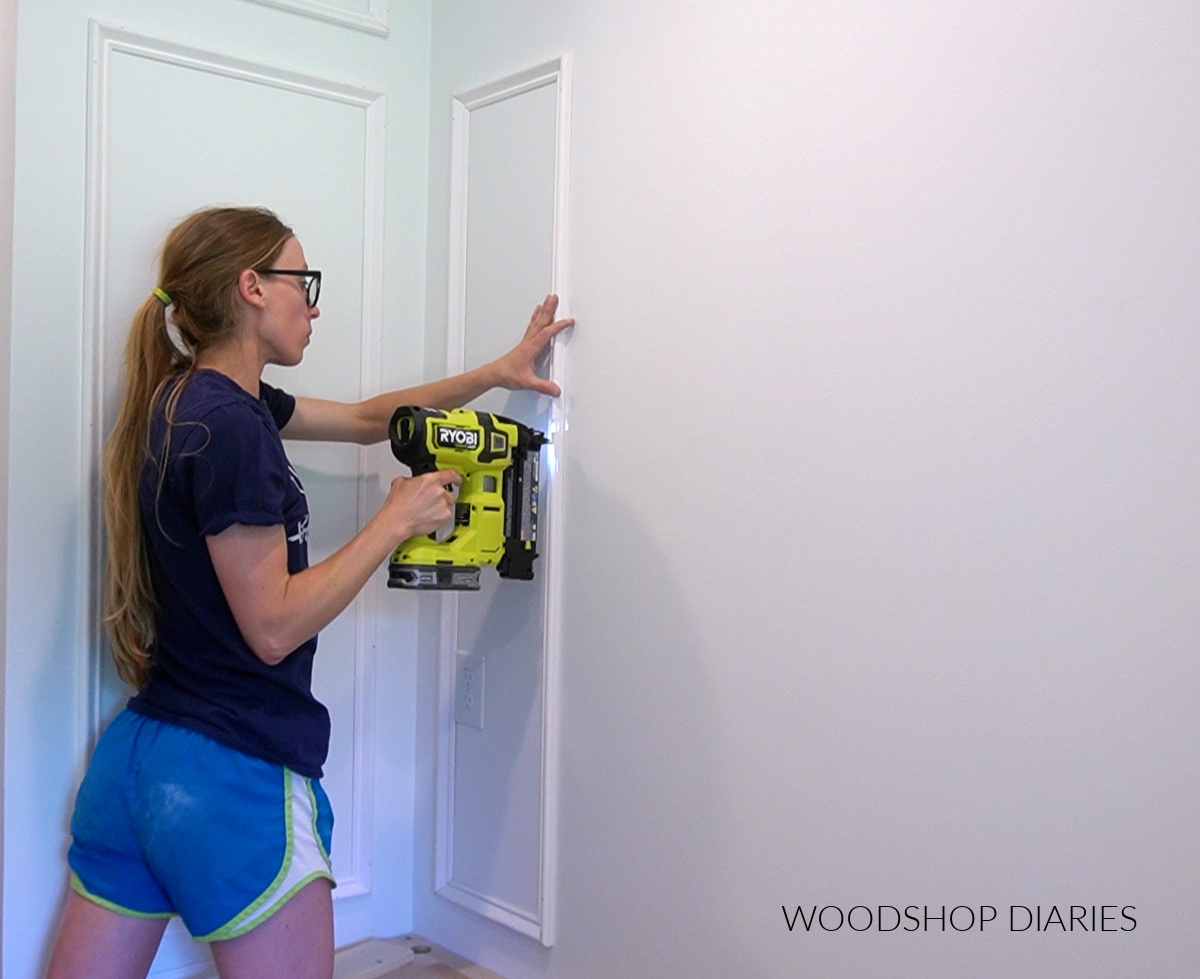
This little bench nook seemed like the perfect spot to try this out!
.
I used base cap molding for this and laid out my pattern with shorter boxes on top and taller boxes on bottom.
.
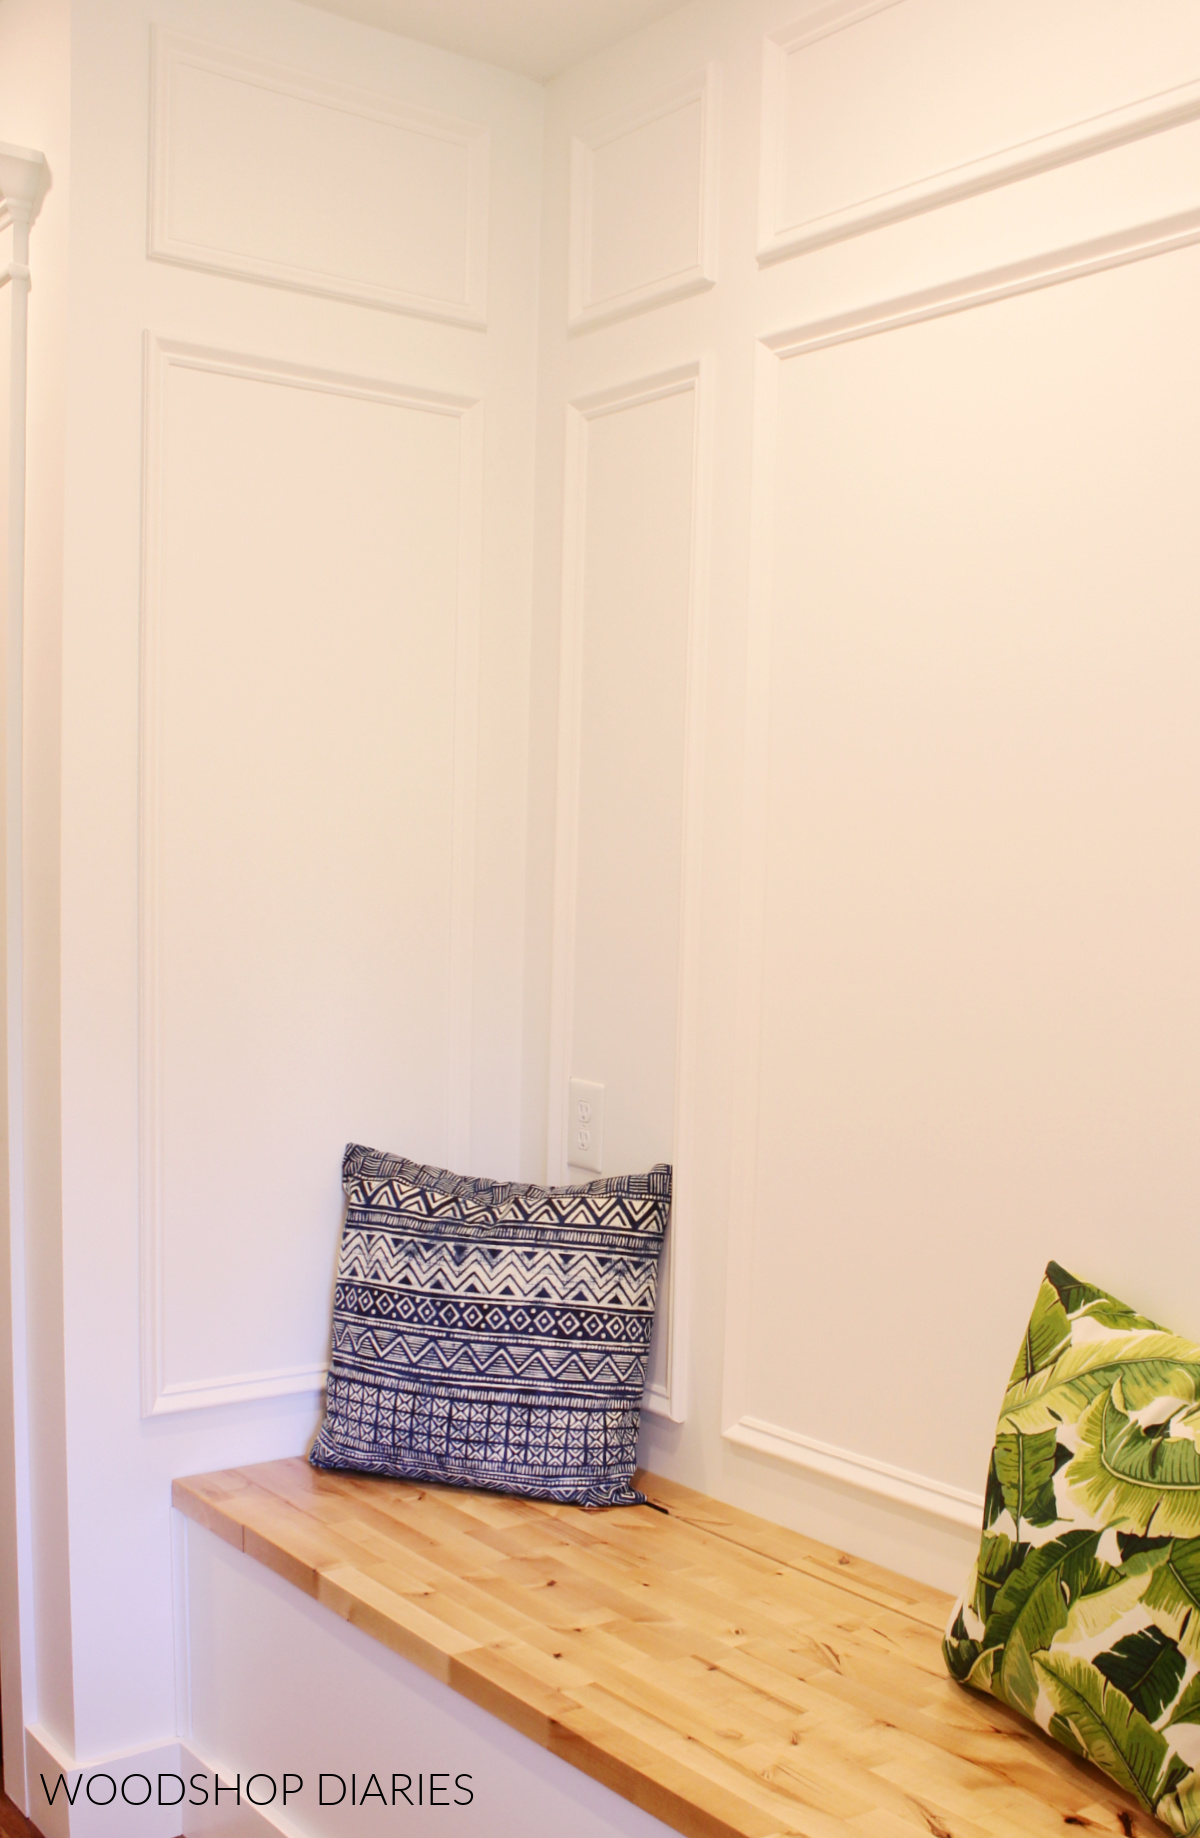
It really added a subtle, but beautiful addition to an otherwise plain wall and I can’t wait to hang some plants or artwork in here–after I finally decide what I want haha.
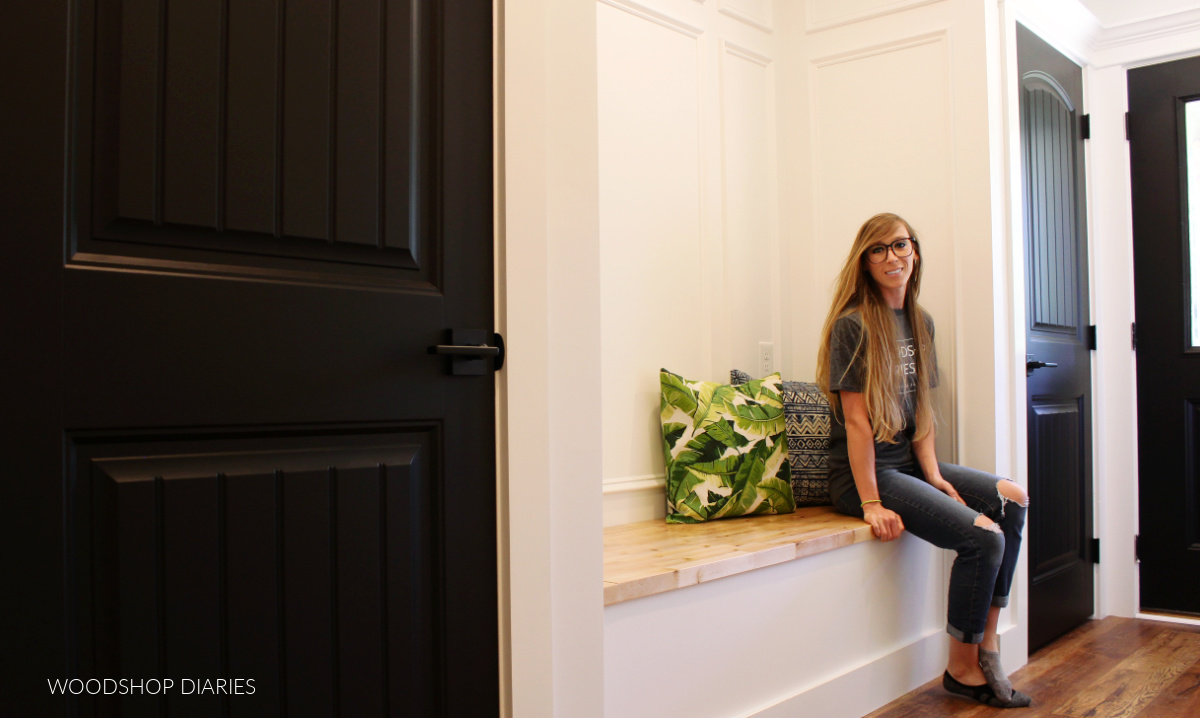
Hallway Makeover Final Reveal:
And now this bright, modern, and functional hallway looks like a completely different space!

I LOVE walking by here now and noticing the little details and seeing the bright reflection of the sunlight from the door off the white walls.
.
This bench is a great place to hide away some of my bulky crafting supplies and will also make a great place to sit down and take off or put on shoes as we head out this door OR just to sit down and read a book in the afternoon sunshine.
Products & Paint Colors Used in DIY Hallway Makeover:
Paint Colors:
- Doors: PPG Onyx Black in Satin
- Walls & Wall Trim: SW Pure White in Satin
- Baseboards and Door Trim: SW Pure White in Semi Gloss
Products:
For a list of supplies to build bench seat, see DIY built in bench seat post here. For a list of supplies to install wall trim, see DIY picture frame molding accent wall tutorial here.
.
I hope you enjoyed this transformation and if you’d like to keep up with the latest projects and plans, be sure to subscribe to the newsletter below to stay up to date!
If you want to save this project for later, be sure to pin it or save it to your favorite social channel!

Until next time, friends, happy building!