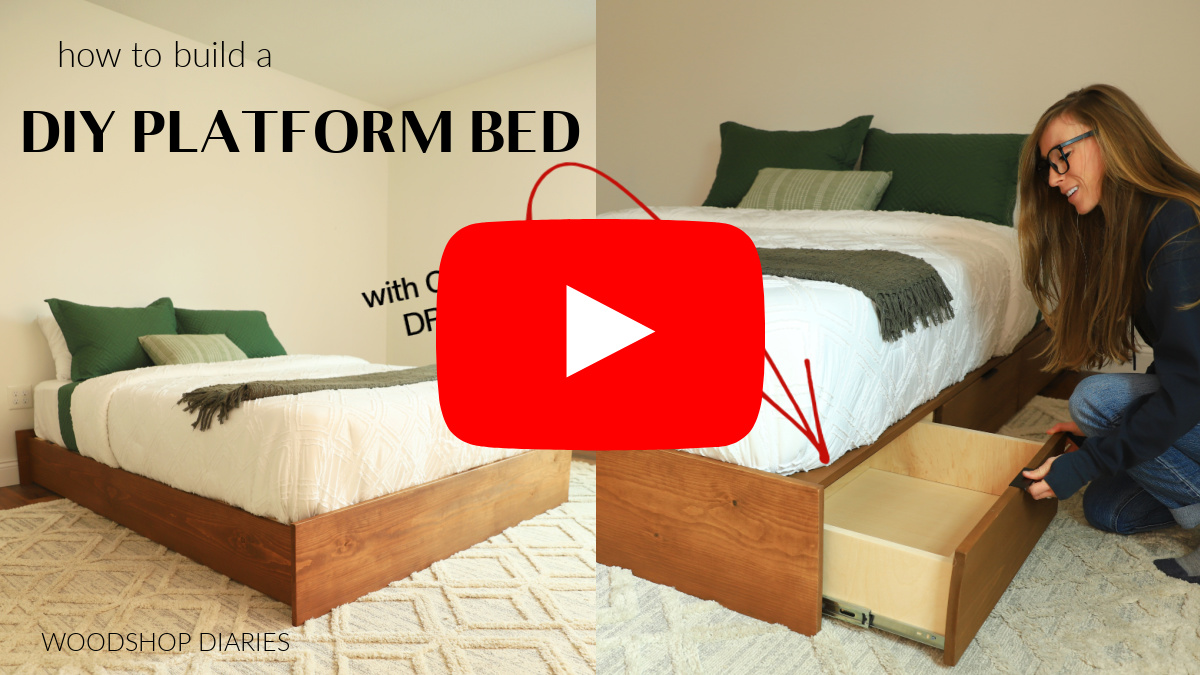
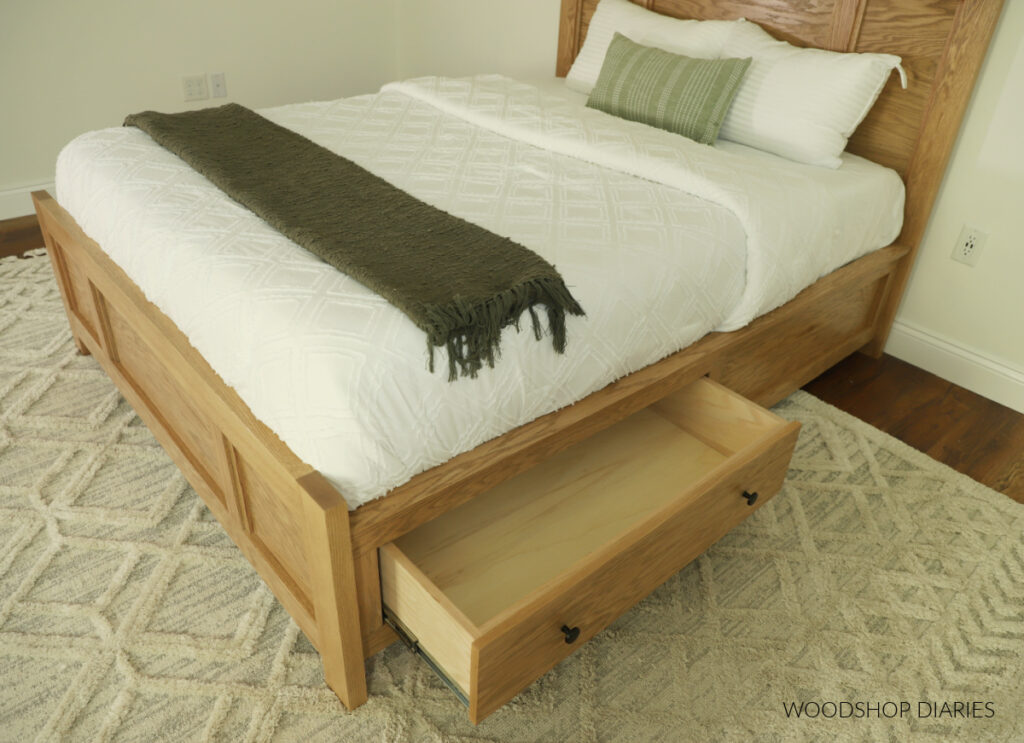
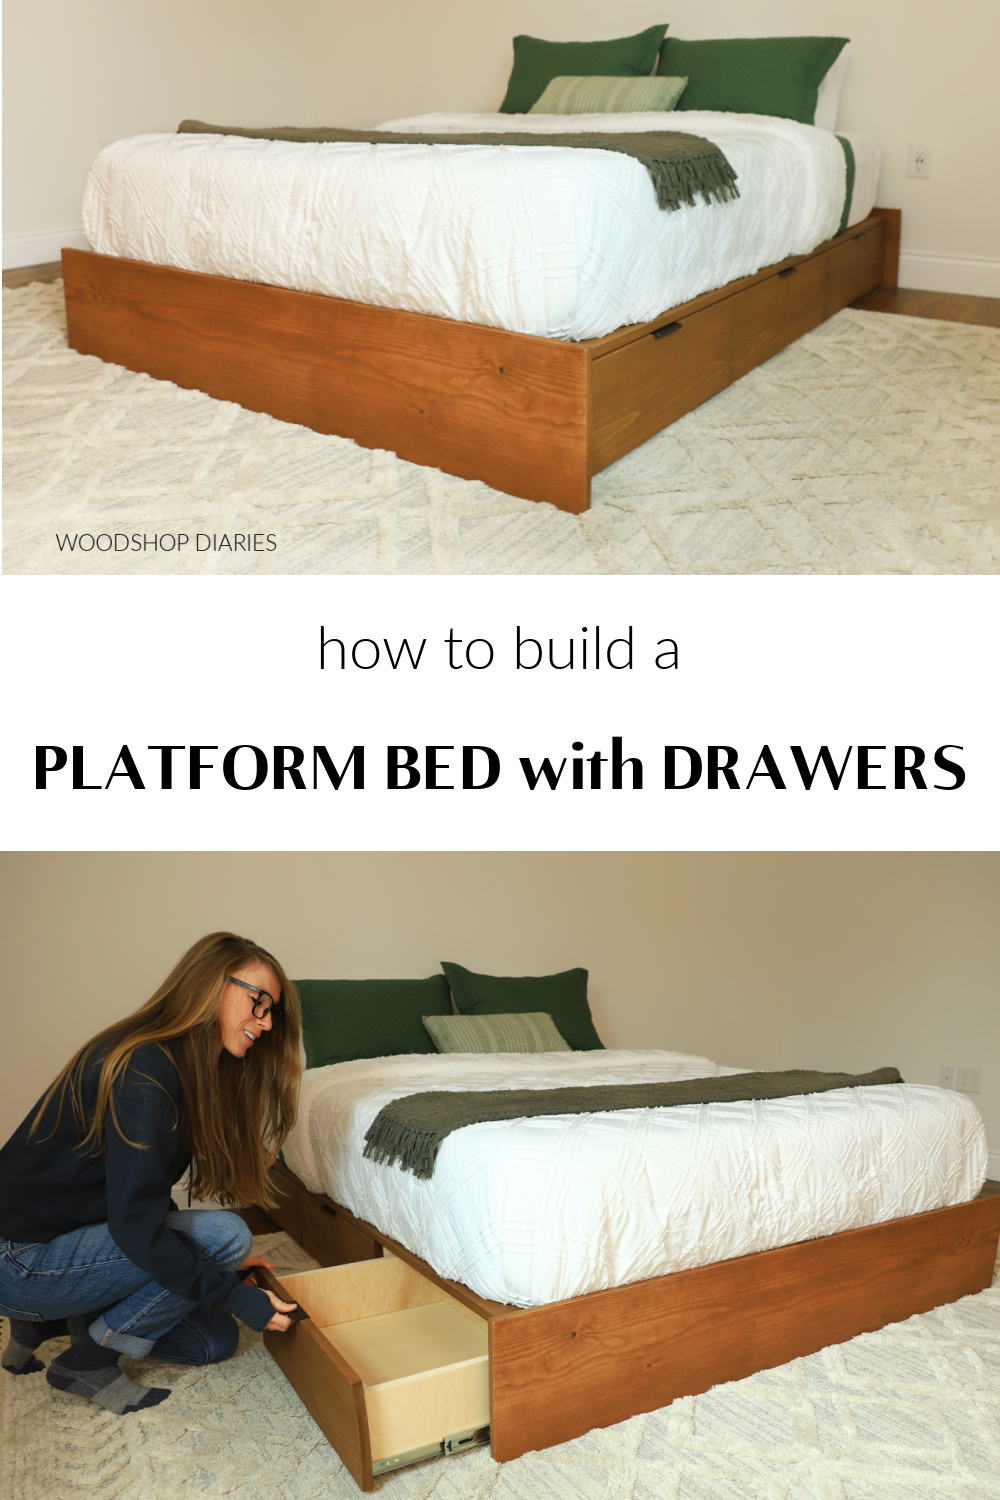
In this post, I’m sharing how to build a DIY platform storage bed with 3 drawers on each side!
This modern, minimalist design can mesh well with any style of existing furniture, so if you need to upgrade your current bed frame to one with storage, this is a great solution!
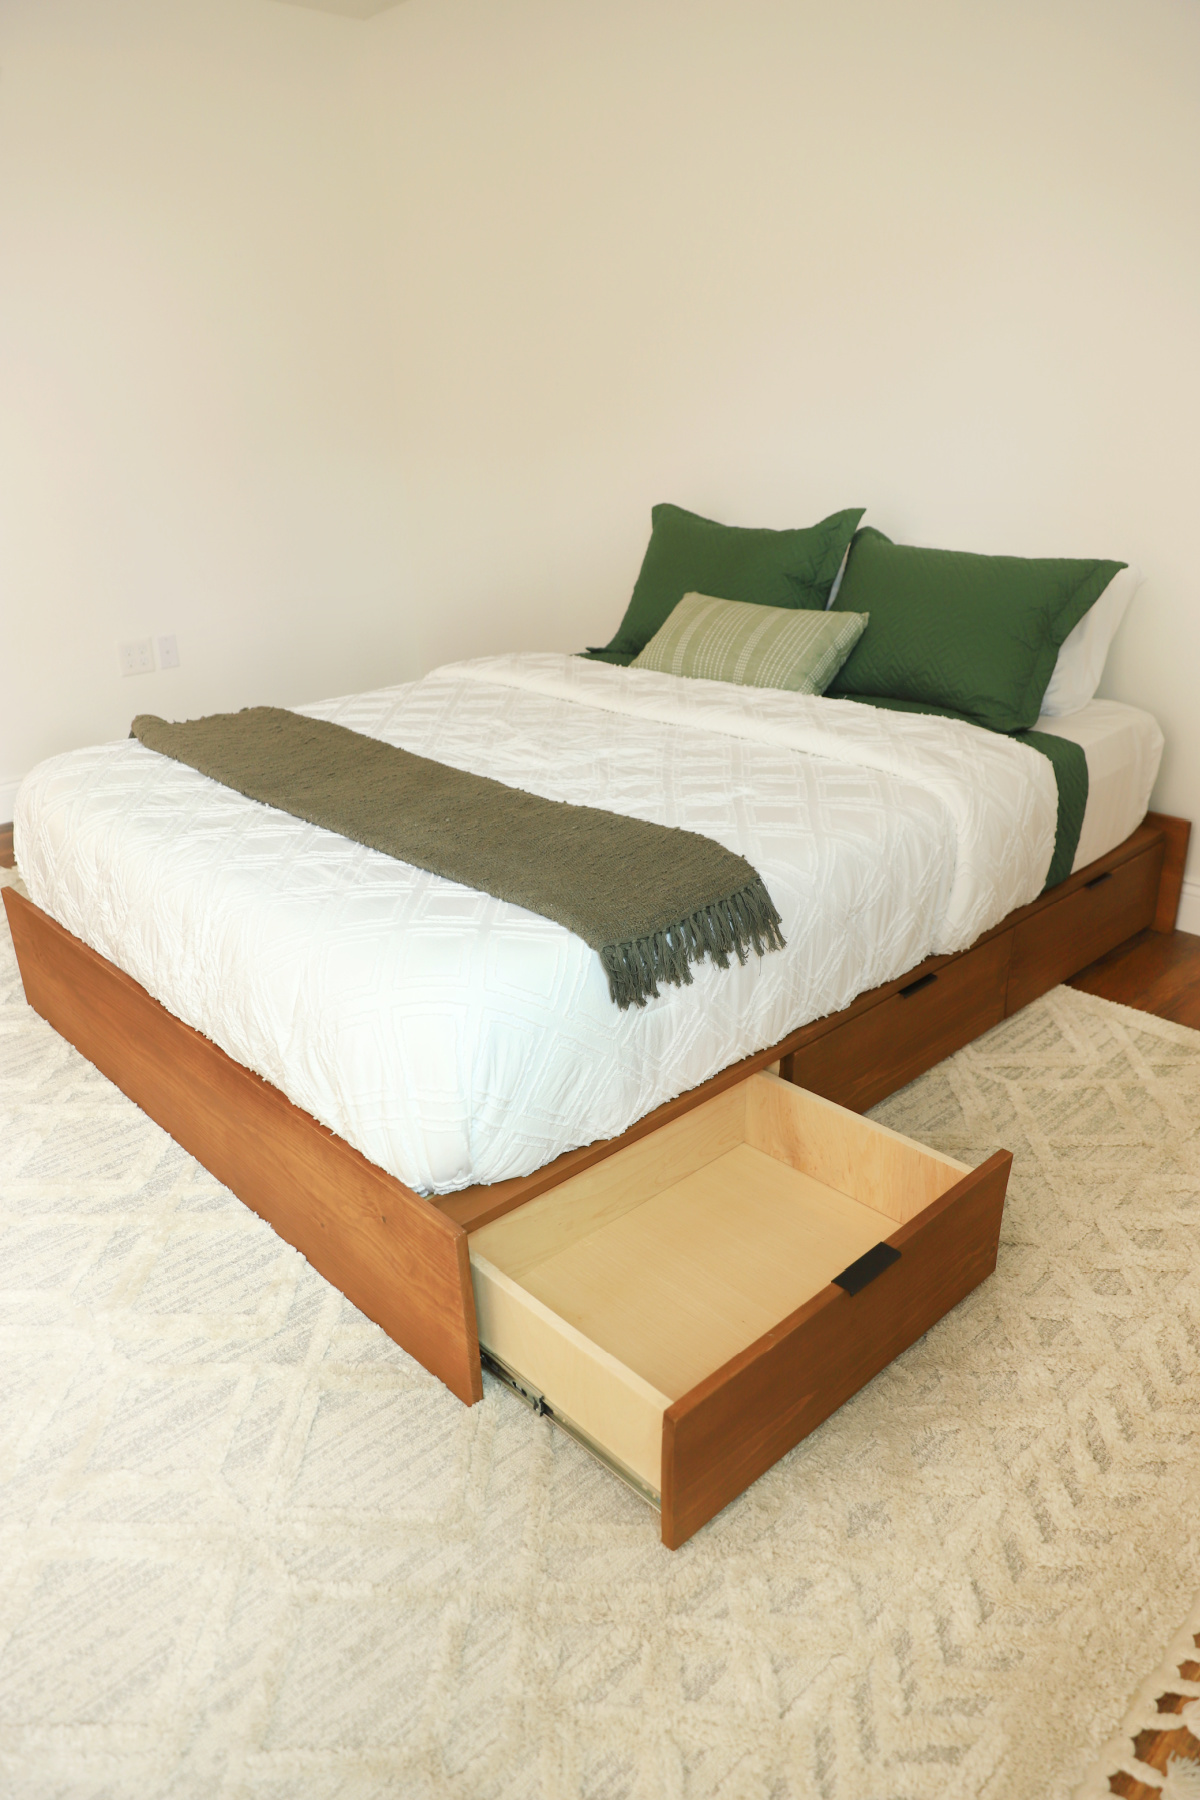
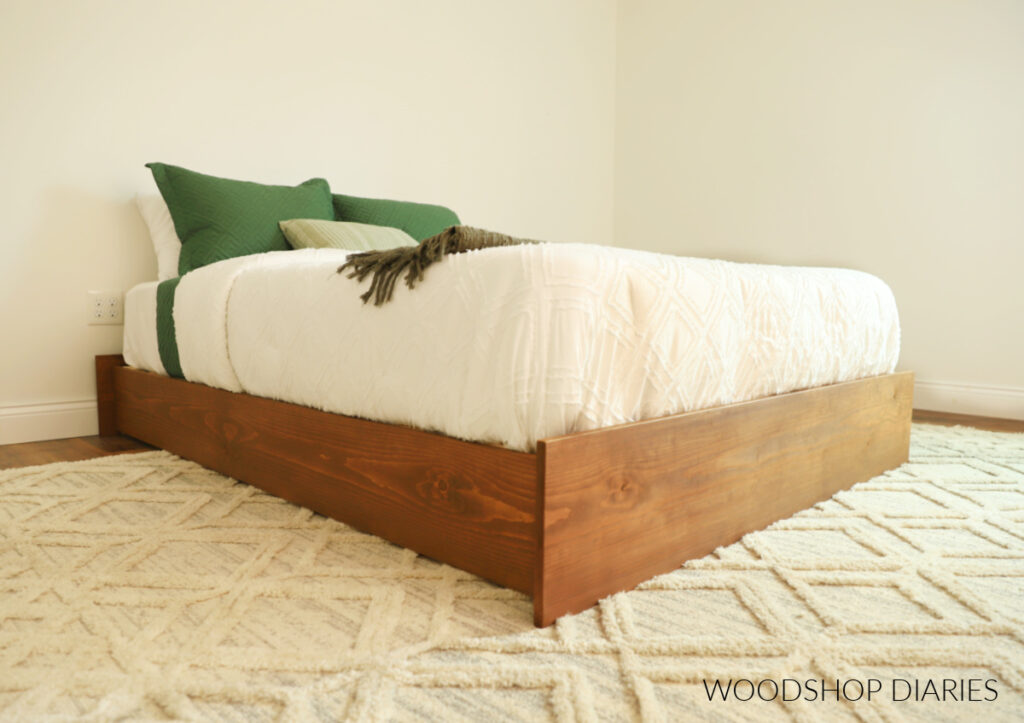
Because this design is really just the platform frame, you can easily add your own head and/or footboard to it to customize it, too!
By the way, if you’re looking for a similar design, but without storage, head over to this post to see how to build this same bed without the drawers.
This bed frame is easy to build and easy on the budget, so if you’re ready to see how to build it, let’s dive in!
**This post contains affiliate links. See website policies.
What to know before building a DIY platform storage bed
While building a bed can seem like a big project because of it’s size, it’s quite simple if you break it down into pieces.
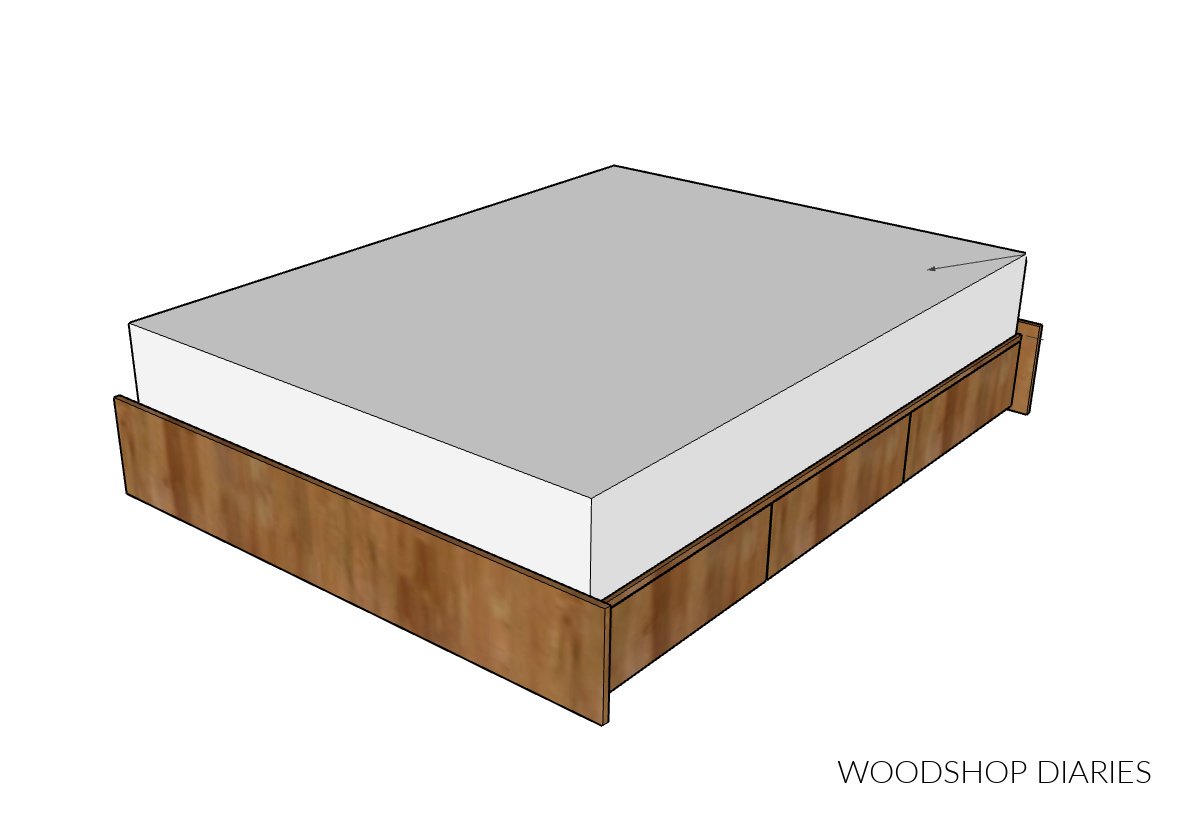
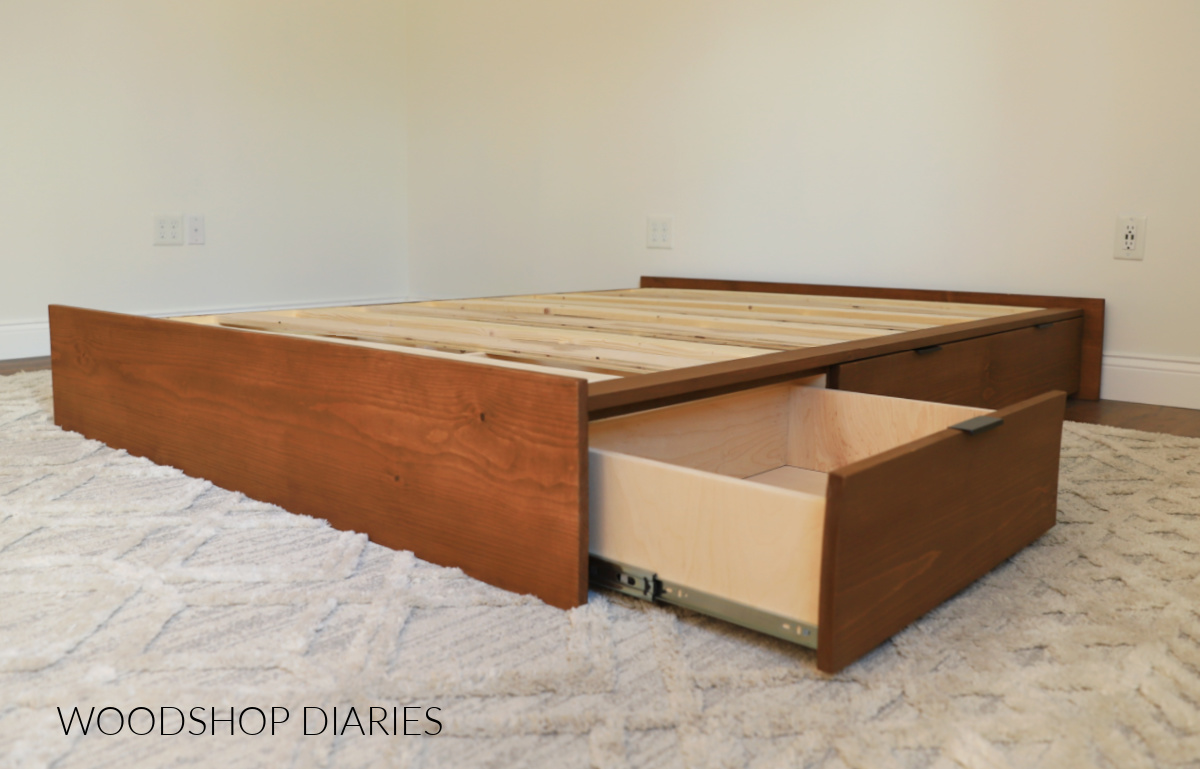
Generally, a bed frame consists of four parts: 2 side rails, 1 headboard and one footboard. The exact style and design may vary, but the frame will have four sides. In this case, two sides contain drawer boxes as you can see below:
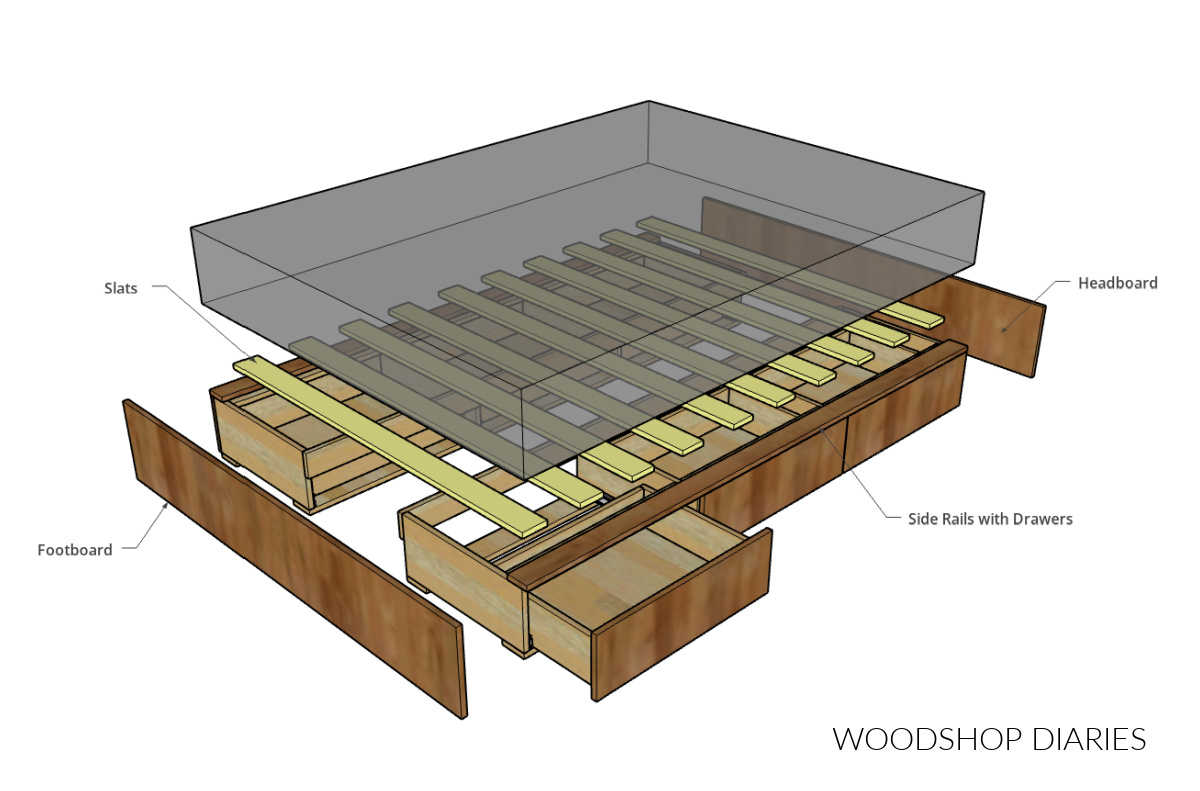
Then, slats are usually added across the top to support the mattress.
So, essentially, to build a bed, you just need to assemble the four parts separately, then attach them together and add slats. Although large in size, it’s quite simple in complexity.
Bed Frame Sizing
Mattresses come in various sizes, so it makes sense that bed frames also come in multiple sizes to accommodate. Twin, full, queen, and king are the most common. Below are standard mattress dimensions for these sizes:
- Twin: 38″ x 75″
- Full: 54″ x 75″
- Queen: 60″ x 80″
- King: 76″ x 80″
NOTE: This bed frame design is built 1″ wider and 1″ longer than the standard mattress dimensions to allow some wiggle room on all sides.
Overall dimensions and material amounts will vary based on the size bed you’re building. However, the assembly process remains the same no matter the size.
If you’d like specifics, I’ve included the dimensions, materials lists, and cut diagrams for all four sizes in the printable plans.
You may find these resources helpful throughout the build:
Are DIY projects your thing? Sign up for our newsletter for priority access to the latest projects and build plans!
How to build a Platform Bed with Drawers
If you prefer to watch, I’ve shared the full build video with tons of tips, behind the scenes, and additional details on my YouTube Channel here. This video shows how to build this bed design both with and without drawers.
Love watching how-to videos? Subscribe to my YouTube channel for plenty more where that came from!
Prefer to print? Grab the printable storage bed building plans here:
Tools & Materials
Tools:
- Drill/Driver
- Miter Saw (optional–any saw that can cut straight will work)
- Table saw
- Pocket Hole Jig
- Circular Saw with straight edge and/or cutting guide
Materials:
- 1×12 boards*
- 1×4 boards*
- (1) 4’x’8′ sheet ¾″ plywood
- (1) 4’x8′ sheet ¼″ plywood
- 1 ¼″ pocket hole screws
- 1 ¼″ wood screws
- (6) pair 18″ ball bearing drawer slides
- Wood glue
- Edge banding (optional)
*Length and number of boards will vary based on what size bed you’re building (twin, full, queen, king). Refer to plans for exact amount.
NOTE: 1×12 and 1×4 are nominal dimensions. Learn more about understanding lumber sizing here.
MATERIAL OPTIONS:
I used construction grade lumber (pine/spruce) from the local big box store for this build to keep it budget friendly, but you can use any species of wood you prefer.
Alternatively, if you’d rather, you could skip the solid boards use 3×4″ hardwood plywood for all of the 1×12 and 1×4 boards instead.
Step 1: Cut Head and Footboards
First, I cut my head and foot board pieces from 1×12 boards. As mentioned previously, the size will vary depending on what size bed you’re building.
For this design, I cut these pieces 5″ longer than the width of my mattress. Then I laid these out on my shop floor while I moved on to building the sides.
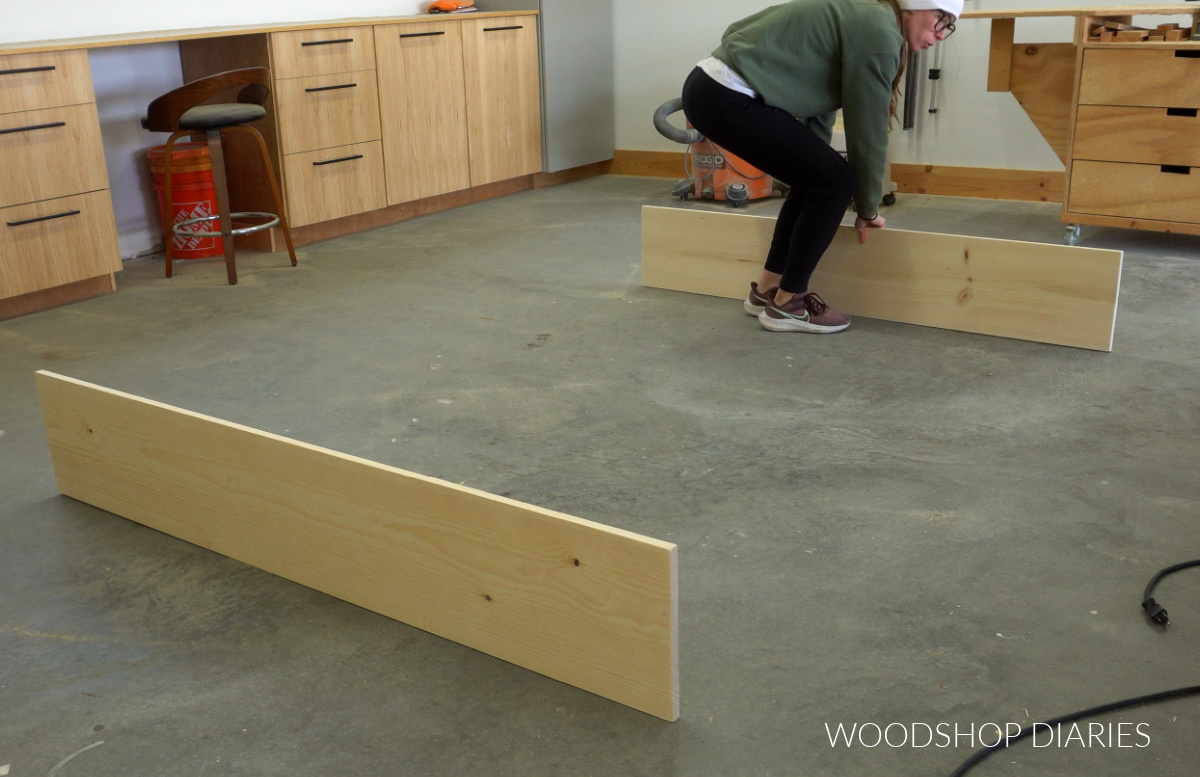
By the way–don’t forget to sand! I sanded the head and footboard pieces well before setting them aside.
RELATED: How to sand wood
Step 2: Assemble Platform Storage Bed Sides
The side rails for this storage bed are designed to house three drawer boxes each. So I cut four pieces of ¾″ plywood to use for the sides and the two middle dividers.
Then I cut three pieces of 1×4 to about 1″ longer than the length of my mattress to connect them together.
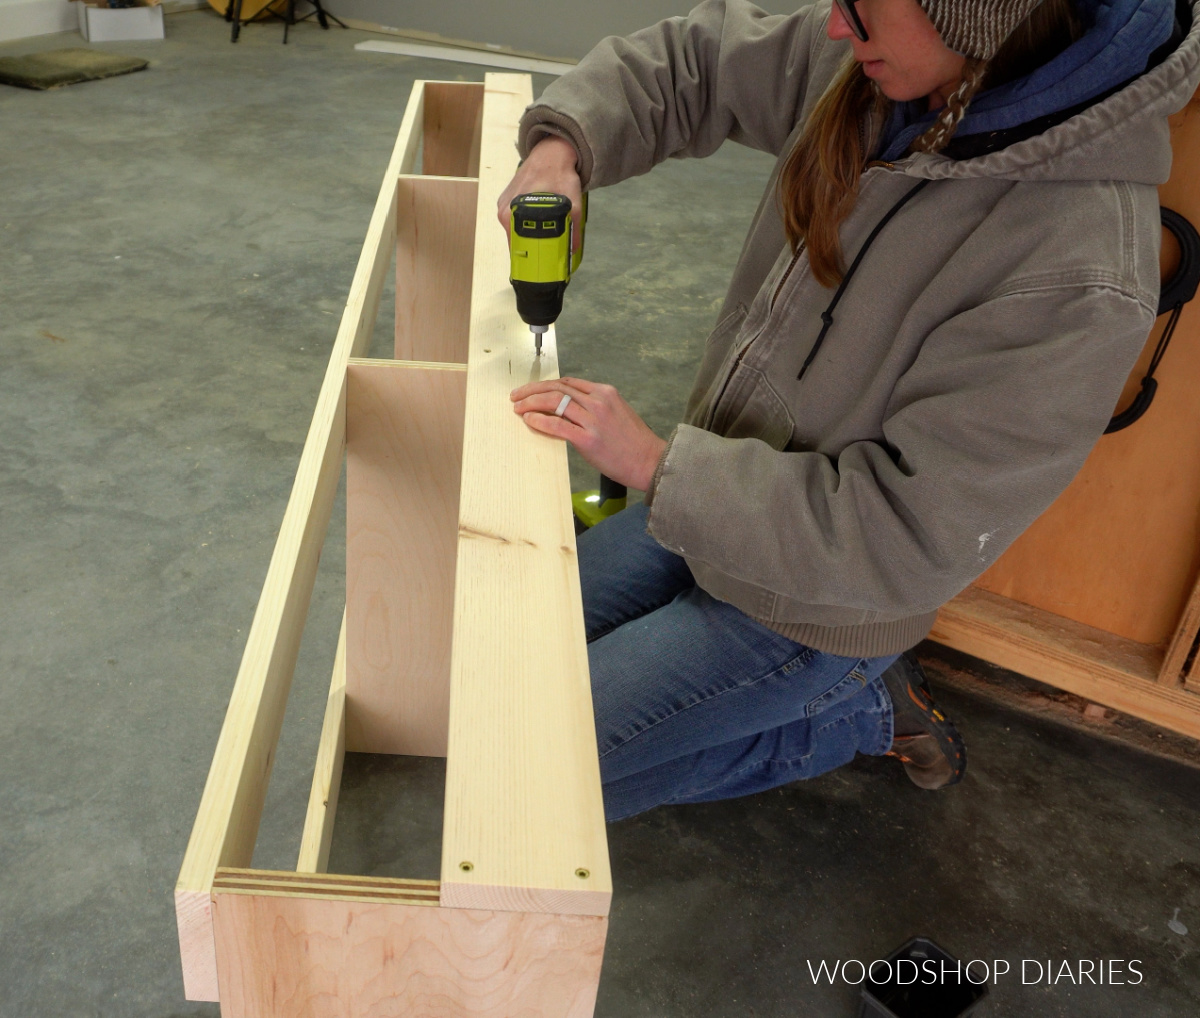
I simply used wood screws to attach two of the 1x4s along the bottom of the plywood panels, then added the third 1×4 along the back at the top.
I evenly spaced my plywood panels so that my drawer boxes would be equal size, but you could adjust if you wanted one smaller/larger or if you wanted to add more than three drawers.
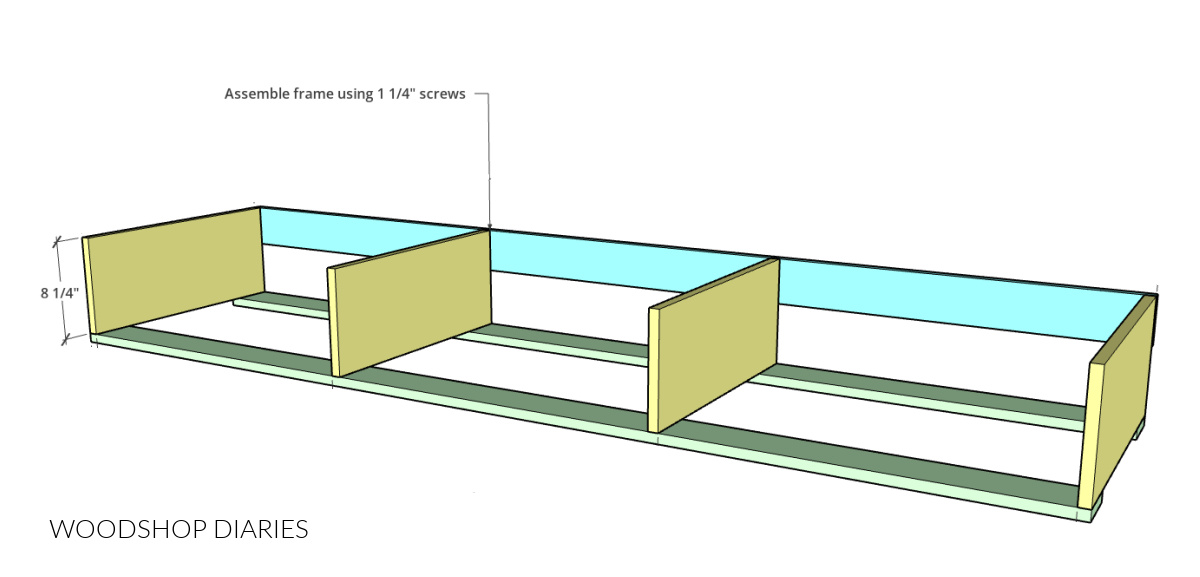
To finish the side rail frame, I cut three pieces of 1×4 and used pocket holes and screws to attach them between each plywood panel at the top front corners.
Prefer to print? Grab the Printable Platform Storage Bed Building Plans Here!
I mentioned in step 1 that I used 1x12s for the head and footboards. I also used 1x12s for the sides, but I ripped my 1x12s for the sides to 8 ¼″ to use for the drawer fronts.
I set the 8 ¼″ wide piece to the side (for the next step) and the leftover piece (an approximately 3″ wide strip) I used for trim on the top of each side rail frame.
So I trimmed this ~3″ wide strip to the width of my side rail frame and clamped it so that it was overhanging the front edge about ¾″. Then I secured it with screws through the top supports.
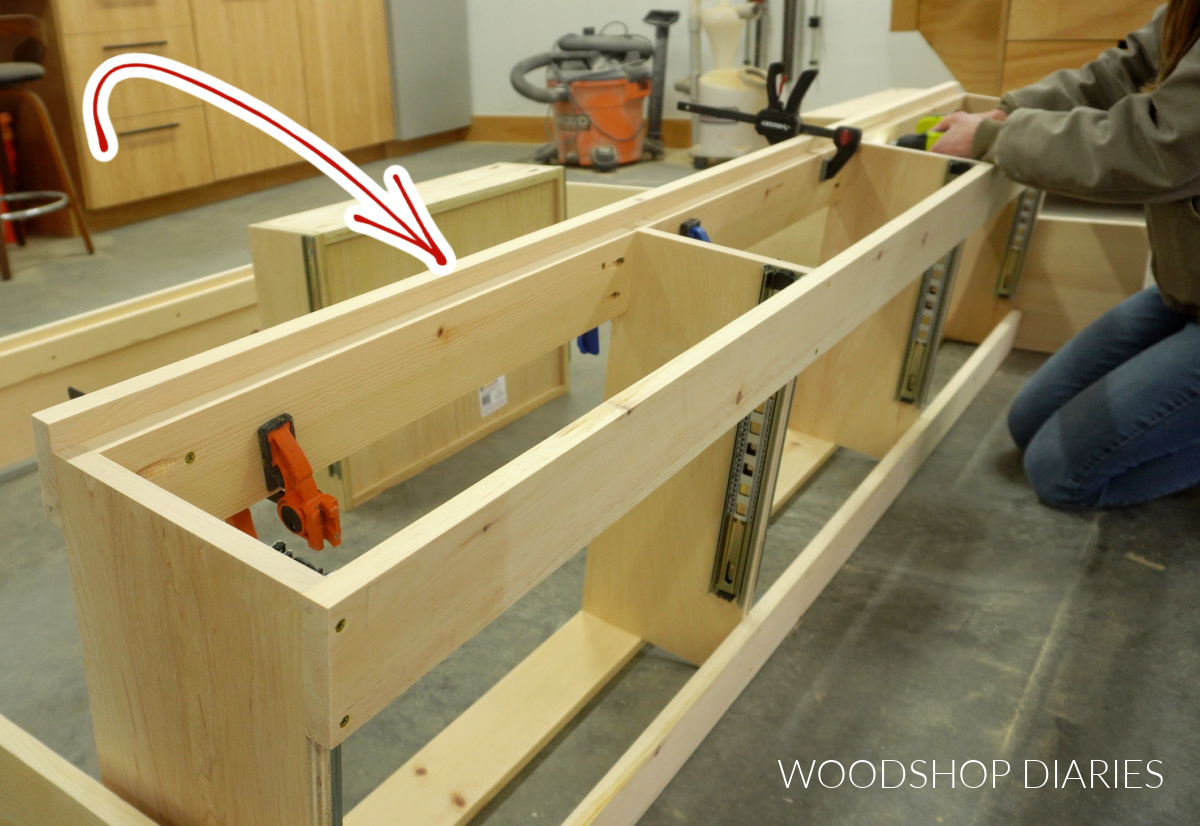
Ignore the drawer slides in the next photo–I did things a bit out of order. I’ll add those in the next step.
After one frame is assembled, repeat to make a second side rail frame for the other side of the bed. OR, if you only want drawers on one side, head to this post to see how to make the other side without drawers.
Step 3: Build and Install Drawers
I installed three pair of 18″ ball bearing drawer slides into each side rail frame. Learn how to install drawer slides here.
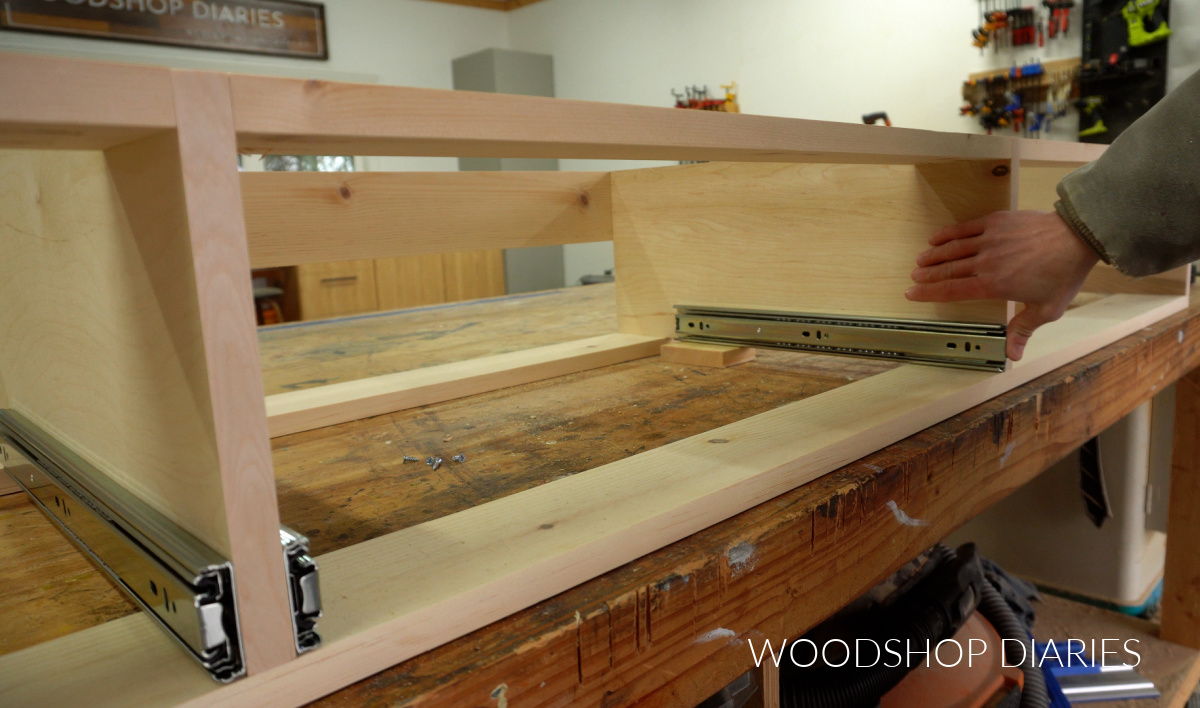
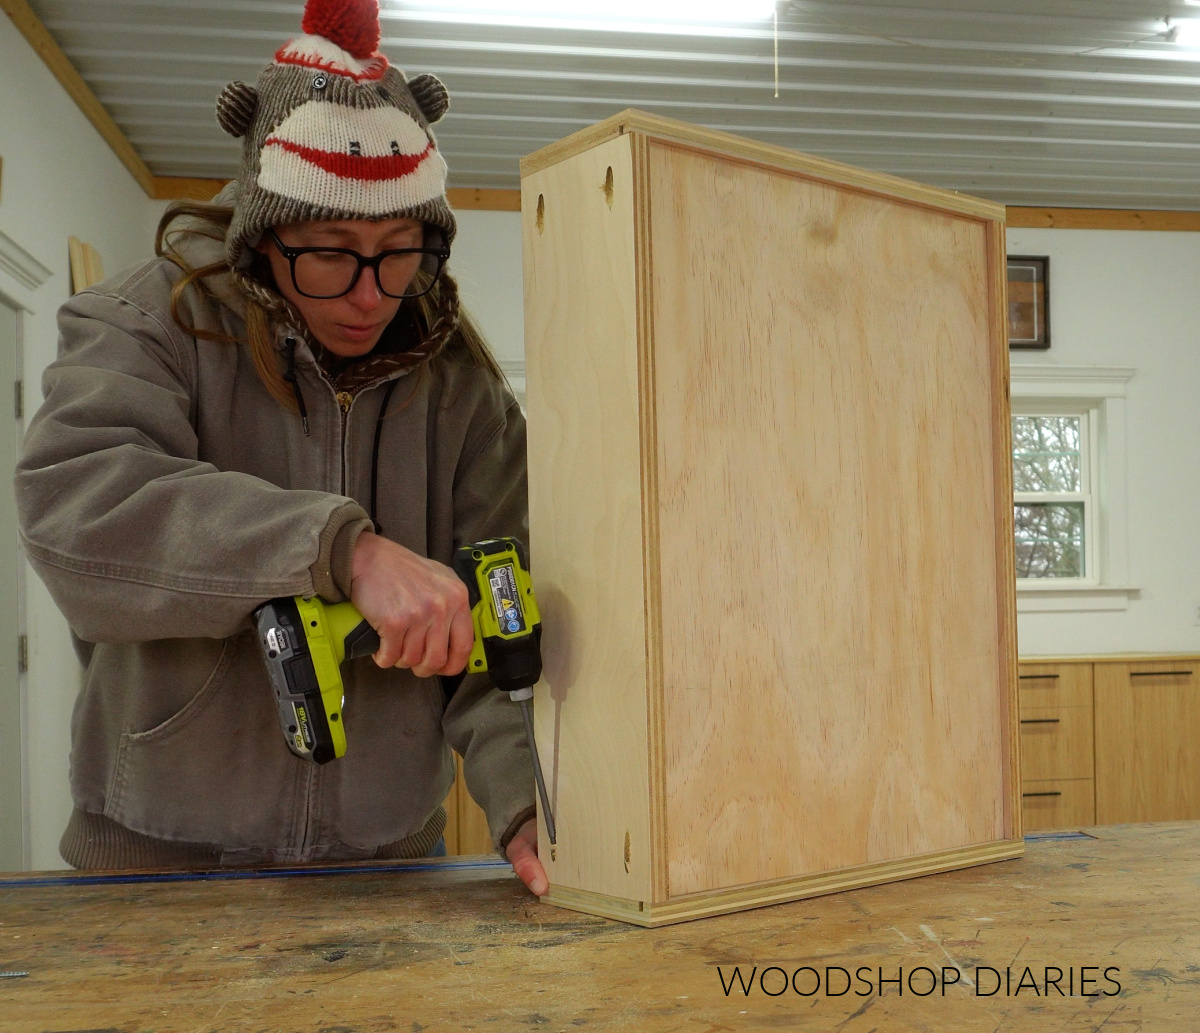
Then I assembled three identically sized drawer boxes to go into each one.
RELATED: How to size drawer boxes
ALSO RELATED: How to build a drawer box
Once the drawer boxes were assembled, I installed them into the side rails so that they were flush to the front edge of the frame. This will allow me to add continuous grain overlay drawer fronts.
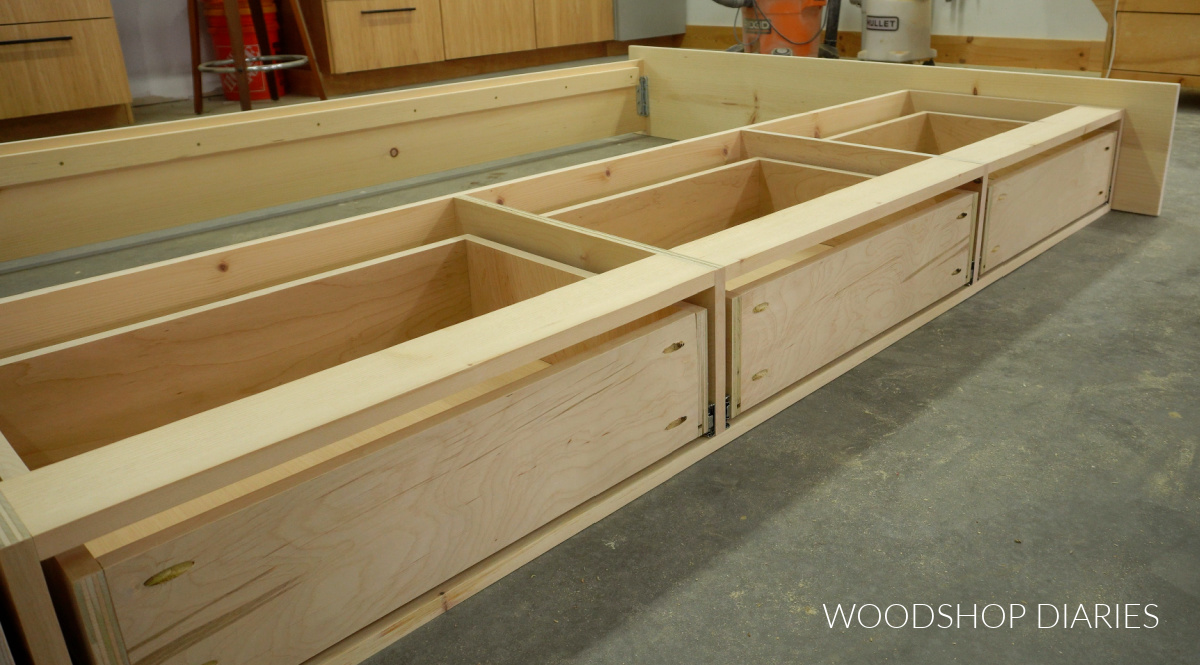
From my 8 ¼″ wide boards from step 2, I trimmed three drawer fronts. I cut these so that when I placed them across the front of my drawers, the grain pattern was continuous all the way across.
To make installing these easy, I flipped my side rail on its back and placed the drawer fronts in position. That allowed gravity to help hold them in place while I screwed them on from the inside of each drawer box.

At this point, the bed was ready for finish. I recommend finishing the head/footboards and side rails separately before assembling.
You can paint, stain, finish however you’d like, but I used Minwax Semi-Transparent Water Based Stain in Pecan. Then I sealed it with Minwax Polycrylic.
RELATED: How to stain wood
Step 4: Assemble Platform Storage Bed
I carried each piece of the bed into the room where I wanted it to go and started fitting them together to attach.
TIP: Remove the drawer boxes from the side rail frames using the tabs on the drawer slides. It’s much easier to carry and adjust without the drawers. Once assembled, you can slide them right back in.
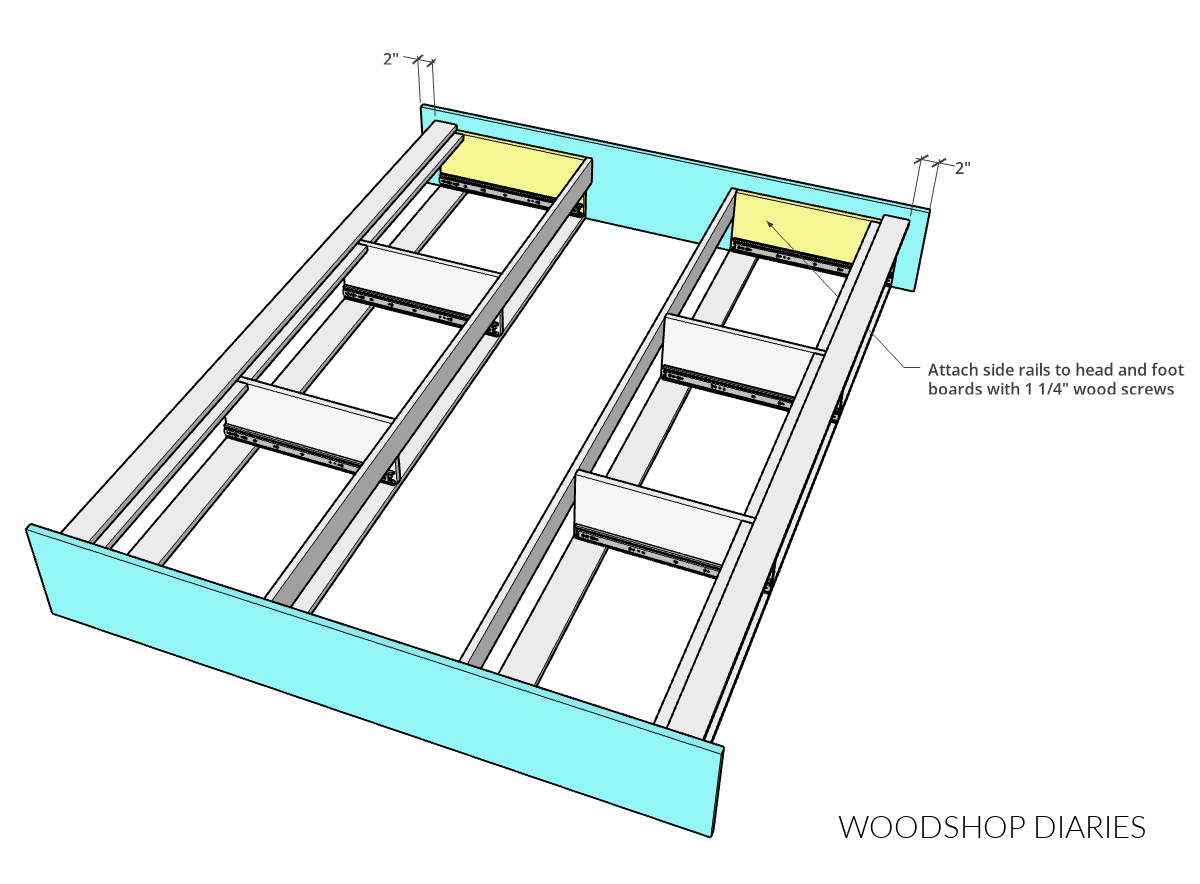
I positioned the side rail frames between the head and footboard.
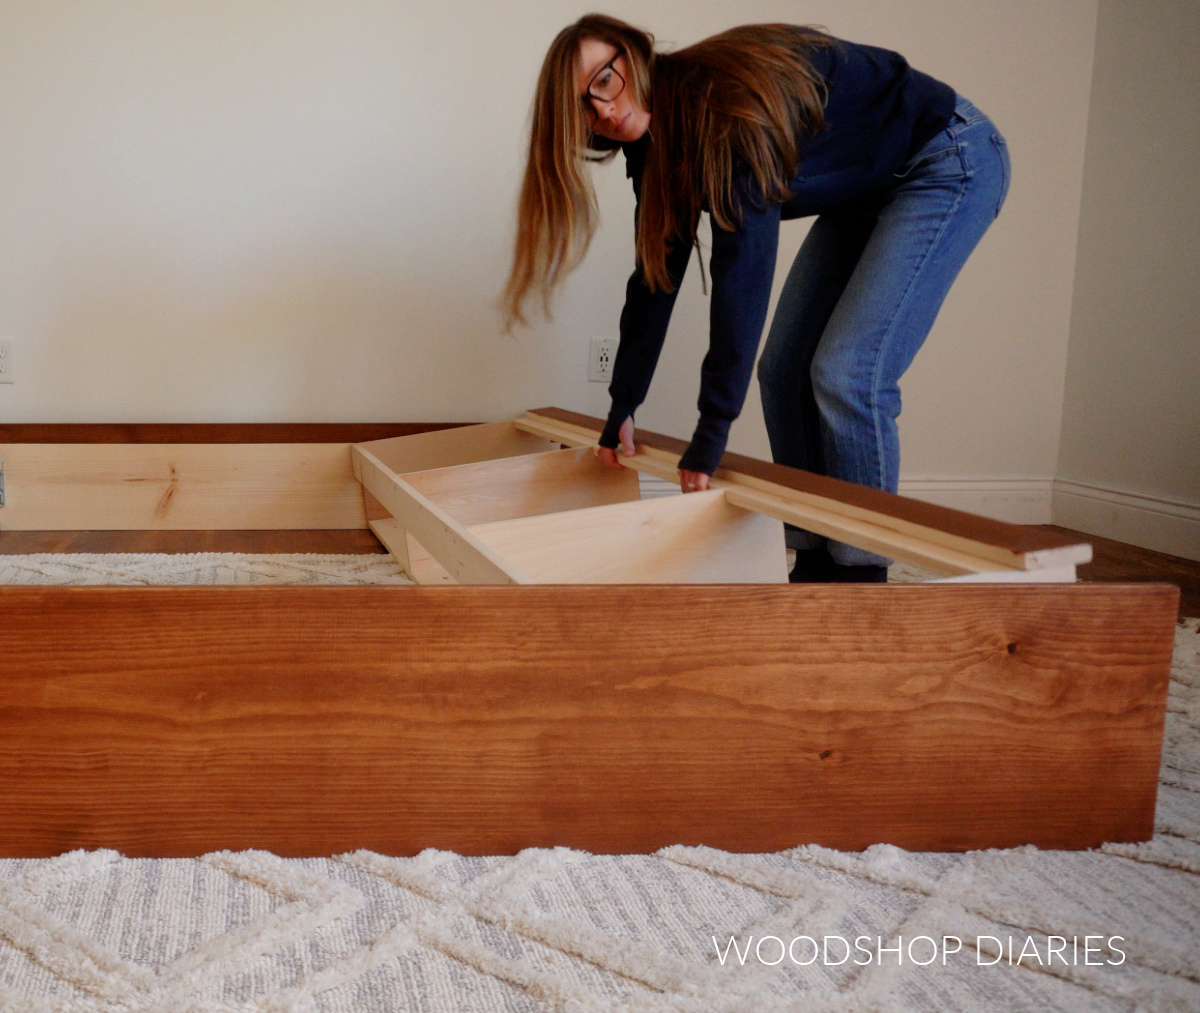
I adjusted the side rails so that they were 2″ in from the outside edges of the head and footboard, then screwed them together with screws through the side panels (shown in yellow).
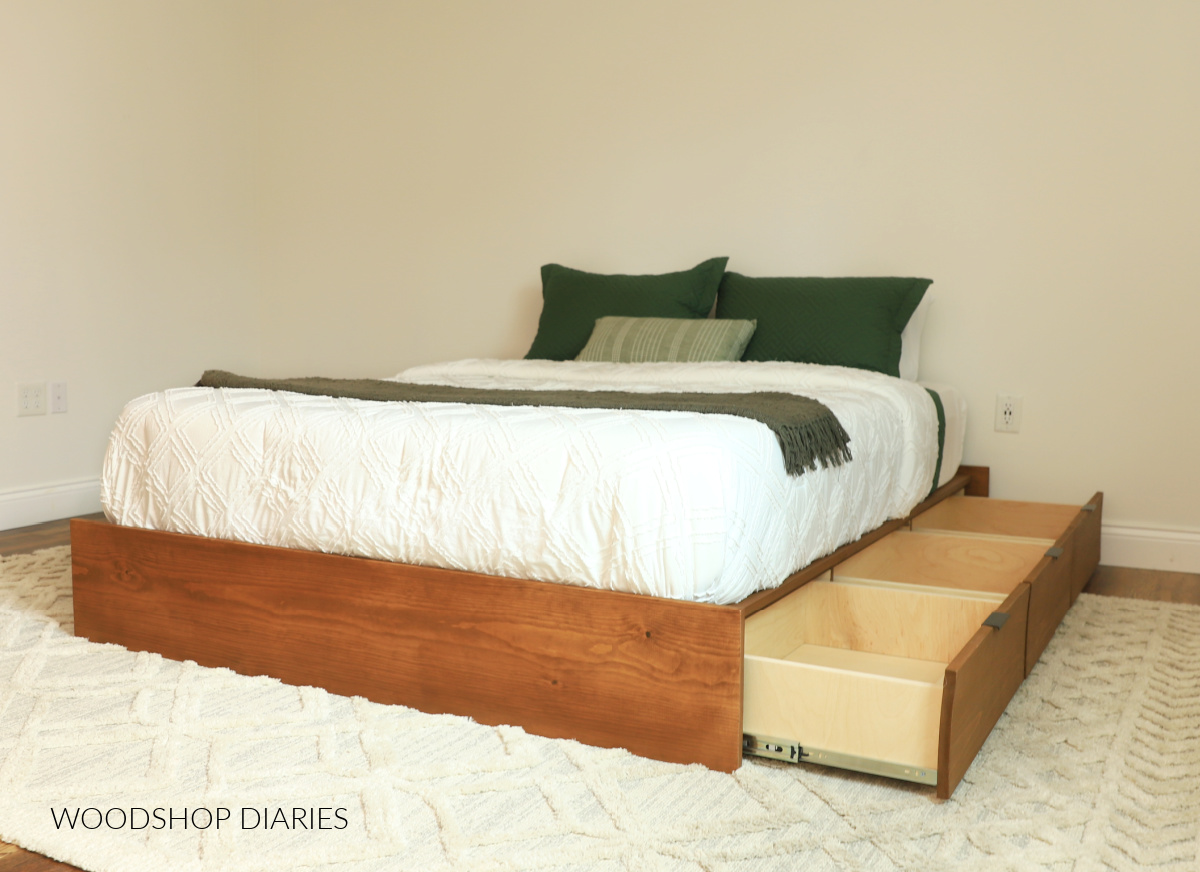
Once secured on each end, I reinstalled the drawer boxes and added these finger pulls to make opening the drawers easier. But if you wanted a different style knob or drawer pull, that would work fine.
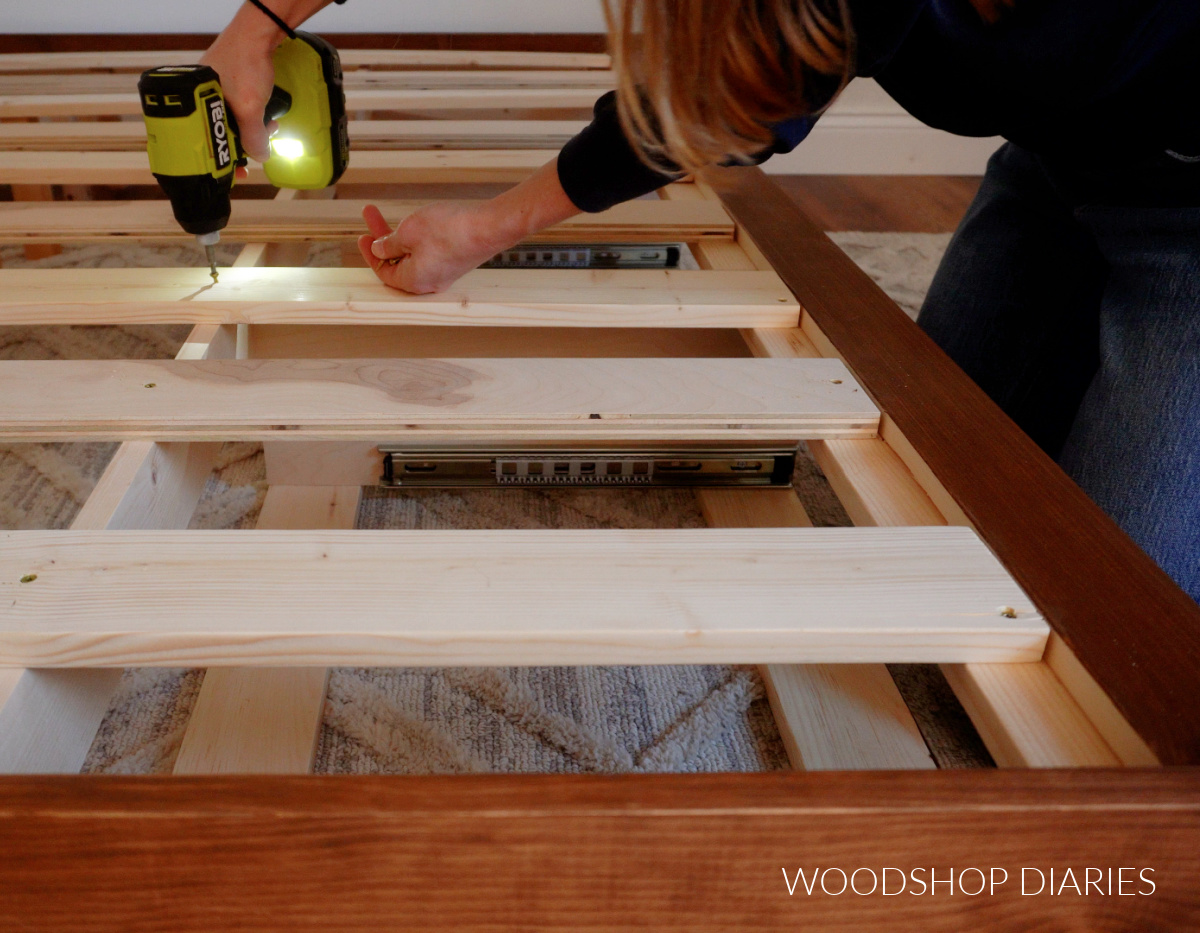
Step 5: Install Bed Slats
The last part is simply adding the bed slats to support the mattress. To do this, I measured between the trim pieces on the top of each side rail to find the exact length I needed to cut my slats.
I cut a combination of 1x4s and ¾″ plywood strips for my bed slats. (I didn’t have enough of either to cut them all the same, but any ~¾″ thick material would work for the slats.)
Then I evenly spaced these between the side rails and secured with screws at each end AND into the backs of each frame.
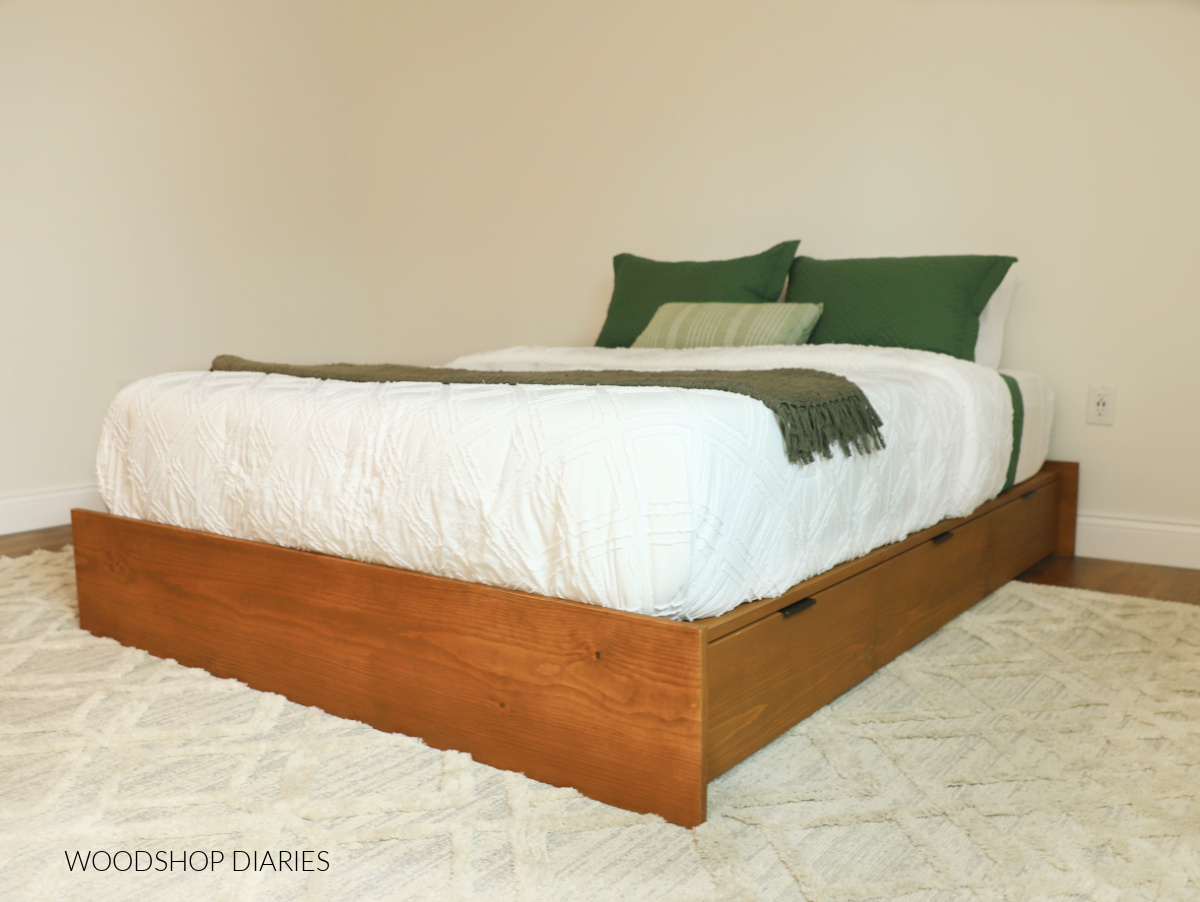
Once the slats were secured, this simple platform storage bed is complete and ready for the mattress and bedding of your choosing.
This is such a simple and practical way to add some extra storage to your bedroom without taking up any additional floor space.
The smooth sides are clean and modern for a minimalist vibe. But, if you wanted something a little less plain, you could dress it up by adding some decorative trim details on the drawer fronts and/or the footboard.
You could also add a taller stand alone headboard to this platform bed frame or install a unique wall treatment to the wall behind the bed to act as a headboard.
This is such a simple design, so you can style it so many ways to fit your needs and your space!
If you’re ready to build your own, be sure to grab the printable building plans here!
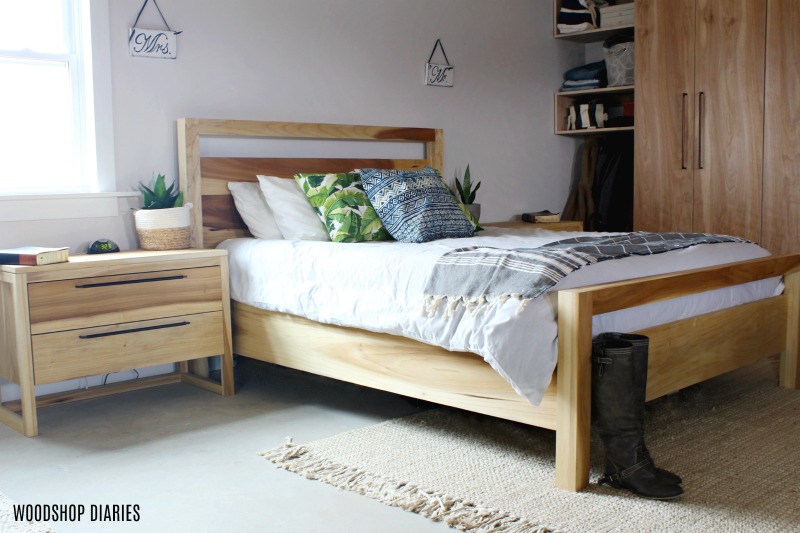
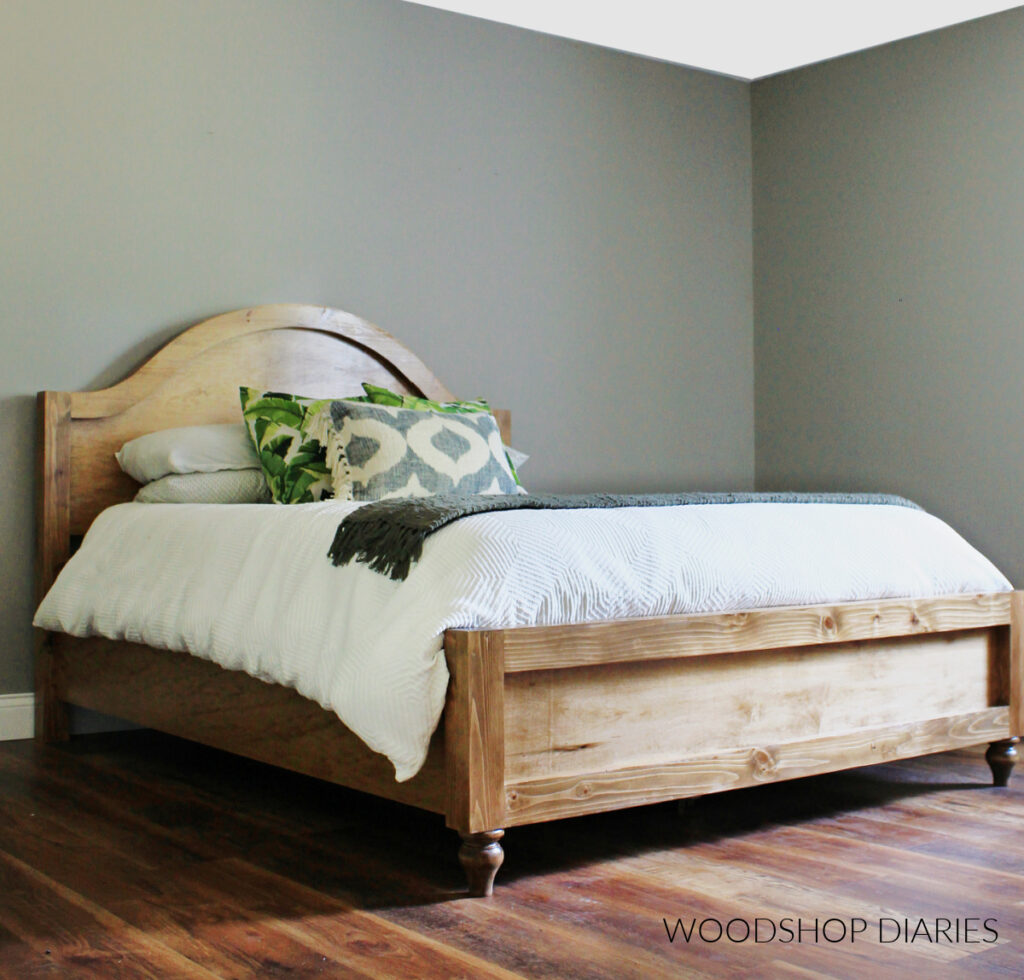
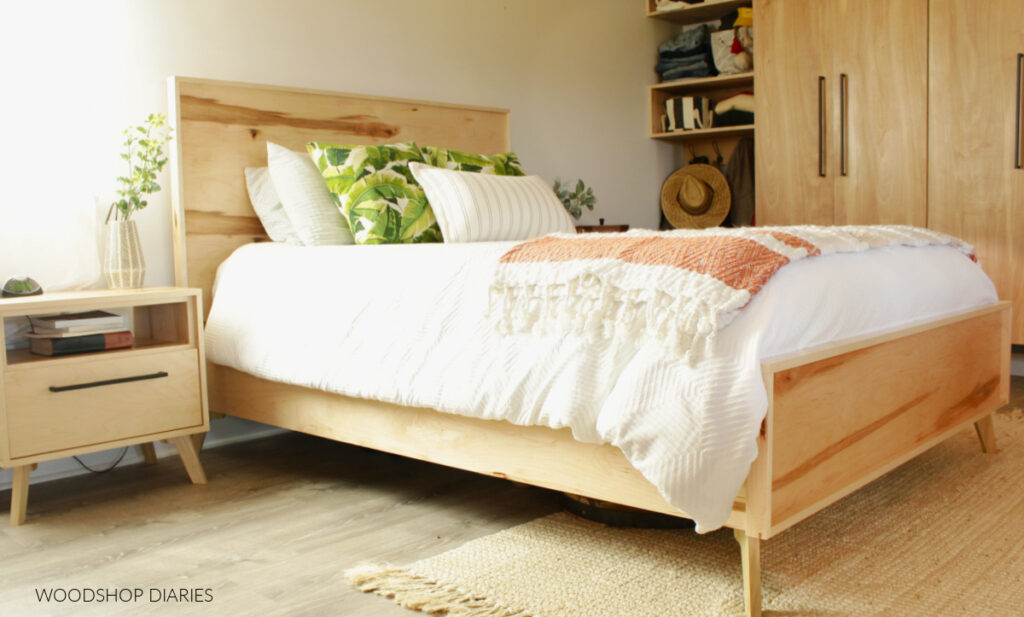
Looking for more DIY bed ideas?
Loved this project, but searching for more DIY bed frame ideas? I get that–it’s good to have options!
Here are a few of my favorite DIY bed frames (with plans!)–just click the image(s) below to take you to the how to for each one:
If you enjoyed this project and would like to save it for later, be sure to pin it or share to your favorite social platform.
Until next time, happy building!