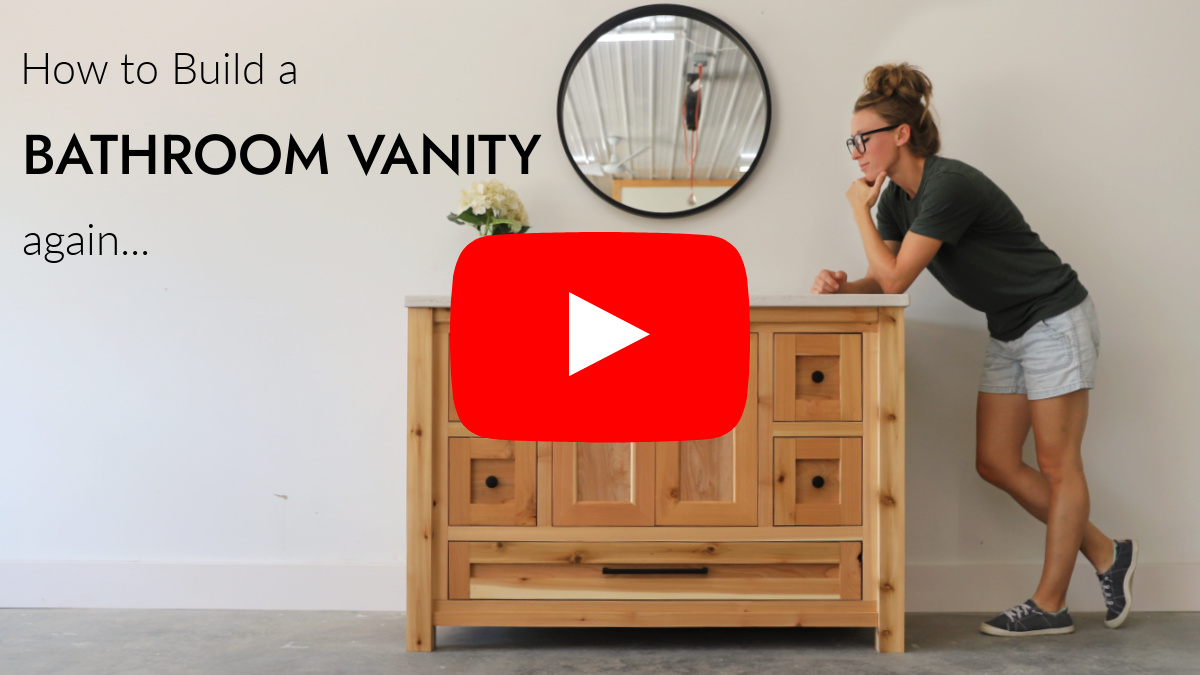
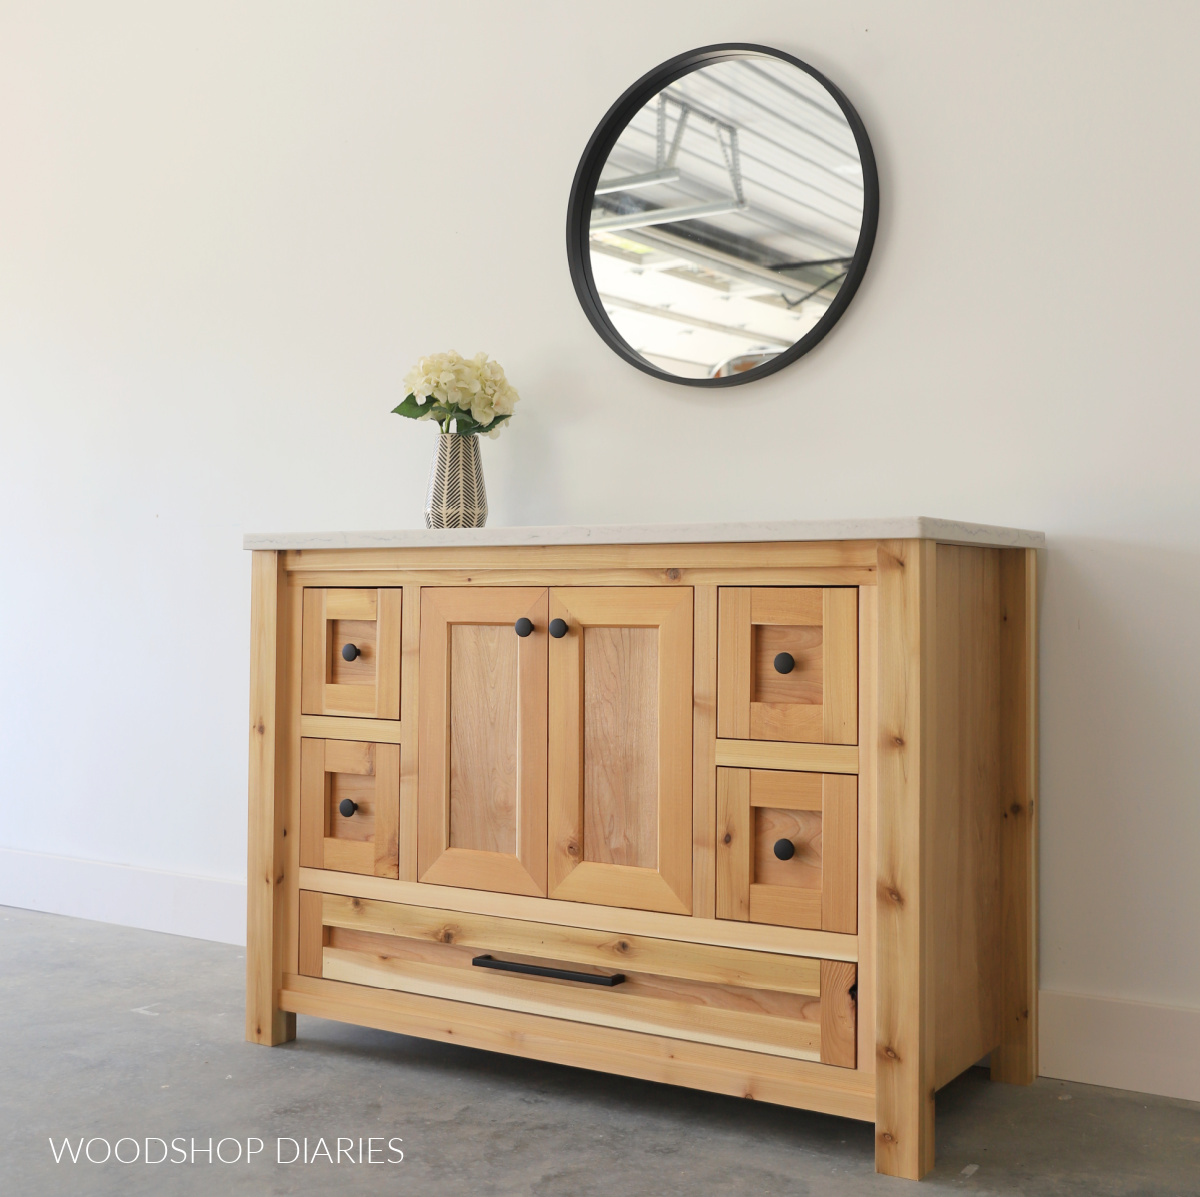
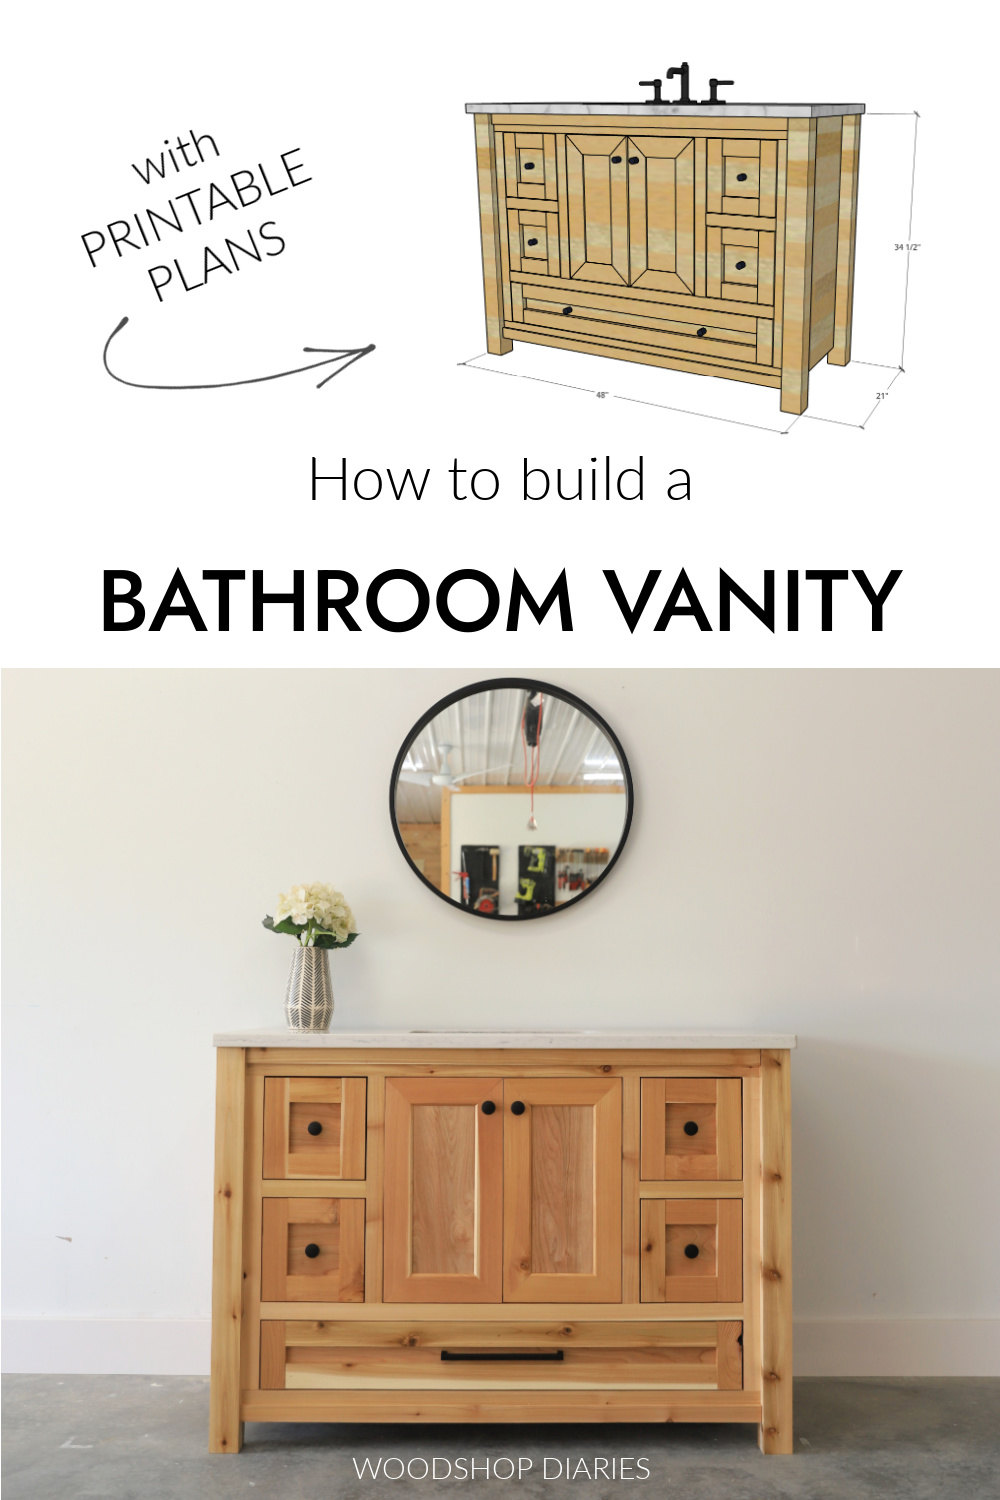
In this post, I’m sharing DIY single sink bathroom vanity plans packed with both cabinet and drawer storage.
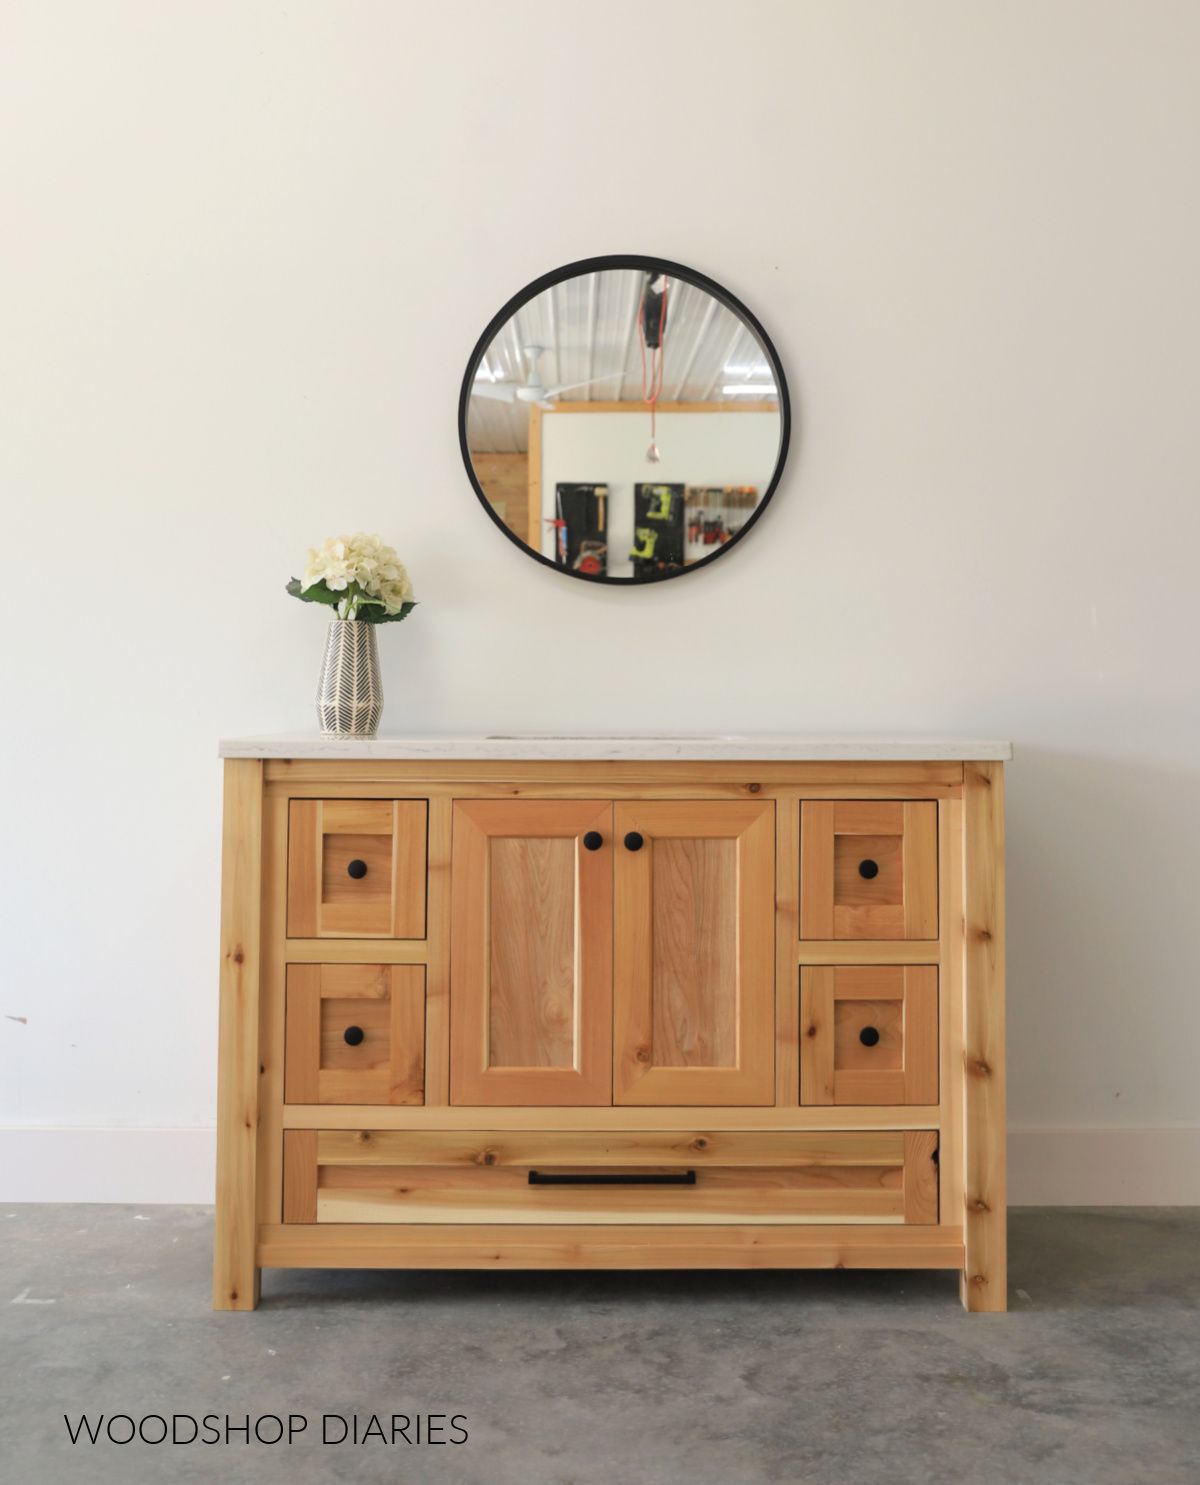
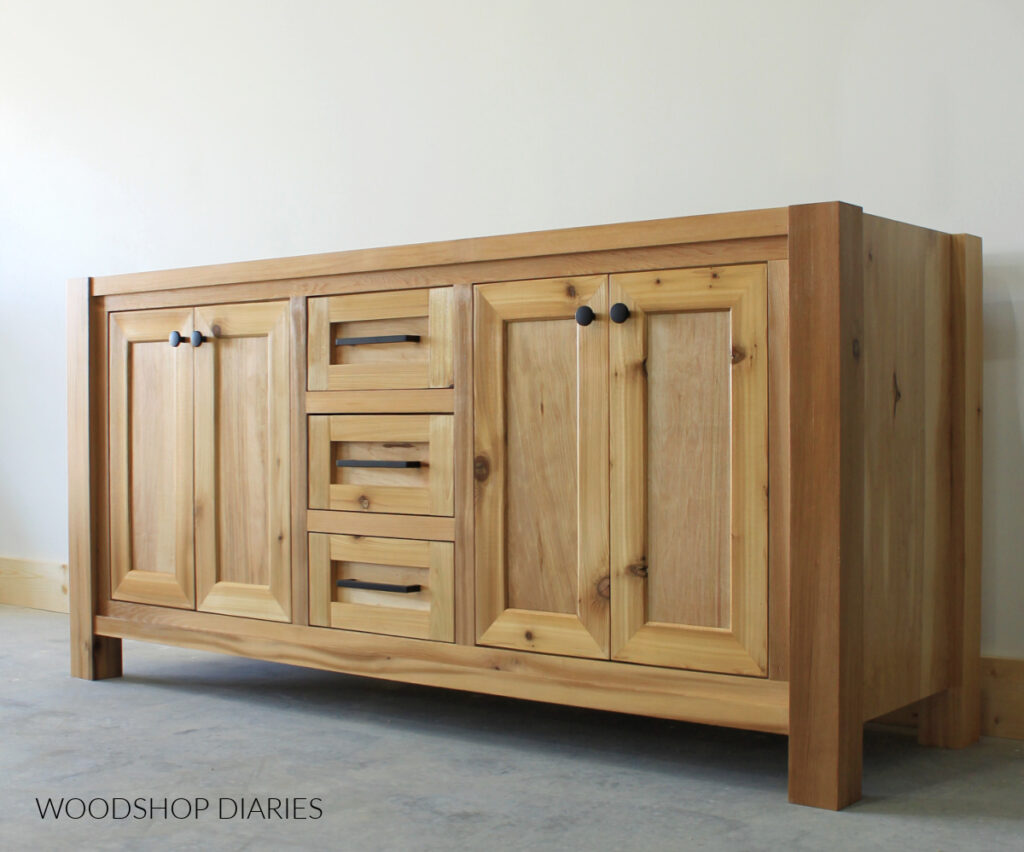
I designed this single sink vanity cabinet to match the double sink version I shared a few years ago. I wanted to “re-create” it as a coordinating single sink piece.
Ironically, I built a pair of these–so it was still a “two sink project” HA! But, the reason I made two is to replace the pair of vanities I built for my parents’ bathroom several years back.
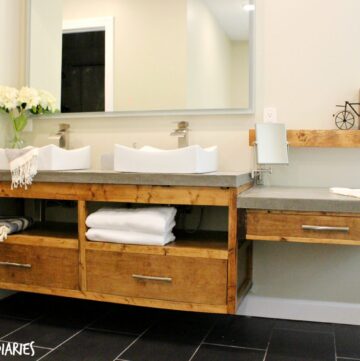
You probably don’t remember them, so here’s a peek at their previous vanities:
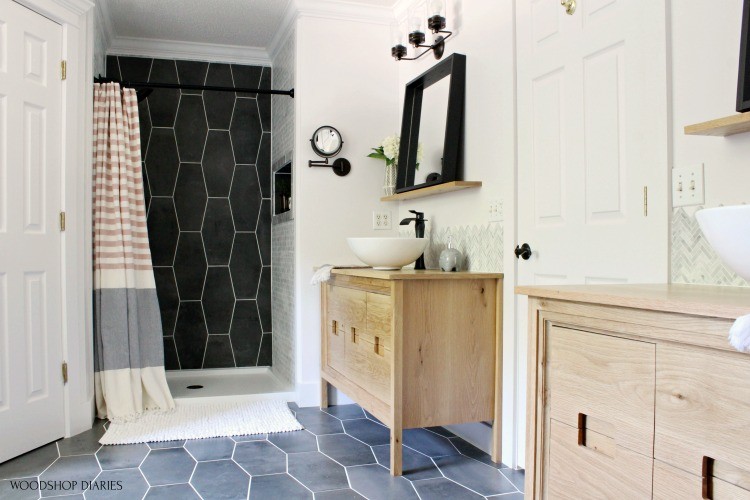
You can find the build plans for the previous vanities here.
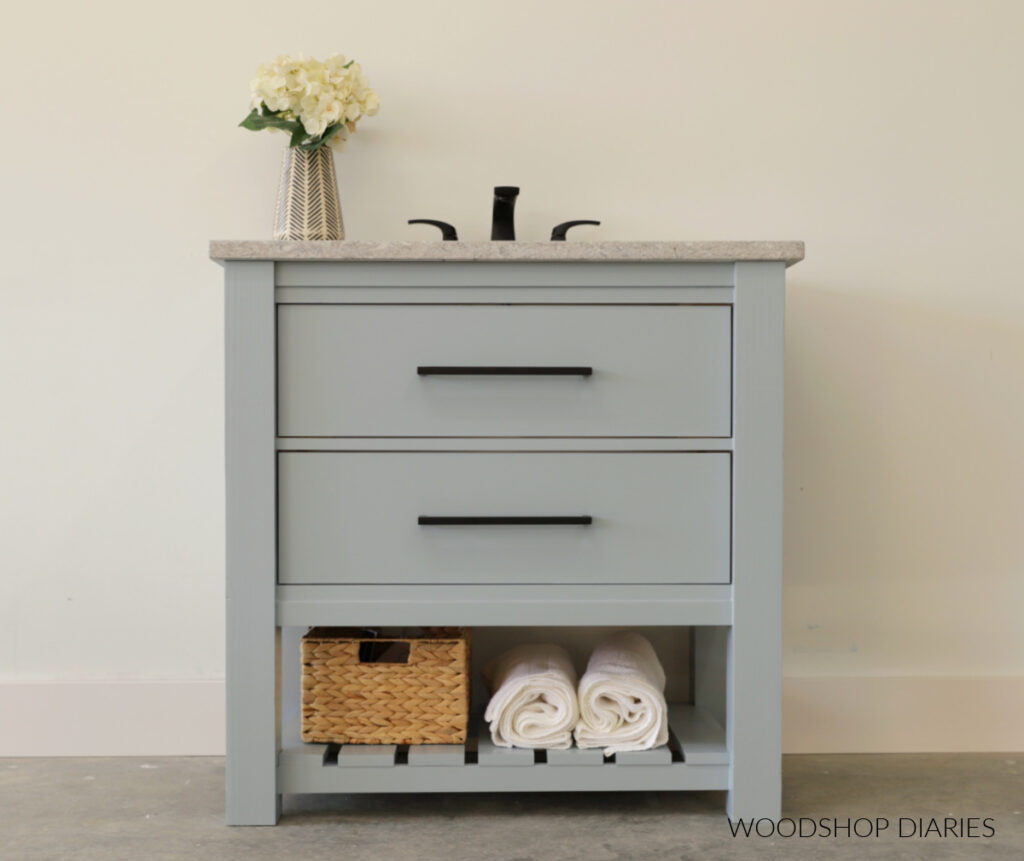
My mom still loved the vanities, but she was tired of the vessel sinks on top (I don’t really blame her), so we are replacing them new vanities, which are taller and have an undermount sink.
An added bonus is the fact that these new vanities also have significantly more storage space! And who doesn’t love extra storage in the bathroom??
So if you’re ready to dive into building one (or two!), I’ll show you how below.
*This post contains affiliate links. See website policies.
What to know before building
After building the vanity, we are adding a granite top and undermount sink to complete it.
Many home improvement and big box stores (like Lowe’s or Home Depot) have off-the-shelf countertop and sink combos you can purchase to use with this build.
However, I recommend checking with your local granite countertop suppliers as they usually have leftovers or “remnants” they can custom cut a small vanity top from for cheaper.
Our granite supplier also included the undermount sink to go with the countertop. (We will attach it once the vanities are installed in the bathroom.)
*Double check that your countertop, sink, and existing plumbing will work or can be modified to work with the vanity dimensions before building!
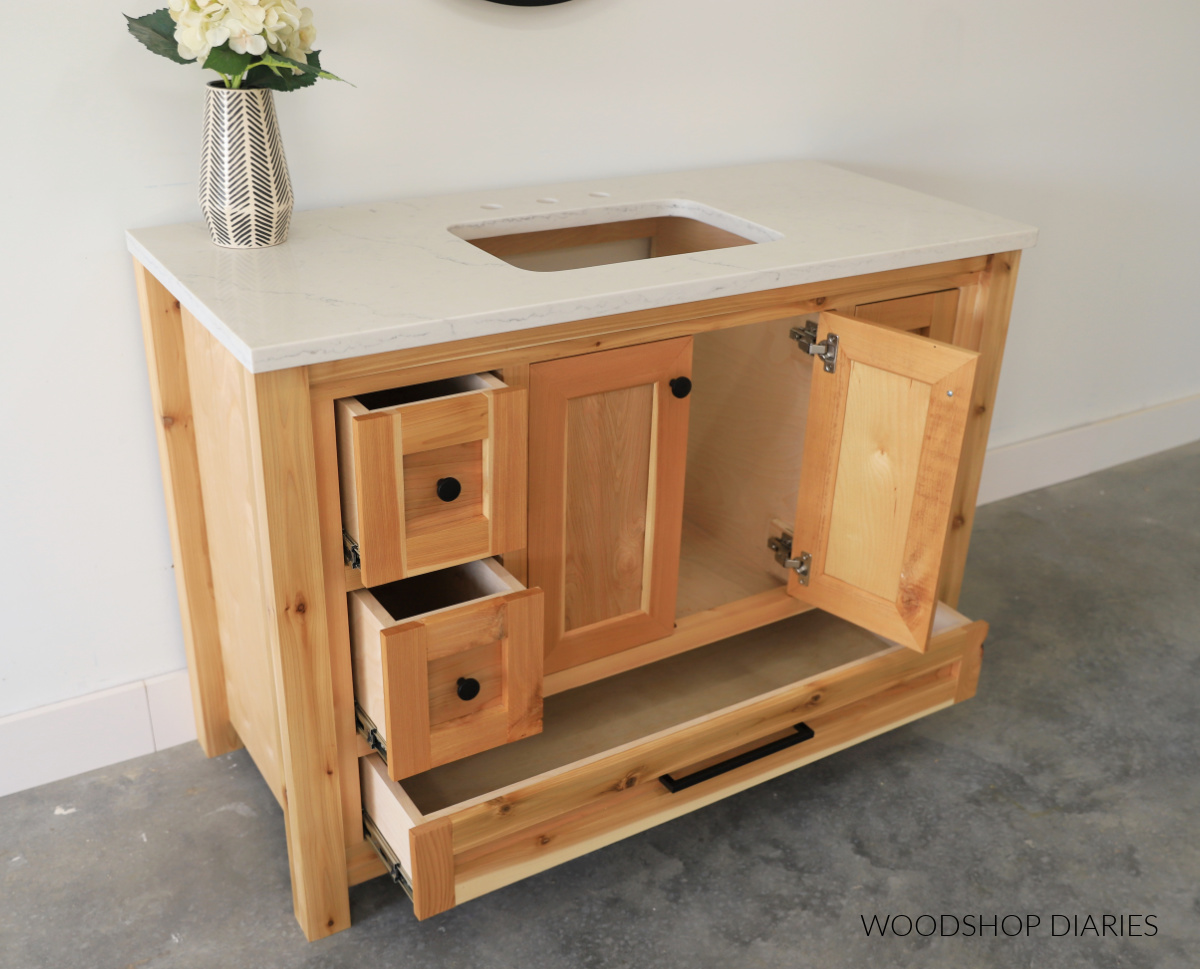
OVERALL DIMENSIONS
The overall dimensions of this vanity (not including countertop) are 21″ deep x 34 ½″ tall x 48″ wide.

This works great with a 22″ deep x 49″ wide x 1 ¼″ thick countertop.
The cabinet opening in the middle is 20 ½″ wide–make sure the sink used with the top will fit into this opening (OR you can trim a little out of the middle divider panels for it to fit).
Material Choices
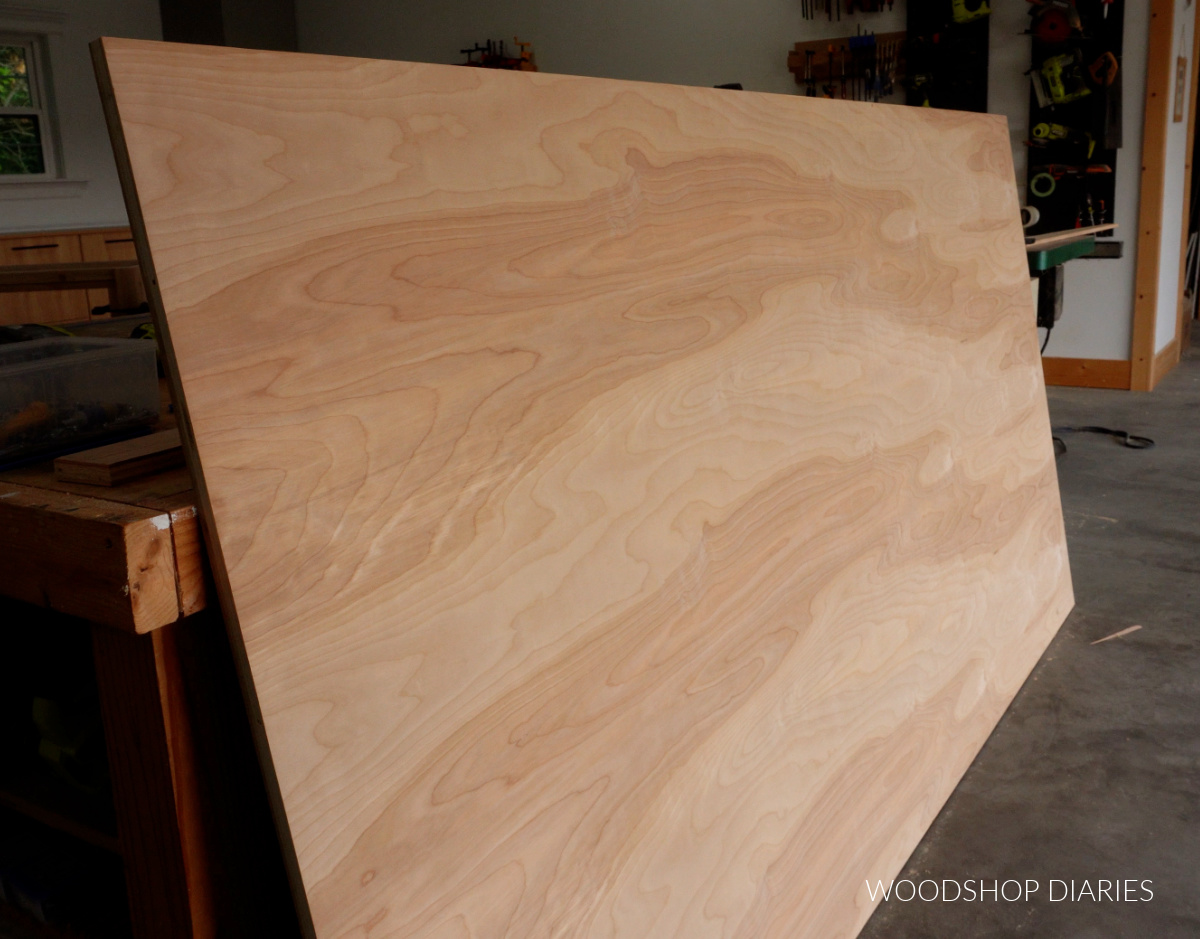
This project was built using cedar lumber and birch plywood. You’re welcome to use whatever type of lumber you prefer for this build.
I’ve found that if you buy birch plywood with some darker color streaks in it, this matches cedar wood really well once sealed.
I cut my own 2x2s and 2x3s from cedar 2x4s. This cuts down on material waste, but if you prefer to buy them precut, you certainly can. I’ve included the cut diagrams for this in the printable plans.
RELATED: Check out this post on how to cut your own 2x2s from 2x4s
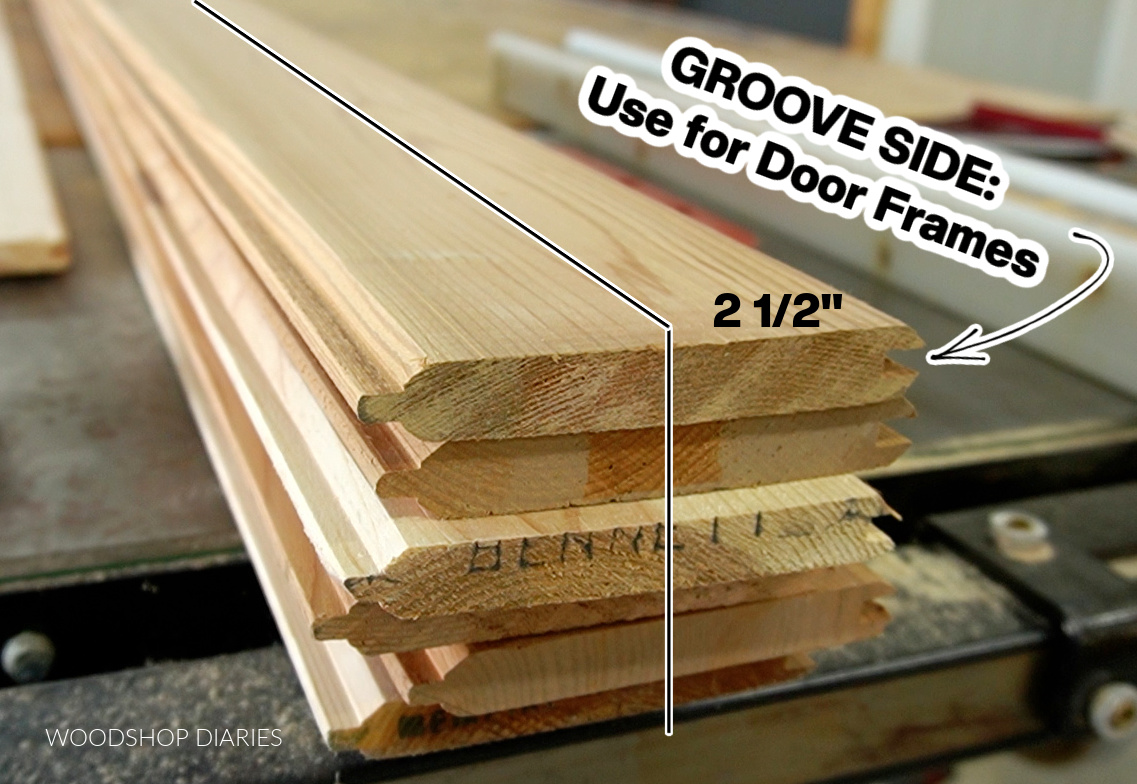
I also used the T&G boards to cut the pieces for the door frames and the drawer front trim. Essentially, I ripped them in half and used the groove side for the door frames and the tongue side for the drawer trim.
RELATED: 7 Ways to Build a Cabinet Door (the T&G method is number 5)
But again, if you prefer to use precut 1x2s and 1x3s for that instead, that’s totally fine.
Helpful resources for the build
These posts and how to guides may be helpful throughout the build process:
Are DIY projects your thing? Sign up for our newsletter for priority access to the latest projects and build plans!
How to Build a Single Sink Bathroom Vanity Cabinet
I’ve included several helpful tips and some behind the scenes info in the build video. You can check it out on my YouTube Channel here.
Love watching how-to videos? Subscribe to my YouTube channel for plenty more where that came from!
Prefer to print? Grab the printable bathroom vanity building plans available here:
Tools & Materials
Tools:
- Circular Saw and Saw Guide(s)
- Miter Saw
- Table Saw
- ⅜″ dowel jig
- Pocket Hole Jig
- Concealed Hinge Jig
- Drill/Driver
- Clamps
Materials:
- (1 + ½) sheet ¾″ plywood (birch used here)
- (1) sheet ¼″ plywood (birch used here)
- (6) 2x4x8 boards (cedar used here)
- (2) 1x6x8 tongue and groove boards (cedar used here)
- (5) pair 18″ drawer slides
- (2) pair inset concealed hinges for frameless cabinets
- 1 ¼″ pocket hole screws
- 2 ½″ pocket hole screws
- 2″ wood screws
- ⅜″ x 1 ½″ wood dowels (for assembling doors)
- Wood Glue
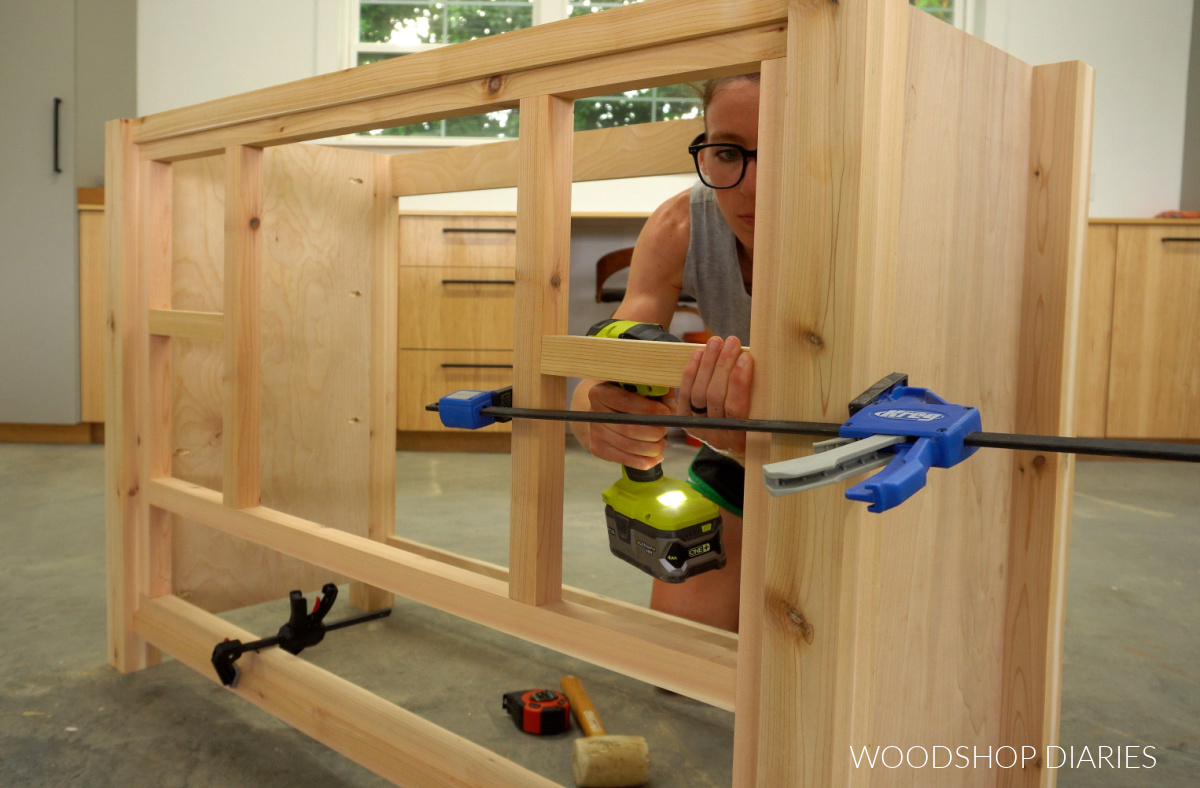
Step 1: Assemble Single Sink Vanity Frame
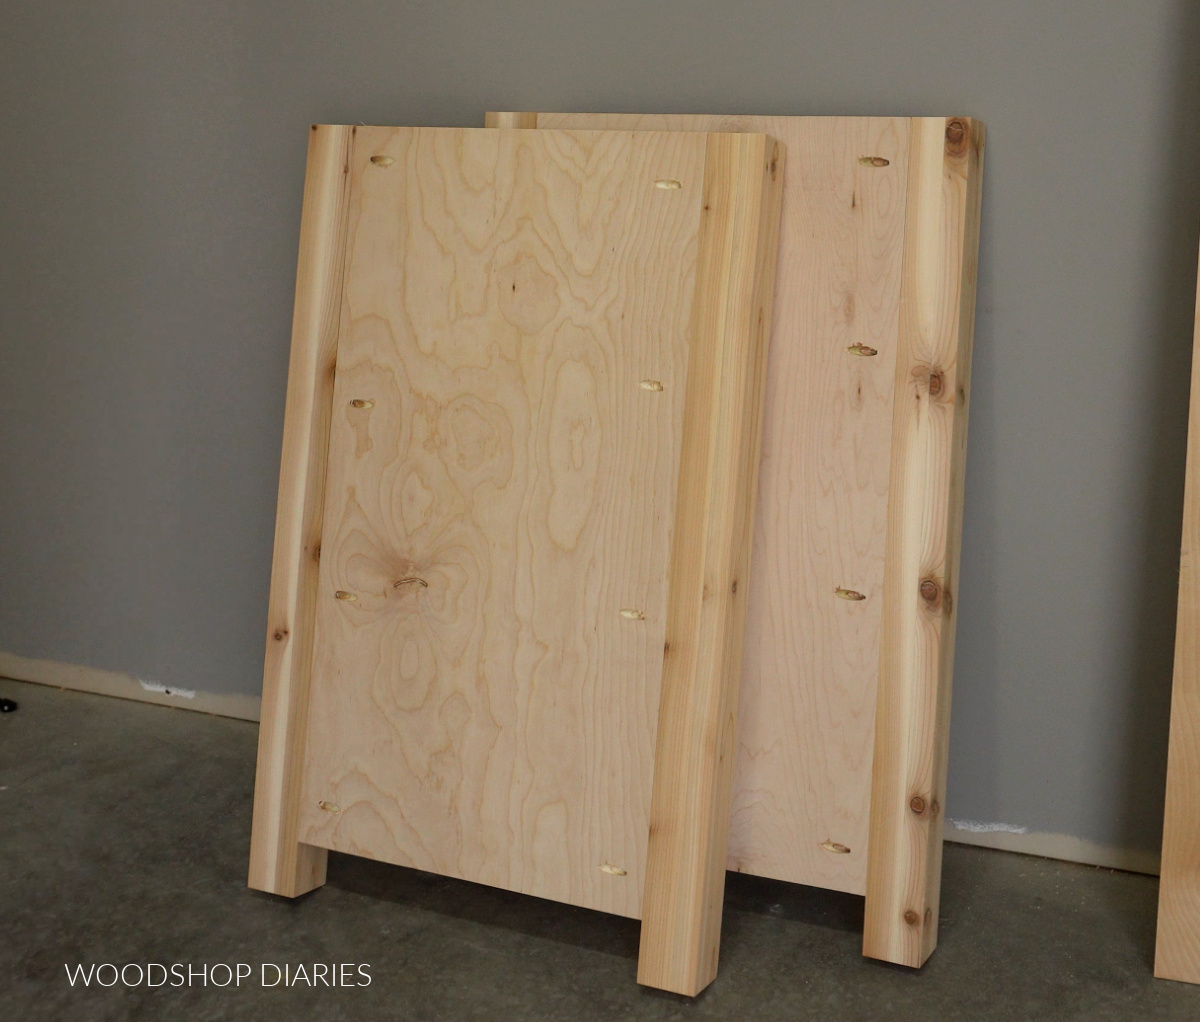
I glued up my own vanity legs by gluing together 4 pair of 2x4s. After the glue was dry, I trimmed the edges to clean them off and give me 2 ½″ x 2 ½″ square posts.
Since I was building two vanities, I made 8 legs, but if you’re just building one, you’d only need four.

NOTE: In the video, I mentioned that I ripped these 2x4s down before gluing up, but that in hindsight I wouldn’t have done that. If I did it again, I’d just glue up full width 2x4s.
Then, I cut two pieces of ¾″ plywood to assemble between the legs to give me two side panels using pocket holes and screws.
RELATED: How to cut plywood sheets
You can find the complete plywood cut diagram for this project in the printable plans.
For the vanity frame, I used 2x3s at the front and ¾″ plywood strips at the back. (Using thinner material at the back allows more room for the faucets to be installed in the countertop.)
I cut my 2x3s from a 2×4. I recommend squaring the edge of the 2x4s for the front framing on the table saw, then cutting off a ¼″ – ½″ thick piece to use for trim later.
Then, rip what’s left to 2 ½″ wide to make the actual 2×3 board. I attached the front and back framing between the side panels using pocket holes and screws.

Then, remember those ¼″-½″ strips I mentioned I cut from the 2x4s? I glued those onto the front 2x3s–one at the top and one at the bottom.
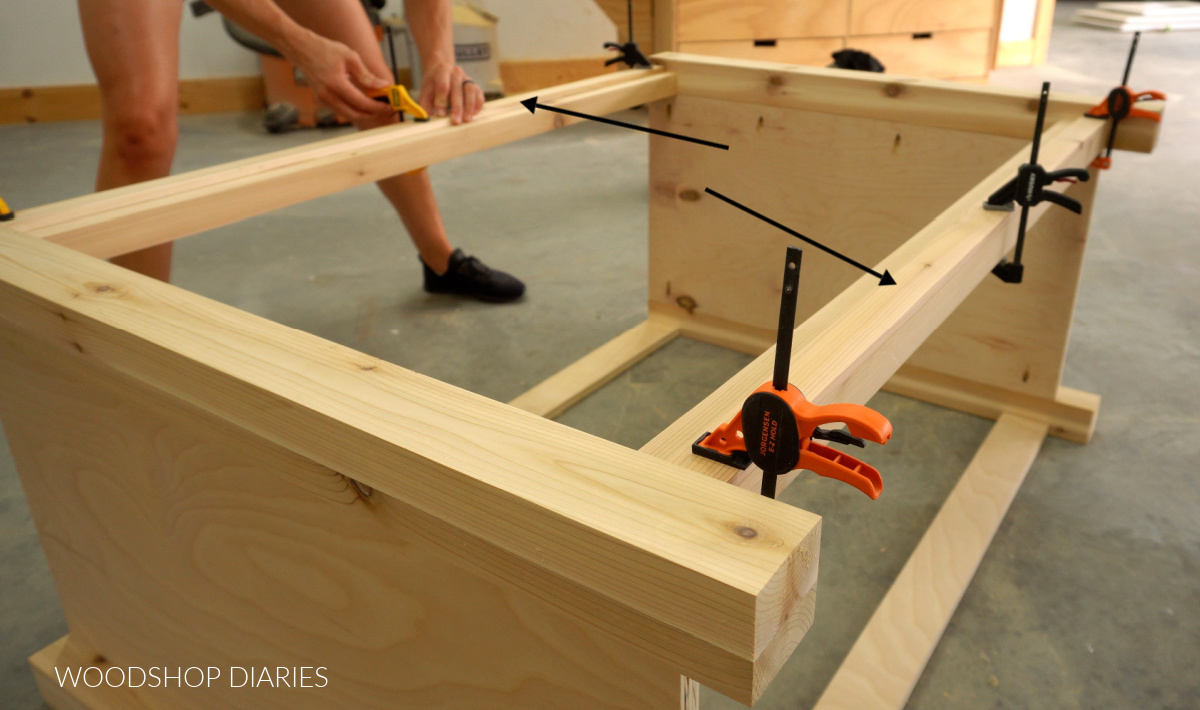
To add just a little more trim and dimension to the front, I also glued 2x2s vertically between the 2x3s on each front leg.
Prefer to print? Grab the printable building plans for this single sink vanity here.
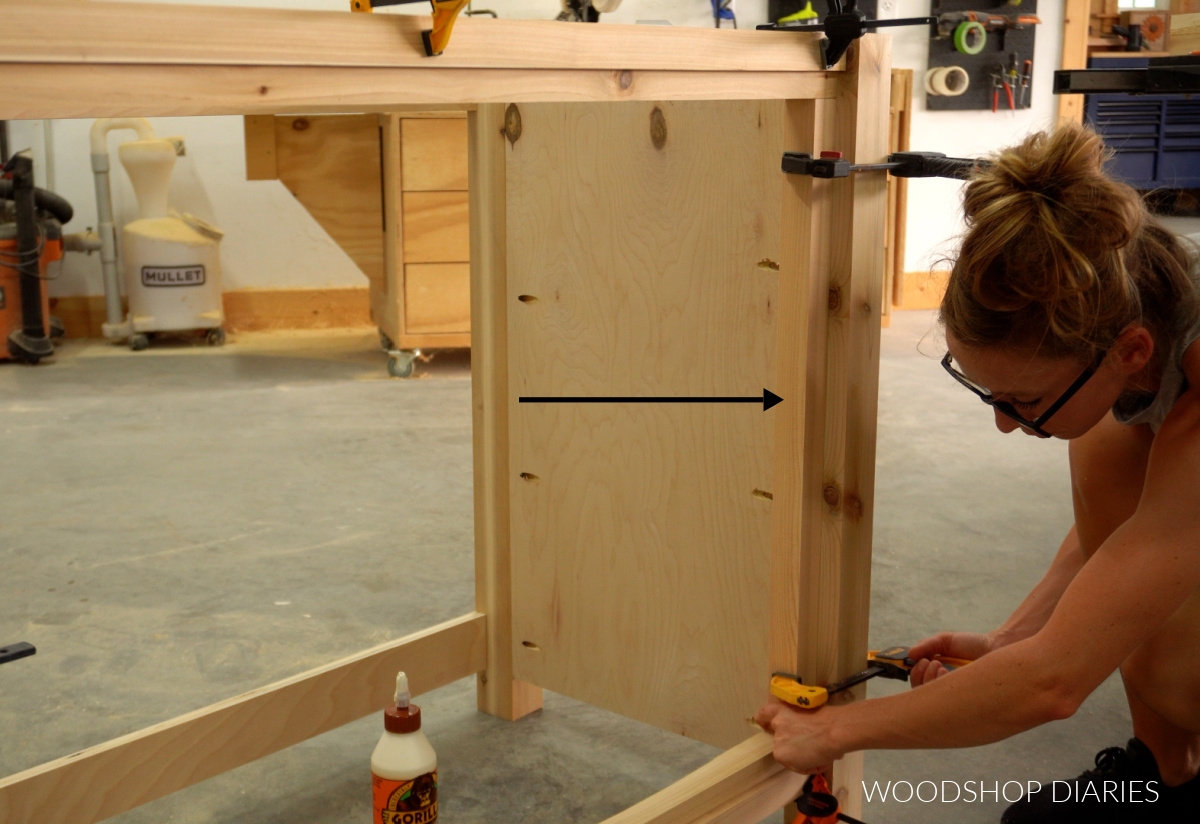
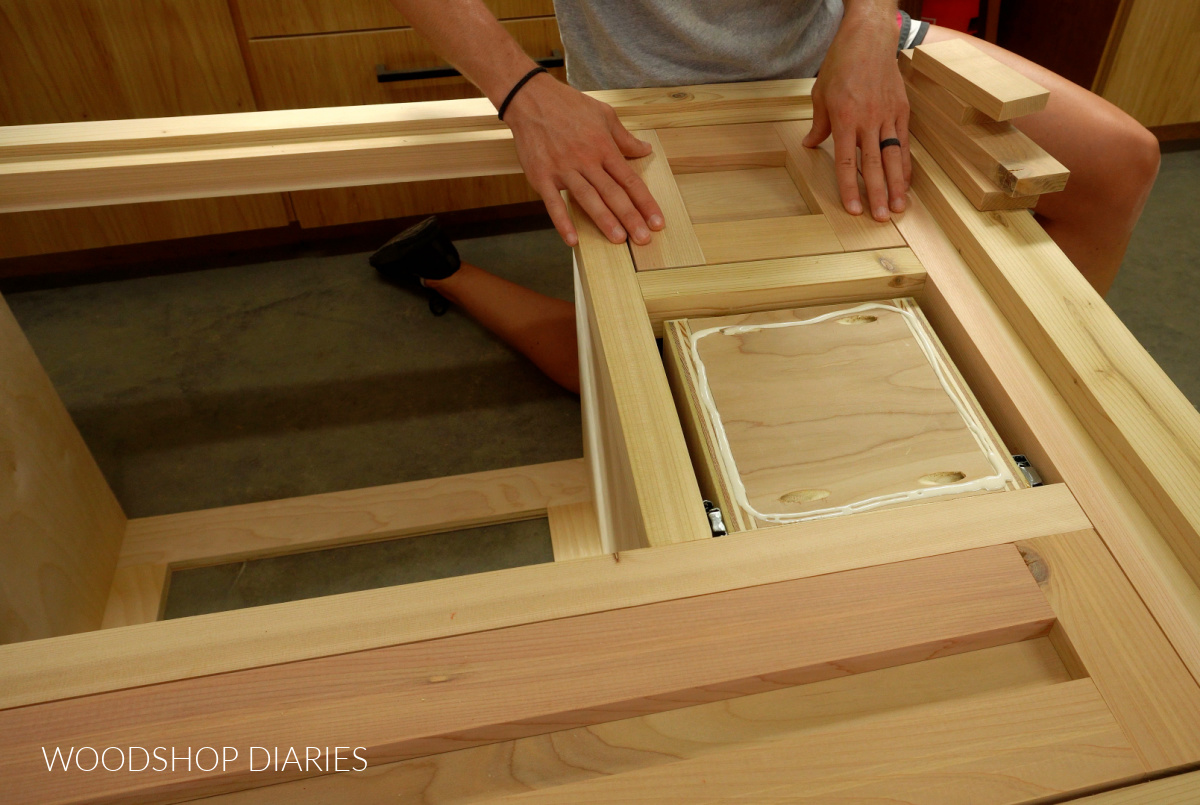
Step 2: Install Divider Framing and Panels
Once the main frame was together, I began adding some pieces to divide it up. This bathroom vanity design had 5 drawers and the top middle section will be doors.
So I cut and installed 2×2 pieces to divide up the large bottom drawer, and each top drawer.
I attached each piece with pocket holes and screws. By the way, when drilling pocket holes in 2x2s, I’ve found they’re much more likely to split if I use two holes in each end.
So normally, I just use one and some wood glue to help keep it from twisting.
After everything was framed out around the front, I added couple plywood strips to frame out the back.
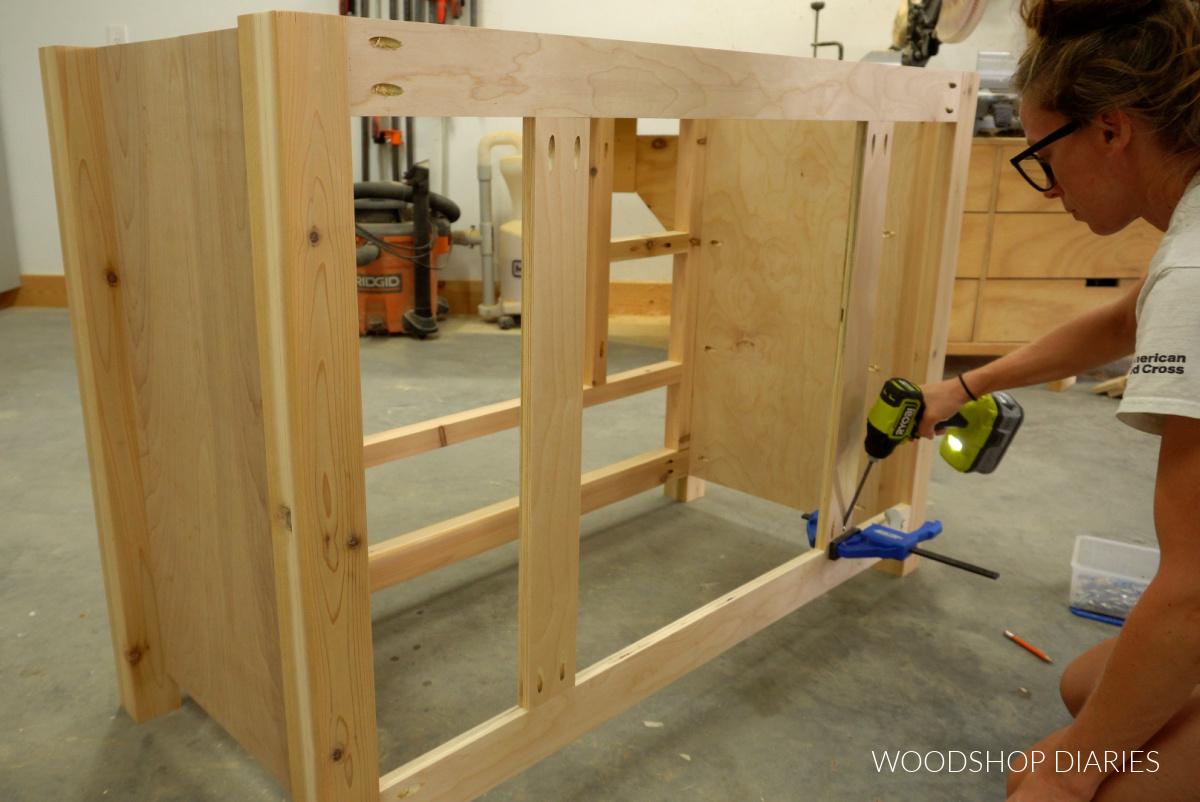
Then, I installed ¾″ plywood divider panels to run between the framing and separate the vanity into three sections.
The middle section will be where the doors will go, so to complete this “cabinet” part of the vanity, I also added a bottom panel between the dividers.
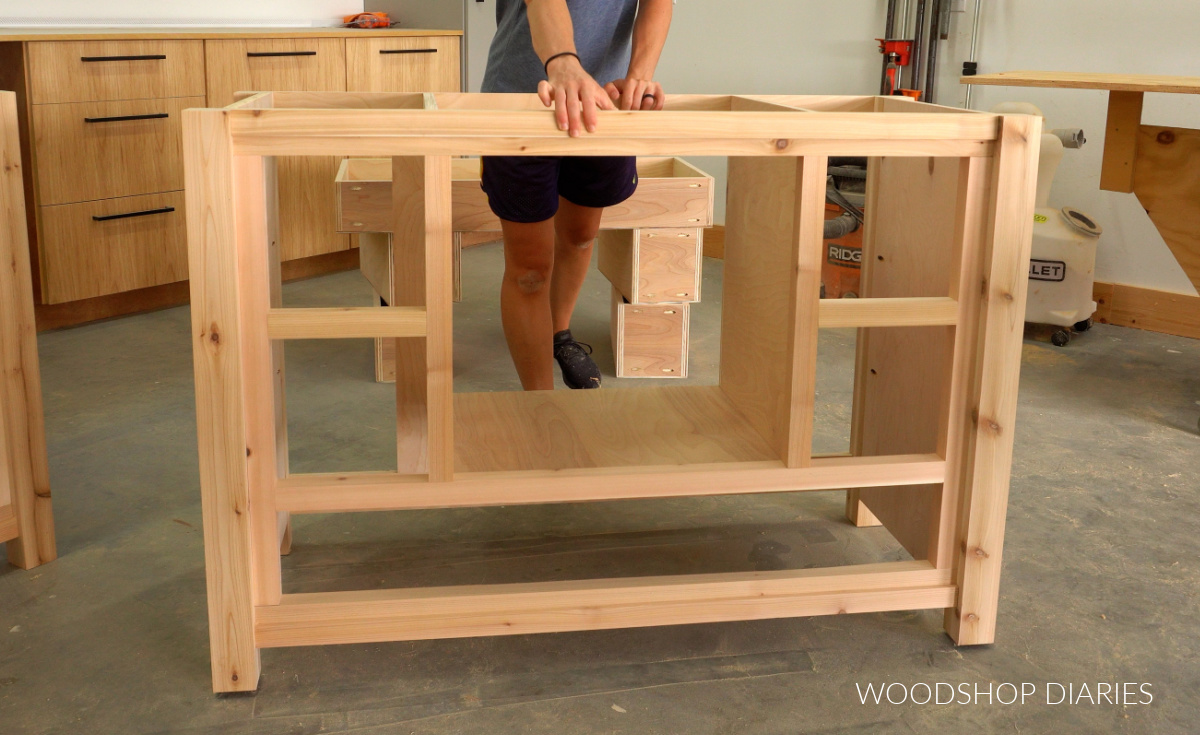
Step 3: Add Drawers to Vanity Cabinet
Now that the main body of the vanity is together, all that’s left is to fill it with drawers and doors. Let’s start with the drawers, first.
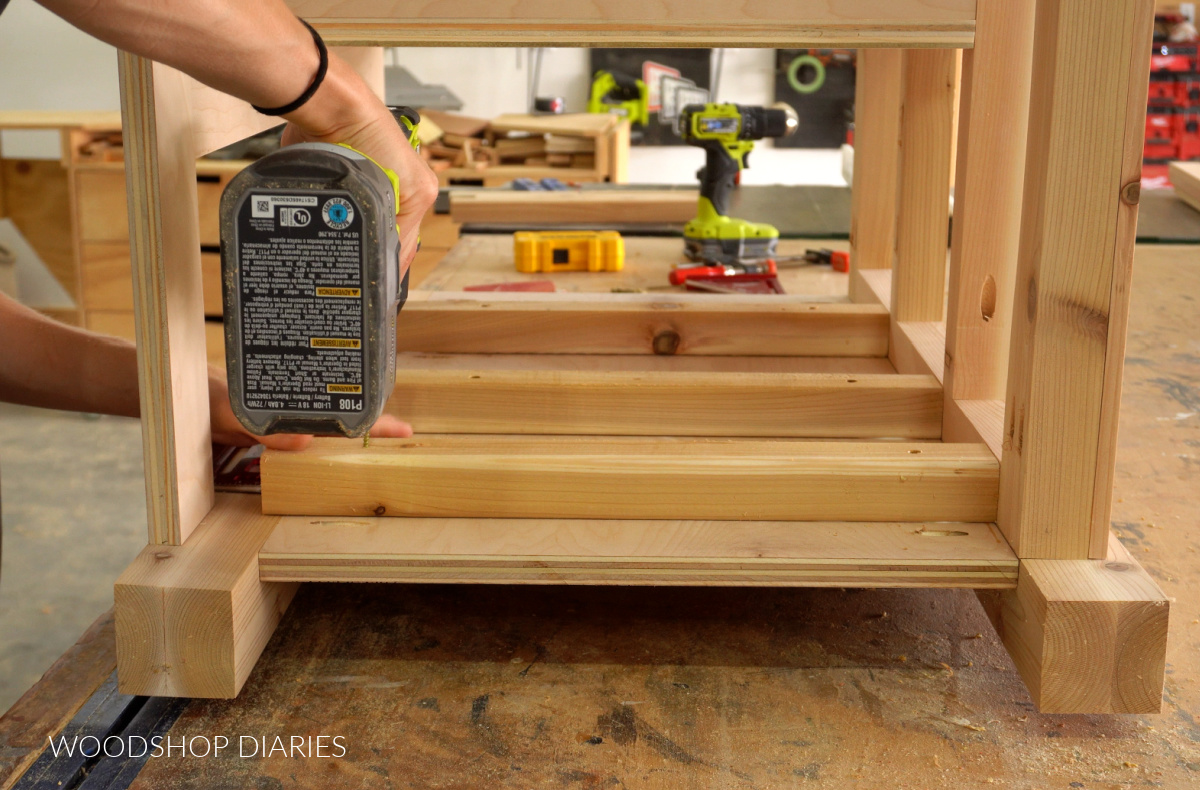
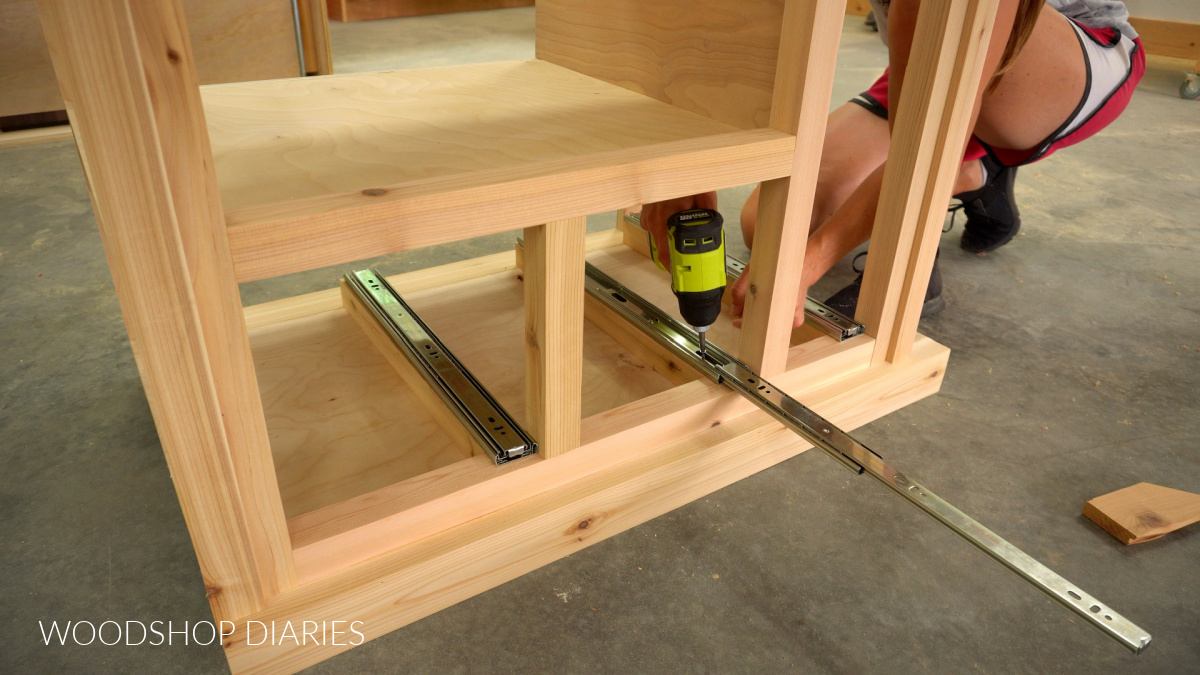
Because I added the extra 2×2 trim on the sides in step 1, that meant I needed to add some additional spacer blocks to the sides to be able to mount the drawer slides.
So I glued and screwed 2x2s to each side right above the front dividers.
Then, I installed the drawer slides into the vanity cabinet onto these spacer blocks and to the middle divider panels.
If you’re new to installing drawer slides, check out this detailed guide on installing drawers and drawer slides.
Then, I began building the drawer boxes. This vanity required two different sizes of drawer box–a shallow, but wide bottom drawer, and four narrow, but tall top drawers.
Normally, I assemble my drawer box sides using ¾″ plywood and install a ¼″ plywood bottom into dadoes I cut on the sides.
RELATED: How to build a drawer box
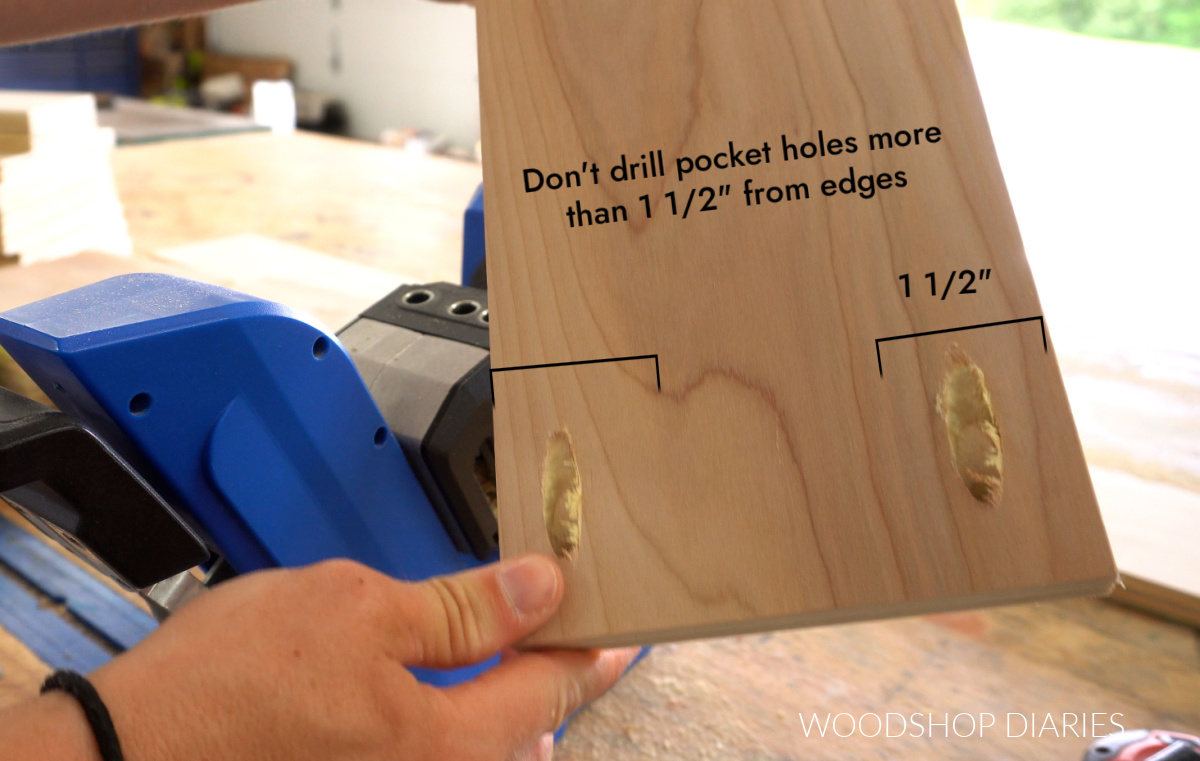
But this time, to save a little extra space inside the drawer, I decided to skip the dadoes. I screwed the four sides of each drawer together using pocket holes and screws.
NOTE: You can certainly assemble the drawers using a different method than pocket holes if you’d like.
However, if you do use pocket holes, make sure not to drill the holes more than about 1 ½″ from the edges of the board. You’ll see why in step 5.
Then, just glued and stapled the ¼″ plywood bottom on.
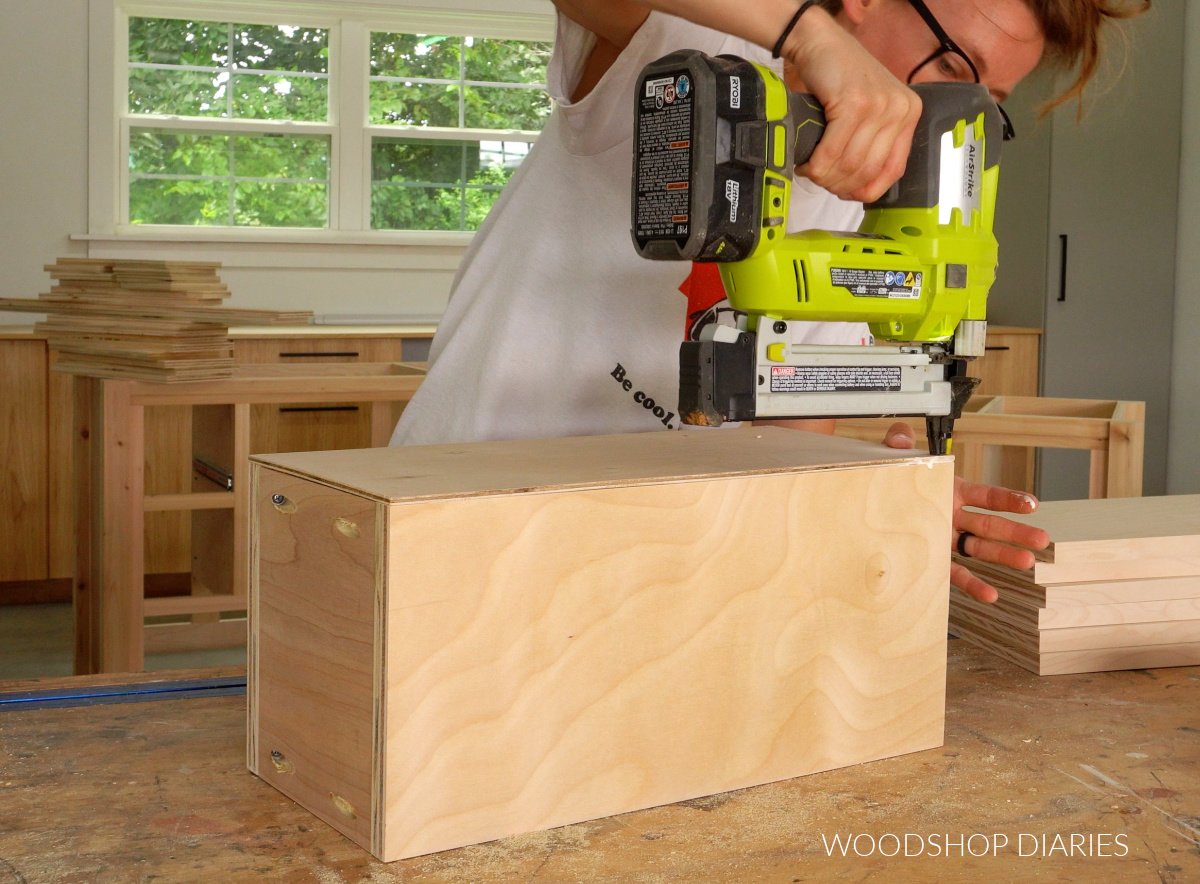
Once the drawer boxes were together, I added them into the vanity by attaching them to the slides.
RELATED: How to install drawer boxes
Ready to build your own? Grab printable building plans with all the dimensions, cut list, and step by step diagrams here.
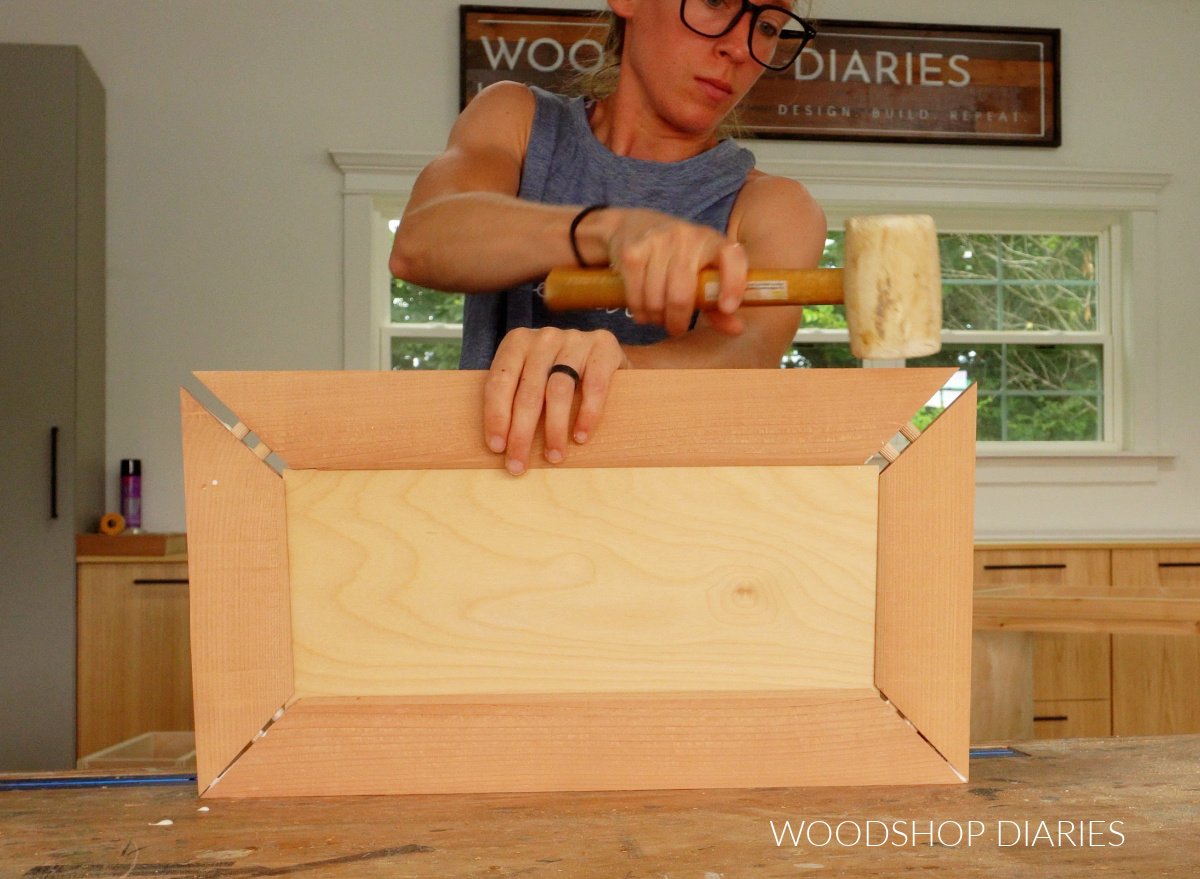
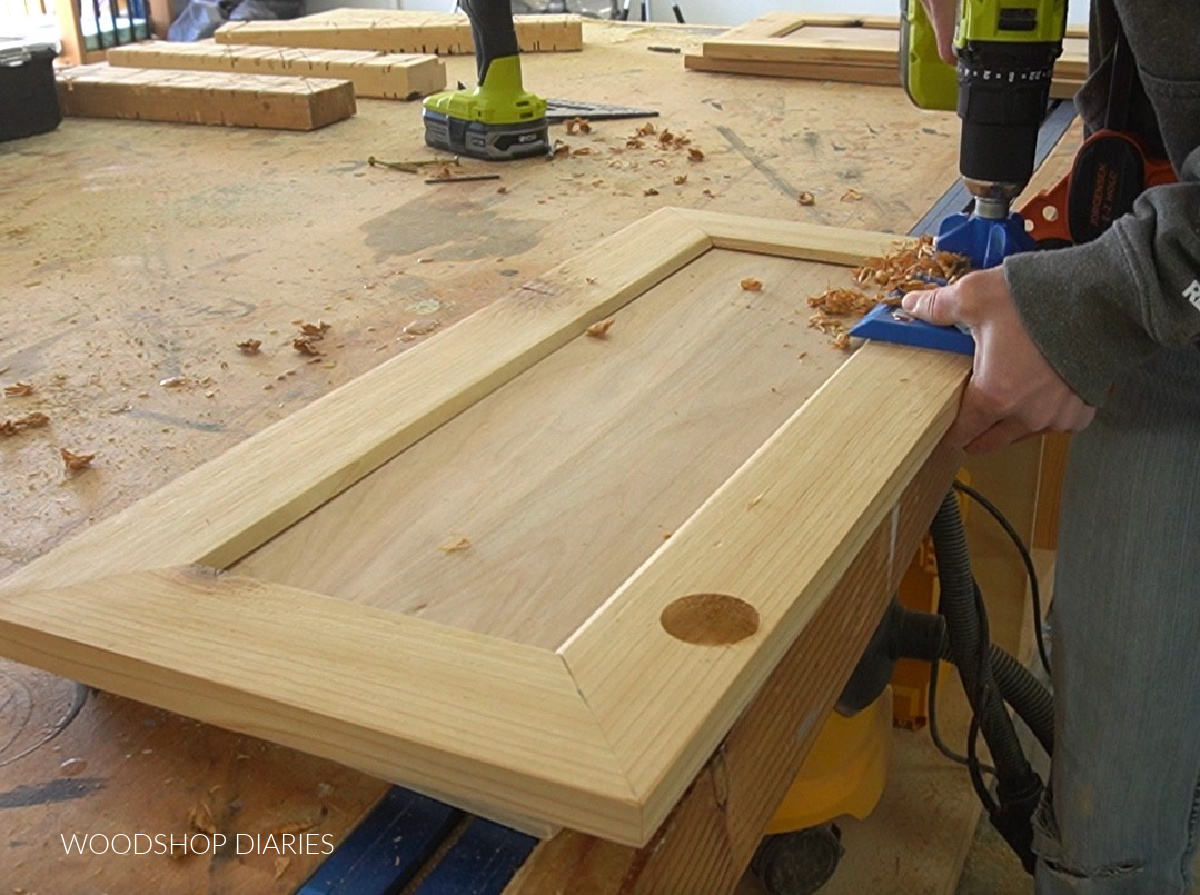
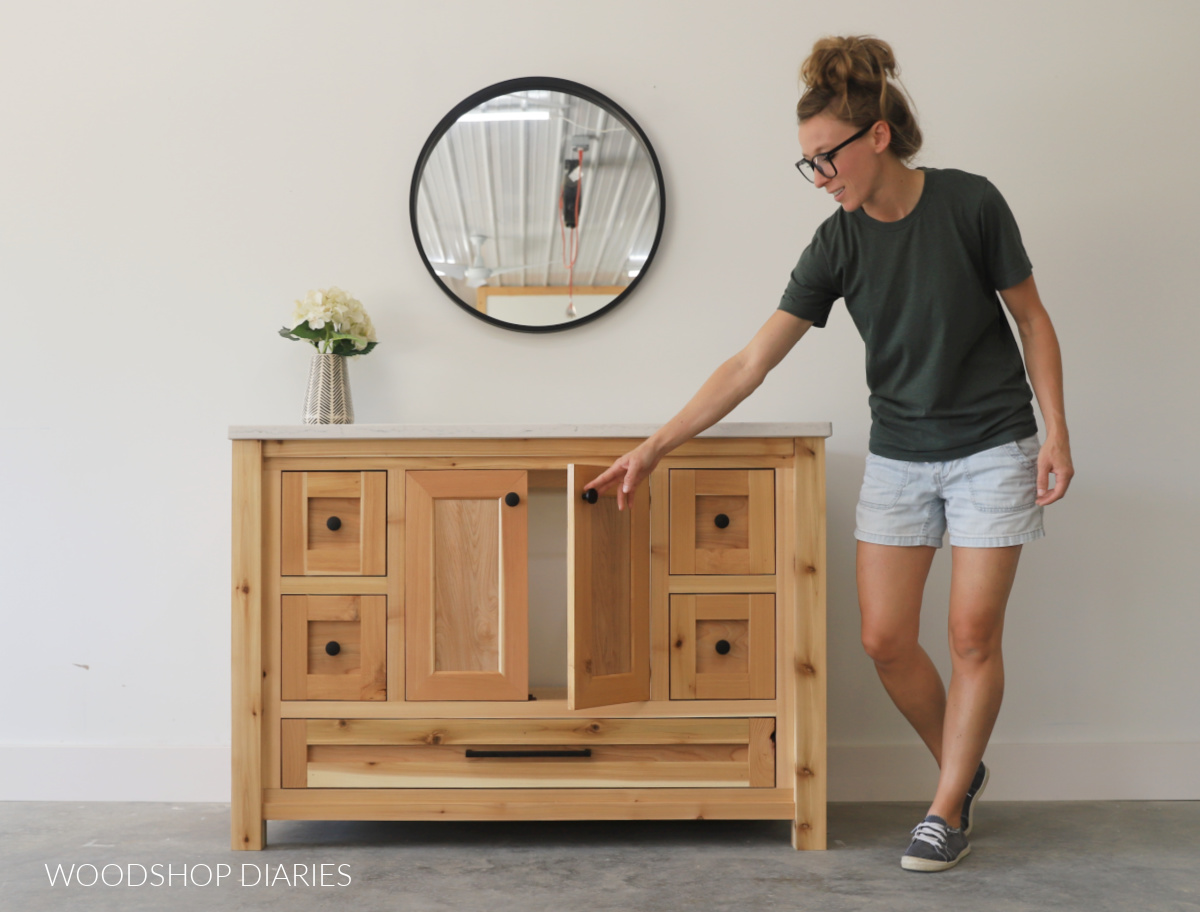
Step 4: Build Doors
I mentioned earlier that for the doors, I trimmed down some tongue and groove 1×6 cedar and used the groove edge of the board for the door frame.
This saves a bit of time since the dadoes are already cut (they’re the groove).
I cut these strips with ends mitered 45 degrees and cut a ¼″ plywood panel to fit inside. Check out this post for 7 ways to build a cabinet door (this method is number 5).
After I test fit the pieces, I assembled using wood glue and dowels.
RELATED: How to use a dowel jig
I clamped the joints tight and allowed to dry.
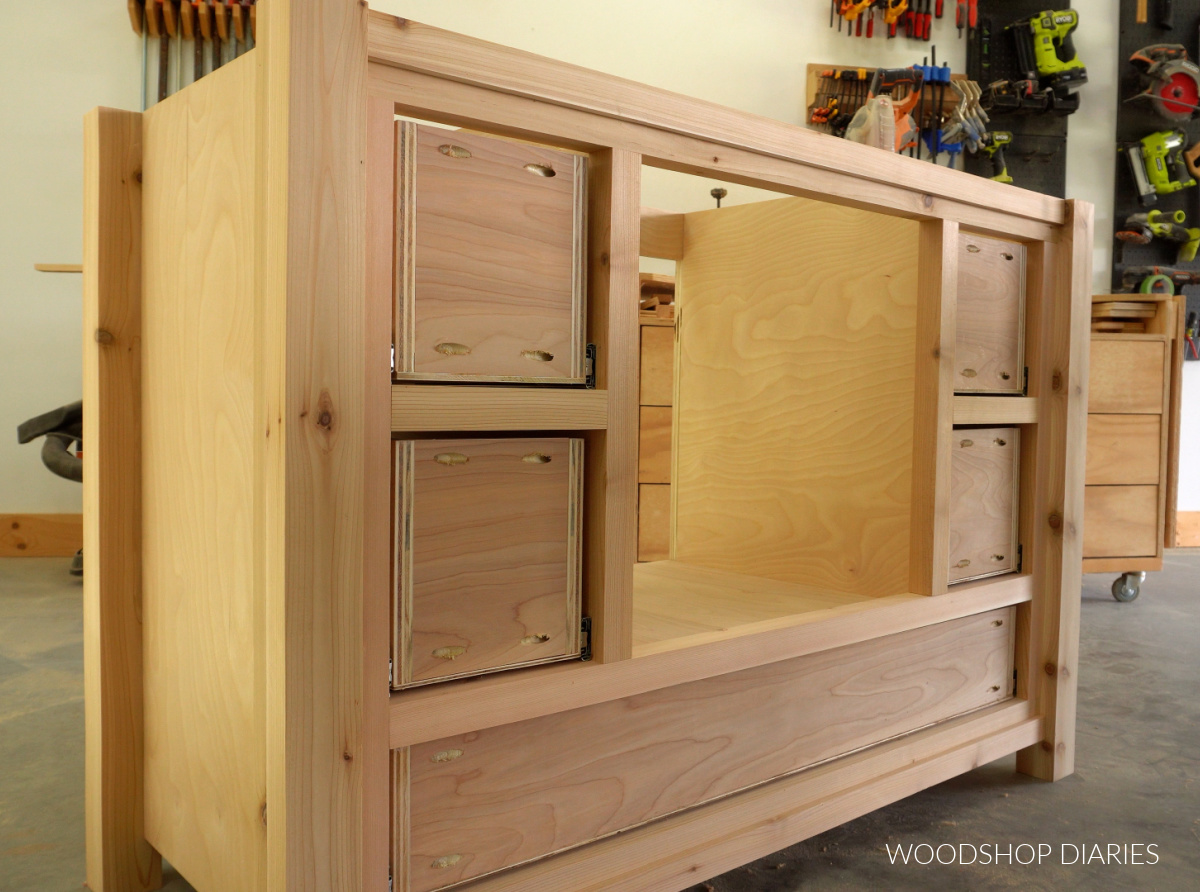
Step 5: Install Drawer Fronts and Doors
The leftover tongue side of the tongue and groove boards is what I used for the drawer front. I trimmed them down on the table saw to remove the tongue edge–this made them about 2″ wide.
Then, I cut pieces to fit around the front of the drawers so that when put together, there was ⅛″ gap between all sides.
I found it easiest to install these pieces by laying the vanity on its back, then applying wood glue along the edge of the drawers. Then I could position the trim as needed and allow to dry.
This is why I suggested drilling pocket holes close to the board edges. These trim pieces will cover them once installed.
After the glue had fully cured on the drawer front trim, I flipped the vanity back up to install the doors.
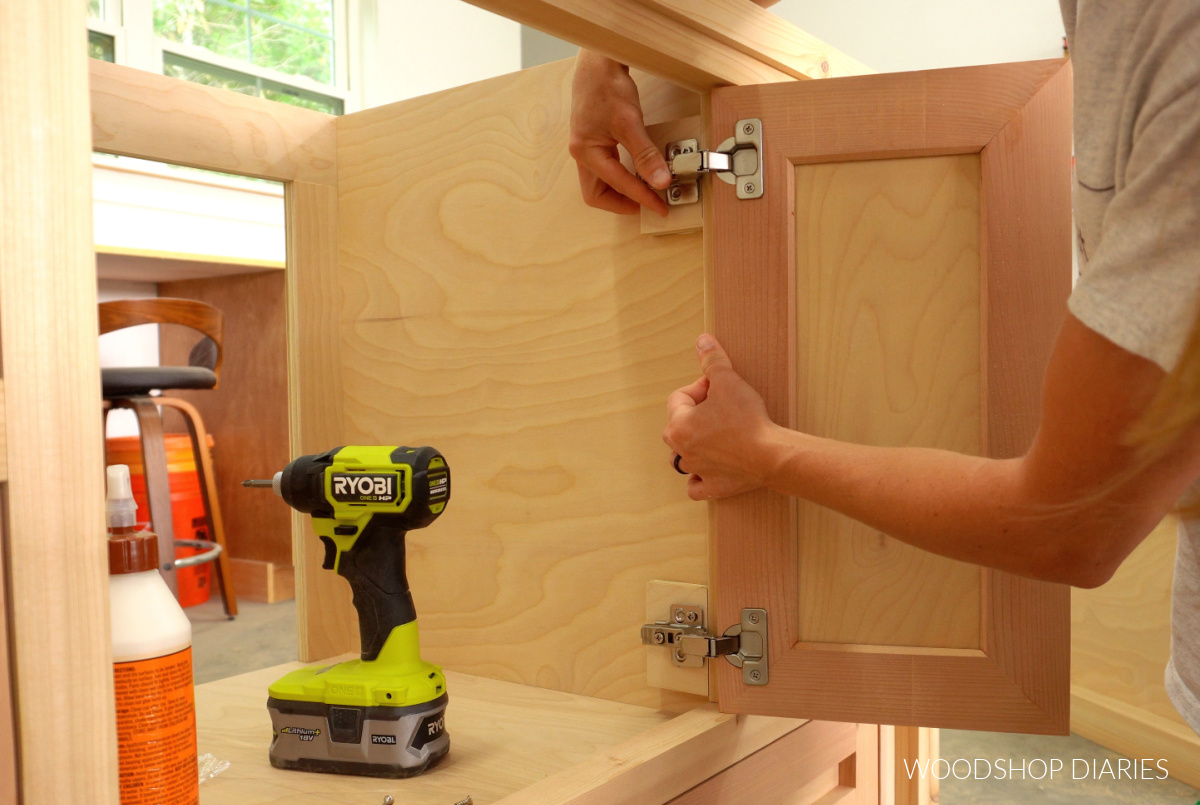
I used a concealed hinge jig to install concealed hinges for inset doors on frameless cabinets to each door.
RELATED: How to install concealed hinges
Now, this isn’t technically a frameless cabinet. But, it’s not a typical face frame cabinet, either, since the frame is a 2×2 and face frames are supposed to be ¾″ thick.
So, I’m using some spacer blocks to “fake” a frameless cabinet. I glued and nailed some scrap ¾″ plywood blocks to go behind each hinge inside the cabinet.
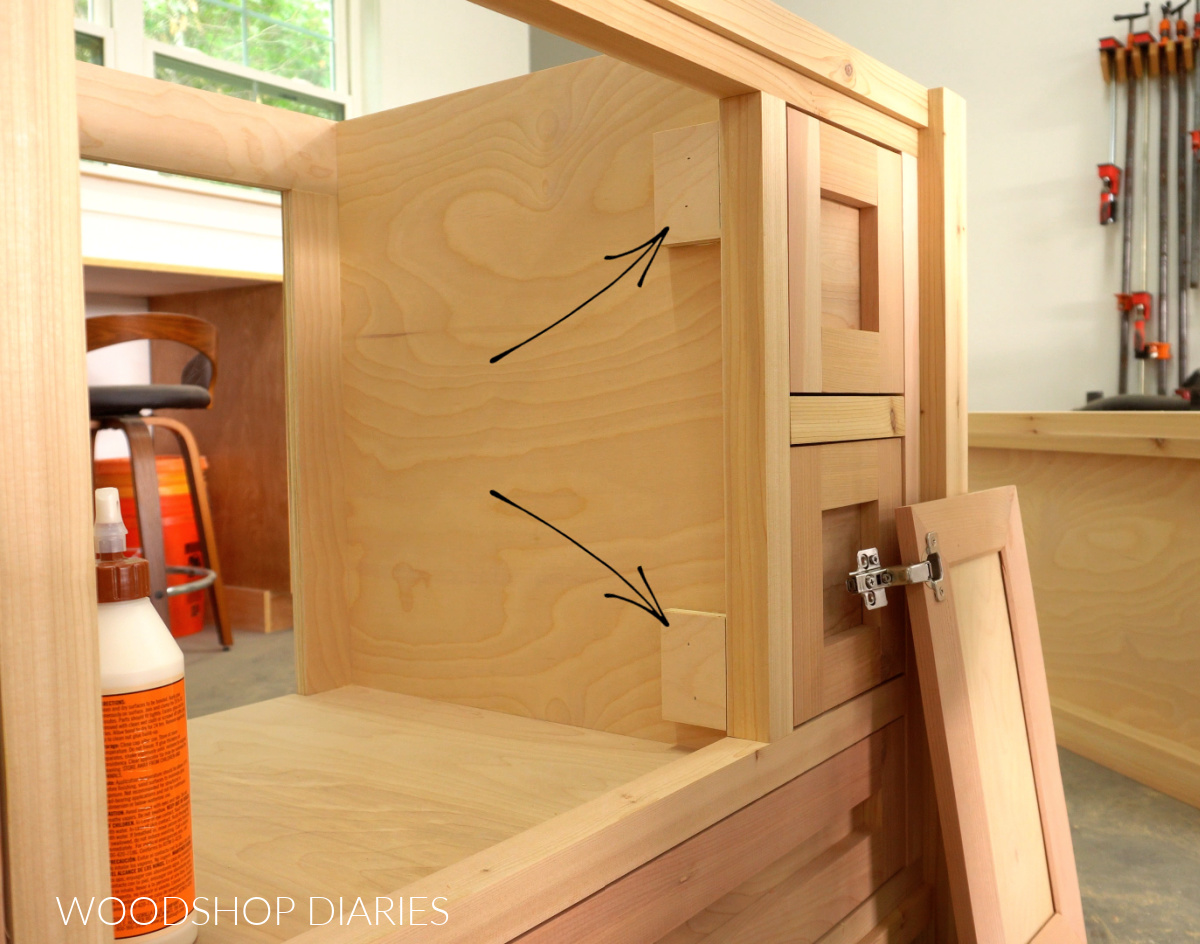
Then, I can mount the hinges directly to these blocks. This way, it will function like a frameless cabinet.
At this point, once the doors are on, the build is complete and it’s ready for finish. I opted for a simple clear coat, but you can paint/stain/finish as desired.
I applied three coats of Minwax Helmsman Water Based Clear Coat to the vanities and allowed to dry.
Step 6: Add Hardware
Once the finish was dry, I added some knobs to the doors and top drawers, and a drawer pull to the bottom drawer.
I also added a simple magnetic catch behind the doors to help prevent them from “kicking in” (this tends to happen with inset doors).
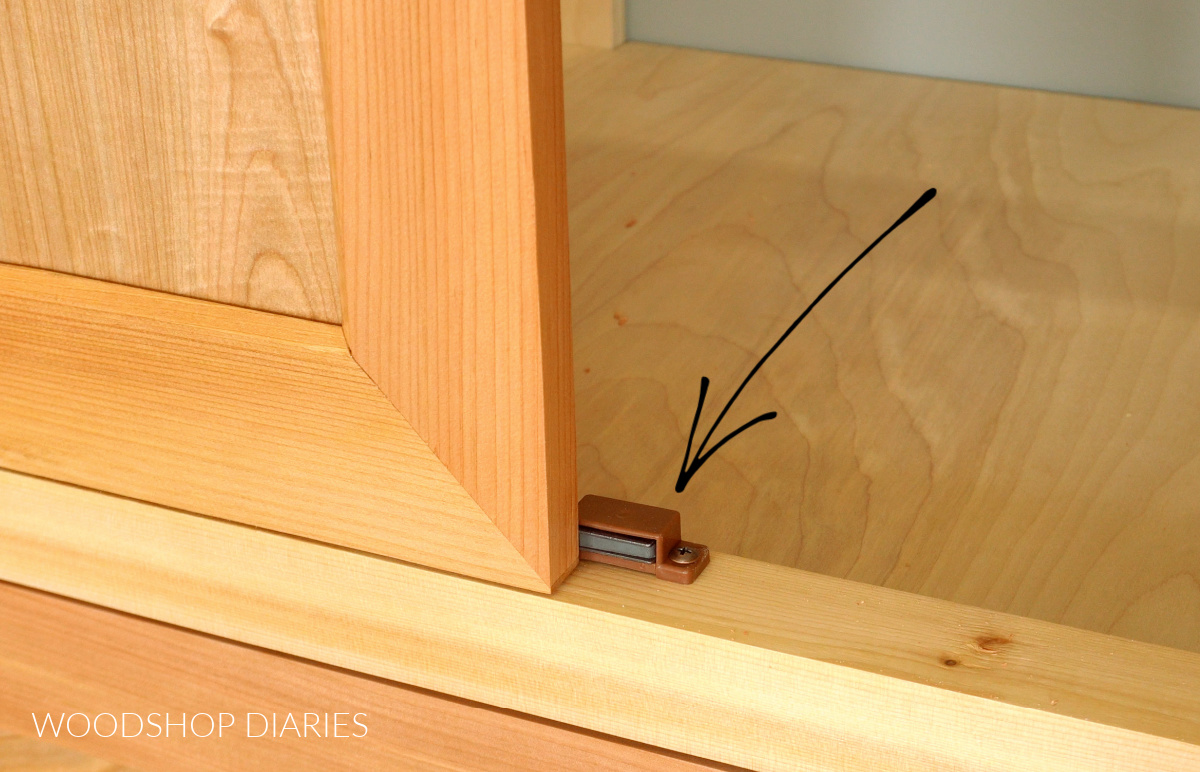
Unless it needs it, I usually don’t attach the metal piece of the catch to the door, so it’s not really a magnetic catch (since there’s no metal for the magnet to pull on) so much as it’s just a little stop block.
But if the door is a little warped and needs help pulling in flat, you can definitely use the magnetic feature to pull it flat.
Step 7: Install Vanity and Add Countertop
Before I can install these into my parents’ bathroom, I need to remove the old ones, remove the backsplash, patch the drywall, and paint. So we aren’t quite there yet–I’ve got some more work to do.
However, when we get ready to install them, we will position them in place and secure to the wall studs through the back supports/framing of each vanity.
Then, we will attach the countertop, sink, faucet, and reconnect the plumbing. You’ll need to check your countertop, sink, and faucet instructions for details on how to install those to the vanity.
But, this post details how we installed a granite top and sink to our vanity a few years ago.
I’ll share an update soon once we get these put in! In the mean time, if you’d like to build one of your own, be sure to grab the printable building plans here.
Looking for more DIY bathroom Projects?
Here are a few of my favorite projects you can build for the bathroom:
If you enjoyed this build and would like to save it for later, be sure to pin it or share to your favorite social channel!
Until next time, friends, happy building!