
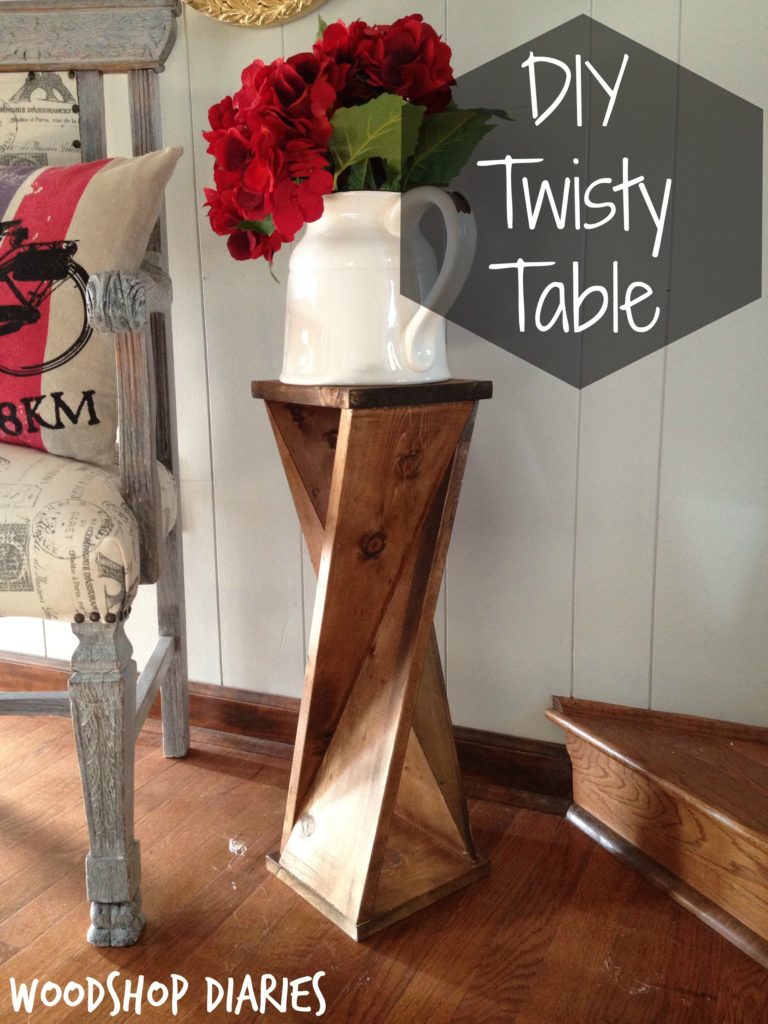
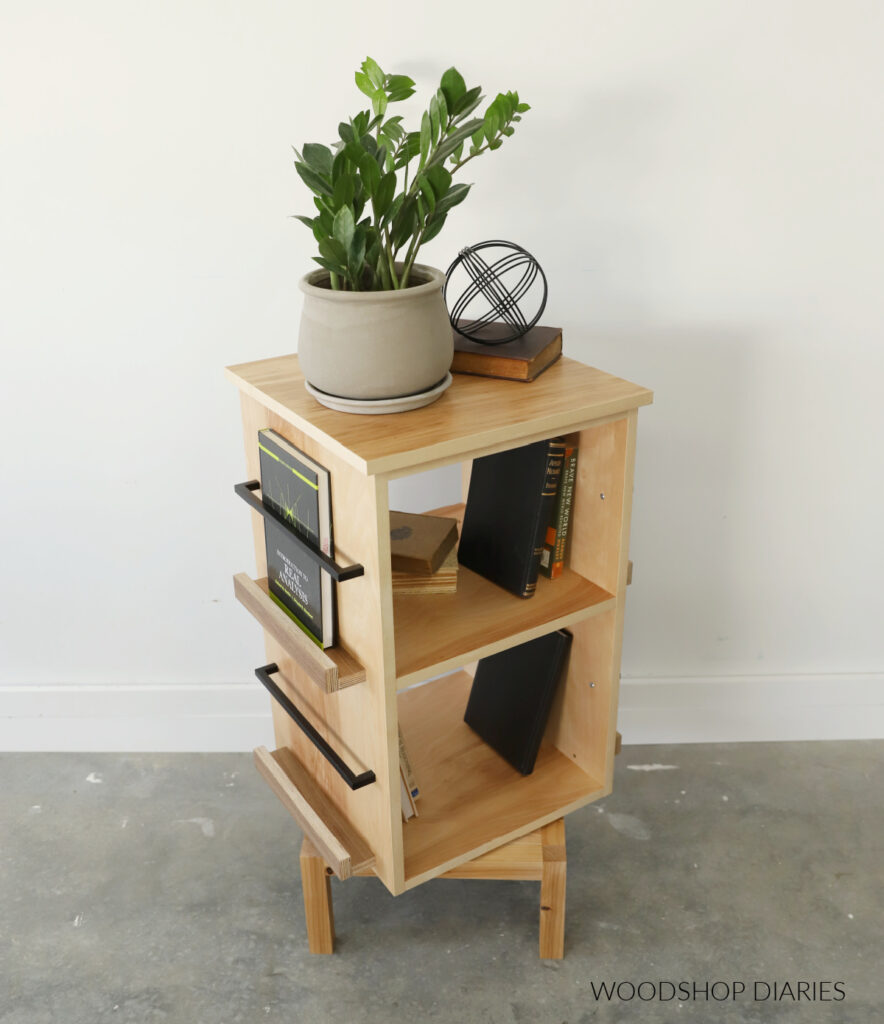
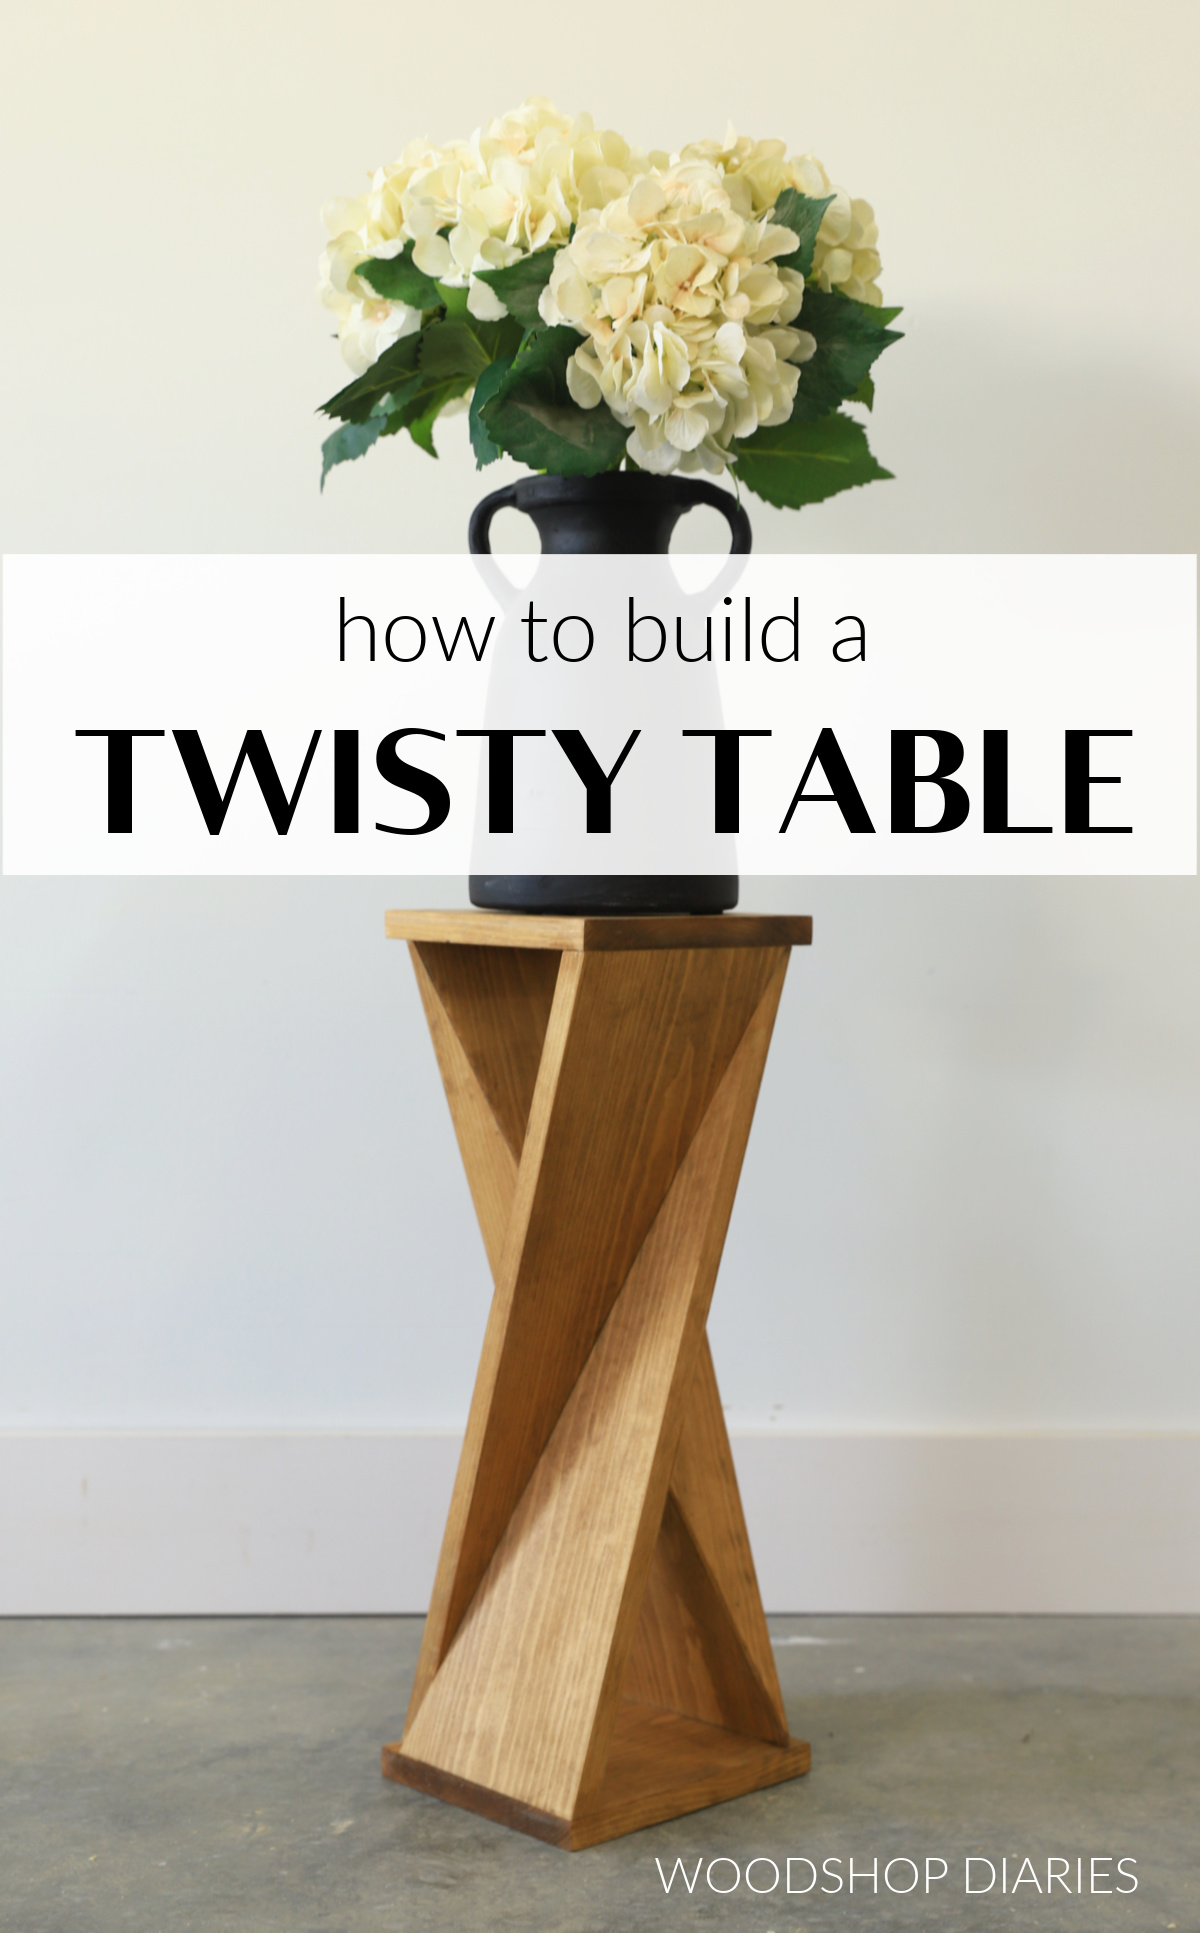
In this post, I’m sharing how to build a unique DIY twisty table from a single board!
This was one of my very first DIY woodworking projects and makes such a fun conversation piece that you can use as a plant stand or a side table.
If the angles seem intimidating, don’t worry! One of the coolest parts about this project is that you don’t have to figure any angles and you barely have to measure anything.
I’m sharing all my “secrets” to building this table (quite easily) in the steps below, so if you’re ready to get building, let’s dive in.
*This post contains affiliate links. See website policies.
**This post was originally published on Oct. 5, 2015, but was updated Sept. 2025 with more in depth instructions and a video (video is linked below).
What to know before building
I originally built this project way back in 2015 as one of my very first DIY projects.
That said, this is not a difficult project to build, but due to the angles, it can be a bit tricky to visualize. So take your time to think it through as you cut your pieces.
I don’t have a “plan” for this project as only one step actually uses any dimensions and even then, they don’t really matter. You’ll see what I mean in the steps below.
Material Choices & Sizing
This project requires just one eight foot long board. I used a 1×8 board, but a 1×10 or 1×12 board would also work fine for a wider table.
You can use just about any wood type you’d like for this. But, to keep things simple, I used basic construction lumber from the big box store. This cost me roughly $8.
This twisty table can be made just about any height you’d like (within reason) by simply adjusting your leg lengths in step 1. I made mine roughly 22″ tall and the top and bottom pieces measured about 7 ¼″ x 8″.

Tool Options
To cut the “twisted” legs for this table, you can use different methods with different tools. I’ll share below how to cut them using a circular saw OR a table saw.
If you cut them with a table saw, you need to build a jig using some scrap wood, a jig saw and a pocket hole jig. I highly recommend watching the video linked below to see both methods in action.
Are DIY projects your thing? Sign up for our newsletter for priority access to the latest projects and build plans!
How to Build a Twisty Table
If you prefer to watch, I’ve shared the full build video with tons of tips, behind the scenes, and additional details on my YouTube Channel here.

Love watching how-to videos? Subscribe to my YouTube channel for plenty more where that came from!
Tools & Materials
Tools:
- Circular Saw OR Table Saw
- Miter Saw
- Clamps
- Brad Nailer
- Drill/Driver
Materials:
- (1) 1x8x8 board
- 1 ¼″ brad nails
- Wood Glue
- 1 ¼″ wood screws (optional)
- Wood Plugs or Dowels (optional)
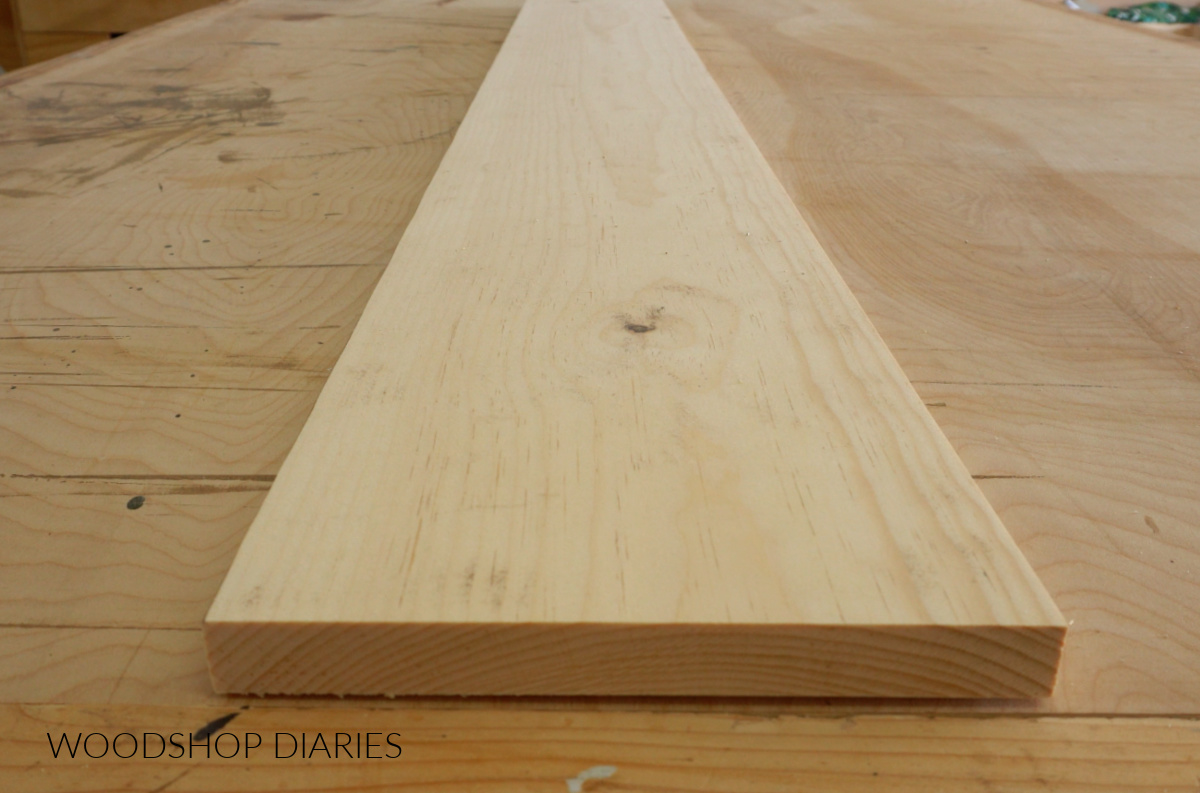
Step 1: Trim Leg Pieces to Length
The first step of this project is to cut two pieces from the 1×8 board that will be used for the “twisted legs.”
I cut my two leg pieces 22″ long and once complete, this gave me a table 22″ tall. But, if you wanted a shorter table, you can cut your two leg pieces shorter. And, if you wanted a taller table, you can cut them longer.
*I don’t recommend cutting the table legs longer than 24″ long just to keep it from being unstable (too tall to be sturdy).
The length of these leg pieces won’t change the following steps, it will only change the overall height of the table once complete. You will still build it exactly the same way.
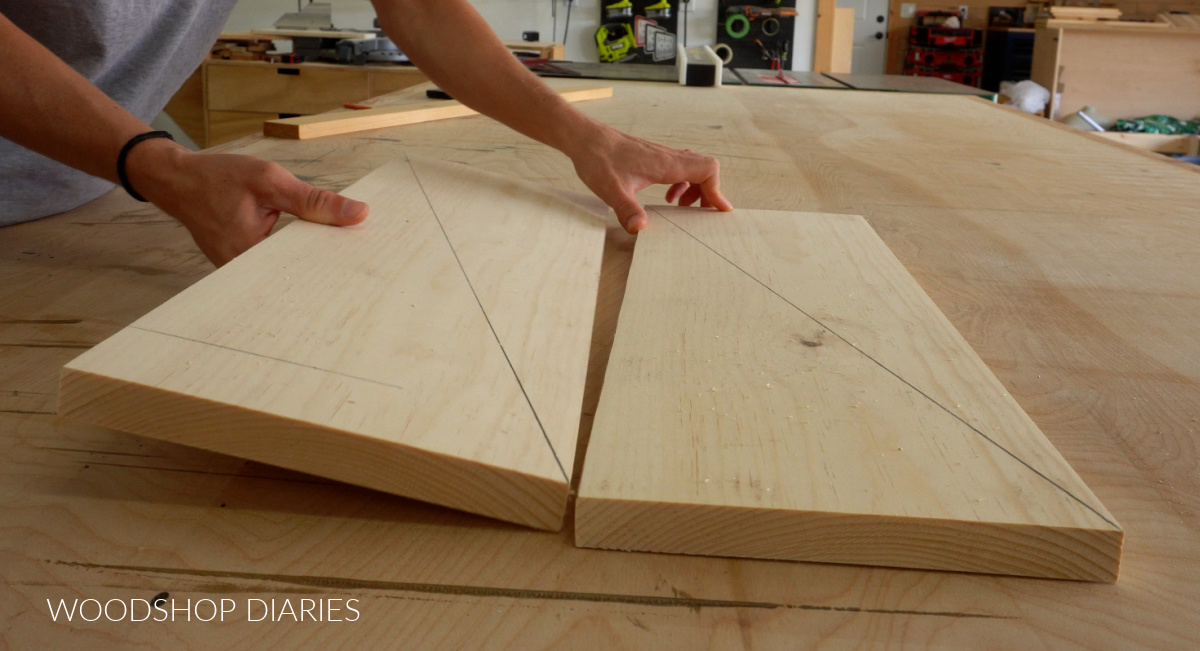
Once these were cut, I used a straight edge (a level, yard stick, or a straight scrap board) to draw a line across one diagonal on each piece.
Step 2: Cut Leg Pieces
To make these legs “twisted,” I essentially need to notch out a V shape down the length of the diagonal lines I marked so that the pieces can fold together.
This can be done multiple ways, but two of the easiest are using a circular saw or a table saw. I’m sharing both methods below.
Cutting with Circular Saw
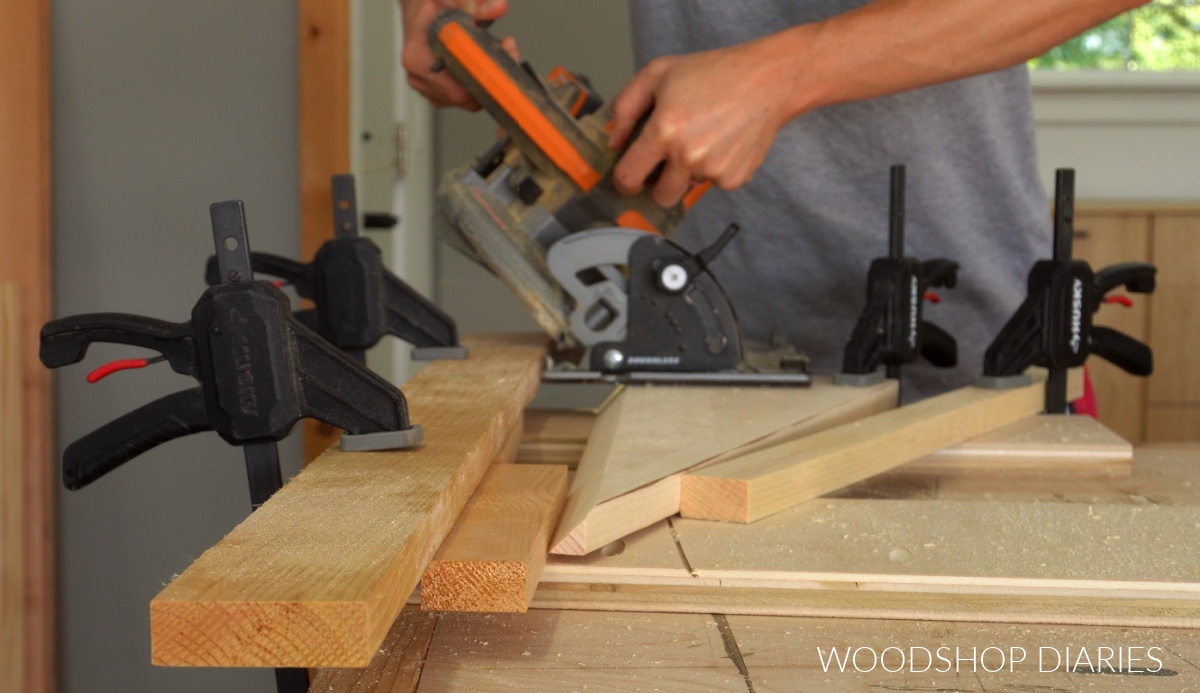
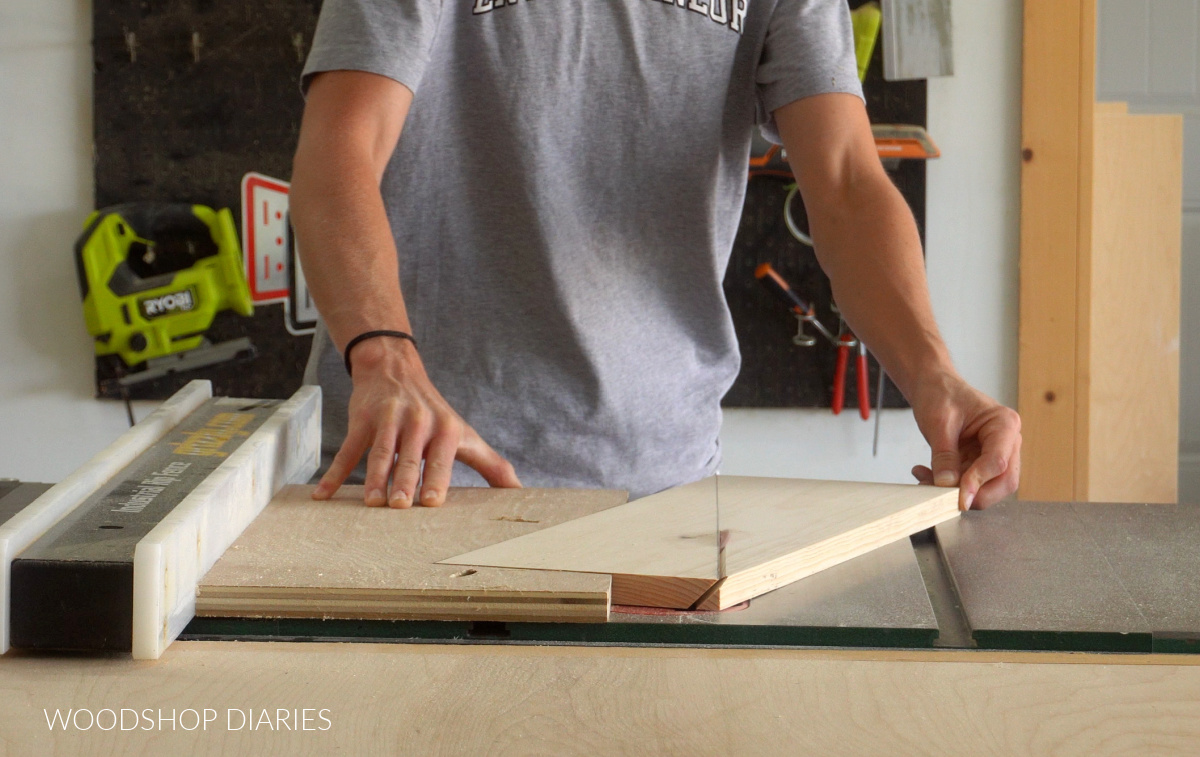
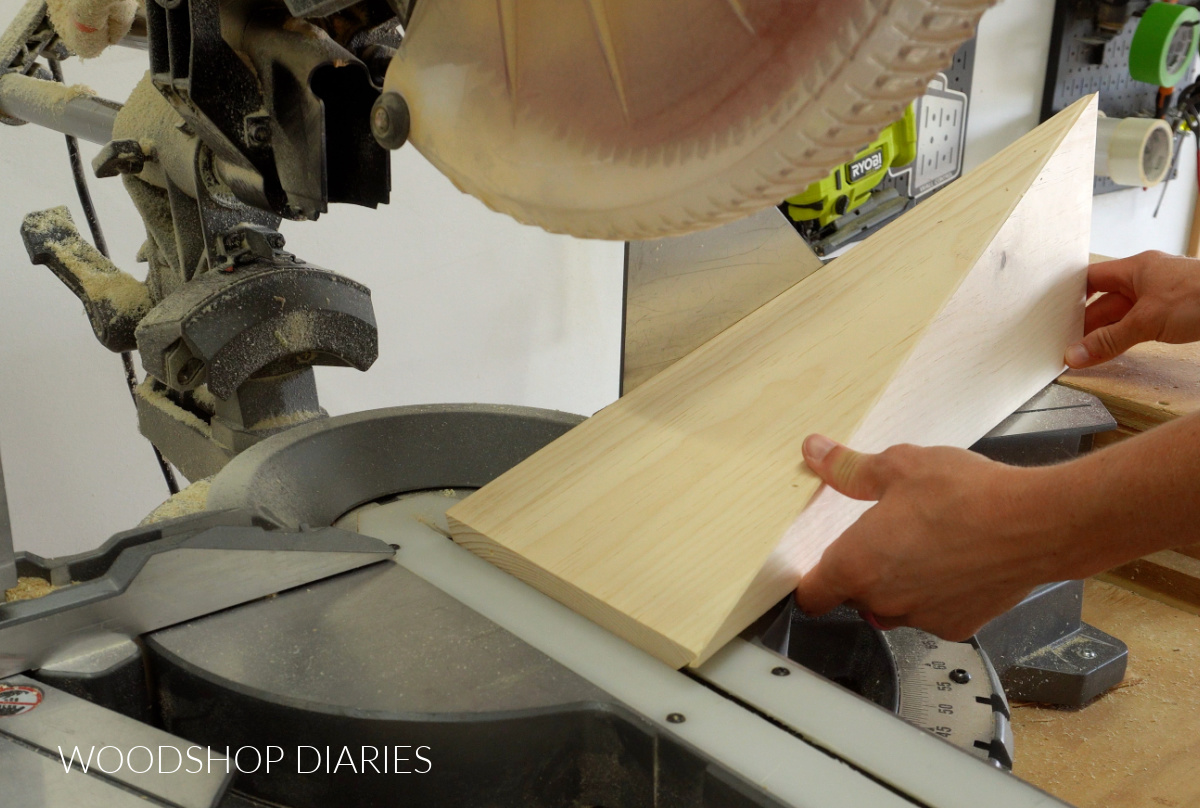
To cut these with a circular saw, first, I set my board on some scrap blocks (so I don’t cut into my workbench), and clamped a straight edge on top.
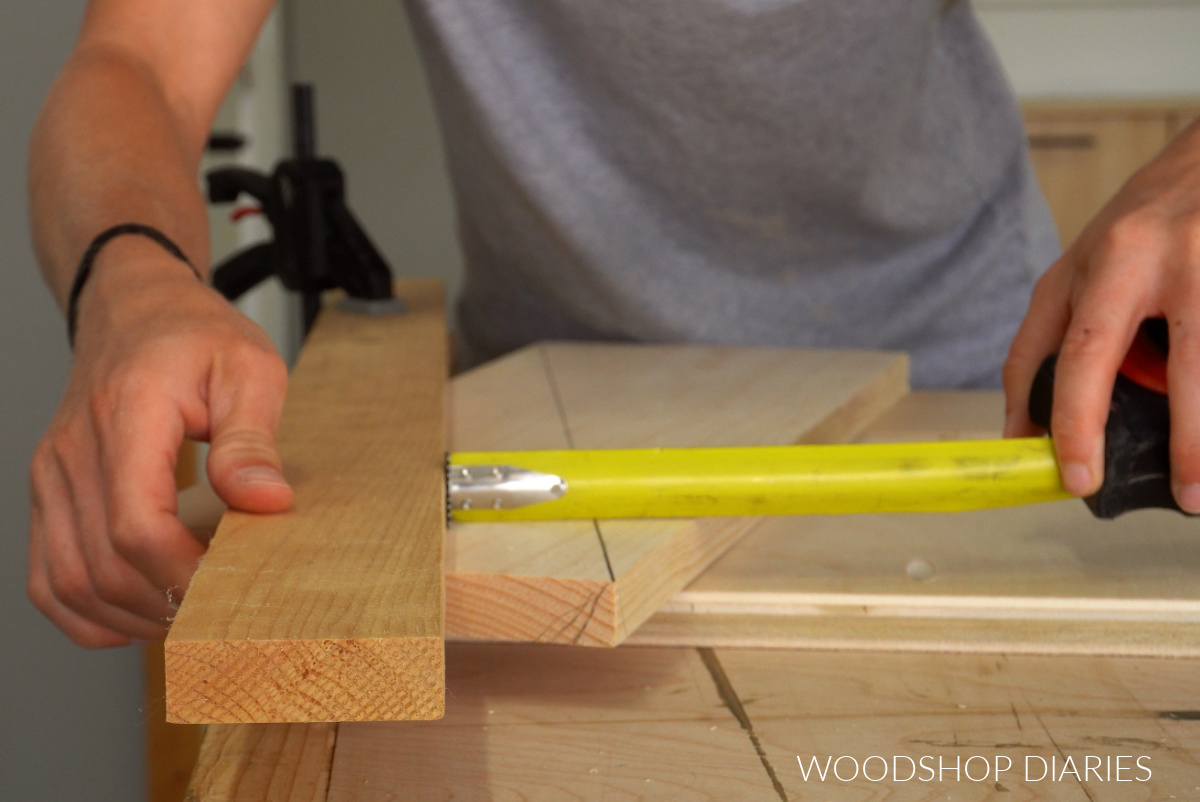
I adjusted my circular saw’s bevel angle to 45 degrees and made sure my straight edge was clamped so that when I ran my saw along it, it would cut right along the diagonal line (see image below).
After I cut along the line, I placed the piece shown on the right side of the photo below to the side. This is my first good piece.

Then, I rotated the other piece 180 degrees and set up my straight edge on some scrap blocks. I clamped the board at the back and nailed some scrap pieces at the front to hold it in place while I made the second cut the same way.
I encourage you to watch the video to see this in more detail.
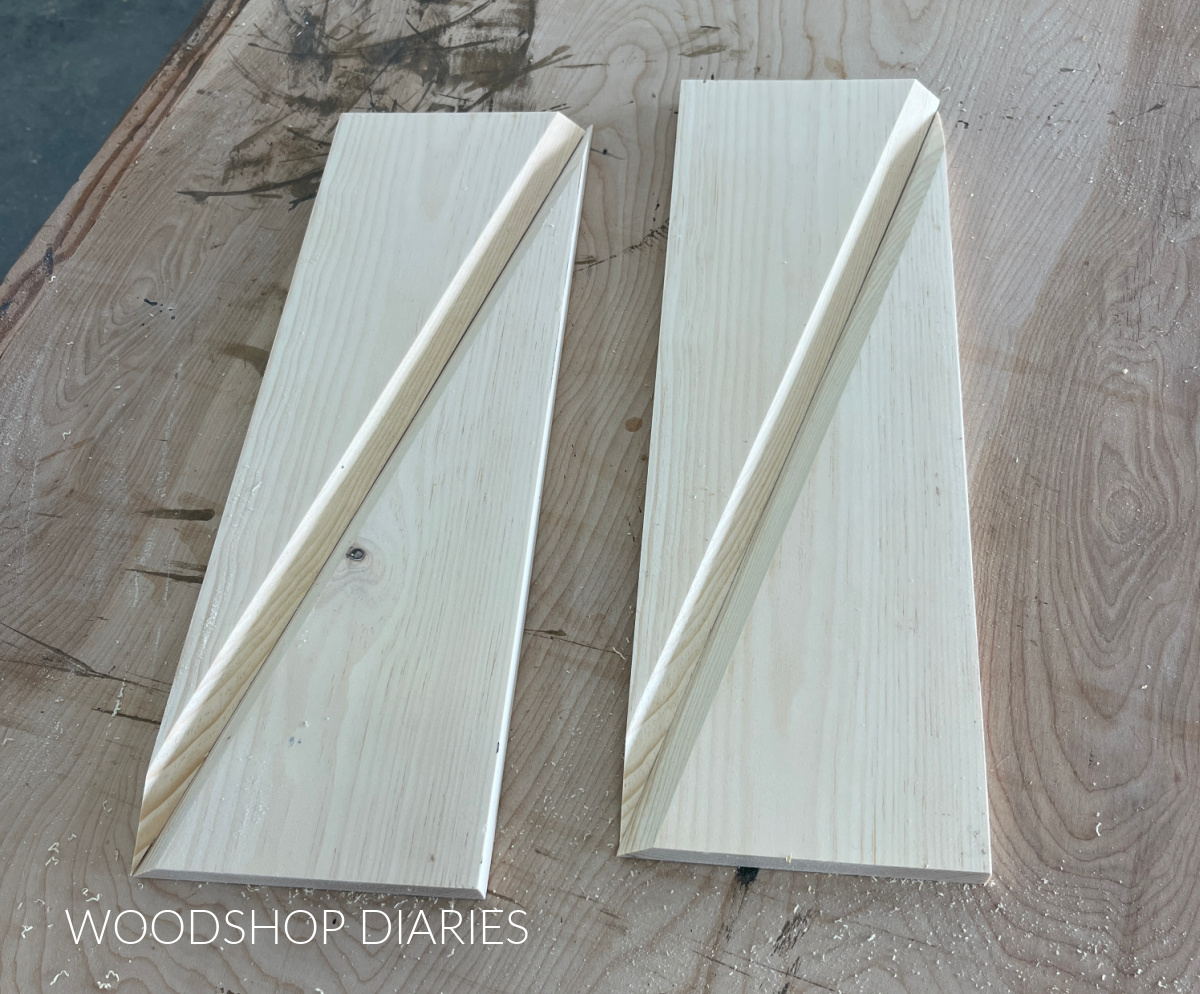
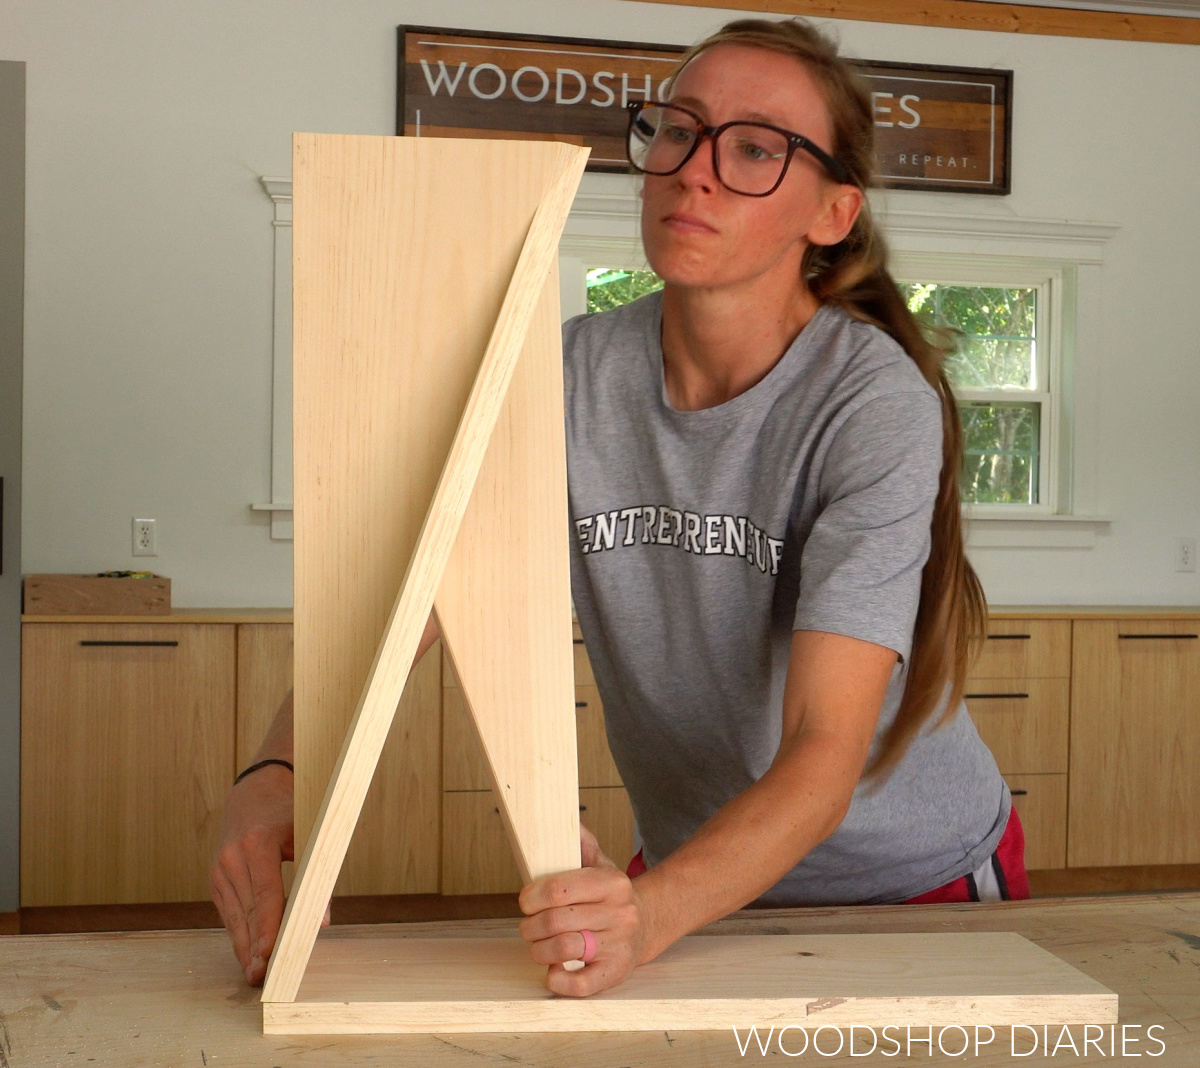
After both cuts were made, I had two triangles like shown below. Notice that there is a V notched out down the diagonal. This allows these pieces to fold together in the next step to make one leg.
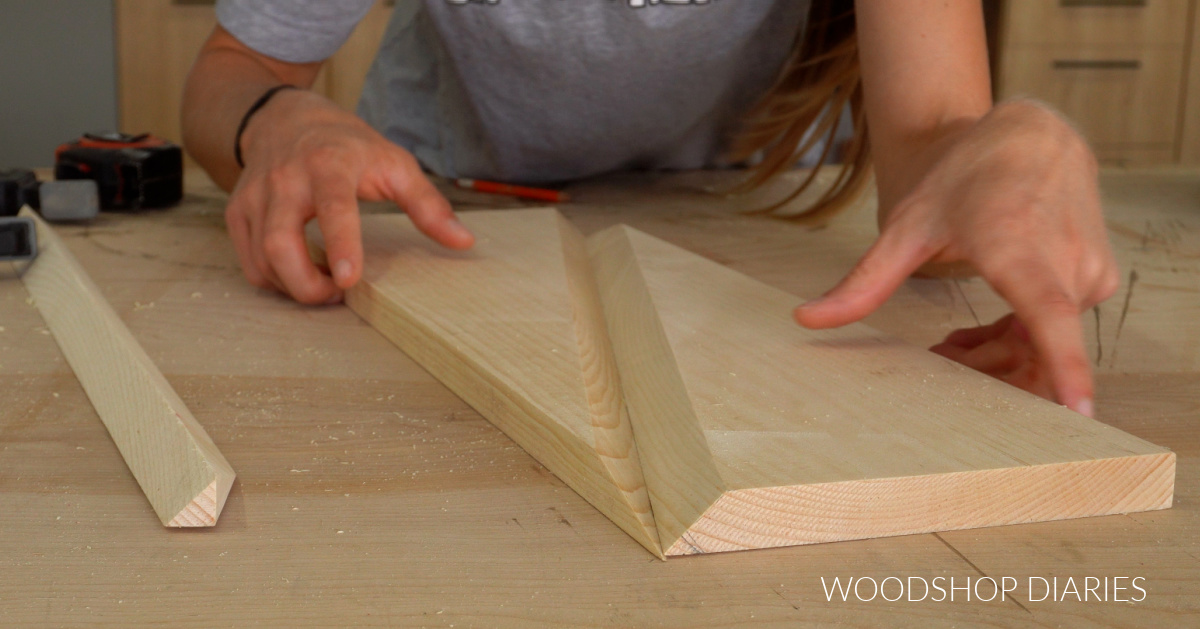
Repeat the same process to cut the other board to make the second leg.
Cutting with Table Saw
To cut these with a table saw, first, I needed to make a jig. This jig will allow me to accurately slide the piece through the saw to cut down the diagonal.
To make this, I clamped a scrap piece of board about 2″ wide (it doesn’t have to be any exact measurement here, just something roughly 1 ½″ – 2 ½″ wide) across the diagonal line I drew in step 1.
Then, I found a scrap piece of ¾″ plywood about 10″ x 20″ (again, this doesn’t have to be an exact measurement, but needs to be roughly the same size as the 1×8 leg piece), and laid this against the board like shown. I traced the shape of the 1×8 onto the plywood.
Then, I cut along these lines with a jig saw. After cutting, I drilled two pocket holes into the jig along the cut lines.
This allows me to secure the piece into the jig with pocket hole screws (make sure these screws are not too close to the diagonal so they won’t interfere with the blade when cutting).
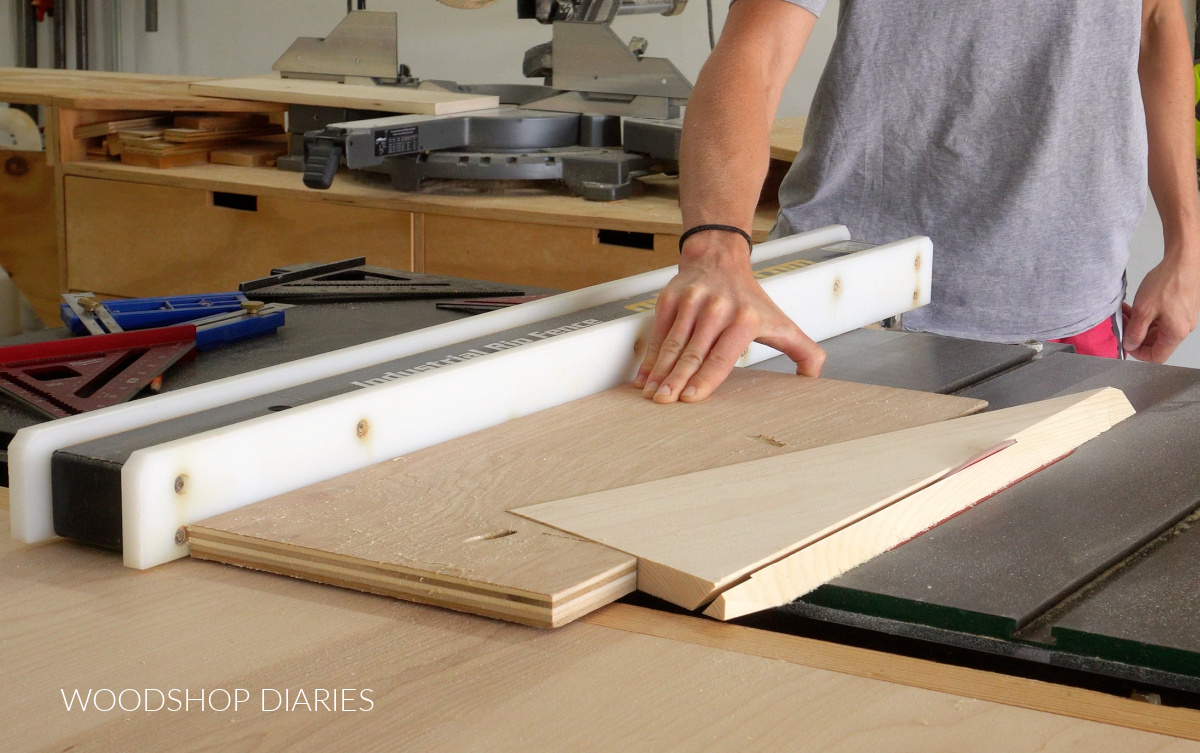
I adjusted my table saw blade bevel to 45 degrees and adjusted my rip fence so that when the jig was placed against it, the blade would cut right along the diagonal mark.
After I made my first cut, the piece attached to the jig is the good piece, so I unscrewed it and set it aside.
Then, I placed the off cut piece into the jig to repeat the beveled cut. Just like with the circular saw method, this gave me two identical triangle pieces with beveled ends cut down the diagonal.
Step 3: Attach Twisty Table Legs
Next, I “folded” each pair of triangles from step 2 down the diagonal and brad nailed them together. I recommend using wood glue and brad nails at least 1 ¼″ long.
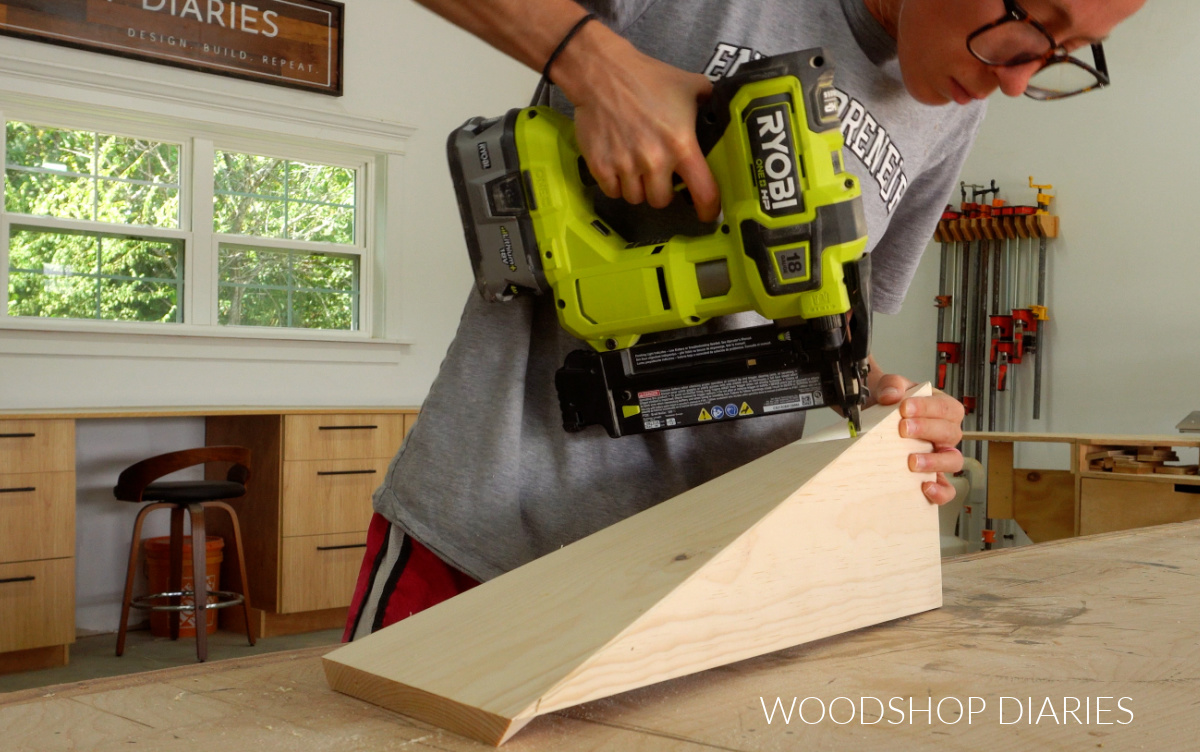
I was careful to keep the nails at least 1 ½″ away from the ends of the board because I have to trim them in the next step and I didn’t want to trim into a nail.
Step 4: Trim Table Leg Ends
Now that the two twisted legs are assembled, I needed to trim the ends so they would slant on the table.
Figuring the angle here would be complex and would vary based on your leg length (see step 1). So instead of doing the math, I just kept my miter saw’s bevel and miter angles set to 0 degrees and placed my leg into the saw like shown.
Then, I just barely trimmed the edge off. I repeated for both ends of each leg cutting exactly the same way.
Once both leg ends are trimmed, I made sure my two legs were exactly the same length. If they’re not, trim the longer one a little more until it matches the shorter one.
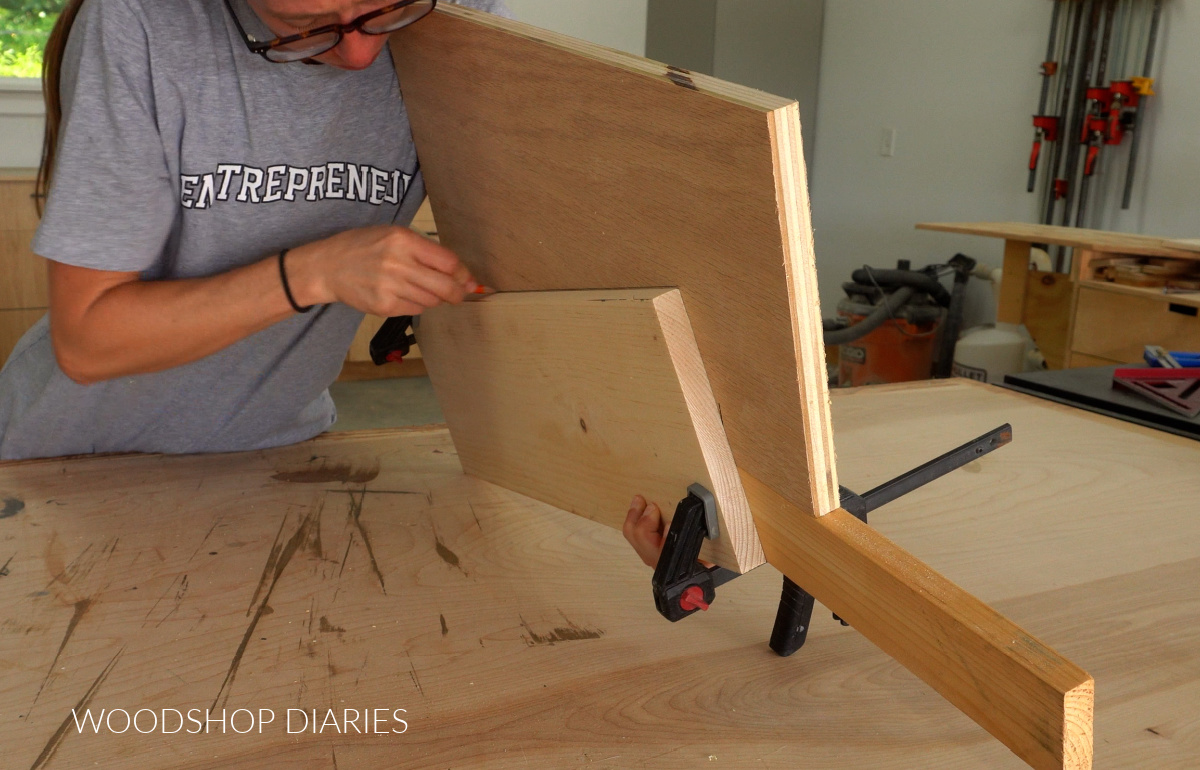
Step 5: Attach Top and Bottom Pieces
Next, I pulled out the rest of my original 1×8 board and placed my legs on top so that they were flat on the bottom and they just barely touched in the middle.
Then I marked on the board where the end of my leg hit and trimmed this on the mark.
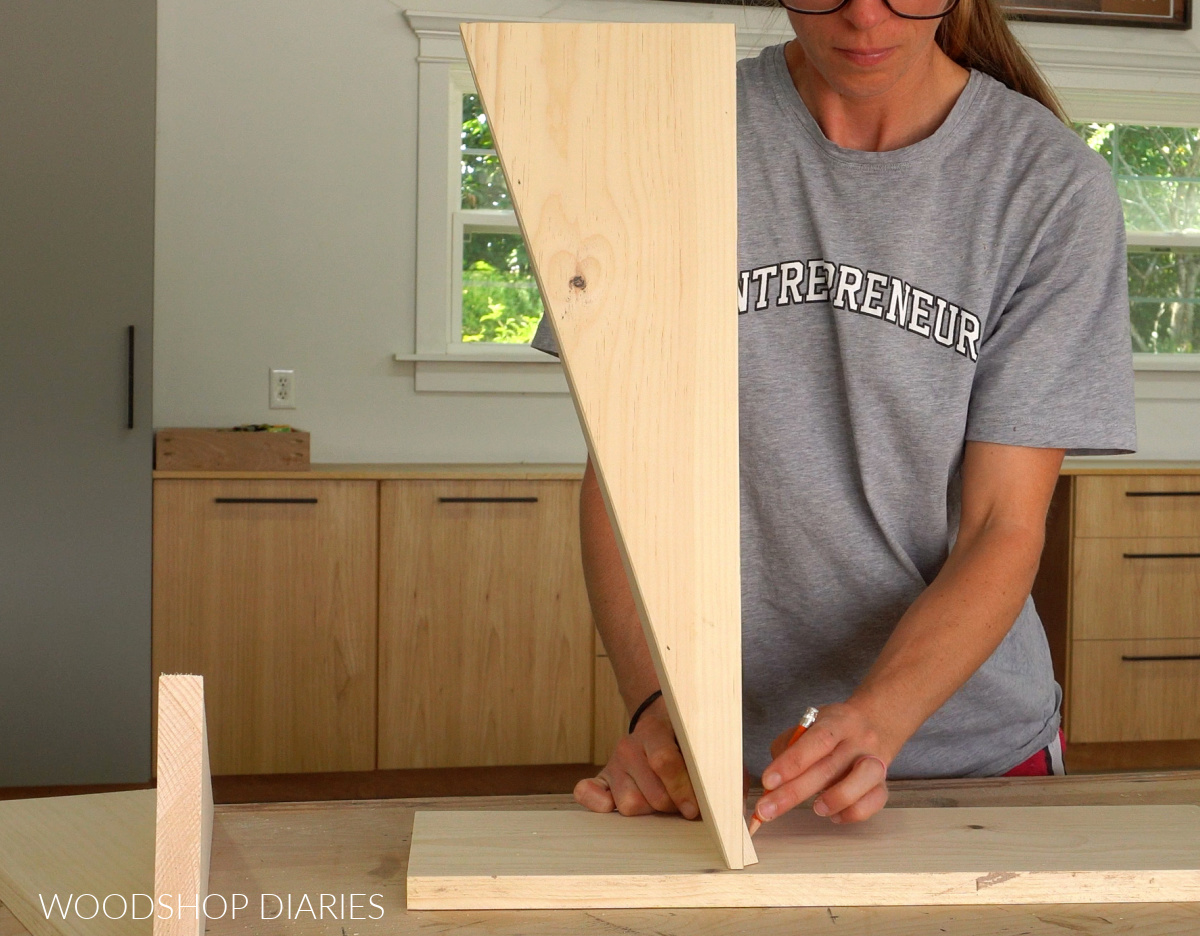
It ended up being about 8″ long, but yours will vary if you used a wider board. I recommend marking and cutting vs measuring for best results.
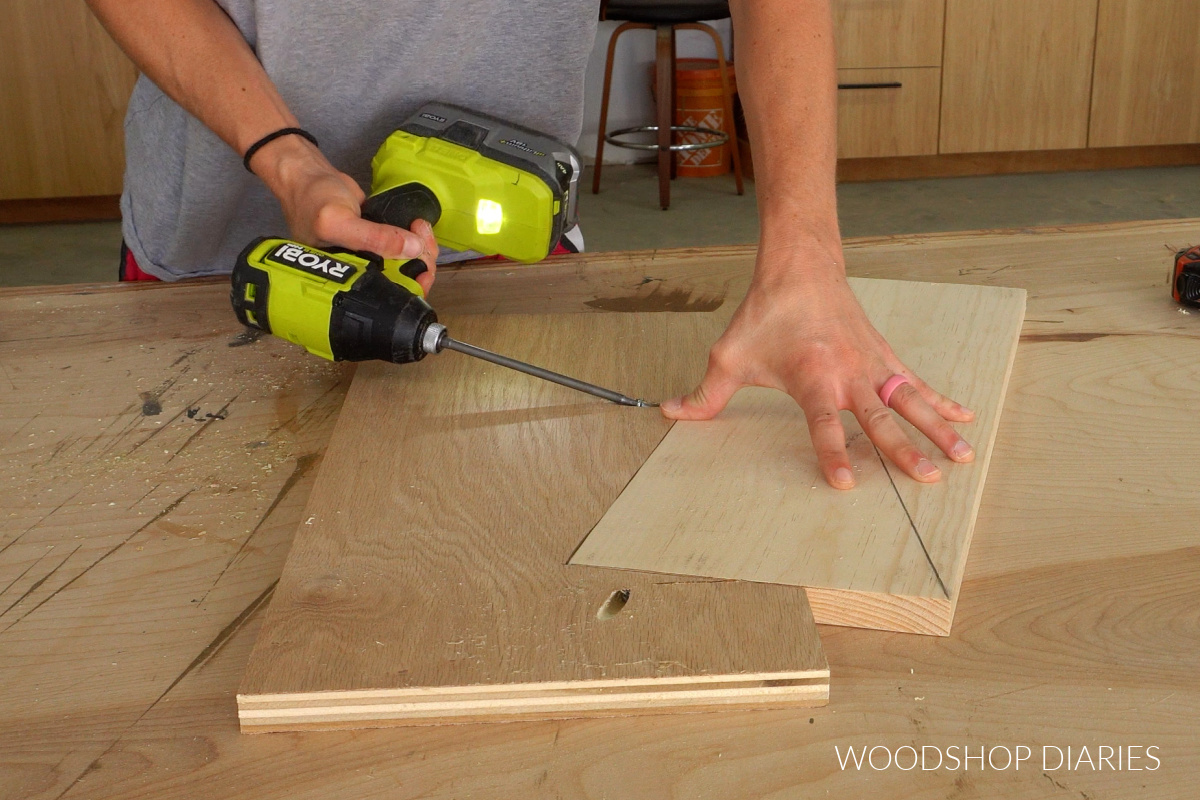
I glued and brad nailed this piece into the ends of the legs, then, cut a second piece the same size to glue and brad nail onto the other end.
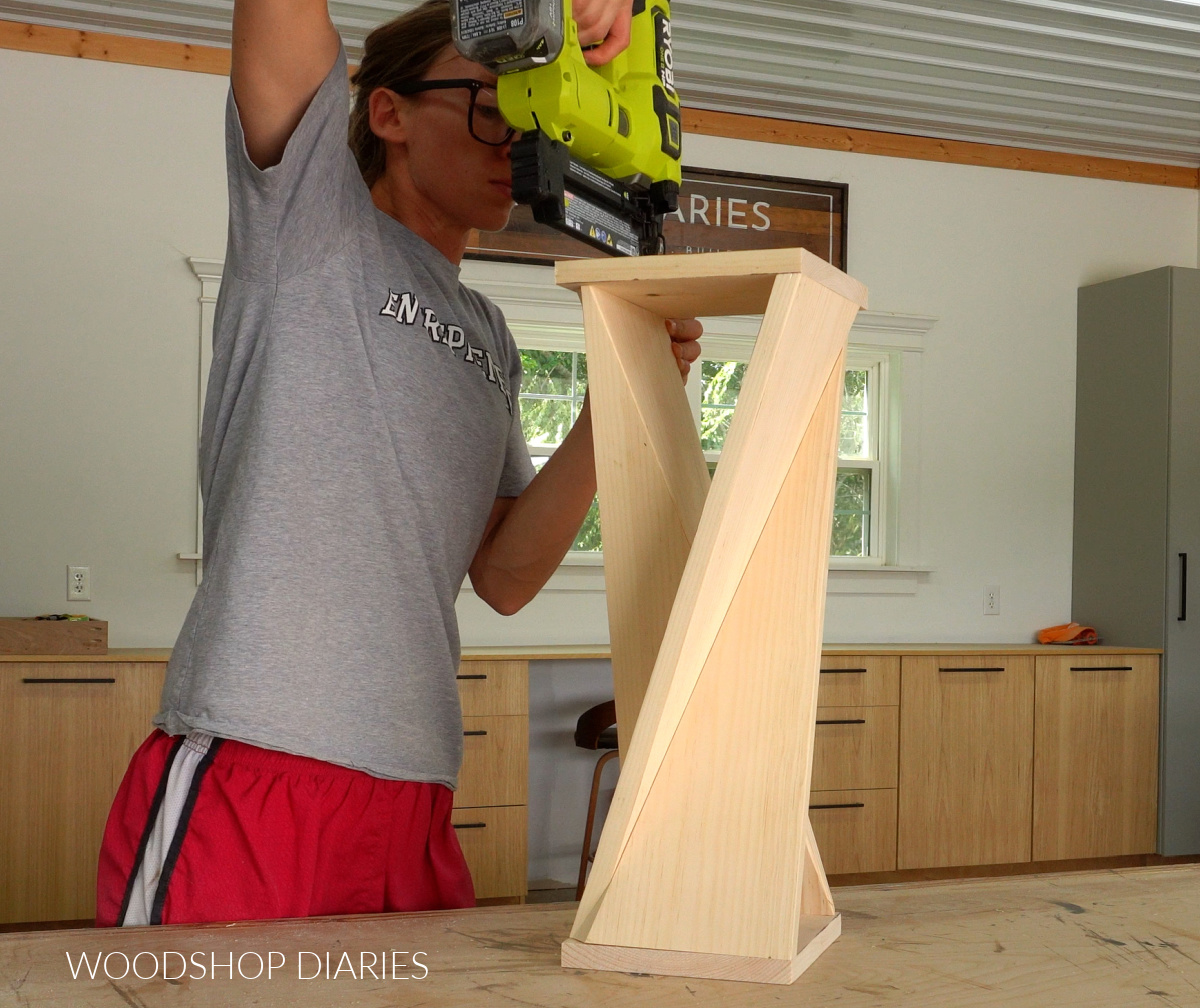
Glue and brad nails should work fine, but once I got them tacked together, I also countersunk holes in the top and bottom to screw these pieces on as well.
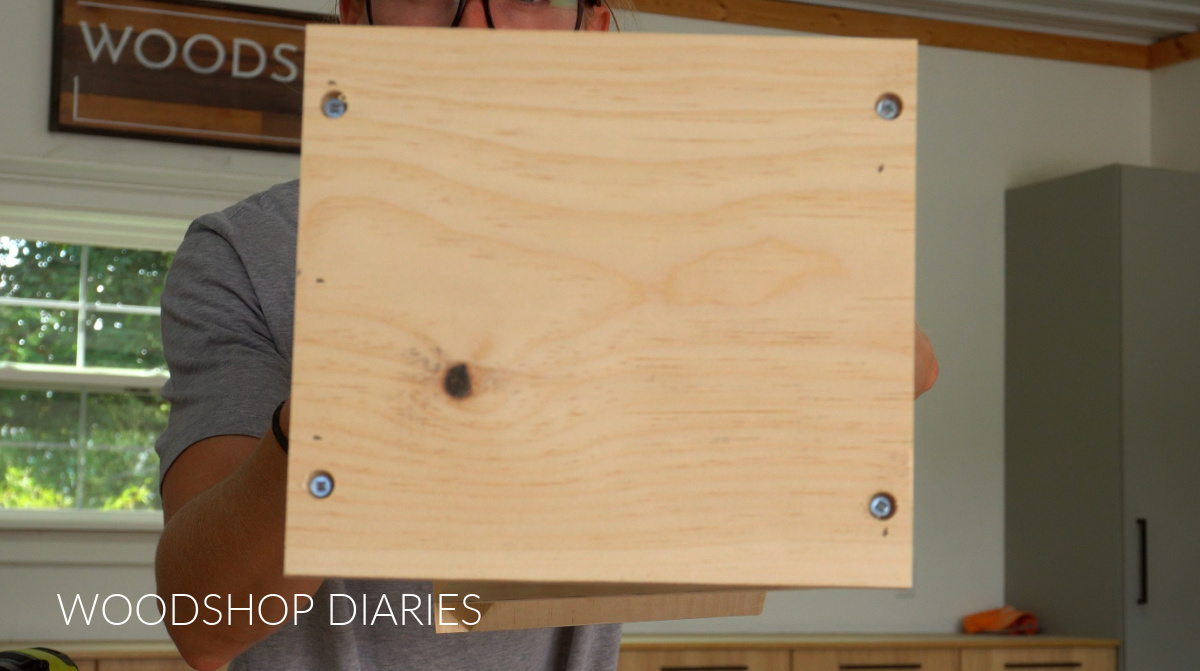
Once they were snug, I glued and plugged the holes with dowel pins and flush cut them smooth once dry.
Step 6: Finish Twisty Table
Finally, I applied some wood stain to the table (I used Minwax Early American, but you can paint or stain however you’d like) to finish it up.
RELATED: How to stain wood
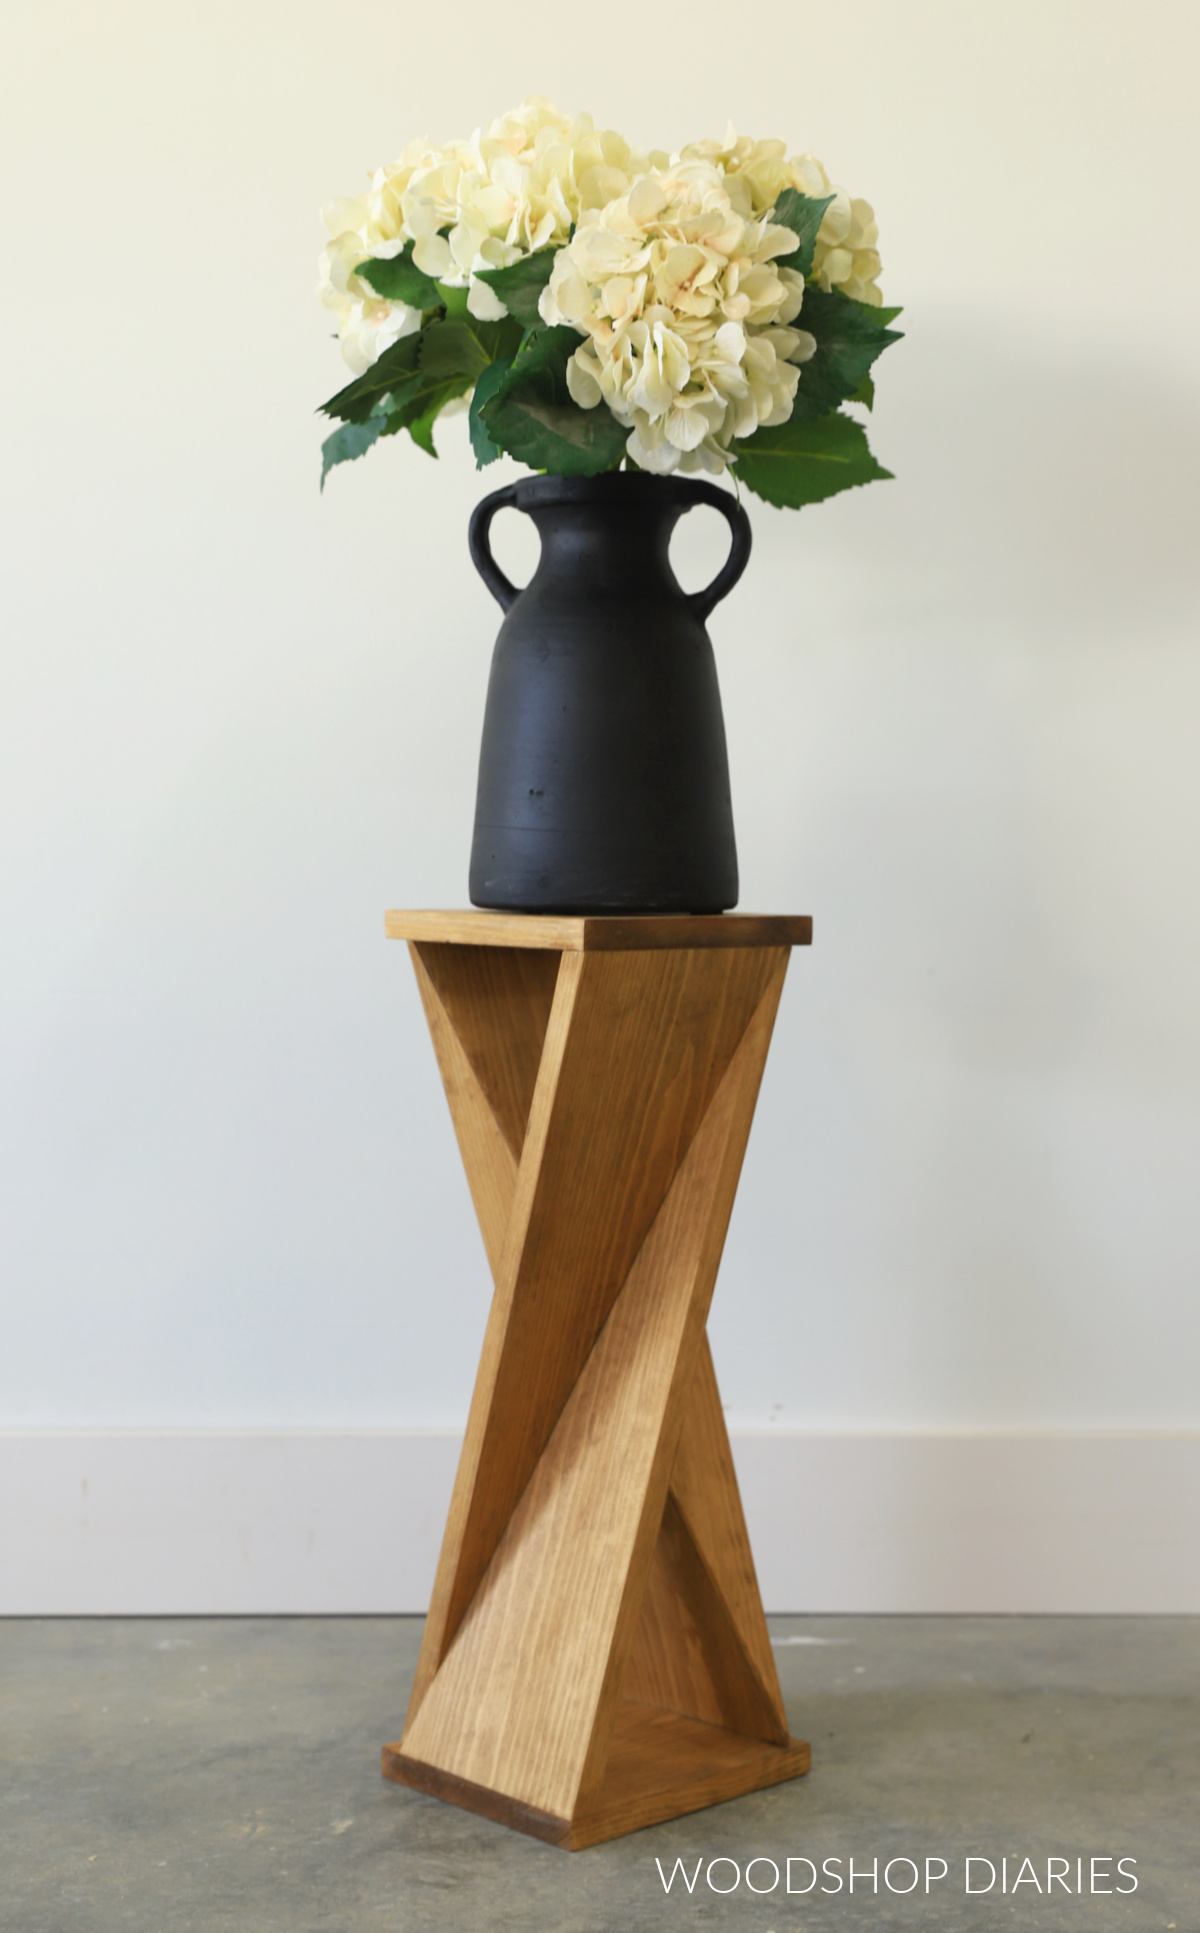
This fun little table is such a unique idea for a little side table if you’re low on space, or a plant stand in front of a window.
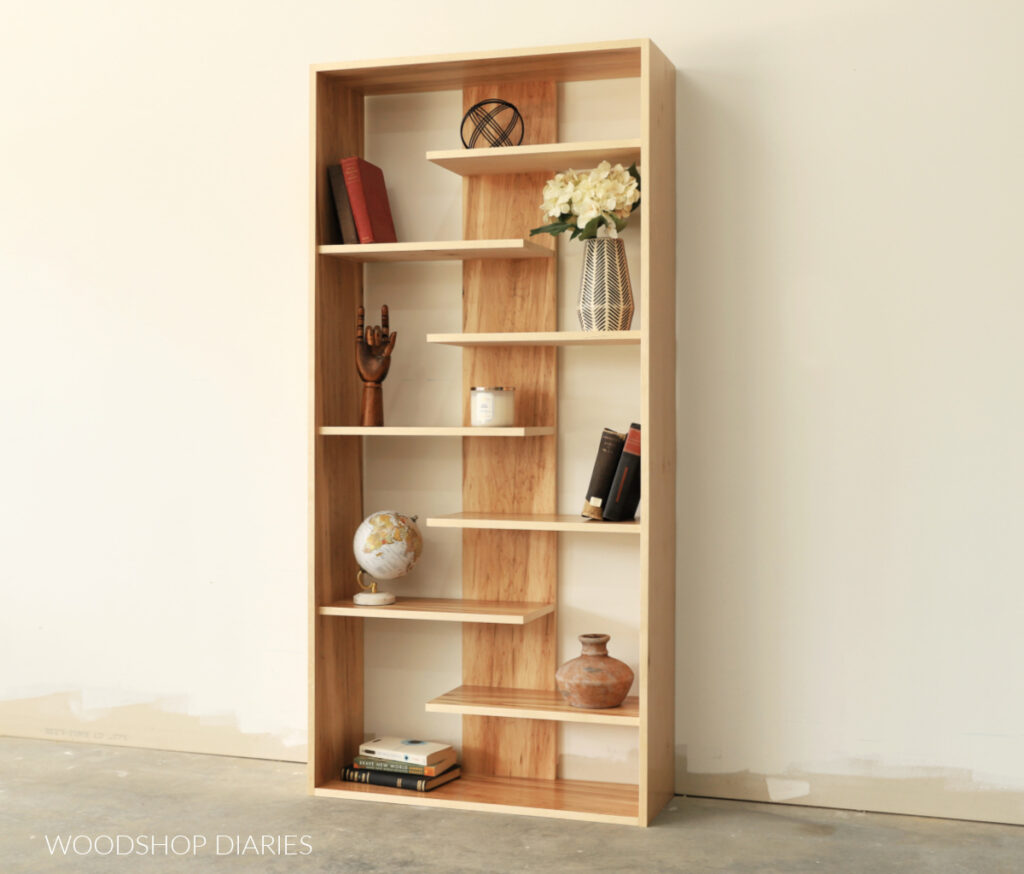
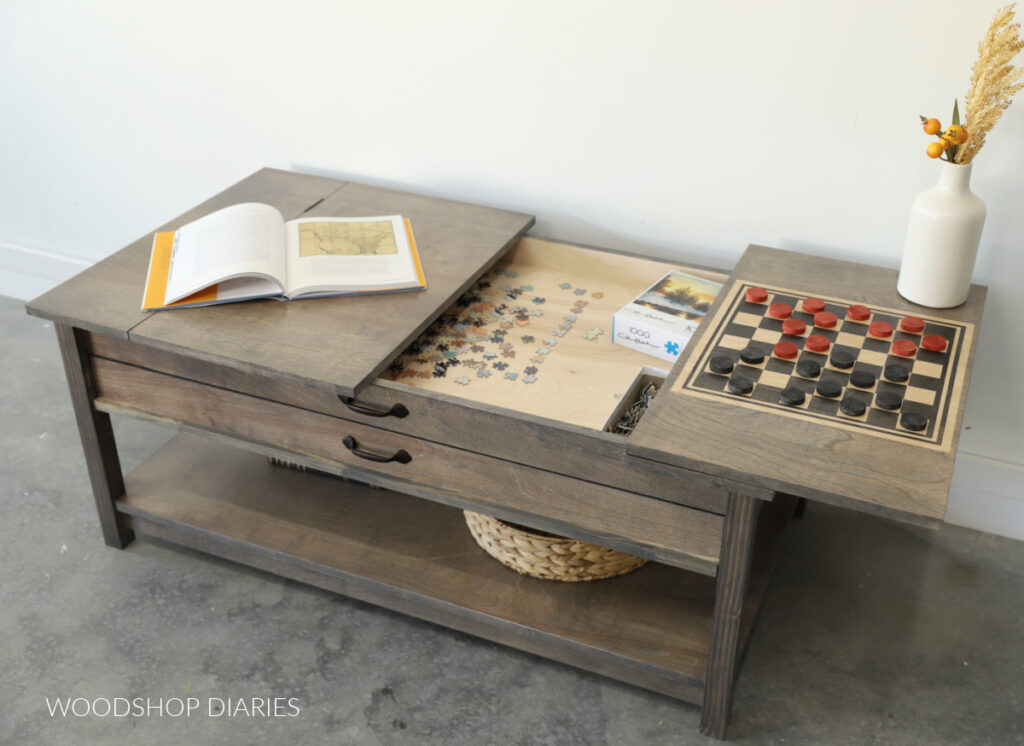
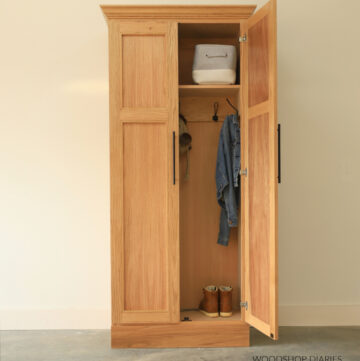
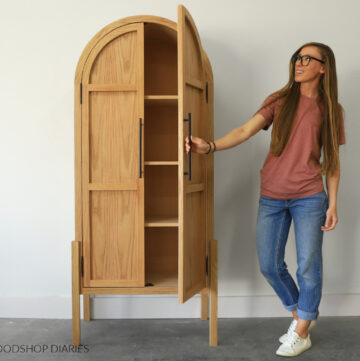
Looking for more unique DIY projects?
If you enjoyed this this project and are looking for more unique DIY project ideas, here are a few favorites you may enjoy browsing. Click the image(s) below to see the how to:

If you enjoyed this project and want to save it for later, don’t forget to pin it or share it to your favorite social channel!
Until next time, happy building!


Shara, Woodshop Diaries says
Awesome! That top sounds like it will look REALLY cool. I’d love to see what you do with these as bases. I hope you find the other tutorials and projects on the site inspiring as well. And PS, there is always a little sarcasm thrown into every post 😉 so I hope you stick around!
RabidAlien says
Well, never got around to the table, wife couldn’t think of a place to put it. So I got into scroll-sawing instead. LOL Plenty of wall space! I did put a twisty-table together this weekend, we recently relocated from DFW to Austin and its been over a month since I’ve had a proper shop. Used some reclaimed wood that came from our old attic, no idea what it was other than wood-ish. For a first attempt, I think it turned out fairly well, considering most of my tools are hand-me-downs older than I am and made more for portability to a worksite than in a dedicated woodwork shop. They work, but my table-saw, for instance, wouldn’t fit the jig and the fence so I had to eyeball everything. It all fit together (with a few well-placed screws and a lot of prayer) and stands more or less level, so a win overall!
RabidAlien says
P.S.: A day without sarcasm is ….like….a nightmare.
Caitlin Lissauer says
But if she ties back those gorgeous locks how can she keep looking like a mermaid princess who can kick ass all around a wood shop?! 🙂
Shara, Woodshop Diaries says
HAHAHA this cracks me up!!
Shara, Woodshop Diaries says
Awesome!! So glad to hear you enjoyed the project and was able to make your own! 🙂
Shara, Woodshop Diaries says
Hi Michelle! Theoretically, you should be able to make it with a circular saw, BUT, when I tried it (because I tried that before using the table saw) i had some trouble. You have to bevel the circ saw blade to 45 degrees and since the board is pretty small, it was difficult to cut it like that. My blade kept getting pinched and wouldn’t cut. BUT it may work better for you. If you do it with a circ saw, just draw a line from a top corner to the opposite bottom corner and cut along that line with a 45 degree bevel. You can clamp a straight edge to it cut cut a straight line. You will then cut one of those pieces again at the same bevel just like you would have to if using the table saw. Think of it as basically cutting out a little 90 degree angle block from the middle of the board so that they will “fold” together at the corners. I don’t recommend using the circ saw for this, but it might be possible…but i didn’t have much luck with it. For more info about the jig, i have a video on my facebook page (it was back in Nov.) you can check out 🙂 Hope that helps!
Shara, Woodshop Diaries says
I believe that would make sense…keep the one that isn’t on the jig.
Shara, Woodshop Diaries says
I believe the final height of my table was about 22″.
Shara, Woodshop Diaries says
Awesome! So glad you liked the project!
Shara, Woodshop Diaries says
So glad you liked the project!! If you build one for yourself, I would love to know how it turns out!
Shara, Chasing A Dream says
Thank you!! Good Luck!
Shara, Chasing A Dream says
Yes the top and bottom pieces should be the same size, or VERY close to the same size.
Shara, Chasing A Dream says
I’m sorry the picture in the post is the only picture I have of this part of the project. Try to copy what I did in that picture and it should work.
Ha says
Trying to cut the top and bottom of the table but it’s not lining up on both ends. Are they the same size? What am I doing wrong? I want to complete this twisted table. Please help…I need some guidance. Thanks.
Shara, Chasing A Dream says
Yes they should be the same size. I cut one piece by setting both legs on the board and lining up the edges. I marked where to cut and cut that piece. I nailed it on, then flipped it over and set the legs on the board again, marked, and then cut the other side. They both should be about the same size, but I didn’t measure exactly, just marked and cut. Also, they should be pretty close to square, not a rectangle.
Shara, Chasing A Dream says
If you look in earlier comments, I give details on how to make the jig. Hope that helps!
diggerjack says
Hello Sarah
Very nice project
Your cutting jig is a good idea
I will try to make one for me in the future
Thanks for sharing
Shara, Chasing A Dream says
Thank you! Glad you liked it!
Shara, Chasing A Dream says
Thank you! I agree…I ignore the bunnies as long as possible 🙂
Shara, Chasing A Dream says
Hi Reggie, thanks for you comment! Actually, these are the instructions. I believe everything you need can be found in this post. And as far as how the jig is made, you basically need to cut a notch in a piece of scrap wood so that a diagonal line on the 1×8 (or whatever size piece of lumber you are using) leg piece is parallel with the straight edge of the scrap wood. The easiest way I do this is draw the diagonal on the leg piece and lay it on the scrap wood so the diagonal is parallel with one straight edge of the scrap. Trace around the leg piece onto the scrap and cut that notch out.
David says
The issue is that you’re trying to cut the entire 1×8. Shara cut two 2 foot pieces off of the 8 foot board. She then cut THOSE two foot pieces diagonally from one corner to the next
Jesse says
No, I’m still struggling with this. If you cut the first diagonal, then flip that second half over and cut it without moving anything, you wont get a nice 45 degree angle. I’ll be able to make it work, but the photos and description aren’t adding up somehow. Thanks for your help. I really like the finished product.
Jesse says
I must be missing something then. If you cut the full 1×8 diagonally in half, then you recut half of it to get the angles right, it is going to get narrower. Do you recut the first ones down to the size of the second ones?
Shara, Chasing A Dream says
They should be the same size. Try to look at the pictures in the post…this is hard to explain with just words. I’m sorry, I probably should have taken even more pictures during the process. You run your full 1×8 board through and cut it at 45 degrees along the diagonal. In the pictures, the piece on the side with the rip fence is the good piece, so take the other piece and flip it over and run it through the same way. DO NOT adjust the rip fence or the angle. It should end up the exact same size as the first diagonal you cut. Think of it this way: with the blade at 45 degrees, you are basically cutting a wedge out of the diagonal. So if you laid both pieces out like they were before you cut them, one side would touch on the diagonal and the other side would have a wedge cut out. Does that make any more sense?
Shara, Chasing A Dream says
Actually all four triangles should be exactly the same size. Did you make adjustments to the table saw between pieces?
Shara, Chasing A Dream says
Thank you. I used Minwax Provincial on this one.
Shara, Chasing A Dream says
Thank you!
Shara, Chasing A Dream says
Thank you so much! And my compressor is actually yellow…I’m not a big fan of pink haha. I do appreciate you taking the time to read and I hope you enjoyed it.
Shara, Chasing A Dream says
I’m so sorry! I do not have these measurements on hand. I can go home and measure it, but honestly I think it’s probably easier to make your jig this way: cut your board to the length you want it (as I said in the blog, I did 2ft, but you could go shorter if you wanted a shorter table). Take a straight edge and draw a line from one corner to the other to make a diagonal. Place the board on top of the scrap you will make your jig out of and measure from a straight, square edge of the jig to the diagonal you drew. Do this in a few places and adjust as needed to make sure the distance from the straight edge of the jig to the diagonal is the same at both ends. Then trace the corner where the board is laying on the jig and cut that piece out. Does that make any sense? Then your board will fit perfectly and when you run the jig along your rip guide, the blade will cut straight alone the diagonal.
Jesse says
So, after you cut the second diagonal on the other two pieces, the the third and fourth triangle are quite a bit narrower than the first two, correct? And do you pair a wide and a narrow triangle together?
alex says
I’m going to have to try this , really is a cool idea ! Thankx for the instructions & pix !
Shara, Chasing A Dream says
Thank you! Let me know how it turns out!
Smitha Easter says
This looks SO COOL! I love your style! 🙂
Shara, Chasing A Dream says
Thank you!
Shara, Chasing A Dream says
Haha thanks! I hope you’re right! There are some pretty awesome submissions so far. I’m impressed with what people can make out of a single board!
Ha Burton says
Did cutting the ends of the legs turn out to be a 7 degree angle?
Those angle cuts have to be just right for the table to sit flat. I say you did a Ha-Sum job. It looks great.
Ryan says
Yeah I agree. There is no way you just eye ball the angle for the top and bottom. And you cannot lay flat on the mitor saw after you attach each leg. Do you have more info ?
Shara, Woodshop Diaries says
Hi, the saw blade on the table saw is a 45 degree angle. I didn’t eye ball the blade angle, just the distance from the rip fence to the blade. You can spend the time to figure out the miter angle for the miter saw, but it was easier not to do the math and just cut it according to the picture in the post where its sitting at a slight angle.