Last week I was so excited to show you all my sister’s new faux fireplace. I had a lot of good response from that post, so I thought I would post a “follow up” project. This week has been so crazy that I haven’t had time to make anything big or fancy, but this is a simple “build it yourself” project that was really fun to make.
A little backstory: when I took pictures of my sister’s faux fireplace (by the way, if you haven’t seen it, you totally should! It’s one of my top 5 fav projects 🙂 ), I used several of my own props to decorate with. When I left after the “photo shoot,” my sister was left with a big lantern and some candles for her fireplace. Obviously, that wasn’t very fun, so she decided she wanted a box full of sticks to put in the middle of her fireplace. The problem was, she didn’t have sticks or a box.
Luckily for her, I will at least try to make her whatever she wants. So here we go….a two toned wood box….full of sticks 🙂
![IMG_3702[1]](https://chasingadreamblog.files.wordpress.com/2015/07/img_37021.jpg)
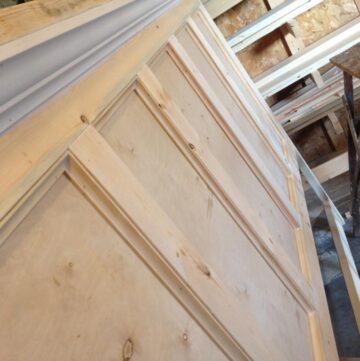
First, I built the frame from 2x2s on the corners and 1x2s on the bottom. I made the 2×2 corners 11 ¼″ tall, and the 1×2 long bottom sides 19 ½″ long. The small 1×2 bottom sides were 6″ long. I pocket hole screwed the bottom long pieces to the corners. Then, pocket hole screwed the short bottom sides on.
![IMG_3686[1]](https://chasingadreamblog.files.wordpress.com/2015/07/img_36861.jpg)
![IMG_3687[1]](https://chasingadreamblog.files.wordpress.com/2015/07/img_36871.jpg)
Then, I cut 1×4 pieces for the sides of the box–6 pieces 6″ long and 6 pieces 19 ½″ long.
![IMG_3688[1]](https://chasingadreamblog.files.wordpress.com/2015/07/img_36881.jpg)
I took the frame inside to “black wash” it. I could have stained it with Ebony Minwax stain, but I didn’t have any, so I did this instead. First, get a bowl of water, some black paint, and a small craft paint brush.
![IMG_3689[1]](https://chasingadreamblog.files.wordpress.com/2015/07/img_36891.jpg)
Dip the brush in the water and rub the brush across the top of the bowl to get the excess water out. Then lightly dip the brush into the paint. Brush onto the wood and smear around as it will be very thin and will “wipe” around easily. Be sure to brush over any drips so it looks smooth. then flip over and do the other side.
![IMG_3690[1]](https://chasingadreamblog.files.wordpress.com/2015/07/img_36901.jpg)
![IMG_3691[1]](https://chasingadreamblog.files.wordpress.com/2015/07/img_36911.jpg)
![IMG_3692[1]](https://chasingadreamblog.files.wordpress.com/2015/07/img_36921.jpg)
While this is drying, I stained the boards for the sides with Minwax Provincial. I tried Minwax Espresso, but it was so dark, you couldn’t tell much difference in the black wash and the side boards.
Once everything was dry, I glued the side boards onto the frame and clamped it.
![IMG_3699[1]](https://chasingadreamblog.files.wordpress.com/2015/07/img_36991.jpg)
Do this on all 4 sides. Note: make sure your boards are as close to the EXACT same length as the bottom 1×2 boards. If your side boards are a little short or a little long, it will be hard to glue.
I would have pocket hole screwed the boards on, but I didn’t want the pocket holes to show (and I am not very good at patching those holes or patient enough to wait for the putty to dry). As long as the boards are tight, the glue will hold just fine.
![IMG_3700[1]](https://chasingadreamblog.files.wordpress.com/2015/07/img_37001.jpg)
For the bottom, I ripped a board long enough and wide enough to fill the hole and pocket hole screwed it in. I forgot to take a picture of this….SORRY!
Then I gathered some sticks I had leftover from a tree that fell in our yard a month or so ago.
![IMG_3703[1]](https://chasingadreamblog.files.wordpress.com/2015/07/img_37031.jpg)
![IMG_3706[1]](https://chasingadreamblog.files.wordpress.com/2015/07/img_37061.jpg)
![IMG_3704[1]](https://chasingadreamblog.files.wordpress.com/2015/07/img_37041.jpg)
![IMG_3707[1]](https://chasingadreamblog.files.wordpress.com/2015/07/img_37071.jpg)
![IMG_3705[1]](https://chasingadreamblog.files.wordpress.com/2015/07/img_37051.jpg)
![IMG_3708[1]](https://chasingadreamblog.files.wordpress.com/2015/07/img_37081.jpg)
Such a simple project, but so cute! She plans to put some lights and ribbon around the sticks for the seasons. Once she does, I will get some better pictures….I’m still learning this whole picture taking thing haha.
Now it’s your turn to build this super simple two toned wood box. If you build one, I would love to see your finished product and how you plan to use it! Happy building!
PS Be sure to check out my Facebook page and follow the blog for more simple DIY tutorials to come! 🙂