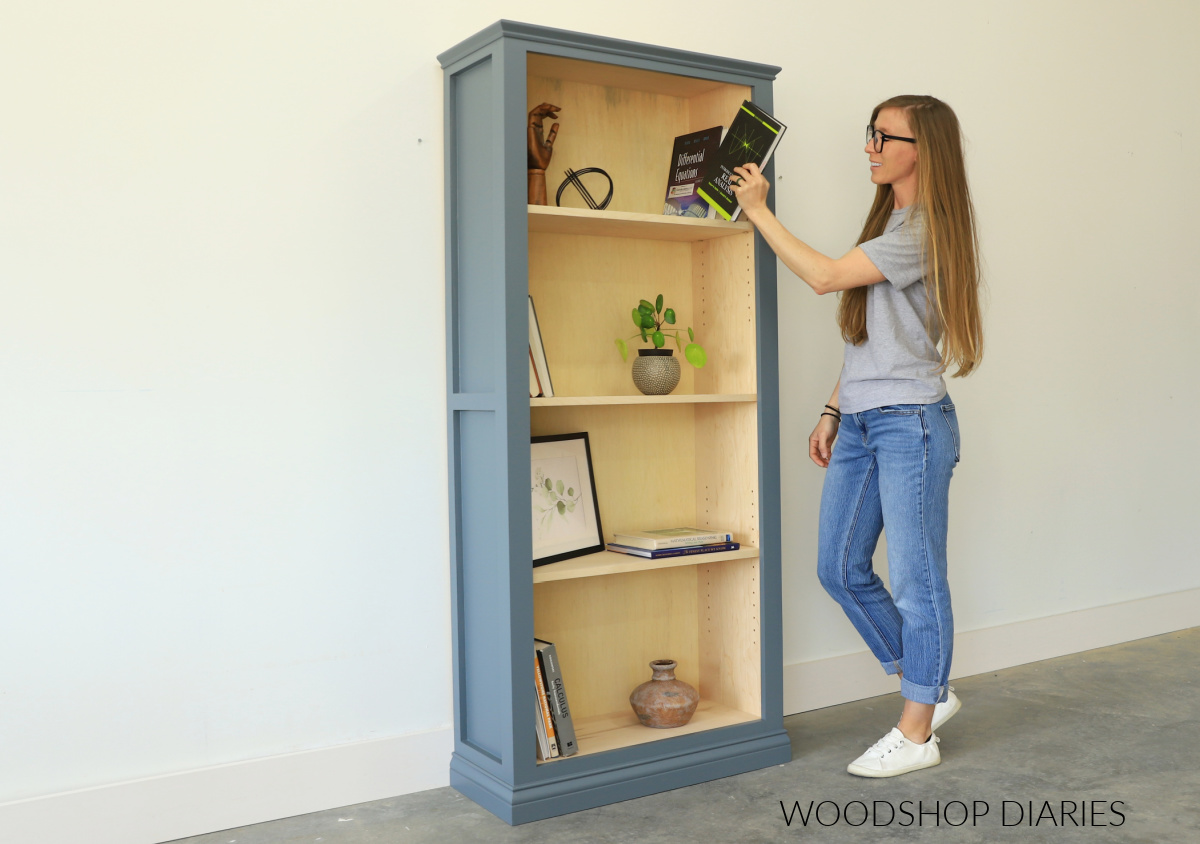
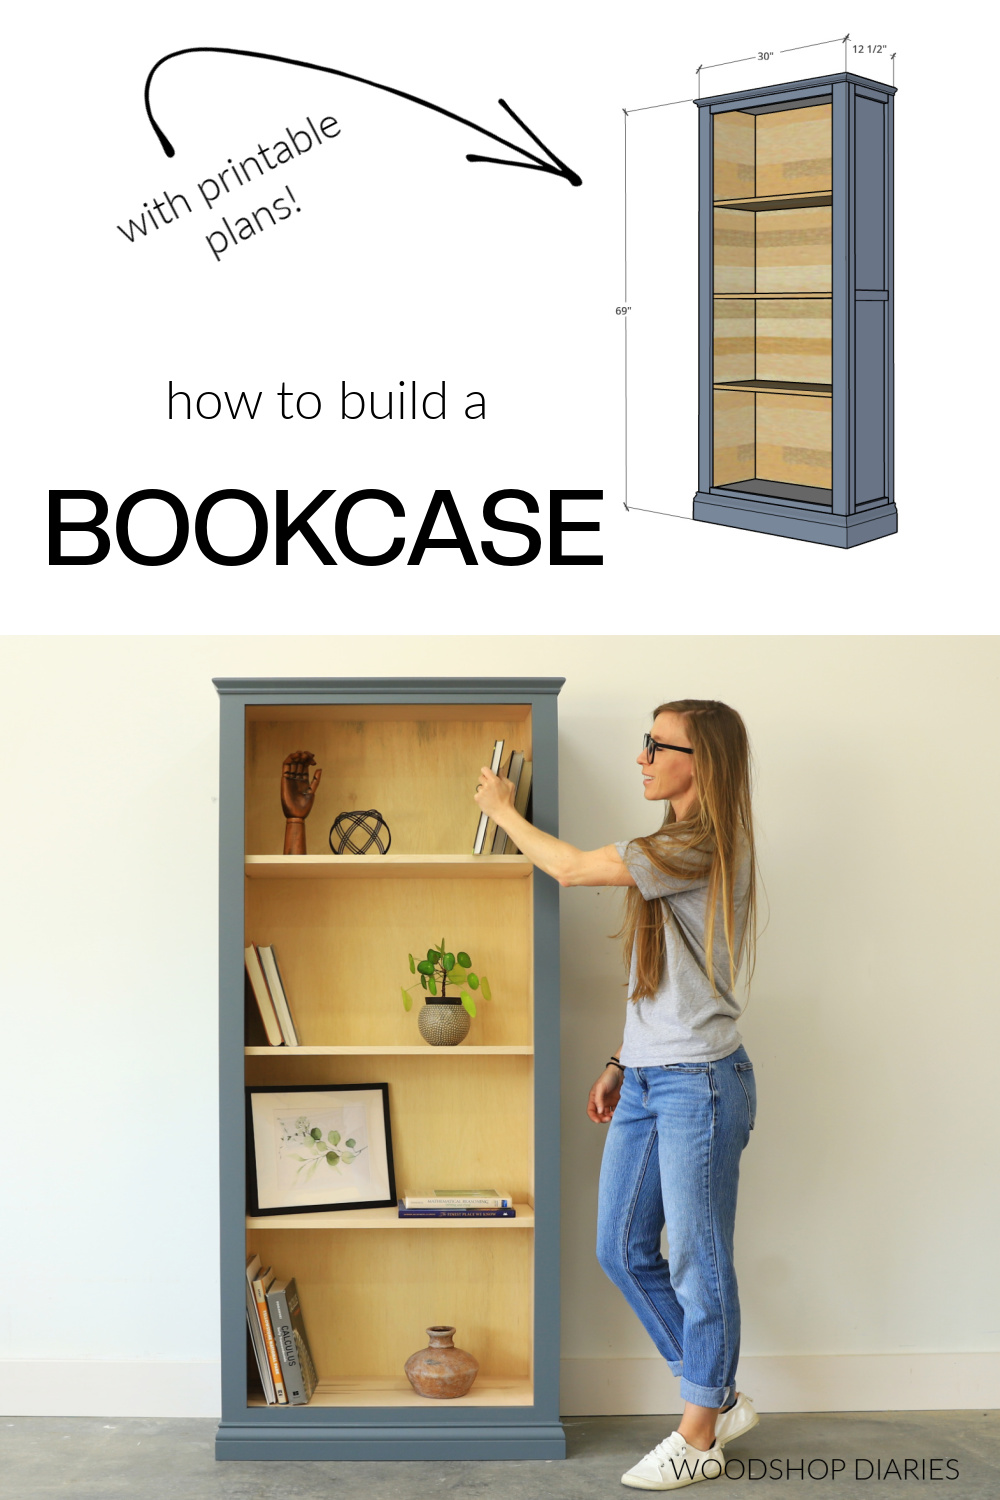
In this post, I’m showing you how to build a simple, traditional bookcase with trim!
A bookcase is one of the best practical, simple, but classic pieces to DIY. You don’t need a lot of tools, experience, or material to build one.
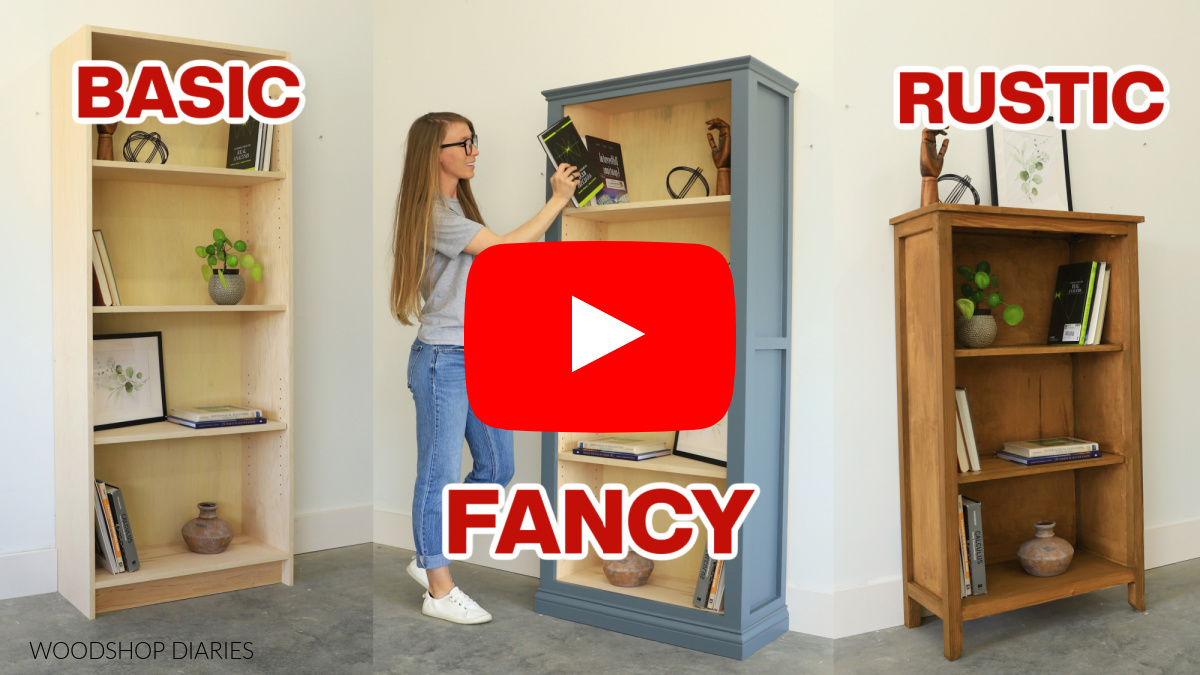
It’s not a time consuming project and you can dress it up and customize it to be as simple or as fancy as you’d like!
If you’re thinking about building a bookcase (or two…you can put several together to make a wall of shelves!), I’ll walk you through it step by step below.
*This post contains affiliate links. Please see website policies.
What to know before building
Building a basic bookshelf is an excellent beginner woodworking project. While somewhat large in size (I guess it depends on what you consider large ha!), it’s easy to assemble in just a few steps and with a few common tools.
And for an even simpler project, you can skip adding the additional trim and face frame.
In this YouTube video, I share how to build a bookcase three different ways and the first way is the most basic option. It’s simply a plywood box with shelves:
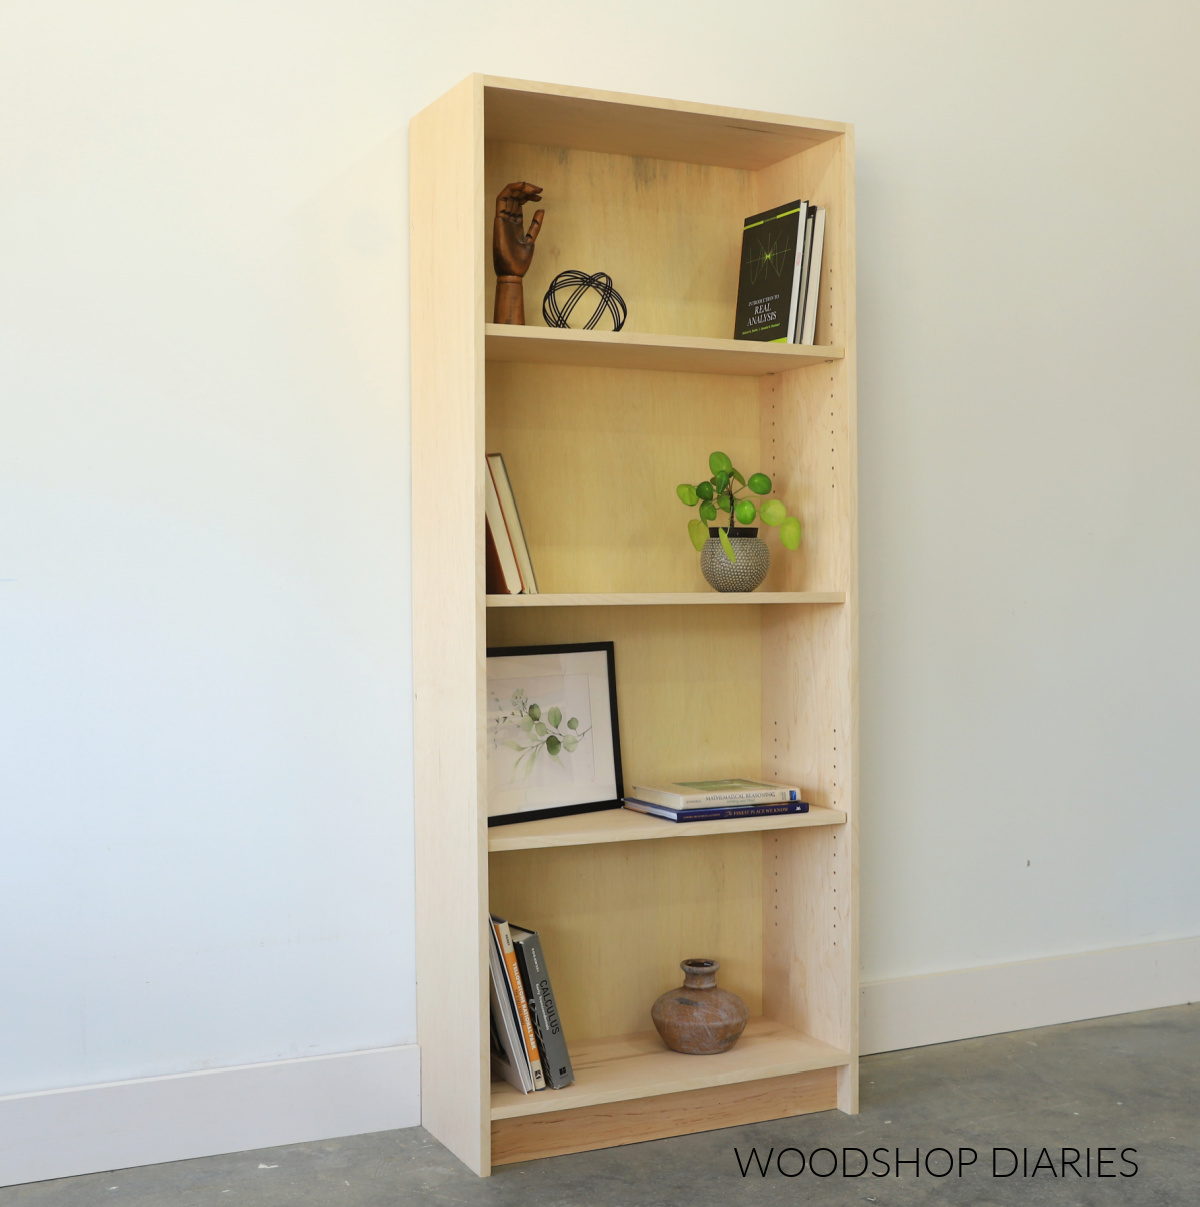
The second bookshelf…the one I’m sharing in this post…is literally this exact bookcase, but with additional trim added on the sides and front. So I’ll show you how to build both below.
You can stop after step 2 to make the shelf shown above.
What kind of wood should you build a bookcase with?
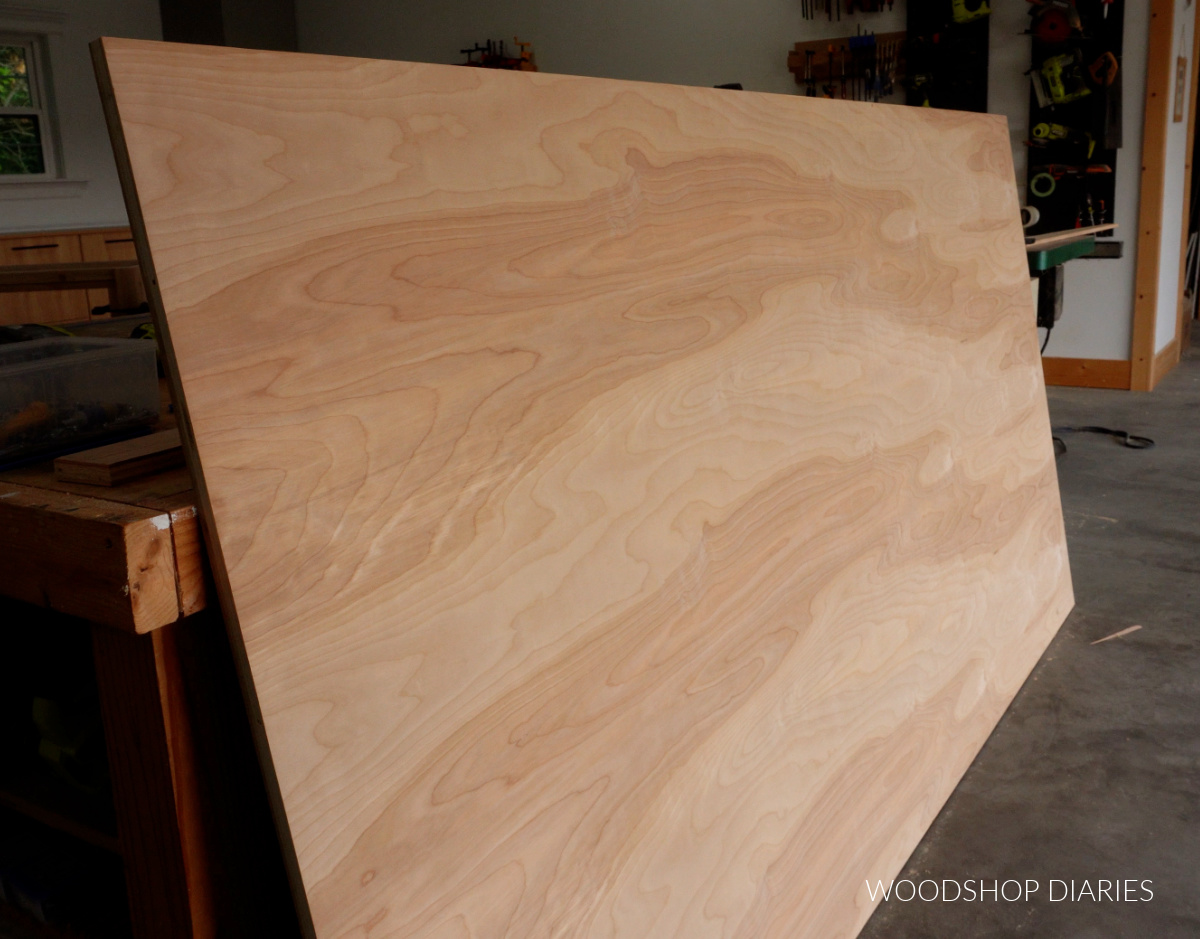
If you know me, you know I love building with plywood. So I built this bookshelf using ¾″ plywood for the body and shelves and ¼″ plywood for the back.
Bookcase depth can vary, but you commonly find bookcases roughly 12″ deep. So, if you wanted to use solid wood instead of plywood, 1×12 boards are a great option since they’re 11 ¼″ wide.
Learn more about understanding lumber sizing here.
I prefer using cabinet grade plywood (like birch, maple, oak) for my bookcases because it’s sometimes challenging to find 1x12s that aren’t twisted or warped. But if you can find some flat ones, they may be a bit cheaper than using plywood.
RELATED: How to choose plywood for your projects
For the trim pieces, if painting, primed pine, whitewood, and poplar are good choices. And if staining, consider using the same type of wood for the trim that you use for the plywood, or something that will stain similarly so that it blends well once finished.
Overall Dimensions
The overall dimensions of this bookshelf are 12 ½″ deep x 30″ wide x 69″ tall.
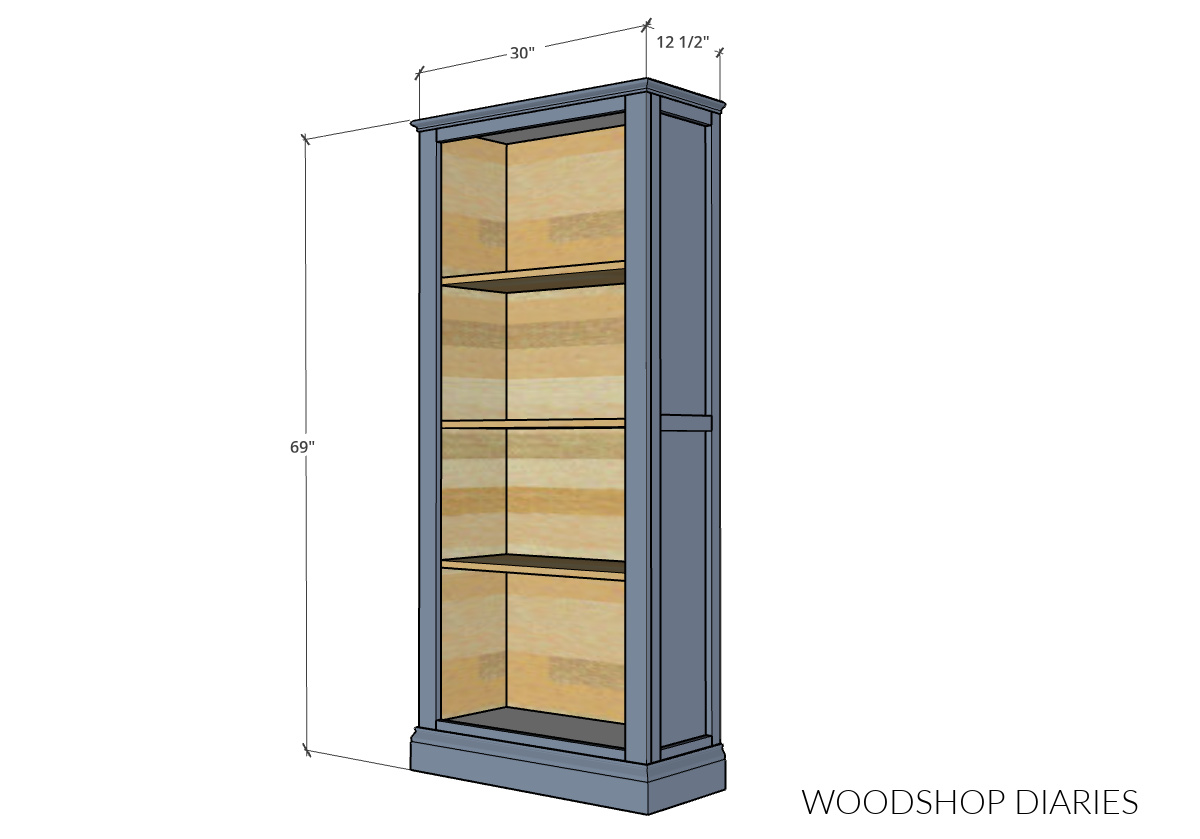
NOTE: These dimensions do not include the additional decorative trim molding added to the top and bottom.
You can customize this trim, so the dimensions will vary based on what type and size of decorative trim is used (base cap, crown, base molding).
You may find these resources helpful throughout the build:
Enjoy DIY projects and woodworking plans? Sign up for priority access for the latest posts on Woodshop Diaries!
How to build a bookshelf
If you prefer to watch, I’ve shared the full build video with tons of tips, behind the scenes, and additional details on my YouTube Channel here.
Love watching how-to videos? Subscribe to my YouTube channel for plenty more where that came from!
Prefer to print? Grab the printable bookshelf building plans available here:
Tools & Materials
Tools:
Materials:
- (1) 4’x8′ sheet ¾″ plywood
- (1) 4’x8′ sheet ¼″ plywood
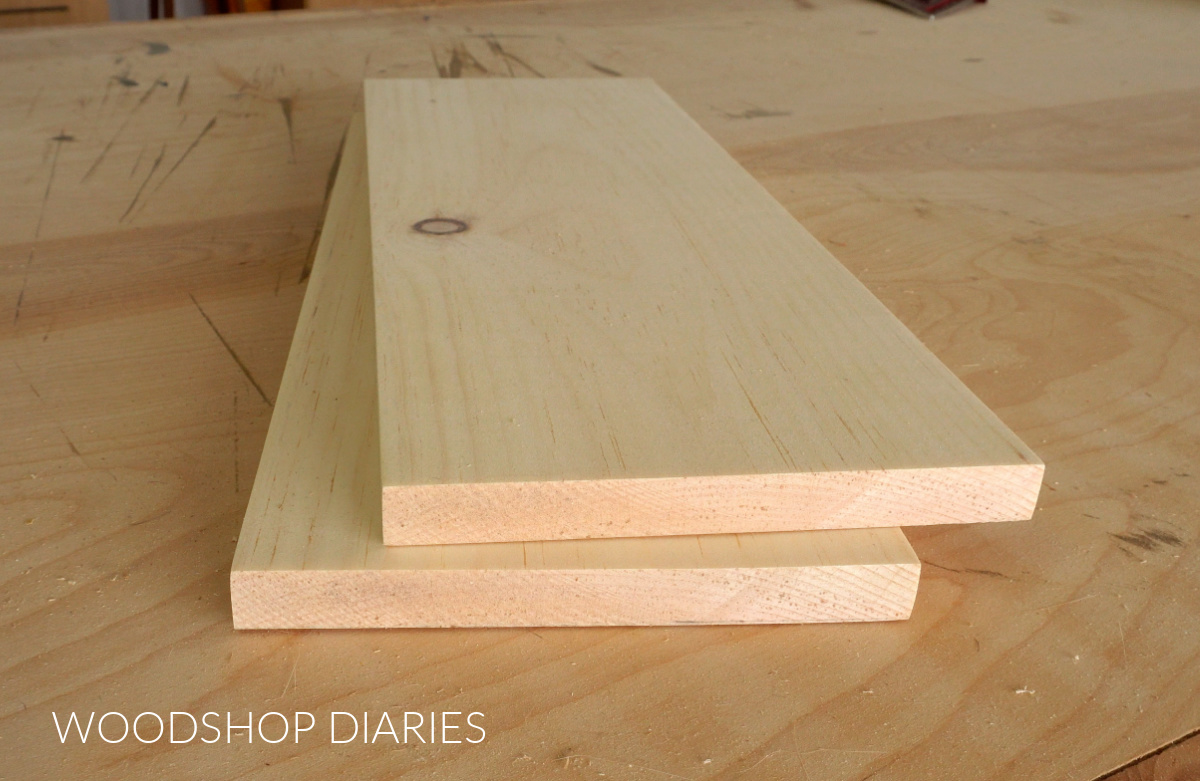
- (4) 1x2x8′ boards
- (2) 1x3x8′ boards
- (1) 1x6x8′ board
- (1) 8′ piece 3 ¼″ tall baseboard molding
- (1) 8′ piece base cap or crown molding (to trim the top)
- 1 ¼” pocket hole screws (100 count box)
- 1 ¼” long brad or finish nails
- Wood glue
- Edge banding (optional, but recommended)
- Shelf Pins
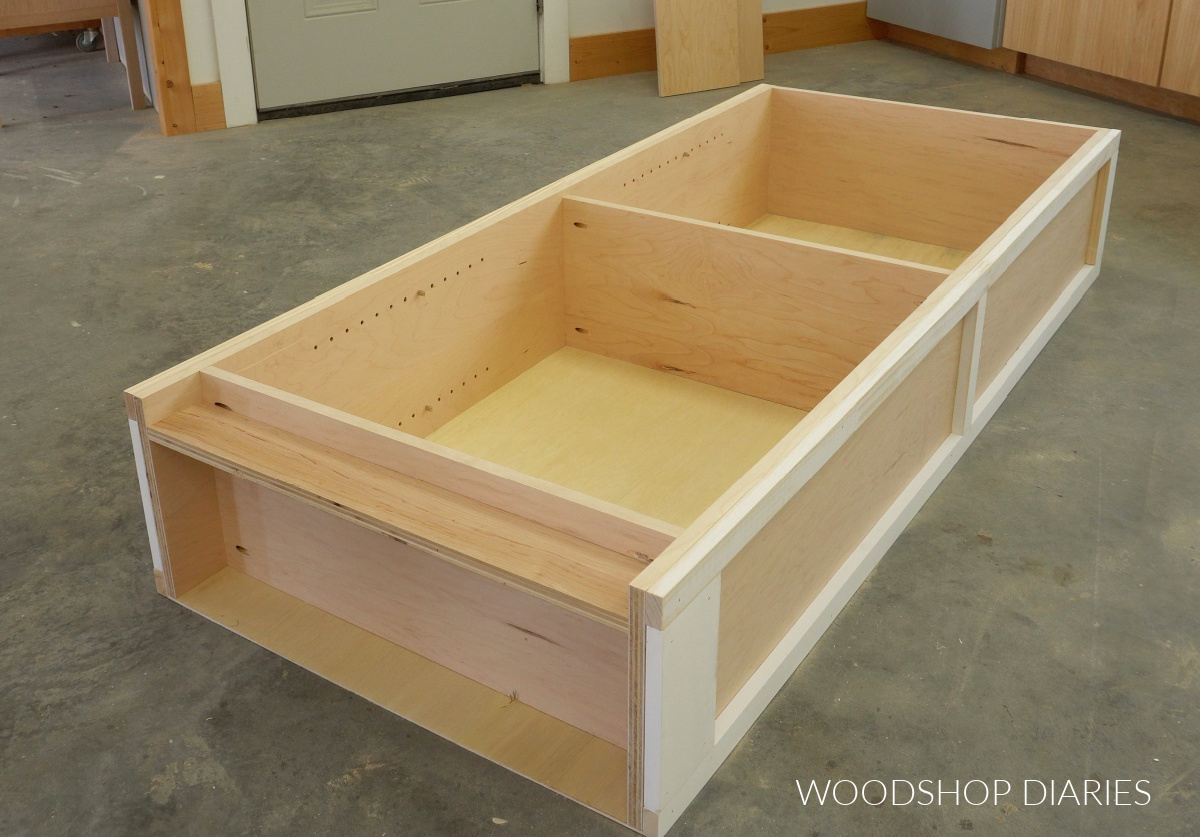
Step 1: Assemble the Bookcase Body
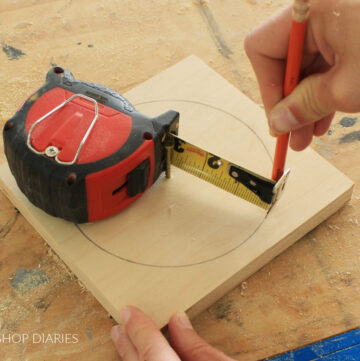
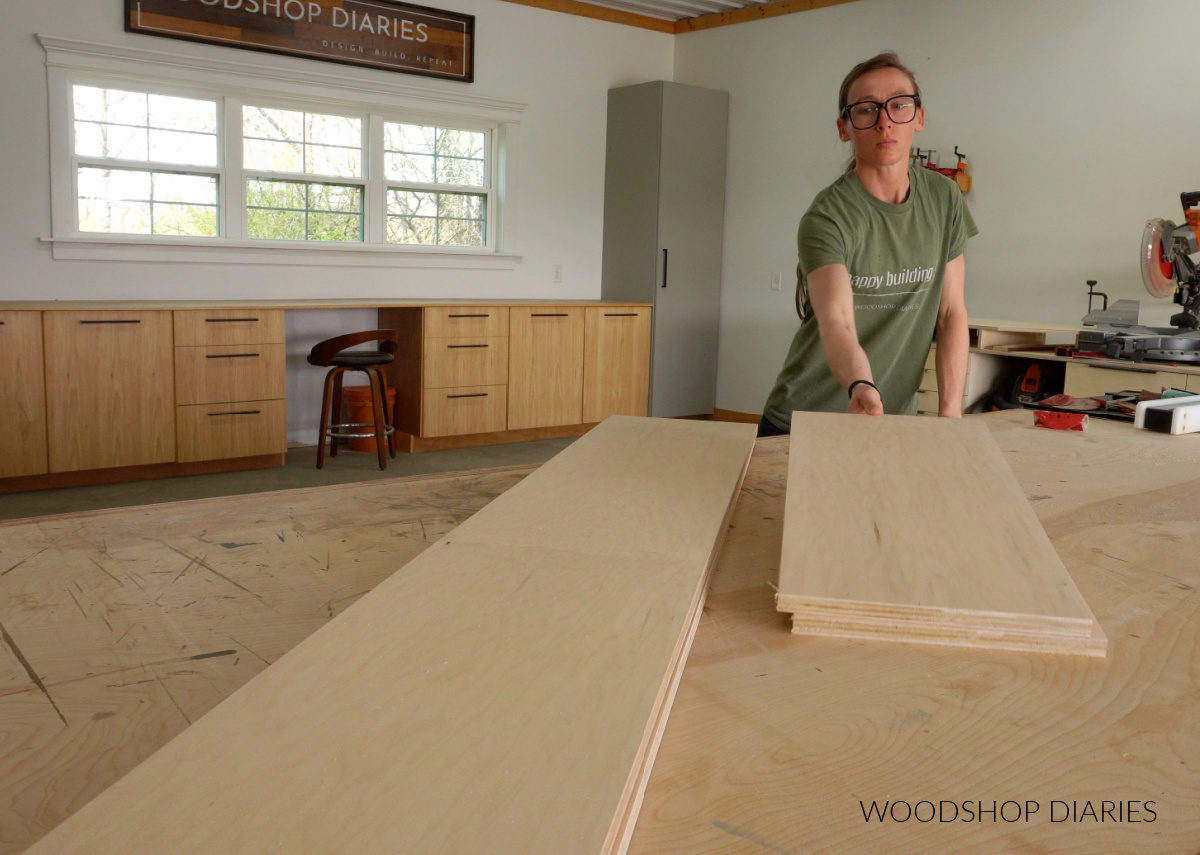
To kick this project off, I ripped two strips off my ¾″ plywood sheet to build by bookshelf body. If you’re using 1x12s, you can skip the plywood ripping.
A plywood sheet is 8′ long, and I cut a piece 27″ long from each of these two strips. One will be for the top and one for the bottom of the shelf.
I used the remaining longer pieces from each strip for the bookshelf sides. So I had two long sides and two short top and bottom pieces.
If you aren’t planning to add additional trim to the shelf, I recommend applying edge banding to the front edges of these pieces to hide the plies. This isn’t NECESSARY, but it does look a lot cleaner.
RELATED: How to apply iron on edge banding
Then, I drilled pocket holes into the ends of my short pieces and assembled a large box with pocket hole screws. Learn how to assemble with pocket holes here.
Notice that the bottom shelf is installed a few inches up from the bottom of each side!
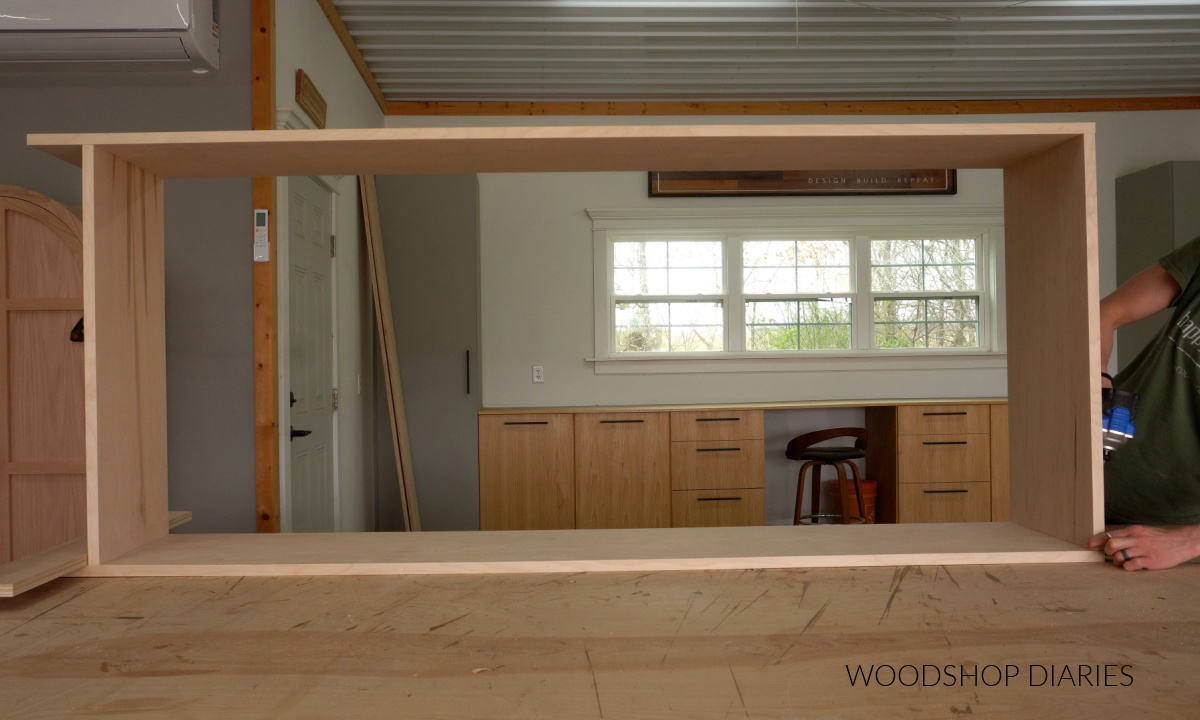
Now that the box was together, I cut a piece of ¼″ plywood to fit and stapled it onto the back side (you can staple, brad nail or screw this on). This really helps to make the large box more rigid.
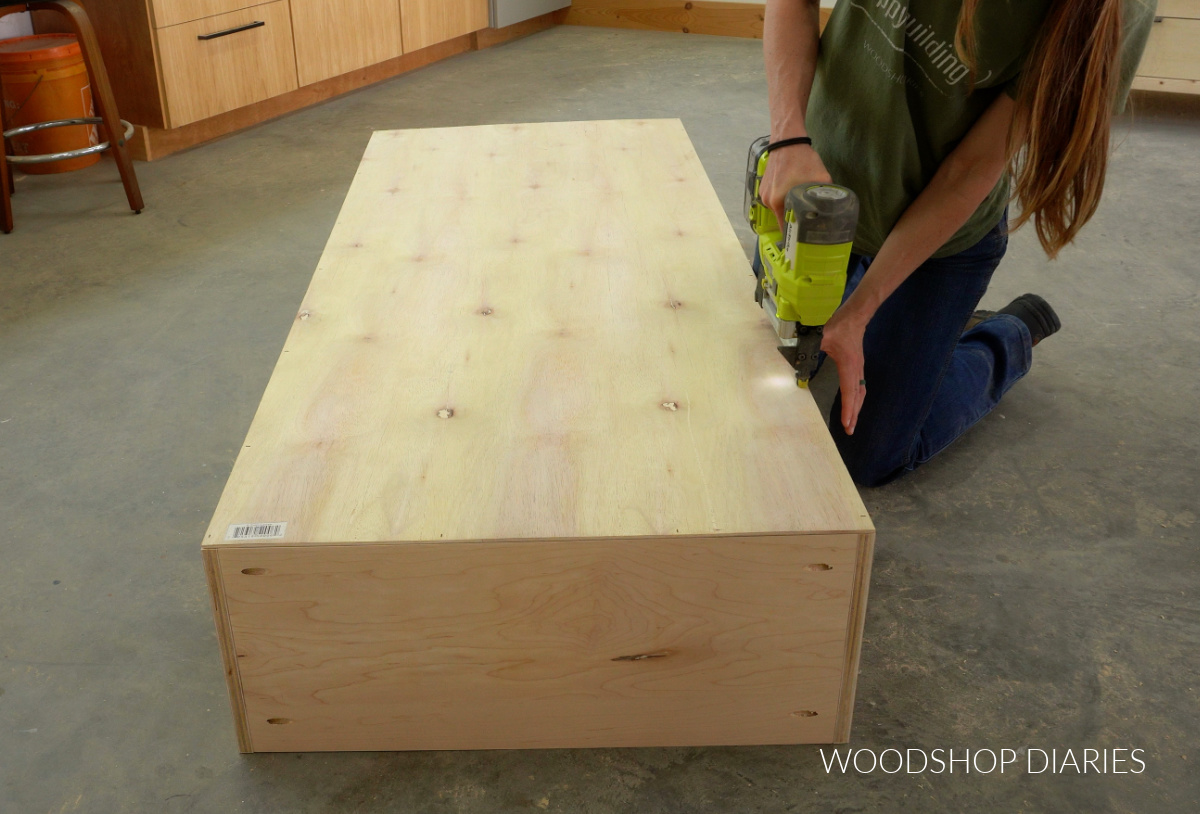
Quick note: If you’re not adding the additional trim and face frame to your shelf, cut a strip of plywood to go underneath the bottom shelf to act as a toe kick.
You can see this in the image below. It’s a simple strip of ¾″ plywood cut to fit, installed with pocket hole screws and inset from the front of the shelf about 1 ½″.
Prefer to print? Grab the printable bookshelf building plans here.
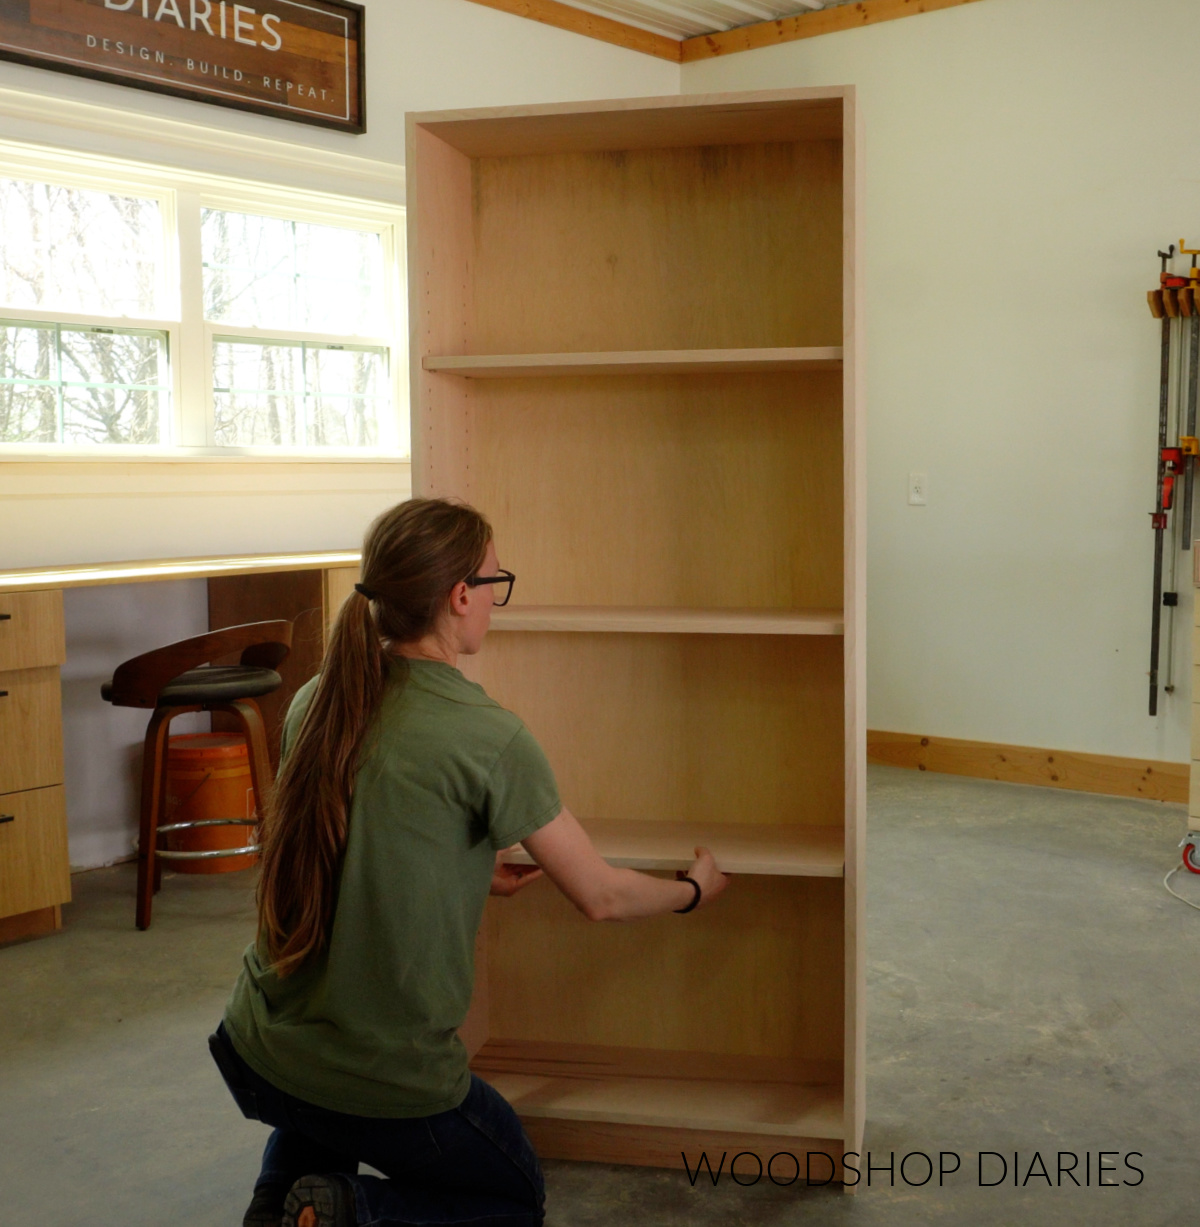
Step 2: Install Shelves
Shelves can be either stationary or adjustable. I personally prefer adjustable shelves (I’m indecisive), but on tall projects like this shelf, tall pantries, or large cabinets, adding a stationary shelf somewhere between the top and bottom helps keep the sides from bowing over a large span.
The stationary shelf doesn’t always have to be in the center–it can be closer toward the top or the bottom. But in this case, it made sense to just put it in the middle.
So I cut a ¾″ plywood shelf and installed it between my side panels in the middle of my shelf using pocket hole screws.
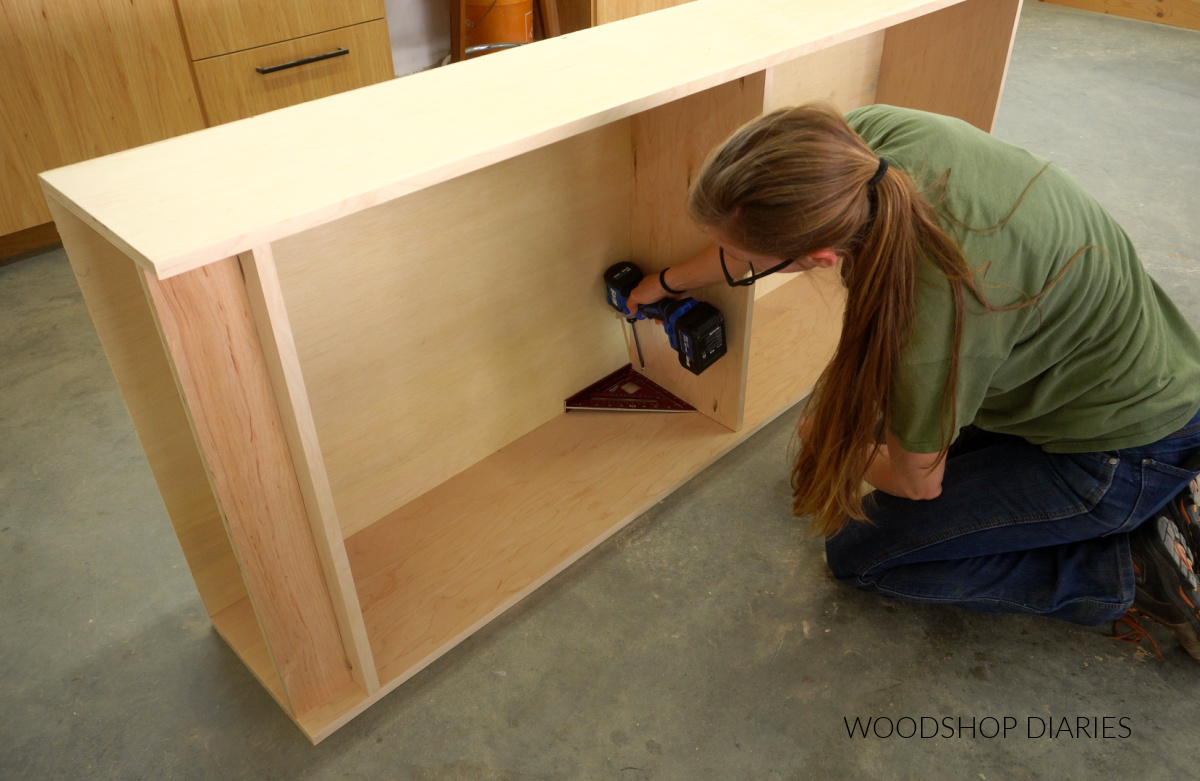
TIP: This stationary shelf won’t be covered by trim later, so I recommend edge banding the front edge since it will be exposed in the finished project.
Then, I drilled shelf pin holes above and below this shelf so I could make the rest of my shelves adjustable.
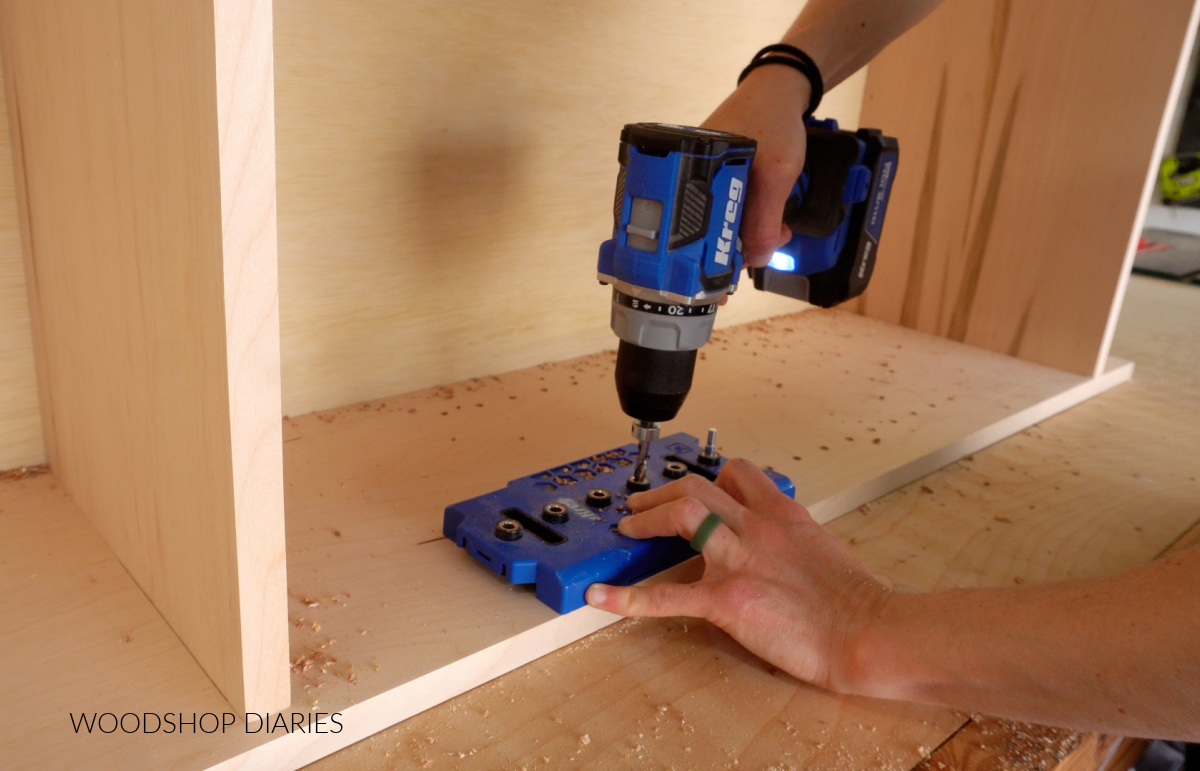
You can learn how to use a shelf pin jig here to add adjustable shelves to any project.
If you’re not familiar, shelf pin holes allow you to place your shelves wherever you’d like using shelf pins.
After my holes were drilled, I cut two more plywood shelves to place inside.
If you don’t want to add the extra trim, you can stop here and finish your new bookcase with paint or stain as desired.
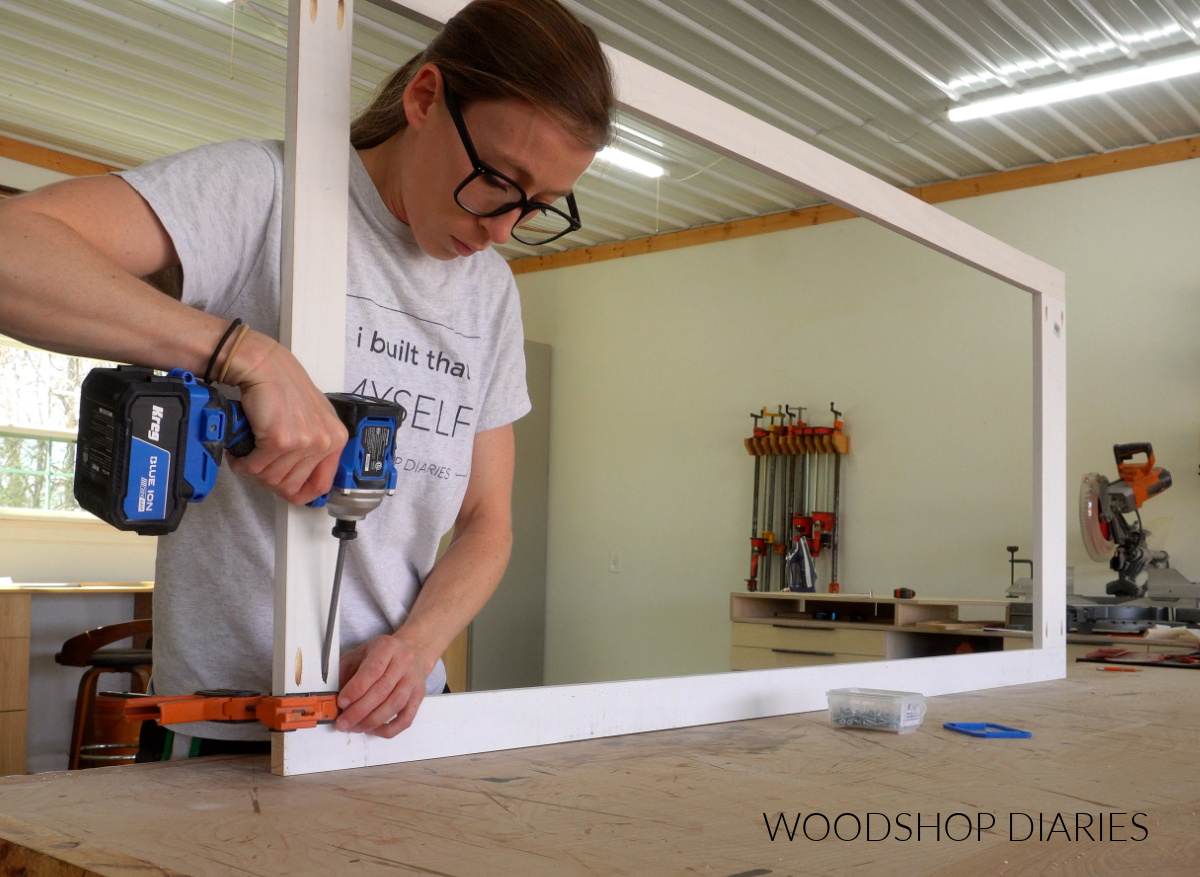
Step 3: Add Side Trim
To dress up the sides, I added a few 1x pieces to trim it out.
First, I glued and nailed 1x2s to run vertically along the front and back edges. The 1×2 on the back also covers the back panel plywood edge.
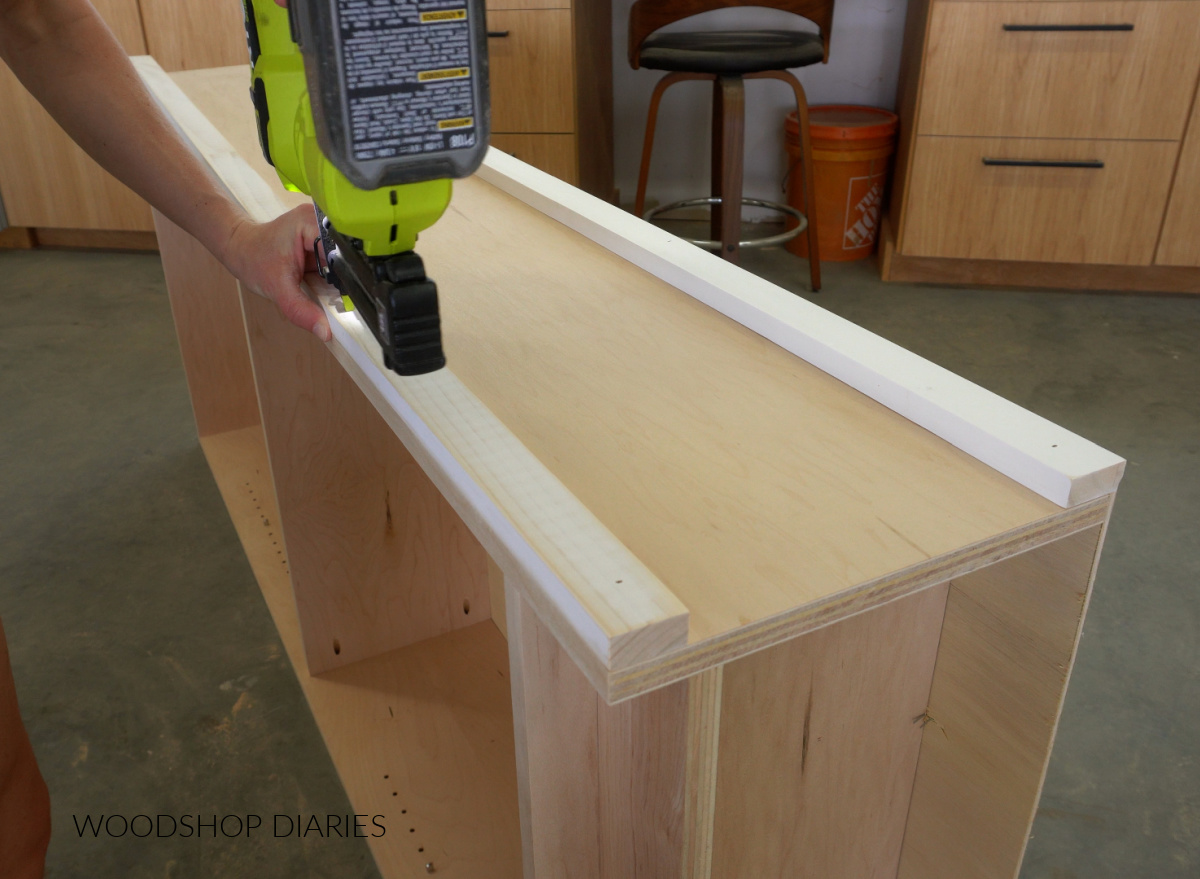
Then, I cut to fit three pieces to run between them. I cut a 1×3 to go at the top, a 1×2 in the middle and a 1×6 at the bottom.
In case you’re wondering…The reason for the thicker pieces at the top and bottom is to allow more room to add decorative moldings later.
I did this on BOTH sides of the bookcase. It’s already looking so “fancy!”
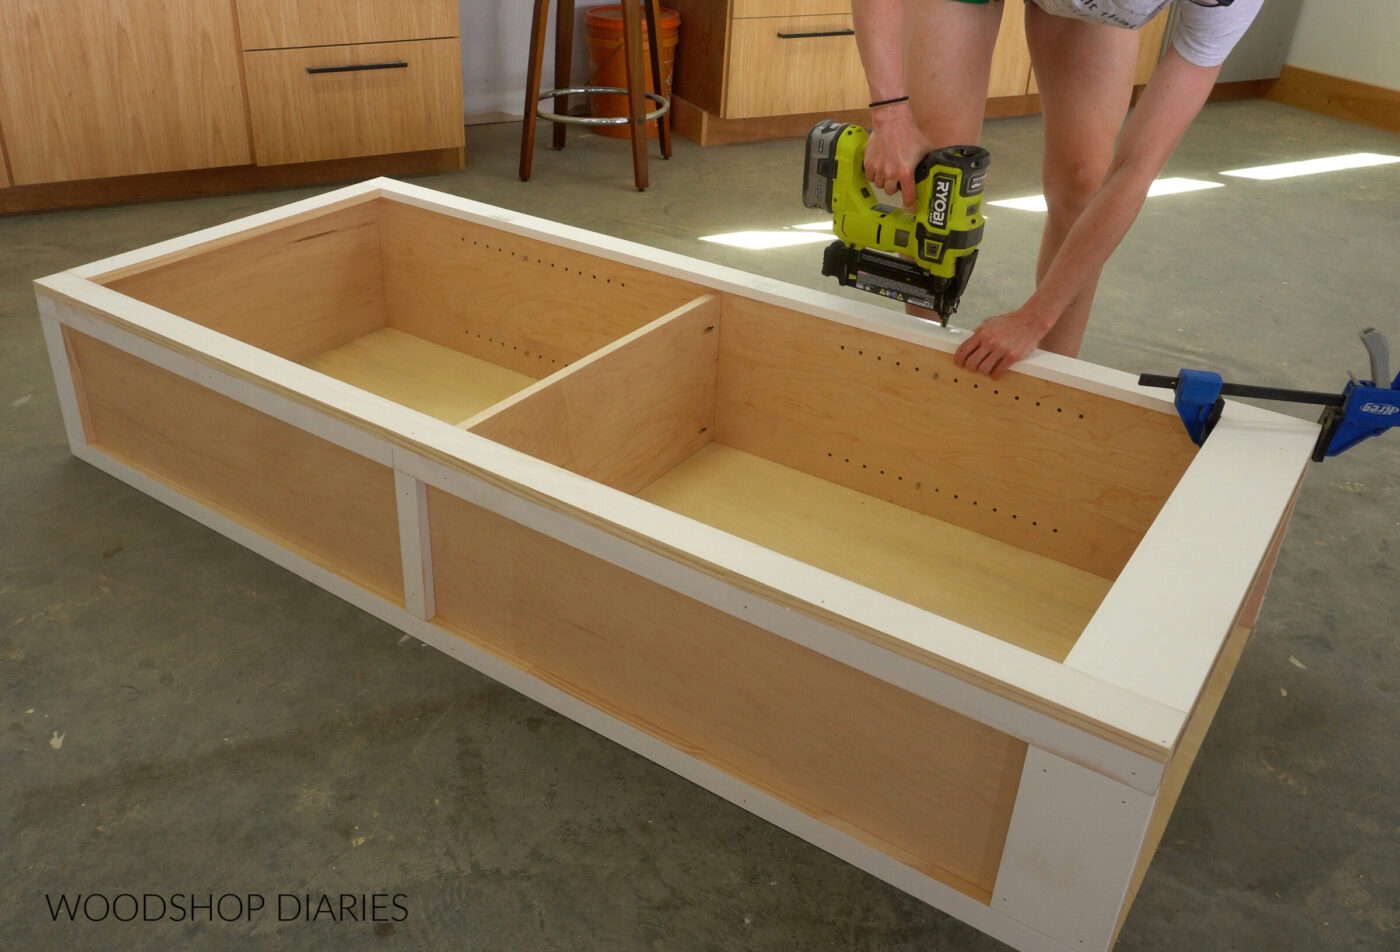
Step 4: Attach Face Frame
Next, I needed to add a face frame to cover my front edges. So I assembled a frame the EXACT size as the front of my shelf. I wanted it to be flush on all sides.
I used 1x3s on the sides and top and a 1×6 on the bottom…so it matches the side trim.
You CAN just glue and nail these pieces individually onto the front of the shelf instead of assembling the frame together. But I prefer to attach my face frame together as one piece, then add it to the front of the shelf.
Either option works, but I personally find that assembling the frame together first makes the shelf more rigid and makes the joints come together more seamlessly.
So I assembled my frame using pocket holes and screws. Then I glued and nailed it onto the front of my shelf.
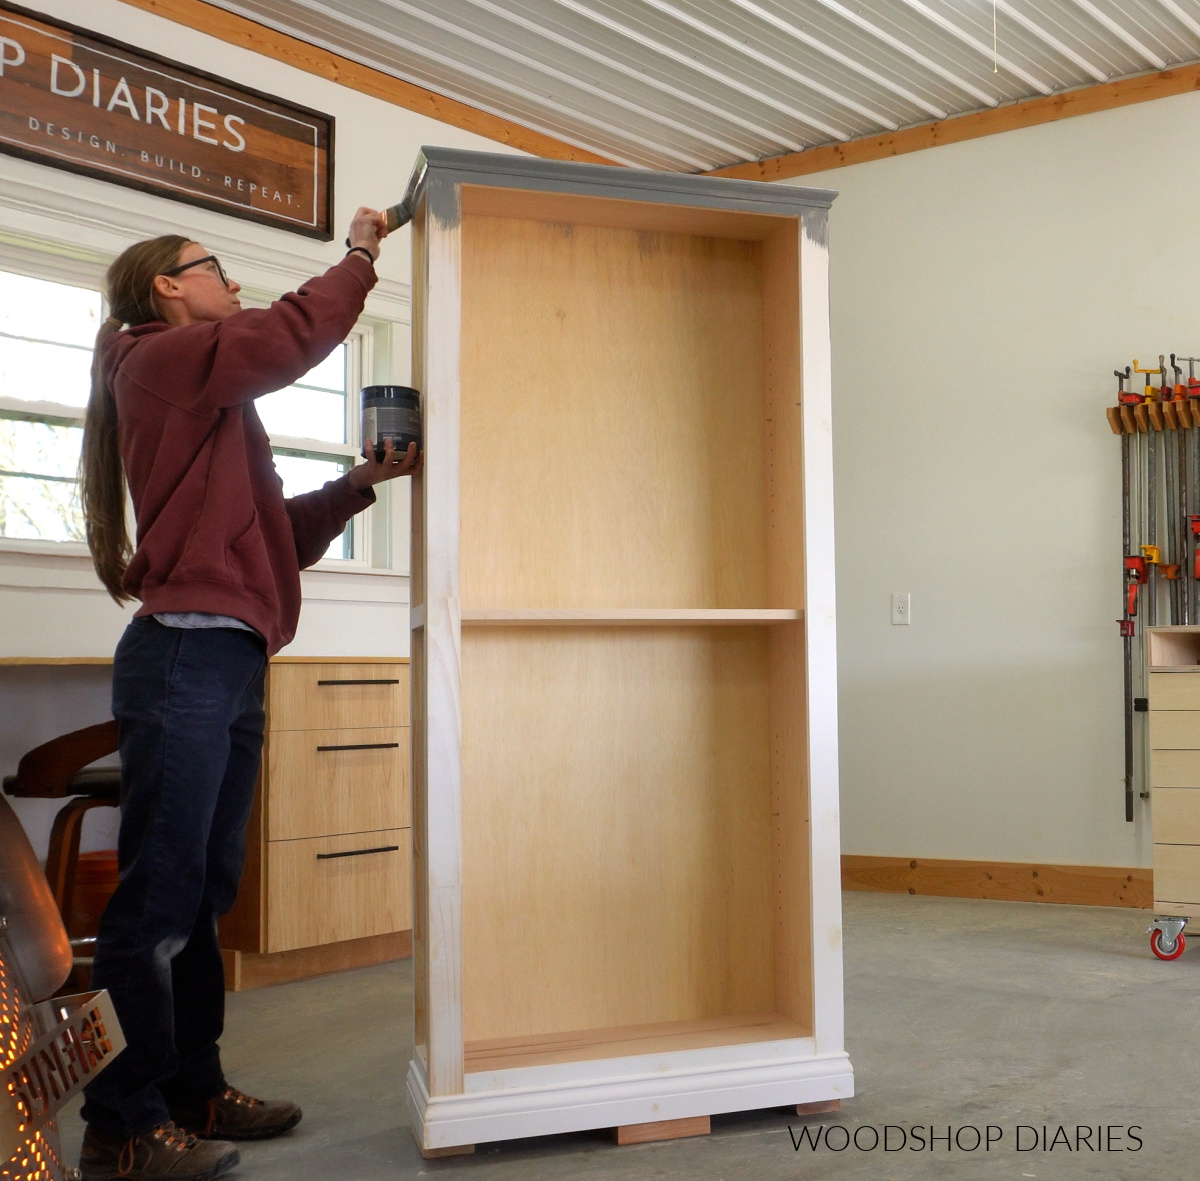
I like my trim joints to look as seamless as possible when painting, so I carefully sanded everything flat and applied wood filler to cover the nail holes and smooth out all the joints.
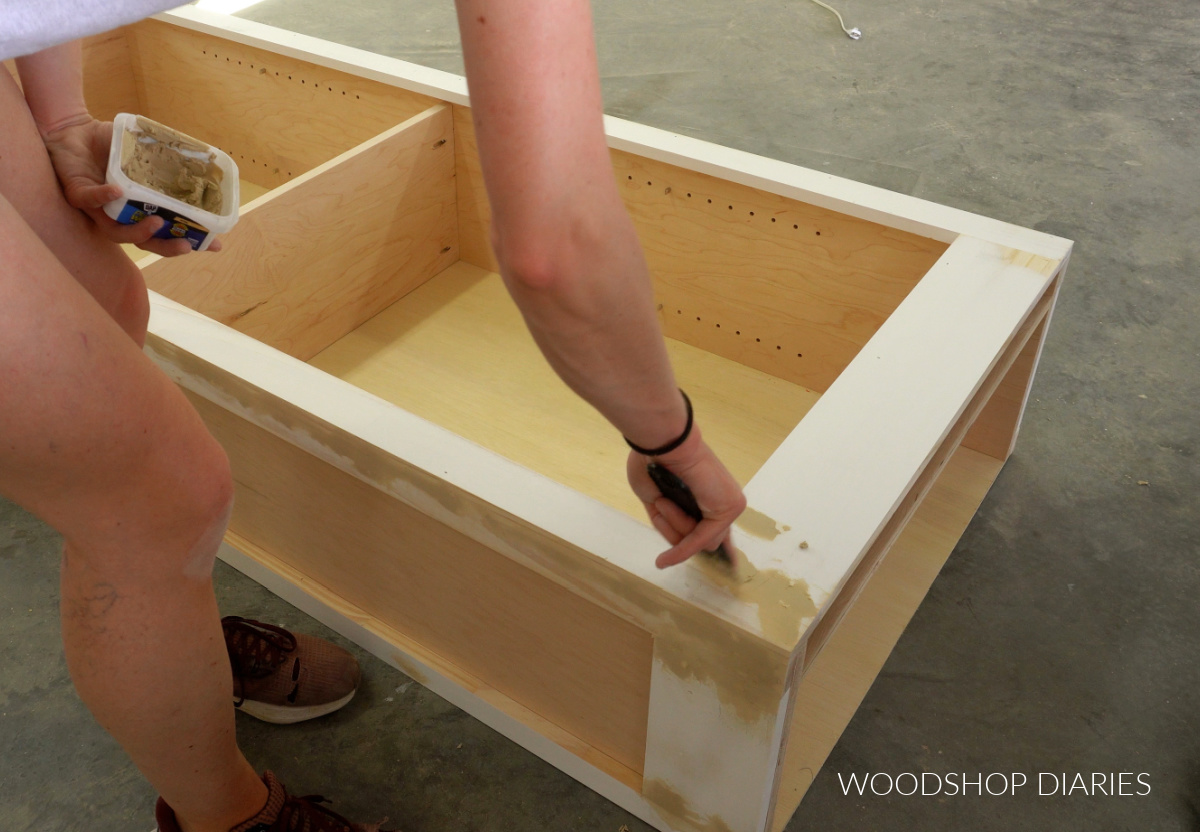
After it dried, I sanded the filler smooth before adding the trim.
You can wait and do all of this smoothing and filling after adding the decorative trim, but I find it a lot easier to sand everything flat before adding the trim.
All the details, dimensions, and cut diagrams for the project can be found in the printable plans!
Step 5: Install Decorative Trim
To add a little extra detail and dimension, I added some decorative molding to the top and bottom of the shelf.
Crown molding is a great option for the top, but I had just enough scrap base cap molding to wrap around the sides and front, so I used that instead.
Feel free to customize the trim detail here to fit your style. I cut to fit, glued and brad nailed the base cap trim around the top.
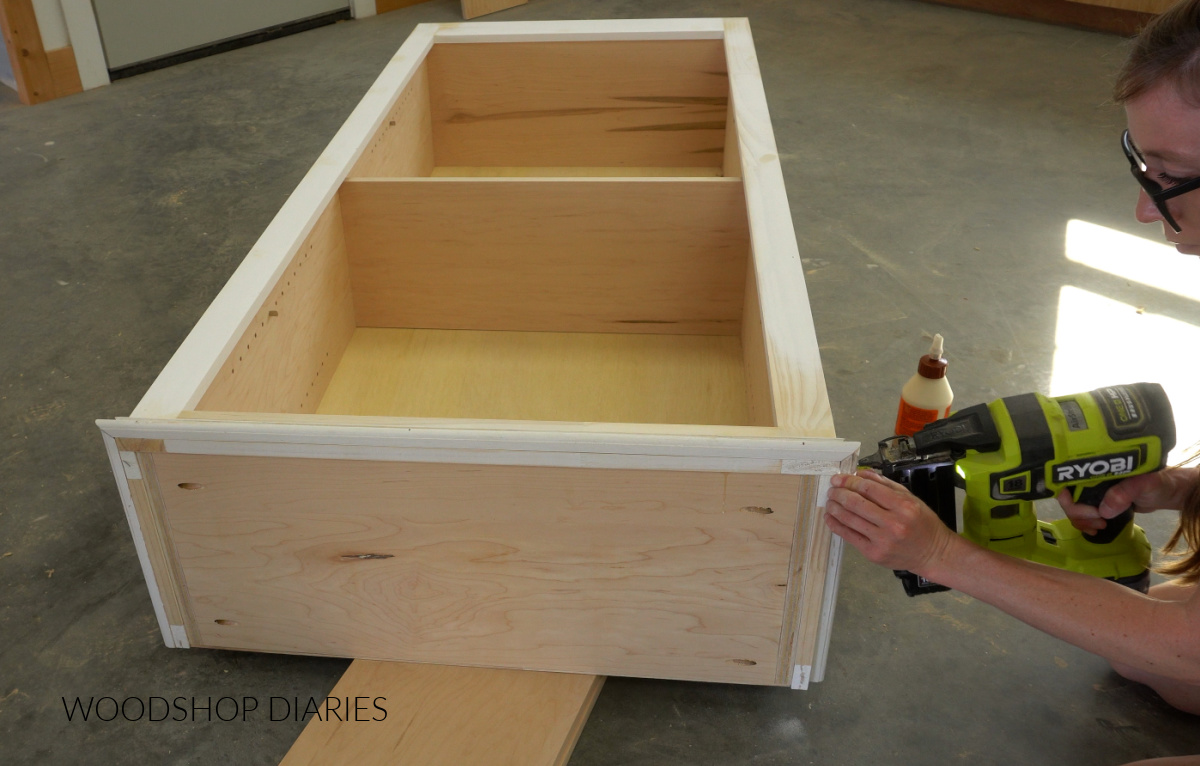
Then, I added baseboard trim around the bottom so it feels “even.” And now, I could finish this up with a coat of paint.
I painted the outside of my shelf in Behr Ocean Swell and the blue grey was a great contrast to the warm wood tones inside.
This simple bookshelf turned out beautifully and was such an enjoyable piece to build.
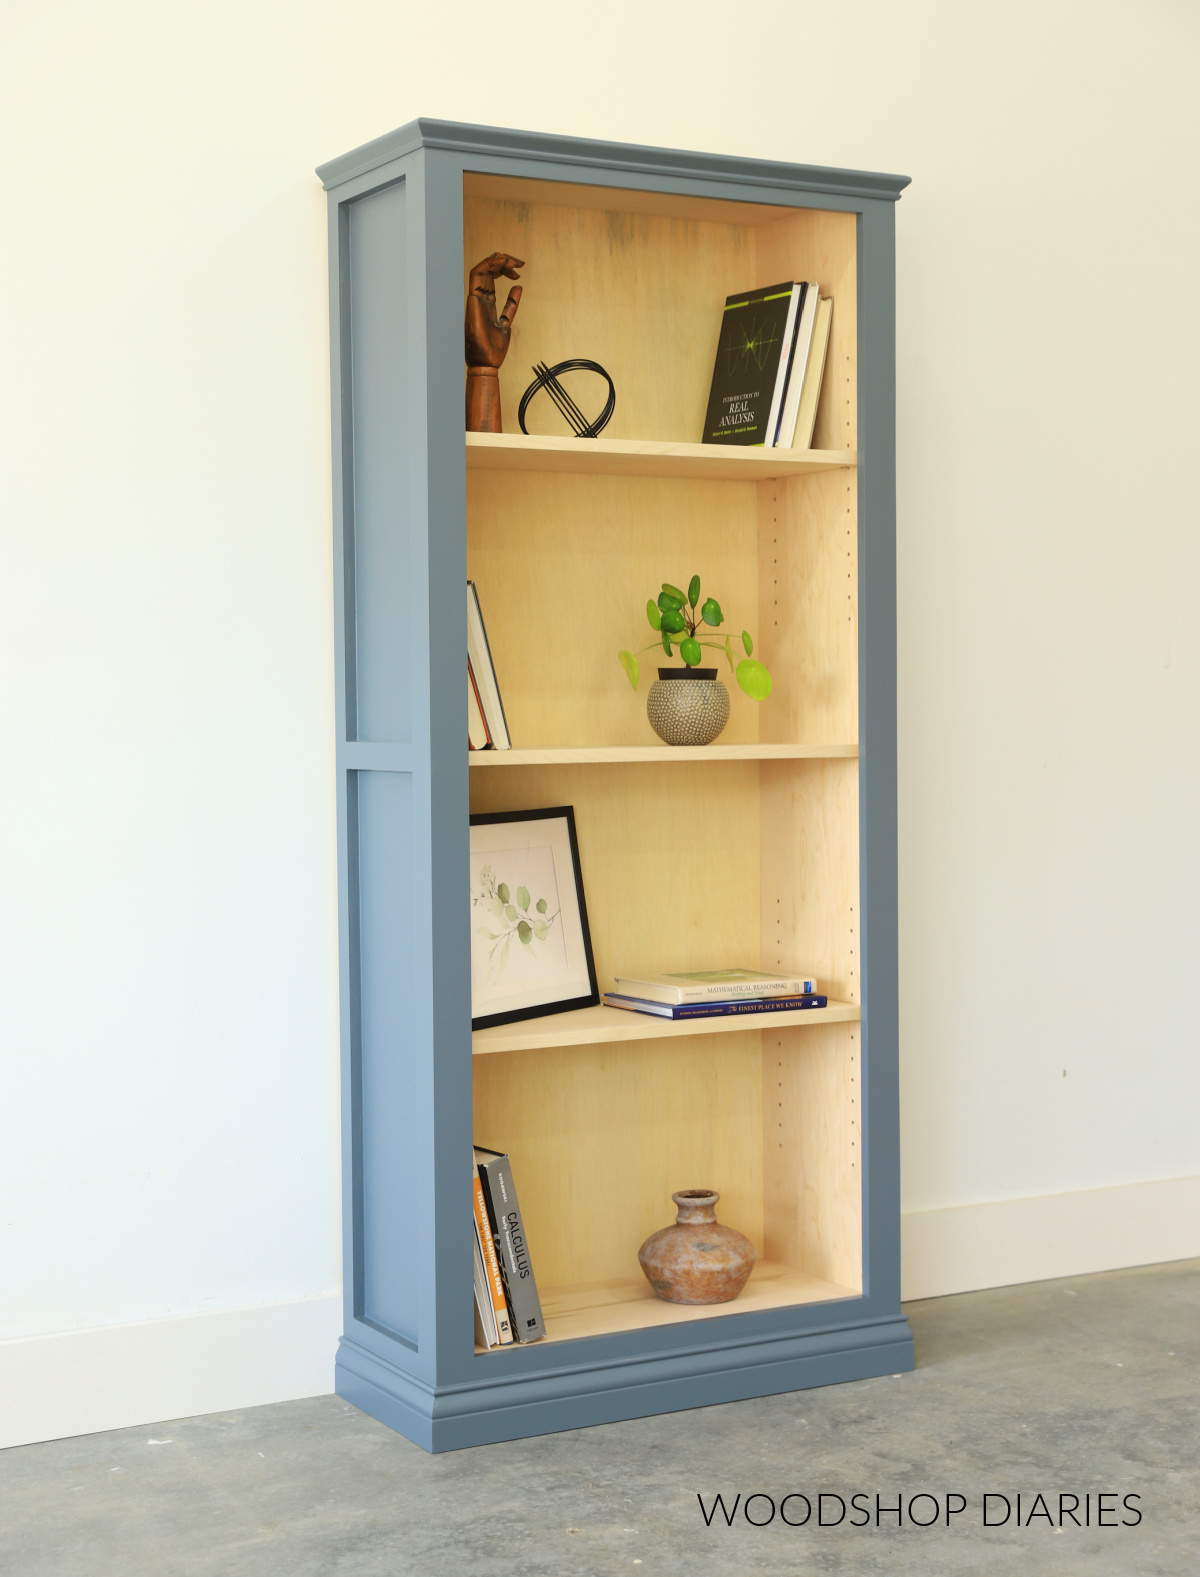
To prevent tip-over, I recommend securing the shelf to the wall before use.
Ready to build your own? Grab the printable bookcase building plans here.
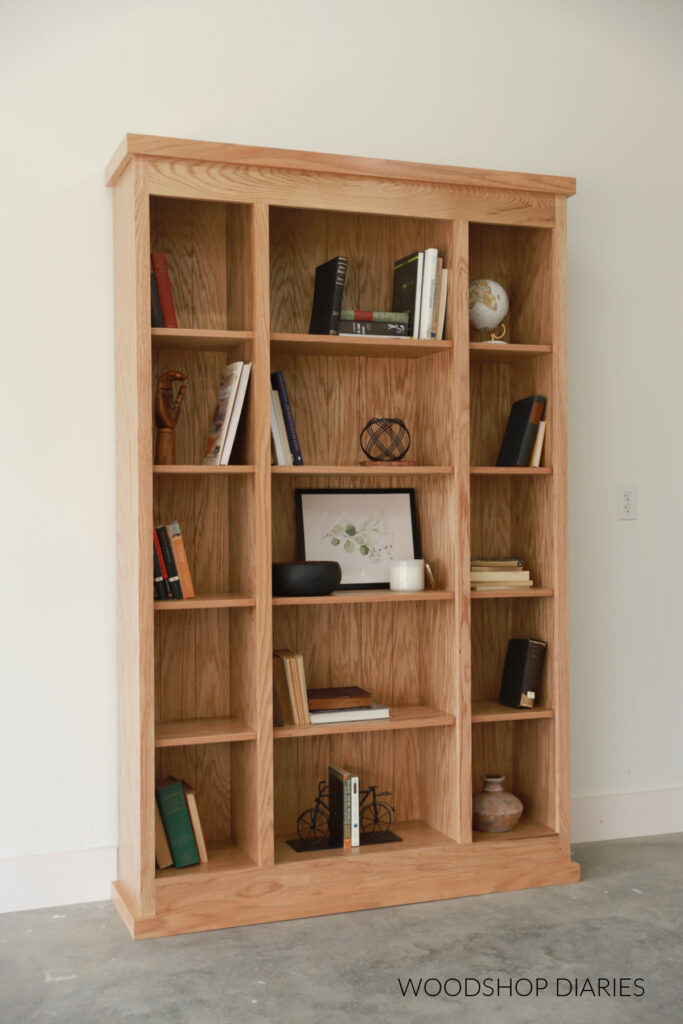
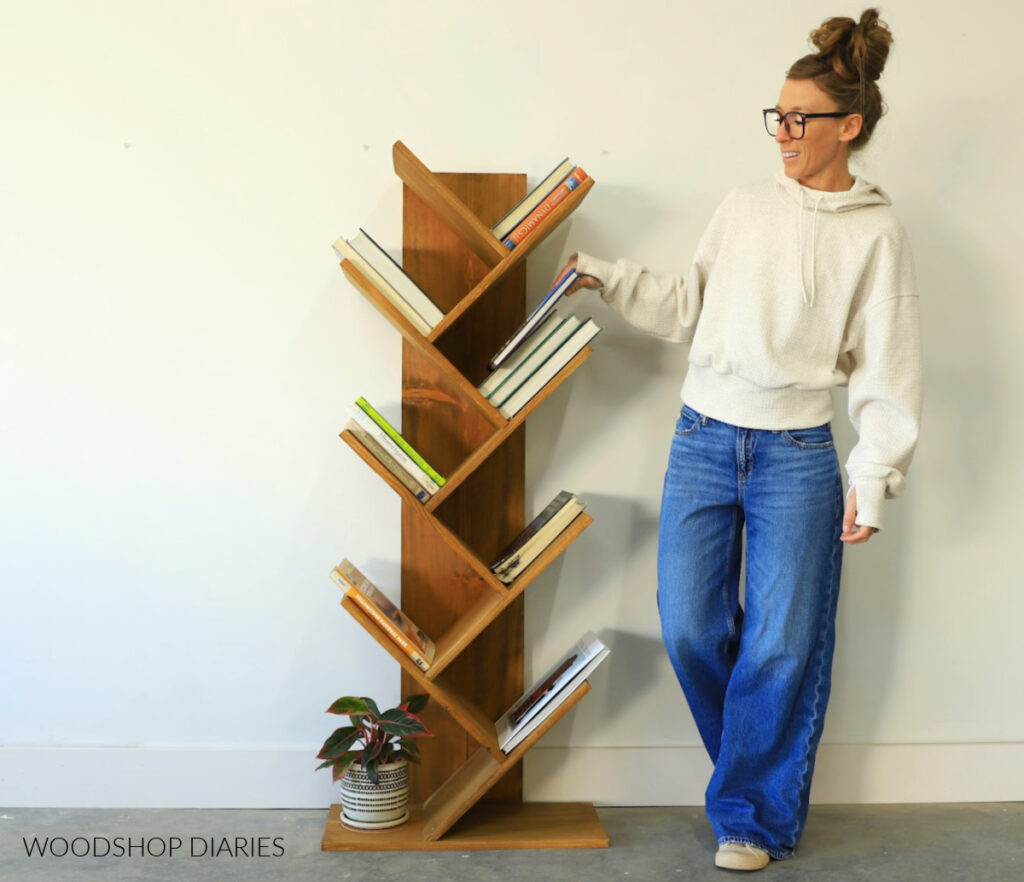
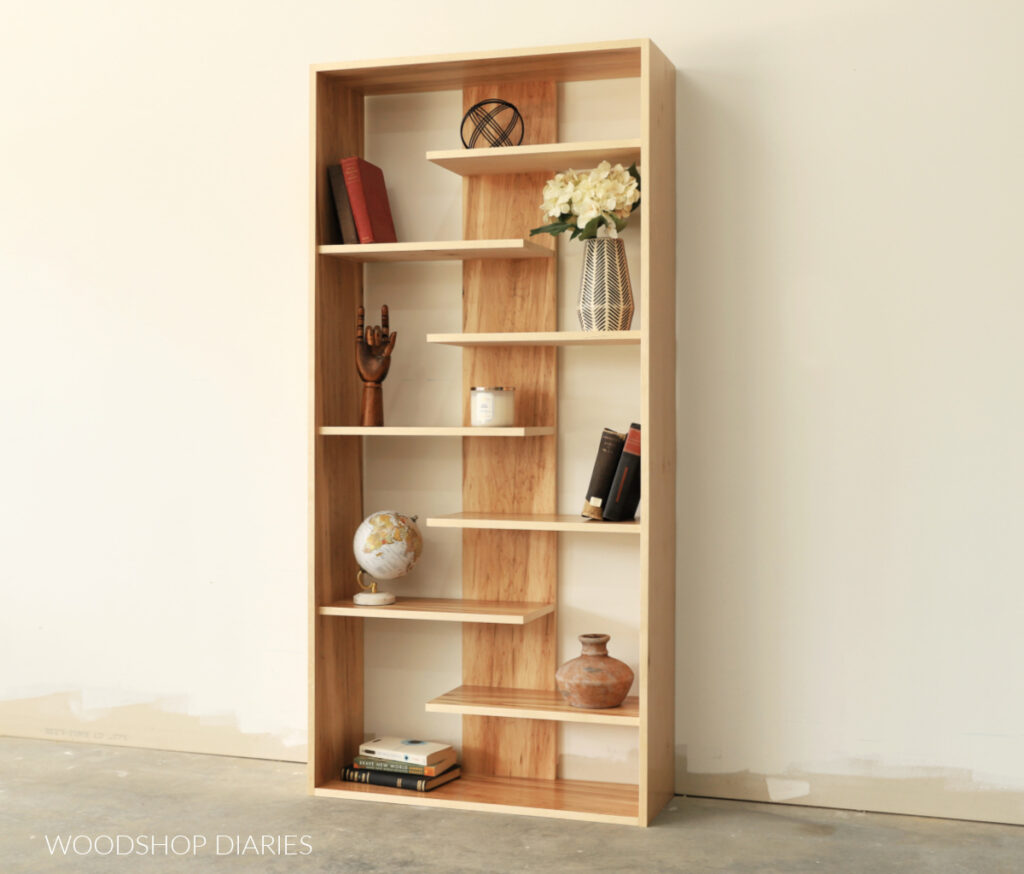
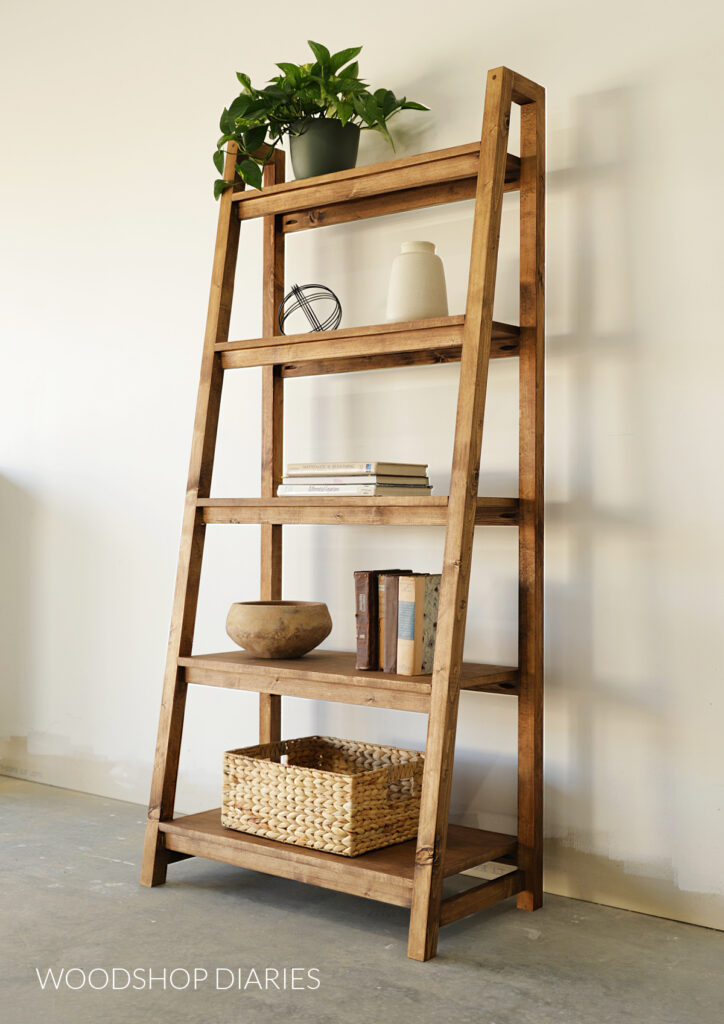
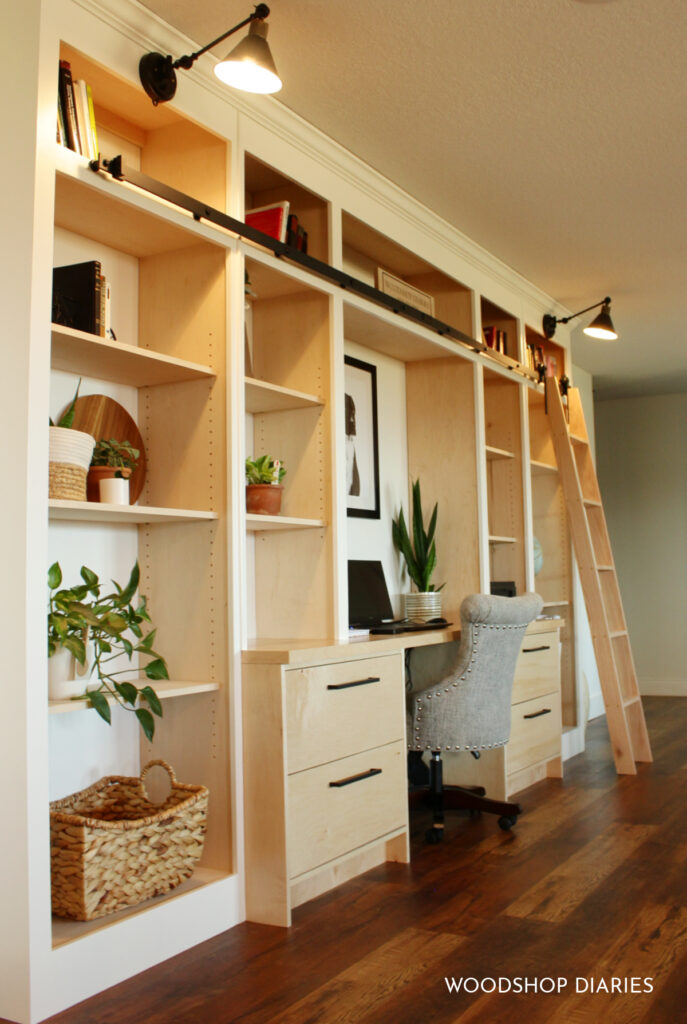
Looking for more bookshelf project ideas?
If you enjoyed this project, but are still looking for more bookshelf ideas, I’ve got you covered! Click on the image(s) below to see how to build each of these easy DIY bookshelves:

Don’t forget to save this project for later by pinning it or sharing to your favorite social channel!
Until next time, happy building!