Welcome to Workshop 101! This is part 5 of a five part series I’m excited to be sharing! Part 5 is my workshop tour–a little before and after a major overhaul I undertook to get it back in shape and ready for work again.
.
This post contains affiliate links. See policies.

After building my sister’s kitchen cabinets a few weeks ago, my shop was a complete wreck. Nothing was organized, everything was covered in sawdust, and I had misplaced several of my favorite tools while transporting them between her house and my shop. #hotmess

So I decided to get my crap together and get my shop back in shape. And that’s what sparked me to write this series. Each Wednesday for five weeks, I’ll be covering the topics listed below here on the blog, but I’ll also be giving my shop an overhaul behind the scenes so that at the end of the series (that’s today!), I will reveal my own shop tour and a kind of before and after.
..
Today is the workshop tour, but I covered the following topics in the previous weeks:
- Part 1: Workshop Maintenance
- Part 2: Workshop Organization
- Part 3: Workshop MVPs
- Part 4: Workshop On the Go
We’ve reached the end of the series, friends! I hope it’s been informative and helpful. I’ve really enjoyed sharing some “behind the scenes” of running a workshop and hope I was able to give you some tidbits to help you in yours.
.
Today, I’d like to wrap up the series by giving you my workshop tour. But first, let me share with you my “workshop story.”
.
My workshop started out in the shed of a rental house when we were in between houses. I had nothing…no tools, no workbench, no storage…nothing. I collected some random rusty screw drivers and a couple hammers and eventually bought my first power tool—a $30 jig saw.
.
Once we bought a house, I upgraded to a single car garage workshop and over the course of three years, transformed it into a nice, functional space for my projects. It’s where I REALLY got started making and building.


Then, we sold that house and built our current garage apartment and I upgraded again to a 2 car garage, BUT I share it with Danny’s tractor and lawn mower, so altogether, it’s really just slightly larger than the single car garage I used to have. His toys take up a lot of space.

But I am thankful to have a space to work (play) in. And that’s where I’m working now. So, let me show you around 🙂

I have worked really hard to get it set up to where I feel like I can work pretty efficiently. But it didn’t start out that way.
.
When we first moved in, I didn’t have a plan. I just threw my stuff on the wall and in the corner without thinking about workflow or the best use of the space. Then I added a large assembly workbench earlier this year and this Husky Mobile Workbench recently and things started getting a little chaotic.

I had tools on the floor, scrap lumber EVERYWHERE, stuff leftover from the house build, and after building my sister’s cabinets, I had had enough. So I took everything out and put it back in how it should have been from the beginning. And now, we are here.

The first thing I did was to move all my lumber to a central location. I had my scrap cart in the back corner and the lumber rack in the front corner. So, over time, I ended up with random lumber cut offs strung out between the two…so basically, all over the shop.
.
So I moved all my lumber and material storage to the back corner to keep it all together. I immediately felt better haha.

But that was where my miter saw stand and sliding door cabinet used to be. So, now, I had to find a new location for them.
.
In my old shop, my miter saw stand was really close to the table saw. Basically I could cut on the miter saw, then turn 90 degrees and be ready to cut on my table saw. It was a tight squeeze, but worked well for me.
.
So I moved my miter saw stand similarly in this situation and placed it next to my table saw.

PS, speaking of my miter saw stand, it’s one of my favorite (and it seems it’s also a reader favorite, too!) things in this shop. I built it a while back, and I’m still loving using it. It gives me a ton of storage, fold down extension wings, and it’s on wheels so I can move it in and out of the way as needed.

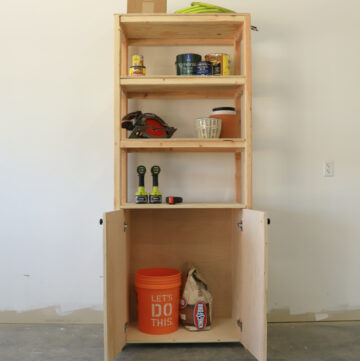
Now, that sliding pegboard cabinet…I put it in this back corner above my mobile planer cart and another rolling cart I built a while back. I keep my less often used tools and such in here, so I opted to put these items further away from my work bench and leave the wall space closer to the workbench for more often used tools on my Wall Control Boards.

Here I keep my drill, driver, sander and circular saw handy to grab while I’m working. It’s just a few steps from the workbench, so that makes things efficient.

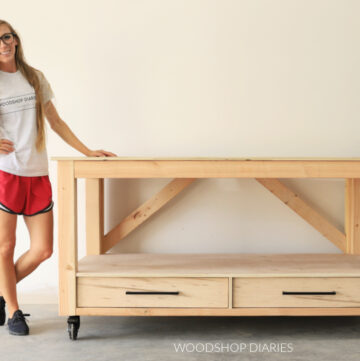
Speaking of workbench, my second favorite item in my workshop is this mobile workbench. I have wanted a large rolling workbench that doubled as an outfeed table for YEARS until I finally had the space to build one earlier this year.

It’s the hub of the shop and it’s where I put most of my projects together, cut down a lot of my plywood, and glue up a lot of my table tops.
.
This workbench also stores a ton of my most used items and long cutting tools. I recently added this little shelf piece to it to store my Husky small parts organizers as well.

It makes a great outfeed table to my Grizzly cabinet table saw and both are on wheels, so if needed, I can roll them around and out of the way.

I HIGHLY recommend whatever table saw that you have, to get it on wheels. It’s a pretty large tool and sometimes it’s nice to be able to roll it away if you aren’t using it. My old saw was on legs and was a PAIN to drag around if I needed to move it.
.
And finally, moving a little further down the wall here, I’ve got my Husky Mobile Workbench and a nice little backdrop for a photoshoot (#bloggerlife). It also doubles as my battery charging station since it has a power strip in the side of it.

Here I keep many of my hand tools and saw blades stored away from dust and debris and neatly tucked out of the way. It also doubles as an assembly table, but I’m super careful not to get any stain or glue on the top since it’s so pretty 🙂
.
Next to it in the front corner, I keep my trash can (which typically stays super full all the time) so it’s easy to take out when I fill it up.
.
I’ve got some open space in the back, and a little in the front for works in progress and for assembling large pieces or cutting down sheets of plywood and Danny’s toys take up the rest of the space.
It was a lot of work to rearrange the shop and I was out of commission for a while in the process, but it was well worth it to rethink how I work in here and how I can make the best use of my space.
.
No matter how big or how small your shop, you can make it work for you with a little planning and a little work and a little creativity. And maybe a few tools to help keep your stuff organized 😉
.
I feel so much better walking in here now than I did when my tools were all over the floor and there was lumber everywhere and nothing had a place.
.
And that ends the workshop tour! So if you’ve followed along this whole series, thank you SO MUCH for sticking with me until the end! And if you’ve missed any part, be sure to check them out here:
- Part 1: Workshop Maintenance
- Part 2: Workshop Organization
- Part 3: Workshop MVPs
- Part 4: Workshop On the Go
I hope it’s been an inspiration and a help to you 🙂 And I hope you’ll pin this for later and I also hope one more thing…that you’ll stick around to see what new projects I’ve got up my sleeve because now that my shop is clean, I’m ready to get back to building!

Thanks so much for following along and until next time, happy building 🙂