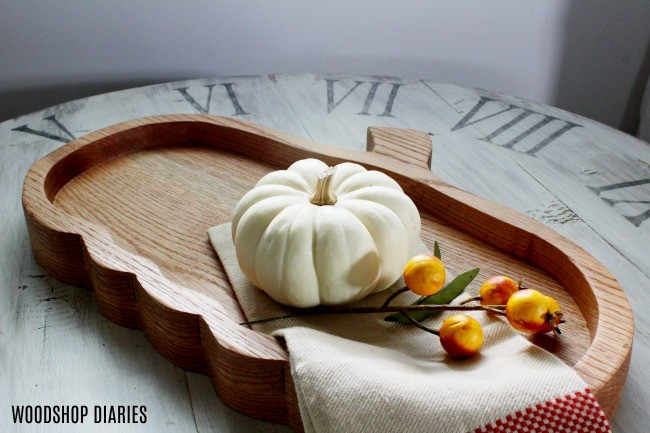
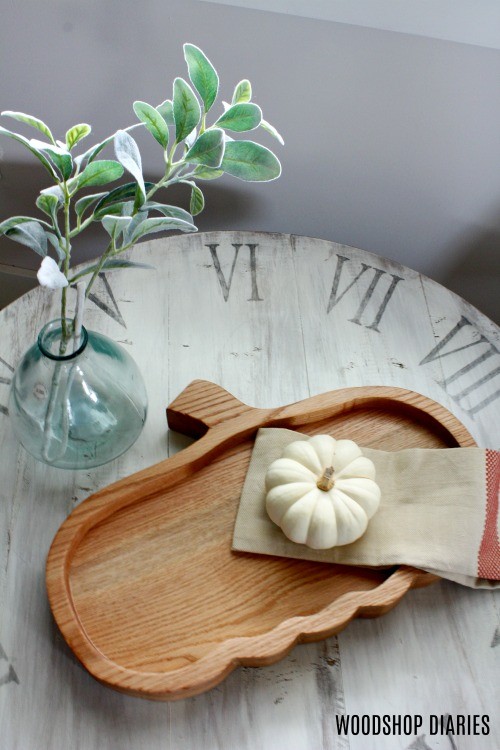
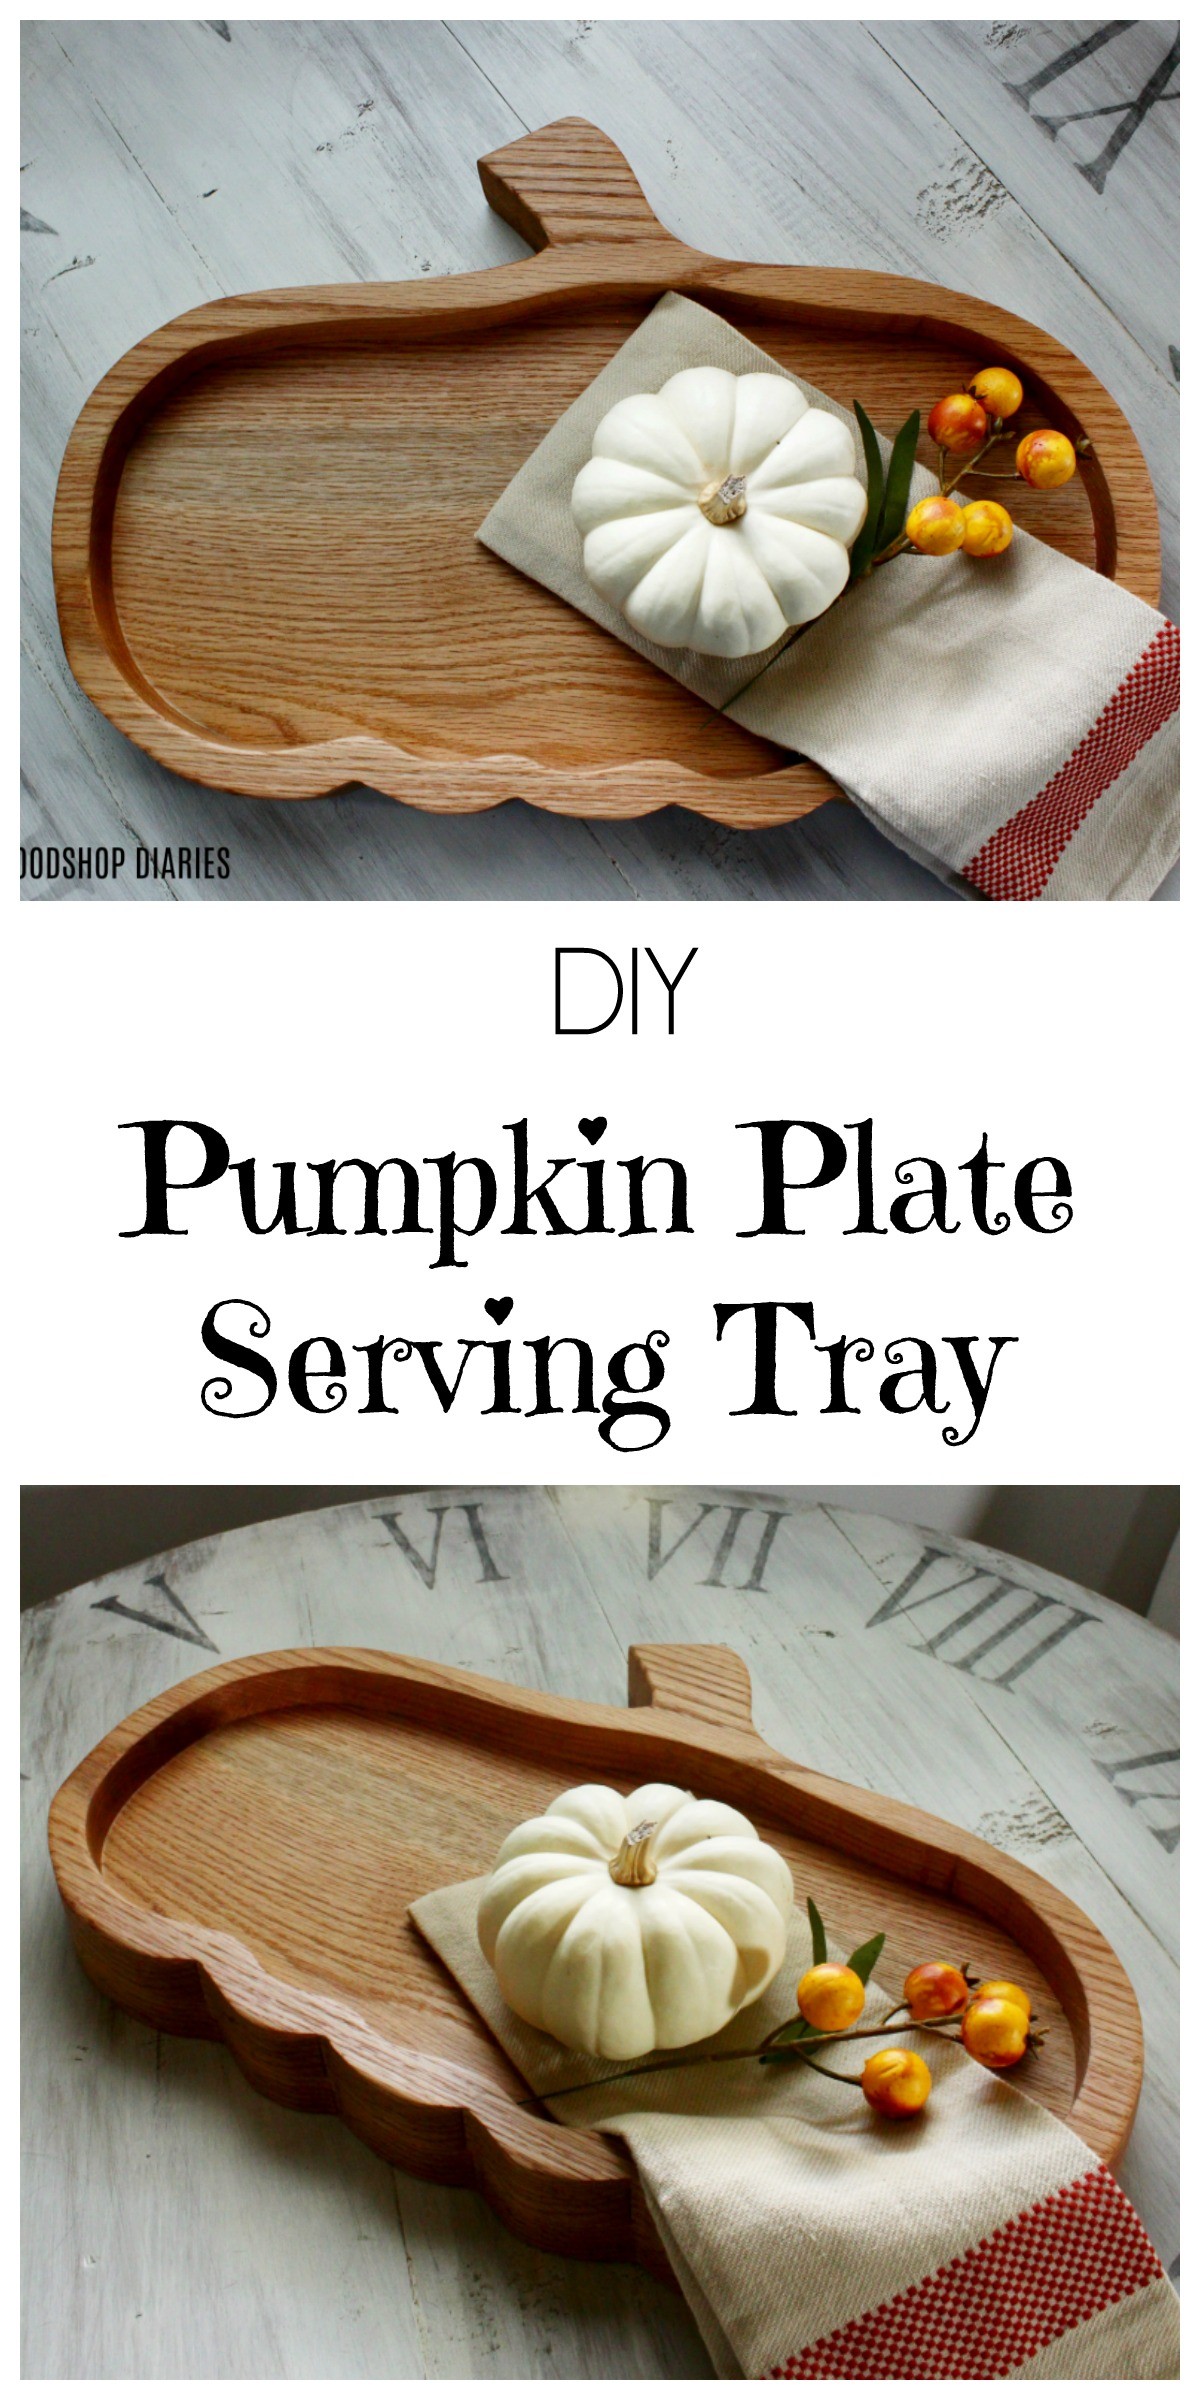
In the mood for a seasonal craft? This DIY pumpkin plate is the perfect fall project!

I love fall.
.
It’s my birthday season. It’s the time of the year that all the bugs go to die and the snakes go away and the smell of tobacco barns fills the air.
.
And the heat index isn’t a billion and one. Oh, and let’s not forget it’s also pumpkin spice latte season 😉
.
This fall, I’ve been SWAMPED with to-dos and I haven’t had much time to put any fun fall projects together. BUT, I was determined to make at least one fall thing, so I squeezed in this adorable pumpkin plate project one afternoon after work.
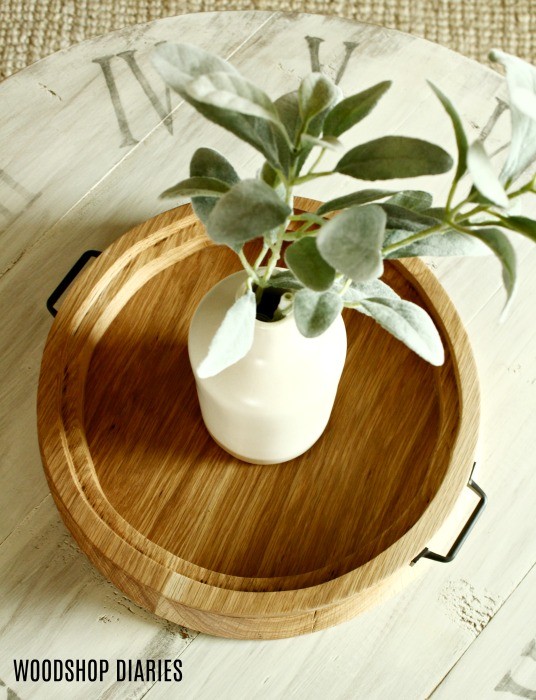
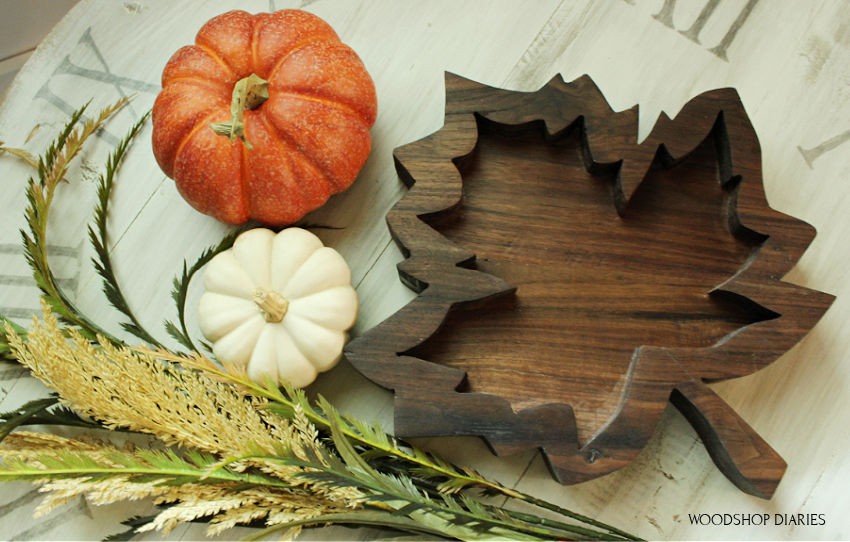
PS, this design is SUPER similar to the design I used to make this round serving tray here
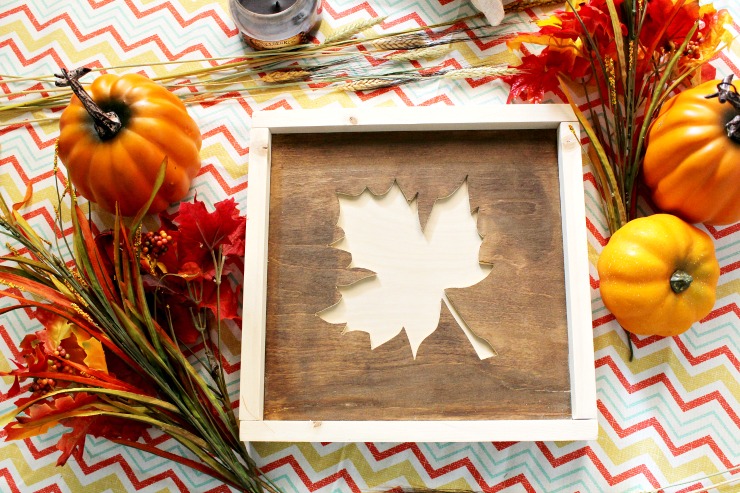
I also did it with this Fall Leaf Tray
I’m sharing the video with you right here and I’ve got the step by step below 😊
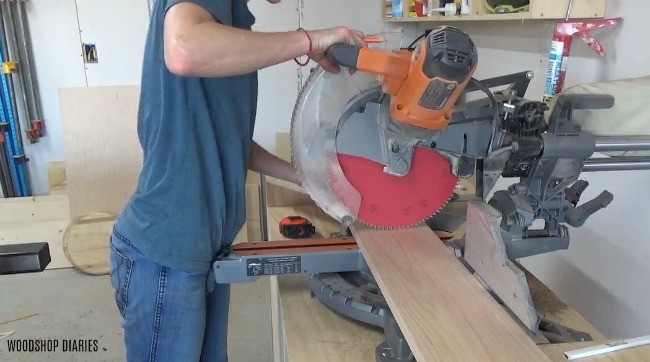
For this project, I went to the lumber yard and asked for the most orange wood they had. I was making a pumpkin plate, so obviously, the more orange the better. I ended up getting some red oak.
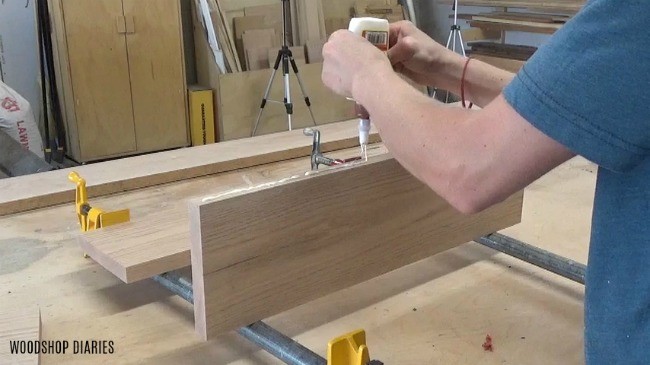
Step 1: Glue Up Two DIY Pumpkin Plate Panels
You can use whatever size boards you want for this project, but mine were approximately 5 ½” wide–which is a standard 1×6 board.
RELATED: Understanding lumber sizing
I trimmed down four pieces at the miter saw about 20” long, then brought them over to the workbench to glue up two sets of two.

Step 2: Cut Two Pumpkin Plate Boards
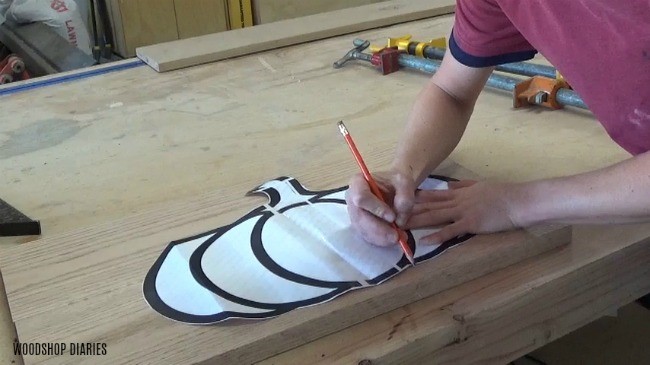
While the glue was drying, I just did a quick Google search for “pumpkin clip art” and found a basic pumpkin shape that I liked. I blew this up to about 11” x 18” in a Word document, printed it out in sections on multiple sheets, taped it together, and cut it out. This was my pumpkin template.
You could also freehand draw your own pumpkin shape, or find one in a coloring book, a newspaper, etc. Feel free to get creative.
Once the glue dried, I removed the boards from the clamps and traced along this pumpkin template onto one of my panels.
Then, I simply cut this out using a jig saw.

Once the first pumpkin was cut out, I traced it onto the second panel and cut it out as well with a jig saw.

I tried to get these two cut outs as close to the same shape as possible–this will help make clean up easier later.
Step 3: Cut Out Middle of Plate
Now that I had two almost identical pumpkin shapes, I traced along the inside of one of them about ¾” from the outside edge.
I used a scrap piece of 1x material and kept my pencil held tight to the side of it while I ran it along the edge of the pumpkin to give me an offset of about ¾” all the way around.
I wasn’t cutting out the stem, so I just freehanded the line below it.
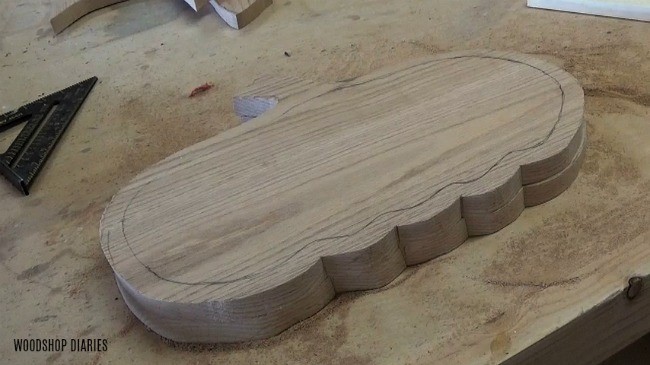
This doesn’t have to be perfect. It just needs to follow the same shape as the outside edge and be approximately ¾″ from the edge. This will be the “lip” on the tray.
I drilled a large hole in the middle section to get my jig saw started and cut out this middle piece along the line I just drew.
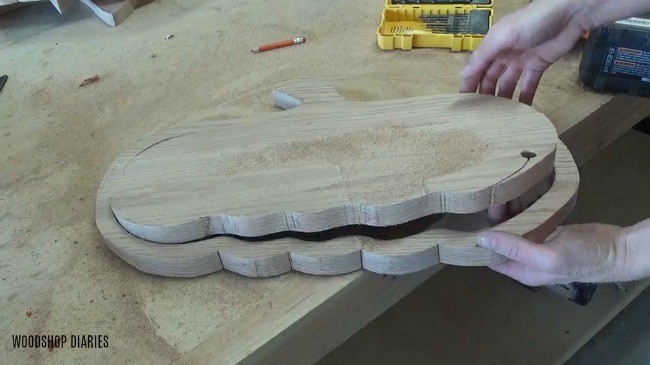
Then, I gave both the top and bottom a good sanding to remove any glue squeeze out from the glue up.
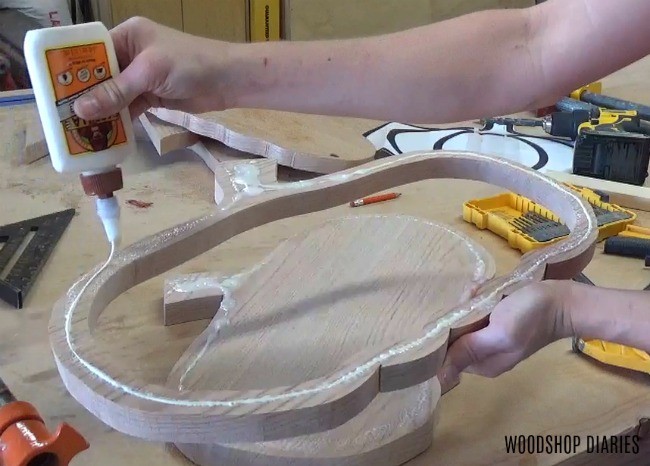
Next, I glued this outline piece onto the bottom plate piece and clamped it. It wasn’t perfect, by any means, but I’ll fix that later.
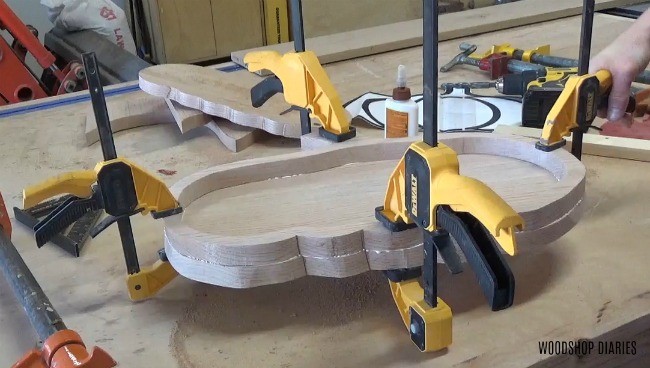
Step 4: Clean Up Edges of Pumpkin Plate
Once the glue was dry, I put a flush trim router bit into my router and adjusted it to cut about 1” deep.
I flipped my pumpkin plate upside down, clamped it to my workbench, and routed along the outside edge to trim everything flush.
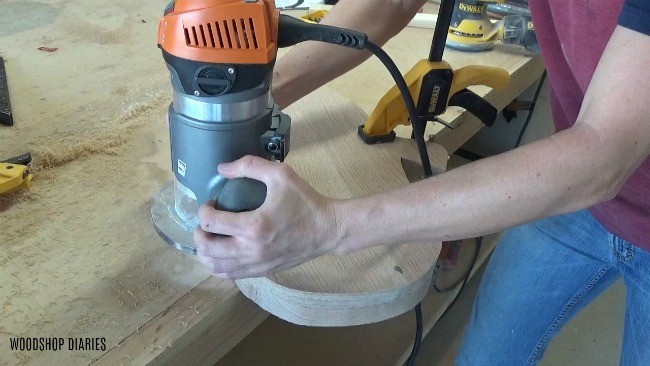
Then I flipped it over and did it again along the top side.
If you don’t have a router, a belt or orbital sander with some 80 grit sandpaper can also help smooth out these edges where the top and bottom pieces meet. Basically, you’re just trying to smooth out the transition so the outside edge is smooth.
.
To get the inside of the curves nice and smooth and to get into the little nooks and crannies, I used a Dremel. If I was patient, sandpaper and a little elbow grease would work as well.
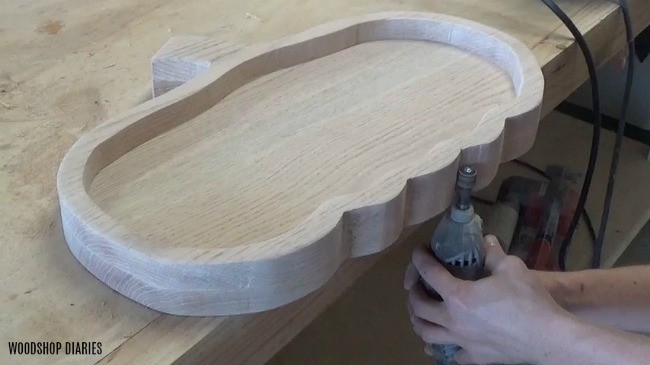
Again, the goal is simply to smooth out these outside edges.
Step 5: Finish Plate
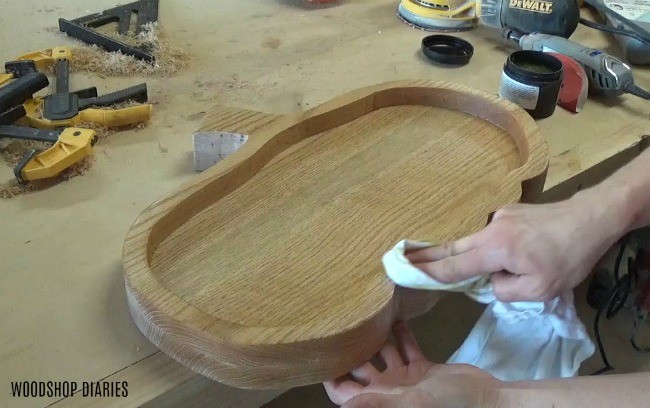
I gave the edges a final sanding, then finished it off with some beeswax to bring out that nice orange tone. Some cutting board oil or Walrus Oil Furniture Butter would work well too. Or, you could paint or stain as you wish.
Keep in mind if you plan to use this for food, you want to opt for a food safe finish.
And, just like that, it’s finished. It turned out super cute and would be perfect for serving up pumpkin muffins and lattes and all the basic fall things haha.
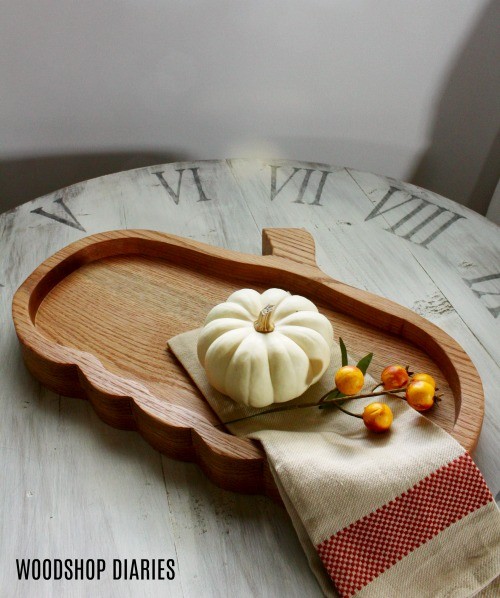
But seriously, this was such a quick and fun project for fall and really for any season if you just switch up the templates.
So I hope I’ve helped you get into the seasonal spirit! Here are a few other fall projects from years past that you may be interested in, too!
If you aren’t already subscribed to my YouTube channel, I’d love if you’d subscribe so you don’t miss out on what’s coming next. And I’d also love if you’d pin this for later 🙂
Until next time friends, happy building!

DIY Pumpkin Plate Servin Tray
Looking for an easy seasonal fall craft or project? This adorable DIY pumpkin plate is a quick and easy project you can make in an afternoon!
Materials
- Red Oak wood
- Wood Glue
- Clamps
- jigsaw
- Dremel
- Router
- Stain and Sealer
Instructions
- Cut wood into four 20" long pieces.
- Glue and clamp up into sets of 2 to create 2 panels
- Trace your pumpkin template onto each panel and cut out using a jigsaw..
- Cut out the middle plate section using a jigsaw.
- Glue the outline of the pumpkin shape to the full pumpkin shape using wood glue and clamps and allow to dry.
- Sand using a router or Dremel to get edges nice and smooth and even.
- Finish with stain and sealer.