
Looking for a fun scrap wood DIY project for the fall season? This is LEGIT, my favorite fall project, and I’m sharing the how-to for you right here! I shared this exact project two years ago, but it’s worth bringing back to the surface 🙂
.
It may be August, but fall is coming and it’s coming fast. Fall is the most wonderful time of the year. You may have heard that that’s actually Christmas…but it’s not. It’s fall.
.
Fall is when you smell the tobacco barns burning, you can start drinking pumpkin spice EVERYTHING, hoodies are acceptable clothing for wearing out in public, you can load up your porch with pumpkins and mums, and IT’S MY BIRTHDAY SEASON. So fall is obviously the best time of the year 🙂
.
Lately, I’ve been on a roll with the scrap wood projects. And, lately, I’ve also been getting into the fall spirit (if you didn’t already notice). So today, I’m combining the two and showing you how to make a SUPER EASY fall wooden sign idea.
Isn’t it like…the cutest thing!? And all you need is some scraps, a drill, a jig saw, and a hammer and nails (or a nail gun)! It’s such a super simple project that will literally take you maybe 30 minutes to finish.
How to Make a DIY Scrap Wood Fall Sign
.
Here’s what you need (post contains affiliate links, see policies):
- Scrap ¼″ thick plywood (mine was 11 ¼″ x 11 ¼″)
- Scrap ¾″ plywood (should match size of ¼″ piece above)
- 1×2 scraps to make the frame
- Jig Saw
- Drill and large bit
- Miter saw
- Nail Gun
- Wood Glue
- Leaf Stencil
.
- Cut List:
- ¼” x 11 ½” x 11 ½”
- ¾” x 11 ½” x 11 ½”
- (2) ¾” x 1 ½” x 11 ½”
- (2) ¾” x 1 ½” x 13”.
And for more scrap wood projects, you can check these out, too, in case you missed them:


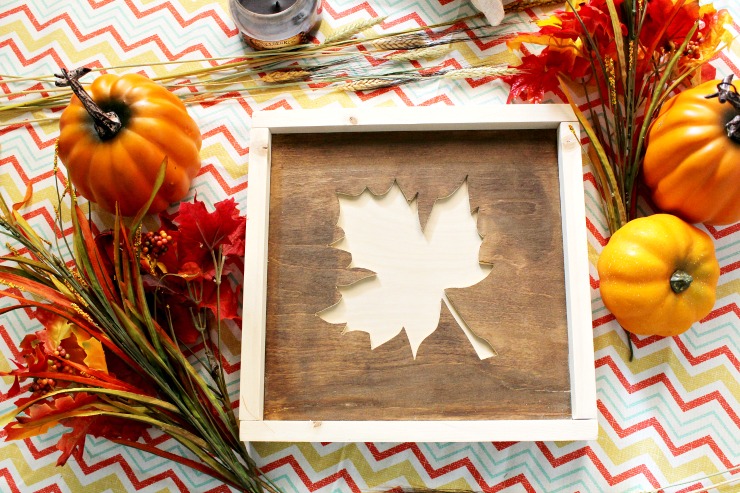
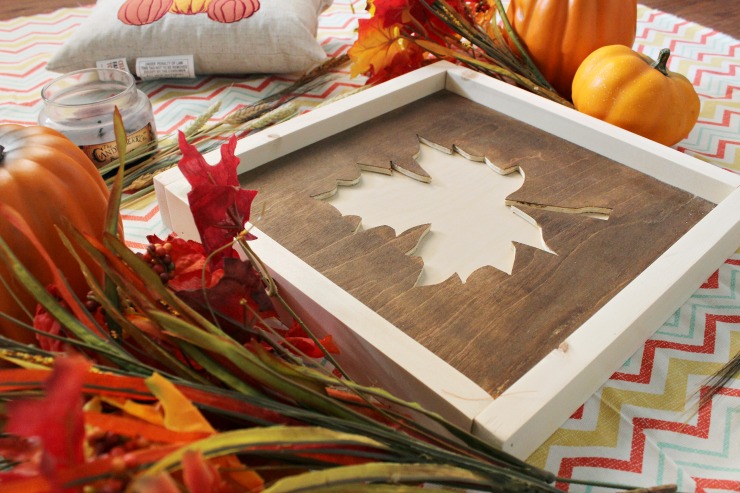
For this particular project, I made the sign with a leaf on it. But you could also do pumpkins, turkeys, or whatever else makes you think of fall.
.
Step 1: Cut Plywood to Size
Because this is a scrap wood project, it’s pretty unique to the scraps you happen to have on hand. In my case, I used 11 ¼″ square plywood pieces, but you could use whatever size you had the ability to make.
.
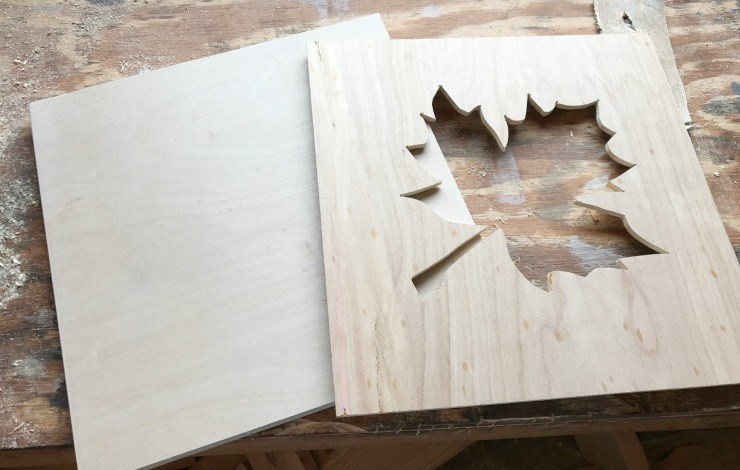
The key thing is that you want to make sure that both your ¼″ and ¾″ pieces are cut to the same size.
.
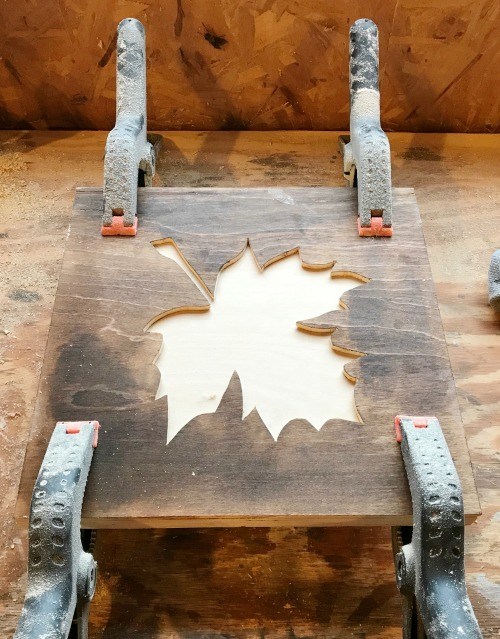
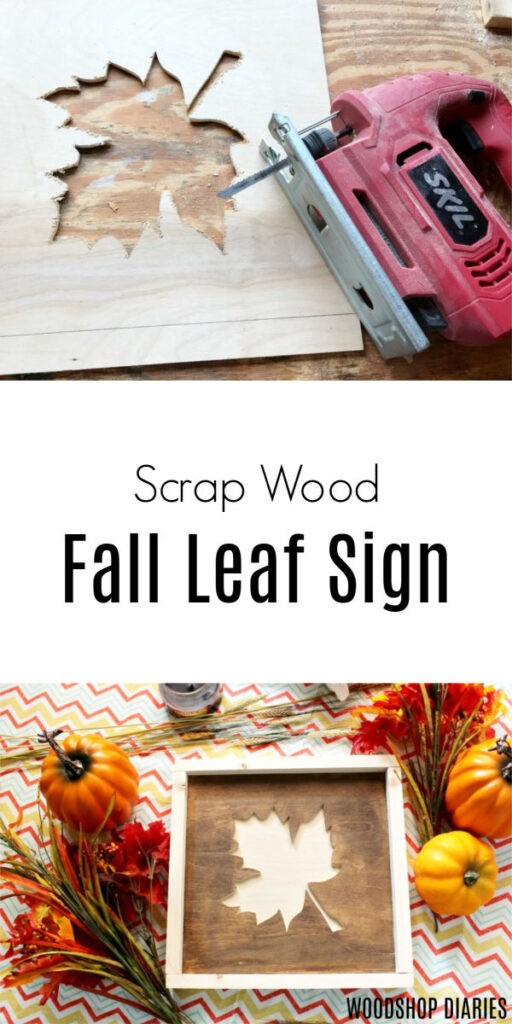
Step 2: Cut Out Leaf
You can buy a leaf-shaped template, or just simply Google “leaf clip art” and use an image you like as a template. I just printed the image to the size I wanted to make and cut it out.
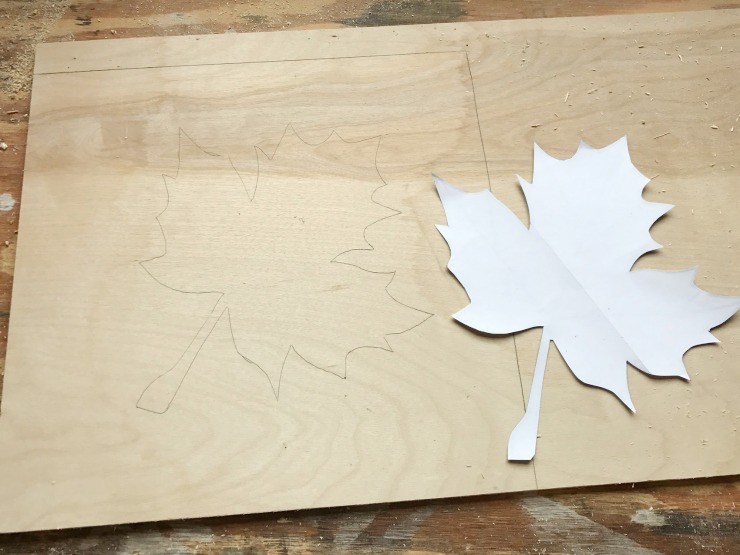
I traced this shape onto my ¼″ plywood and used a drill and a large bit to drill a pilot hole inside the leaf to fit the jig saw blade to start cutting.
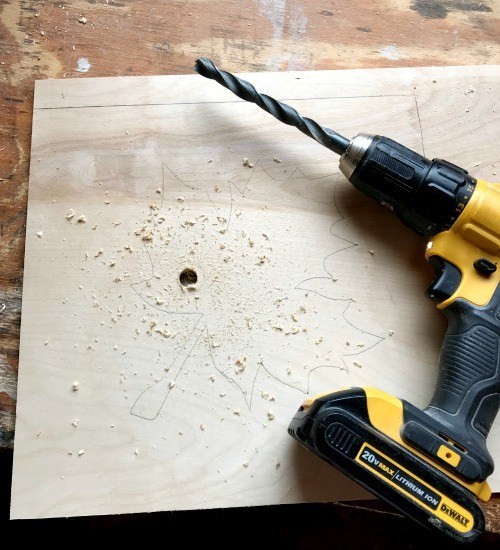
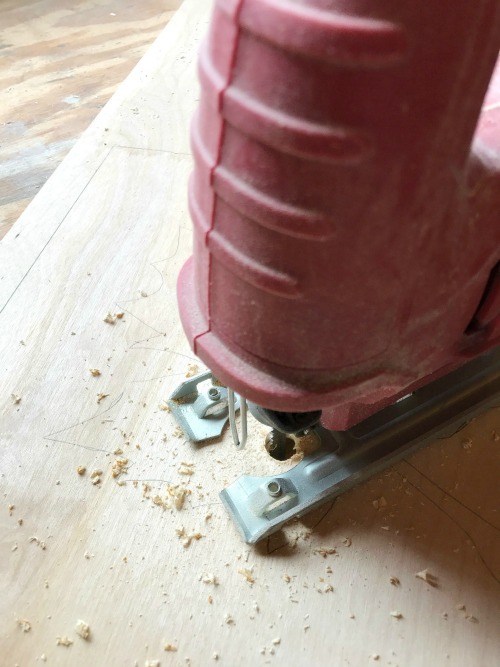
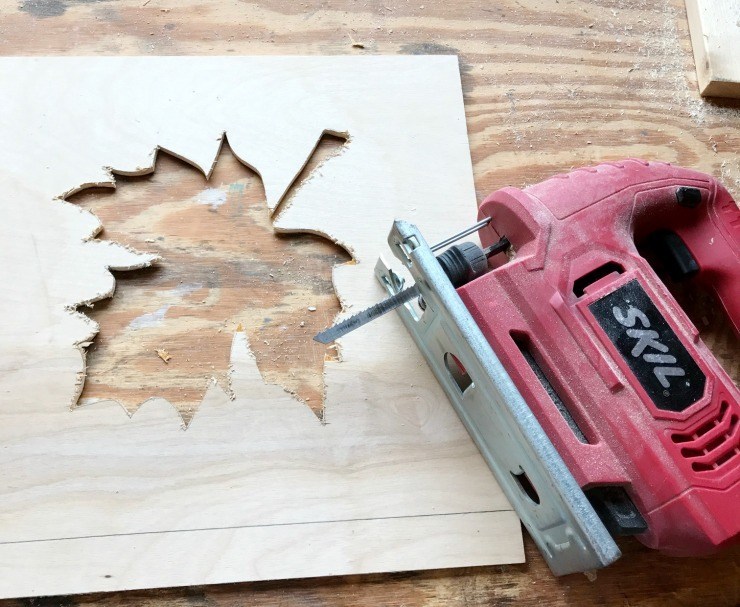
Then I used my jig saw to cut out the leaf.
.
Step 3: Stain or Paint as Desired
.
It’s much easier to finish pieces separately before assembling together, so I went ahead and stained my ¼″ piece of plywood and left my bottom piece natural. You can finish however you wish.
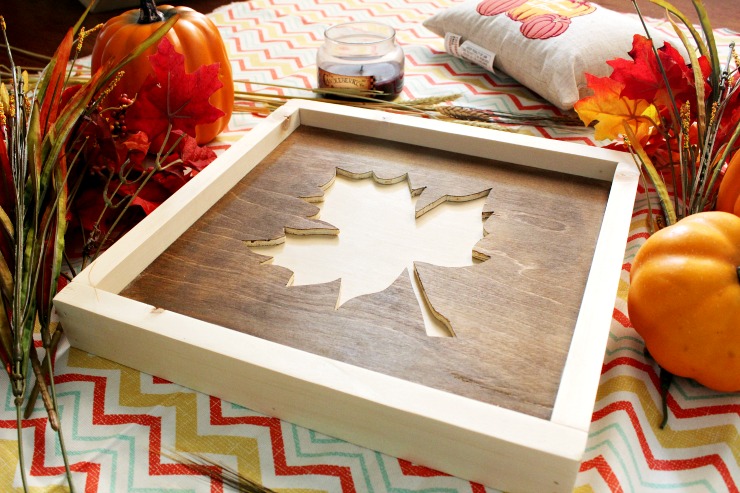
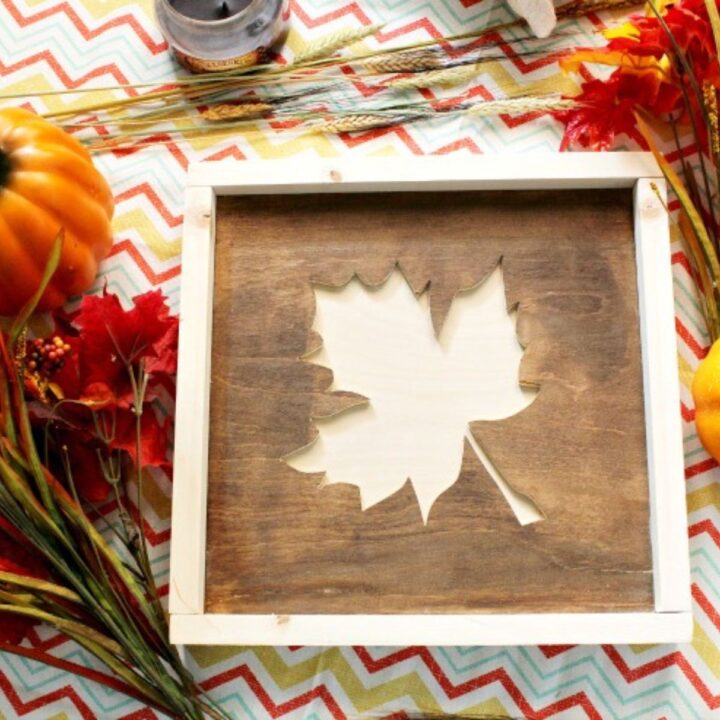
Step 4: Glue Leaf Sign Together
.
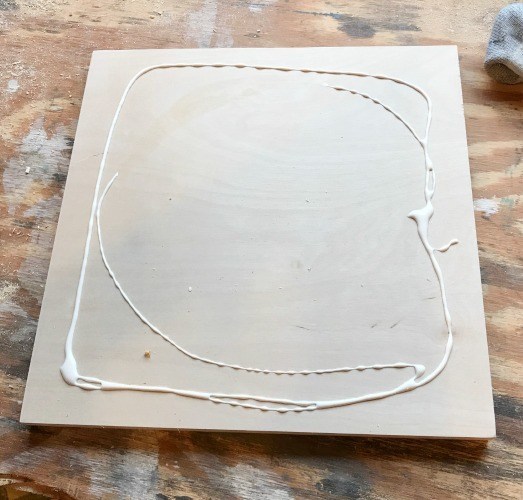
I applied wood glue to the outside edges (not the middle since that’s where the leaf will be) of the ¾″ plywood piece and placed the ¼″ plywood piece on top. I clamped in place while the glue dried.
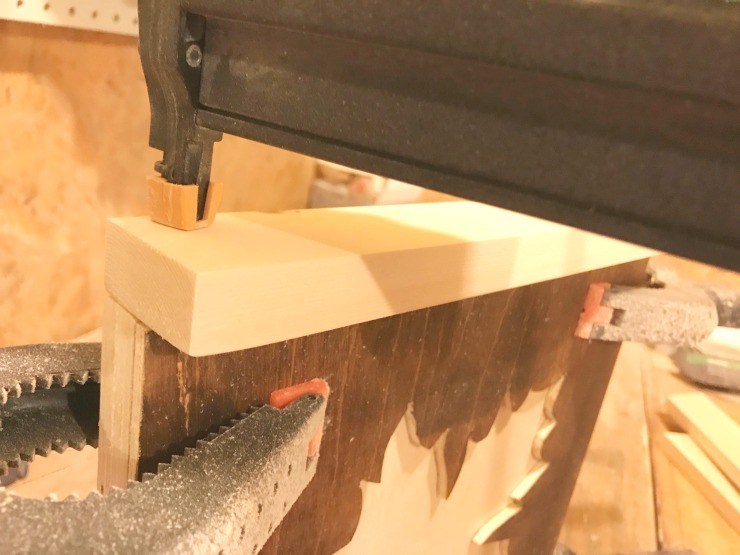
Step 5: Attach Frame
.
I cut pieces of 1×2 to attach around the leaf as a frame. I just glued and nailed these around the edges. Nail guns make this really quick, but if you don’t have a nail gun, a hammer and nails or just glue alone works fine.
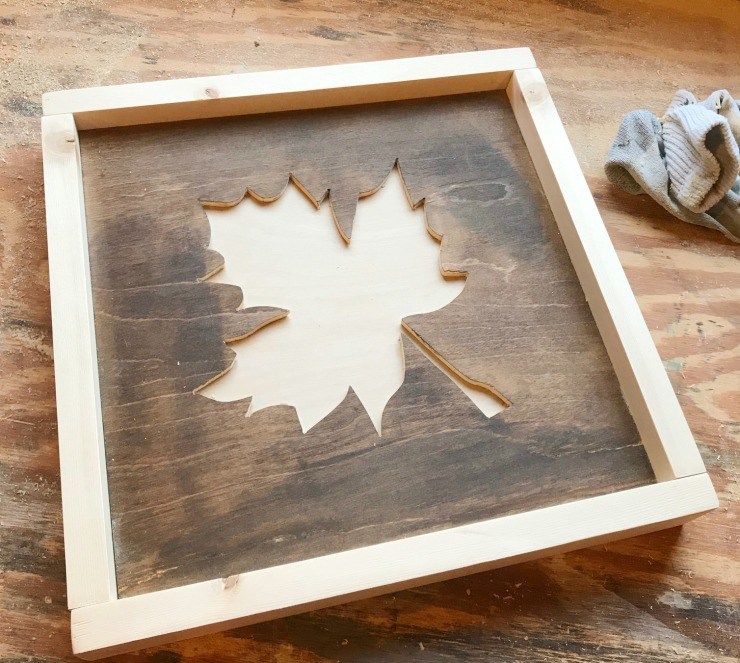
That’s it! See, I told you they were easy 🙂
.
These would be so cute hanging on the wall grouped together or sitting along a console table all decorated up. I’ve got plenty more scraps, so you may see that set up in a future post 😉 act surprised haha.
I’m hoping to have plenty more fun fall crafts and scrap wood projects for you this season as my never ending scrap pile doesn’t seem to be getting any smaller. So if you have any suggestions or ideas you would like to see, I would love it if you’d let me know!
.
But, before you go, don’t forget to pin this fun craft for later!
Until next time, happy building!
DIY Scrap Wood Fall Sign
This easy to make scrap wood fall leaf sign is a quick and easy craft to get ready for the fall season! Follow this tutorial to make your own!
Materials
- Scrap ¼" thick plywood (mine was 11 ¼" x 11 ¼")
- Scrap ¾" plywood (should match size of ¼" piece above)
- 1x2 scraps to make the frame
- Jig Saw
- Drill and large bit
- Miter saw
- Nail Gun
- Wood Glue
- Leaf Stencil
Instructions
- Cut your plywood pieces to whatever size you have the ability to make. This is a scrap wood project, so it will depend on the size of the scraps you have on hand.
- Cut out the leaf by tracing your leaf template onto one of the plywood. pieces, then using a jigsaw to cut the leaf design out. Drill a hole in the design to get it started.
- Stain or paint the leaf panel in the color of your choice.
- Glue your leaf sign together using wood glue and clamps.
- Add a frame around the sign and you're done!


[…] a hole in each window so you can get your jig saw blade in it to cut–just like with this fall leaf sign and these modern Christmas ornament […]