Want to make a SUPER easy and fun DIY fall project with just 2 tools?? I’ve got the idea for you!
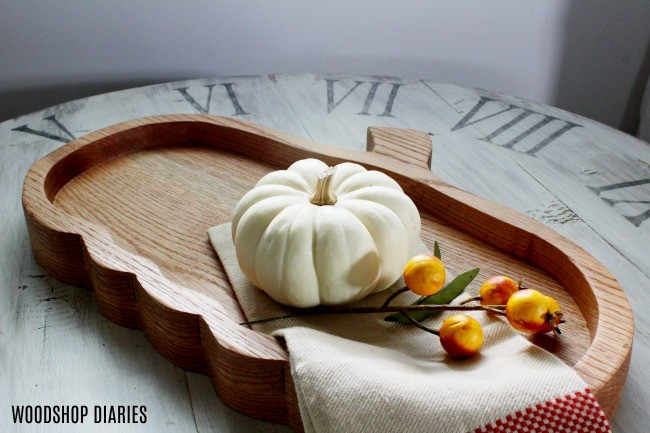
Last year, I made this ADORABLE (I know, I’m biased) little pumpkin tray from red oak. The finished color was orangey and the shape was perfect and I was in love with it.
.
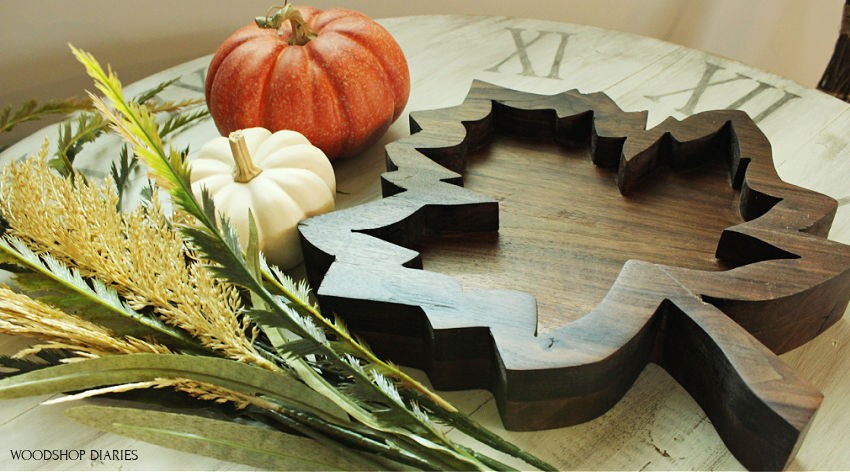
And since I loved it so much, I had intentions of making another one, this time, a leaf shaped one. But, I never found the time before fall was over and it felt like a waste of time at that point.
So when fall rolled around this year, I was determined to make the leaf one even though it was a whole year later!
.
Turns out, that was a good thing. After a year of pondering on it, I realized that I made the pumpkin tray tutorial WAY harder than it had to be and was able to make this leaf one with JUST 2 TOOLS!
.
(FYI: For the pumpkin tray, I cut the outside edges first, then the inside. On this project, I cut the inside first, then cut the outsides together eliminating the need for a router.)
.
Since this project is EASY to modify for any shape, feel free to use this same method to recreate the pumpkin tray, too–just with fewer steps and fewer tools 🙂
.
Want more fall inspiration?? Check out this post on 5 EASY DIY Fall Project Ideas You Can Create This Weekend!
.
So if you’re ready to make your own DIY fall project leaf (or pumpkin) tray, here’s what you need:
*This post contains affiliate links. See policies.
How to Make a Fall Themed Leaf Tray
For This Fall Themed Leaf Tray, You Will Need:
- Jig Saw
- Drill
- Wood scraps (see step 2)
- Shape template (literally Google search “leaf” or “pumpkin” or whatever shape you want and print a shape you like–see step 1)
- Wood Glue
- Clamps
- Sandpaper (80 grit and 220)
- Wood Finish
Step 1: Prepare a Fall Project Shape Template
Obviously for this project, I used a leaf template. But for my pumpkin tray, I used a pumpkin template. You can literally use any shape you want for this.
.
I simple did a quick Google Search for “leaf clip art” and found a leaf shape I liked (it’s a maple leaf…which I know is weird because I made this out of walnut wood haha).
.
I copied and pasted this into a Word Document, resized as needed and printed it off. Because mine was larger than a single sheet of paper, I printed it on two sheets and taped them together.
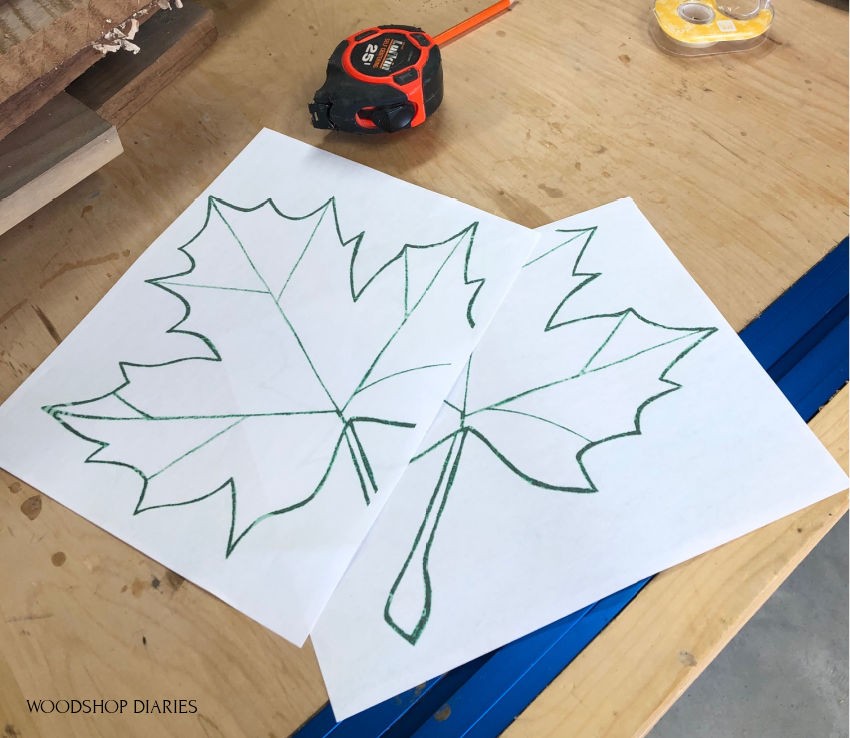
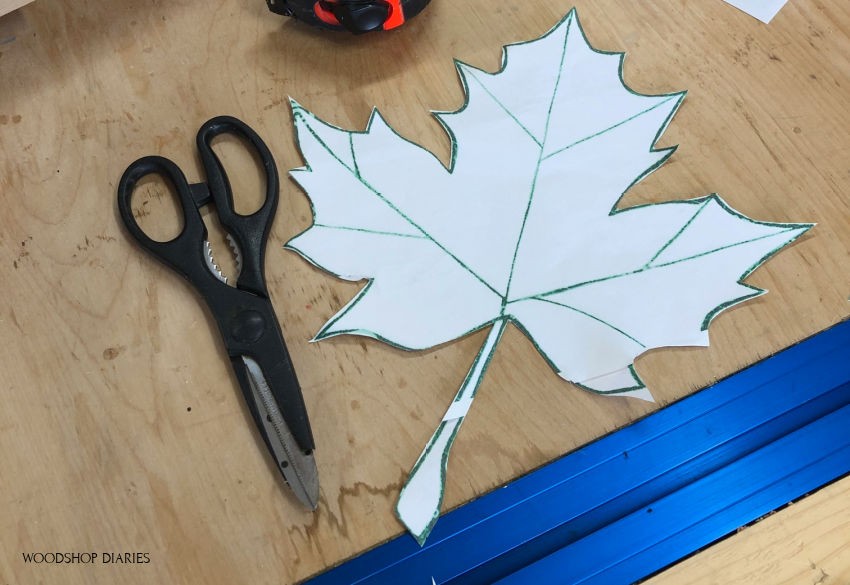
Then, I simply cut along the outline to give me a leaf template.
Step 2: Glue Up Panels for Fall Leaf Tray Cut Out
Now that the template is prepared, I needed to glue up two panels that were at least an inch larger than my template–so there was at least an inch of wood out from every tip if I placed my leaf on it.
.
I had some scrap walnut I used for this, but any 1x scraps will work.
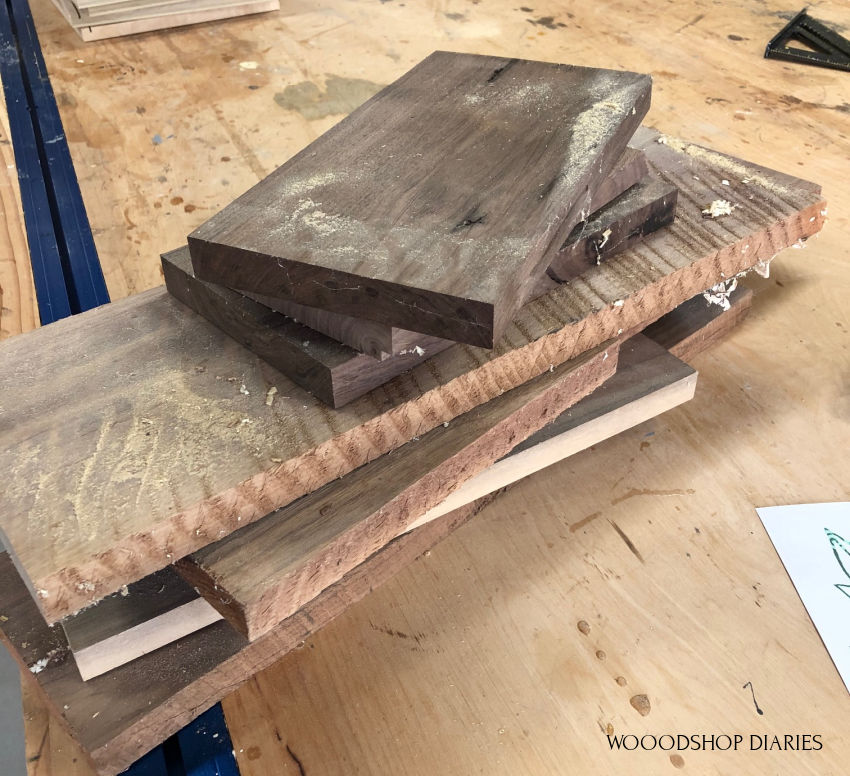
I just arranged boards and made sure they were large enough, then simply applied glue to the edges and clamped until dry.

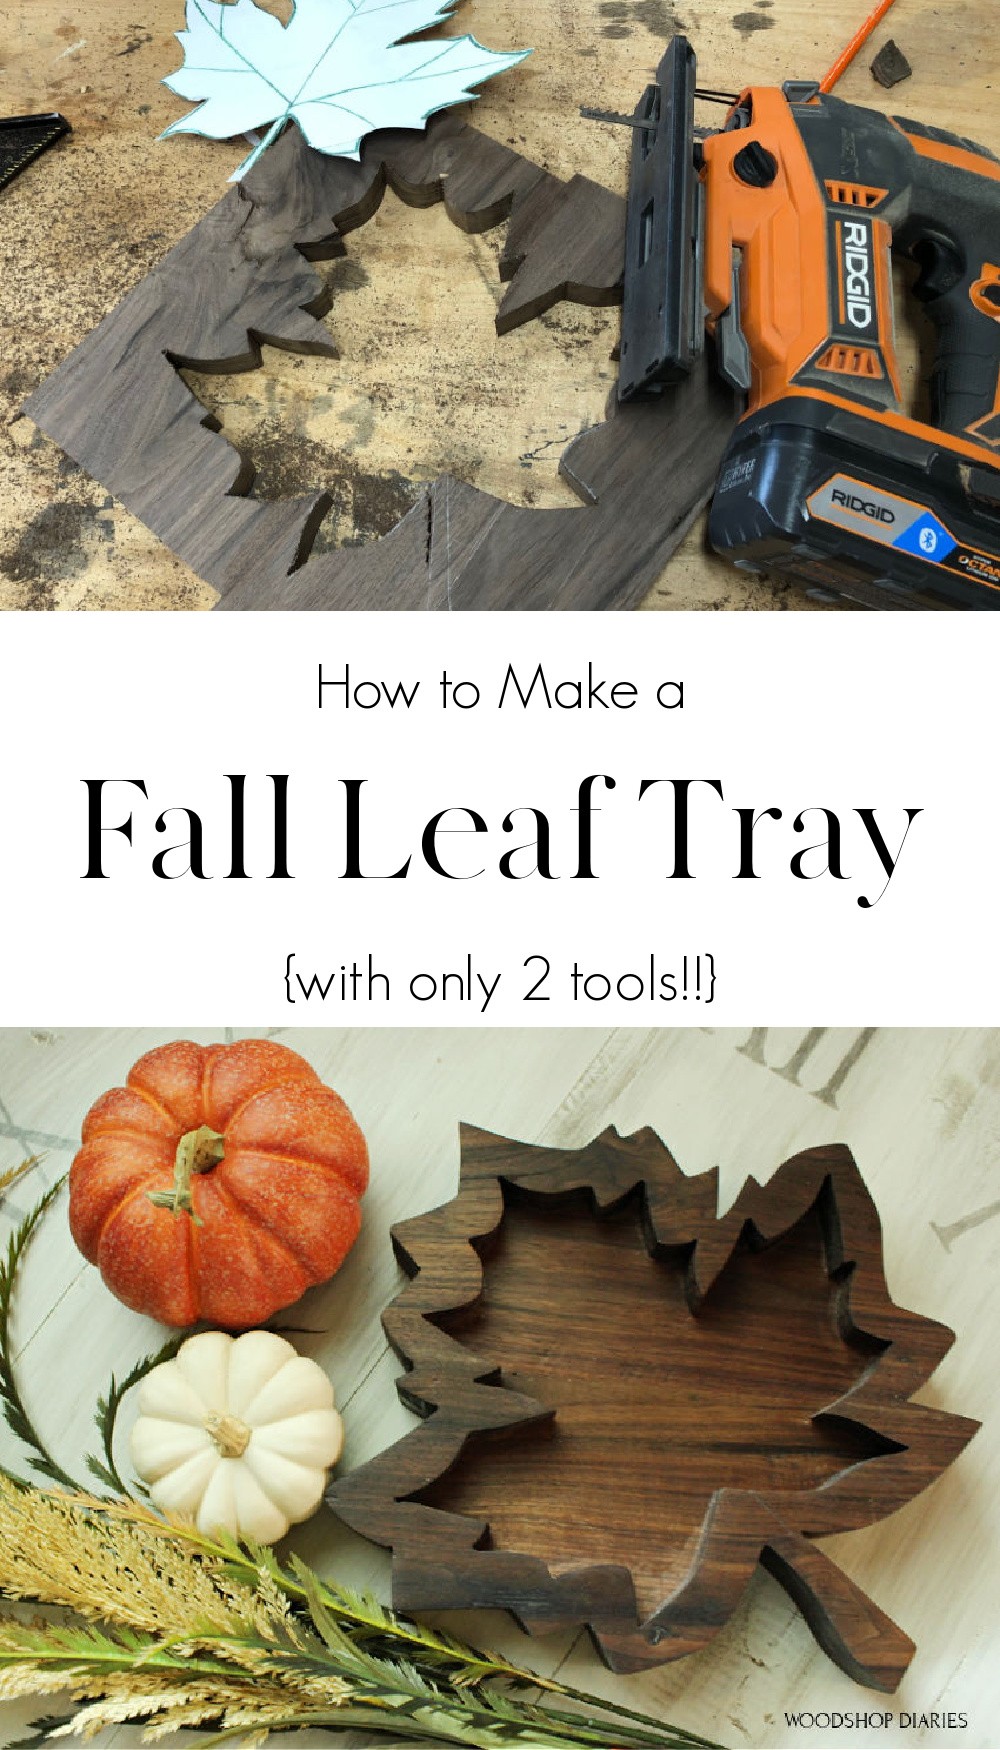
Step 3: Cut Out Fall Shape in One Panel
Once the glue was dry, I traced my leaf shape onto ONE of the panels like shown here. I made sure to center it as best I could so that I could leave as much wood around the outside edges as possible.
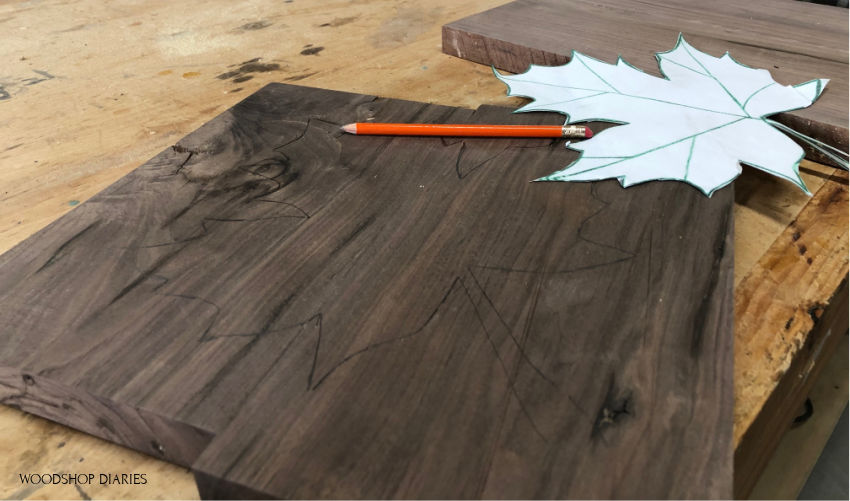
Then, I used a drill and a large bit in the inside of the tracing to give me somewhere to start my jig saw blade.
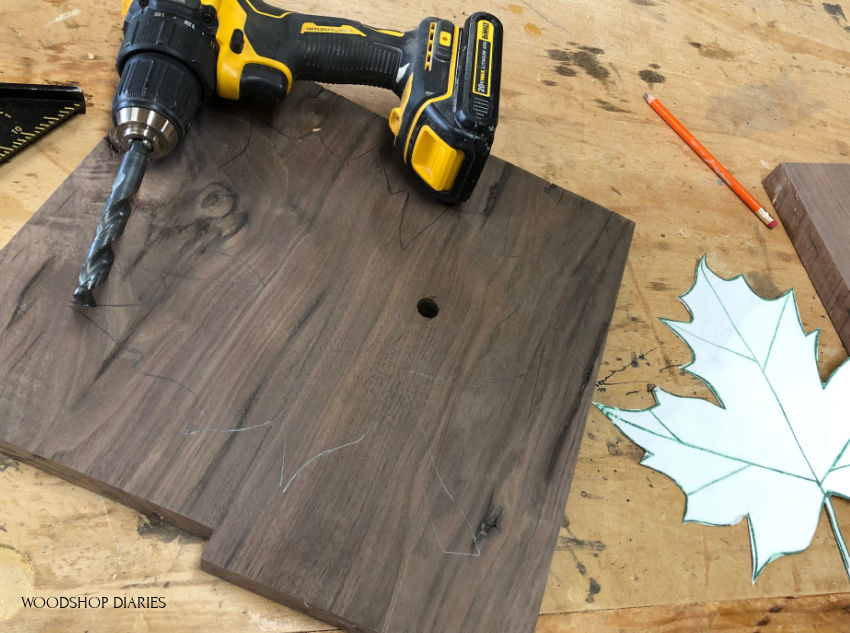
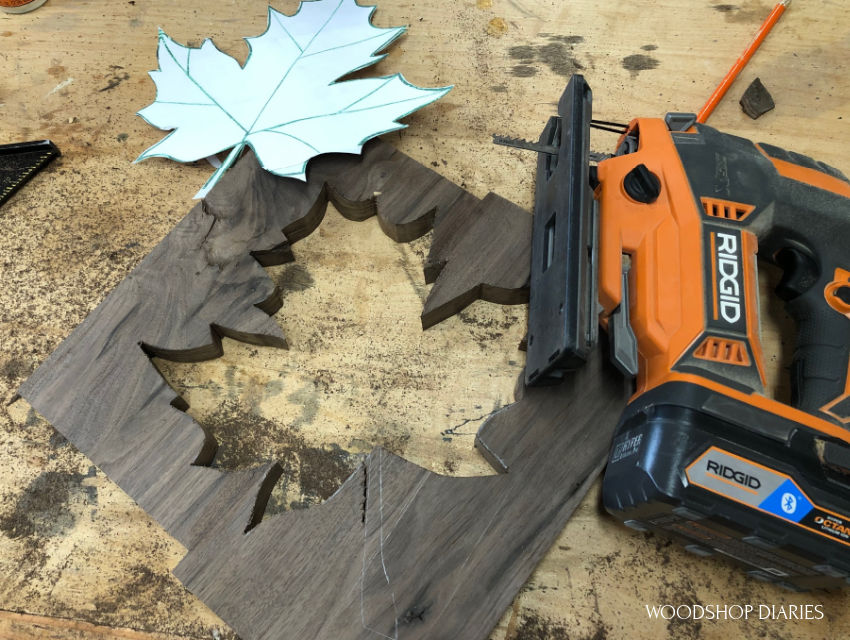
I used my jig saw to trim out the leaf shape out of the INSIDE of the tracing. Also note that I started to cut the stem and then realized I needed to leave the stem here…you’ll see why later.
Step 4: Glue Fall Project Leaf Tray Panels Together
Now, I glued the two panels together leaving as much wood around the cut out edges as possible. I only applied glue around the edge here because I’ll be cutting most of the rest of it off anyway.
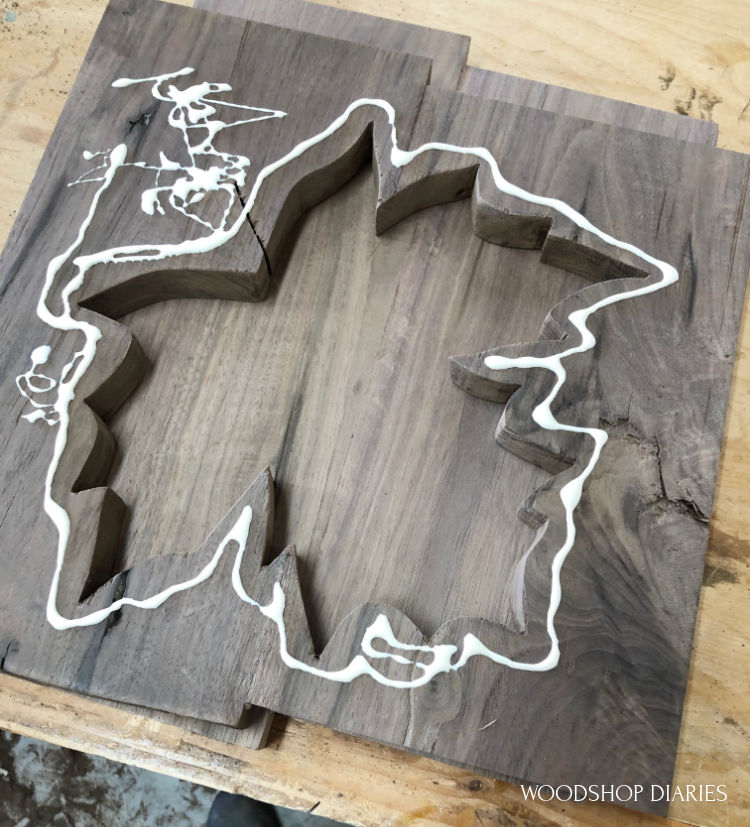
I just clamped this onto the other panel and waited for the glue to dry.
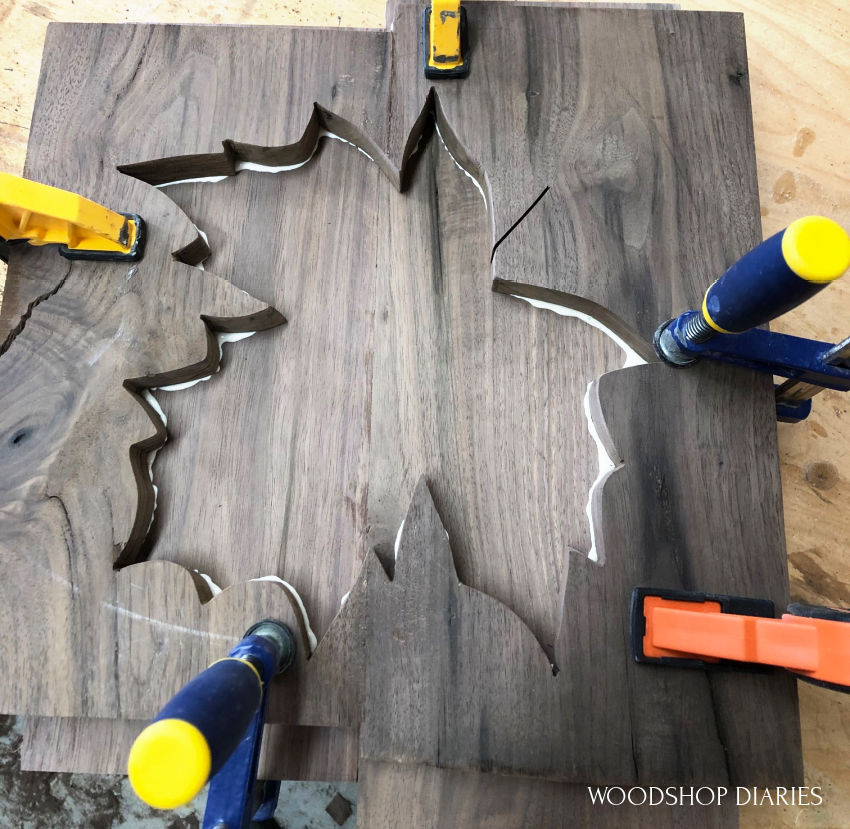
It’s important here to get out as much glue squeeze out as possible. I also recommend using Gorilla Wood Glue for this as it dries more natural, so if you miss some, it won’t look as noticeable.
.
I used an old t shirt wrapped around a chisel to try and get as much out as I could. Best advice I can give is maybe don’t use as much glue as I did haha. Live and learn.
Step 5: Cut Out Final Leaf Tray, Sand and Finish
Once the glue was dry, I traced around the cutout leaf shape about ¾″ from the edge. IT DOES NOT HAVE TO BE PERFECT!!!
.
I just kind of freehand sketched the outline of the leaf here. It’s not perfectly even everywhere and that is OKAY.
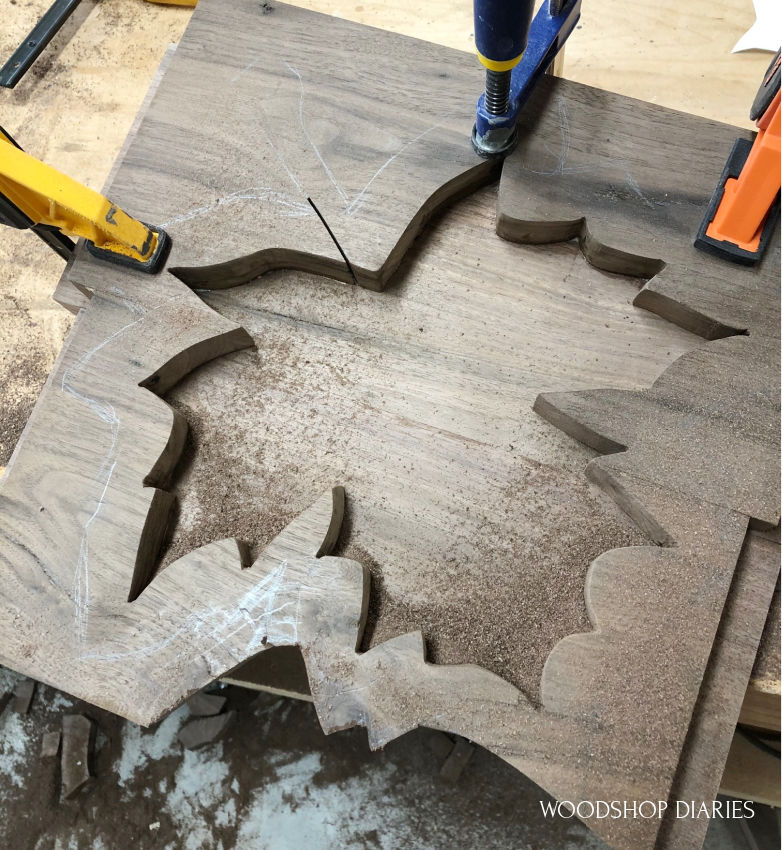
I actually started cutting before the glue was dry…don’t do that haha. Do as I say and not as I do.
.
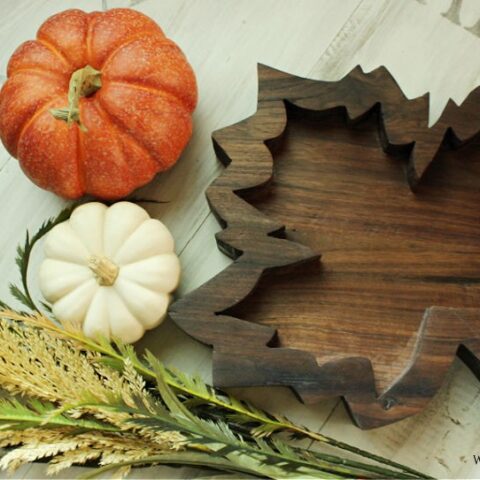
Once the glue was dry, I finished cutting out this shape–this time cutting around the stem, too. Since the stem was so narrow, I left it solid to give it more strength…that’s why I didn’t need to cut it in step 3. Notice I did the same thing on the pumpkin tray, too–I left the stem solid.
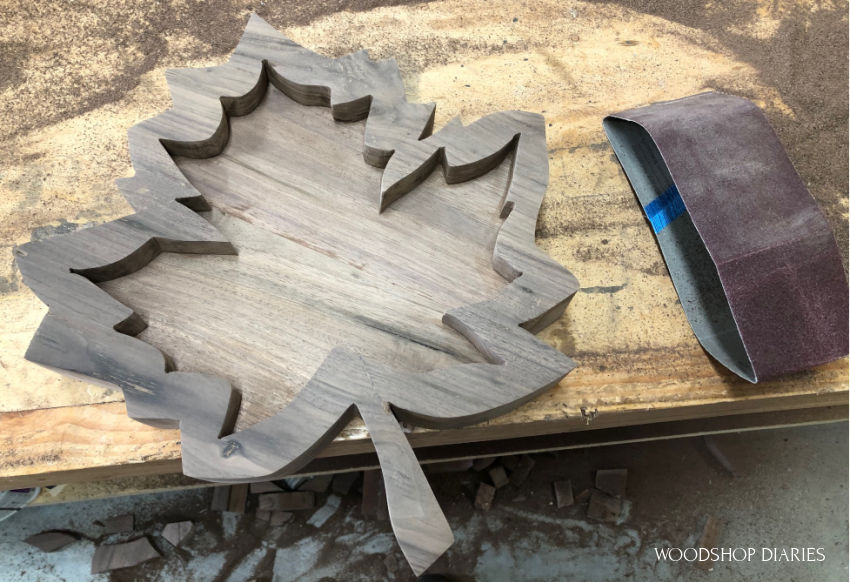
The last part is sanding and finishing. Because of all the nooks and crannies, I just hand sanded most of these edges. I used 80 grit (shown above) to sand rough areas smooth, and then 220 grit to smooth out the scratch marks and prepare it for finish.
.
Finish was also kind of a nightmare with all these nooks and crannies, but eventually I got it all covered with a coat of Walrus Oil Furniture Butter. I’ve been using this a lot recently and really like it.
Check it out here on my poplar dresser builds.
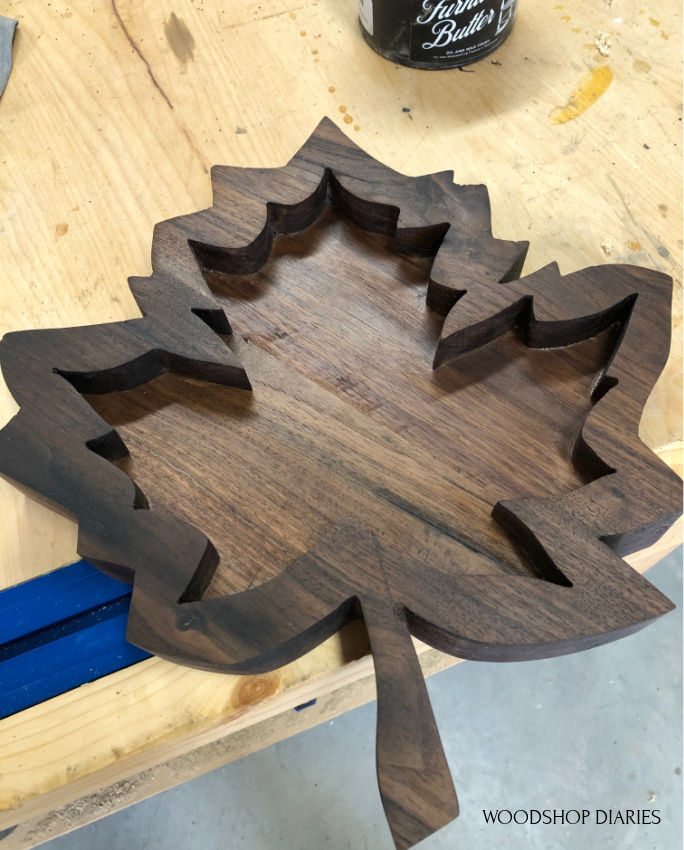
Oh, and remember where I started cutting the stem, but stopped before I got too far? I used some wood glue and walnut sawdust mixed together to fill the cut line (see above?? Look really close) and once it was sanded and finished, it is almost unnoticeable.
.
My dad always says the difference between an amateur and a professional is that a professional knows how to cover up their mistakes *wink wink* I don’t know about that, but I was able to kind of cover up THIS mistake, at least 🙂 Maybe I’ll be a pro one day haha.
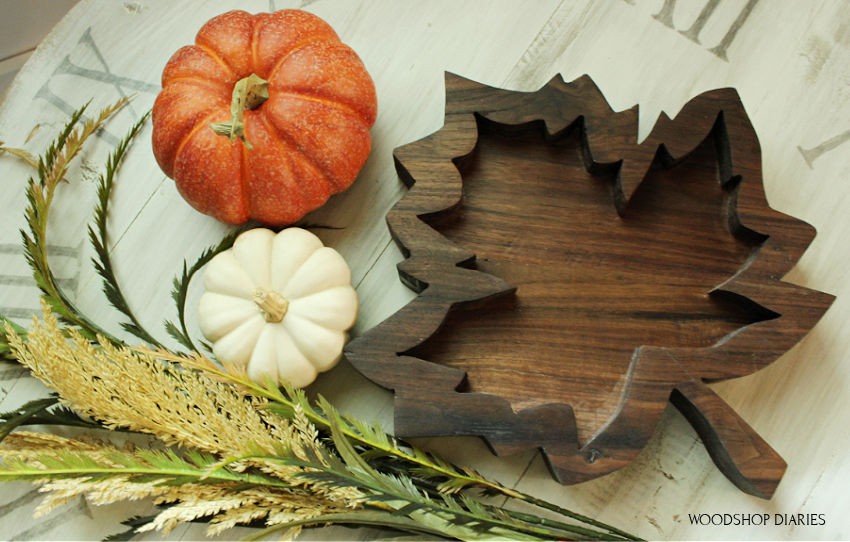
And, now I have a pumpkin AND a leaf tray and I’m ready for fall. Who knows what shape I’ll try next year haha.
.
And if you’re looking for ways to use this cute little DIY tray, this would be great for serving snacks on, or to set on a table or nightstand to catch rings and keys.
.
So if you’ve enjoyed this DIY Fall Project, I’d LOVE it if you’d pin it for later 🙂
Until next time, friends, happy building 🙂
Easy DIY Fall Project: Leaf Tray
Make your own leaf-shaped tray for fall. This easy DIY fall project can be made using just two tools and for FREE using scrap wood!
Materials
- Jig Saw
- Drill
- Wood scraps (see step 2)
- Shape template (literally Google search "leaf" or "pumpkin" or whatever shape you want and print a shape you like--see step 1)
- Wood Glue
- Clamps
- Sandpaper (80 grit and 220)
- Wood Finish
Instructions
- Make your template by downloading a clip art leaf, resize as needed and print it onto a sheet of paper. You may need to do it in two pieces depending on how large you want your tray to be.
- Glue up scrap wood panels. One for the leaf cut out and one for the bottom of the tray.
- Cut out the fall shape in one panel.
- Glue the panels together using wood glue.
- Cut out the final leaf tray, sand, and finish in the stain color of your choice.